
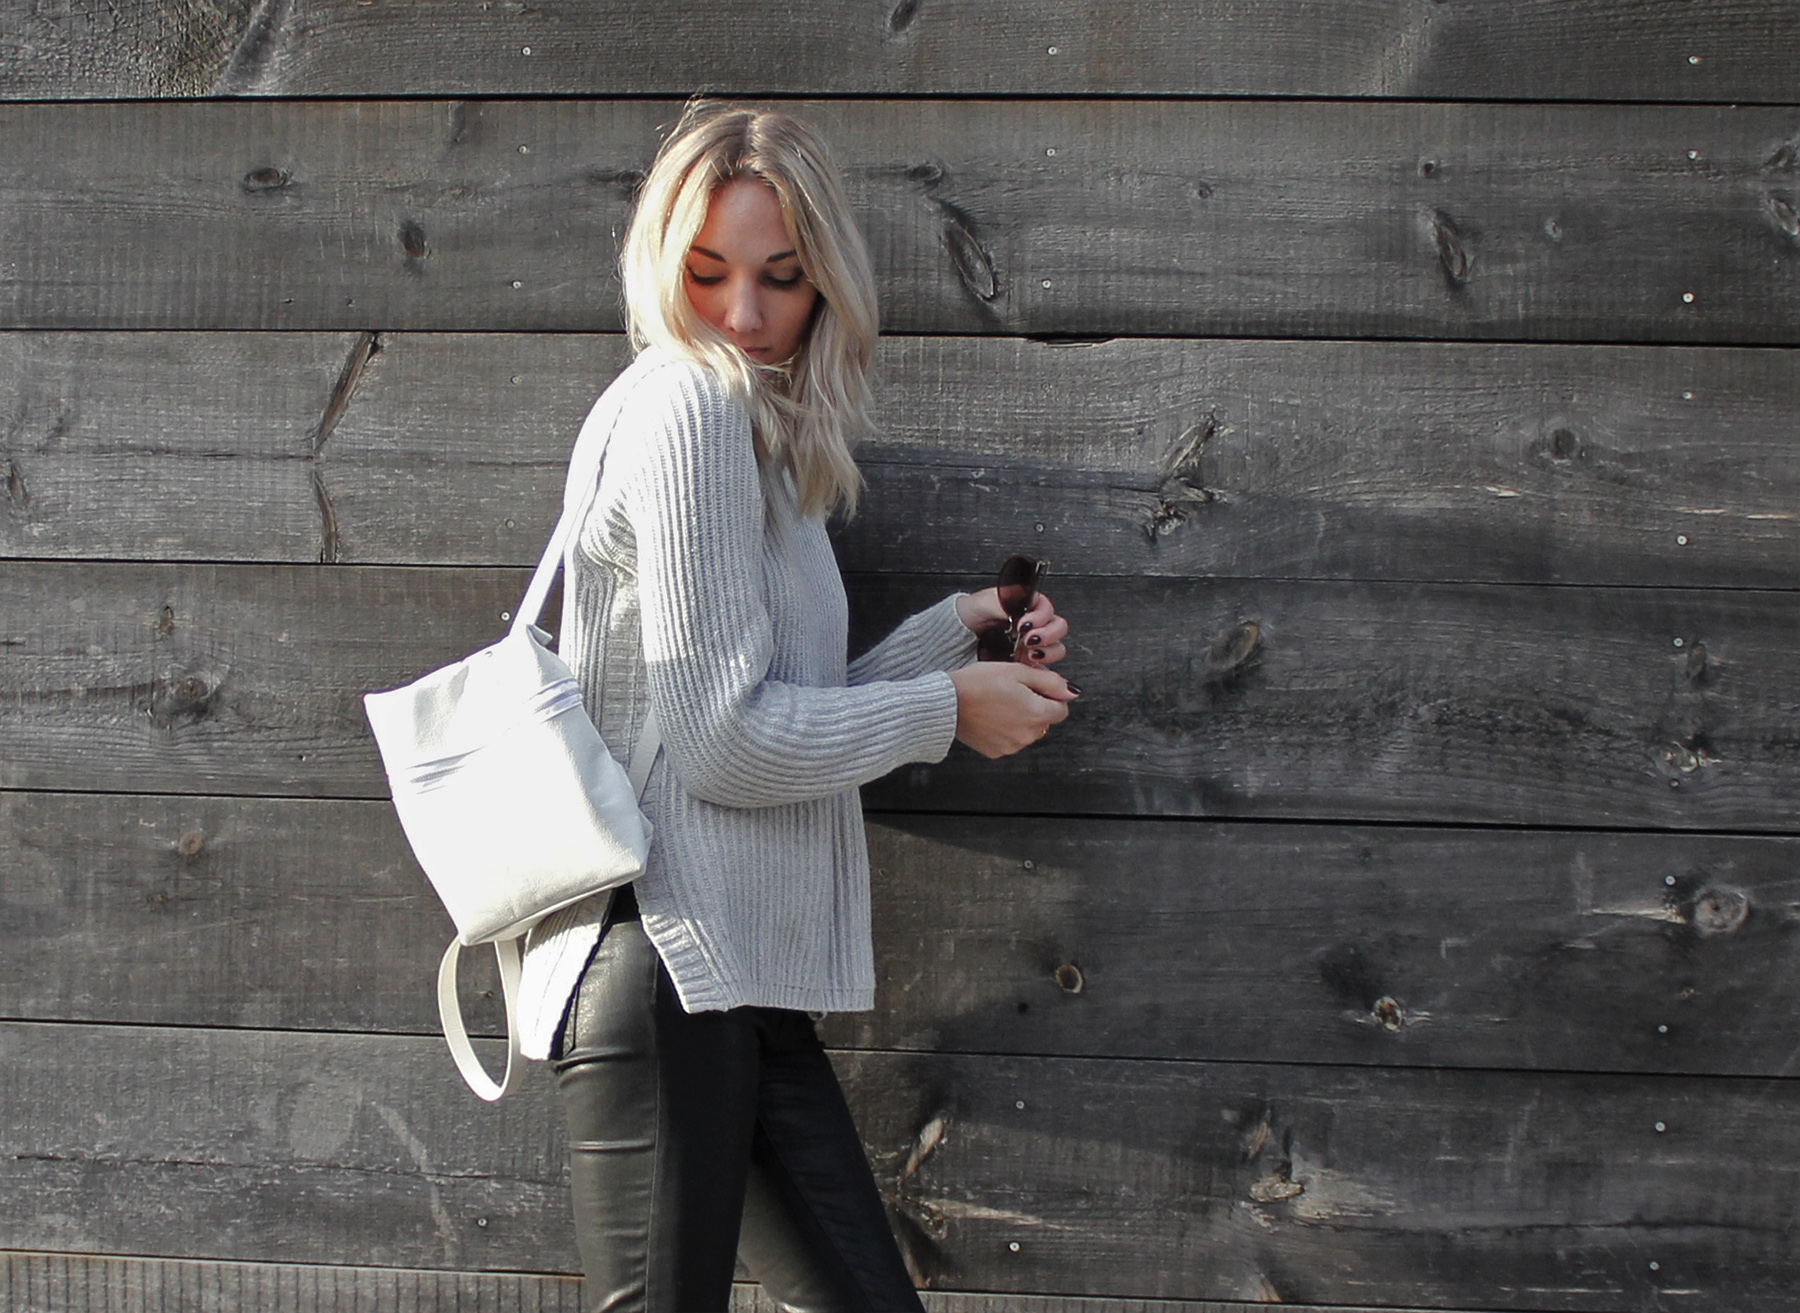
I've always been more of a shoe than a bag lady (mainly because I don't think I can allow myself to get used to spending at designed bag-level right now). But Sarah Law, the genious behind
Kara made a bag I figured I could take a shot at making myself.
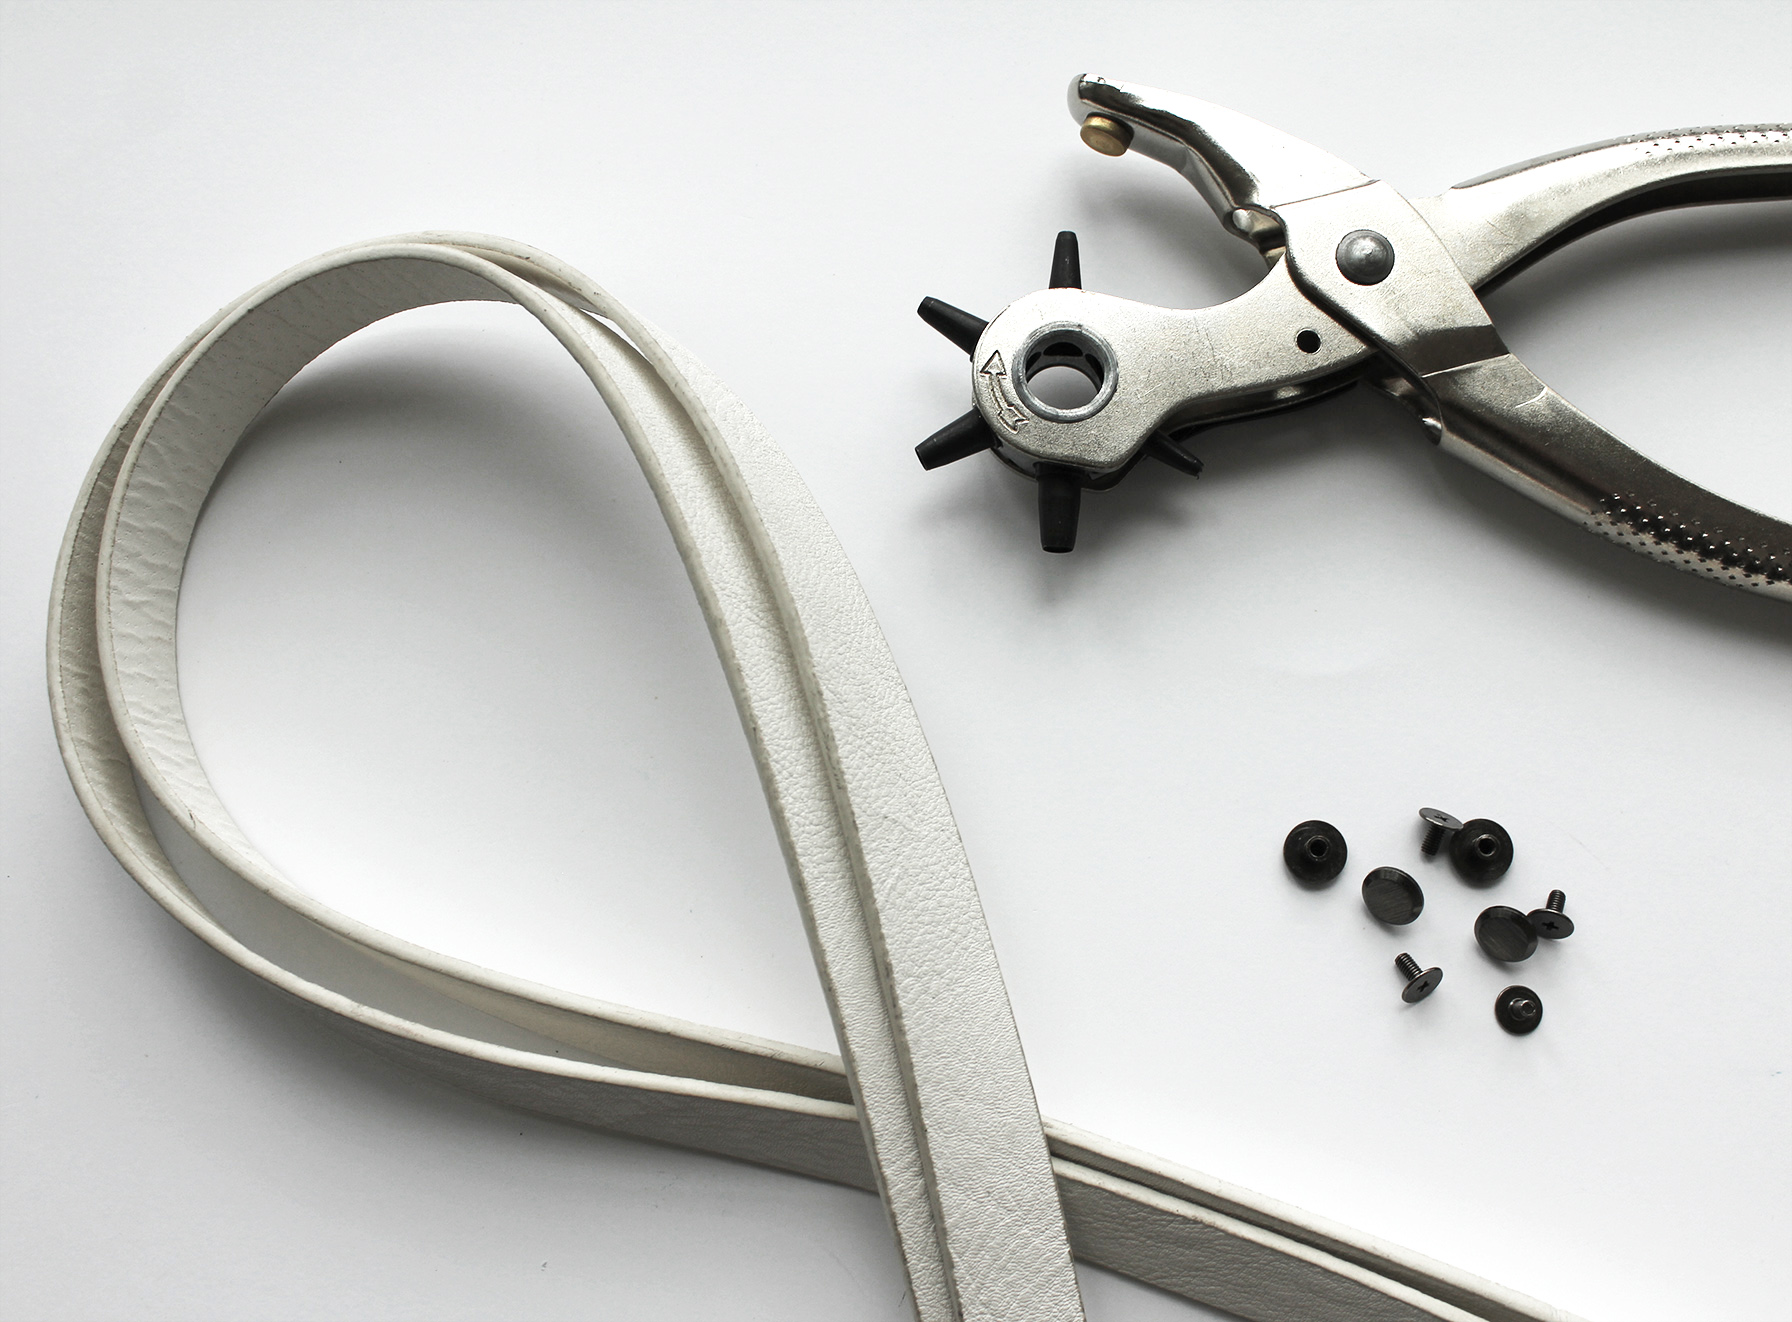
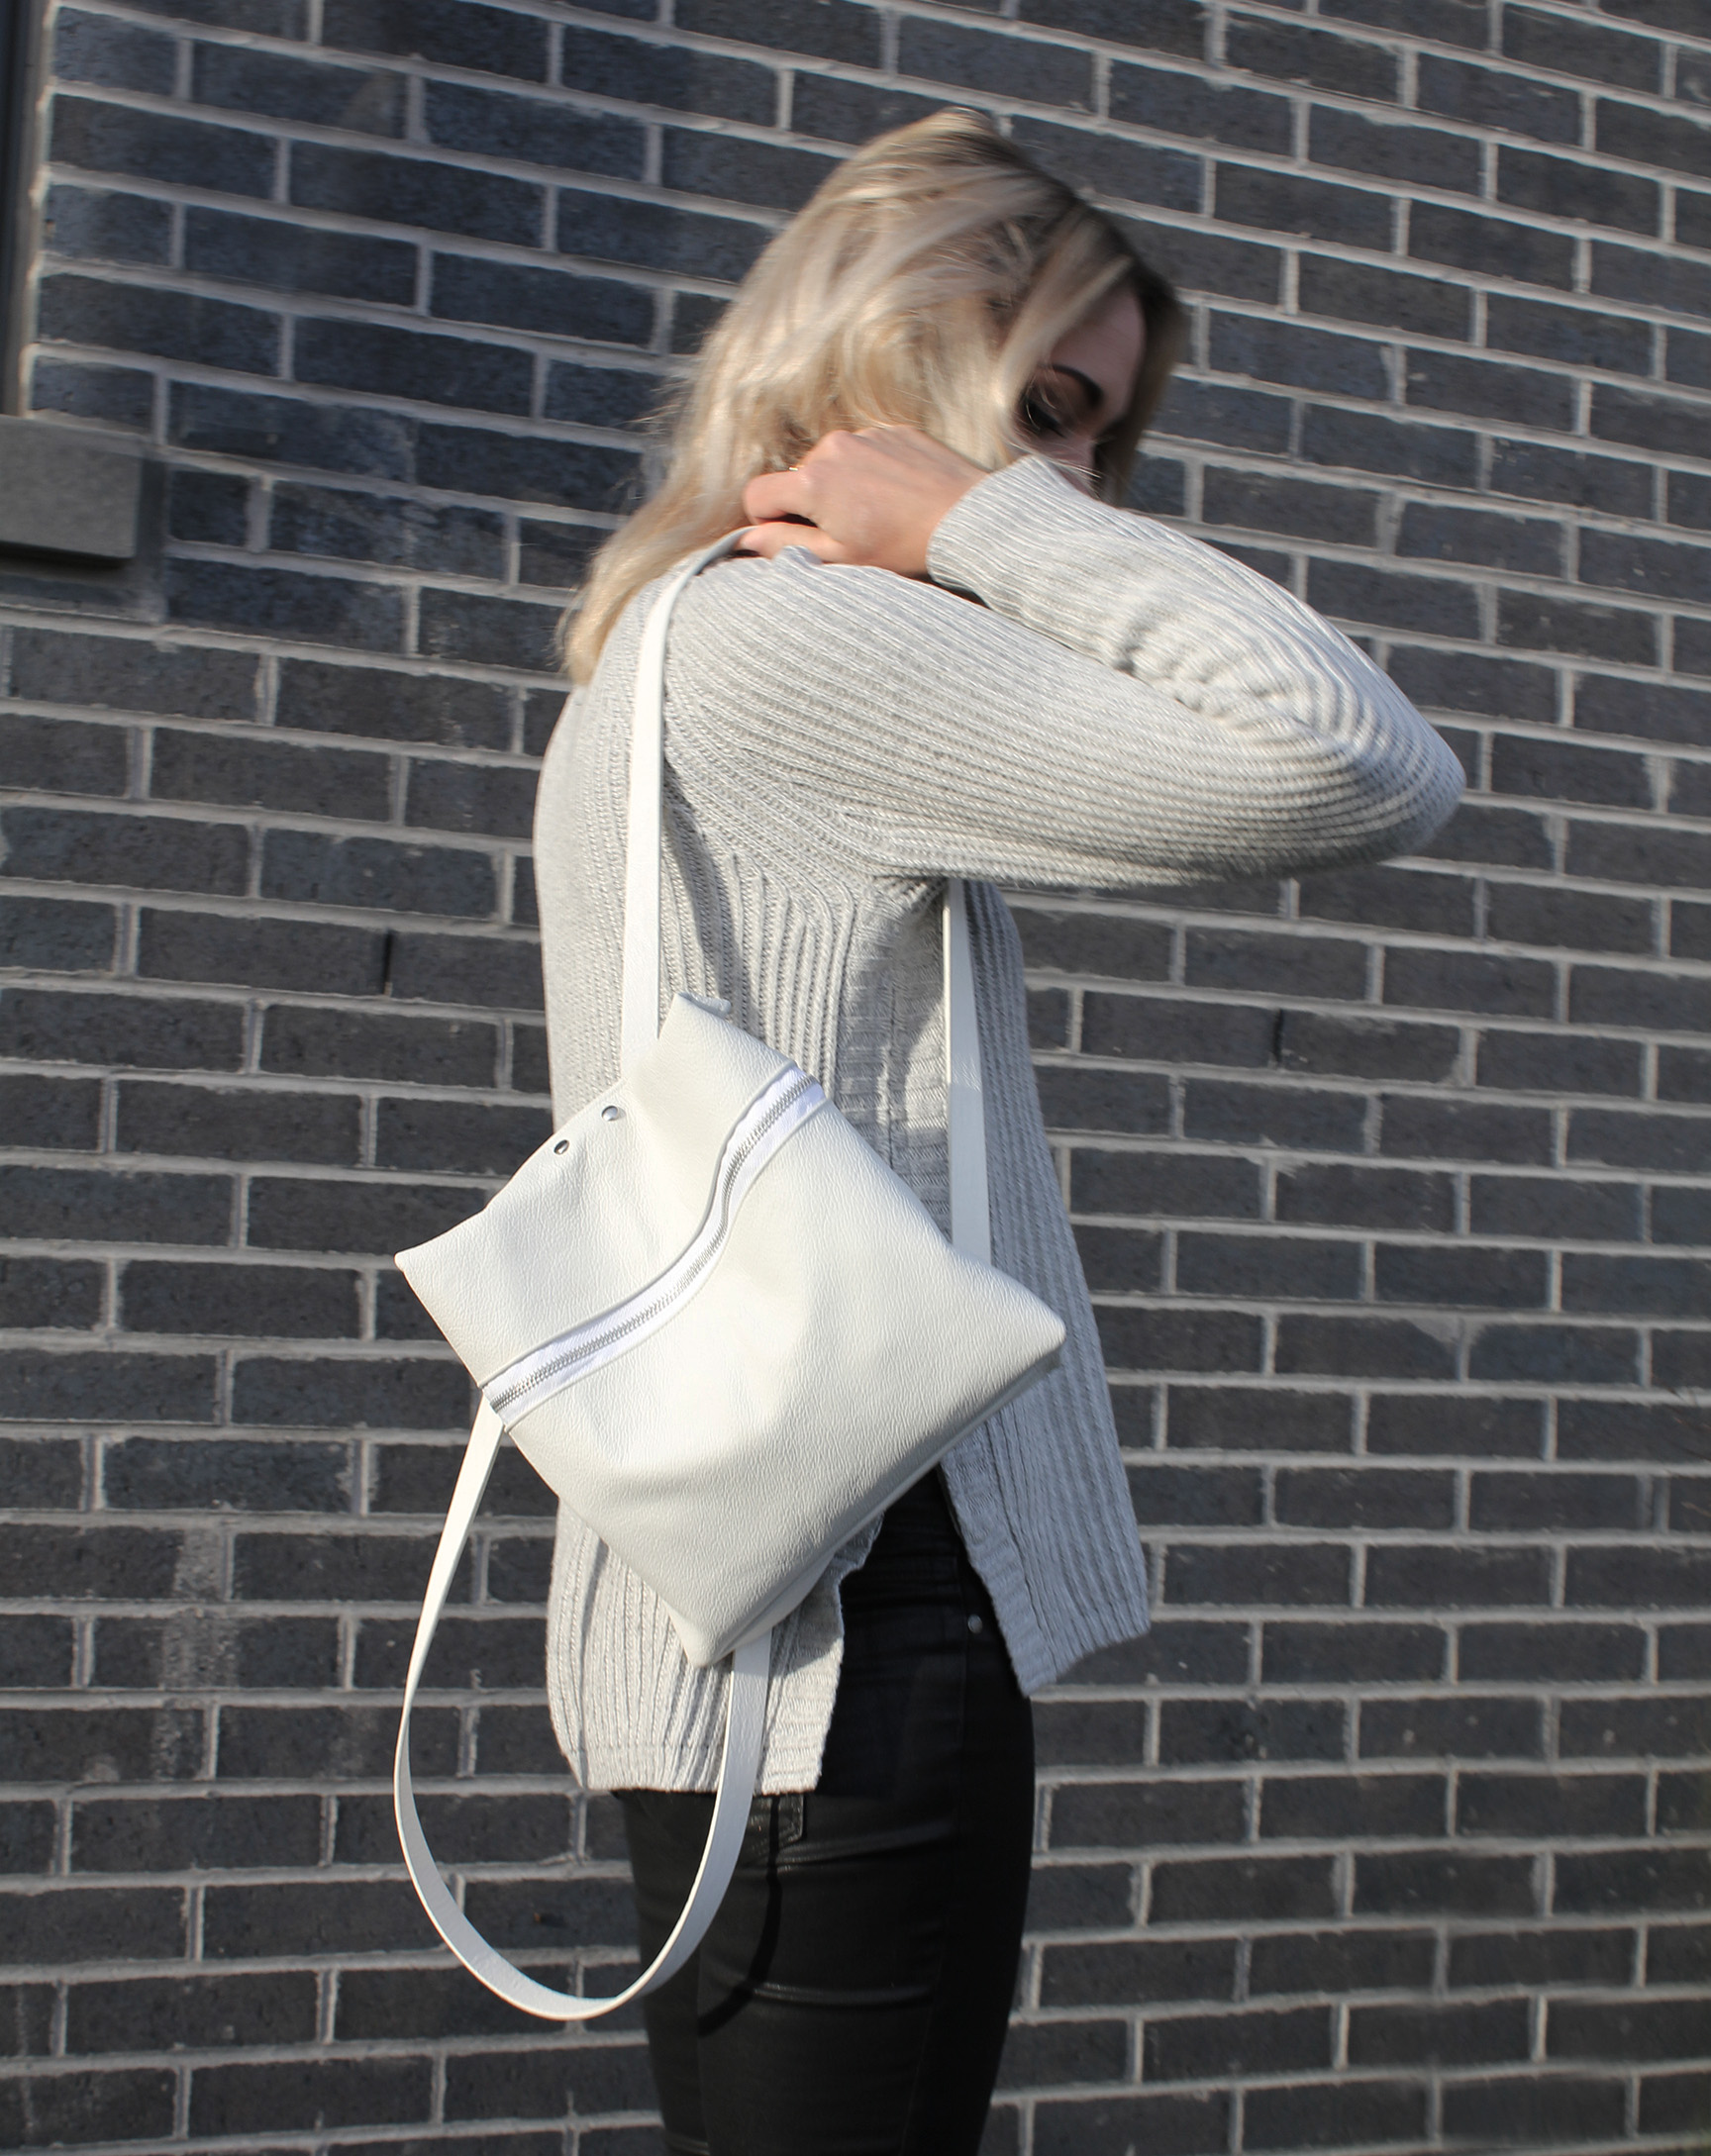
Leather (depending on the desired size of the backpack, my piece was 85cm x 28cm) | Scissors | Zipper (again, depending on the size of the bag, mine was 45 cm) | Thread & Sewing machine | Rivets and the tool that goes with them (I used 6 regular ones for the bag, and four screwable ones for the straps + mini screwdriver) | 2 leather straps, I used belt strap, 80 cm each | Hole-puncher | Optional: equal amount of interfacing as leather, if the leather needs some firmness
I. Start by drawing out your pieces. You really only need one long strip of leather, mine was 28 cm wide and about 85 cm long. Cut off an about 20 cm piece at the end (this will make the back piece shown in step ). You should be left with an approx. 65 cm long piece. Mark the spot for 1/3 of the piece's width, and cut there.
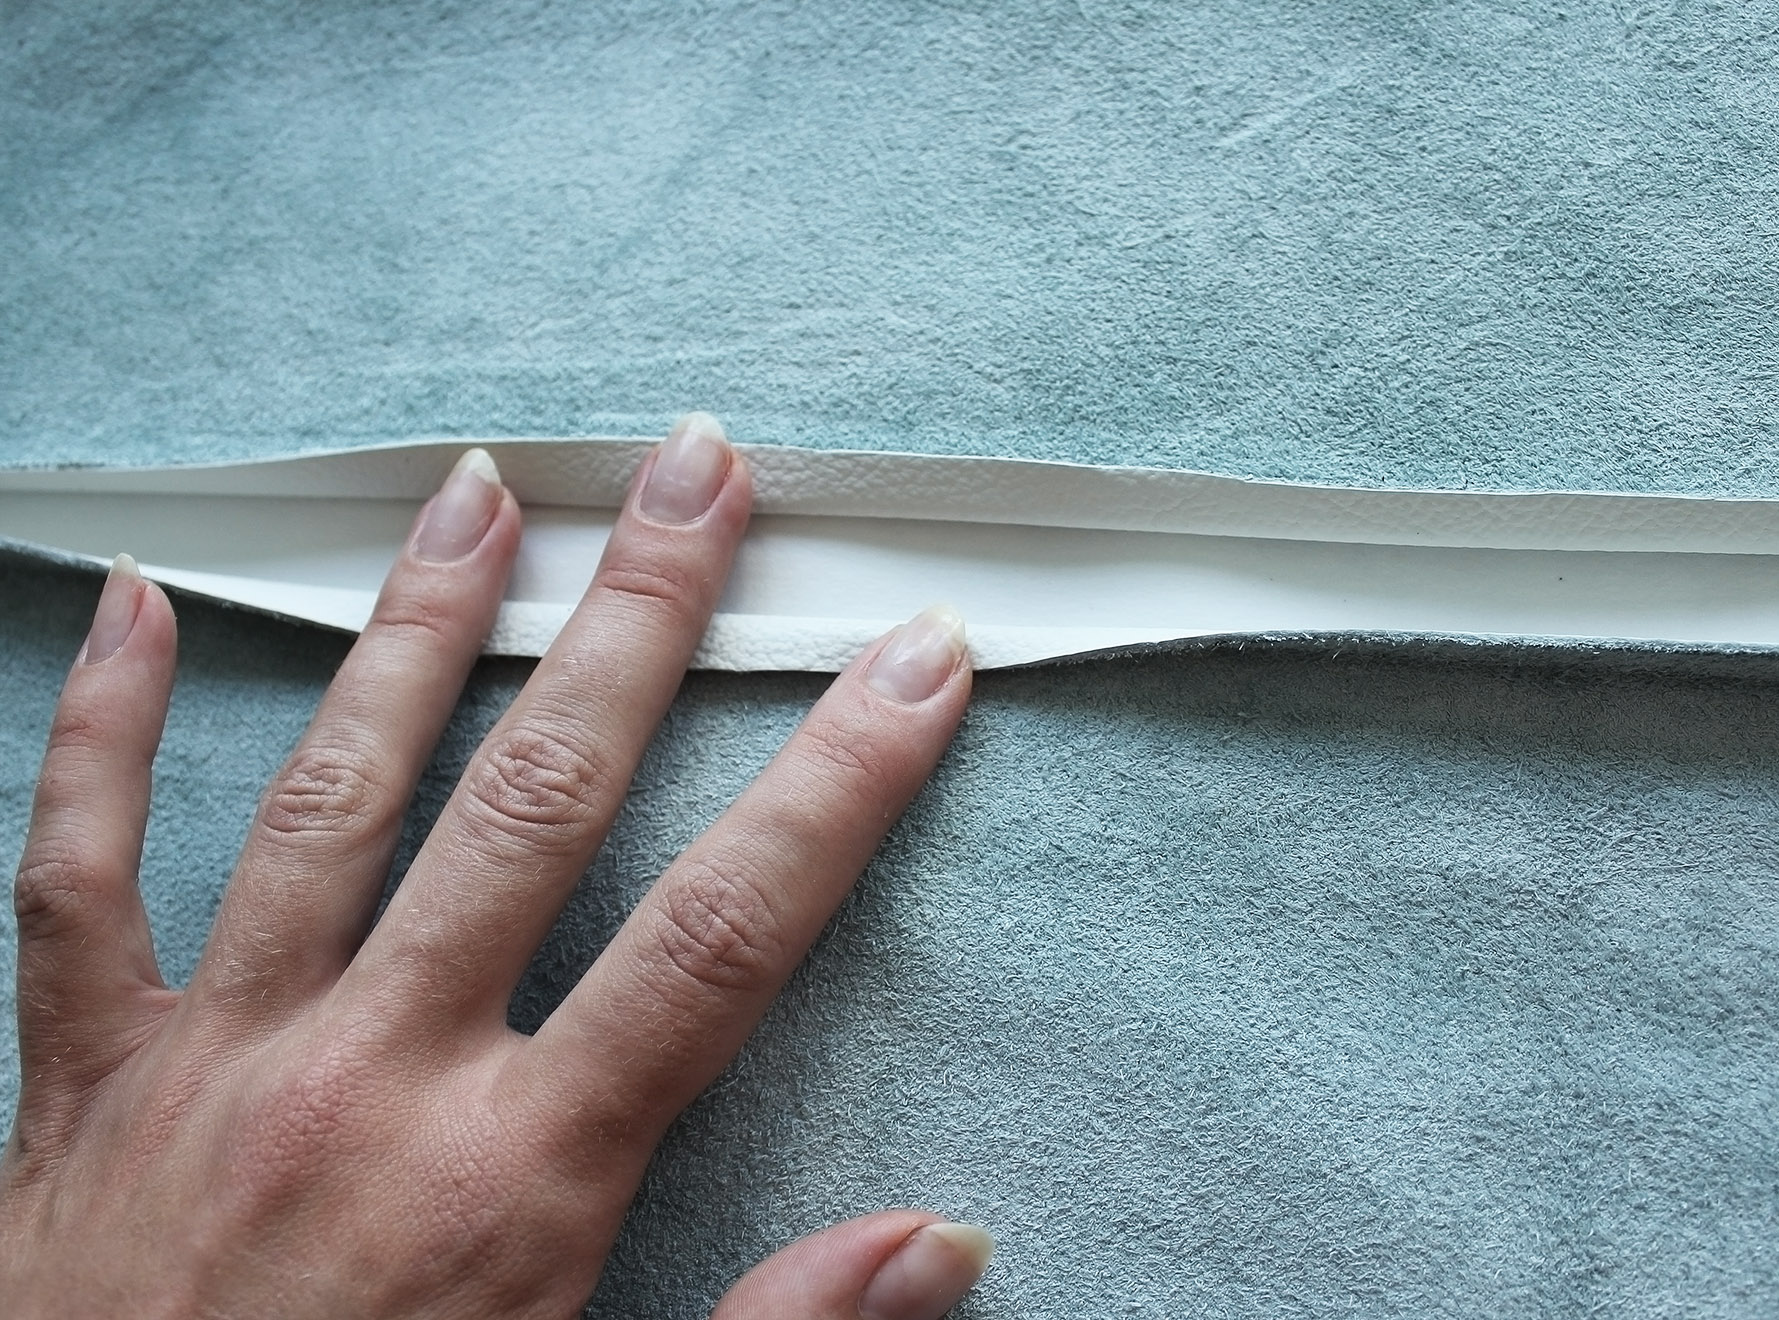
II. Once cut, with a cotton cloth in between, iron a small fold on the long edge of the two pieces you just cut. This will help with sewing the zipper. Add interfacing if required.
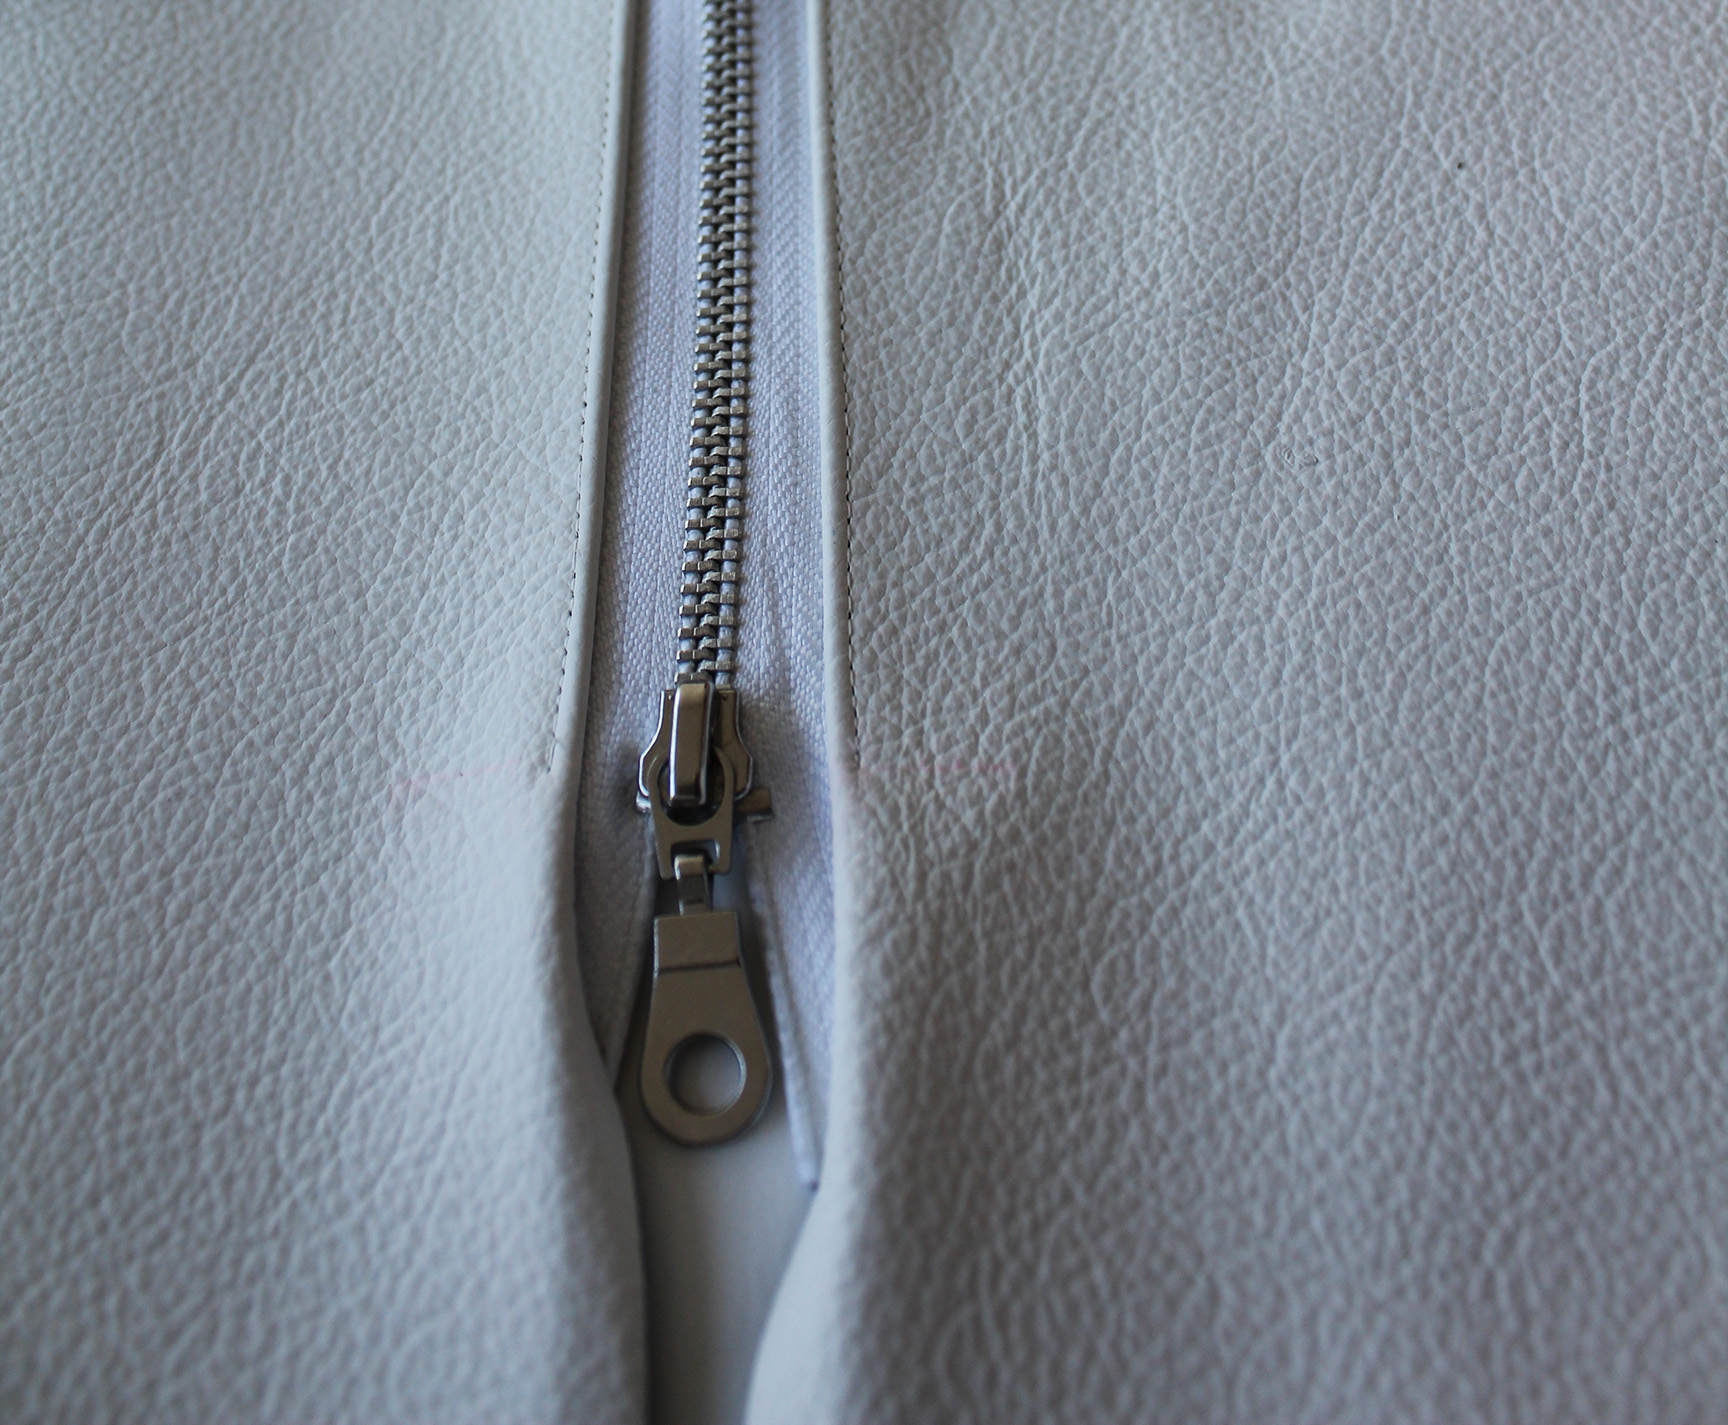
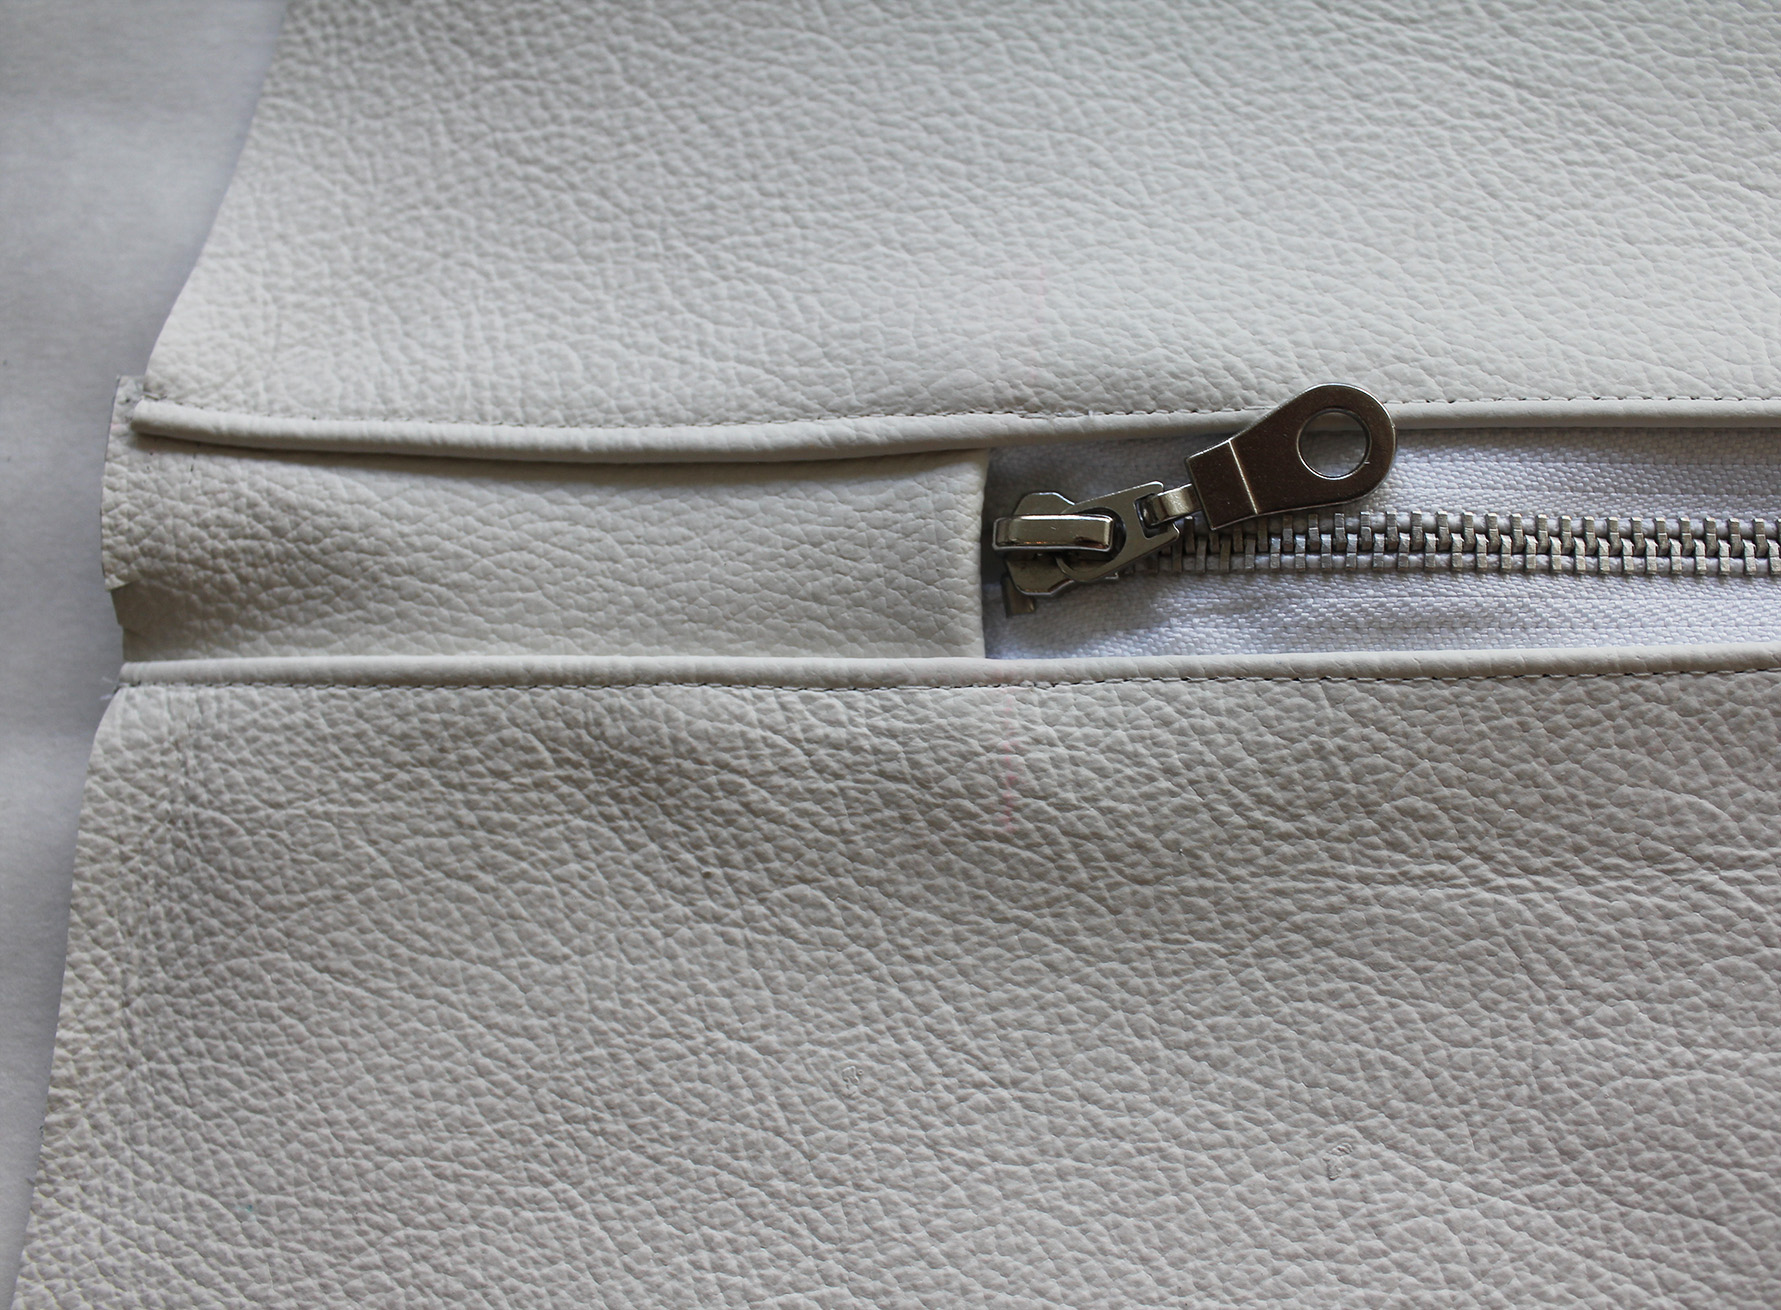
III. Mark the spot for the zipper. You don't want it to go all the way, I had it end 10 cm from the edge. Sew a straight stitch along the edge, stopping at the marks.
IV. Measure the distance from the end of the zipper to the edge, and cut a piece that size (with 1 cm extra in length, to make a fold as shown below).
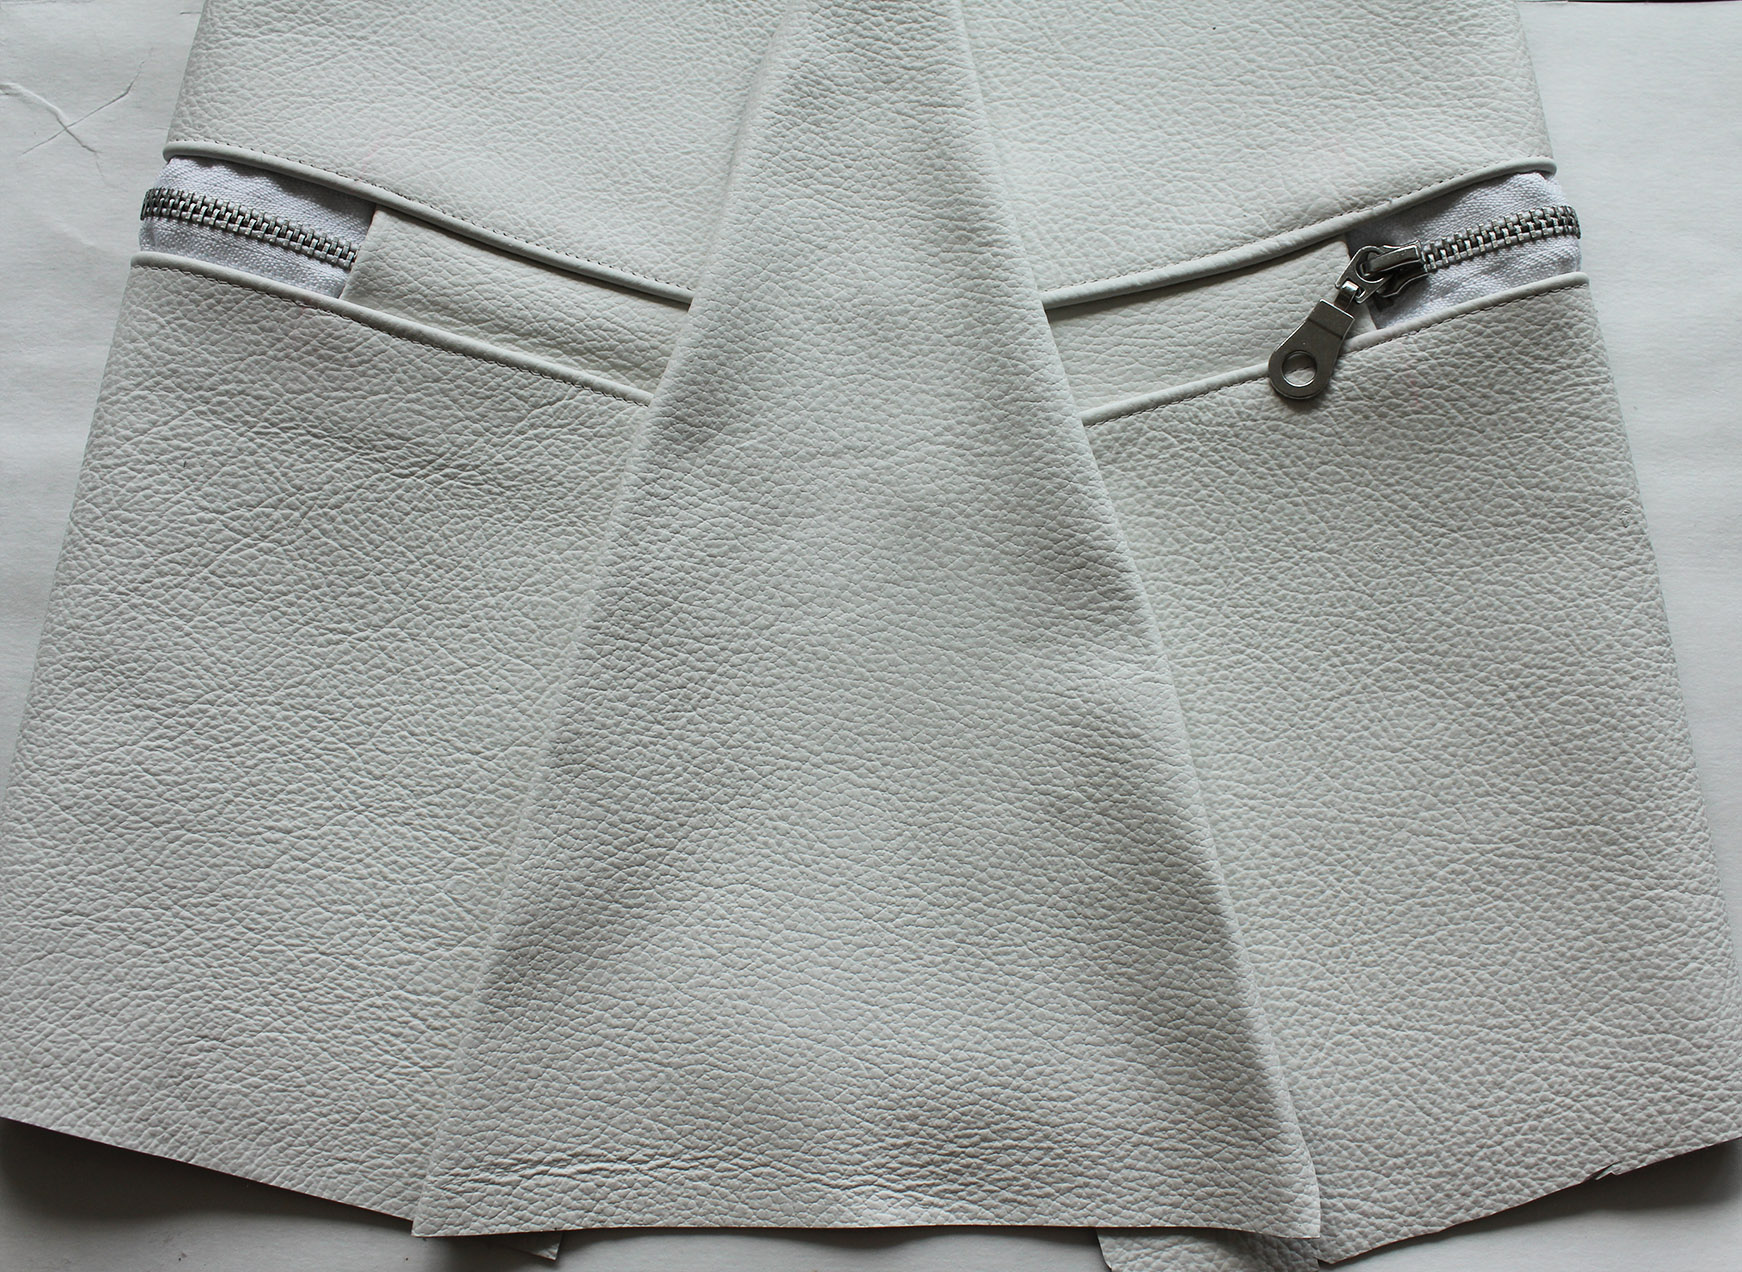
V. Complete the stitch, securing the end piece in place. Repeat for the other end.
VI. Fold the raw edges to the back like this.
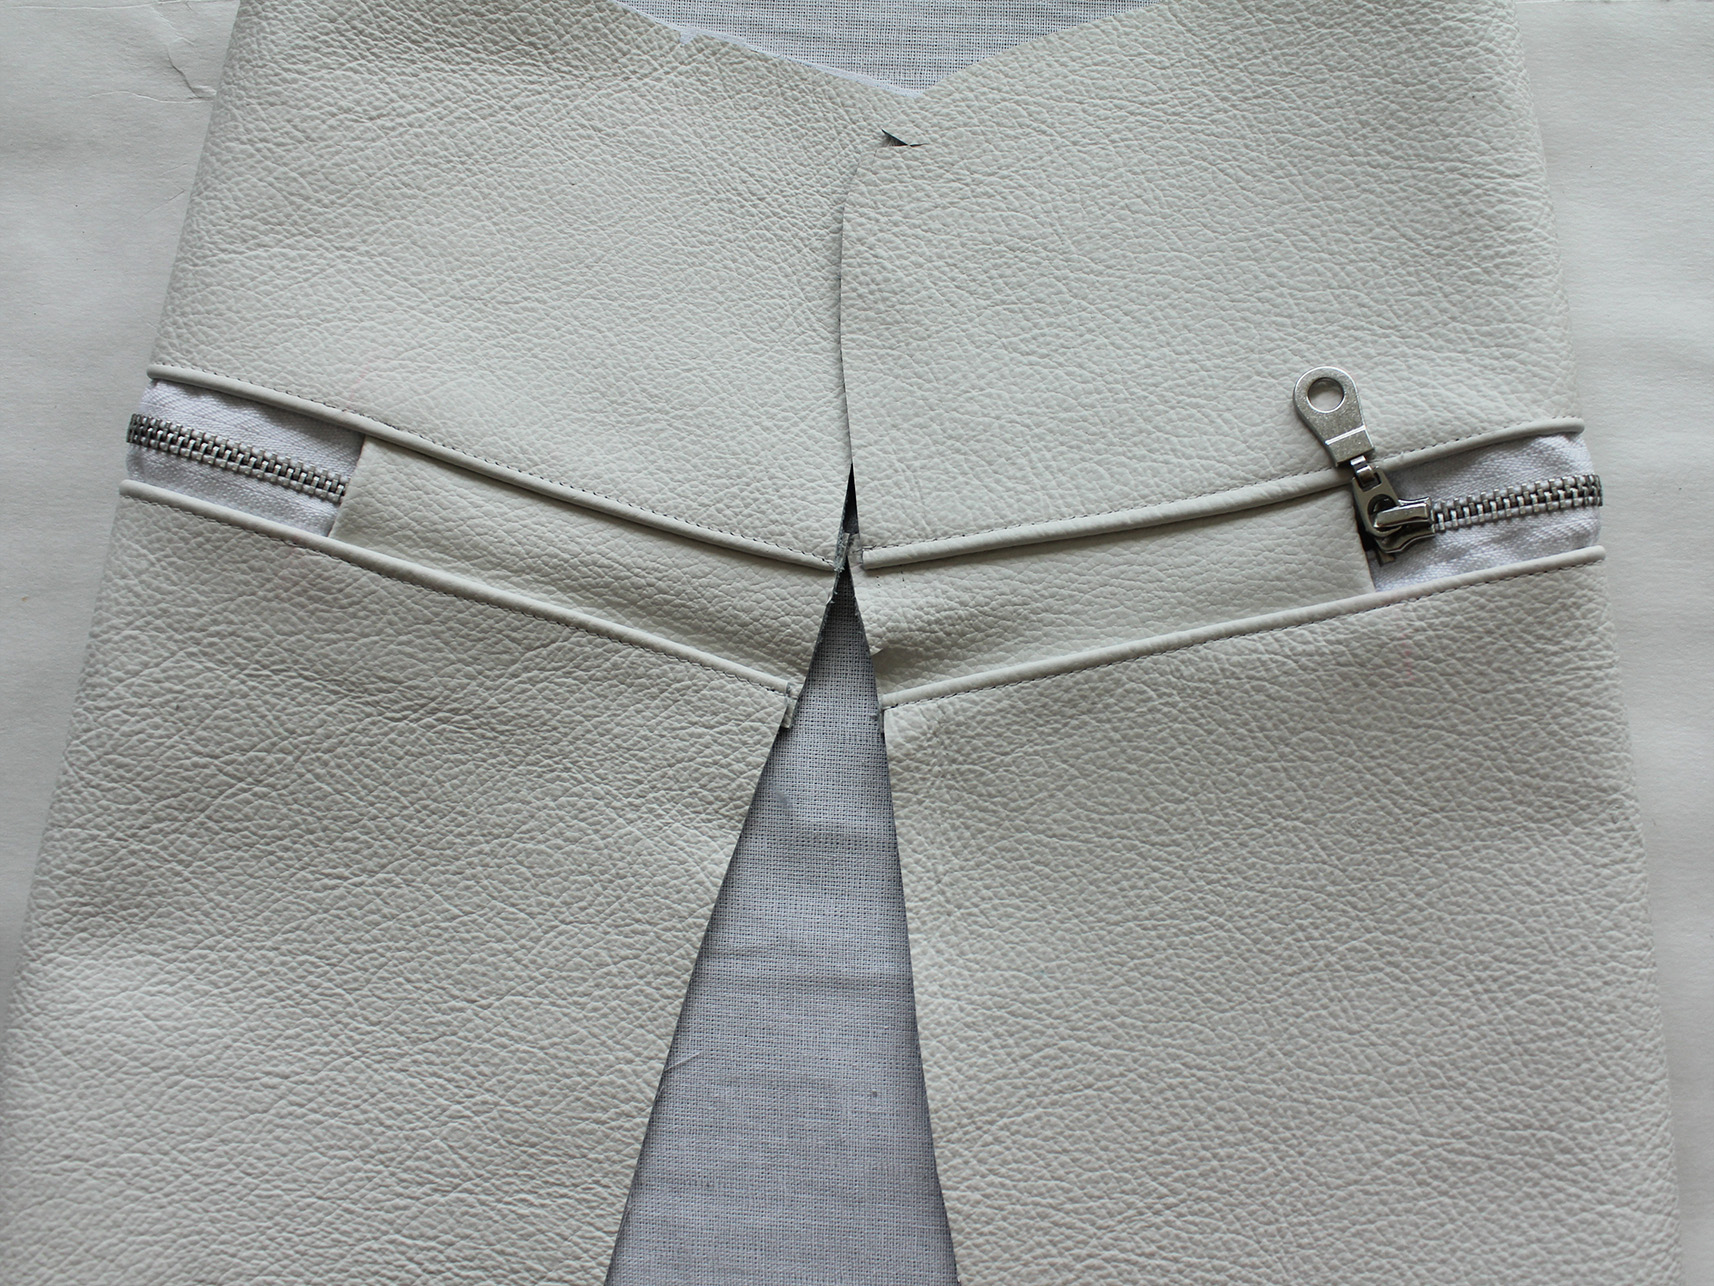
VII. From the piece you cut off at the start, cut off a triangle (mine was 12 cm at the base), pressing folds at the edges with an iron and cotton cloth in between like so:
VIII. Sew a straight stitch right at the edge of the triangle, securing the back piece in place.
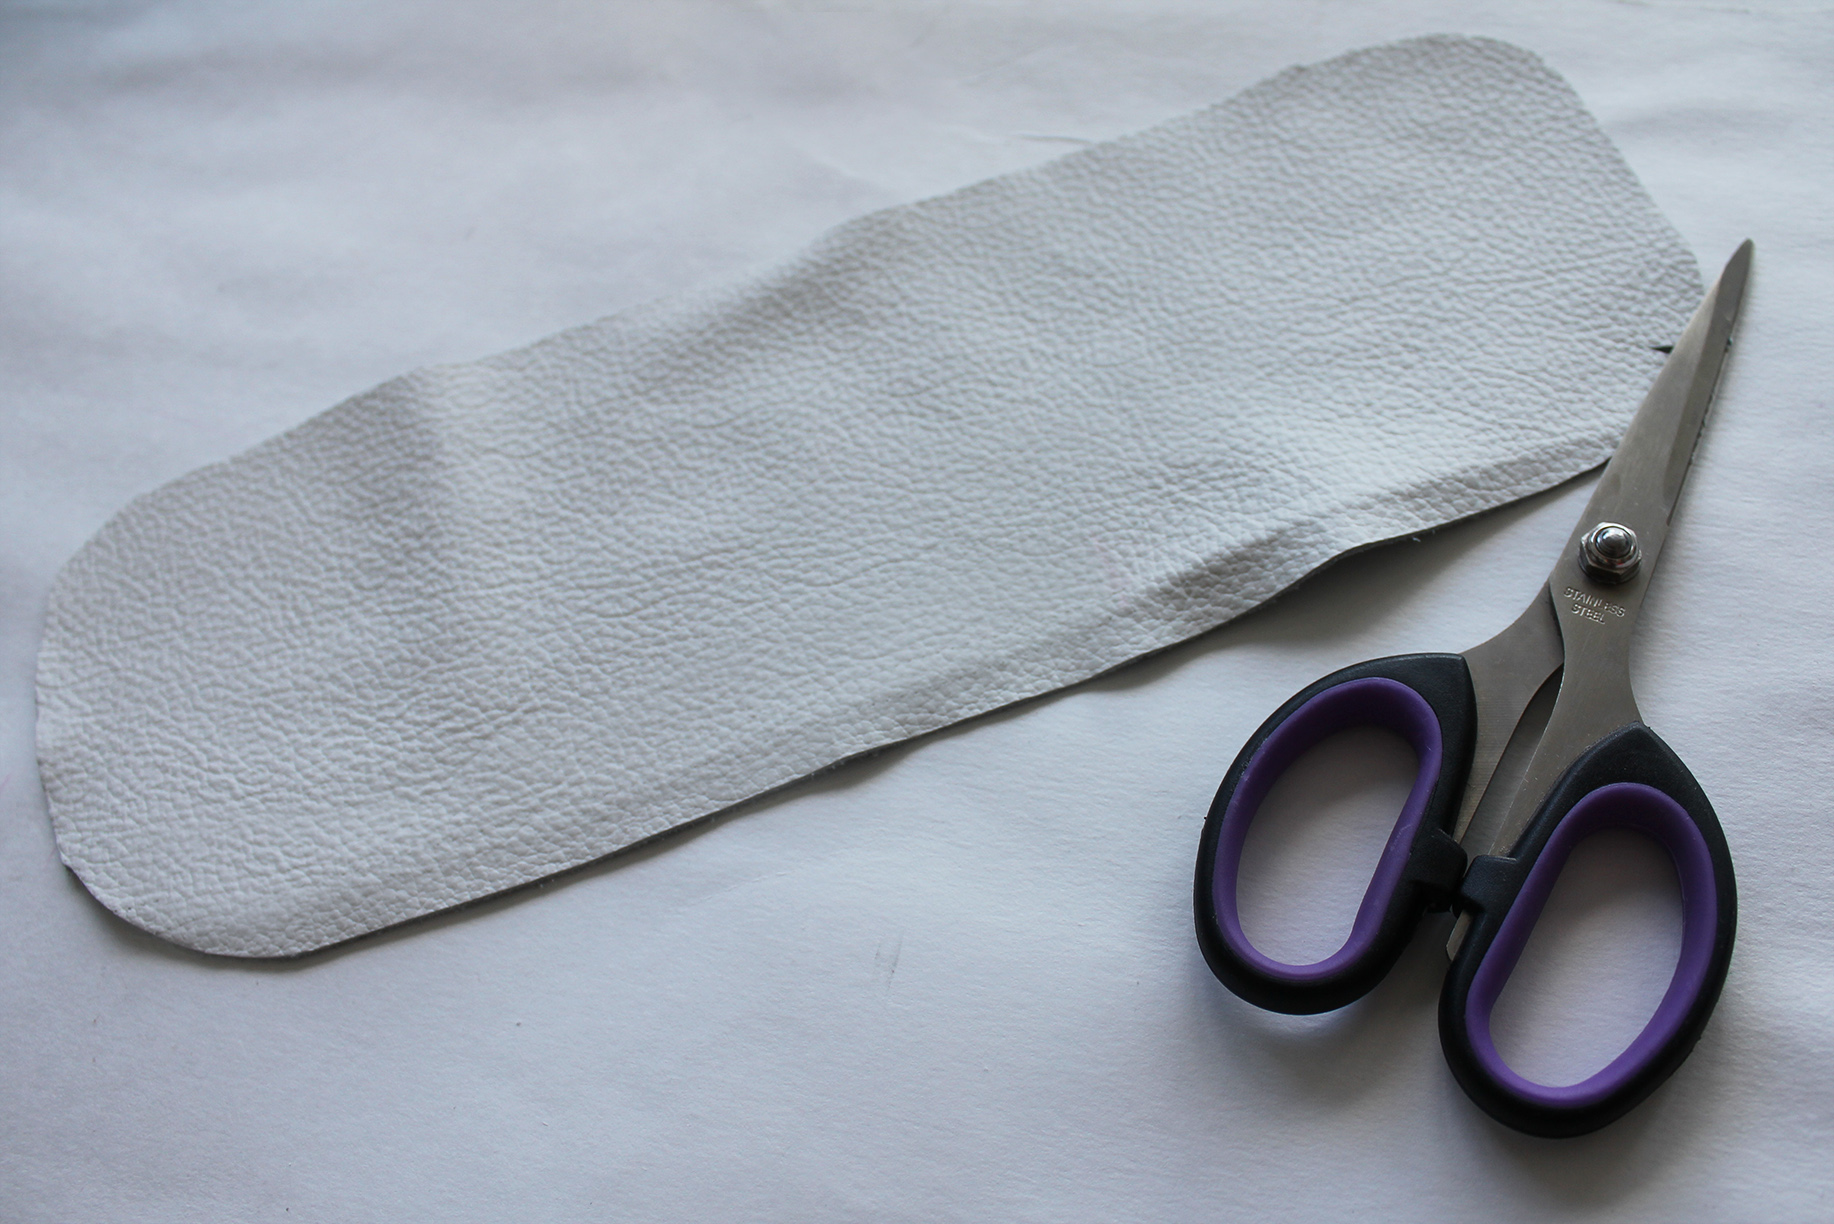
IX. From the piece that you have left, cut out the bottom. The circumference should be the same as what the main bag piece measures at the bottom.. Cut the corners a bit round to help with sewing.
X. Attach the bottom piece to the body of the bag with paperclips, binder clips, or whatever works. Sew a straight stitch all around.
XI. Make a small fold at the top edge of the bag, and sew a straight stitch. You only really need this at the front, I left the top edge at the back unfinished to avoid bulging when folding in the next step.
XII. Fold a couple of darts to give the bag some form, and fold the edge over.
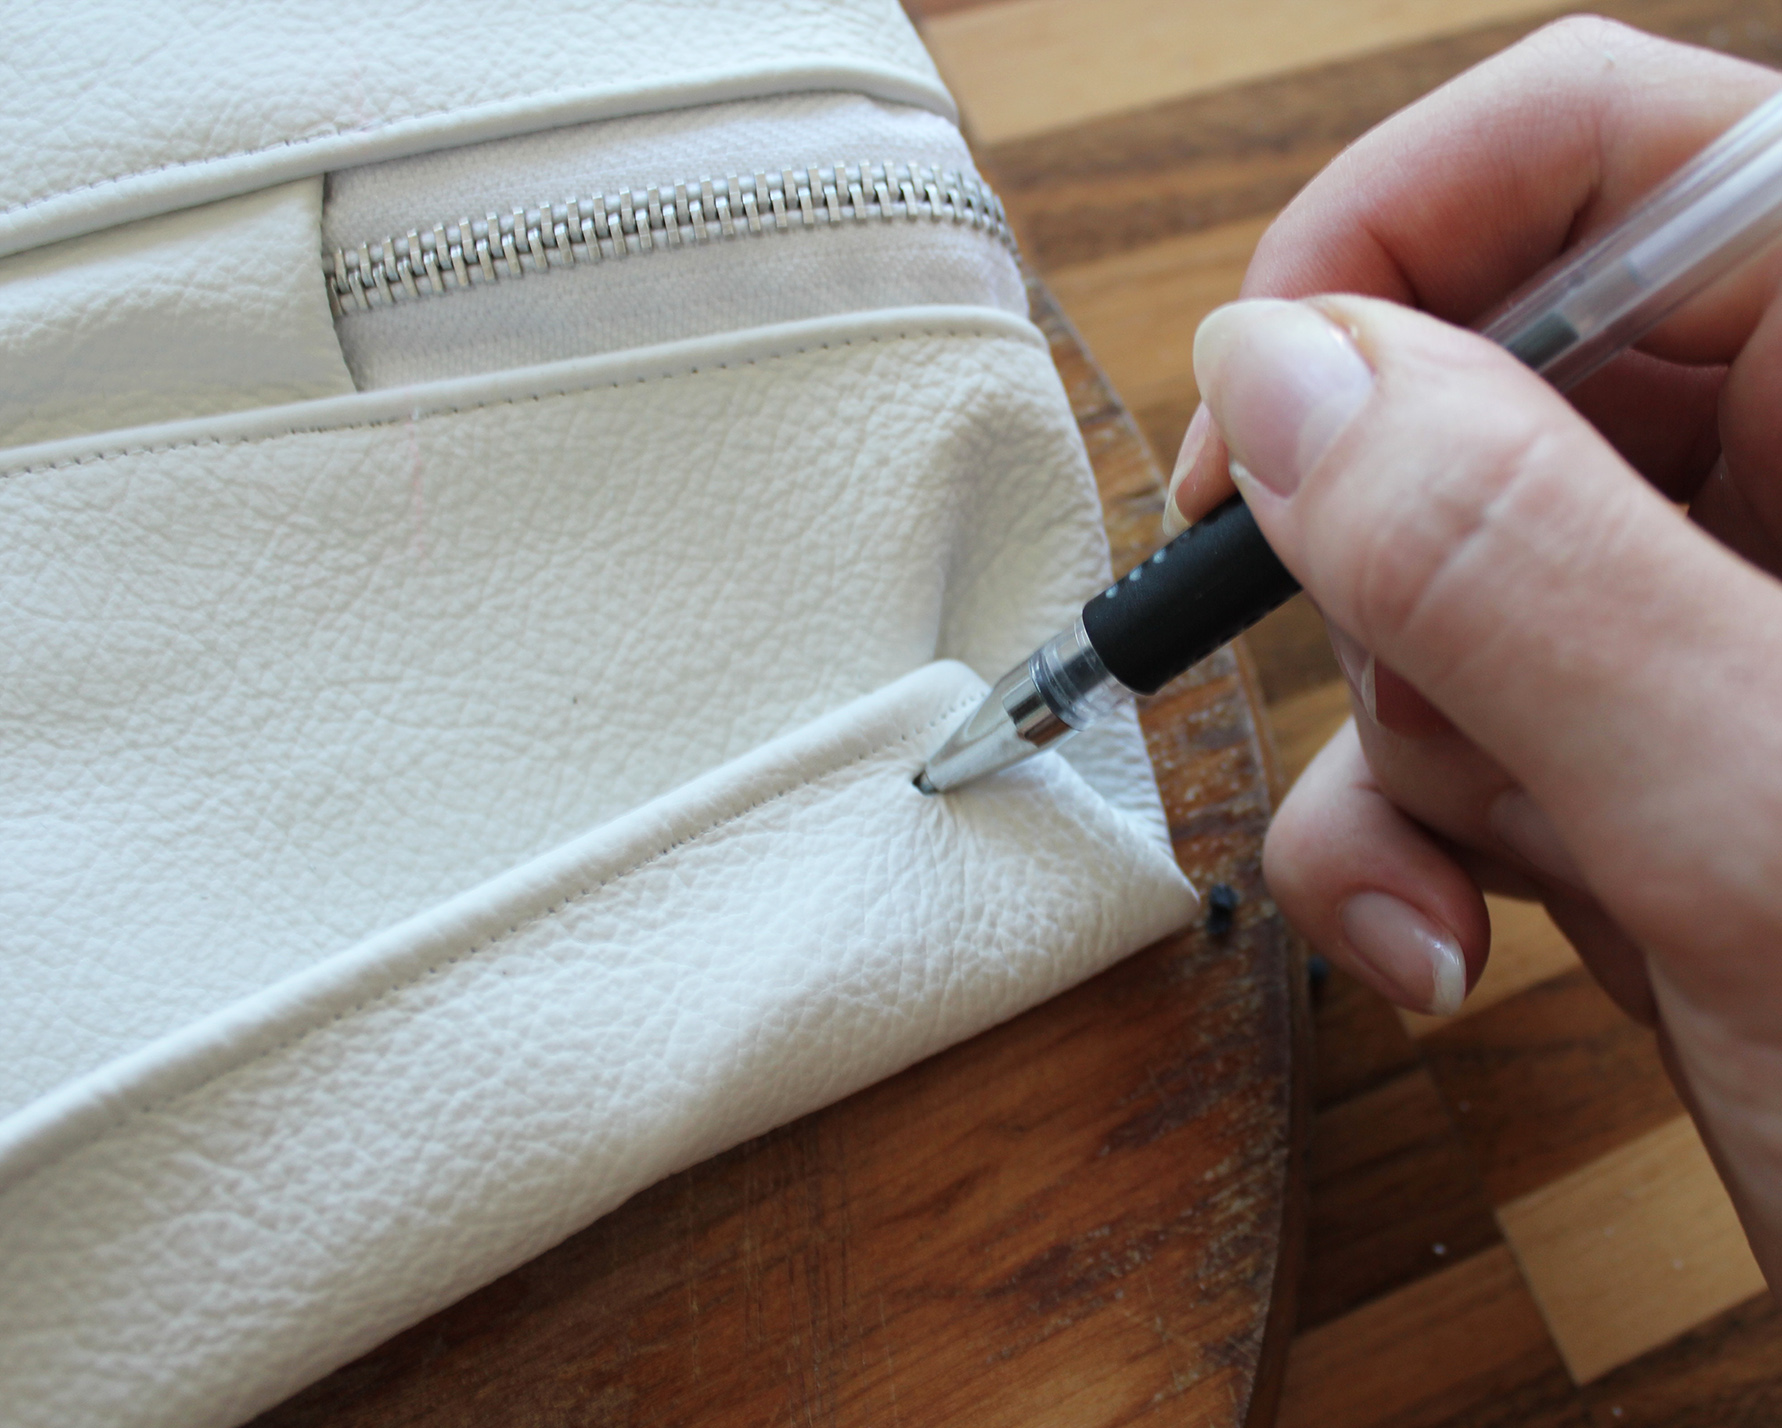
XIII. Start punching holes to attach the fold with rivets. Mark the spots through the holes with a pen.
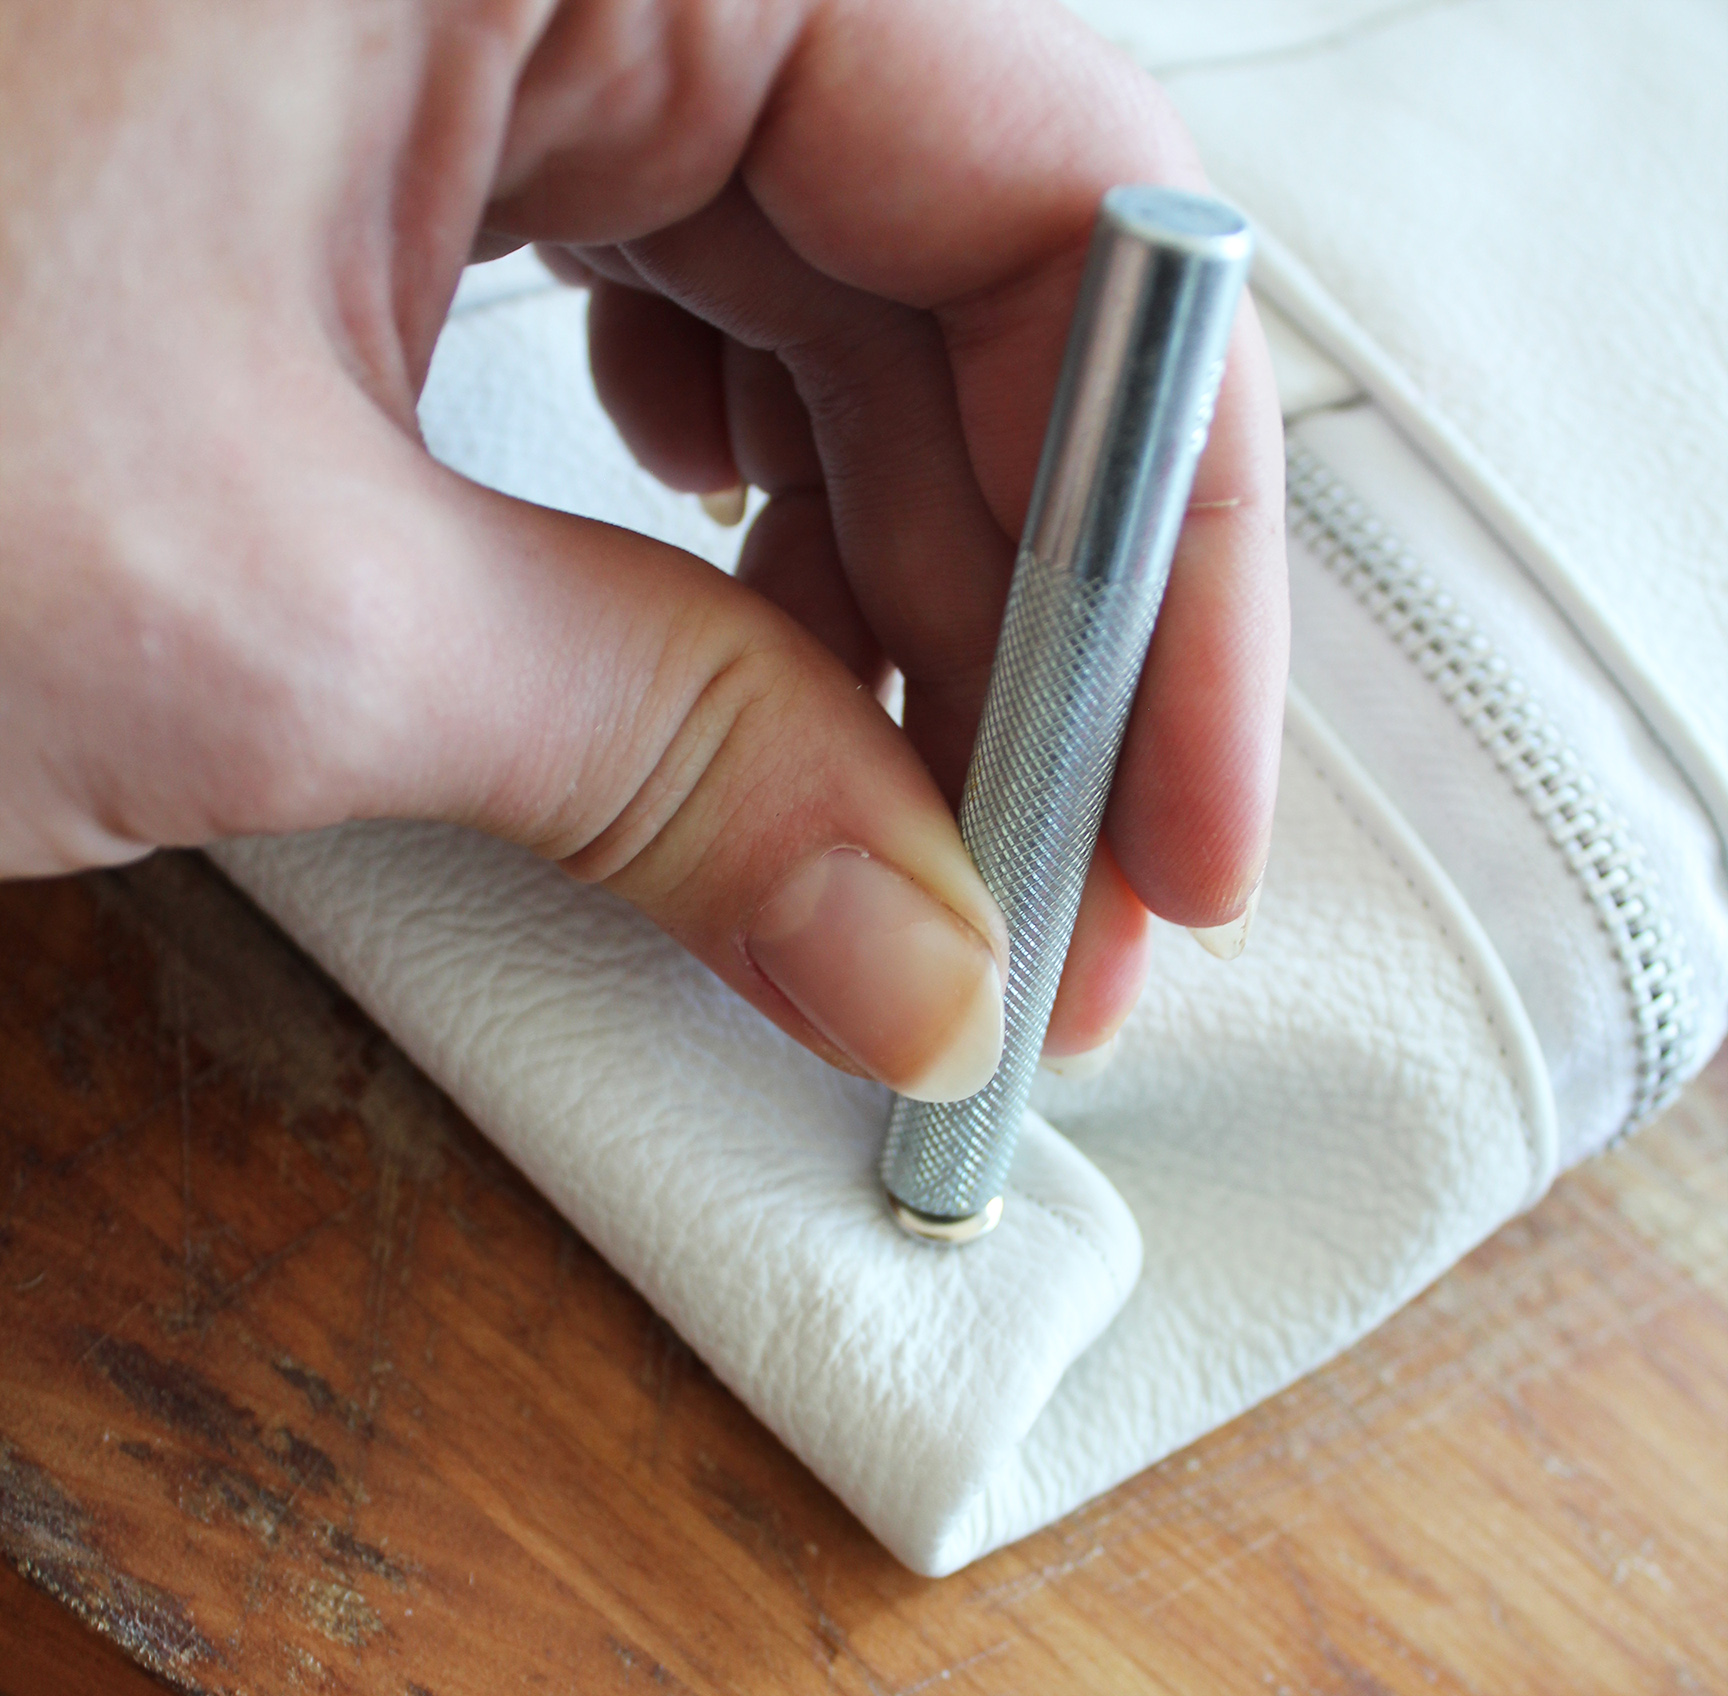
XIV. Secure the rivet with the tool (if you're unsure, youtube has some good videos on this. Just search for 'setting a rivet').
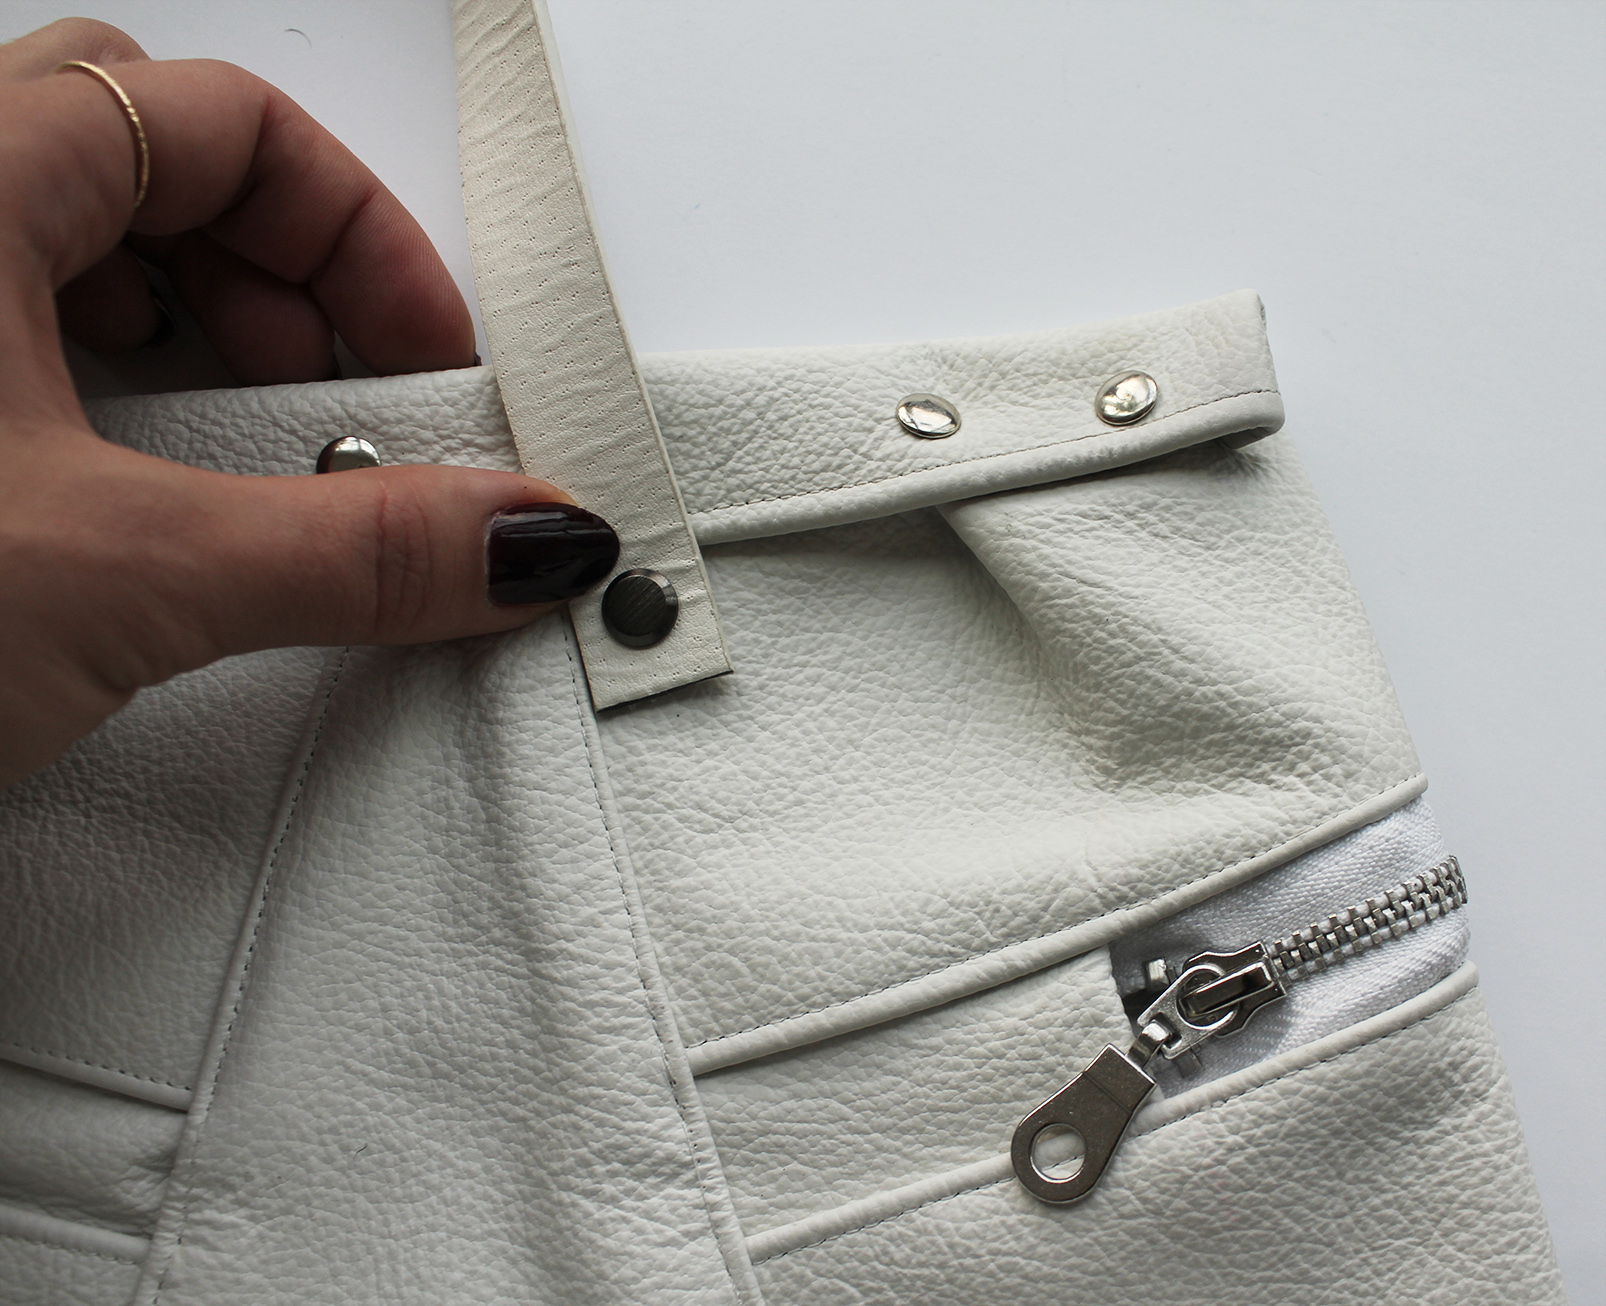
XV. Add as many rivets as required to secure the fold in place. I did a total of six with the ones at the edges being a bit lower to keep it nicely pinned down.
XVI. Now for the straps. Punch holes at the centre ends of both straps.
XVII. Insert the screwable rivets into the holes.
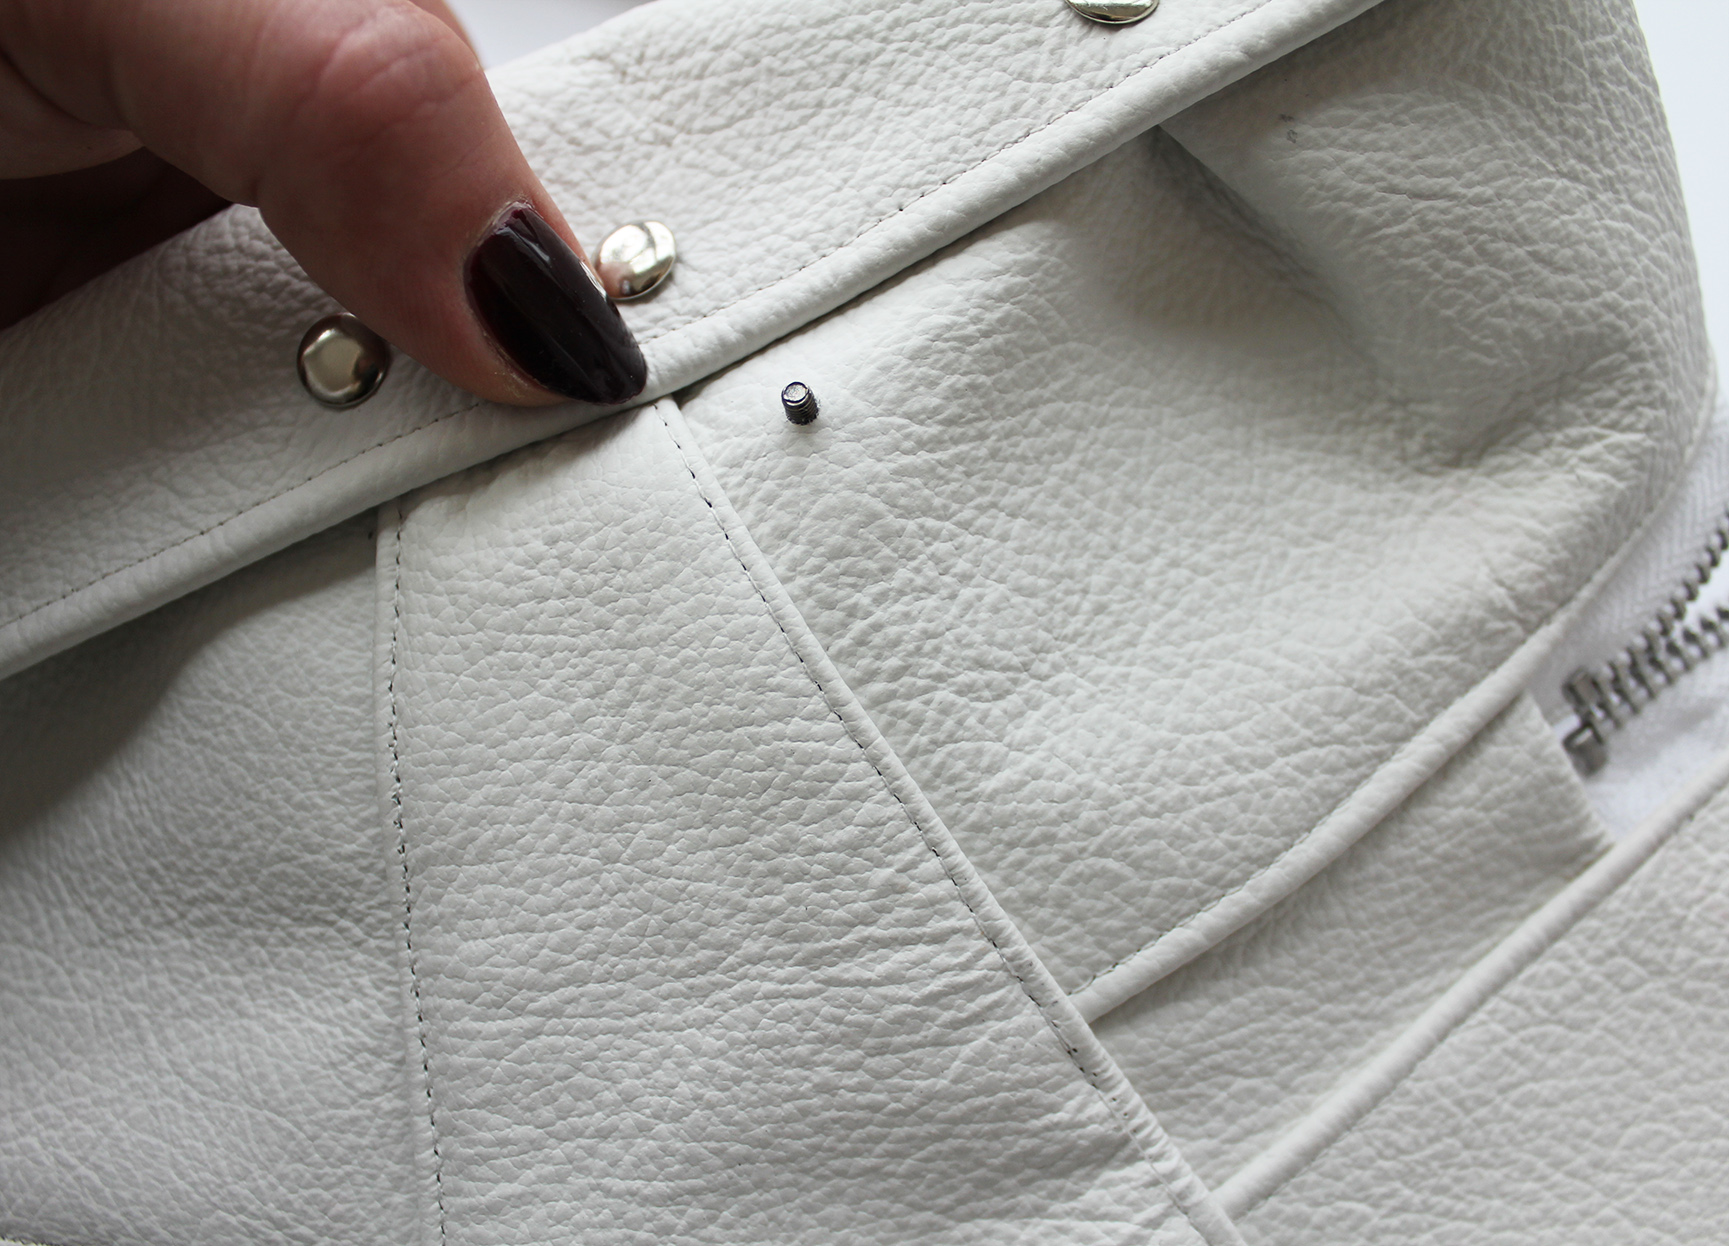
XVIII. Use the rivet to press down onto the leather where you want the strap attached to mark the spot. Punch a hole there and insert the screw end of the rivet. Screw the rivet ends into each other. Repeat for other strap, and do the same thing to attach the other ends of the straps to the bottom of the bag.
The screwable rivets at the ends of the straps are good for allowing for movement when the bag is worn on just one/both shoulders, as the strap can spin around on the rivet.


xo,
Julia


Nice Diy! Congratulation!
ReplyDeletewww.bonnie-bandie.com
Nice Diy! Congratulation!
ReplyDeletewww.bonnie-bandie.com
Thank you:)
Delete