

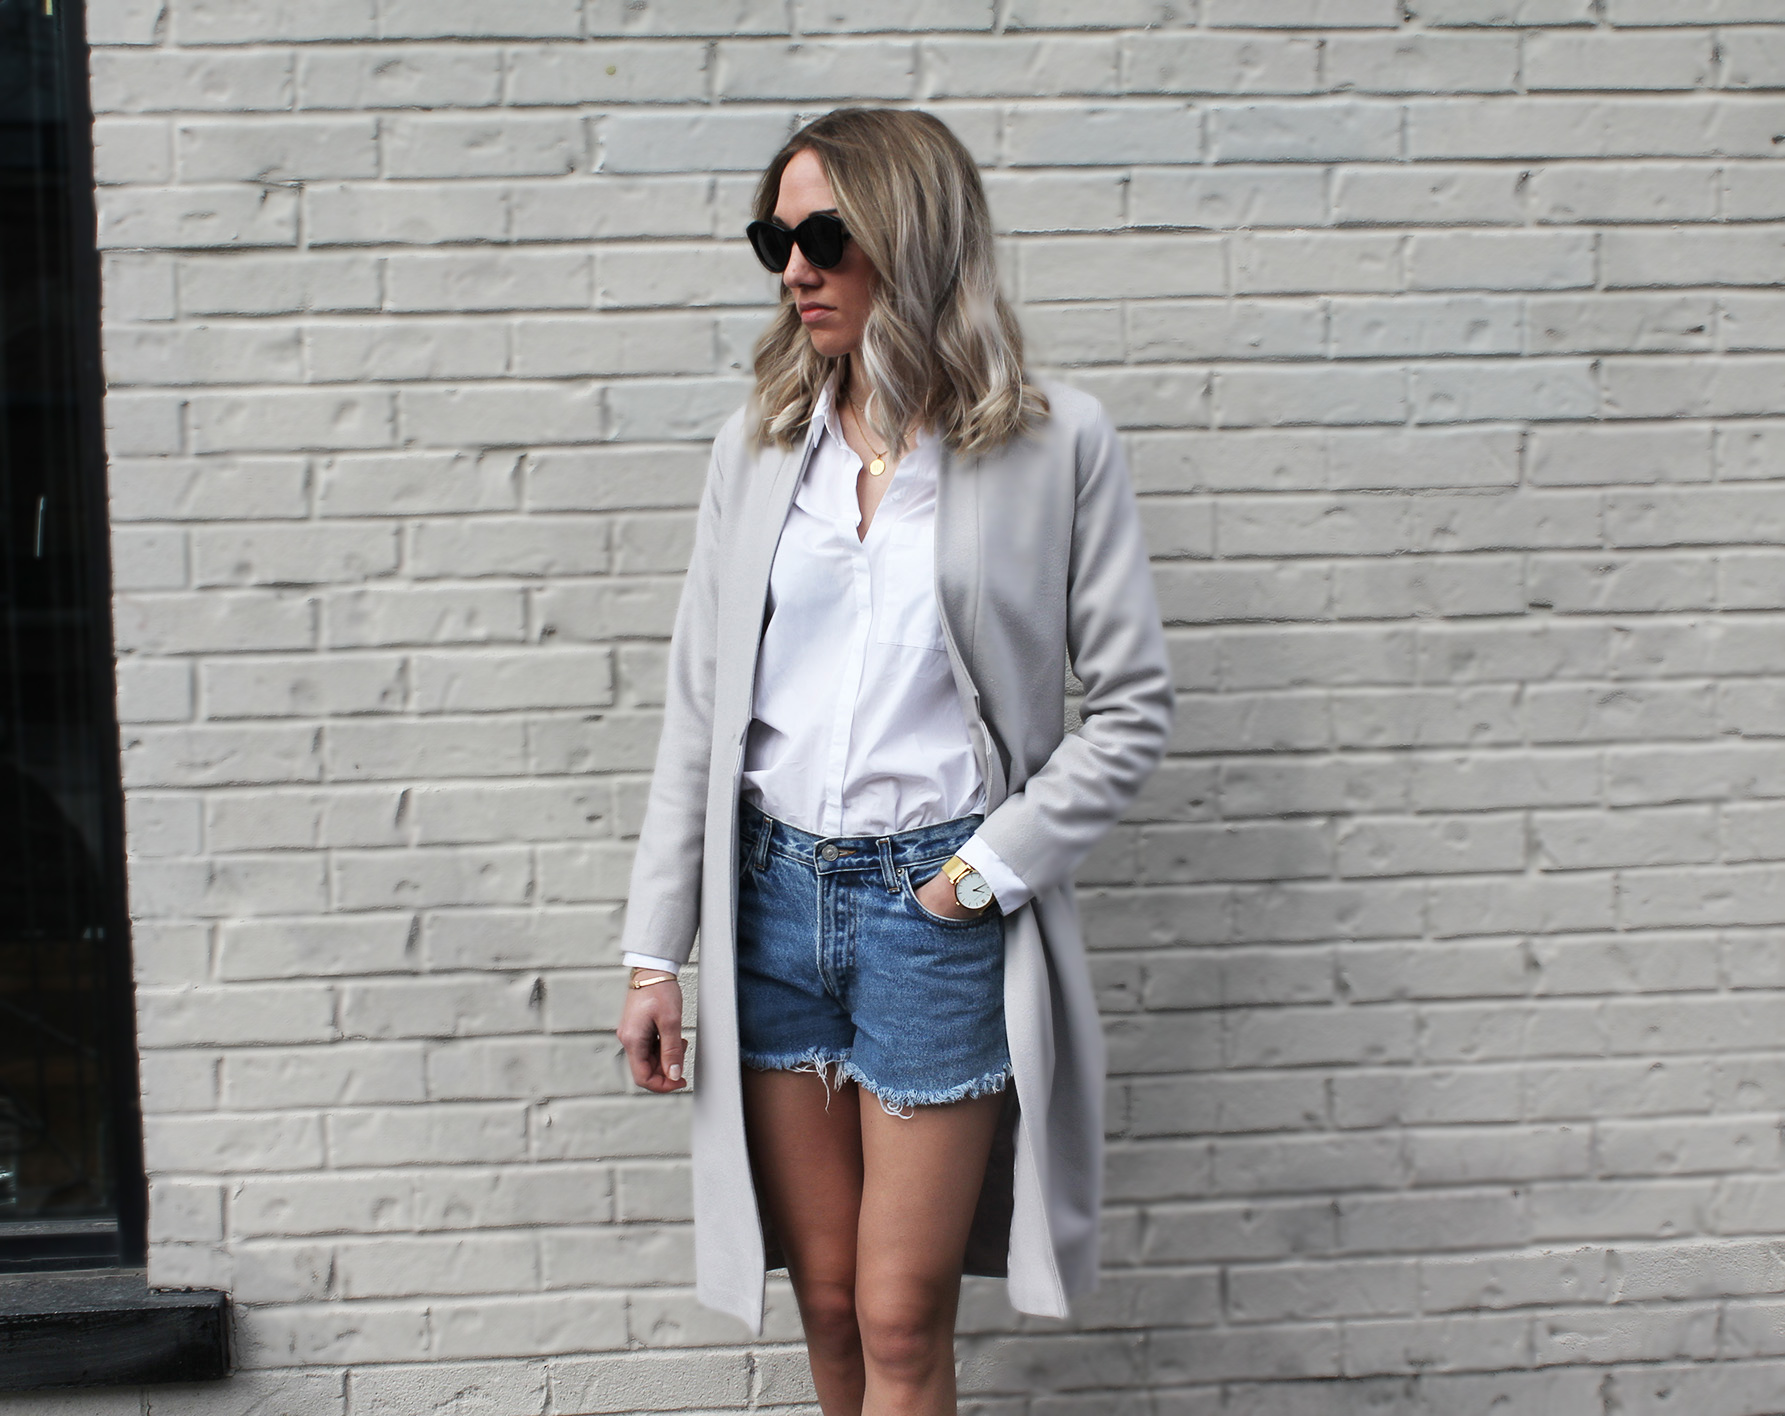
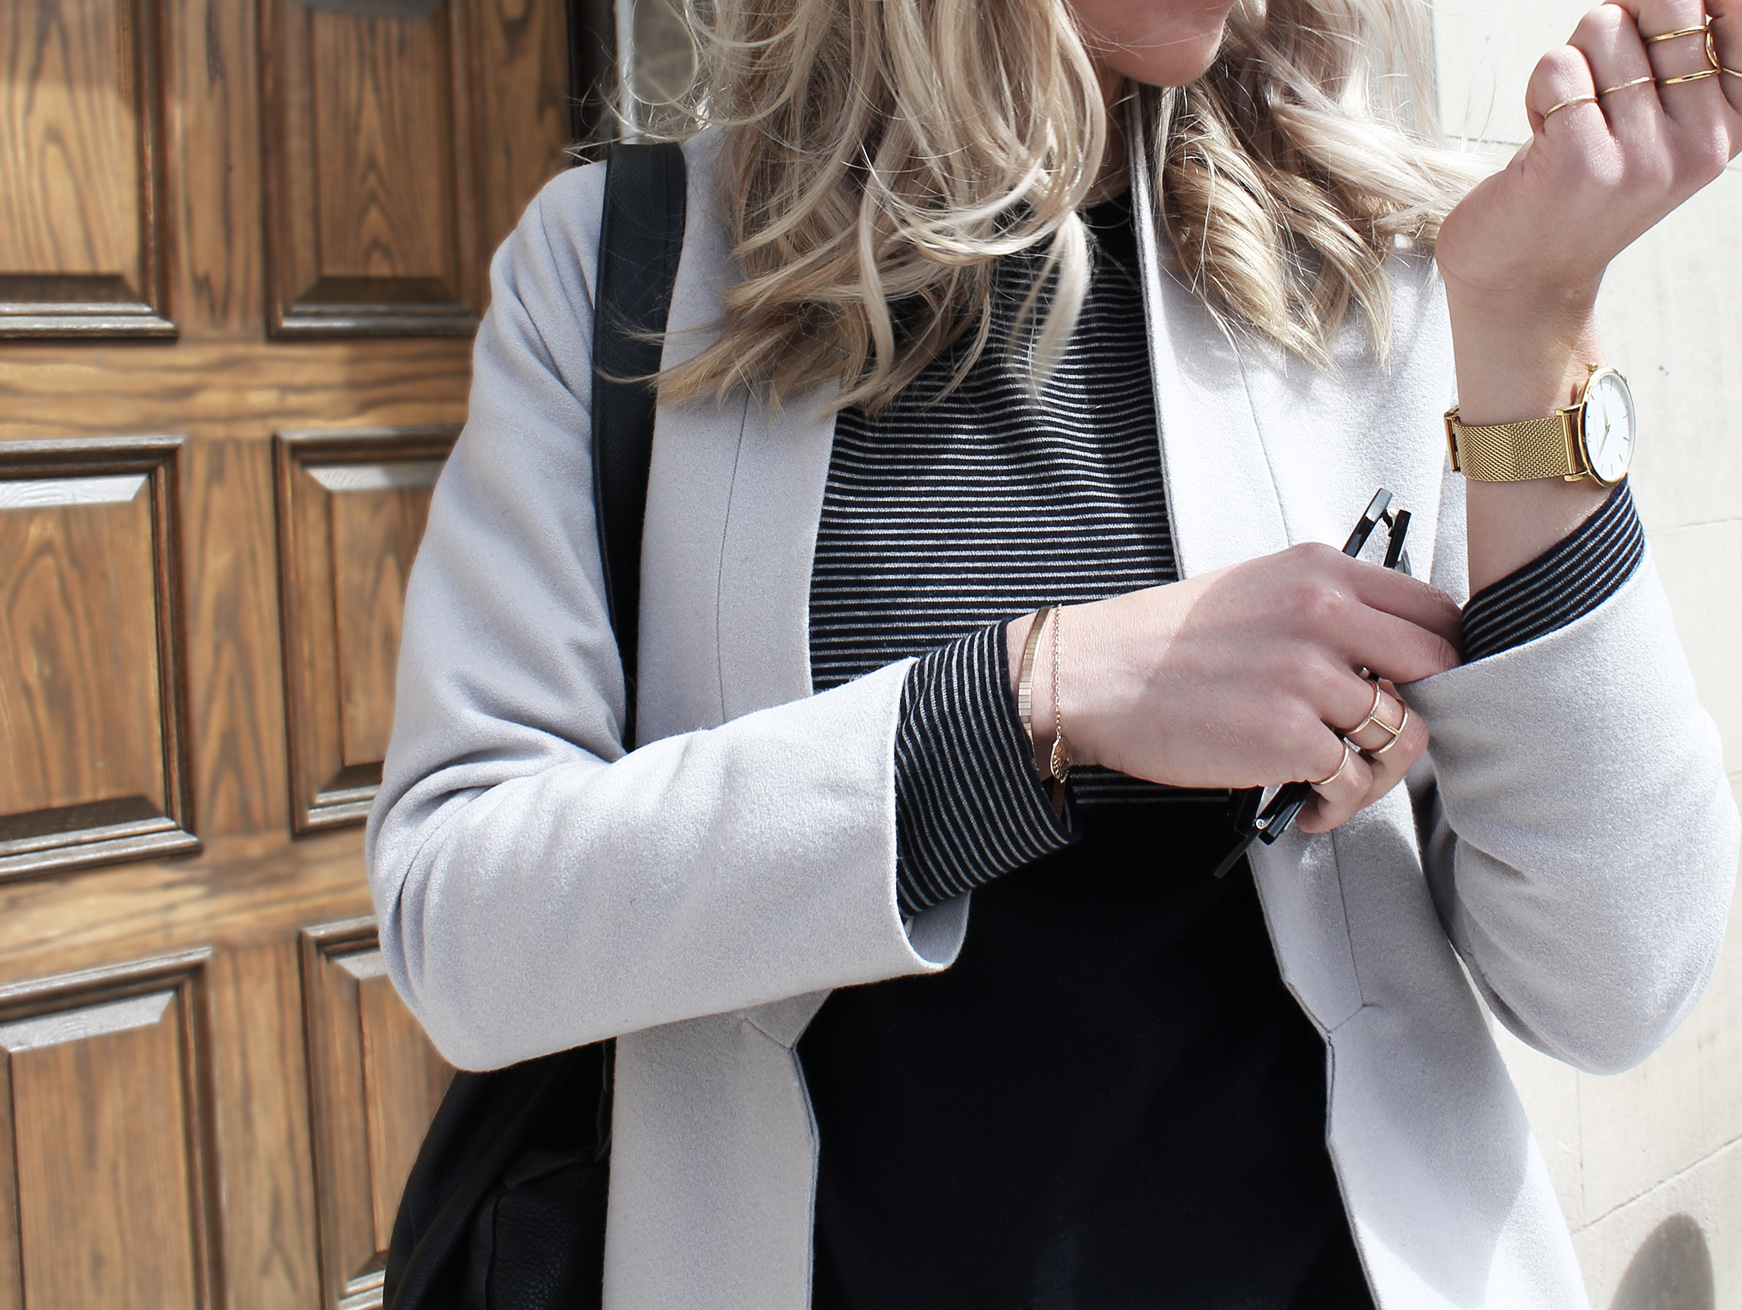
Spring = light coat season. Recently found some nice neutral wool blend on discount, and decided to experiment with the flat lapel trend. It's not as hard as one might think, especially if you employ my sew-hacking methods:)
You could make this with or without lining, depending on dedication/patience.
Tutorials take a lot of time & effort to create, and I choose to make mine available for free. If you enjoy this guide, you can support me with a donation that feels right for you, here.
TOOLS:
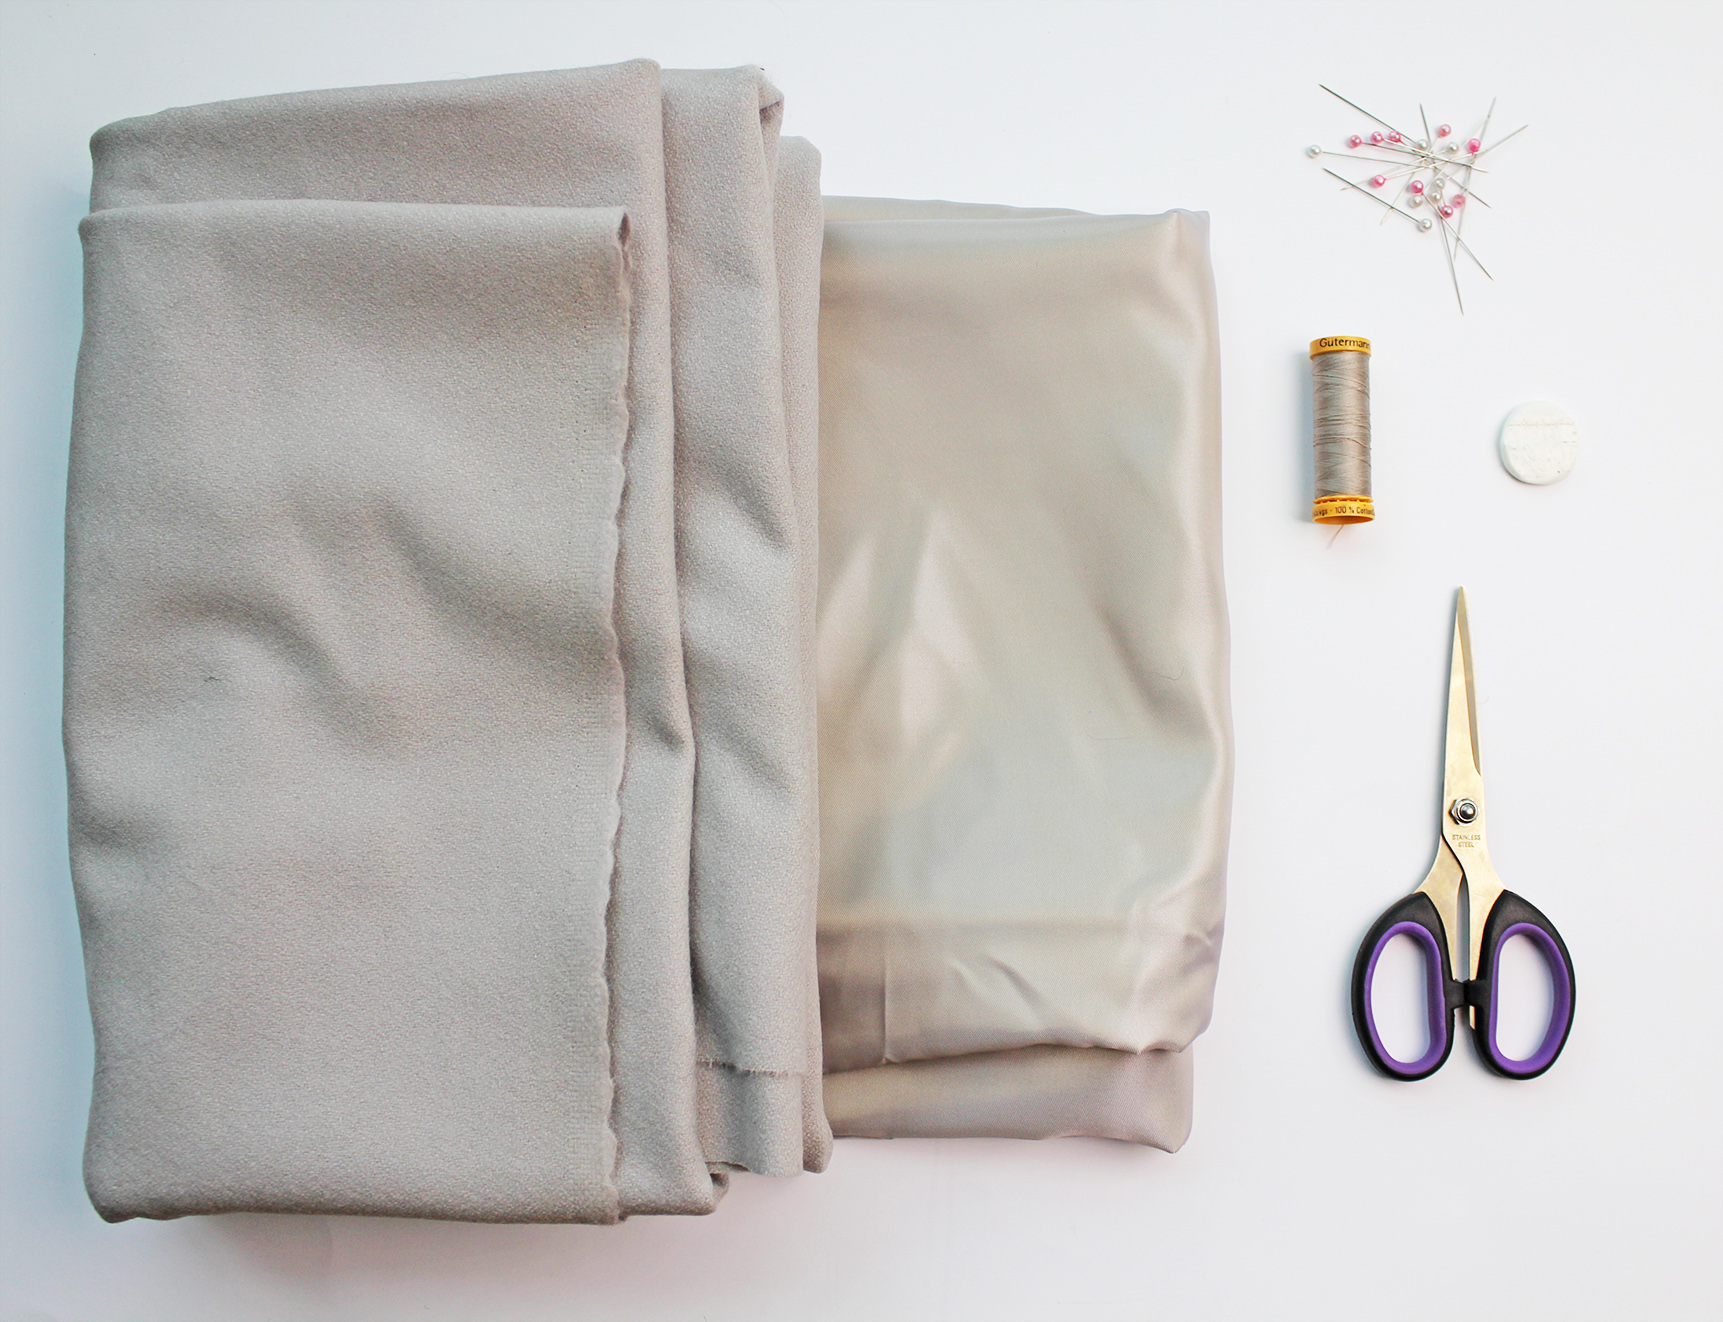
Fabric, about 3m (I used a light wool blend) | Lining (about the same amount) | Matching thread & Sewing machine | Pins | Fabric marker | Scissors
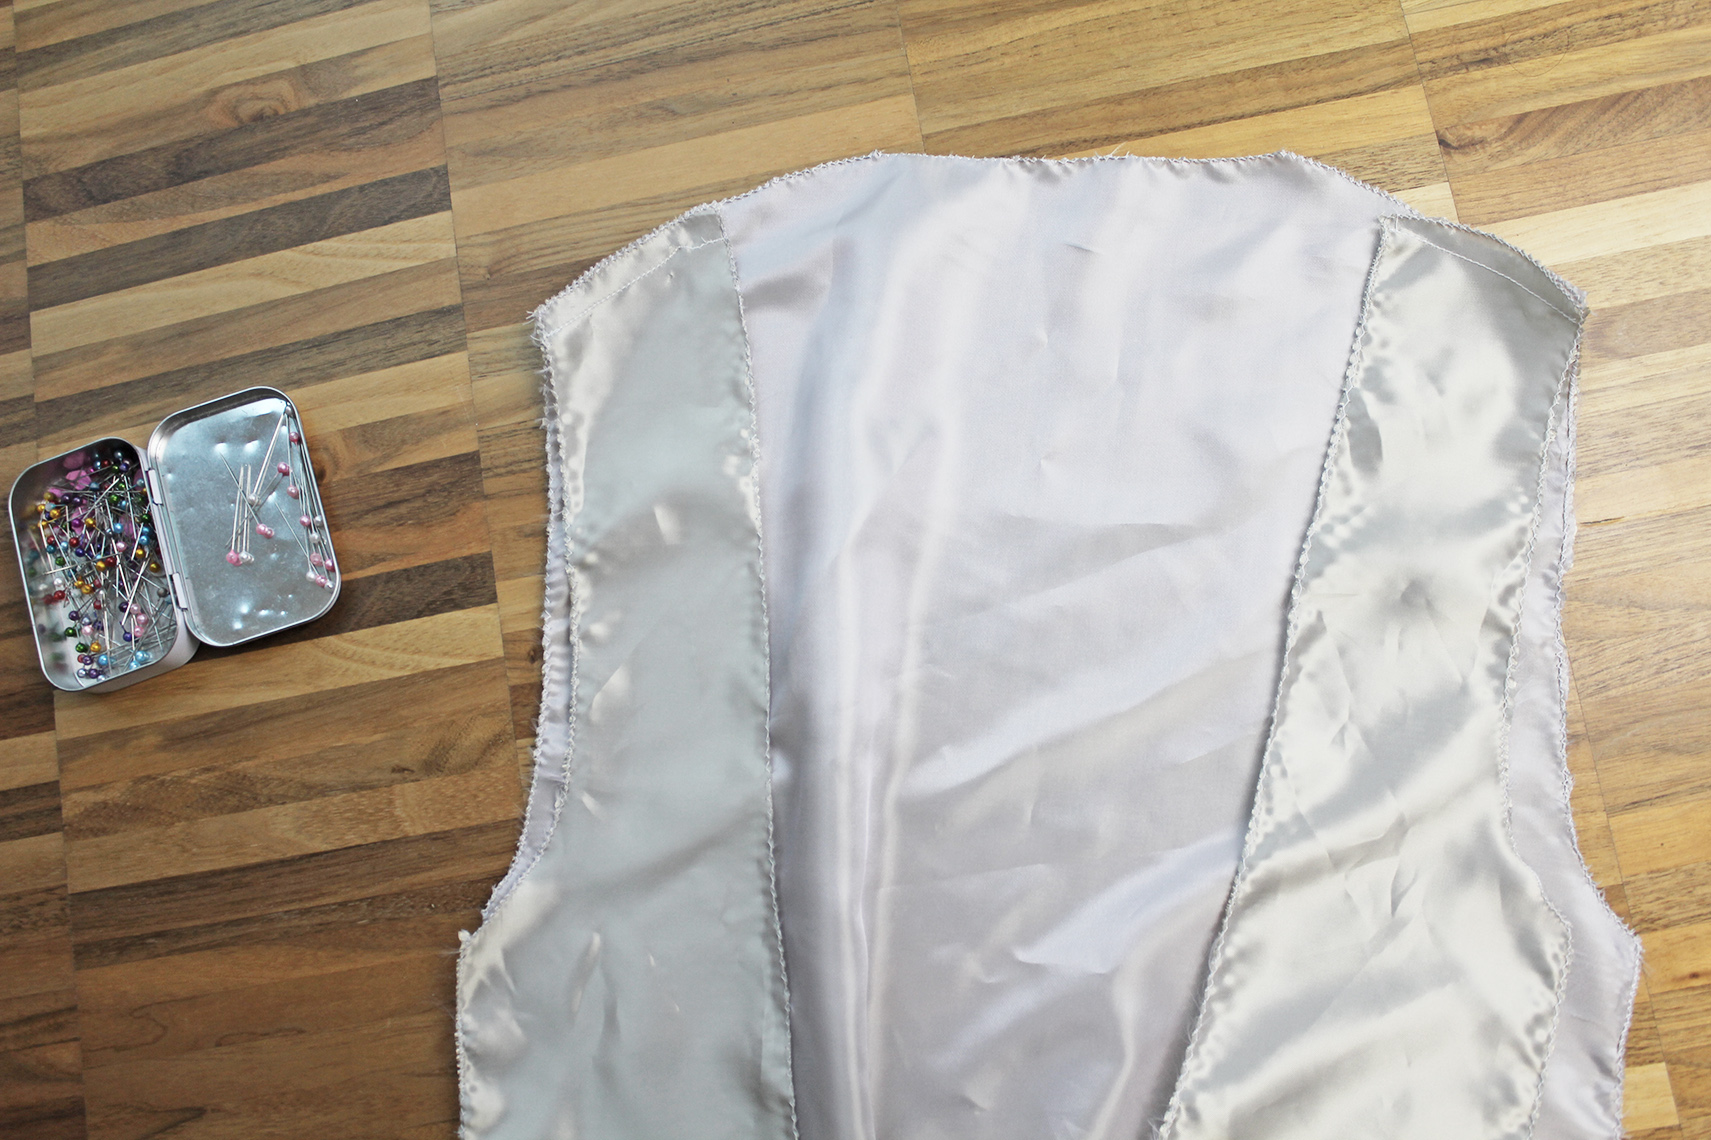
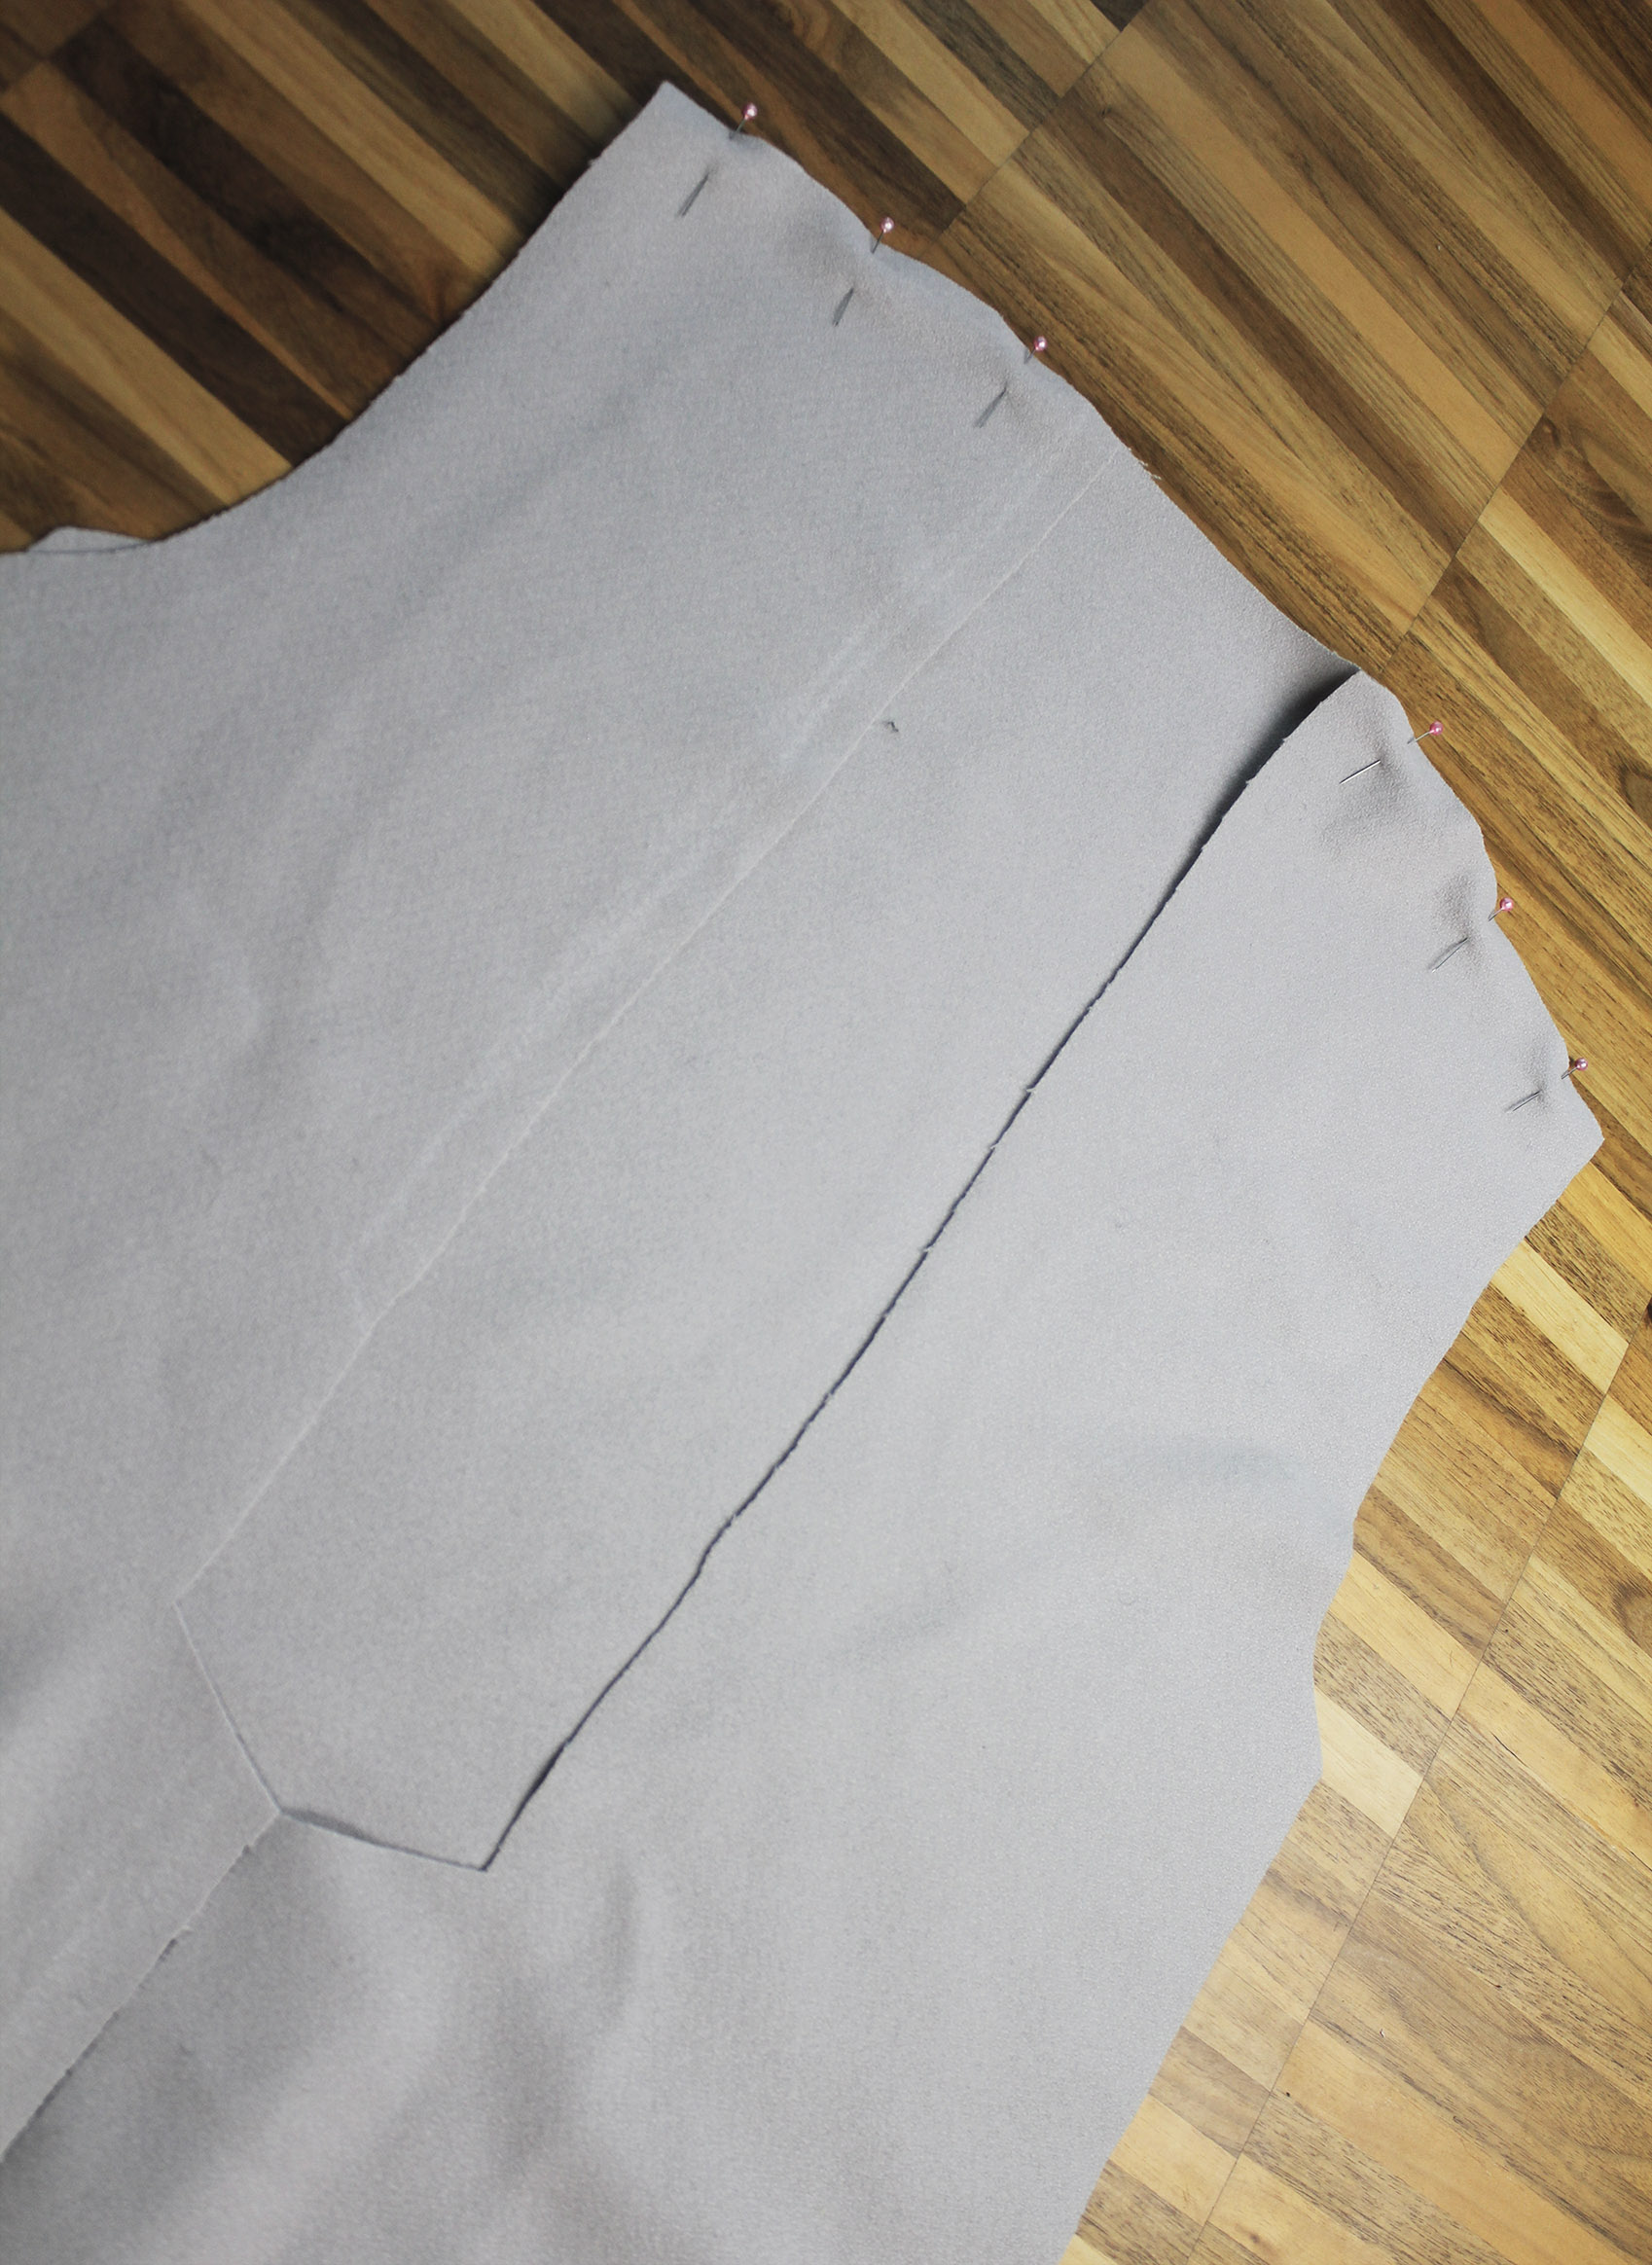
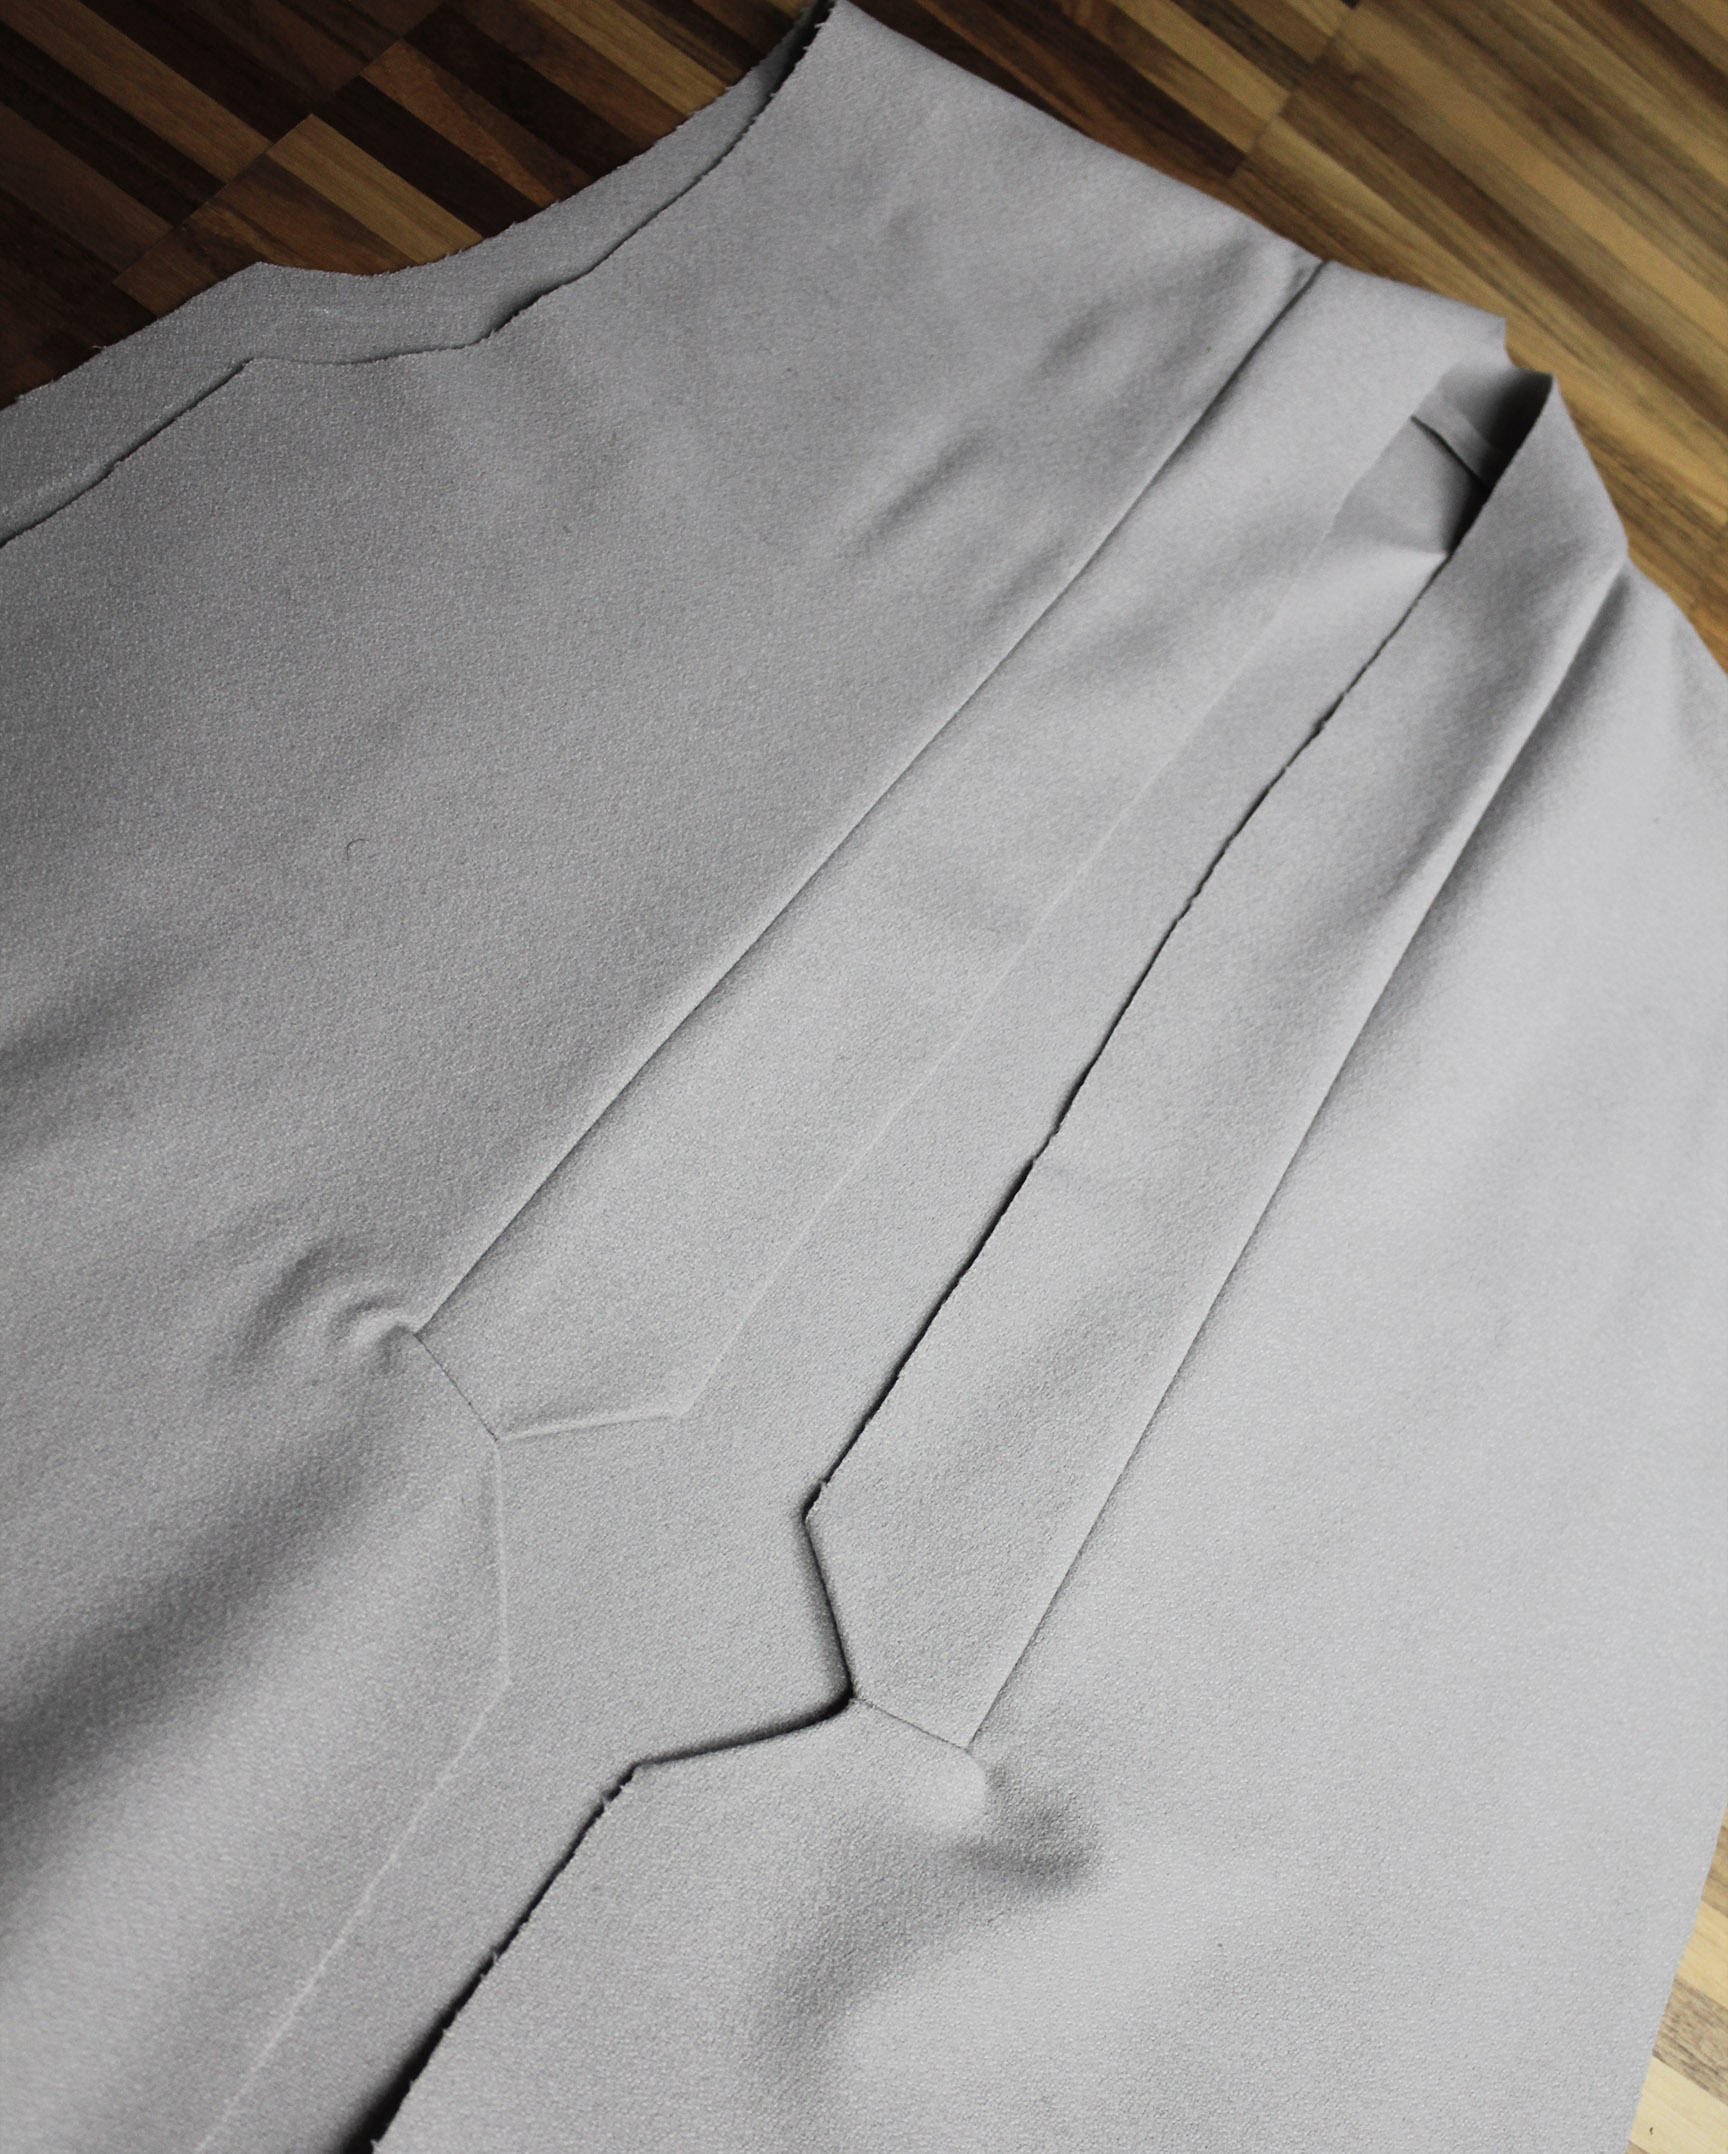
I. You need pieces of the actual coat fabric that look like this. Two front panels, two long pieces the length of the front panels but not as wide (these will be the front panels' reverse sides so the lining doesn't start right at the edge). The long narrow piece is for the lapel.
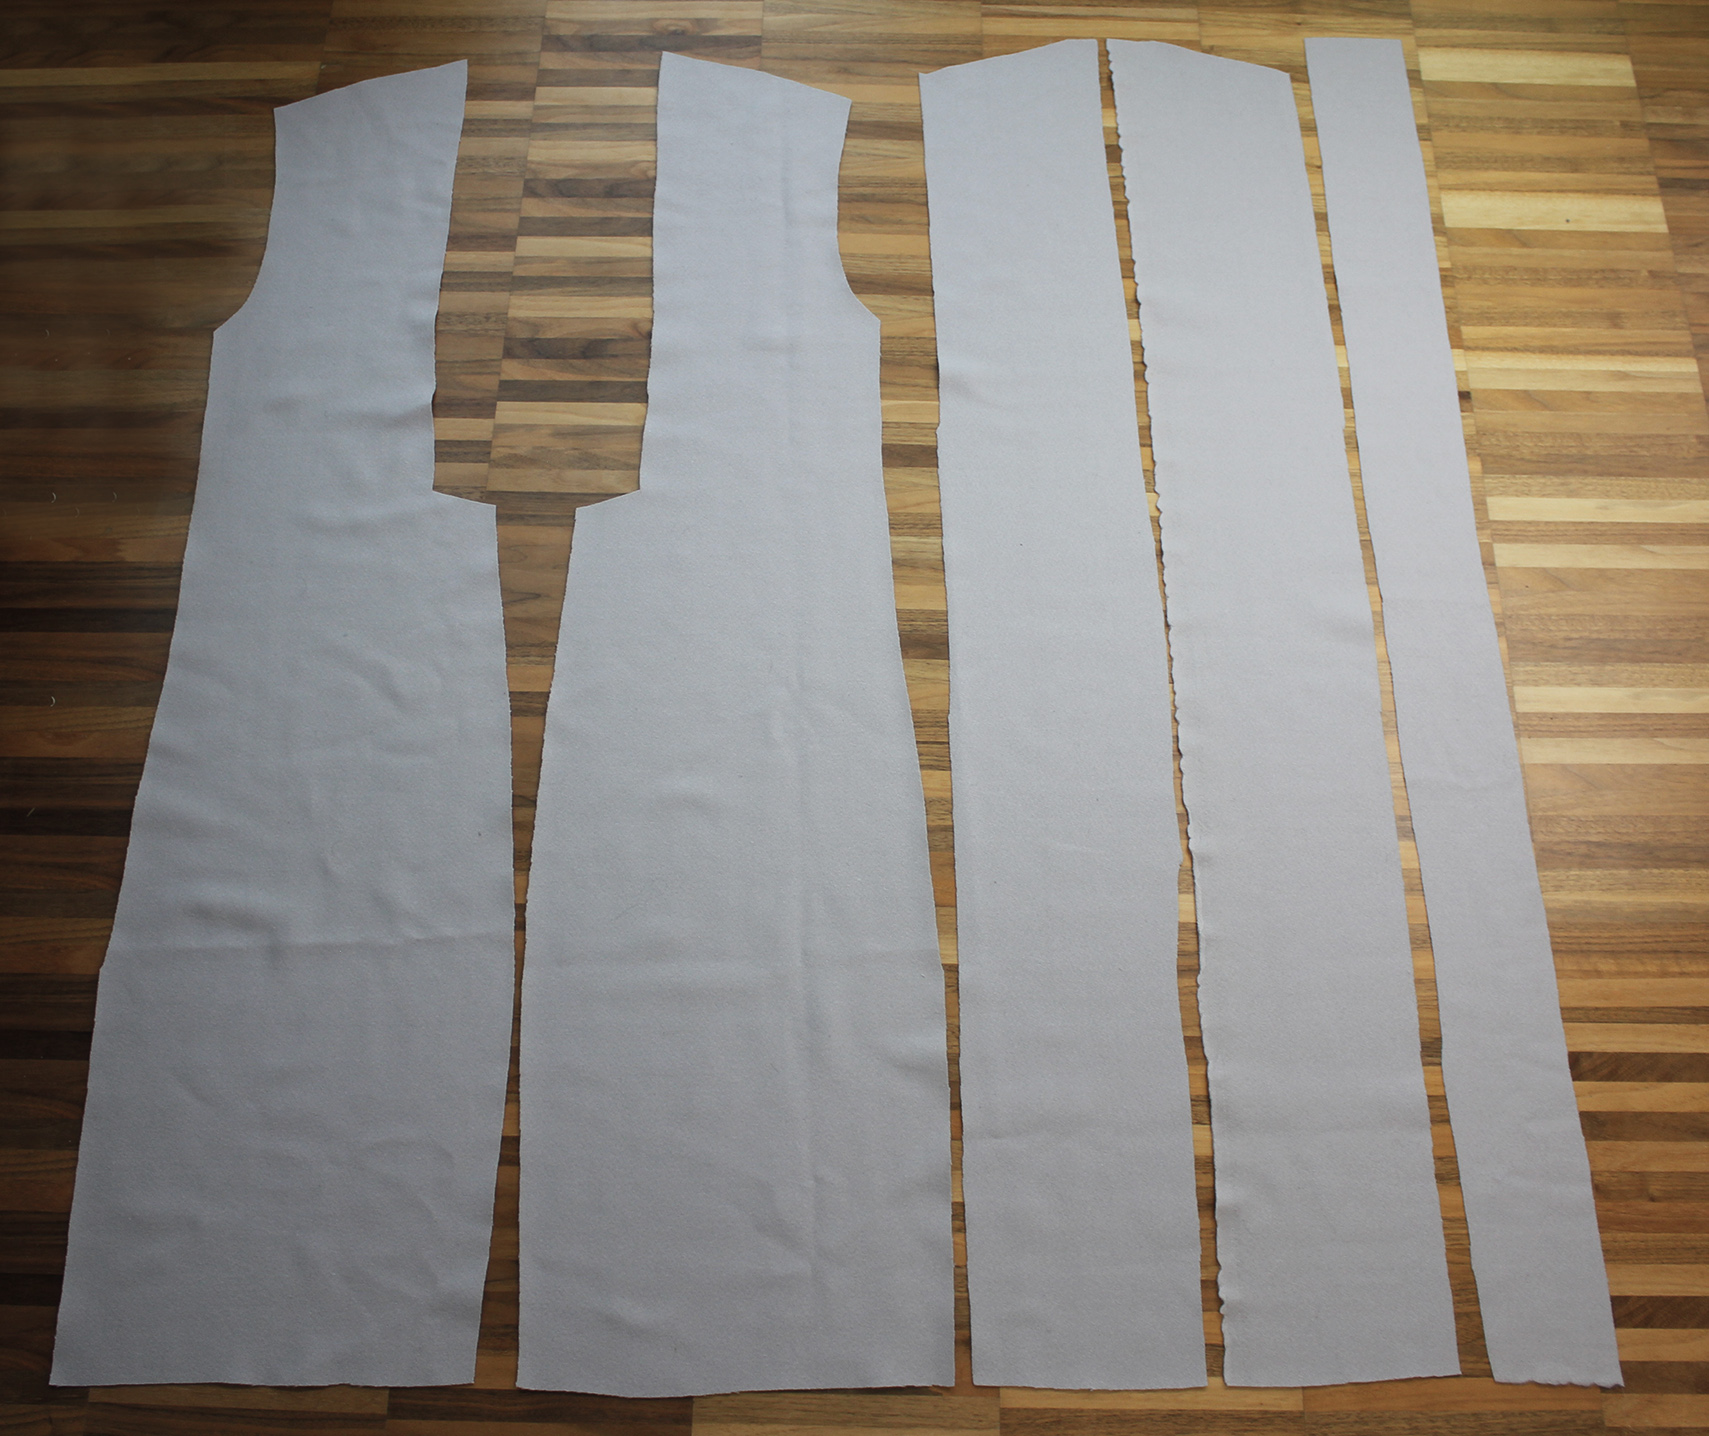
... You also need a back piece, two pieces for the sleeves, and two sets of pocket pieces.
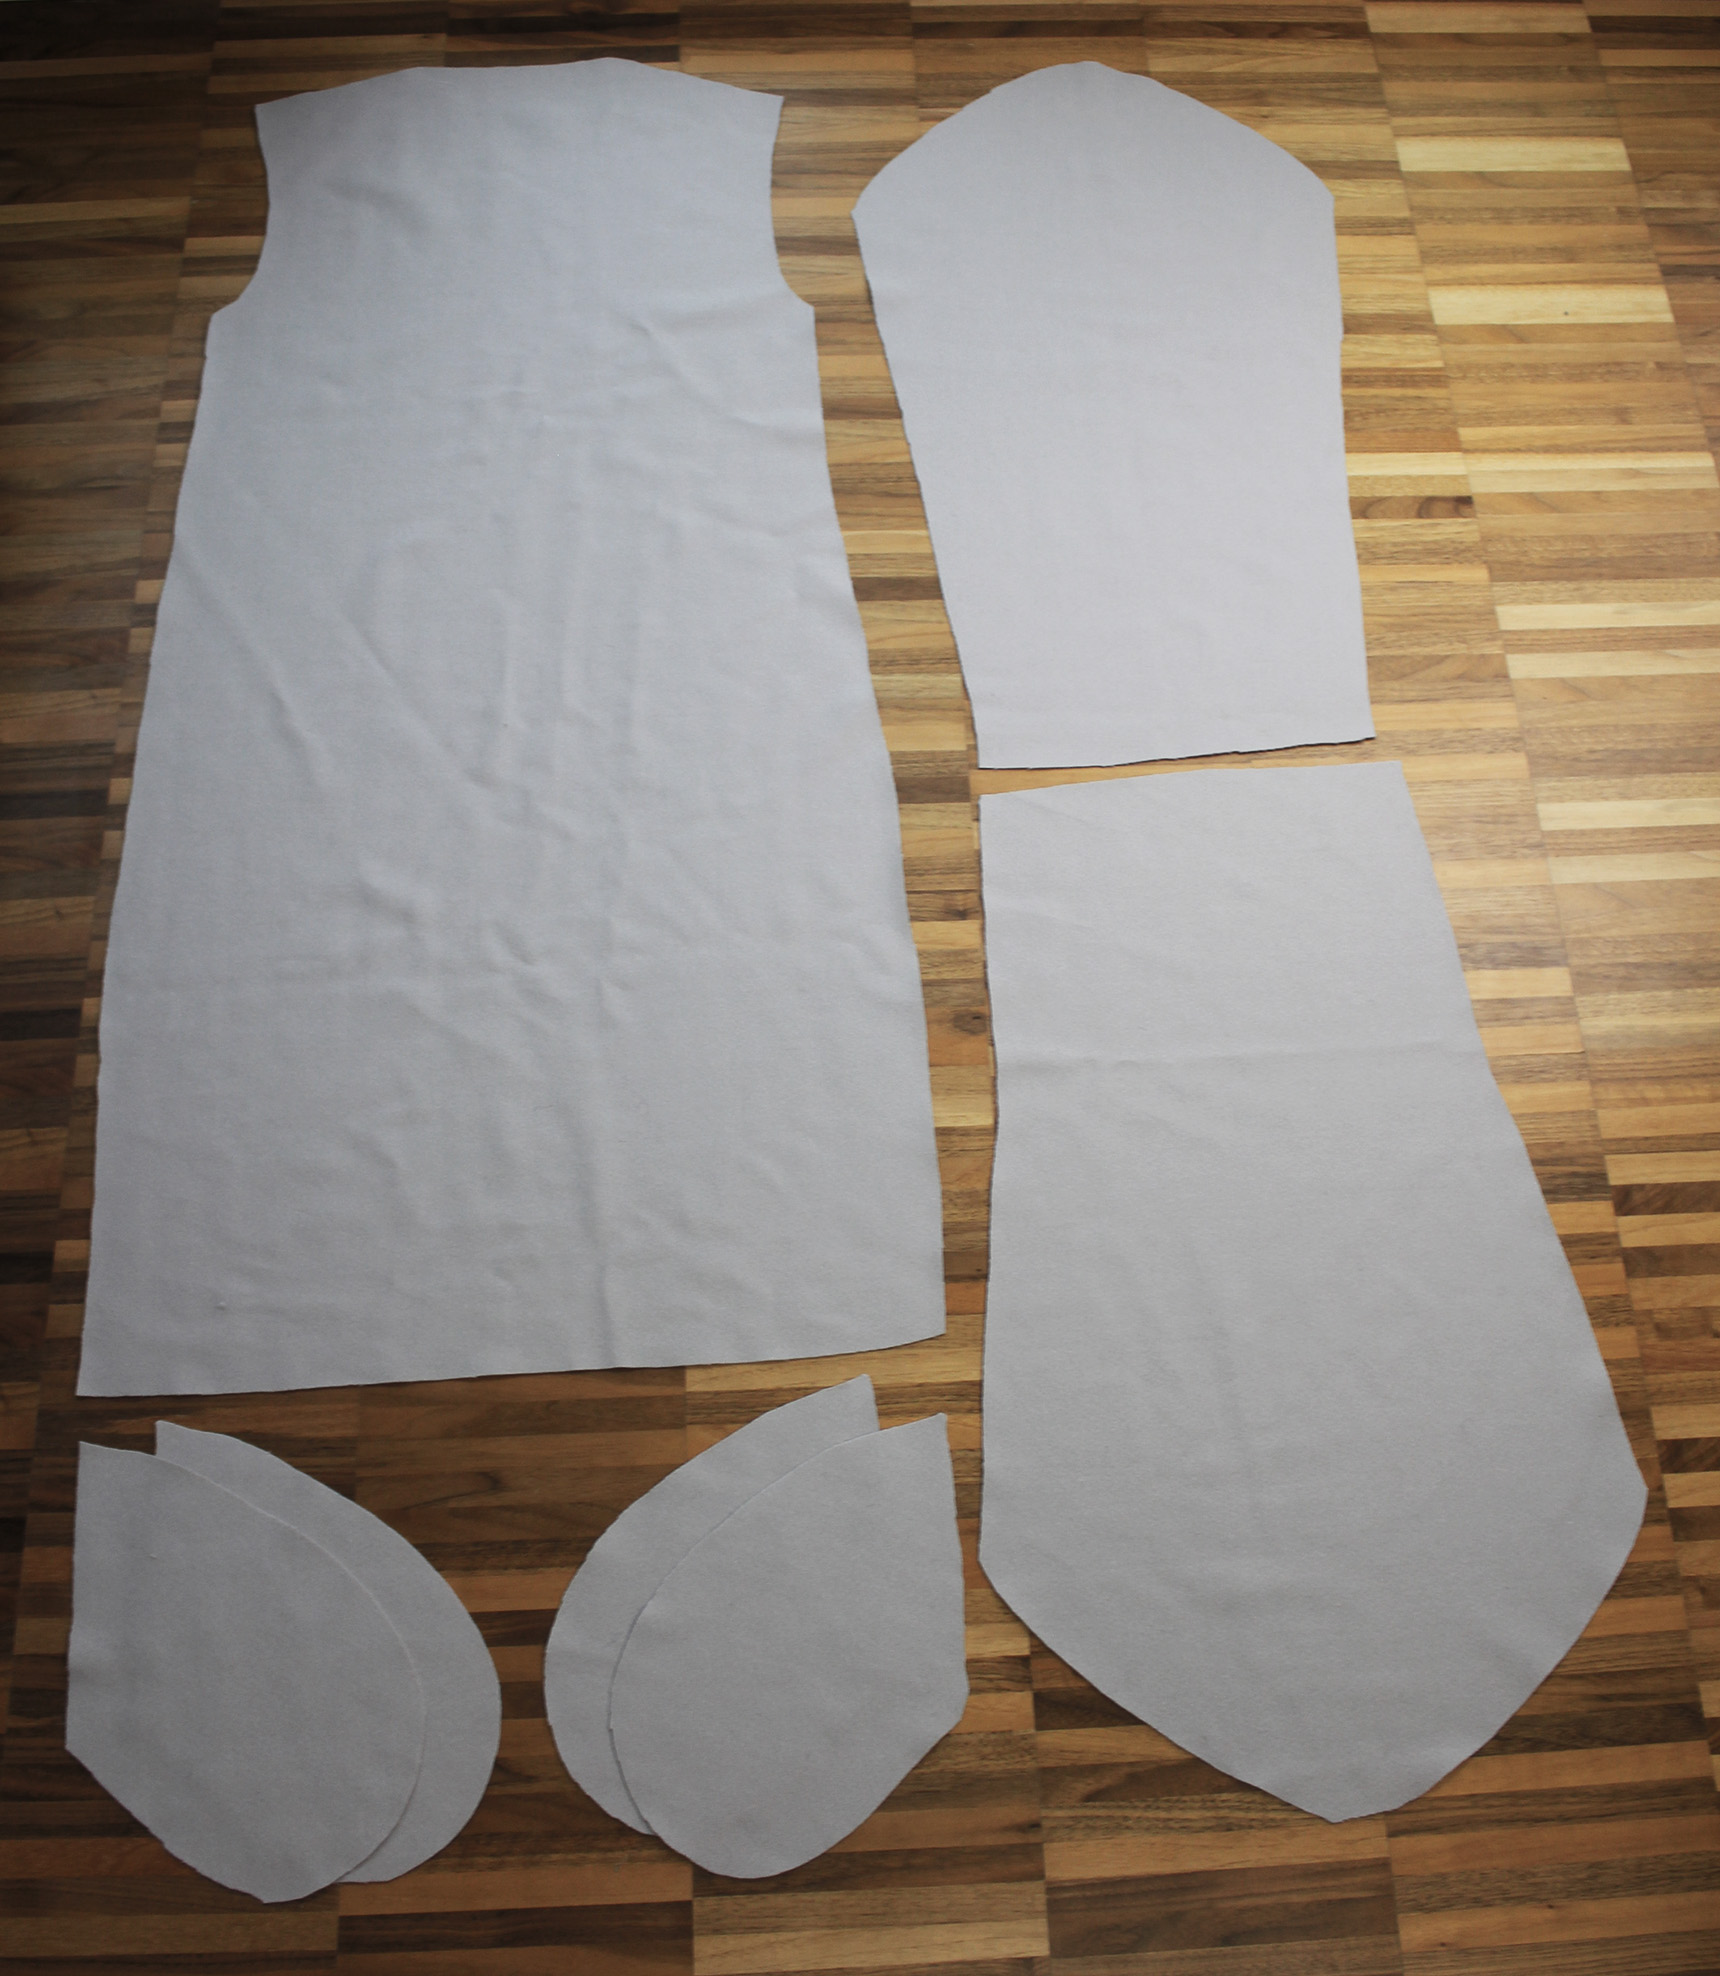
II. Then cut the lining pieces (if making one). They should be identical in size to the sleeve pieces and the back piece, but for the front piece you need a more narrow piece (the front lining is constructed from the long piece of the main fabric and the front lining piece like so:)
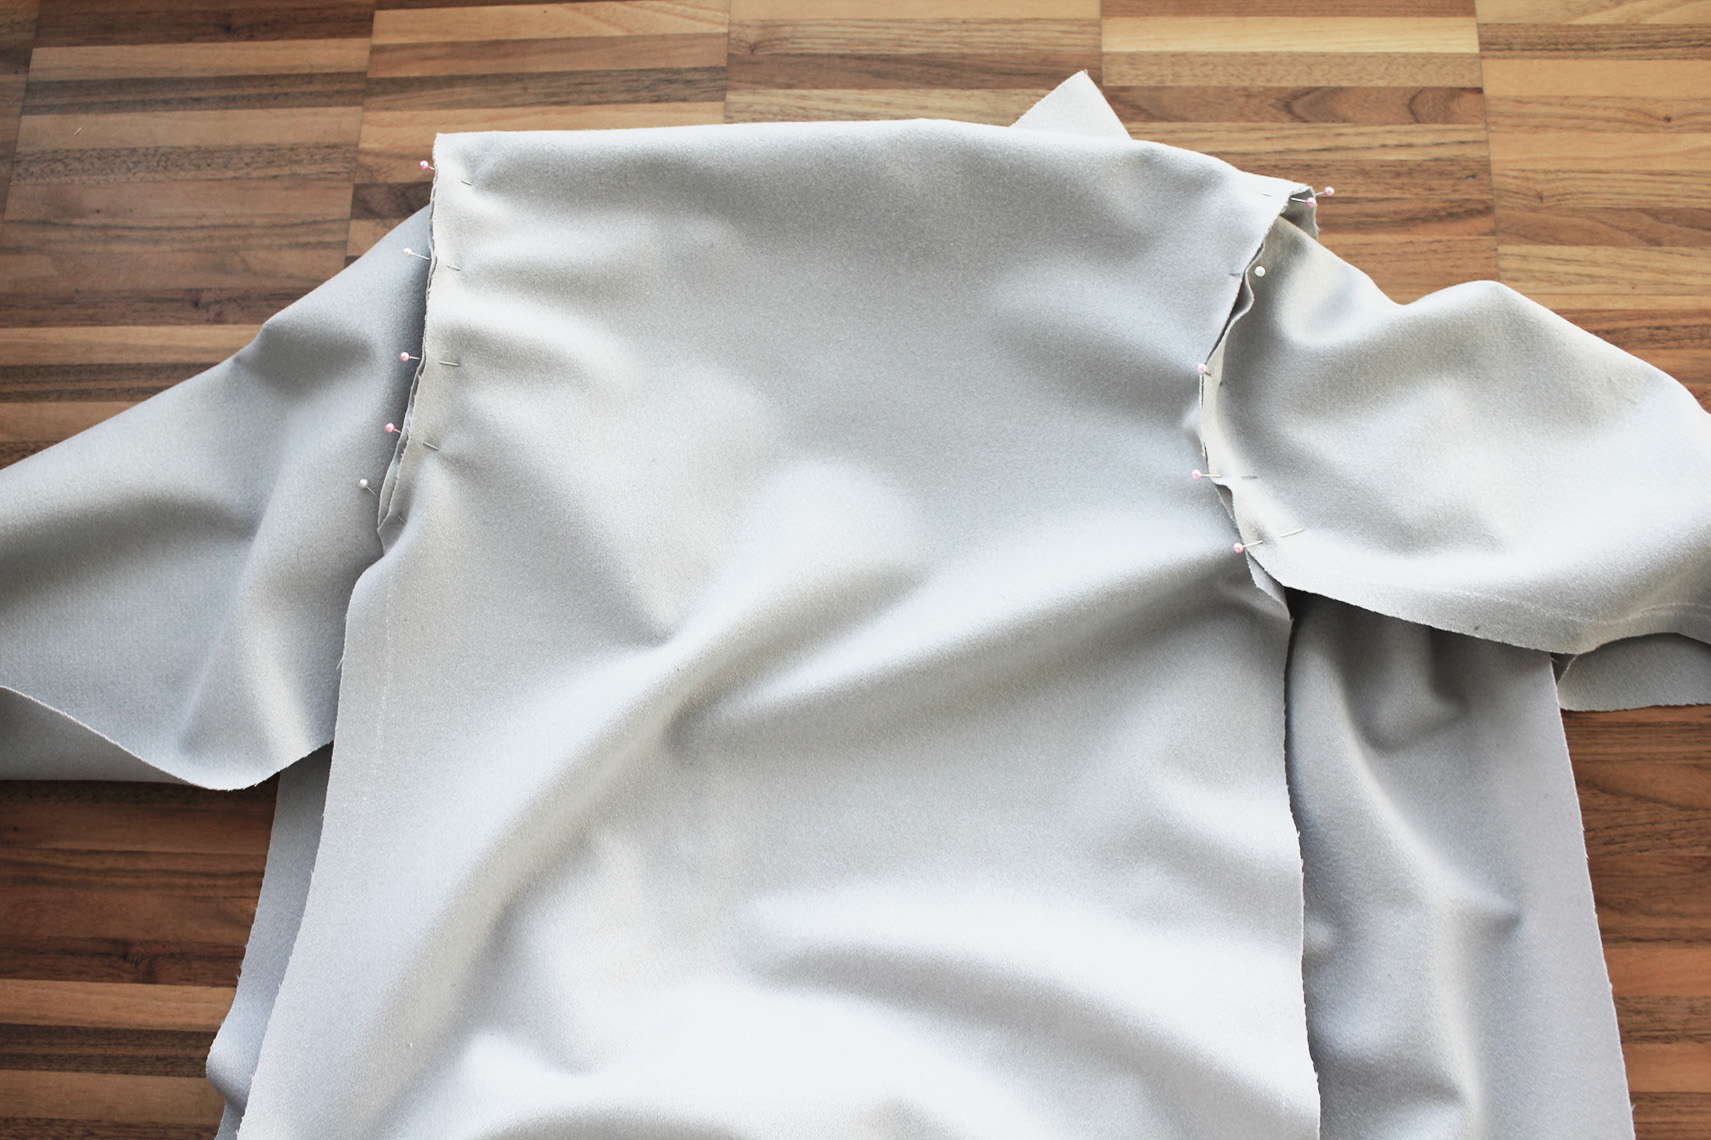
III. Start with the lining. Zig-zag all raw edges, then pin the shoulders together right sides facing.
IV. Pin the sleeves to their places, right sides facing the right side of the rest of the lining, and sew.
V. Pin the sleeve under seams and the sides. Sew all the way. Turn over and press all seams. If your lining is polyester, don't press with steam. The water will stain the fabric.
.. And you'll have a perfectly good
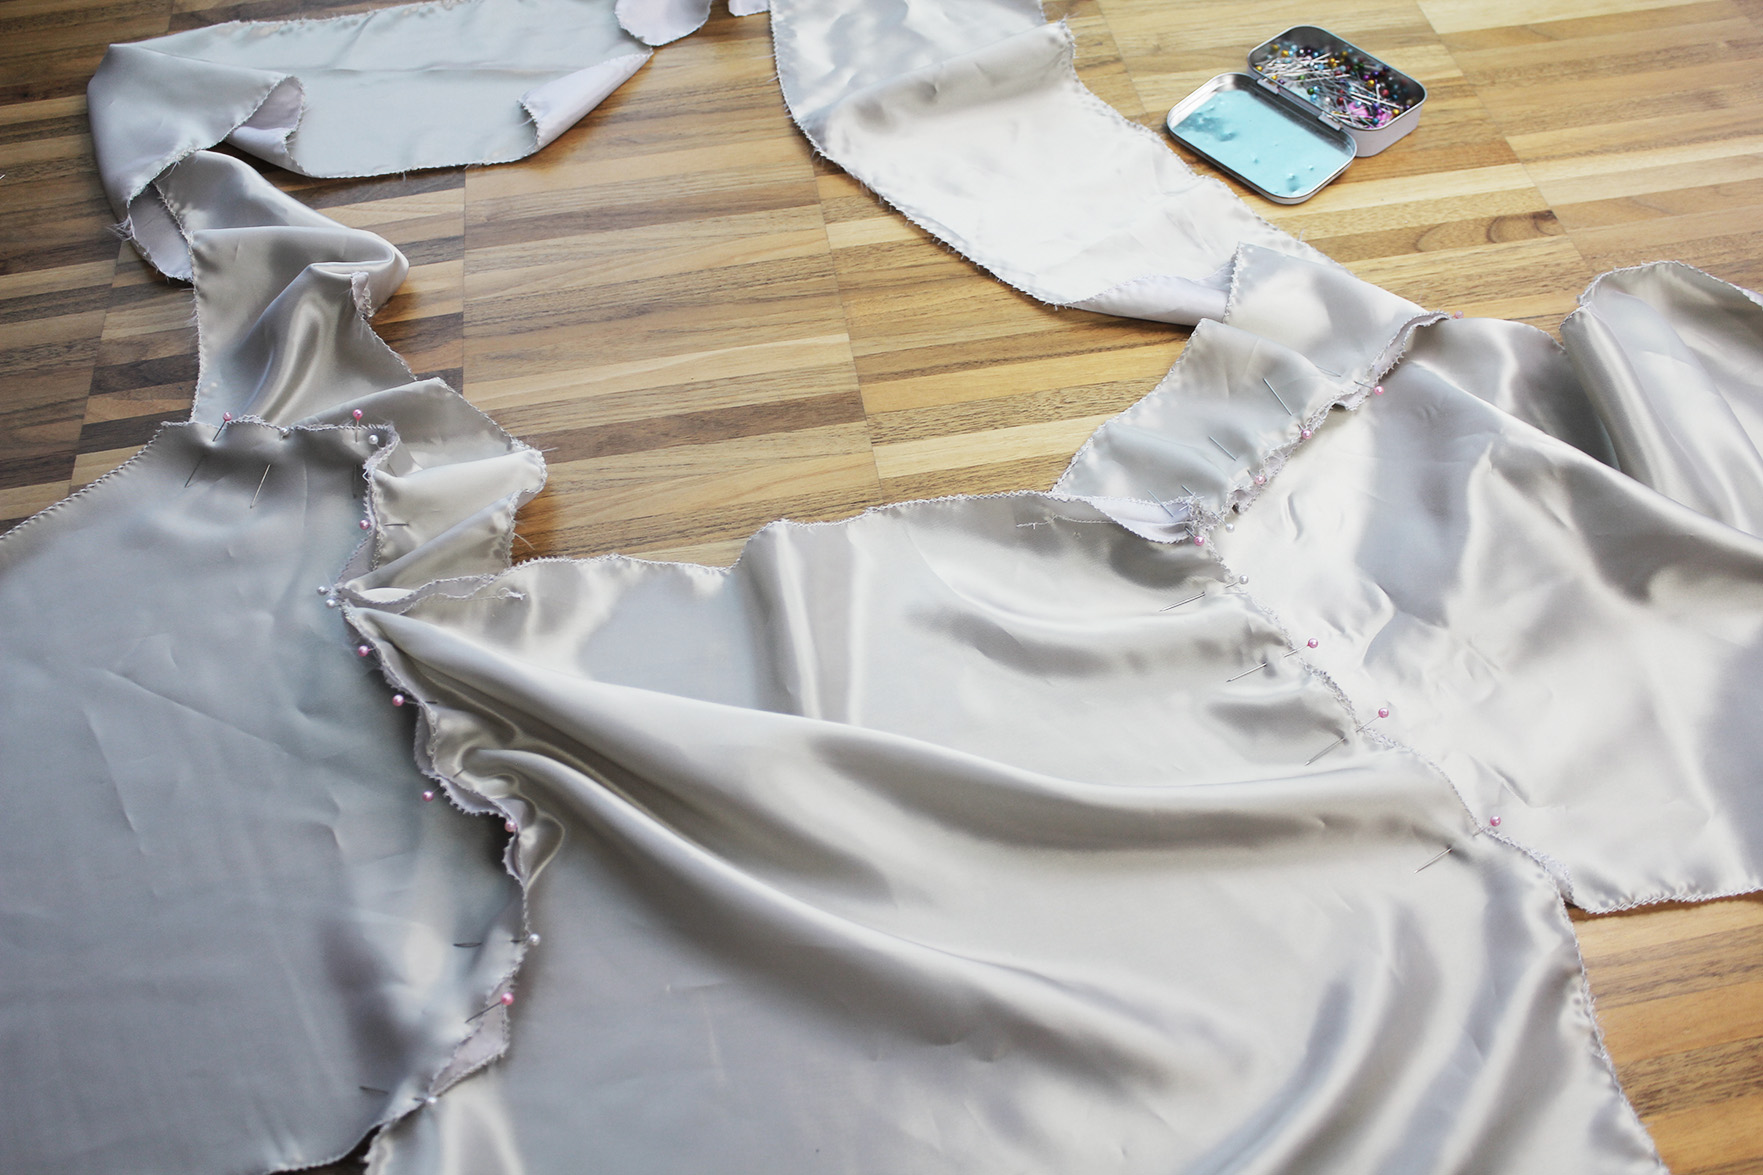
VI. Now for the jacket itself. Pin the shoulders and sew about 1 cm from the edge.
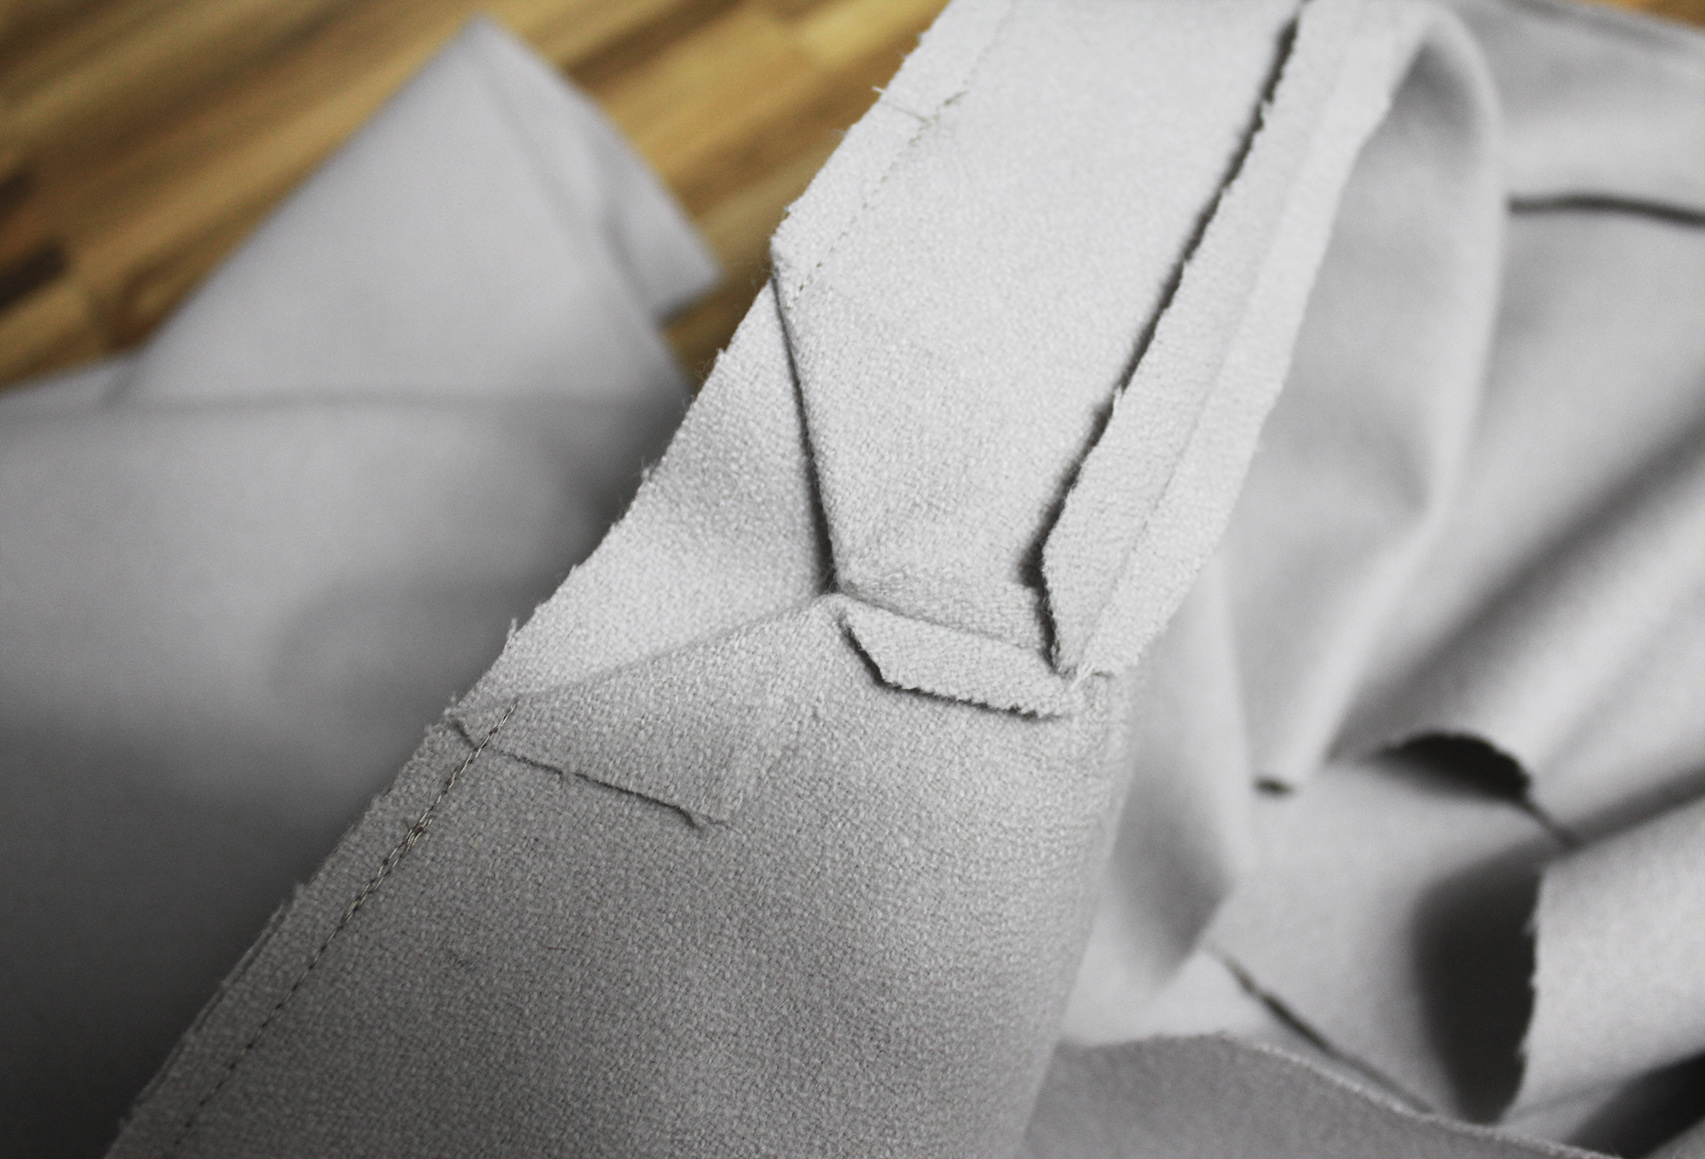
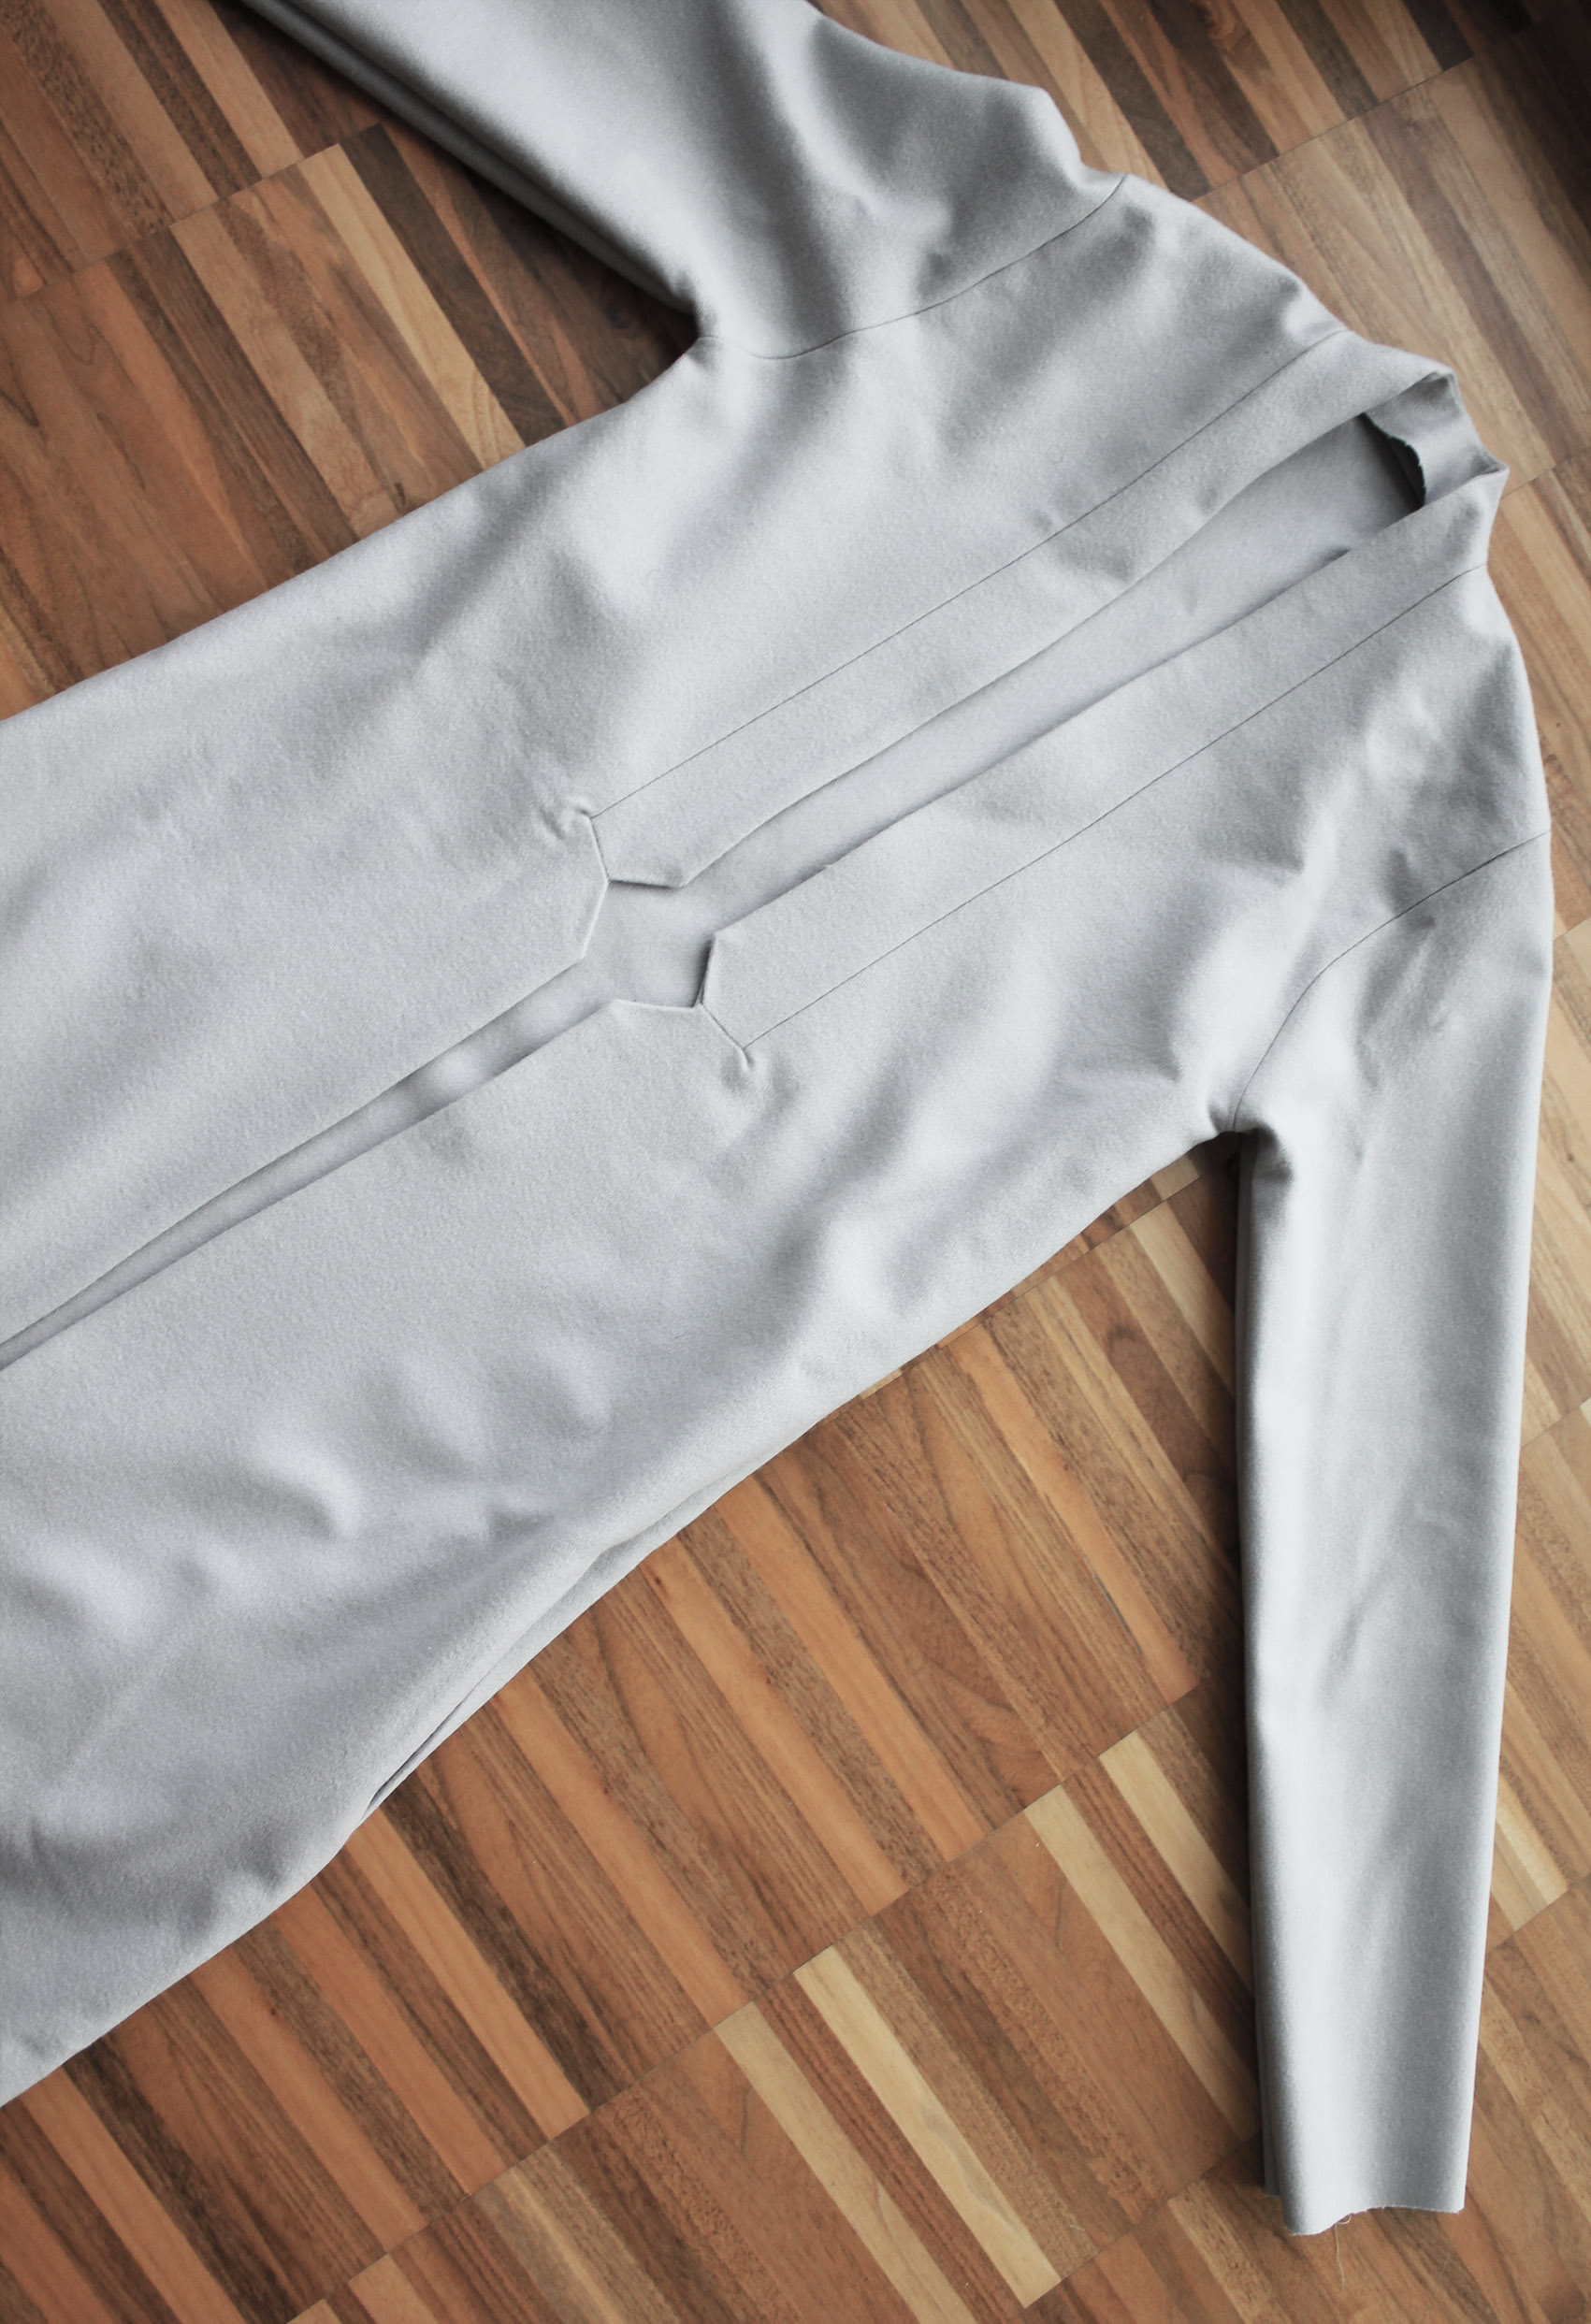
VII. Then pin the long narrow lapel piece to the collar like this, right sides facing. Make sure when folded open, the edge of the piece aligns with the edge of the lower part of each front panel edge (see step VIII to know what I mean). Sew up one side, around the neck, and down the other.
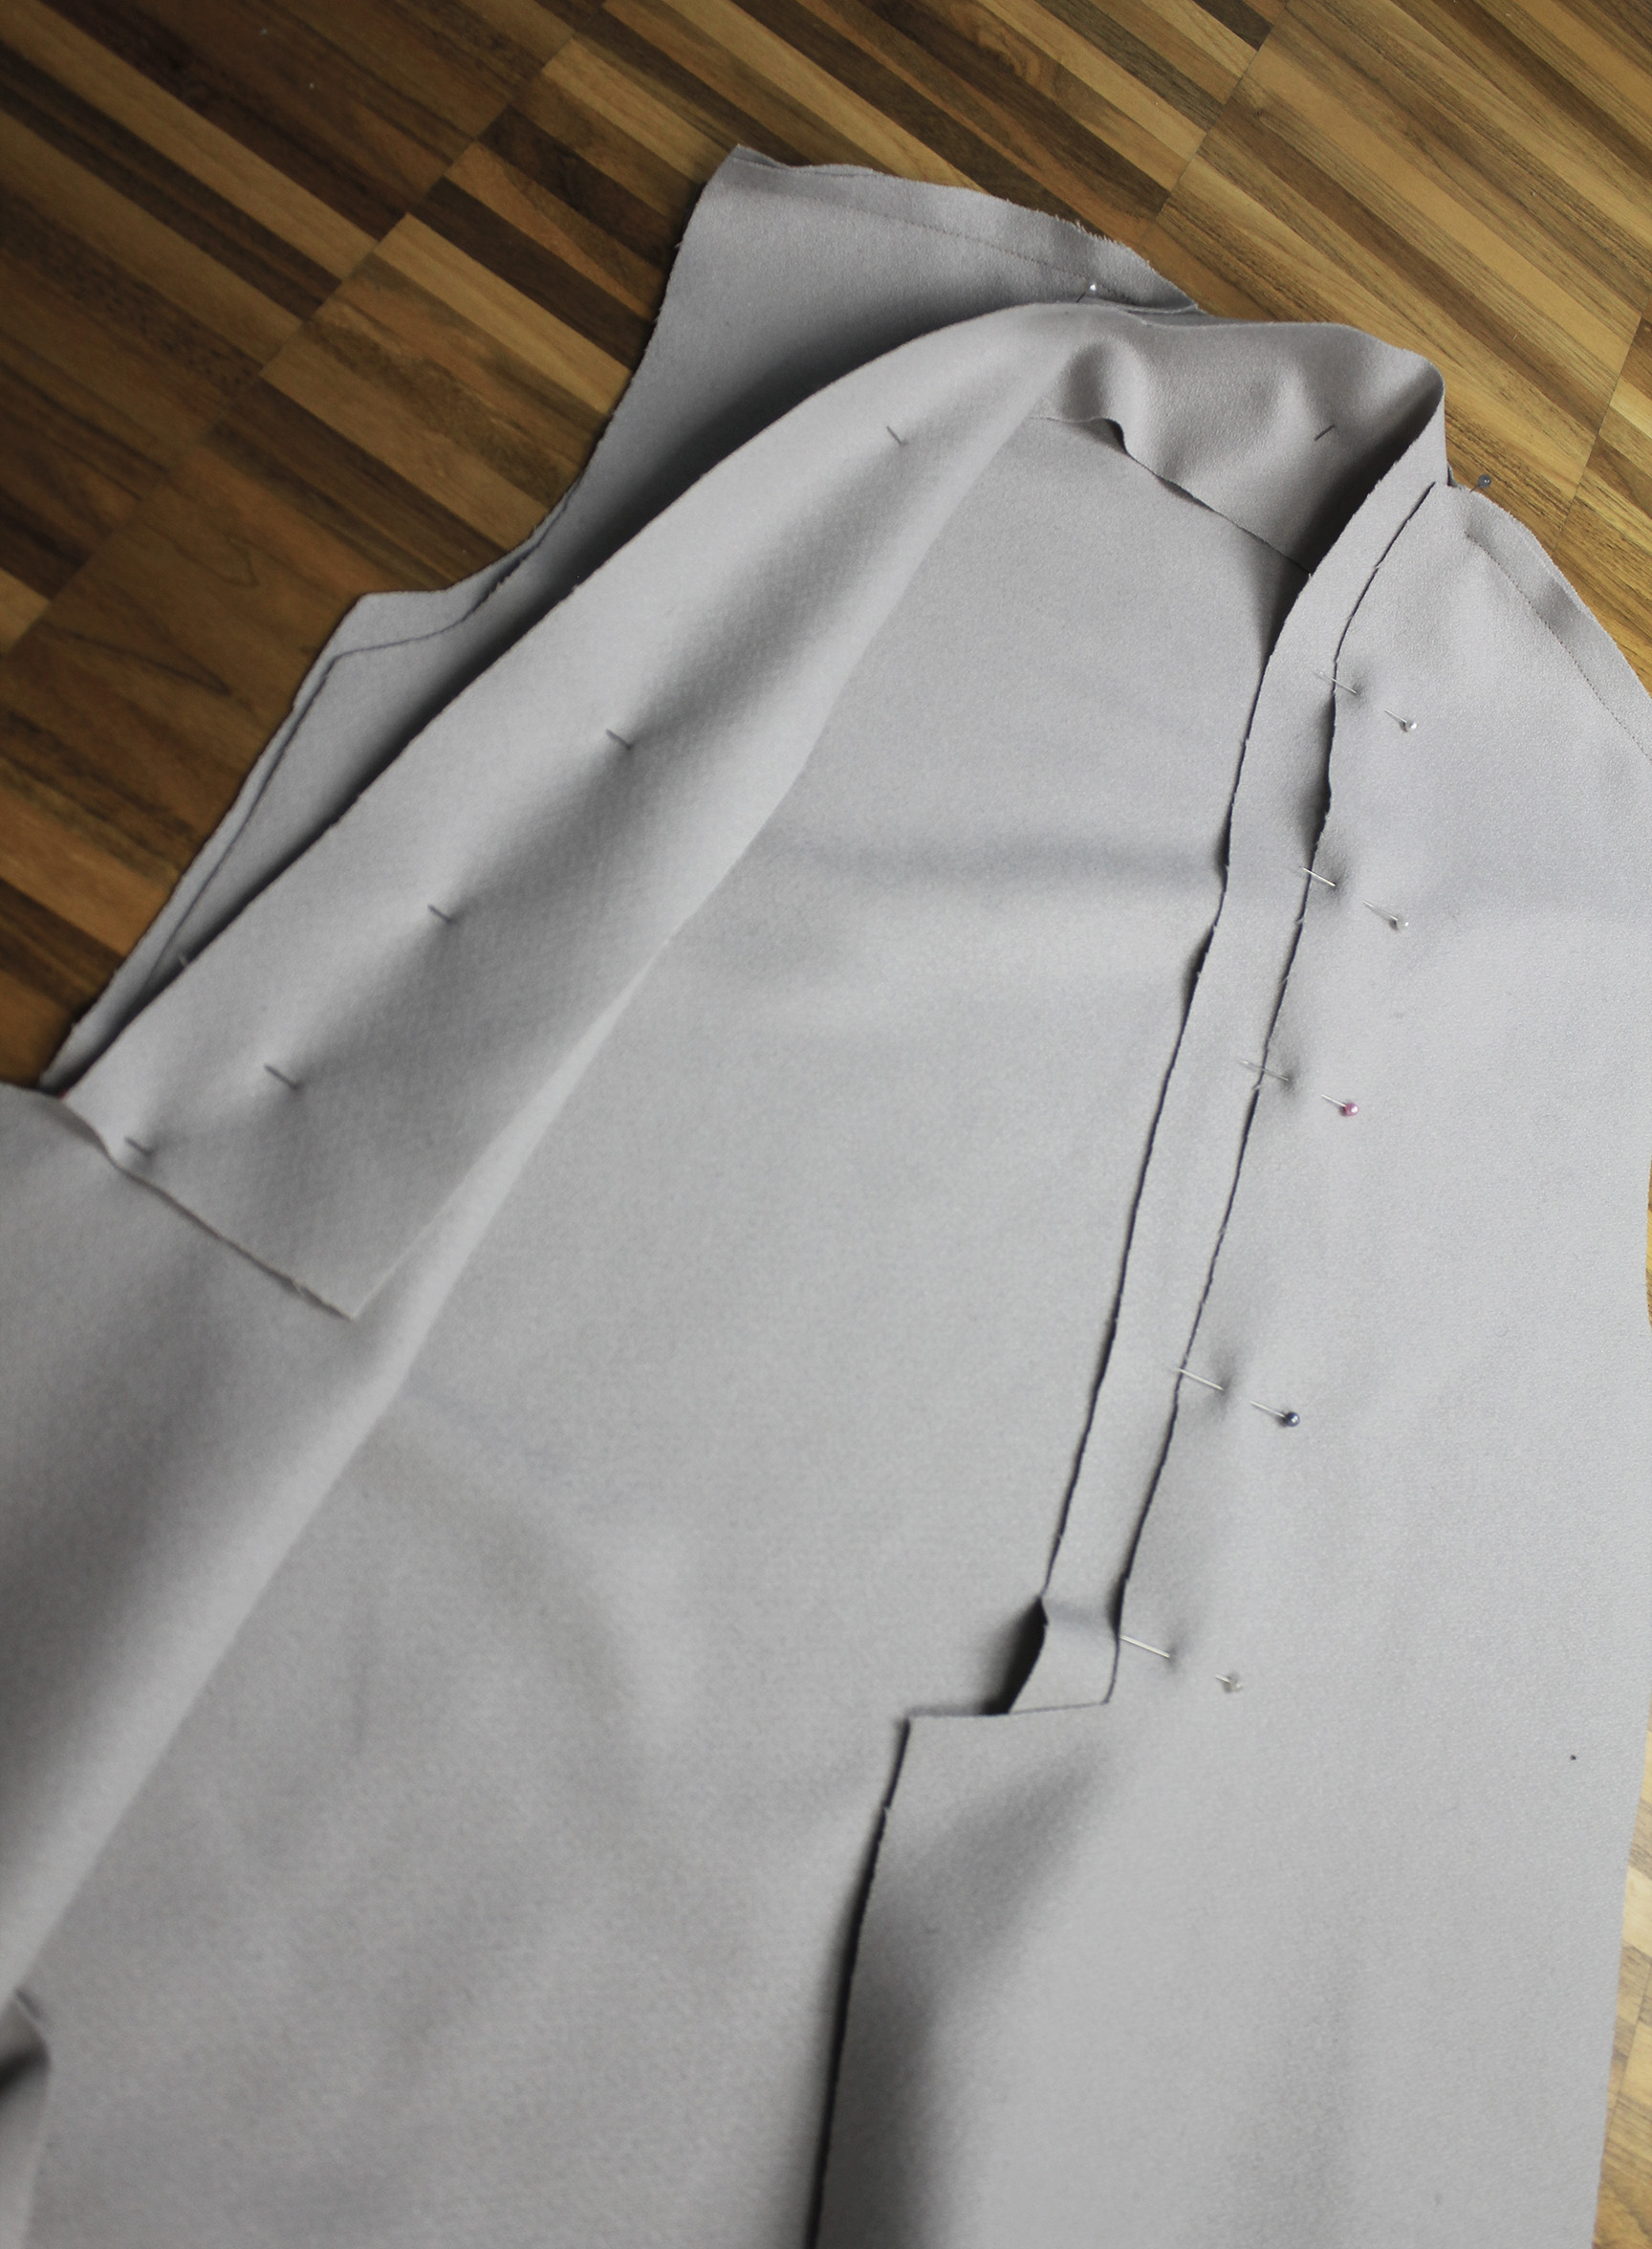
.. Then trim off the excess.
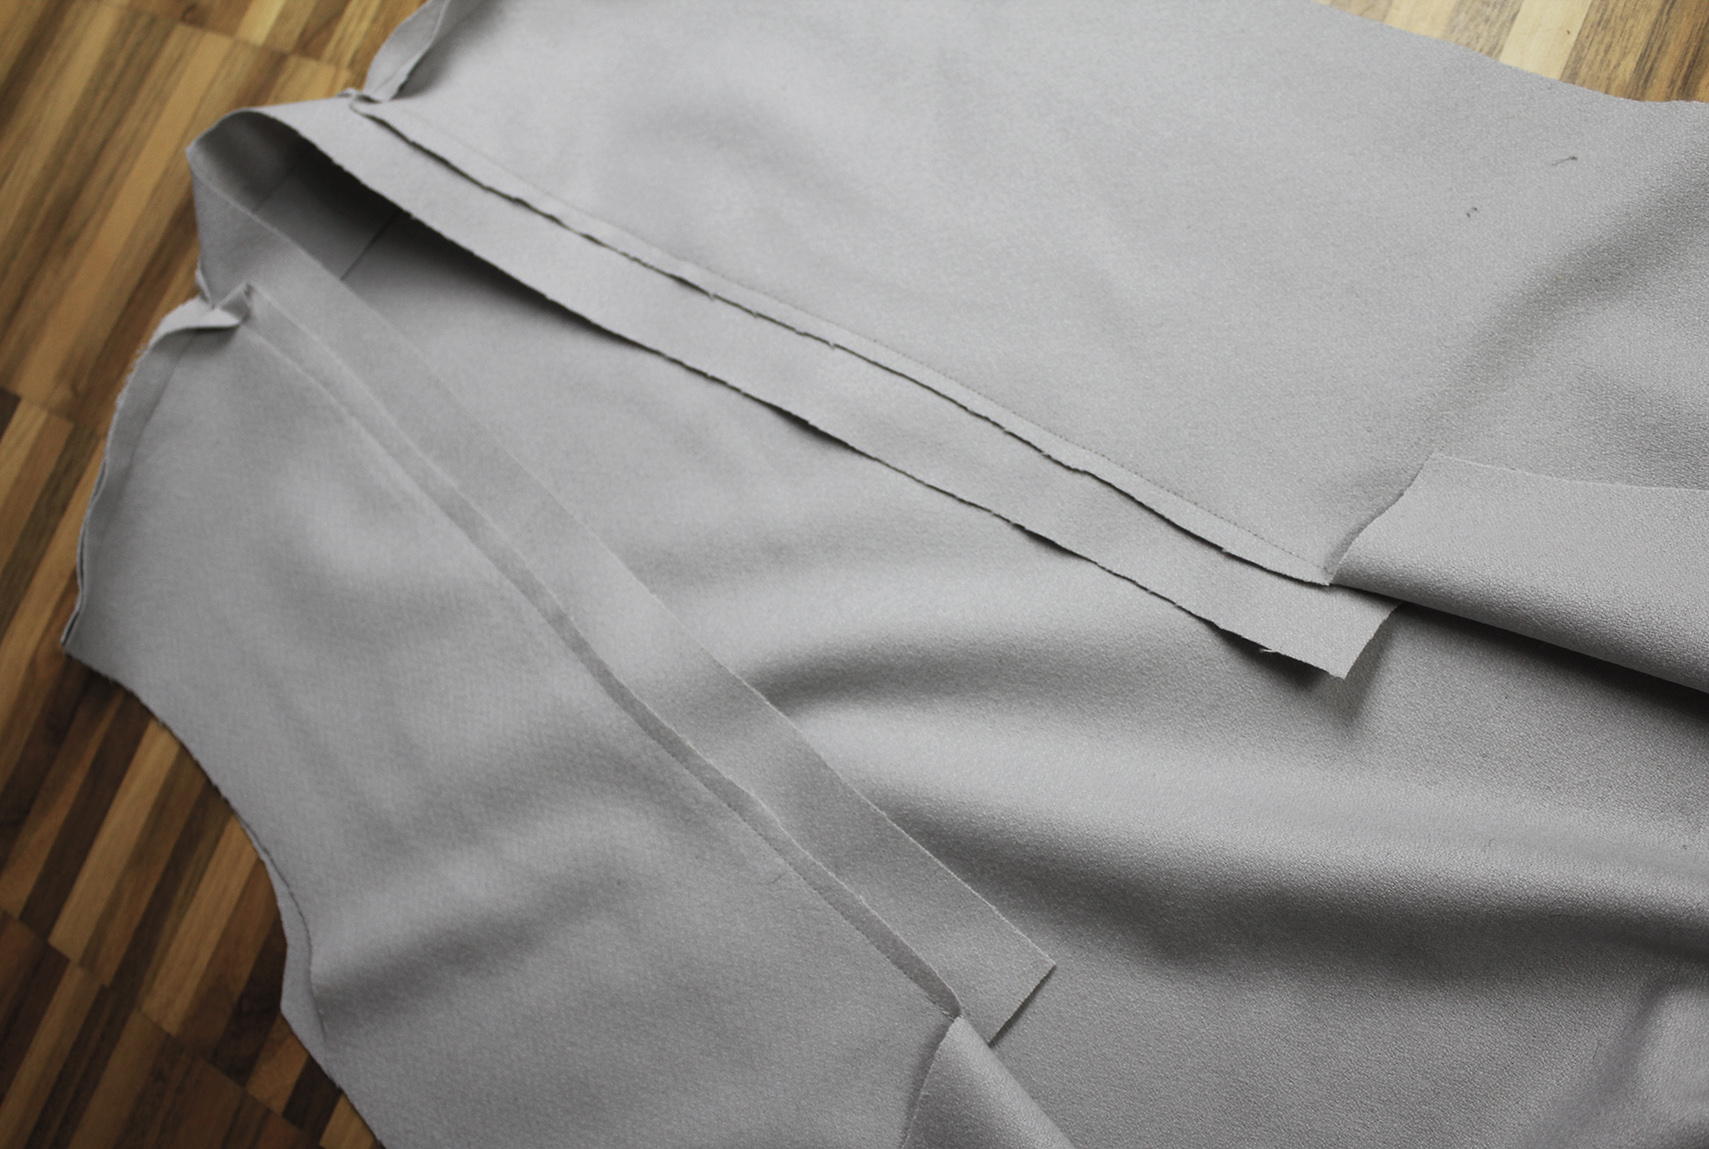
VIII. Flip the lapel flat with the front piece and pin the free edges together. How far you sew here will depend on how deep you want the little V in the lapel to be. I stopped 2 cm from the edge.
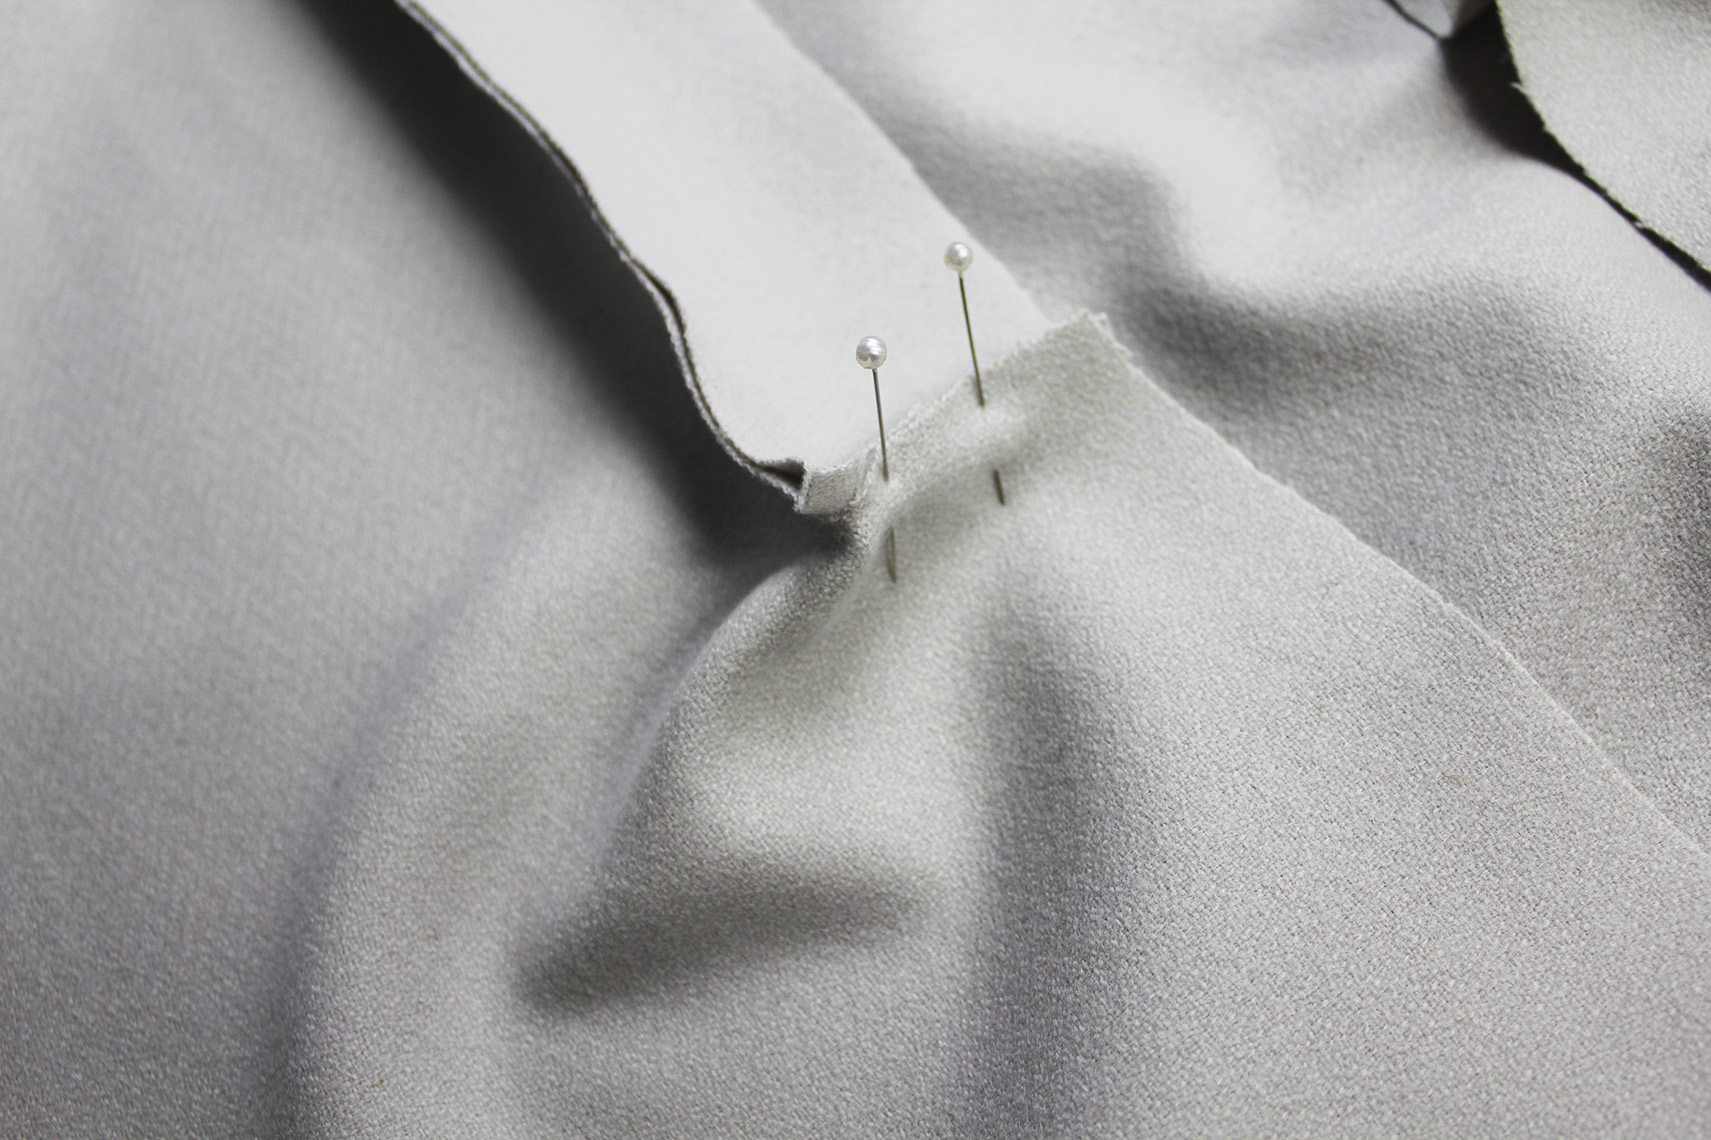
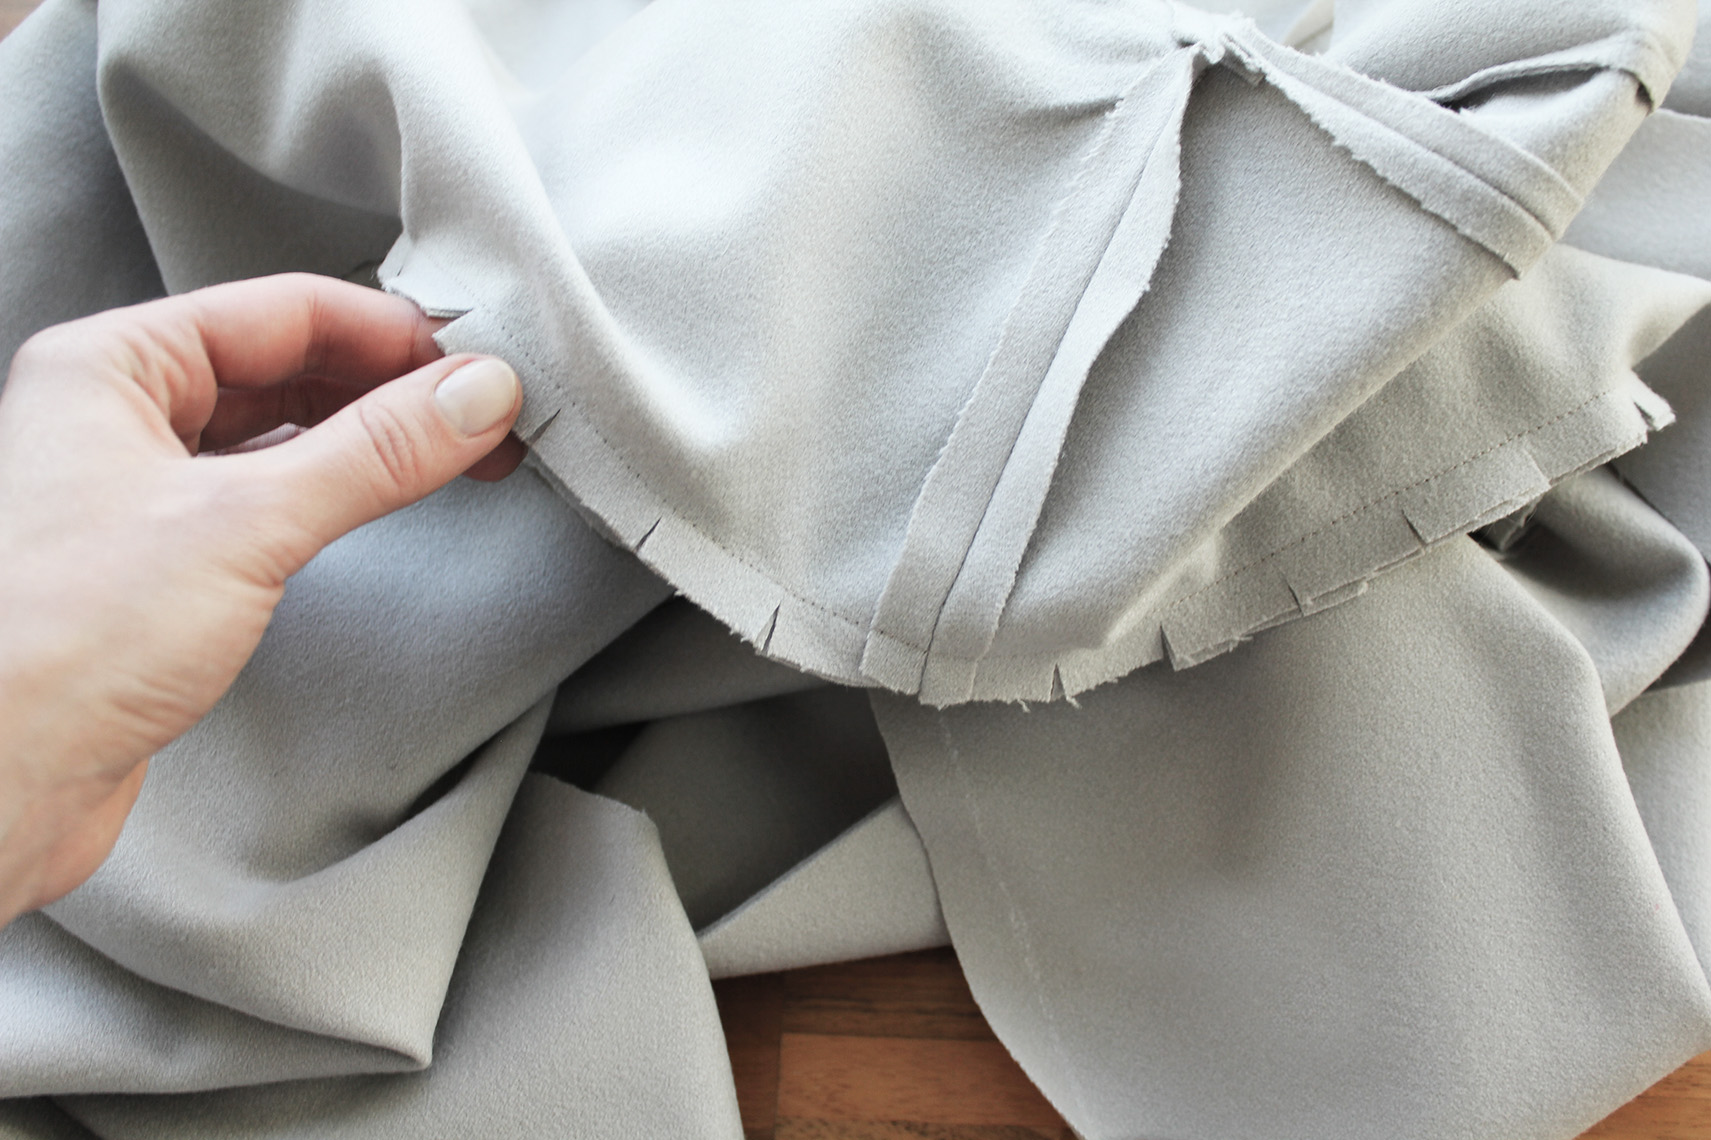
IX. Here starts the hacky part. Press the lapel flat, and fold the unsewn edges into small triangles on the flipside to create the notch in the lapel, press.
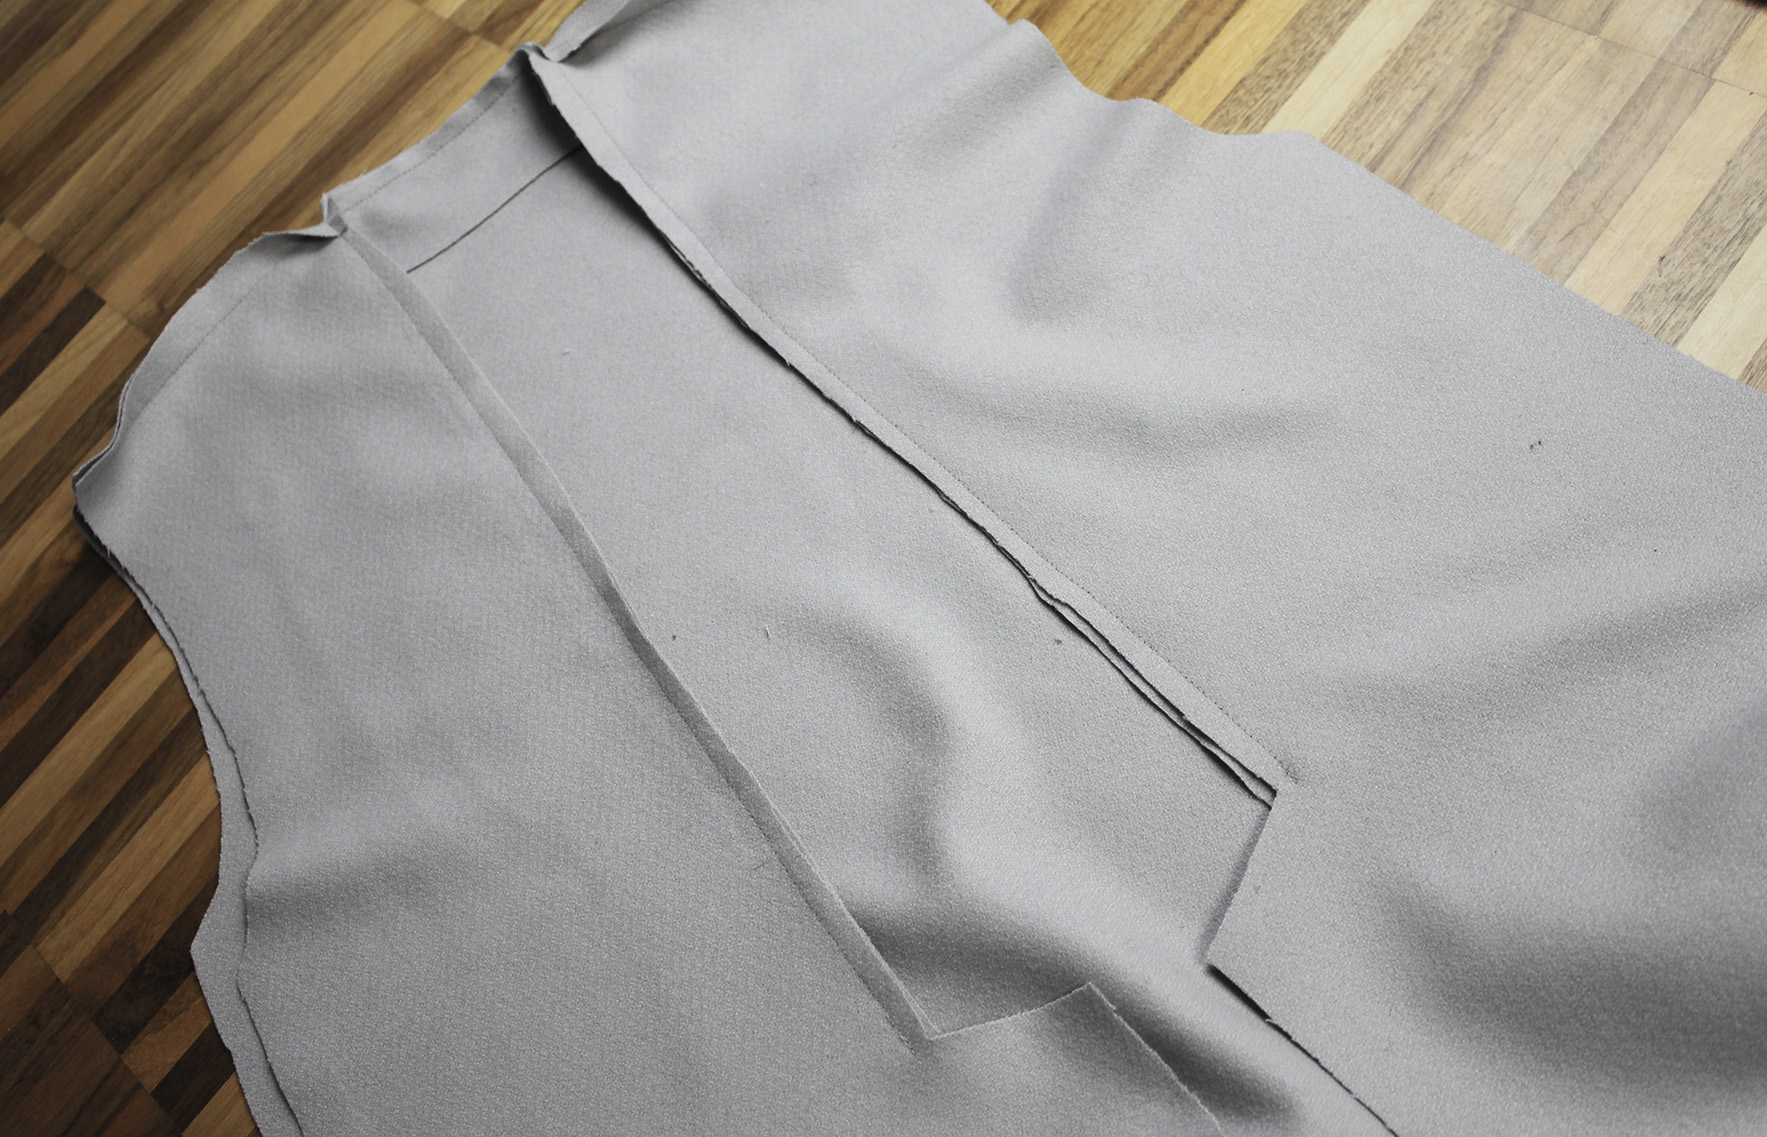
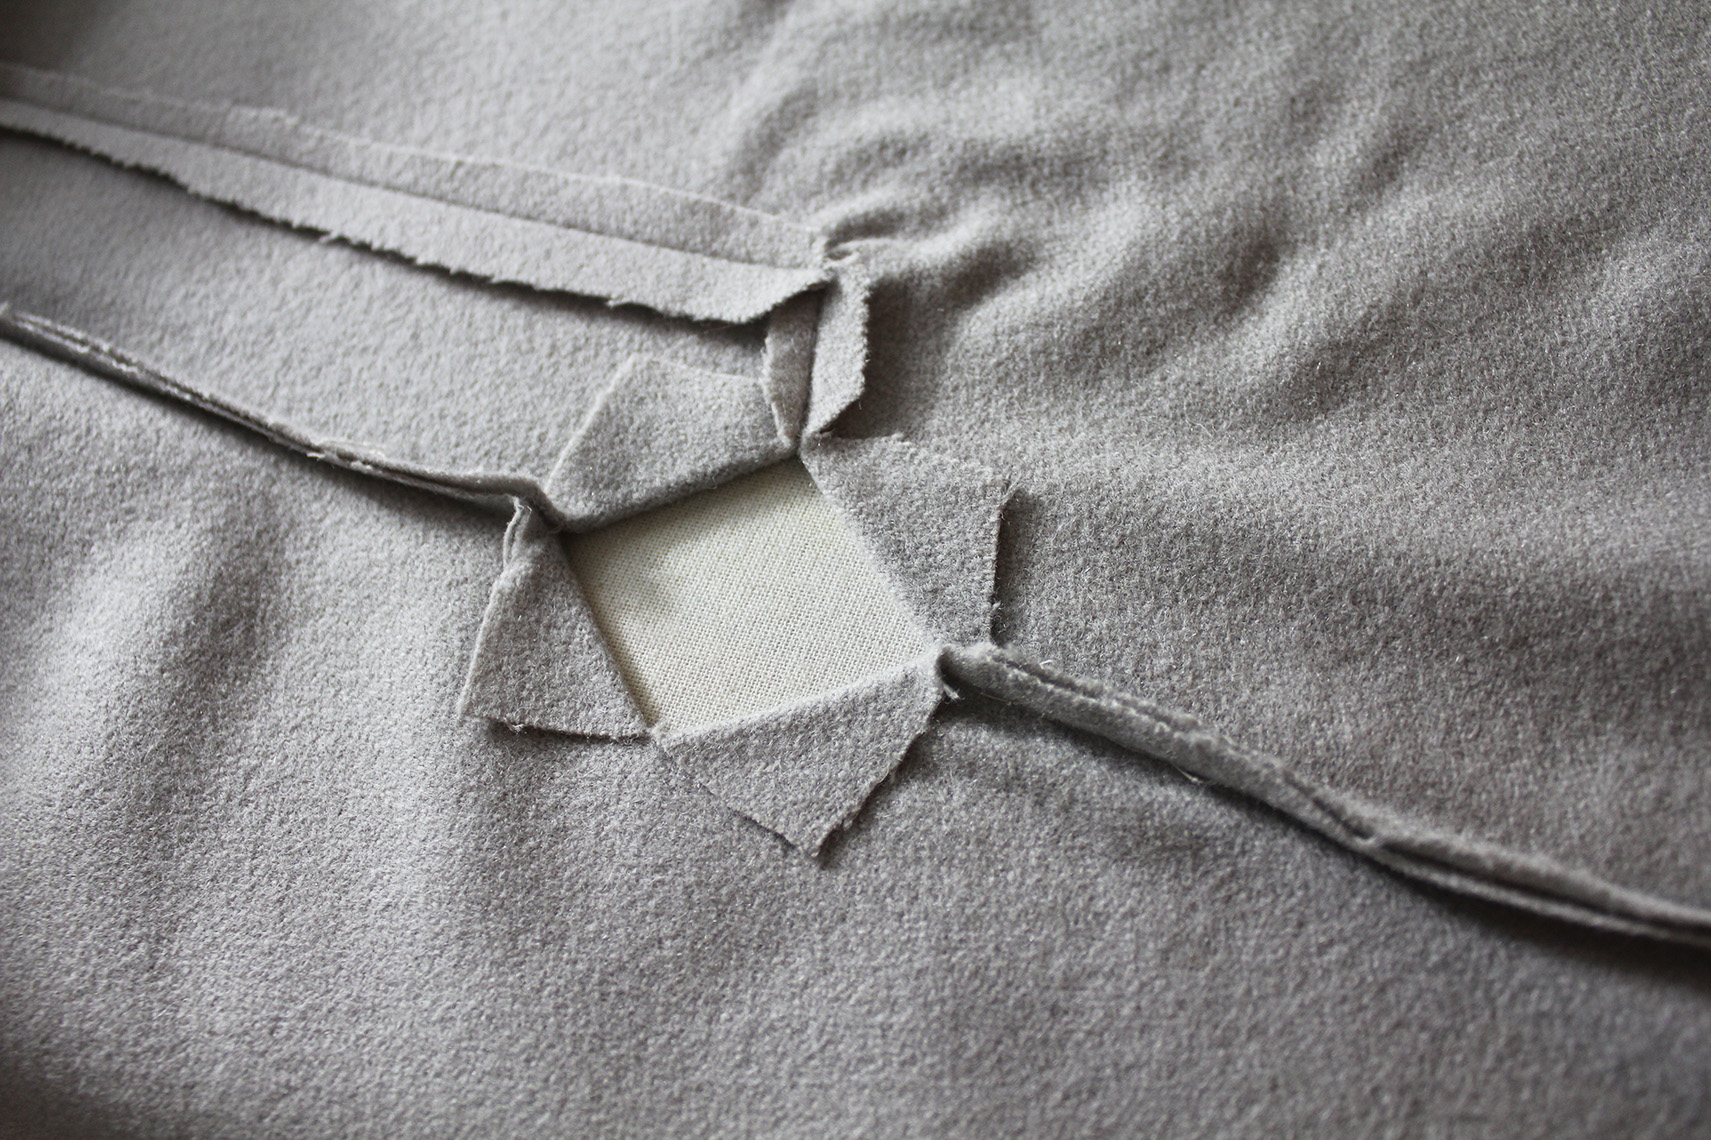
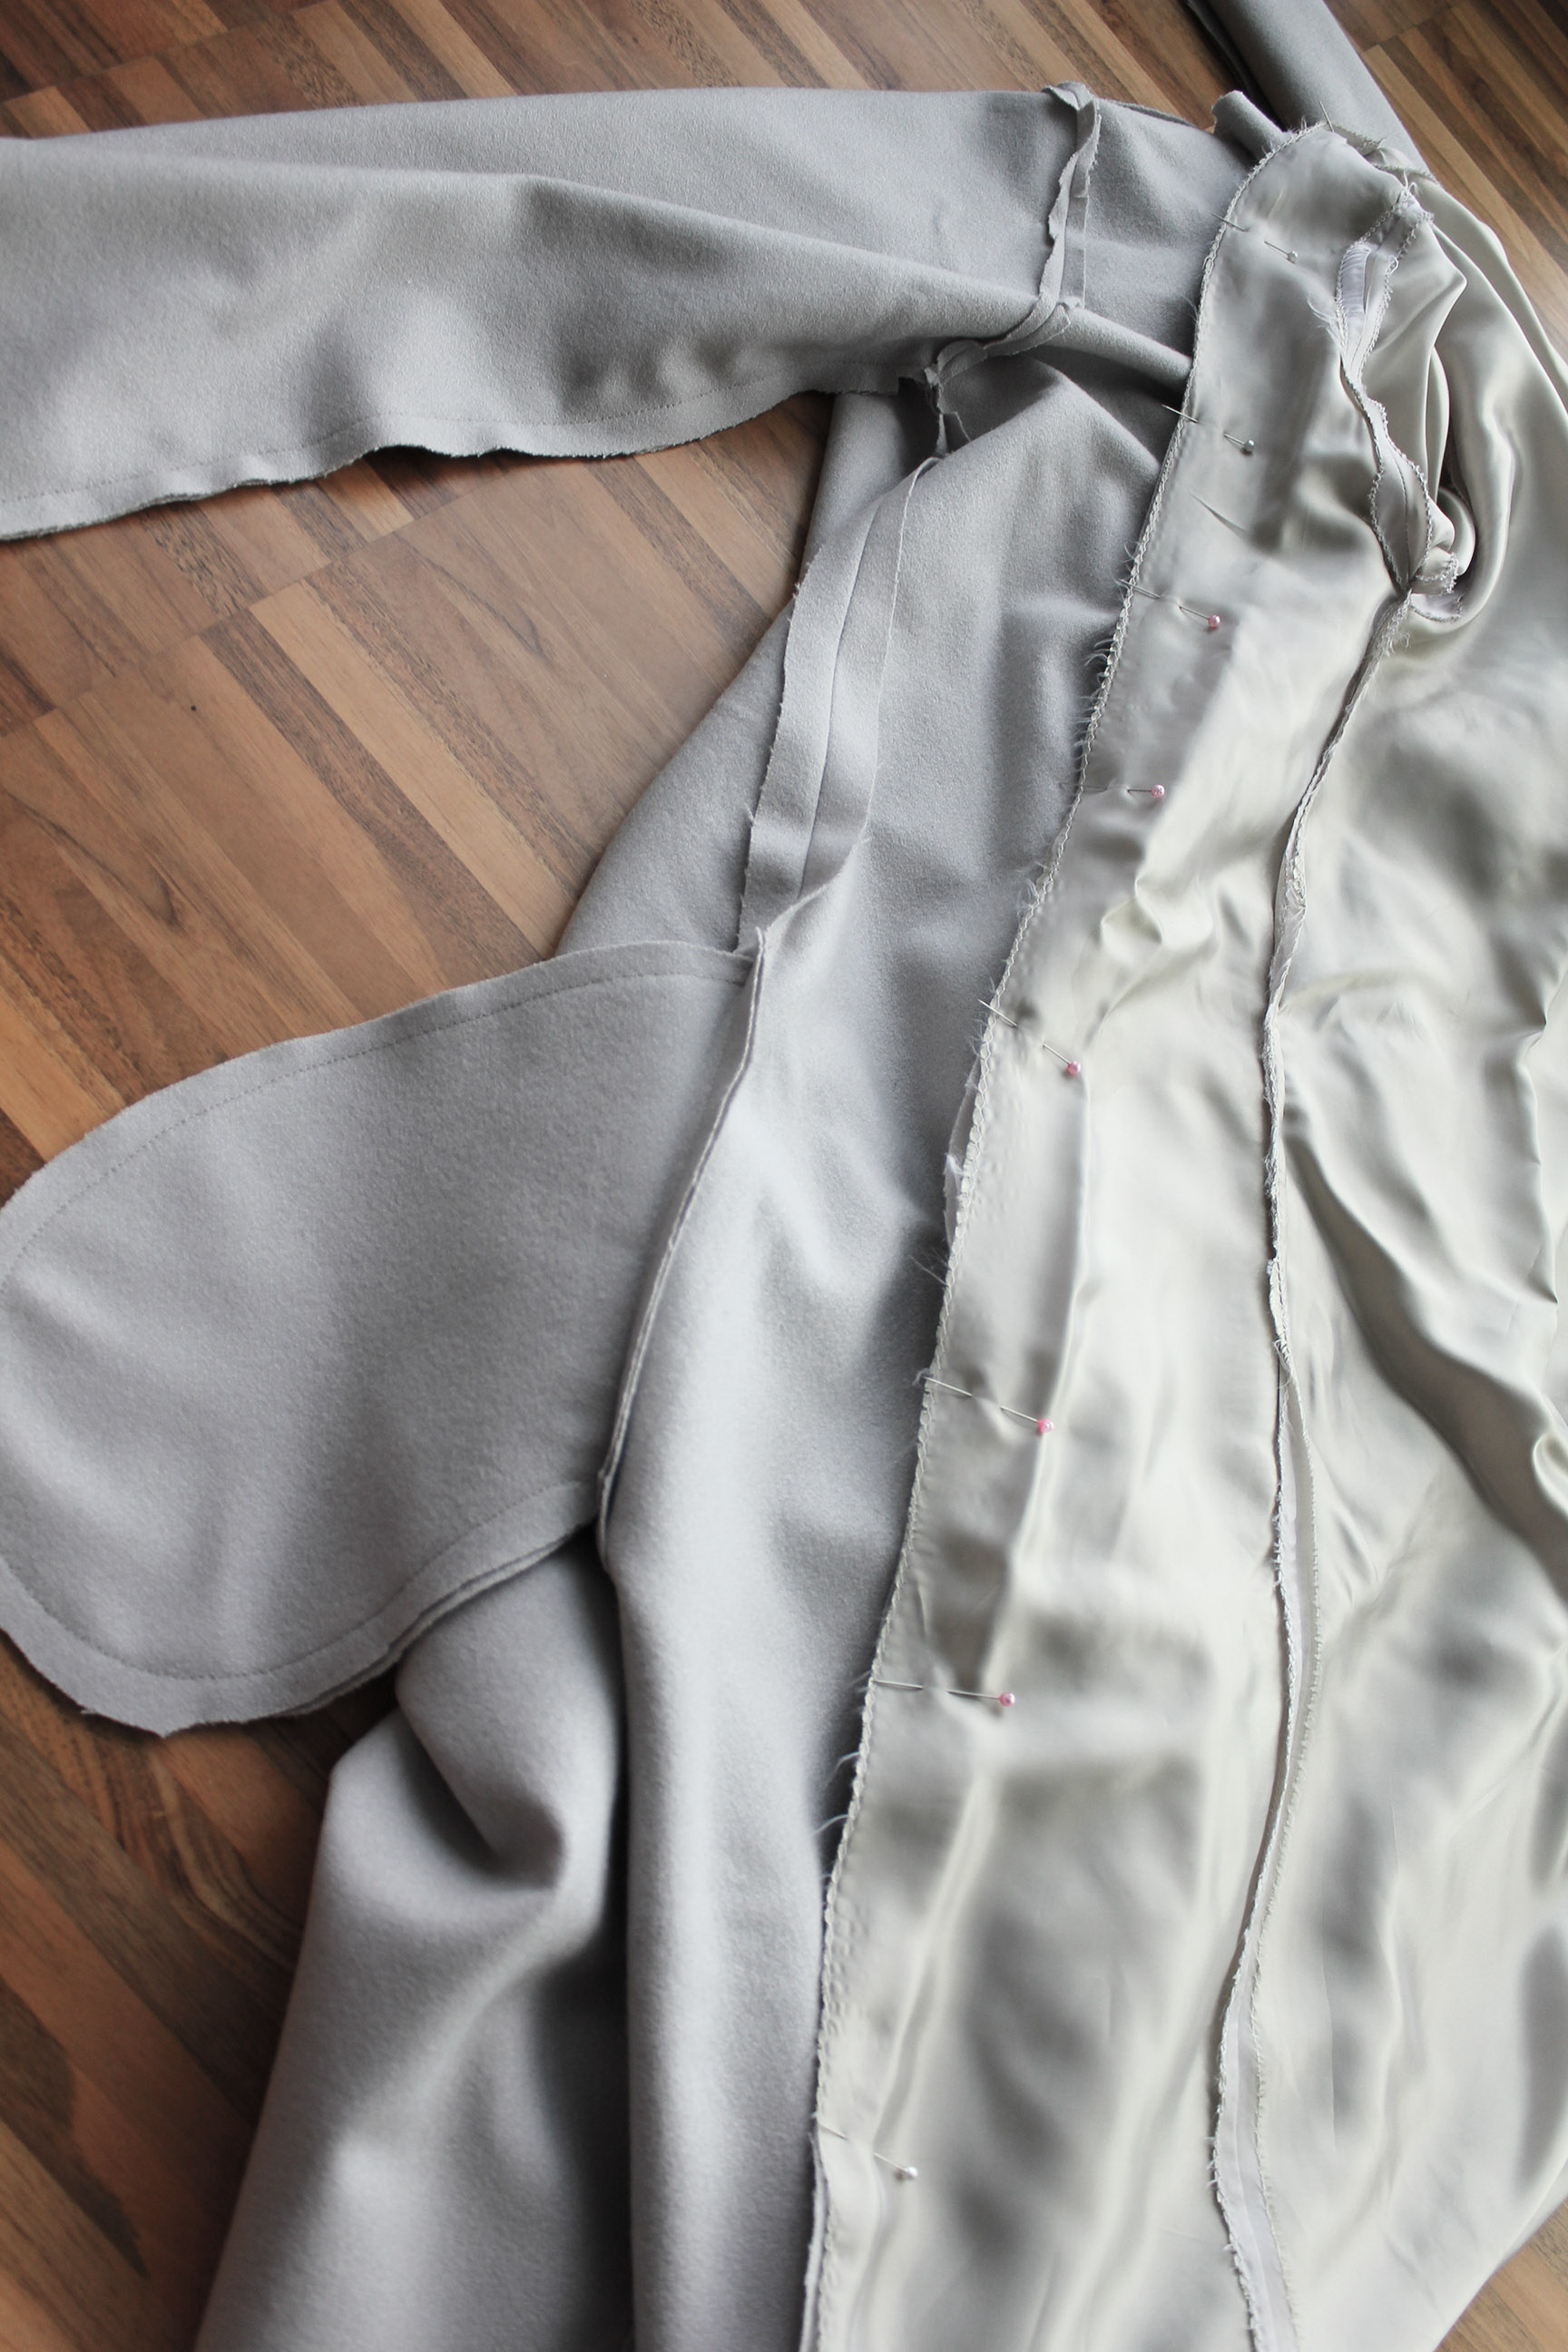
X. Add the reverse side of the lapel. Take the two long pieces and pin them right sides facing to the front edges. Cut a small extension piece for the back of the neck..
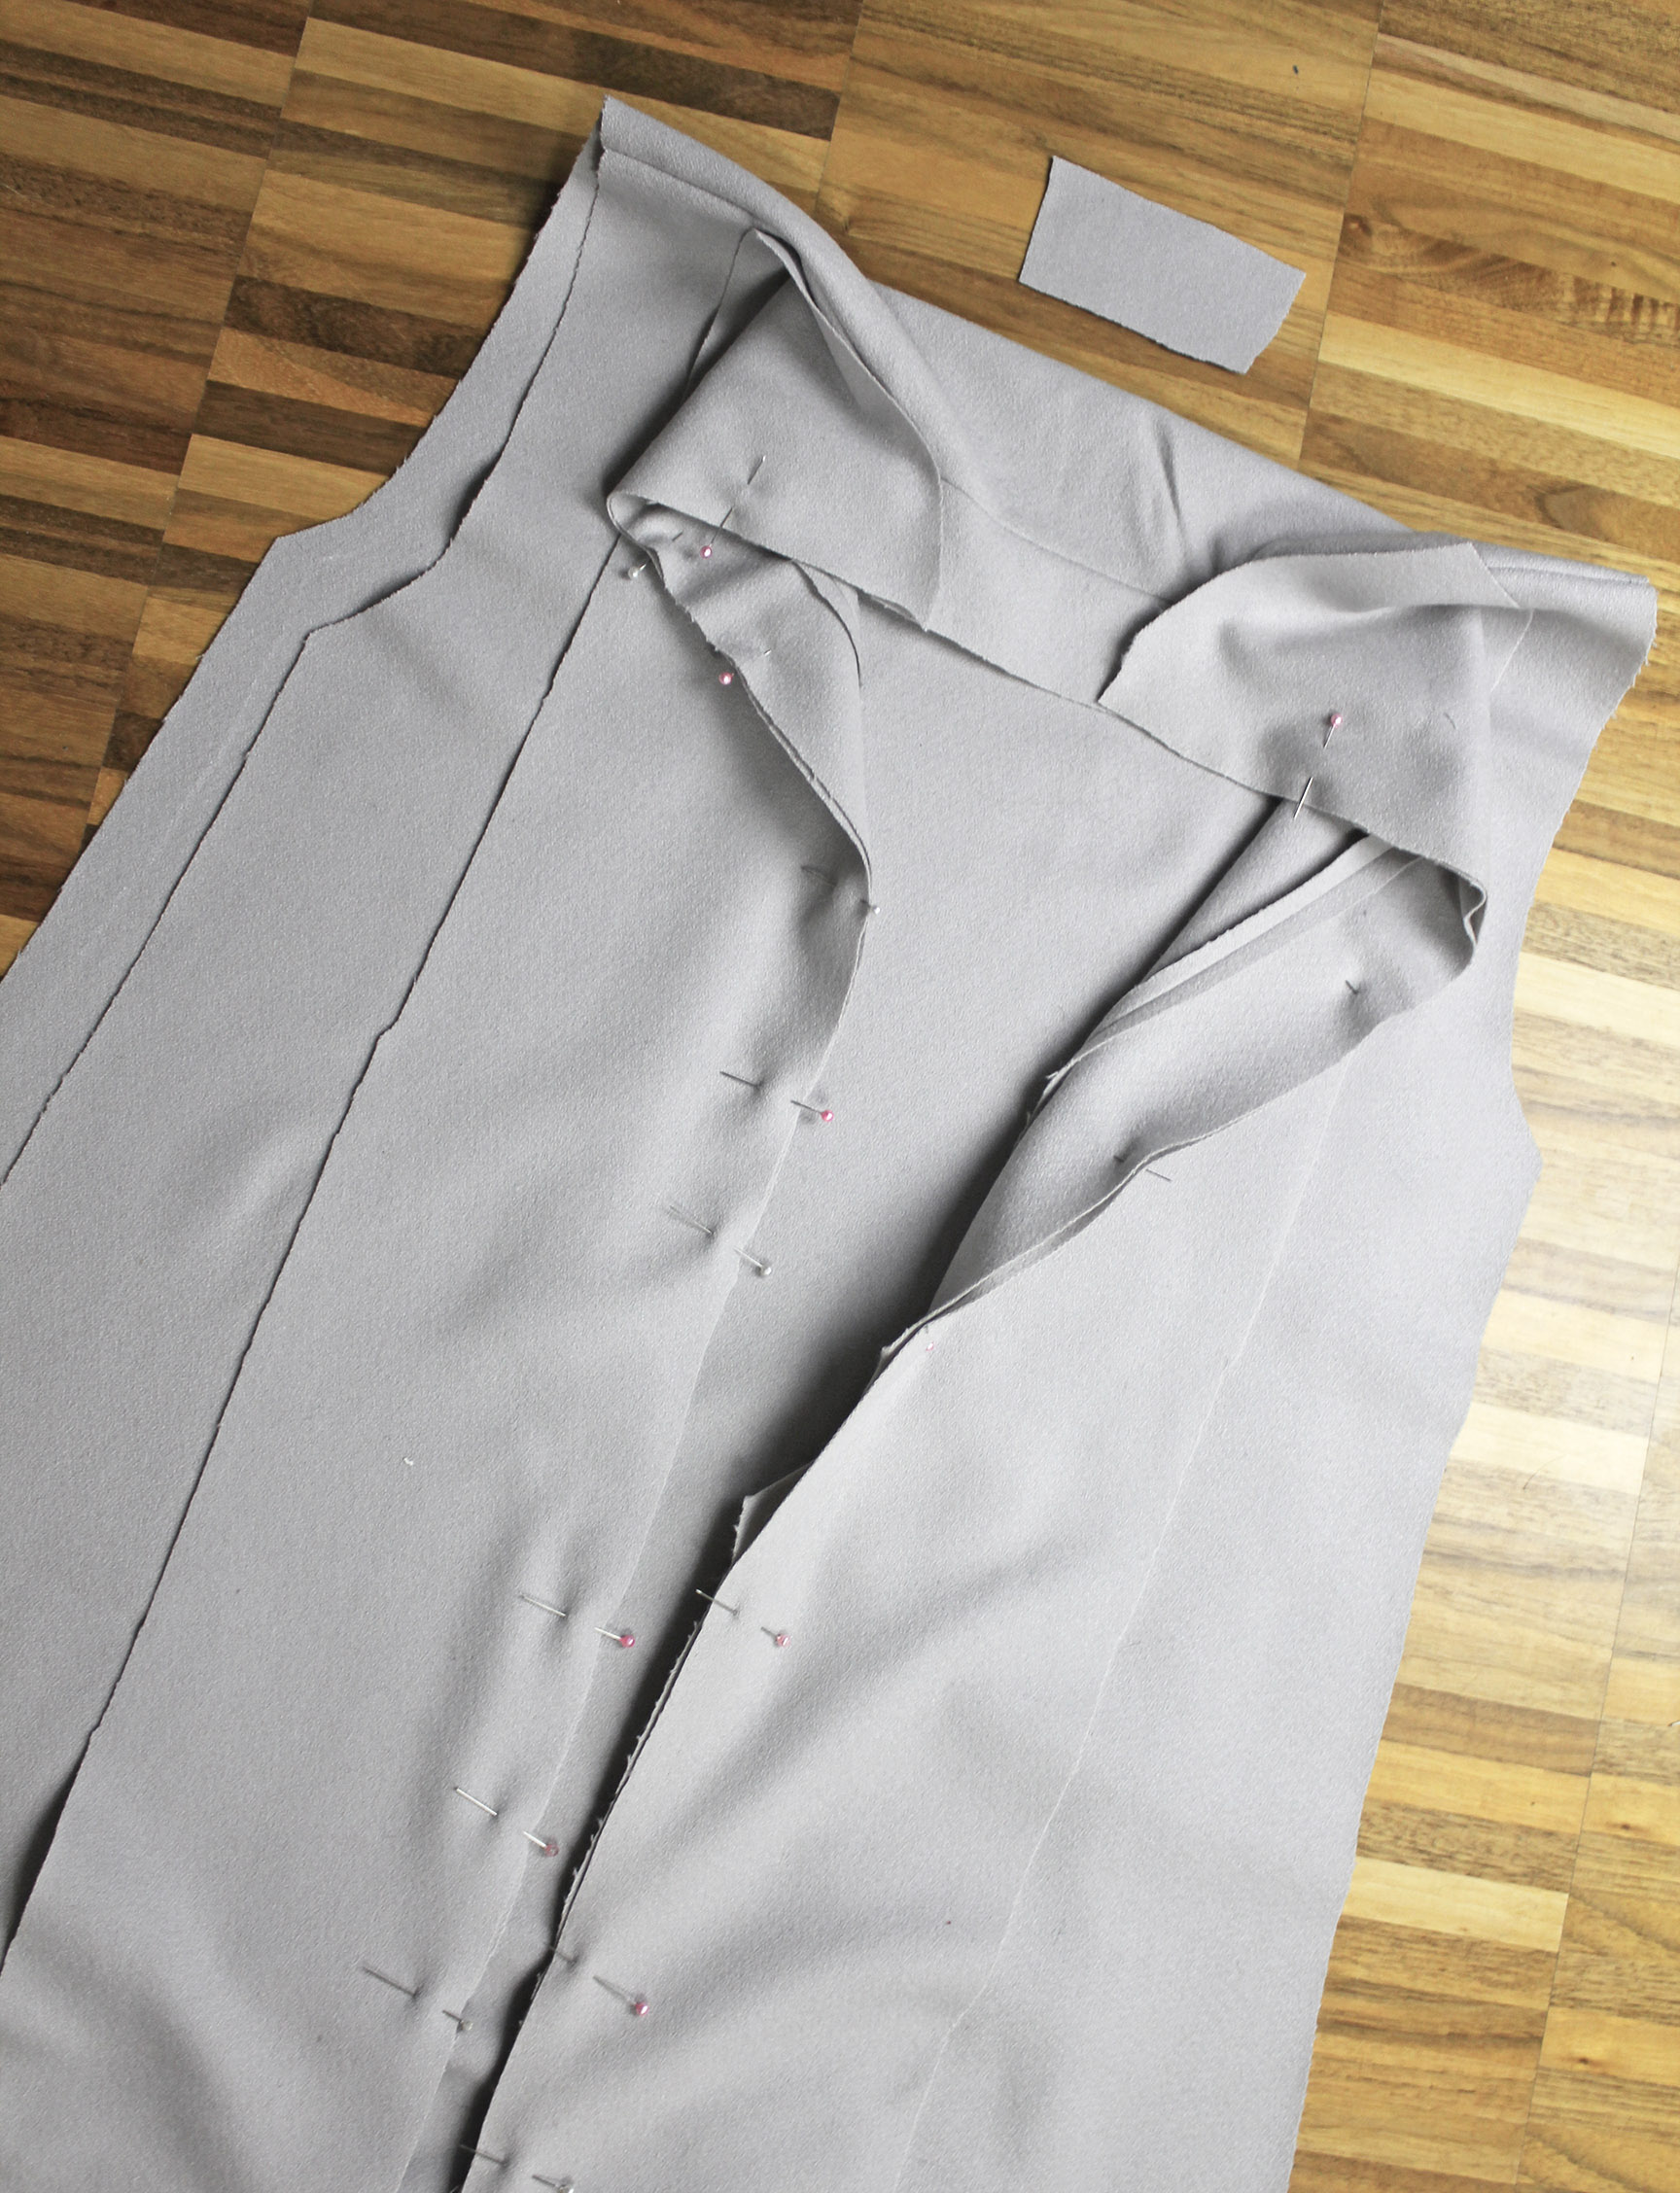
.. And sew it to the two pieces like this:
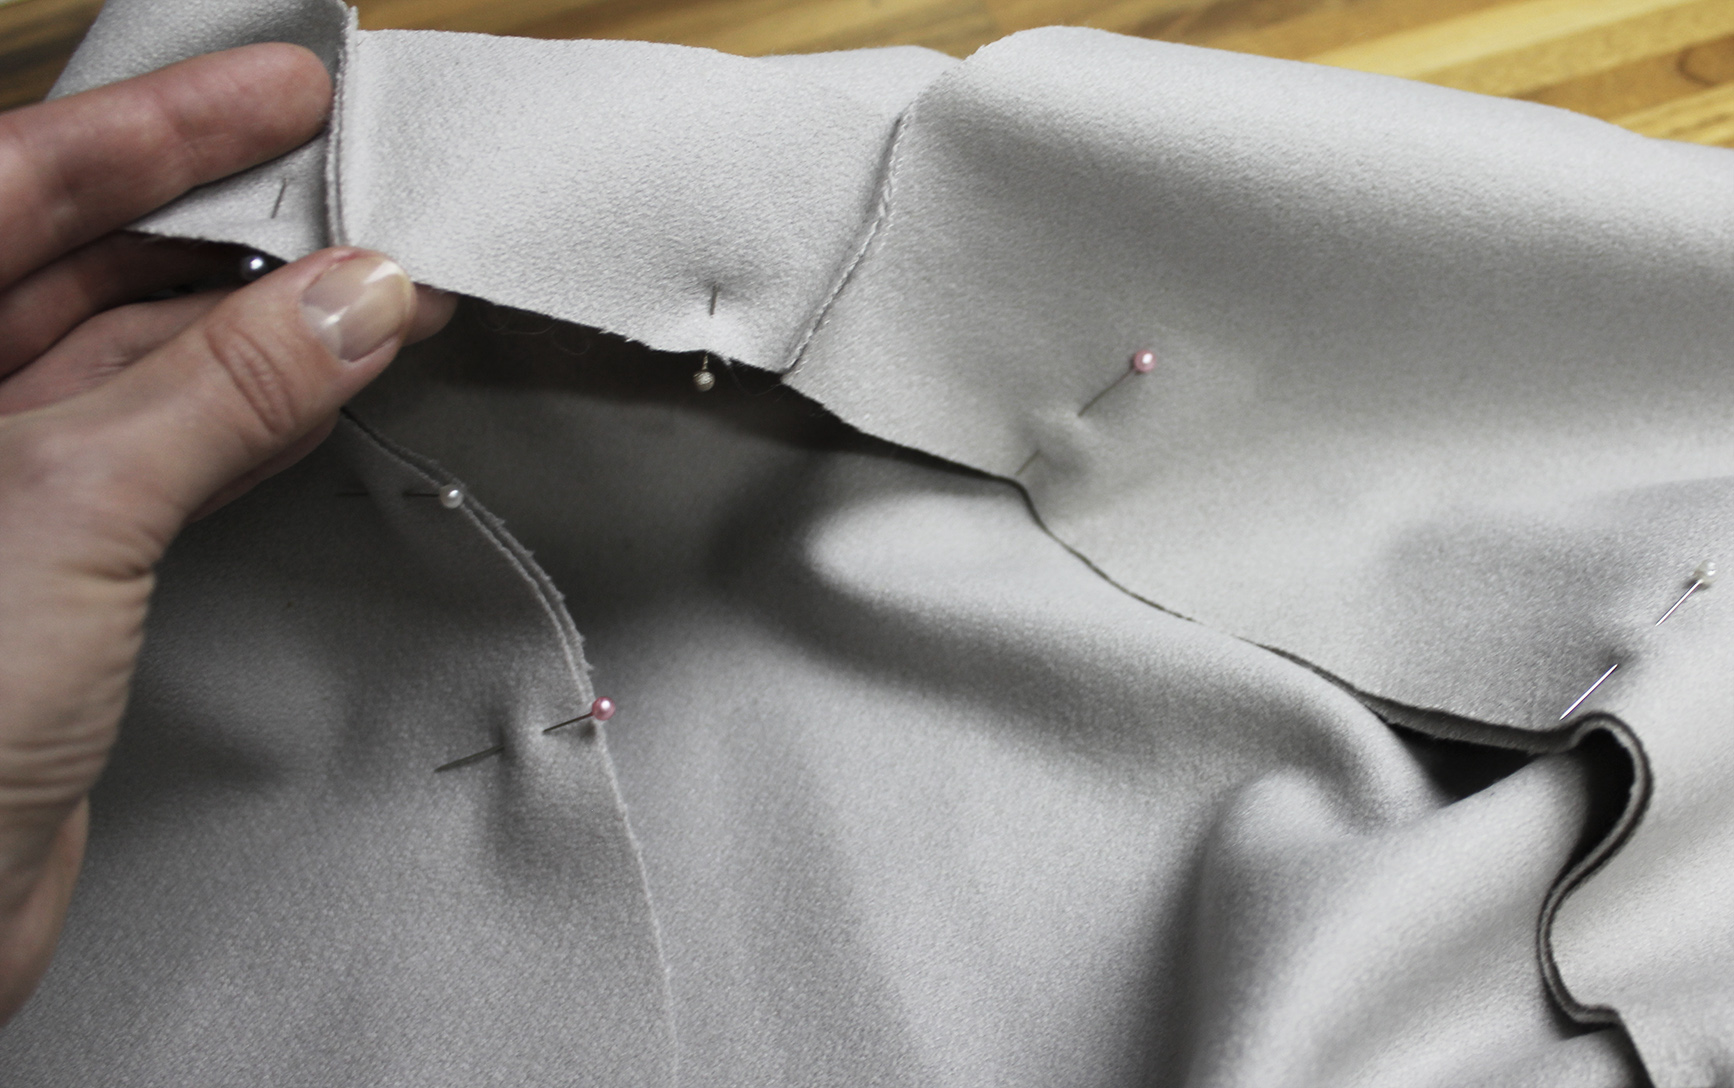
XI. Sew along the whole way from the bottom of one front panel, around the back of the neck, and down the other side. Leave a gap where the V is, backing up at the edge to reinforce the stitch.
XII. Cut a slit the depth of the V and fold the reverse side into similar triangles as you did earlier, press:
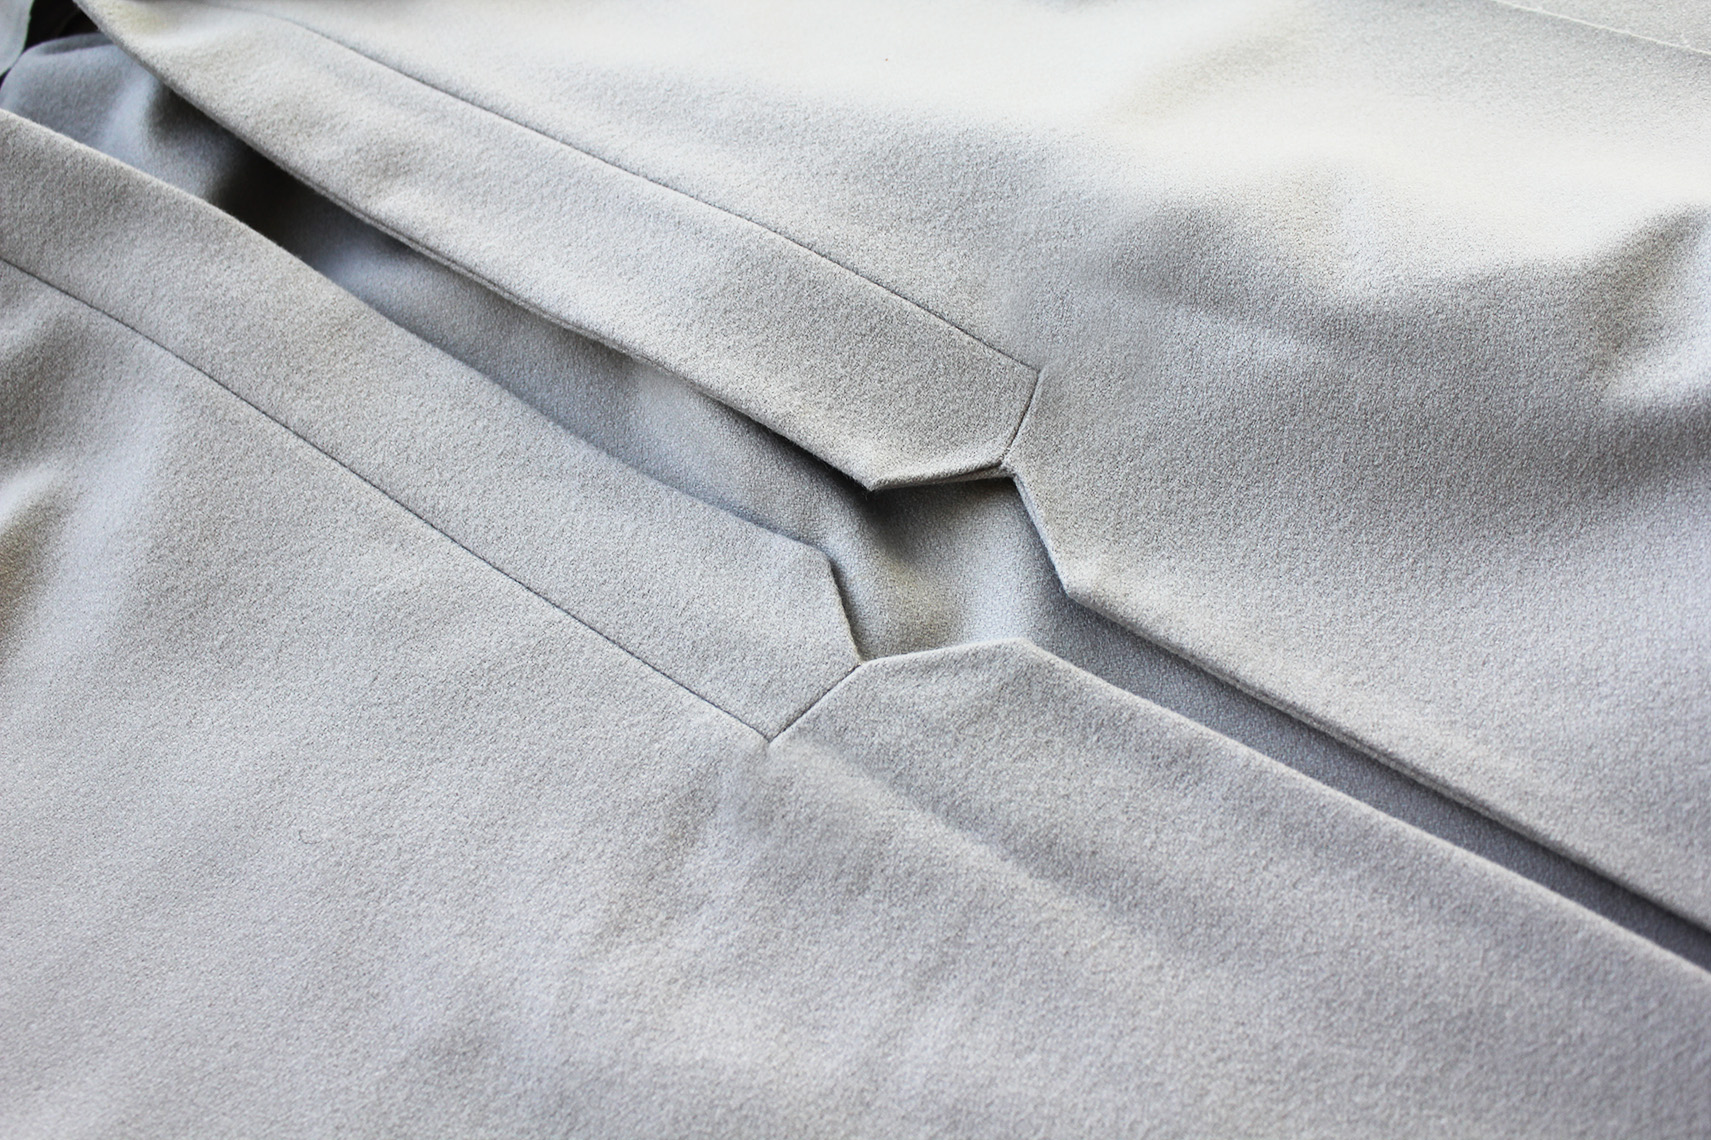
XIII. Flip the reverse side over and hand-stitch the V's together.
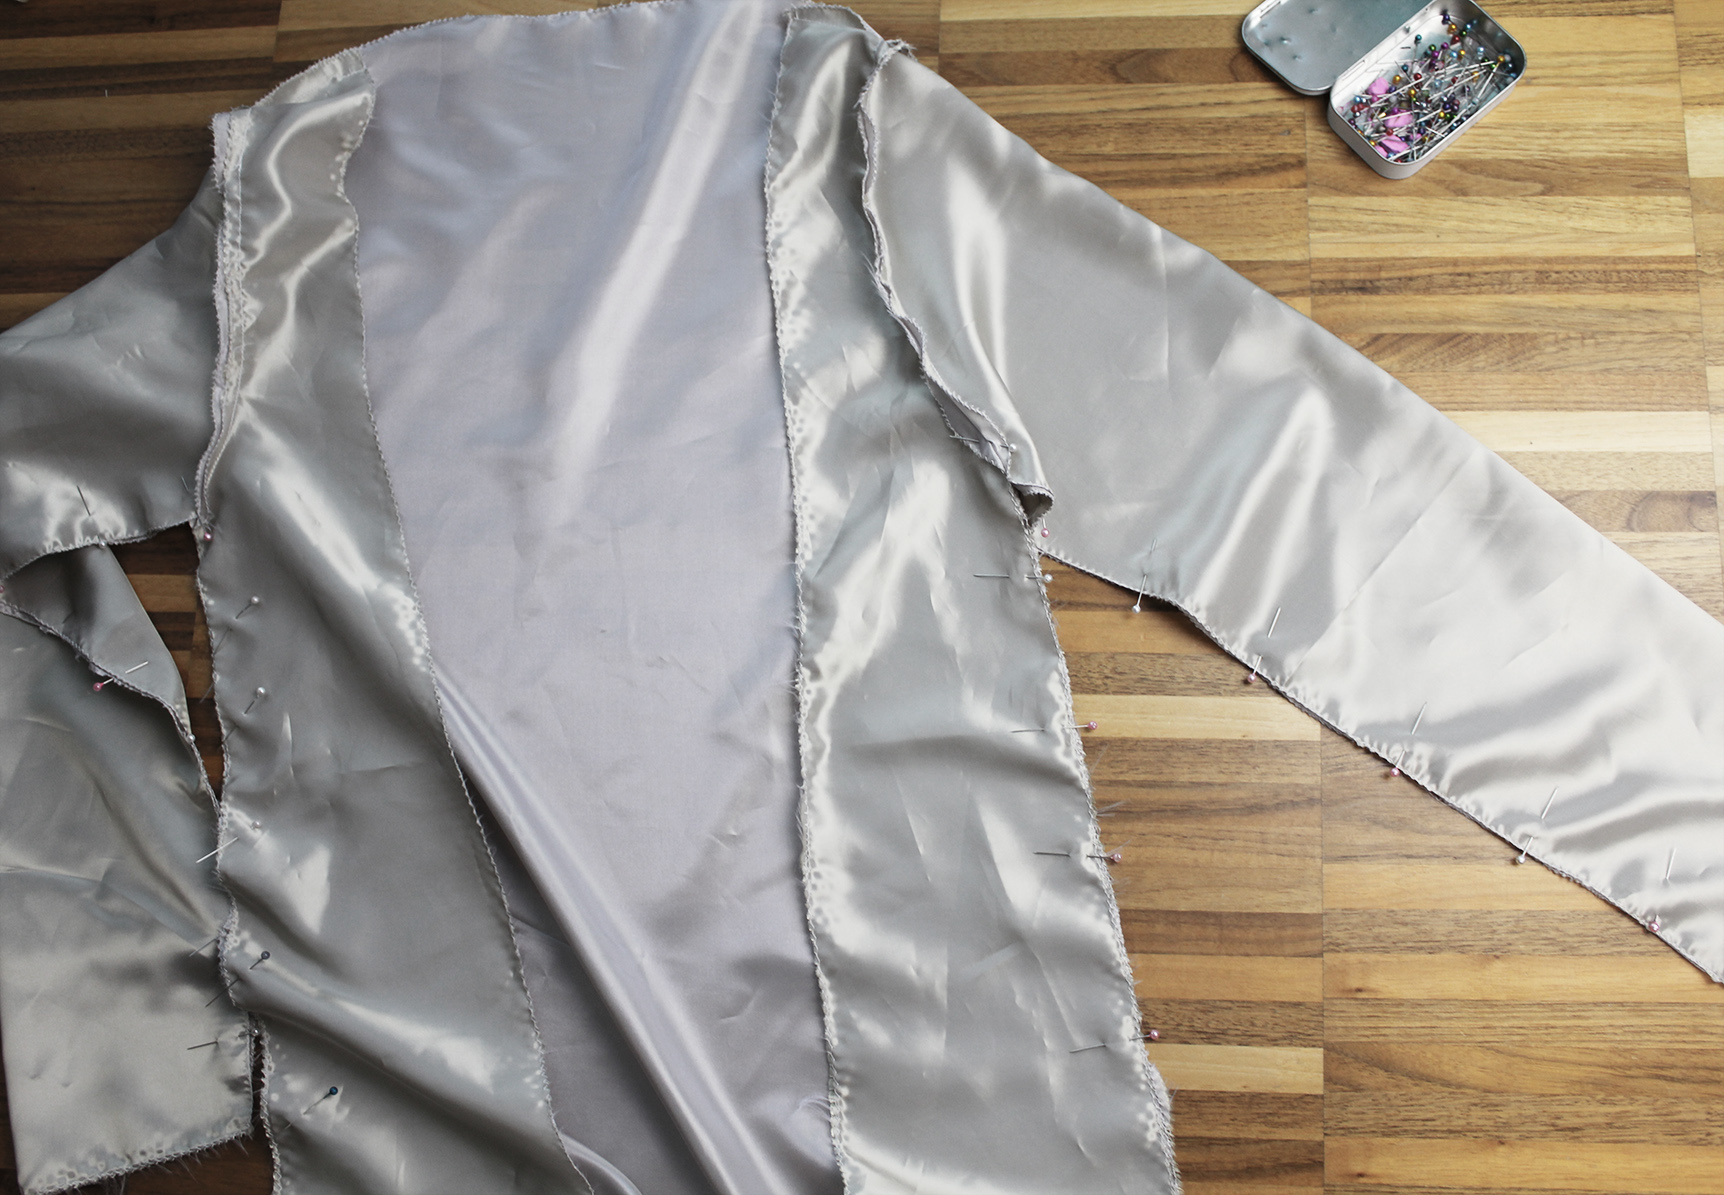
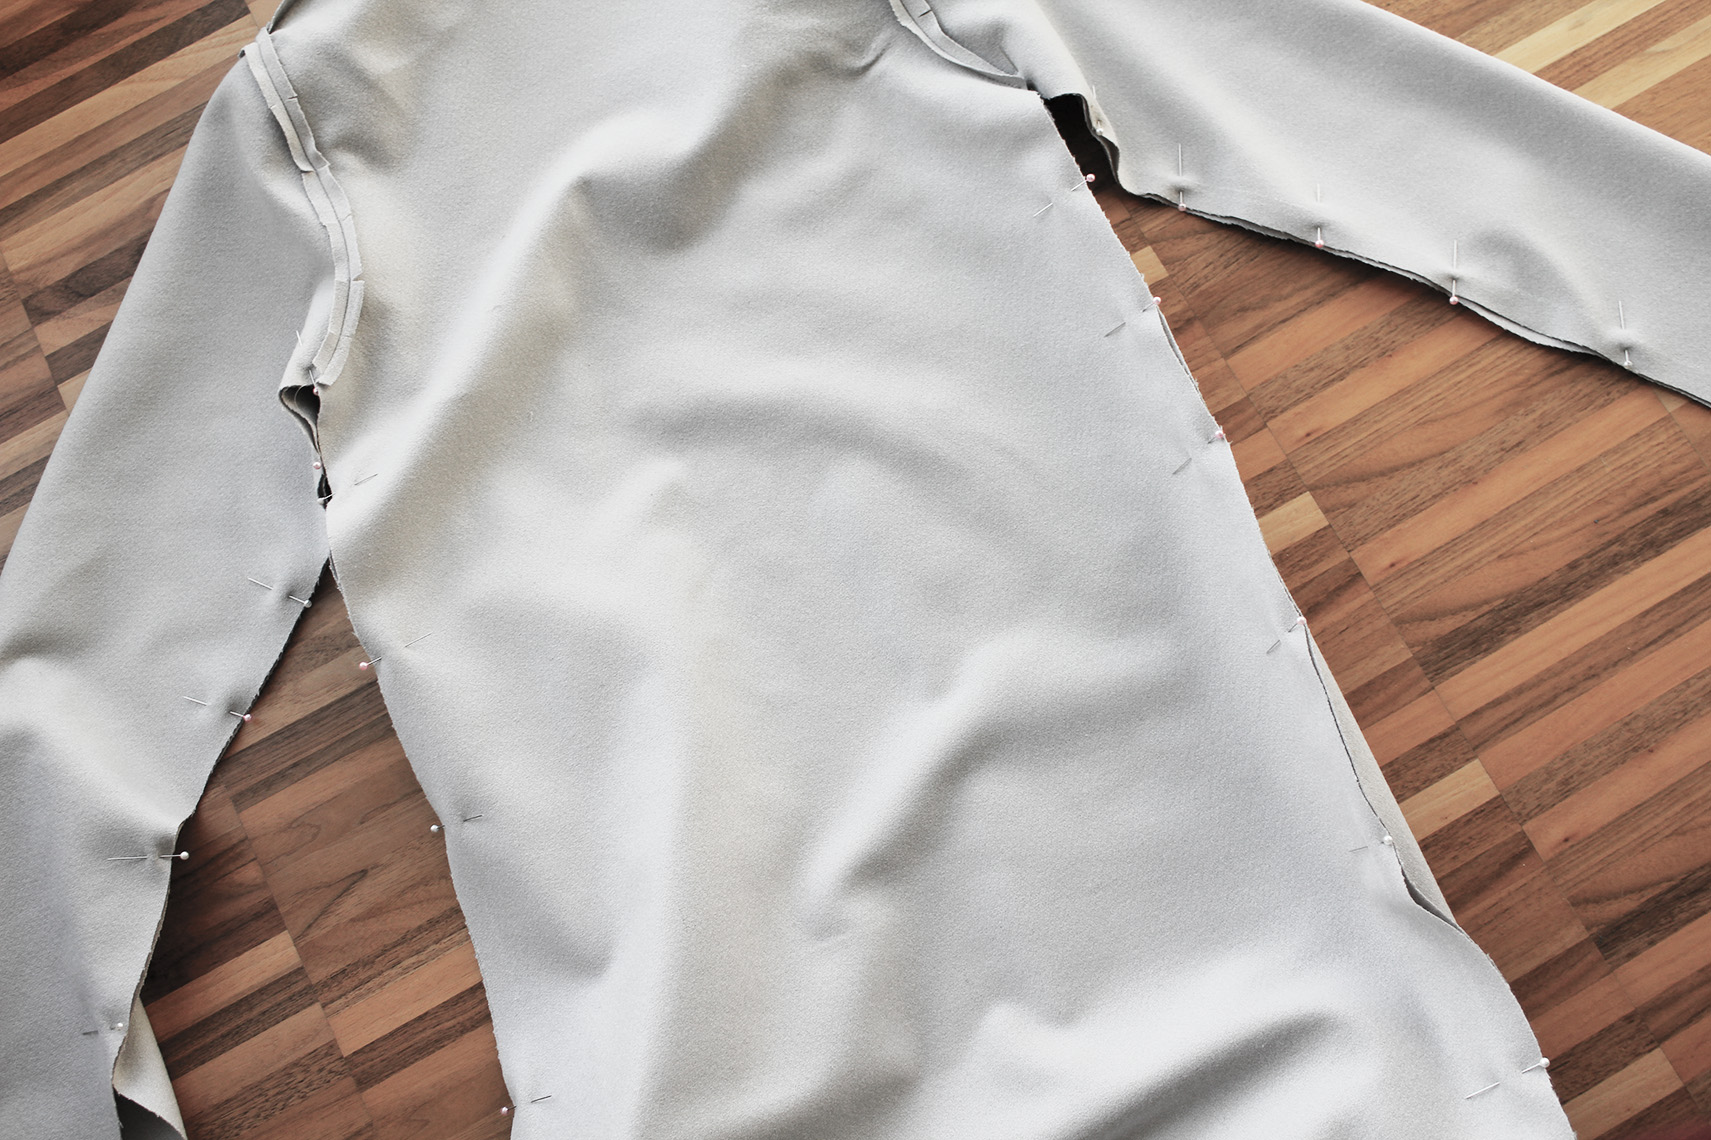
XIV. Pin the sleeves in their places. Sew along the curved edge, and cut little notches along the way before pressing the seam with your iron.
XV. Pin the under arms and the sides together. If you aren't doing pockets, just sew all the way.
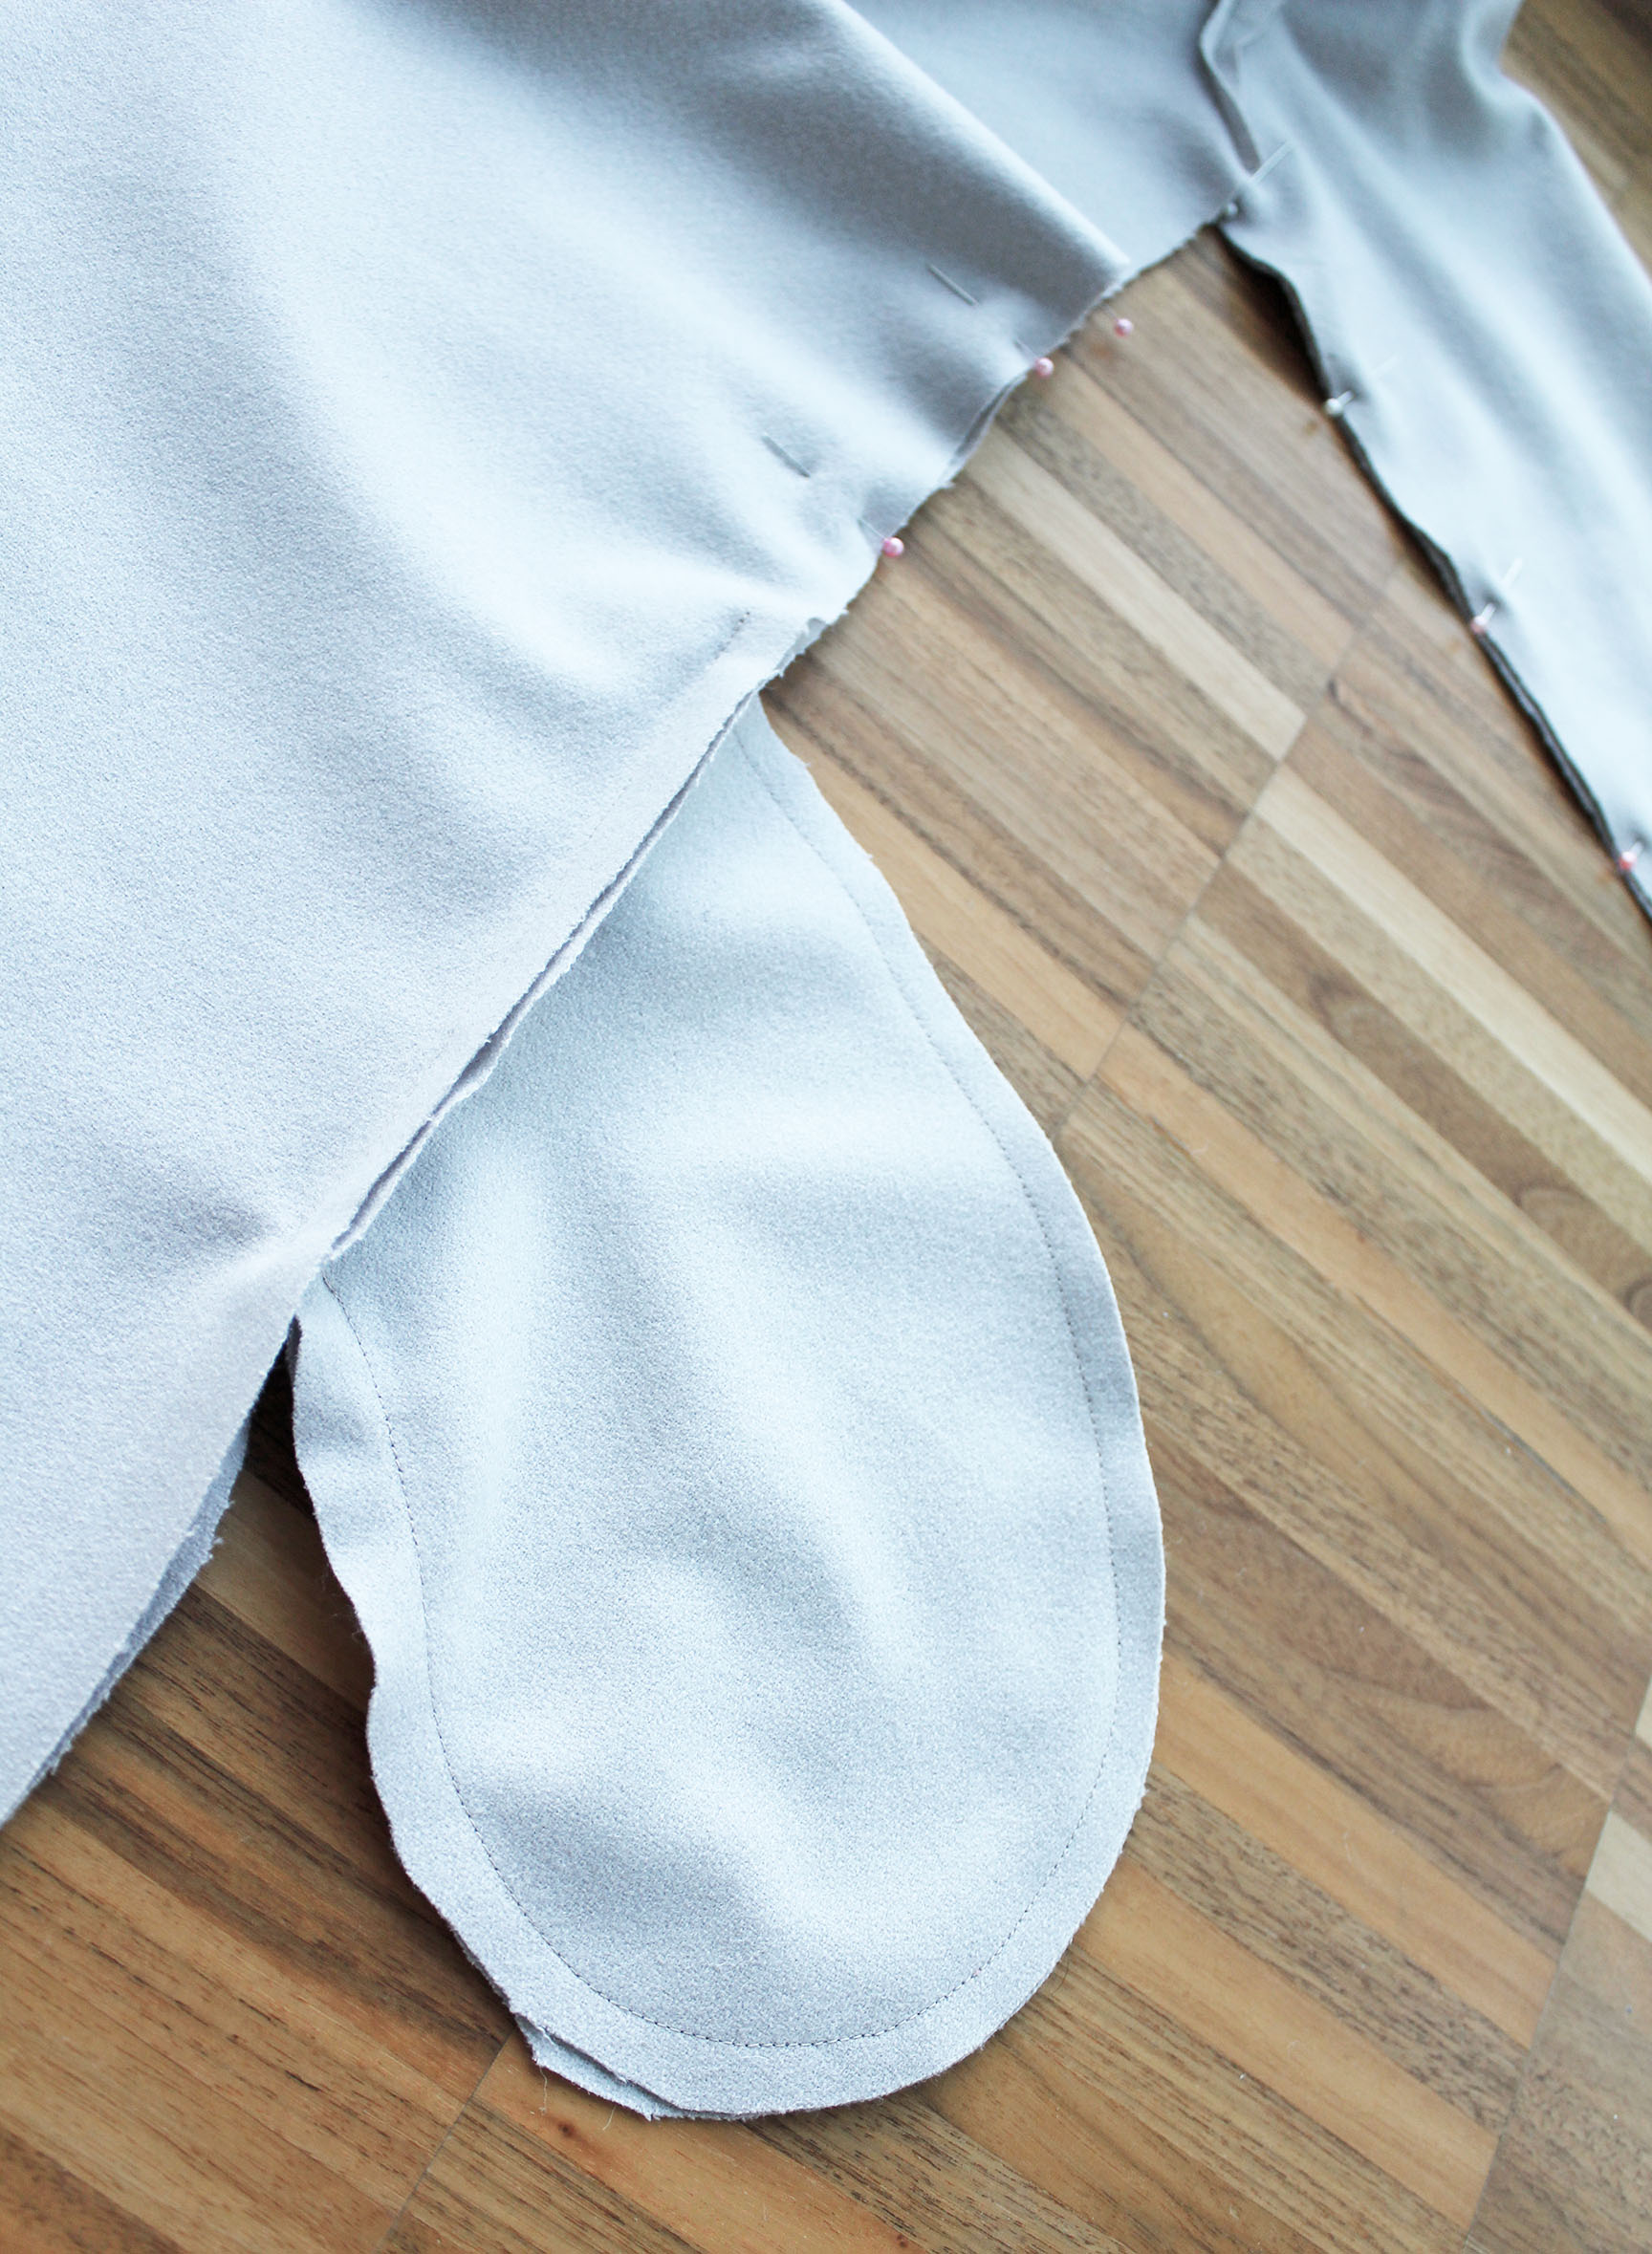
.. If you are doing pockets, this is the time to attach them. Pin them at an equal distance from the arm pit, right side facing the coat's right side.
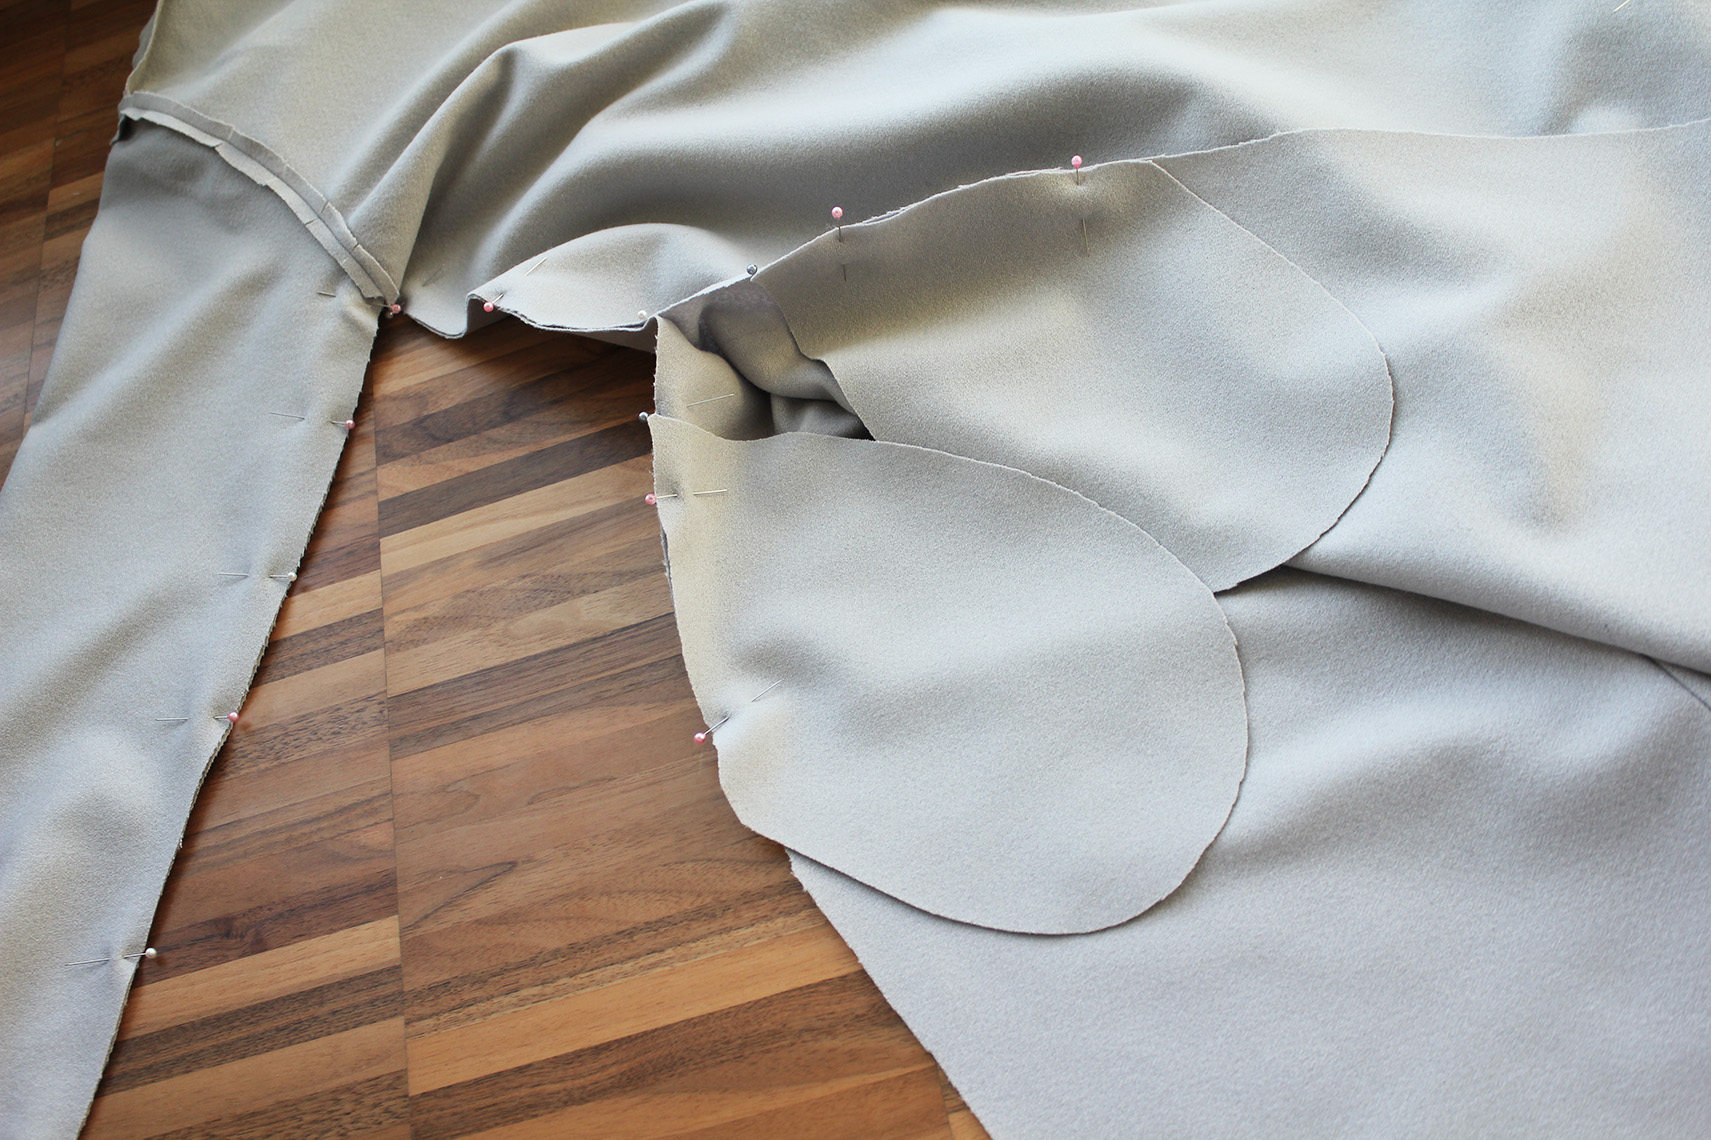
Sew the pocket pieces together. When sewing the side seam, be sure to stop at the start of the pocket and continue after it.
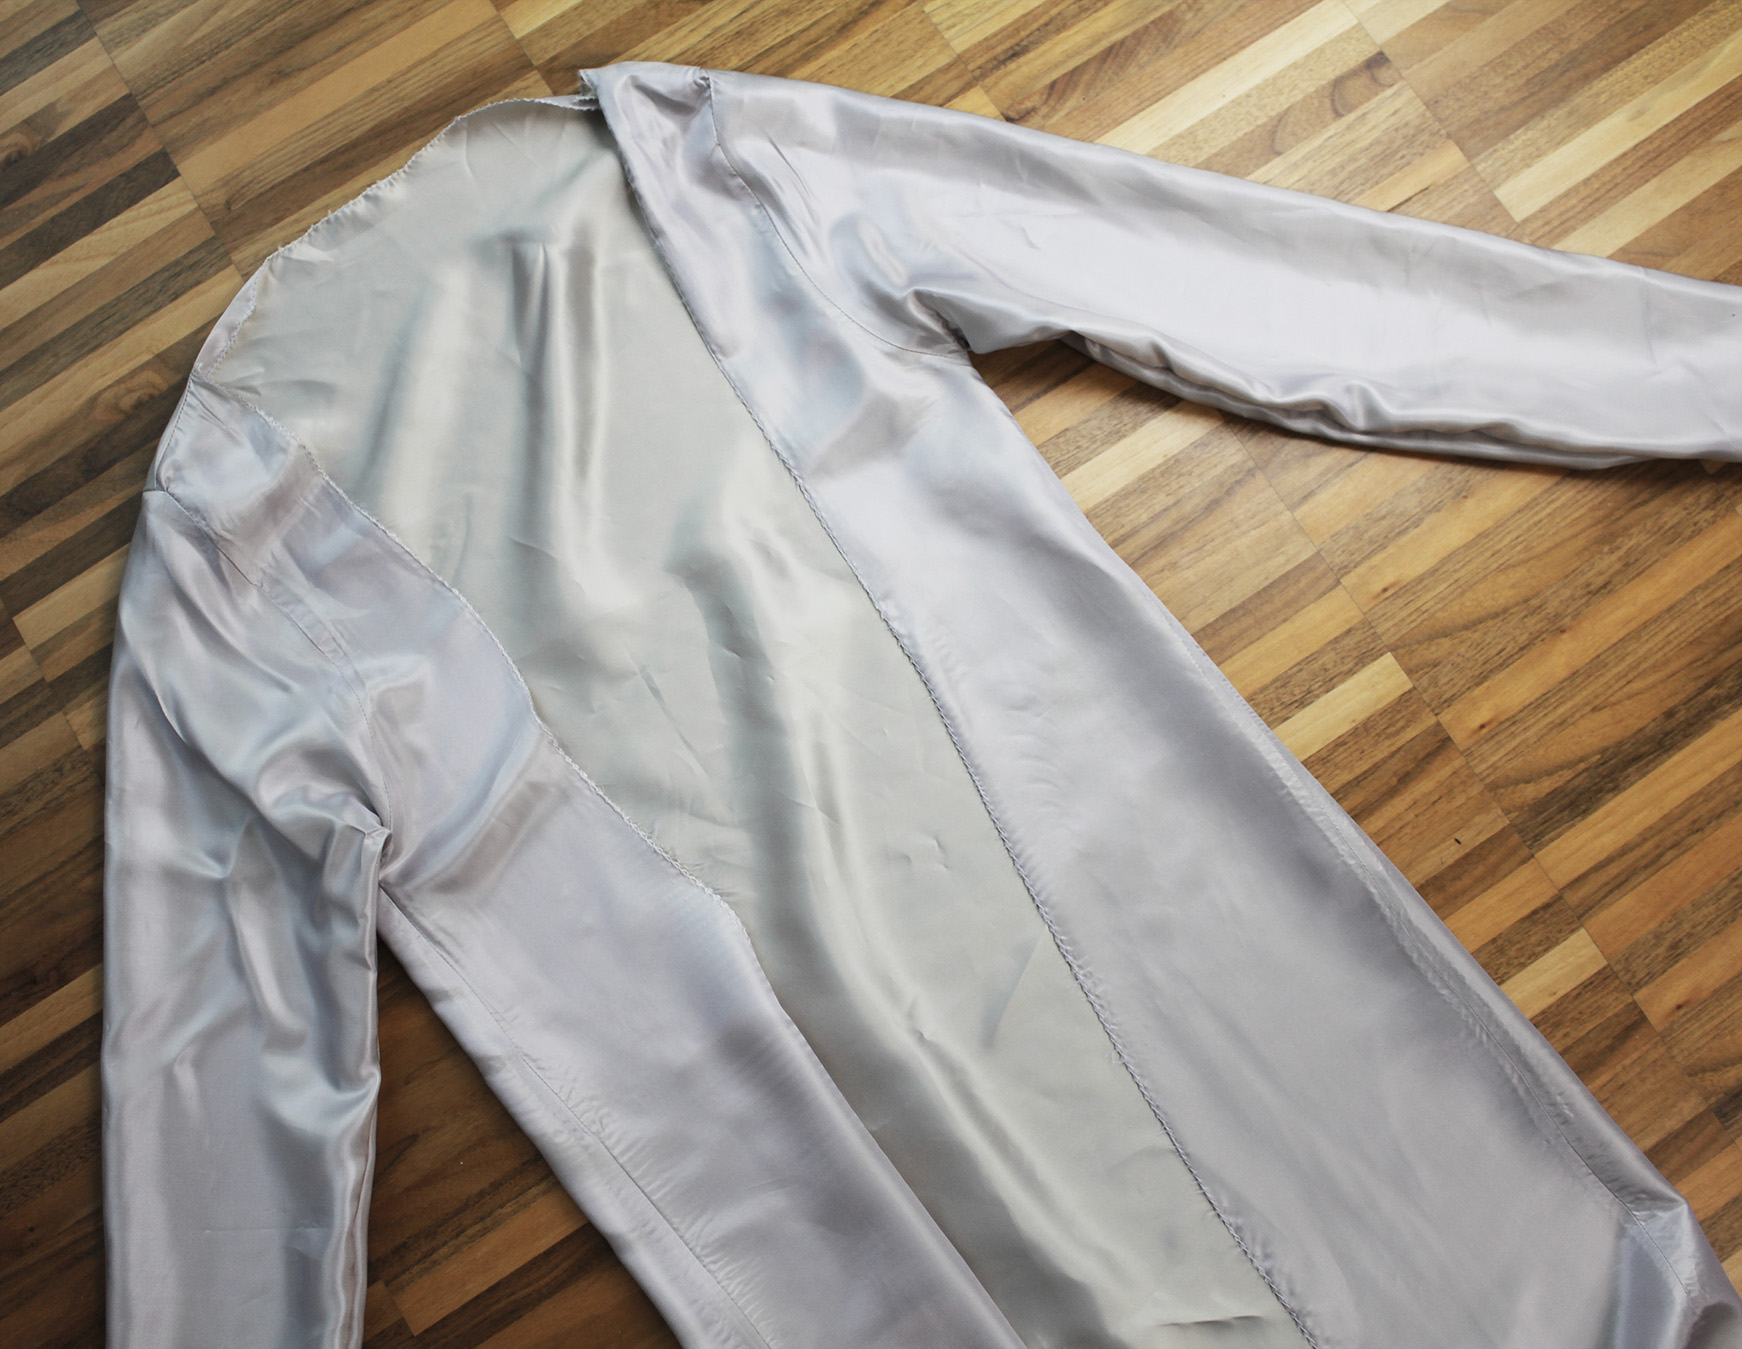
XVI. If you aren't doing the lining, at this point you can just fold the hem and the sleeves and hand-stitch the front fold to the reverse side to keep it in its place.
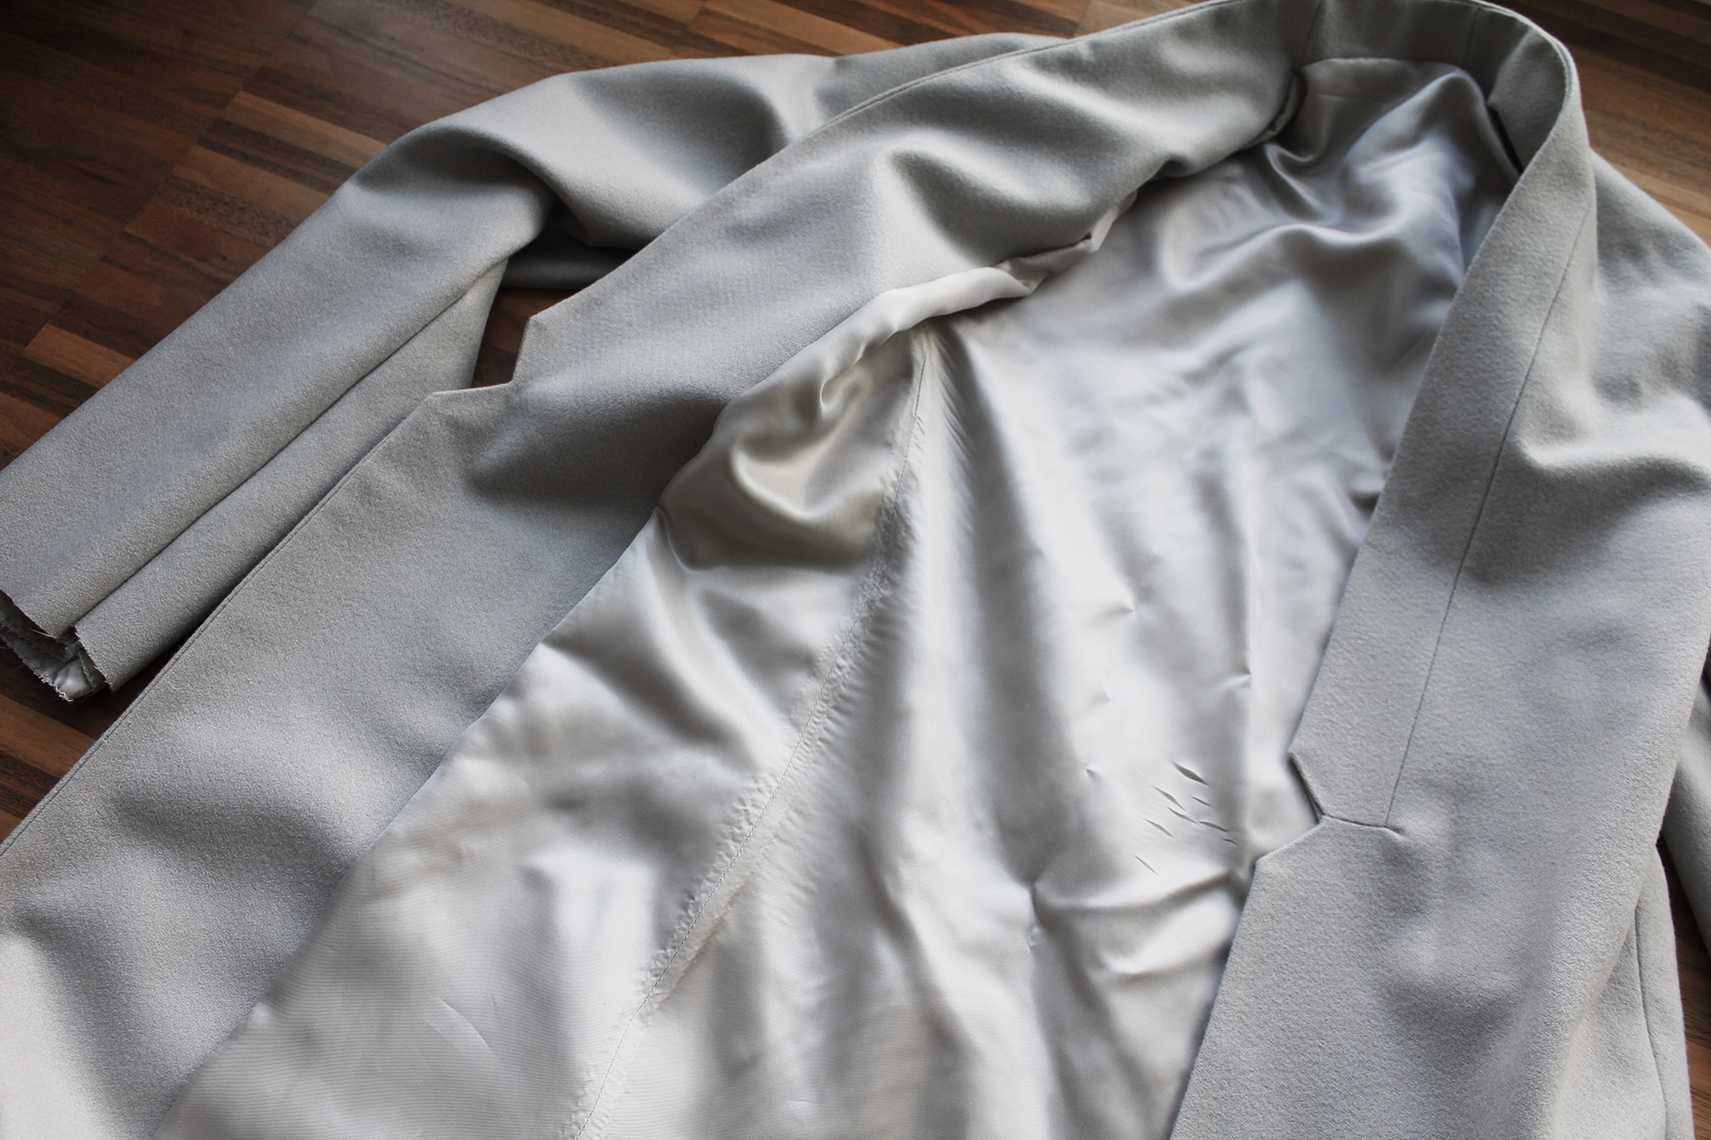
XVII. To attach the lining, pin its front edges to the coat's front opening, right side facing the coat's right side. Sew all around.
When you turn the lining around, it should be nicely attached to the front lapels' reverse sides. Push the arms into their places in the sleeves.
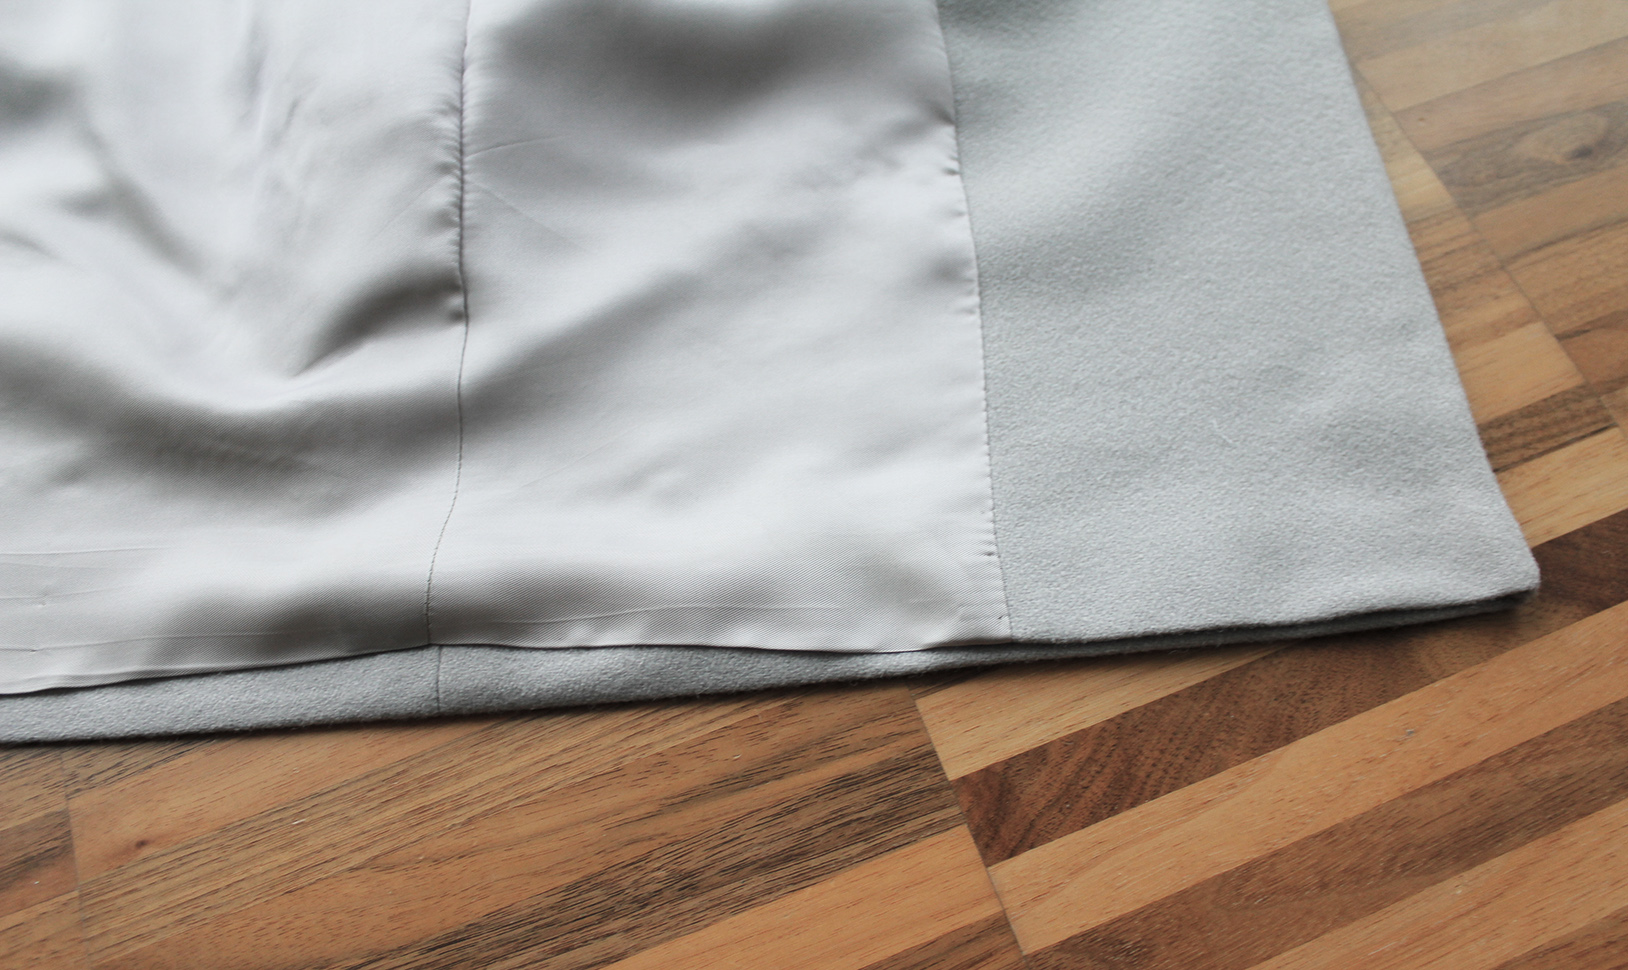
XVII. To finish off, press a fold in the lining piece and the ends of the sleeves so the lining is a bit shorter, and hand-stitch it in place.

.. Repeat the same for the hem.
Been wearing this a lot. Awesome as a spring transition coat but will work all year round in layering!
xo,
Julia


I LOVE THIS ! I found it via your Instagram account.
ReplyDeleteWith this coat, did you use a template or just freestyle the pattern pieces ?
It looks amazing. I want to give it a go
Thanks,
Rosey x
Thanks Rosey:)! I did just free-draw the pieces, I'm pretty bad with patterns and the patience required to work with them... I would love to see your version!!
DeleteJulia
how can i not discover your blog earlier, your blog is amazing !!!!
ReplyDeleteThank you Anjani:)!!
Delete