

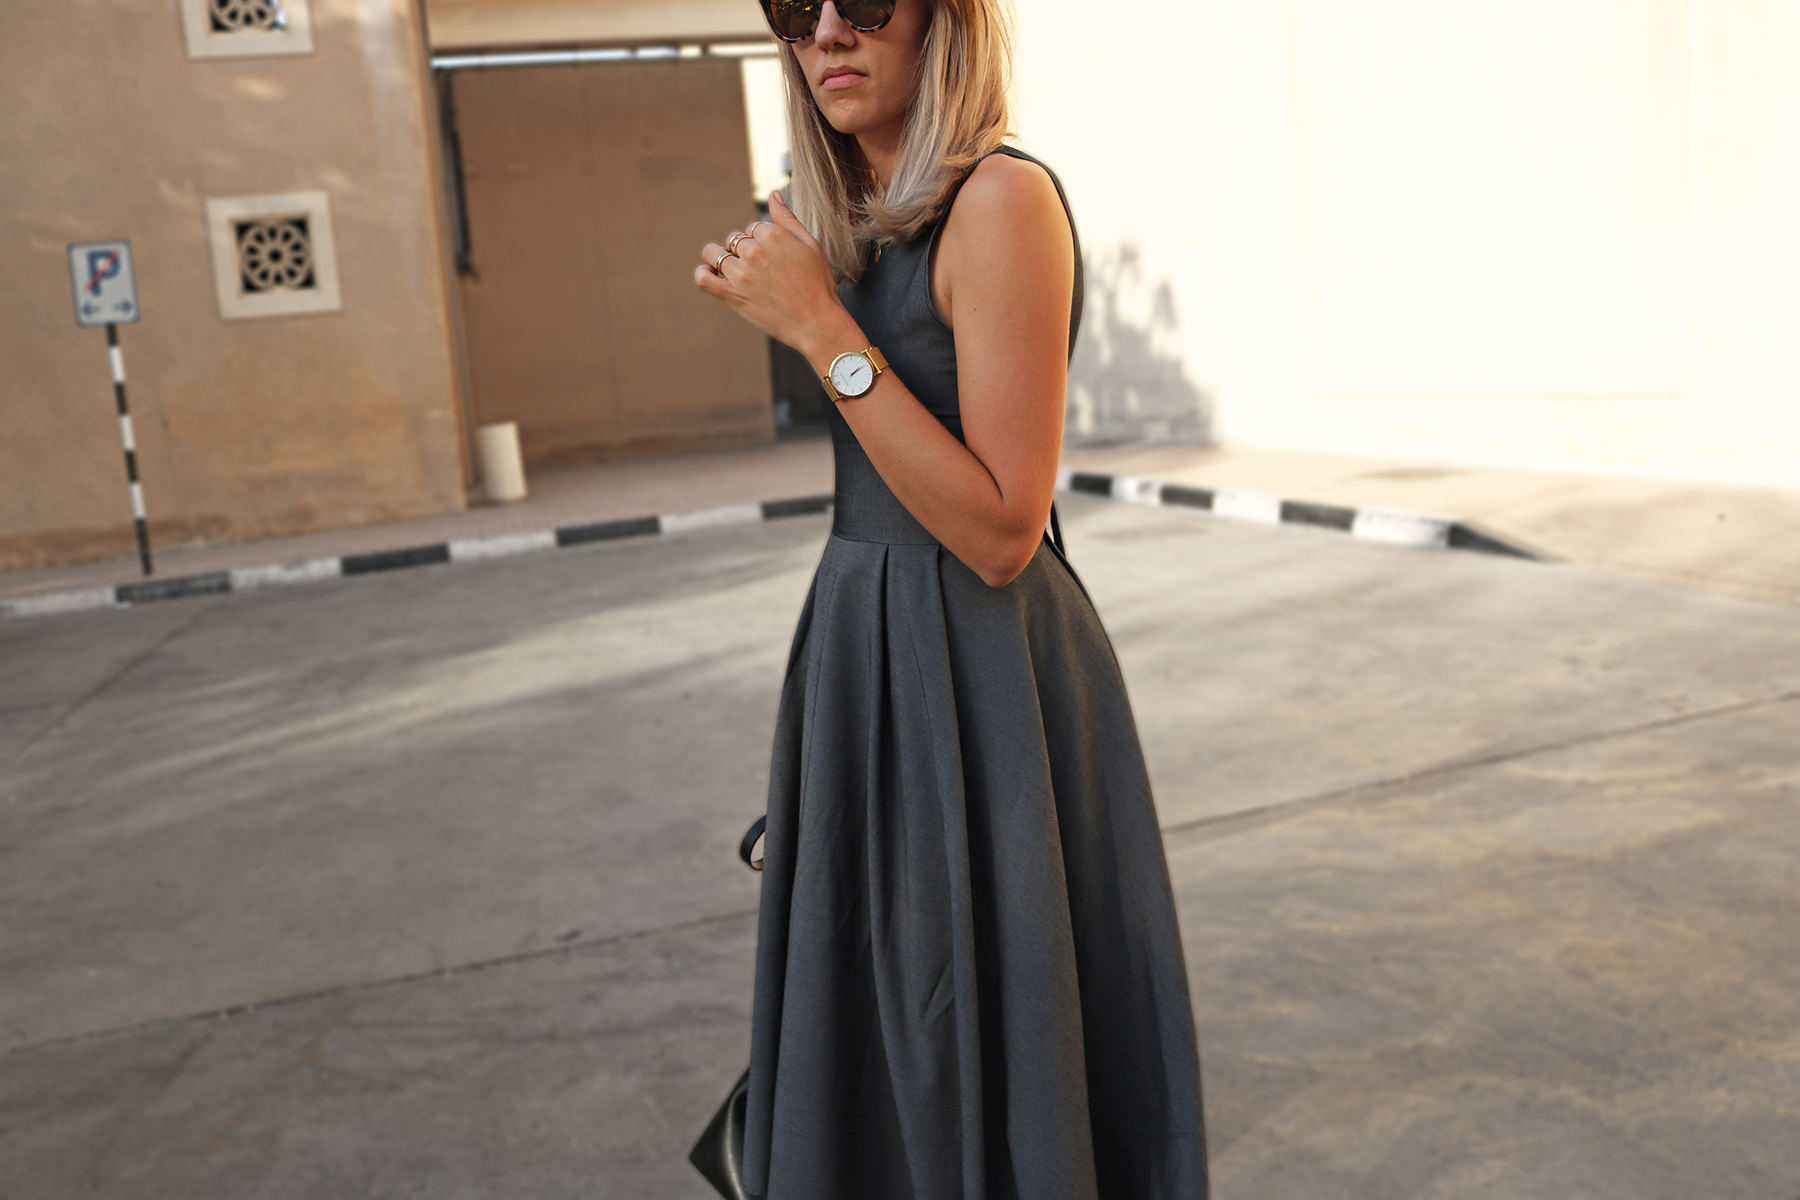
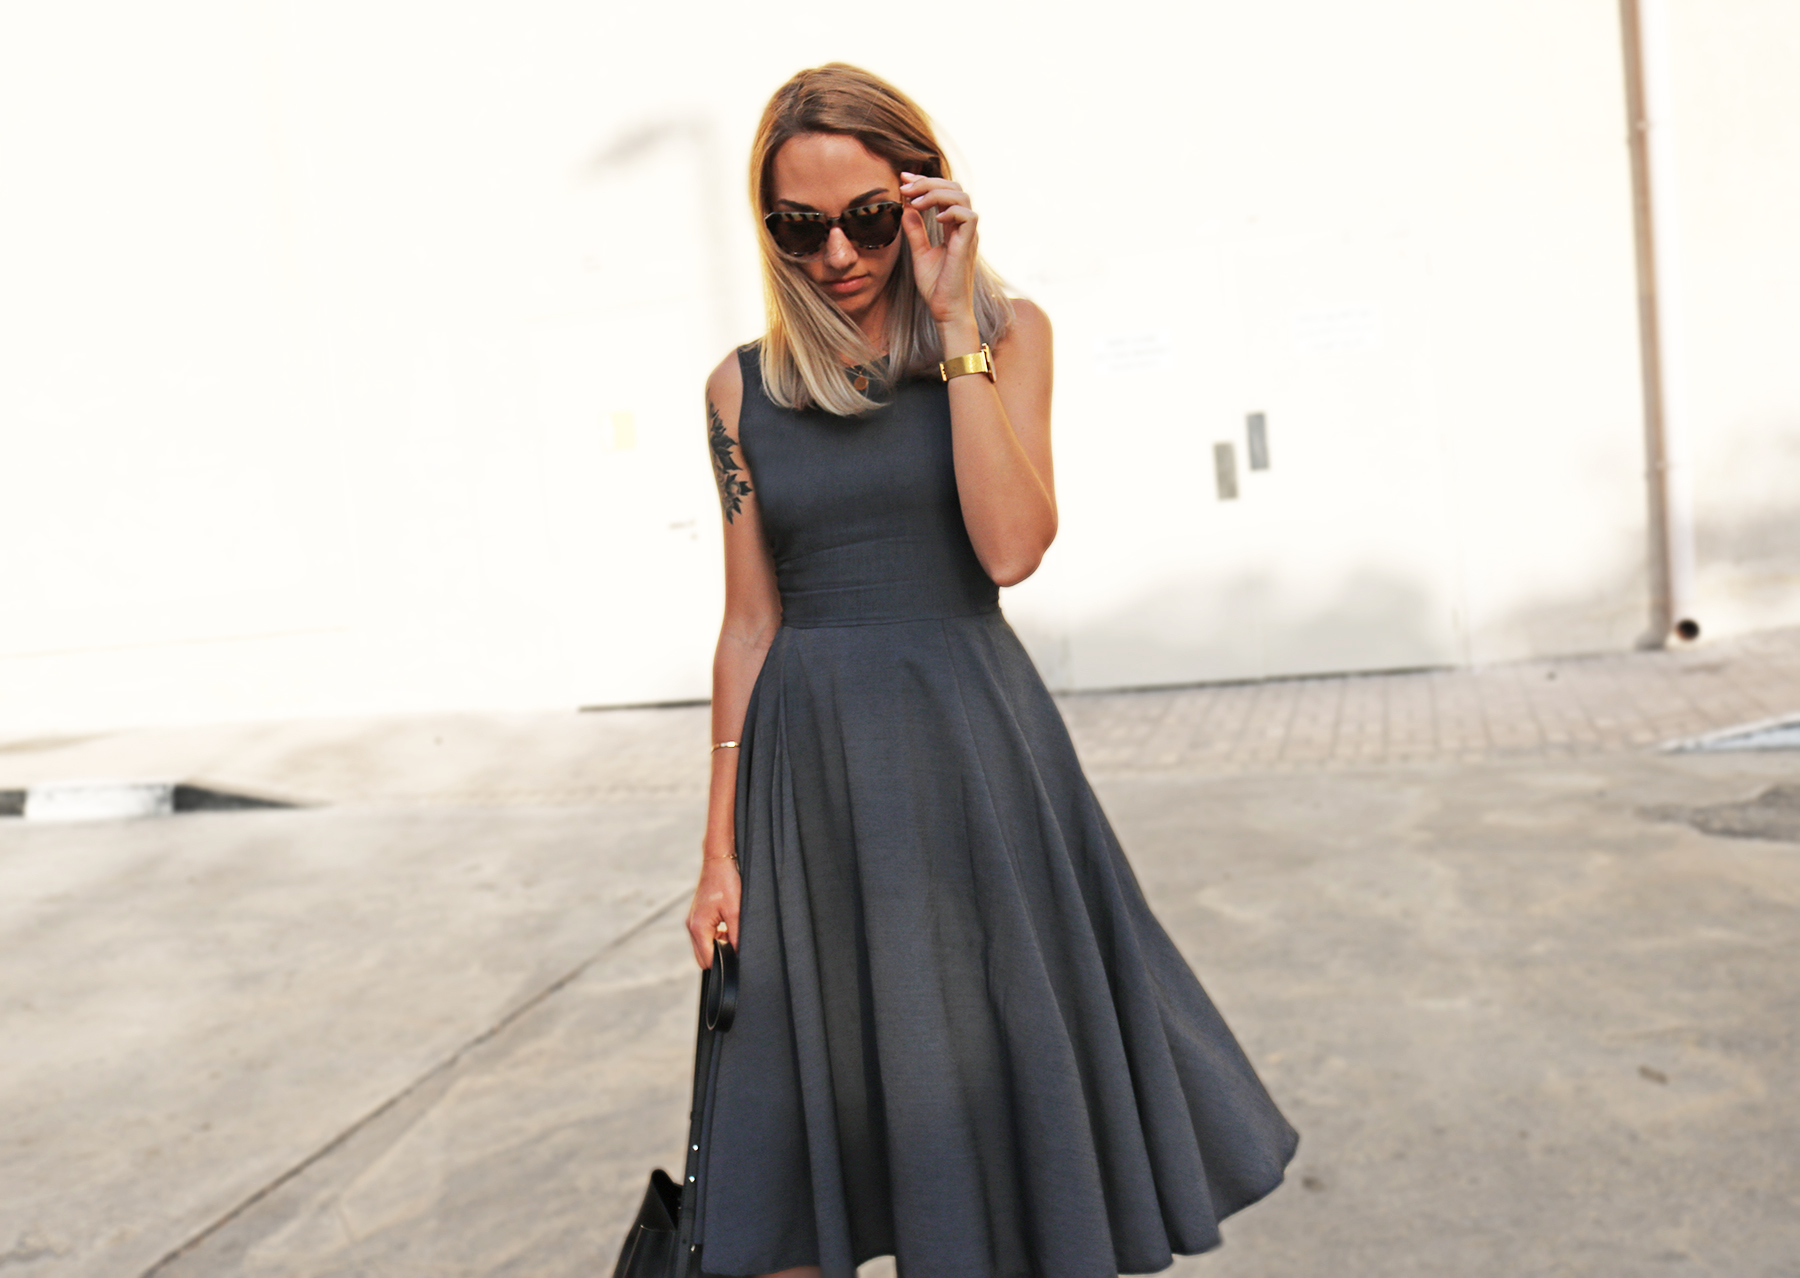
Here's a quick project from last weekend. I swear I wasn't going to do another lace-up detail but it just happened.
Tutorials take a lot of time & effort to create, and I choose to make mine available for free. If you enjoy this guide, you can support me with a donation that feels right for you, here.
TOOLS:

3 m of fabric with moderate stretch (I used Tencel) | Scissors | Fabric marker | Pins | Invisible zipper | Thread & Sewing machine, needle
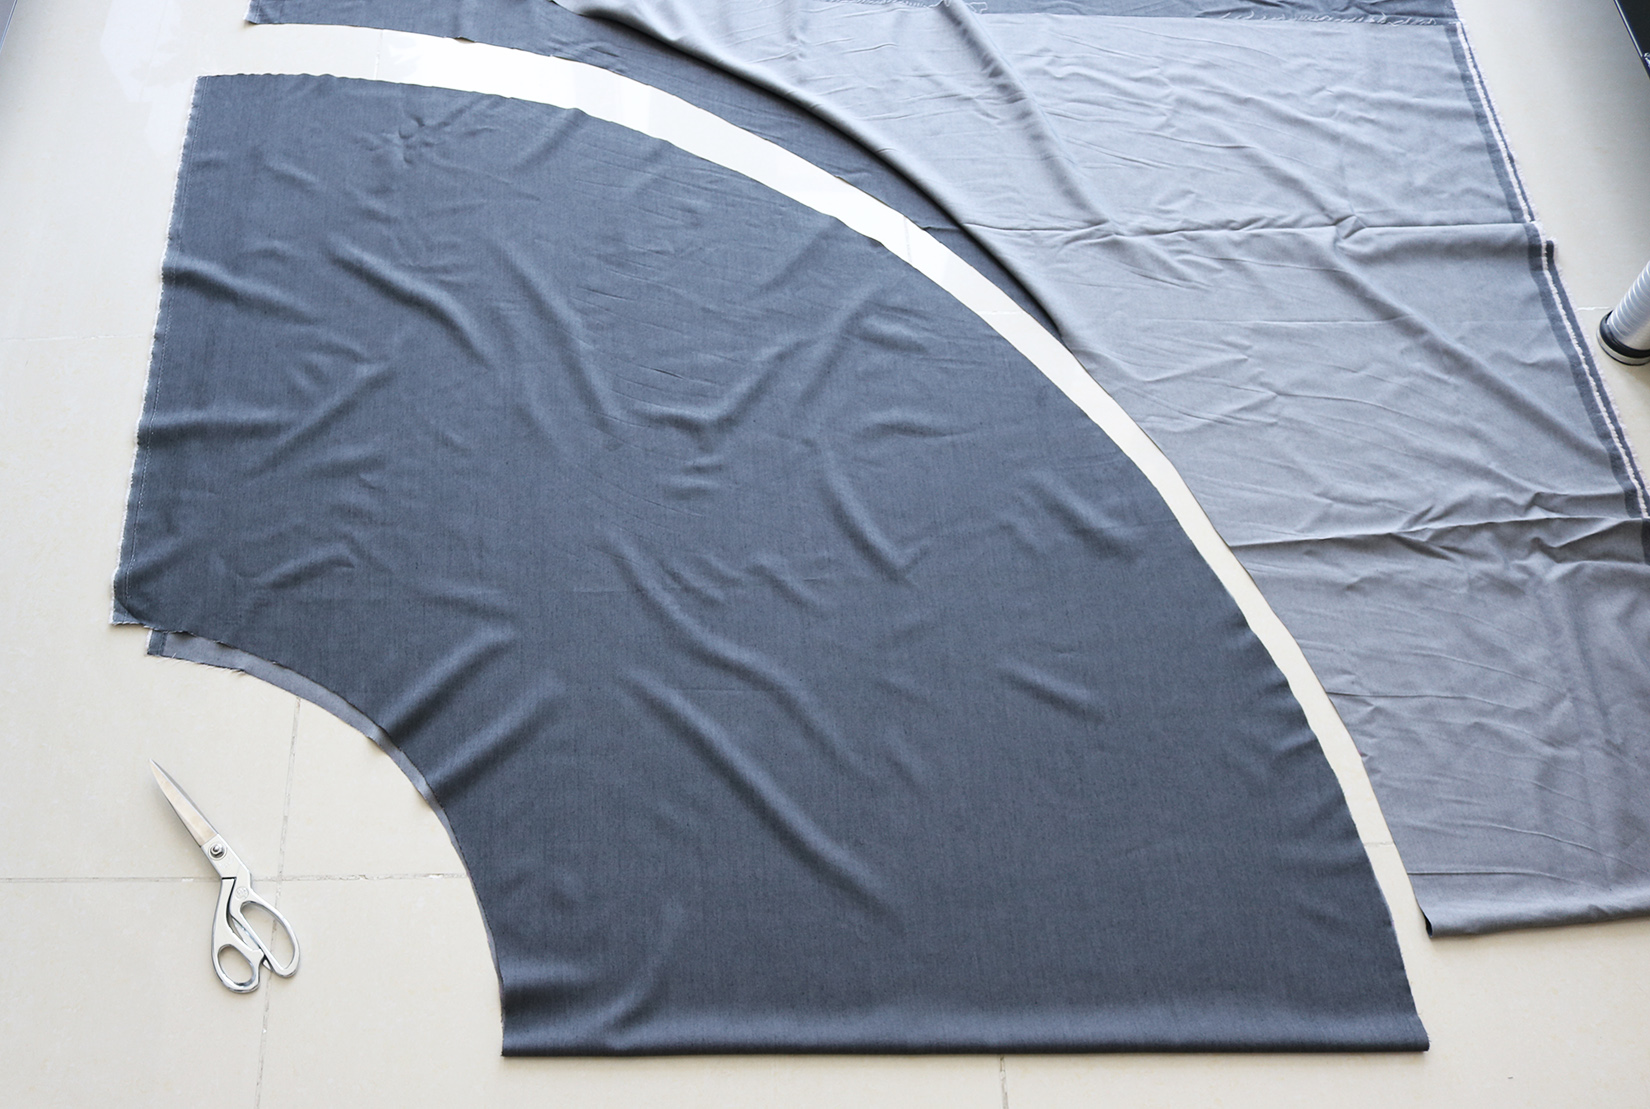
I. First cut out your half-circle (could do full circle as well if you wanted it extra-flowy). To get the radius to draw from the folded corner of fabric, I first calculated how long I wanted my waistline to be so that there would be enough for the pleats. I wanted 4 pleats in the front and 2 in the back. My back pleats were 8 cm each = total 16 cm. For the front, I did 4 x 9 cm pleats = 36 cm. Adding those two totals to my waistline: 16 cm + 36 cm + 70 cm = 122 cm. Plugging that into the good old circle skirt app, I got a waist radius of 38 cm. My skirt length was 75 cm.
II. I first pinned the pleats in place:
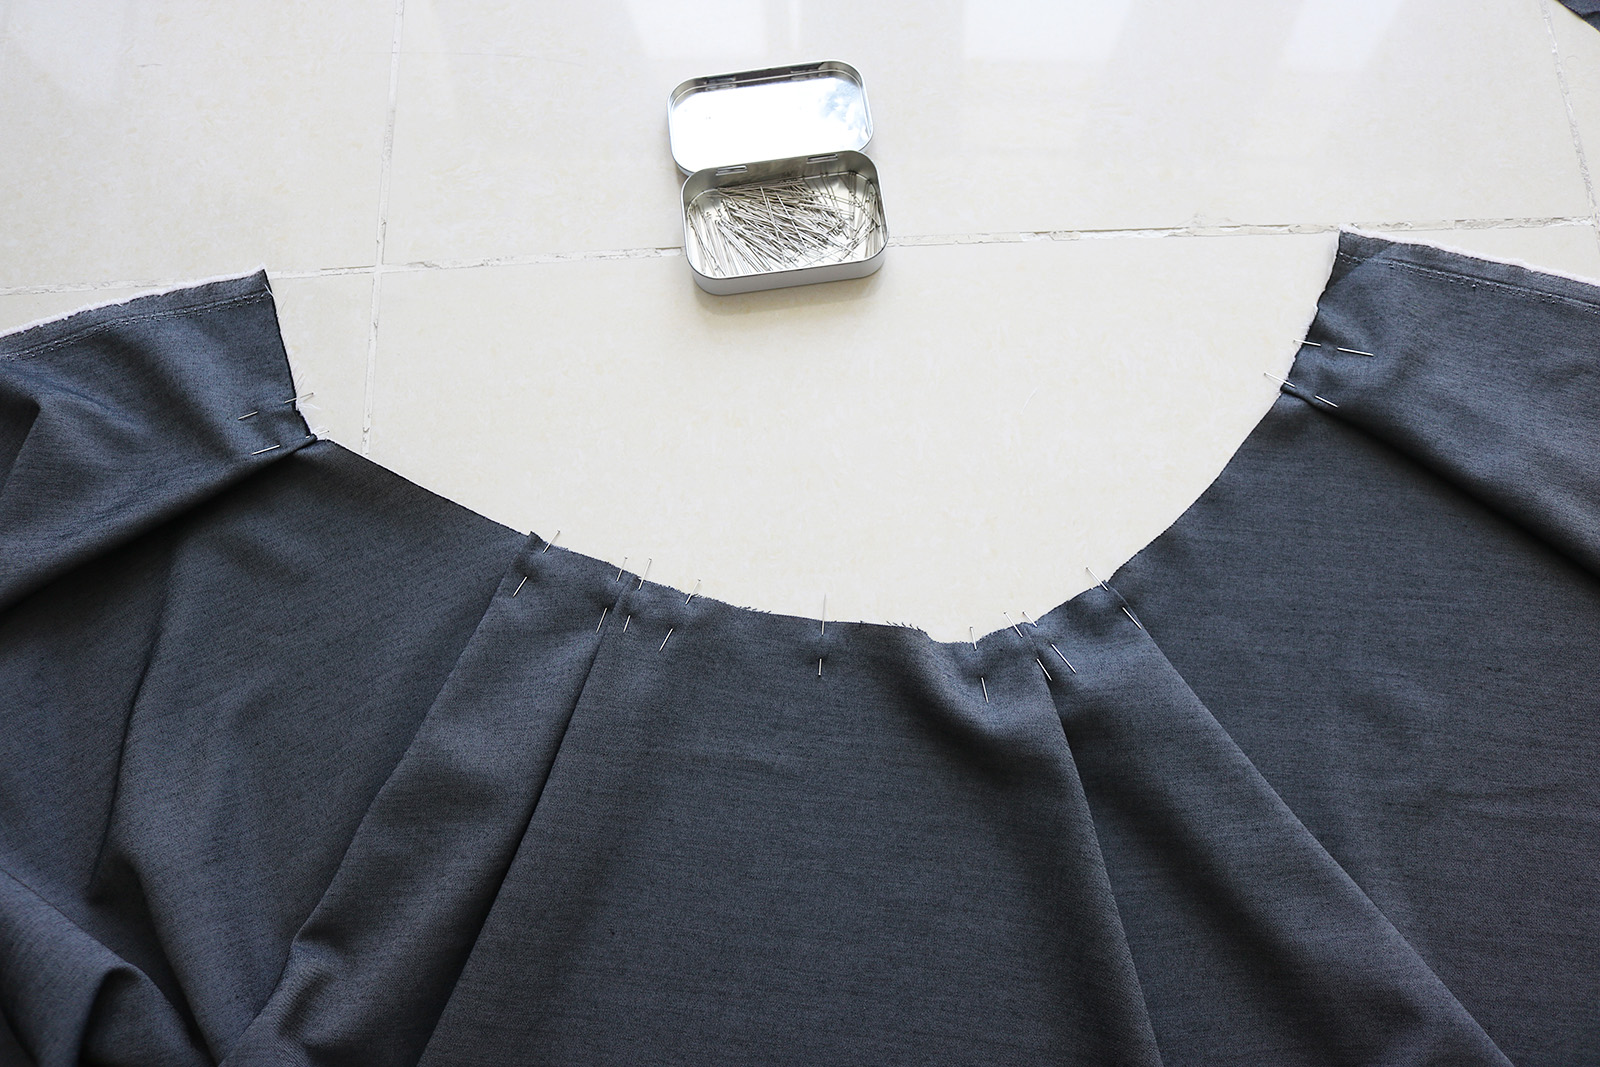
.. And zig-zagged the edge, securing the pleats in place at the same time.

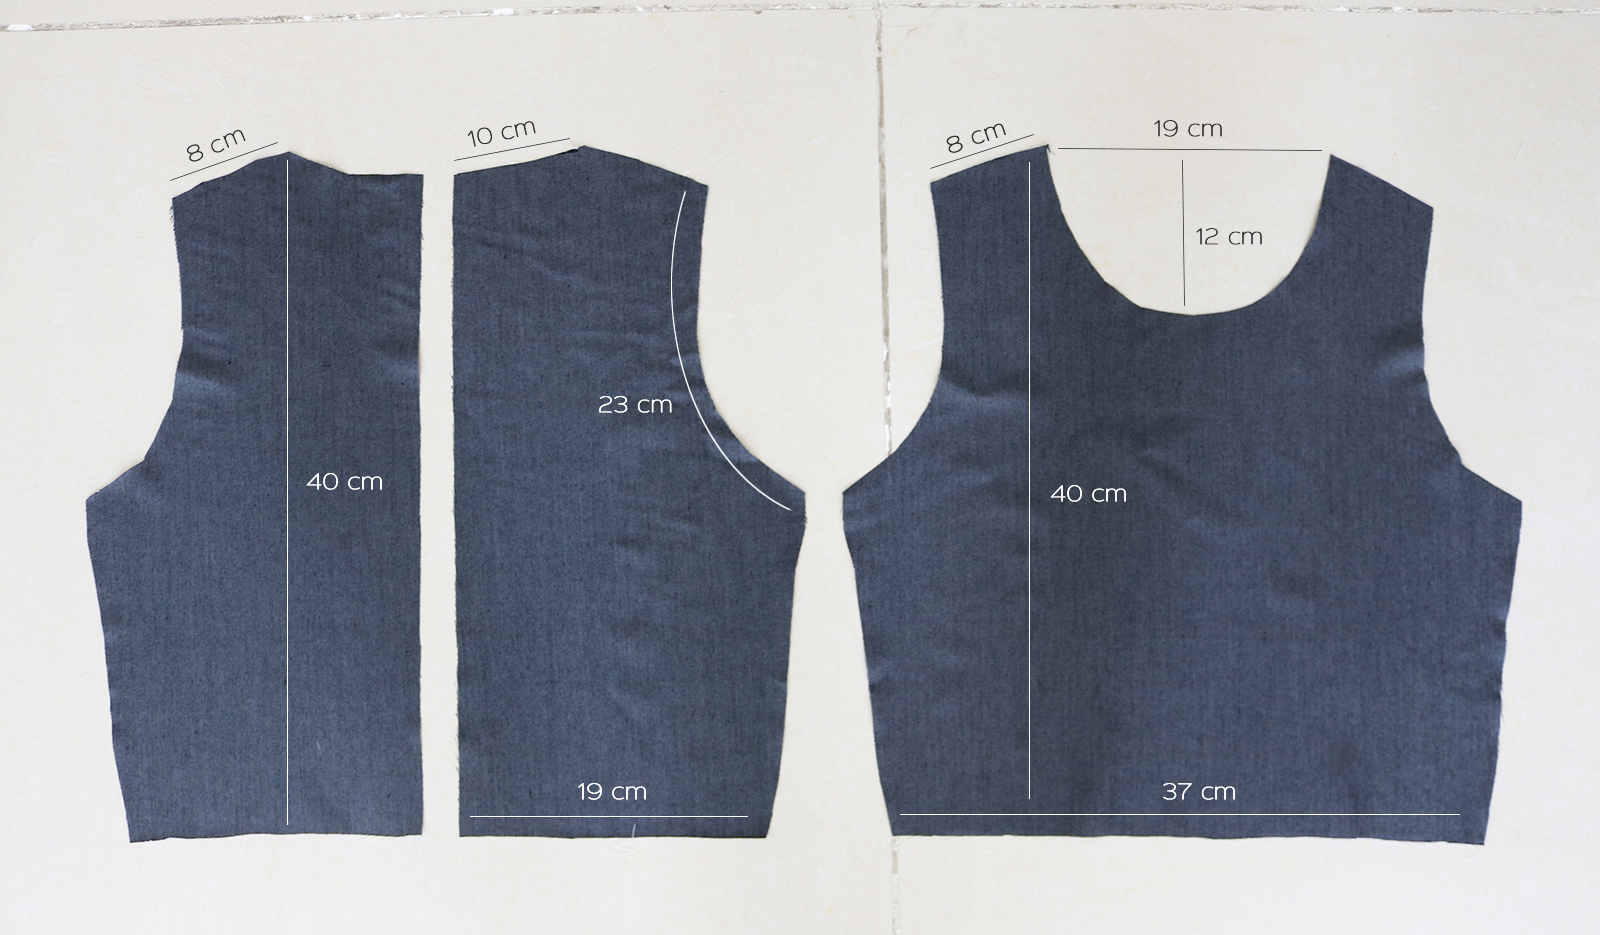
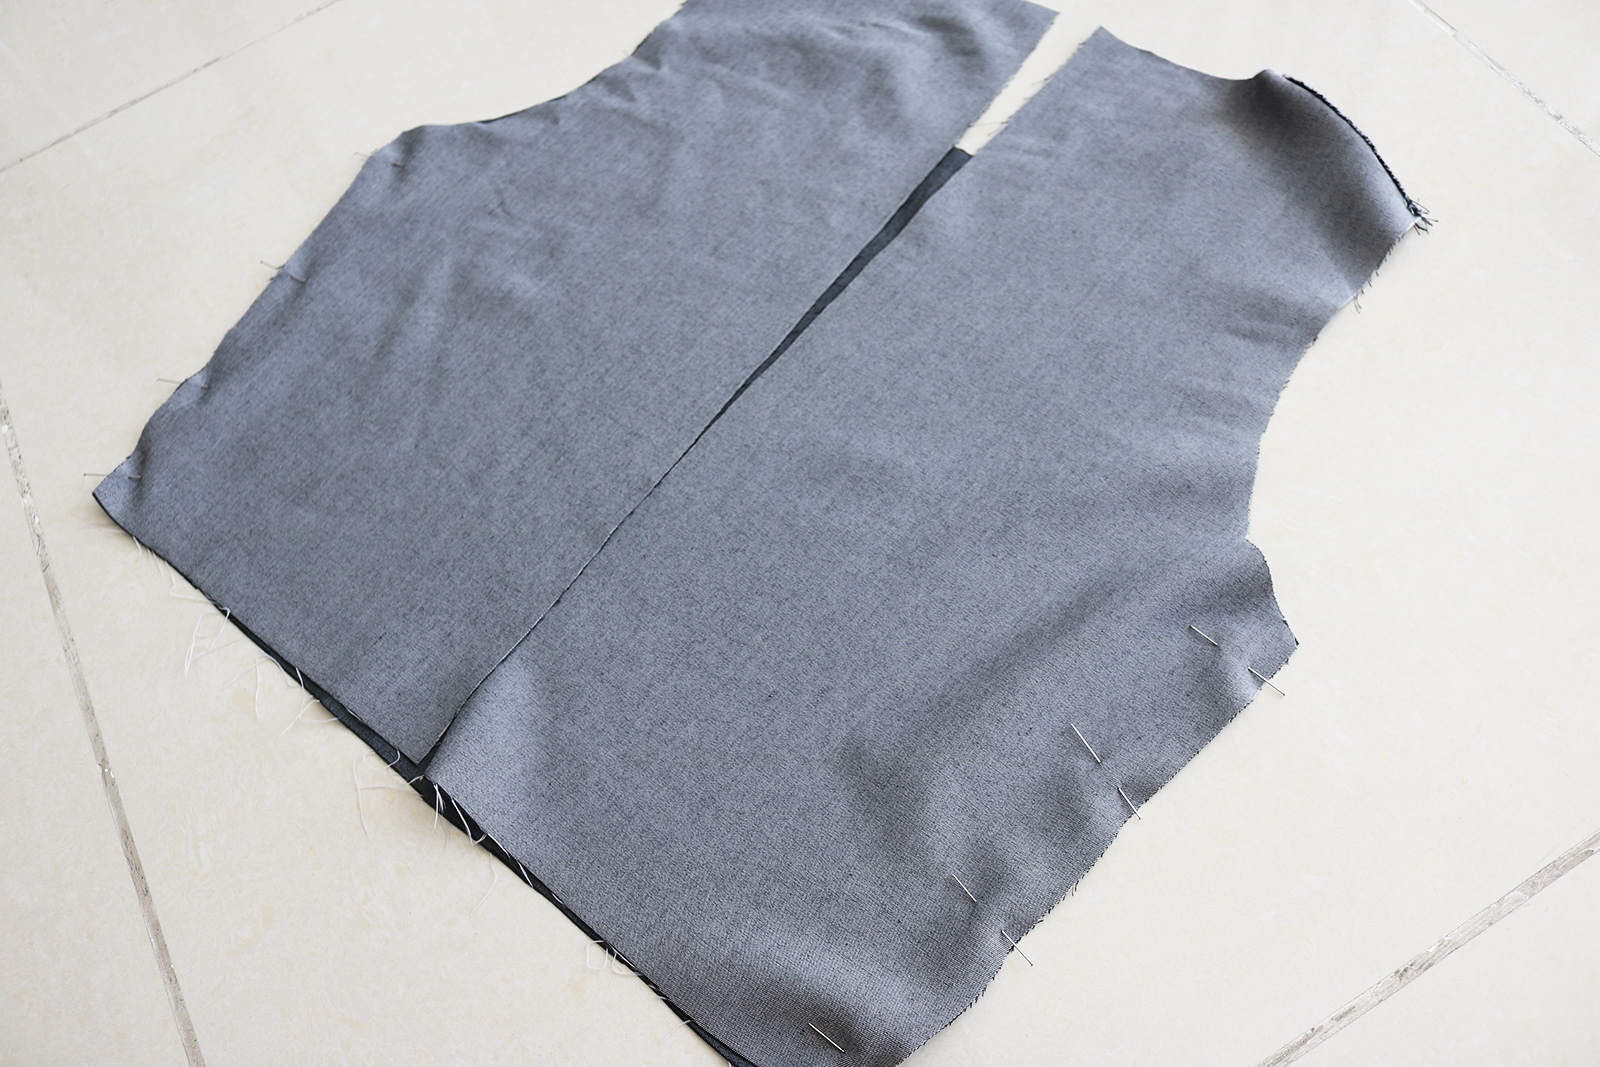
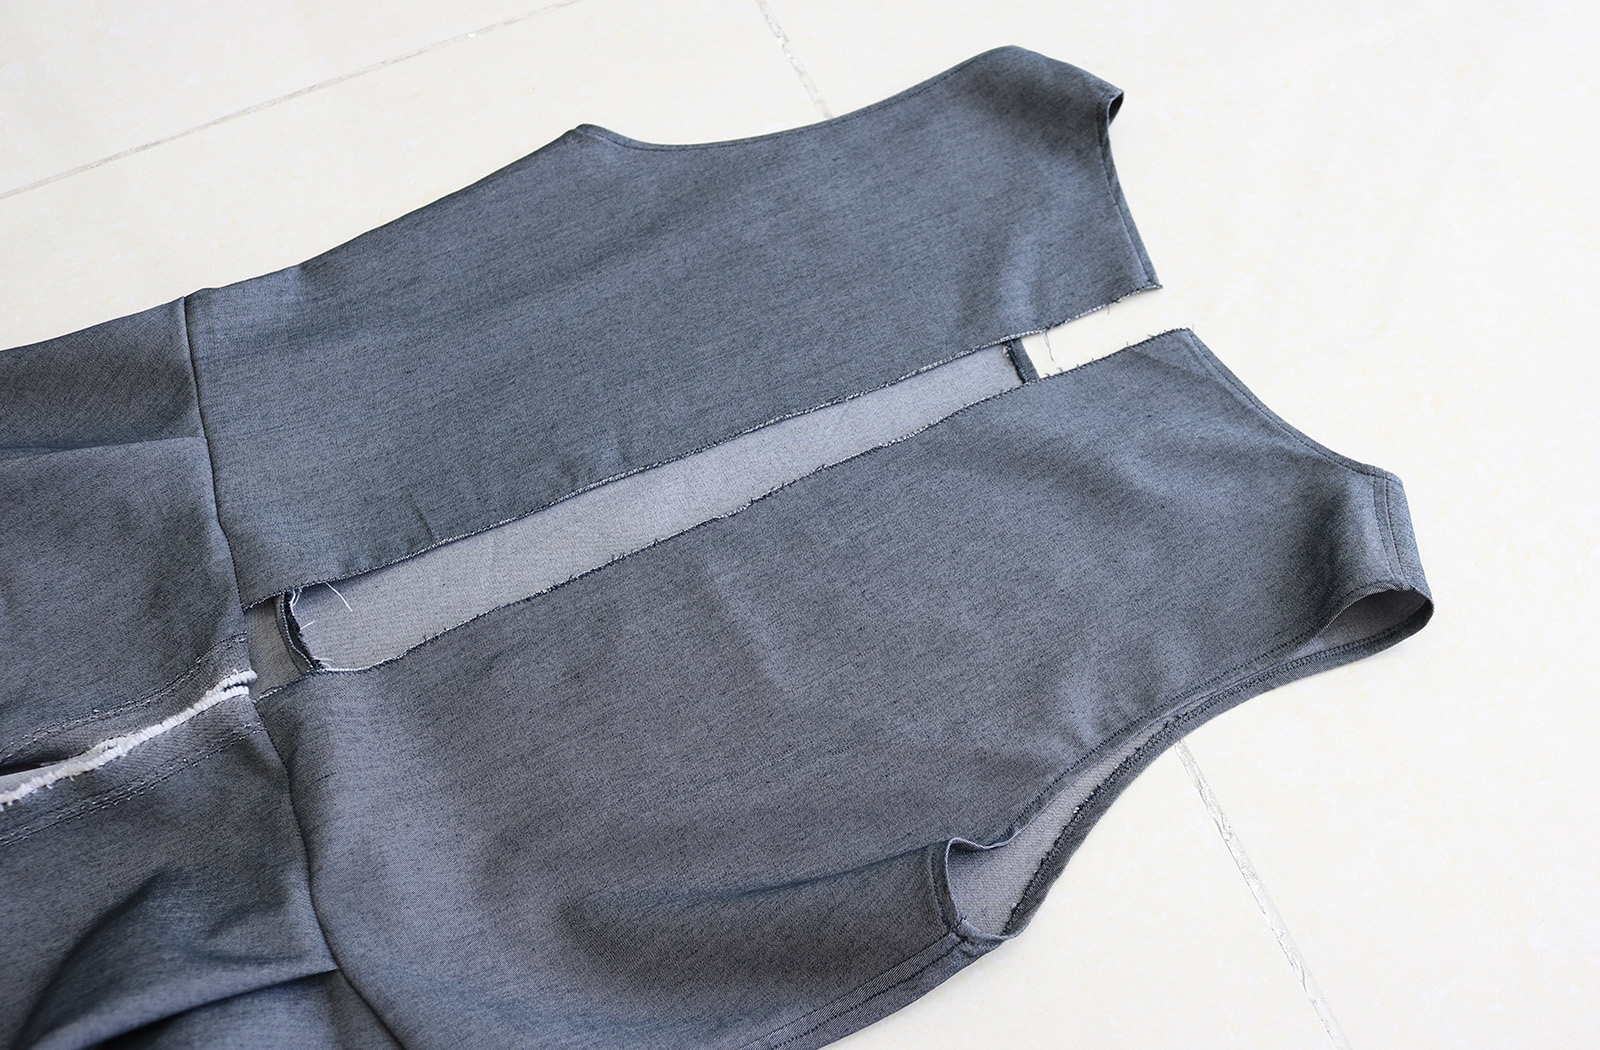
III. Then I cut the top pieces out. Tencel is so amazing in terms of its stretch - just enough not to need darts if you're doing a snug fit. Critical to make sure the stretch runs horizontally. For someone bustier than me, darts would definitely be in order. The key measurement is the waistline of the top - front and back waistline together should equal the waistline of the skirt, plus seam allowances.
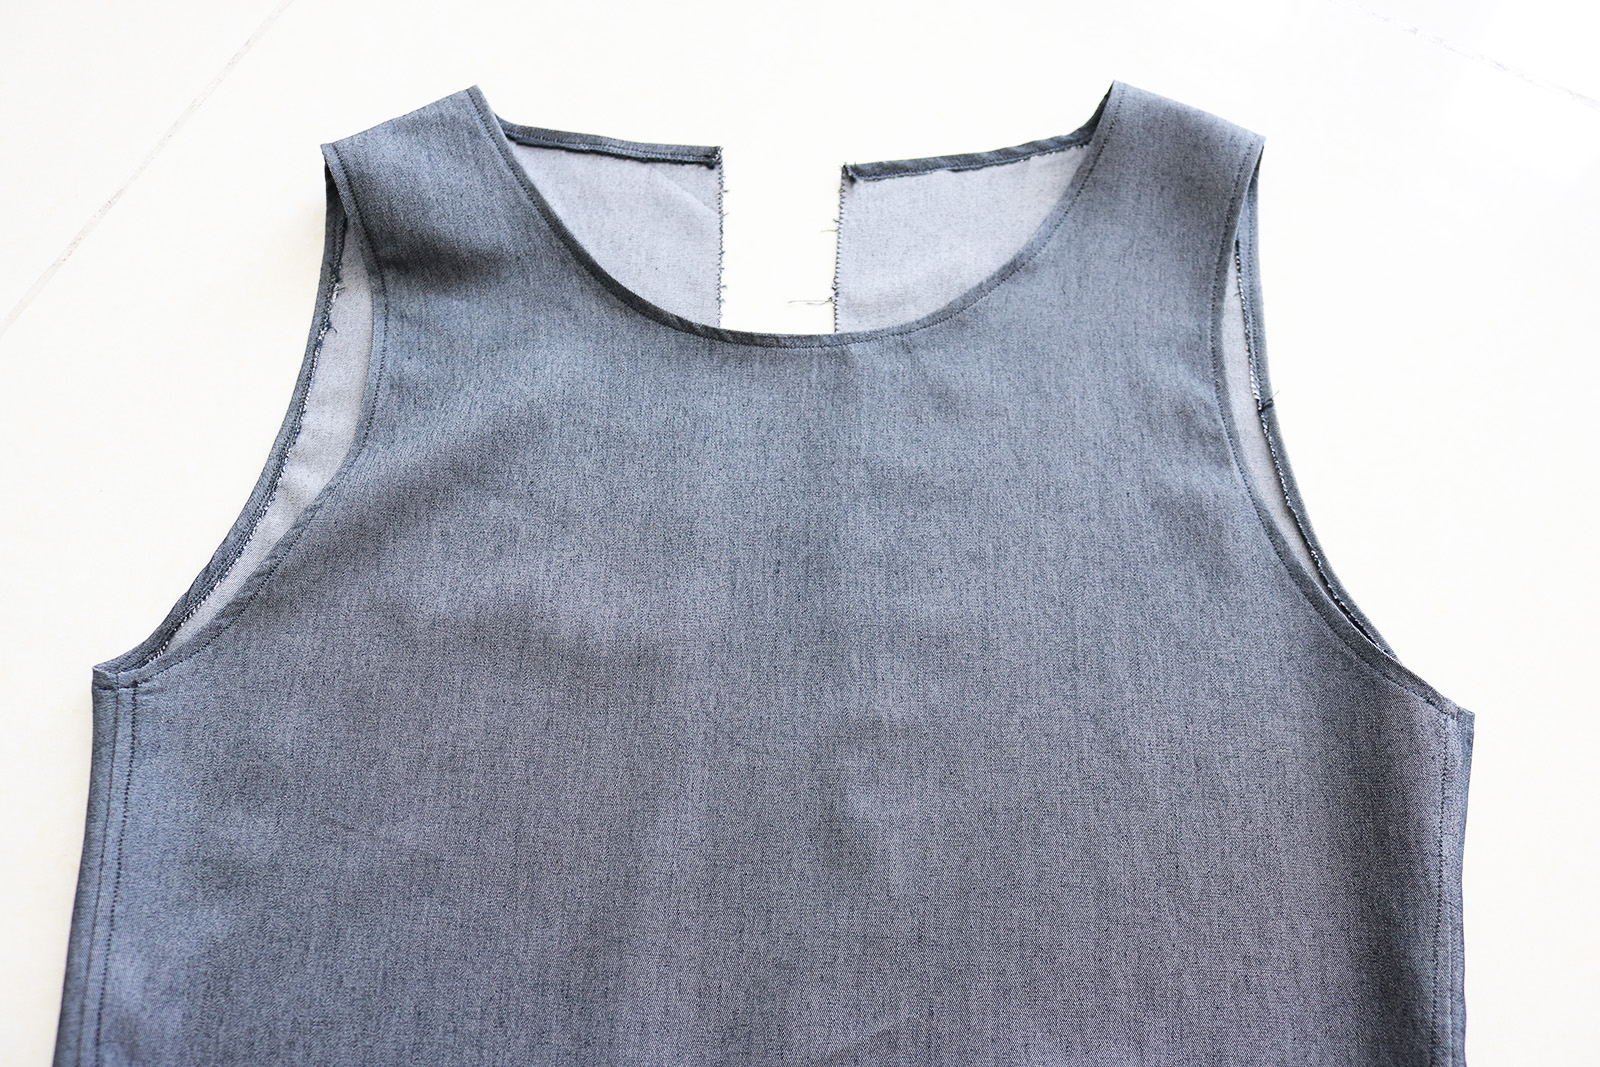
To construct the top I pinned and sewed the shoulder seams together..
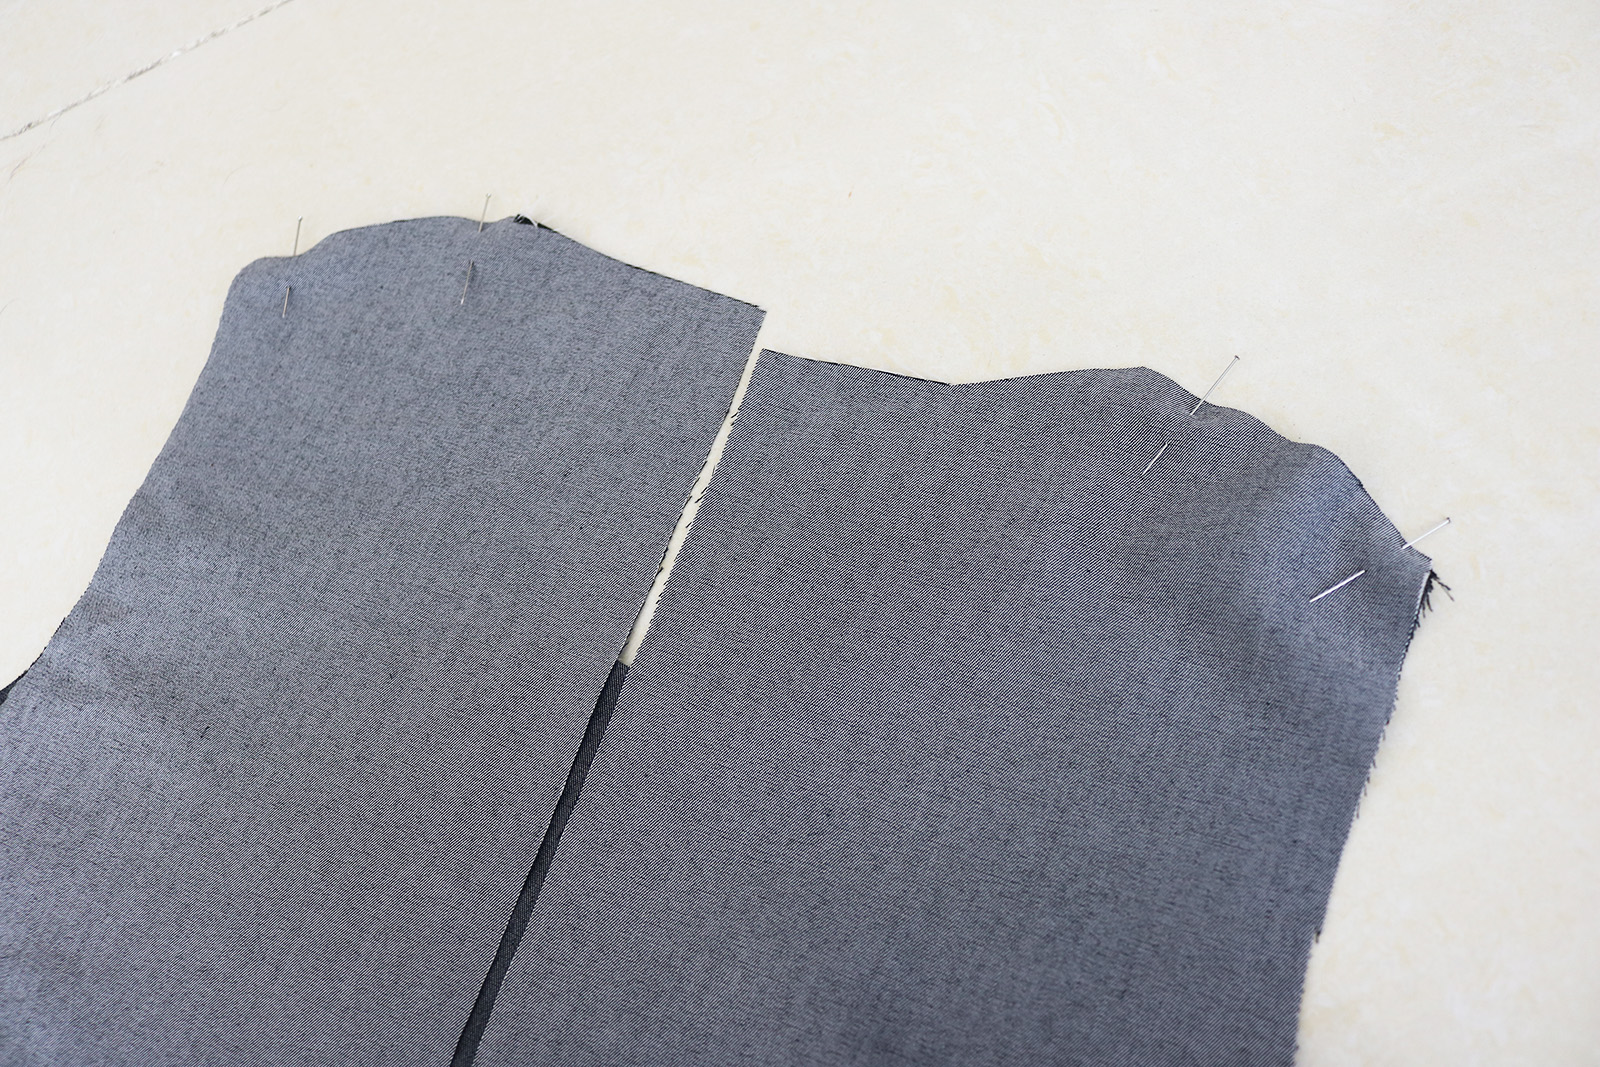
.. Then did the same for the side seams:
.. And finally zig-zagged the arm holes and the neckline, and finished those with a simple fold and a straight stitch. Yes, I could've spent some more time and done nicely finished seams... But I'd been unsuccessfully shopping for a dress for an event the day after, and I desperately needed this to be ready at lightning speed.
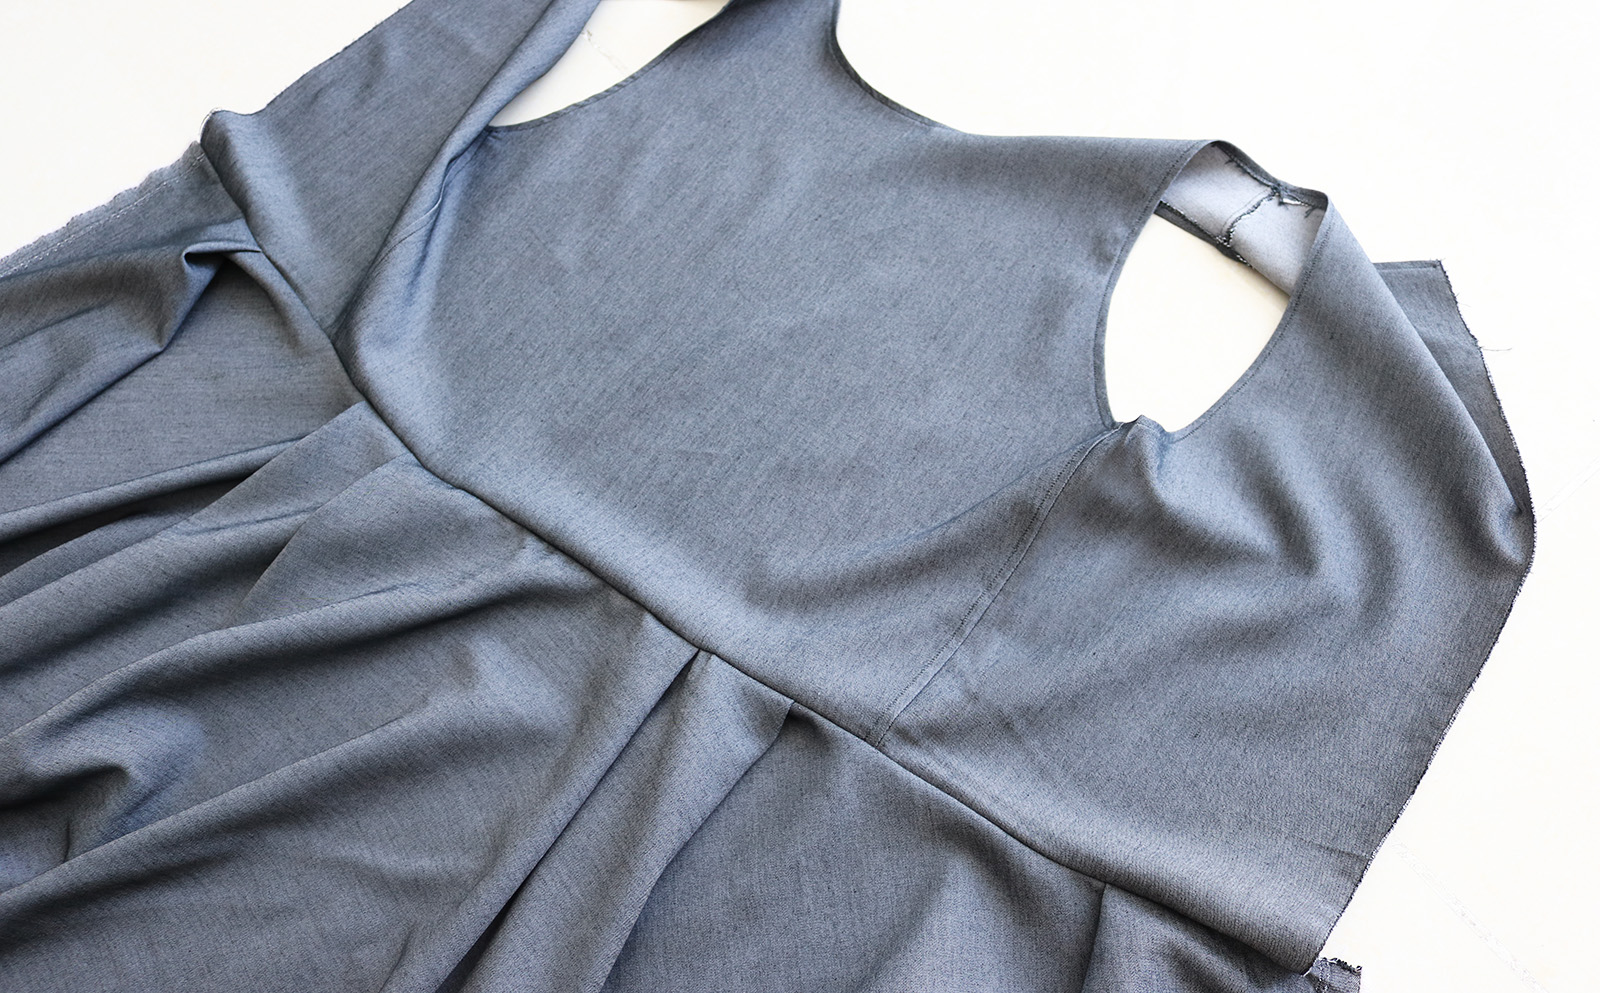
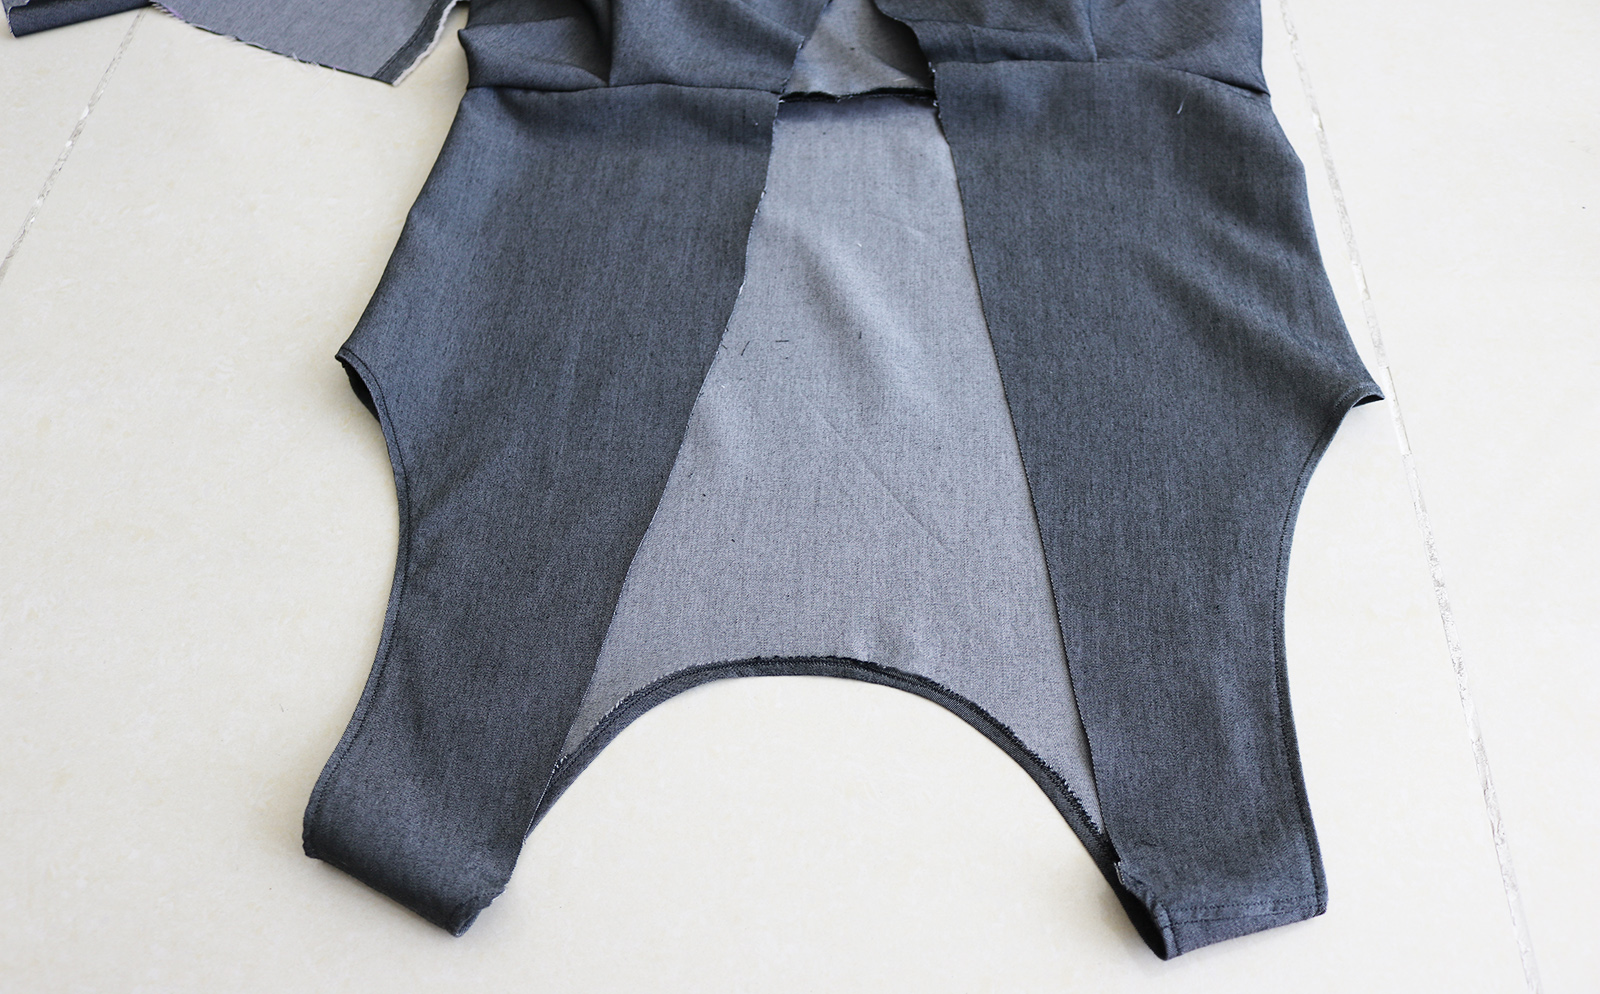
IV. To attach the top to the skirt, I just pinned the pieces together right sides facing.
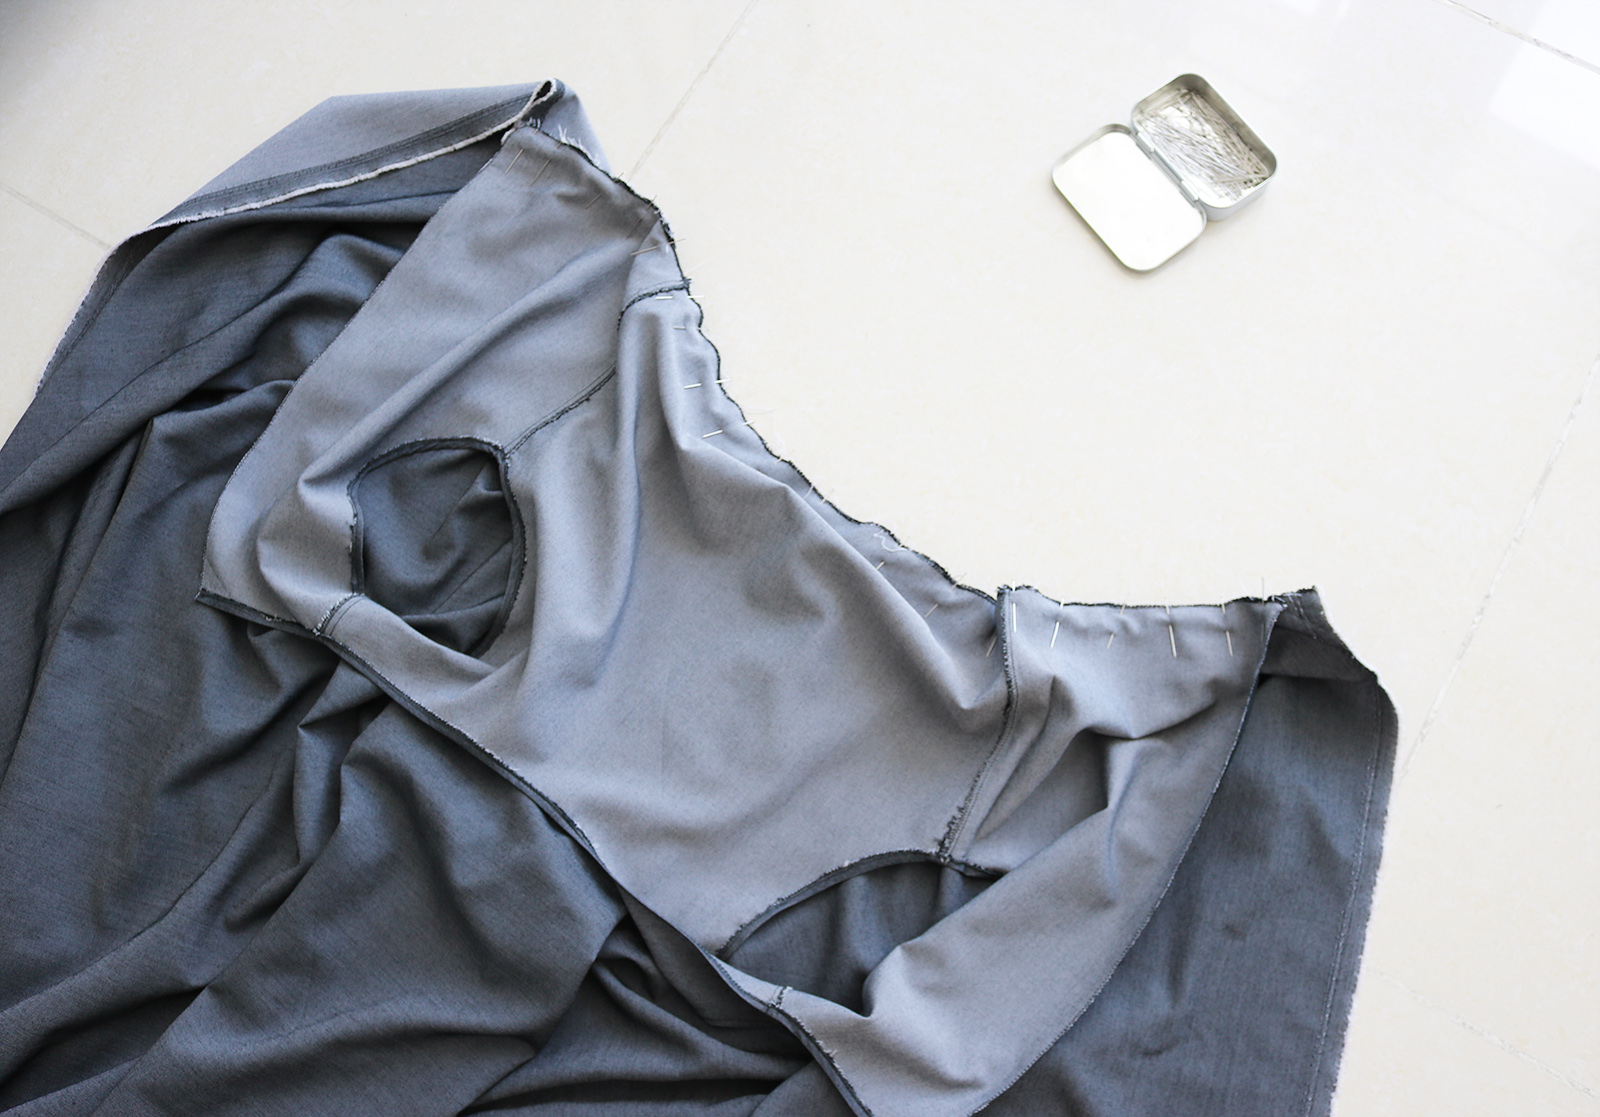
Here's what I had after sewing the top and skirt together.
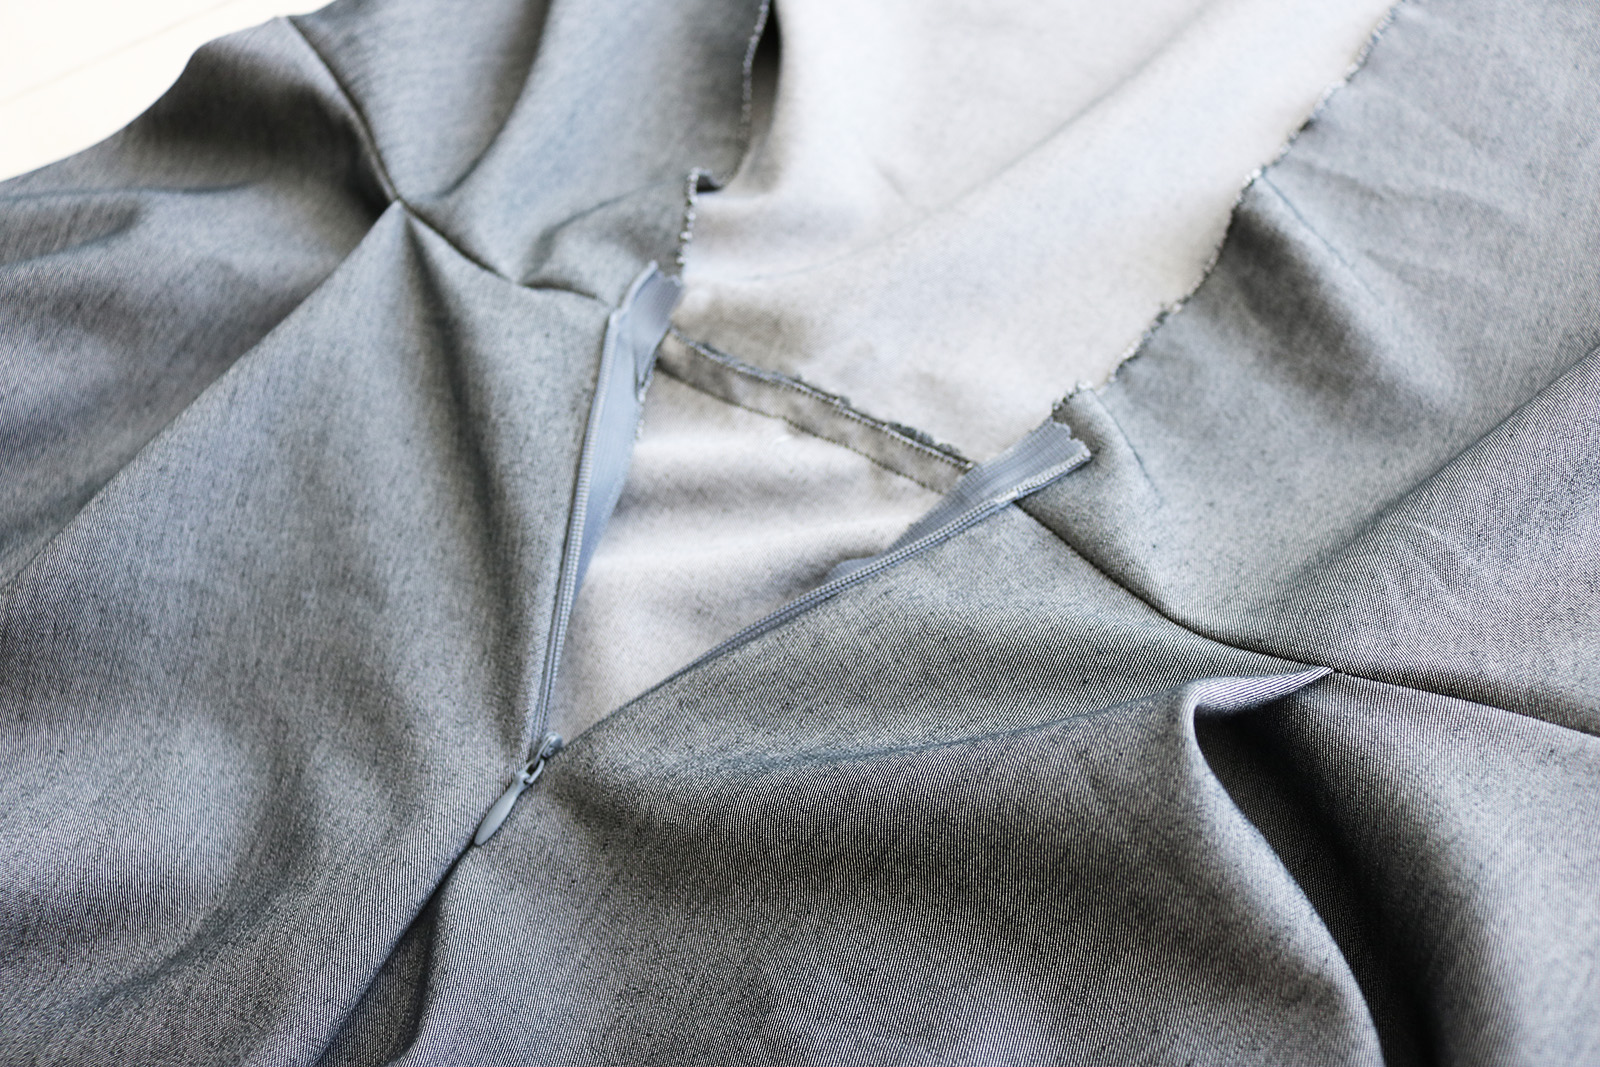
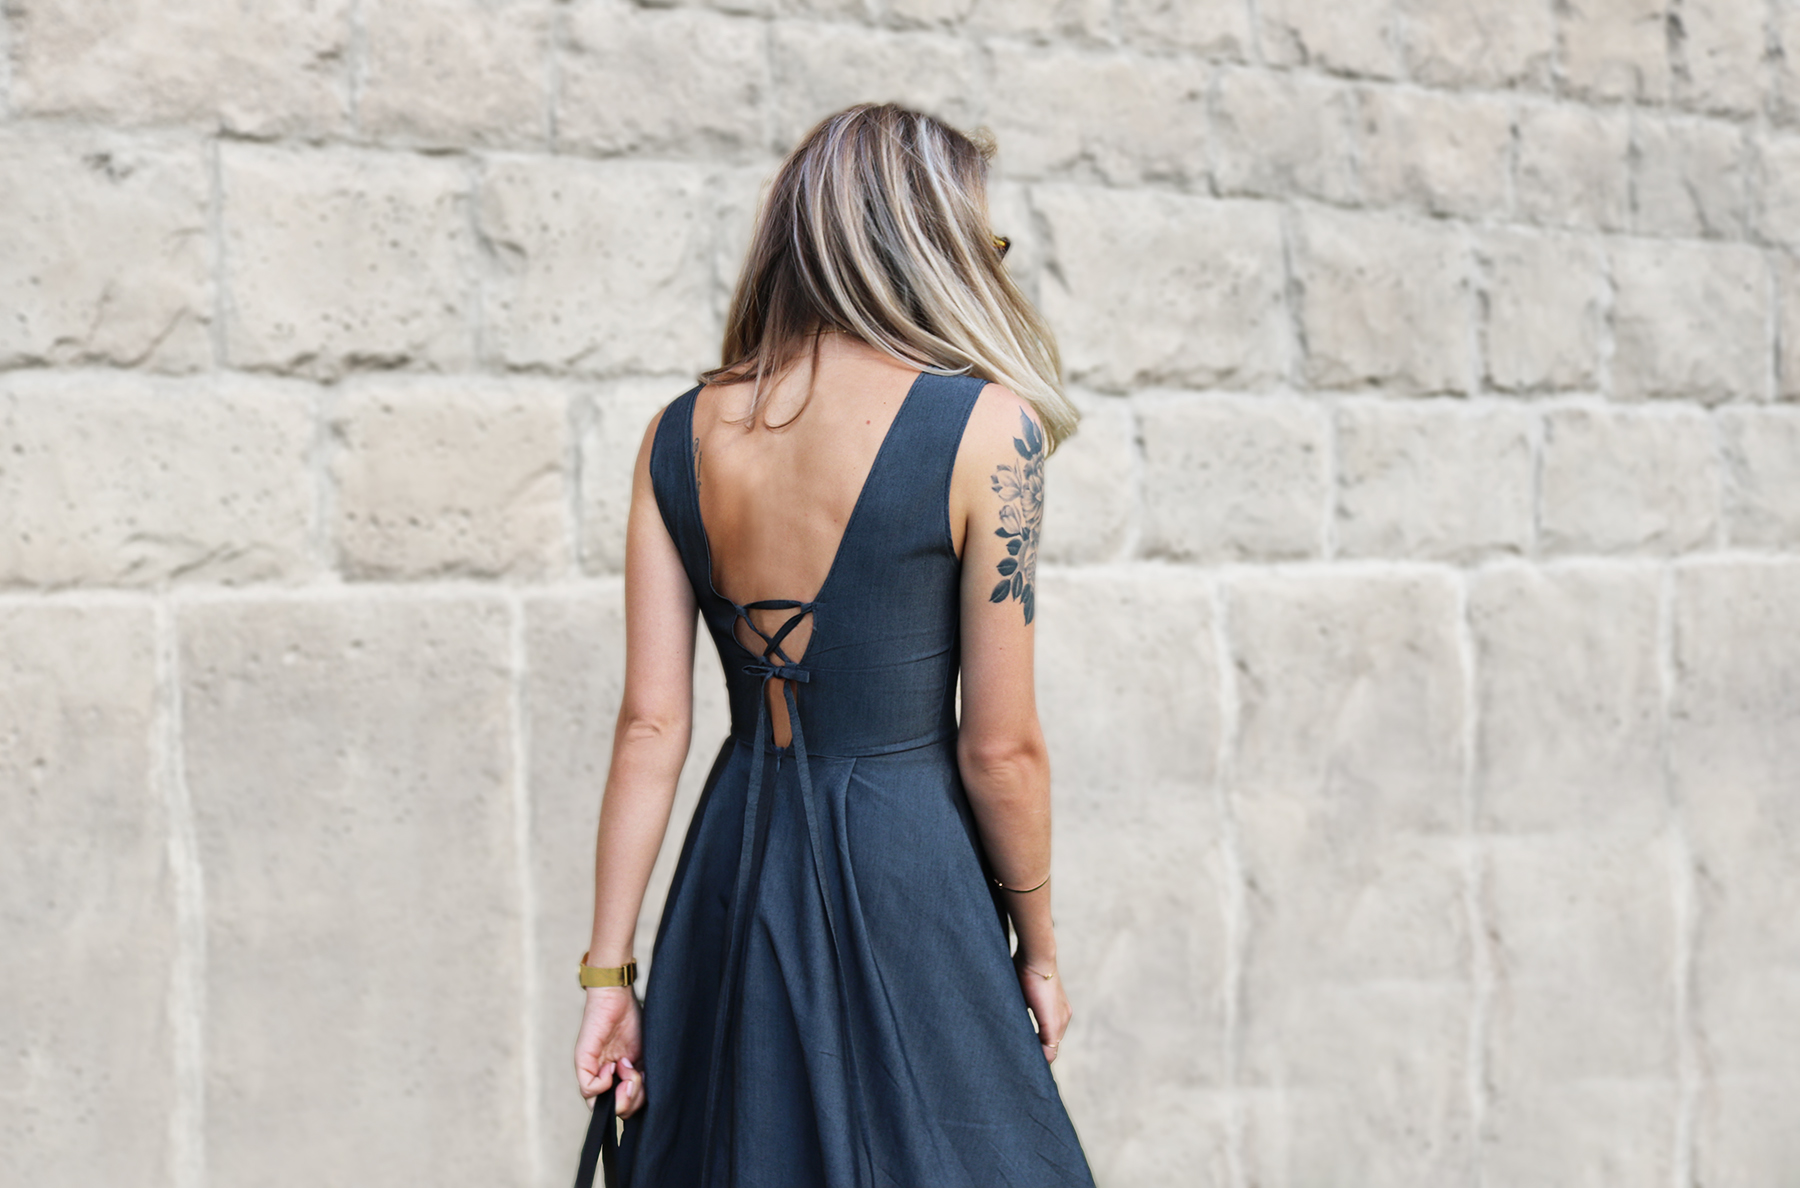
V. Until this point I wasn't sure what I wanted to do with the back. My initial plan was to make this a very work-appropriate dress and just zip it up all the way. But the prospect of making something boring started giving me anxiety.
So I decided to take out the scissors and cut a deep V in the back instead!
VI. Then I added an invisible zipper from the waist down, hand-sewed the zipper ends down to finish, and completed the back seam of the skirt down from the zipper.
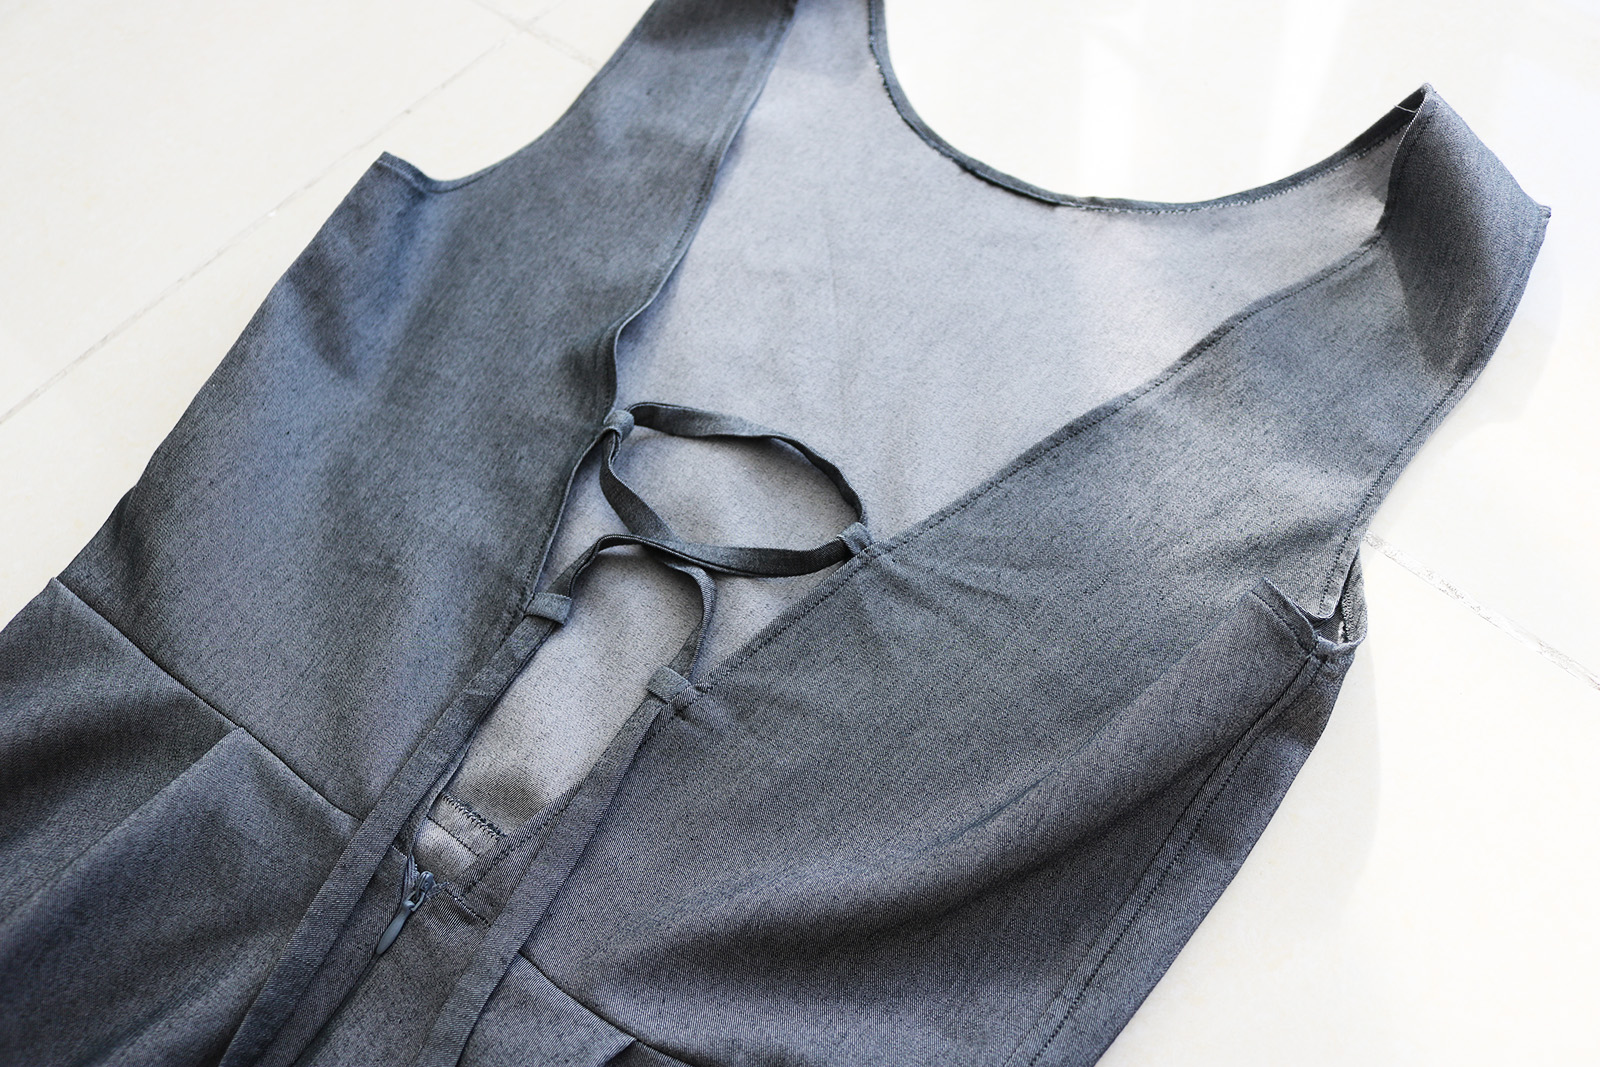
VII. The sides of the low back I finished the same way as I did the arm holes and the neckline. The last step was to make some ribbon from the same fabric (made a total of about 2 m), clip four short 3-cm pieces of it, hand-sew them on either side of the back V to create the loops, and slip through the ribbon.
Lastly I just hemmed the dress. Love!
 xo,
xo,Julia


So sooo gorgeous as usual love
ReplyDeleteIt looks great on you ^^
ReplyDeleteLove this! With a cardigan or cropped blazer it would totally still be work appropriate :)
ReplyDeleteGirrrrrl! You are so seriously talented. How do you whip these things up? Amazing, as always.
ReplyDeleteyou are SO good. Love it.
ReplyDeleteKaarina