

TOOLS:


Thick cotton or other blanket-y fabric, piece the size you prefer | Thick cotton thread (I used the super basic kind made for dying), about 45m | Regular sewing thread (I used the threads that frayed from the edges of my fabric when I cut it) | Fray-stop or clear nail polish | Needle with large eye
I. I made a blanket sized 120 cm x 150 cm. First I cut out a rectangular piece based on those measurements + seam allowances, and finished the long edges with a double fold. The short edges already had a finished edge, which I left as it was. For each short edge, I planned my tassels about 15 cm apart, which meant I needed 9 tassels per short edge. 18 tassels in total.
II. I then created little fabric balls to help construct my tassels. I used the same fabric I made the blanket out of (I had a lot). I ripped 3-cm wide shreds out of the fabric, and cut them into 50-cm long pieces..

.. which I wrapped into little balls like this, tucking the end of the fabric in to keep the form. 1 ball per tassel.
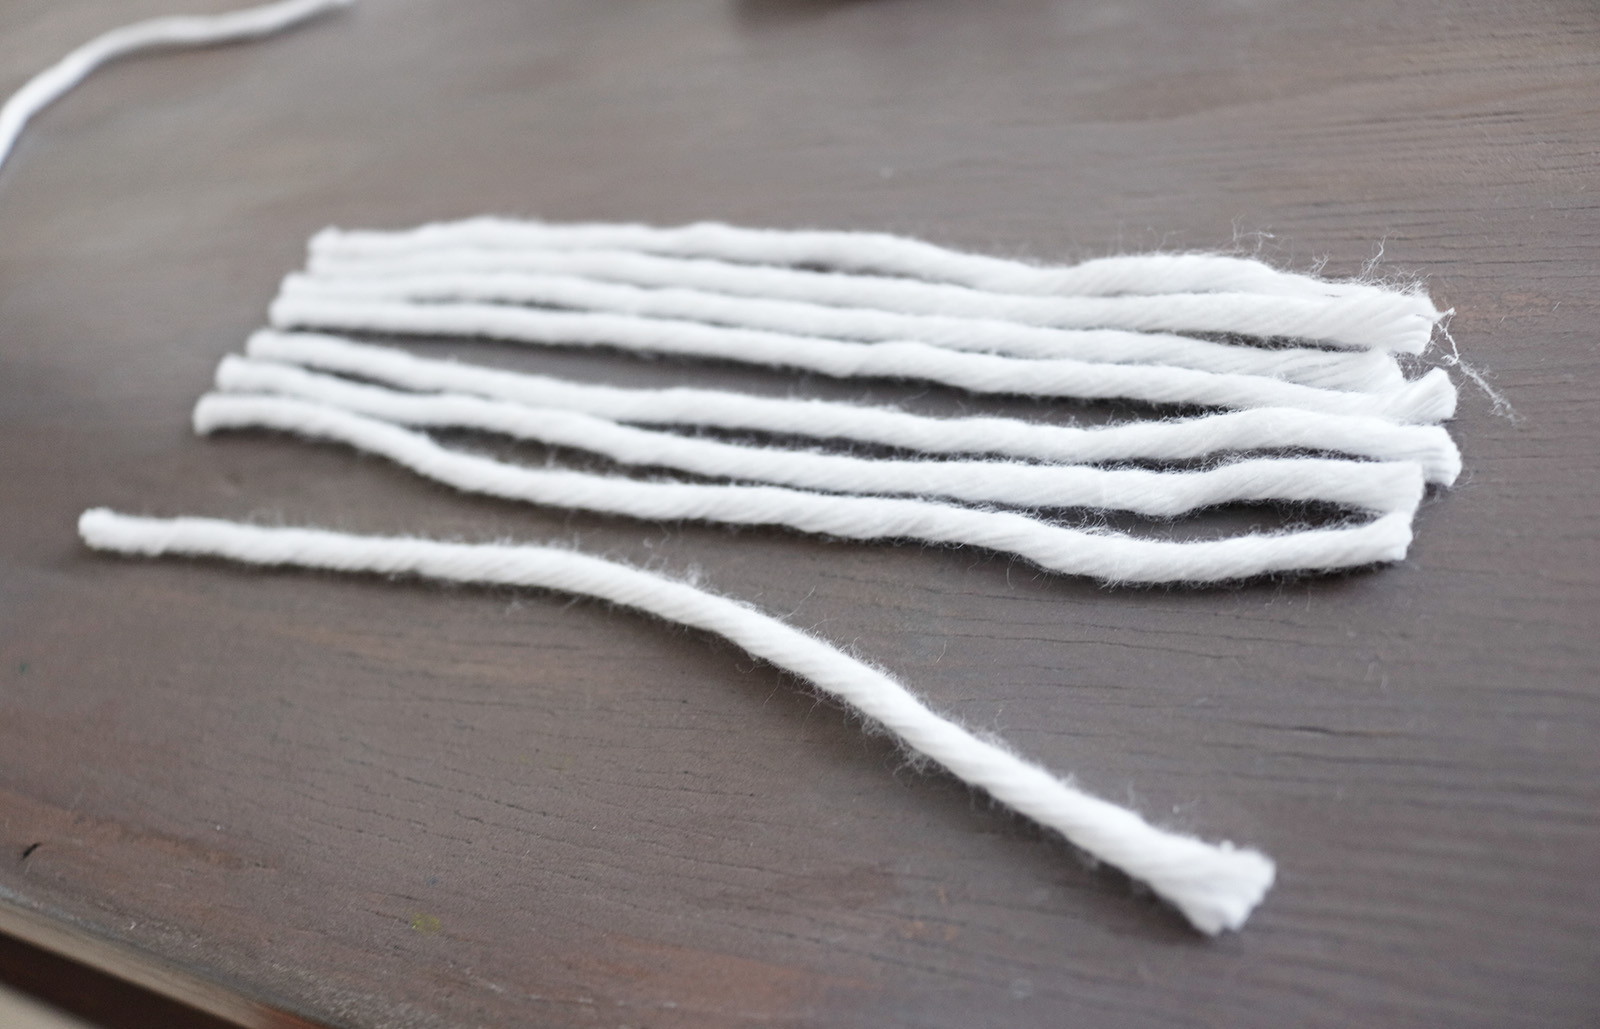
III. Next I cut 20-cm long pieces of the thick cotton thread, 12 for each tassel.
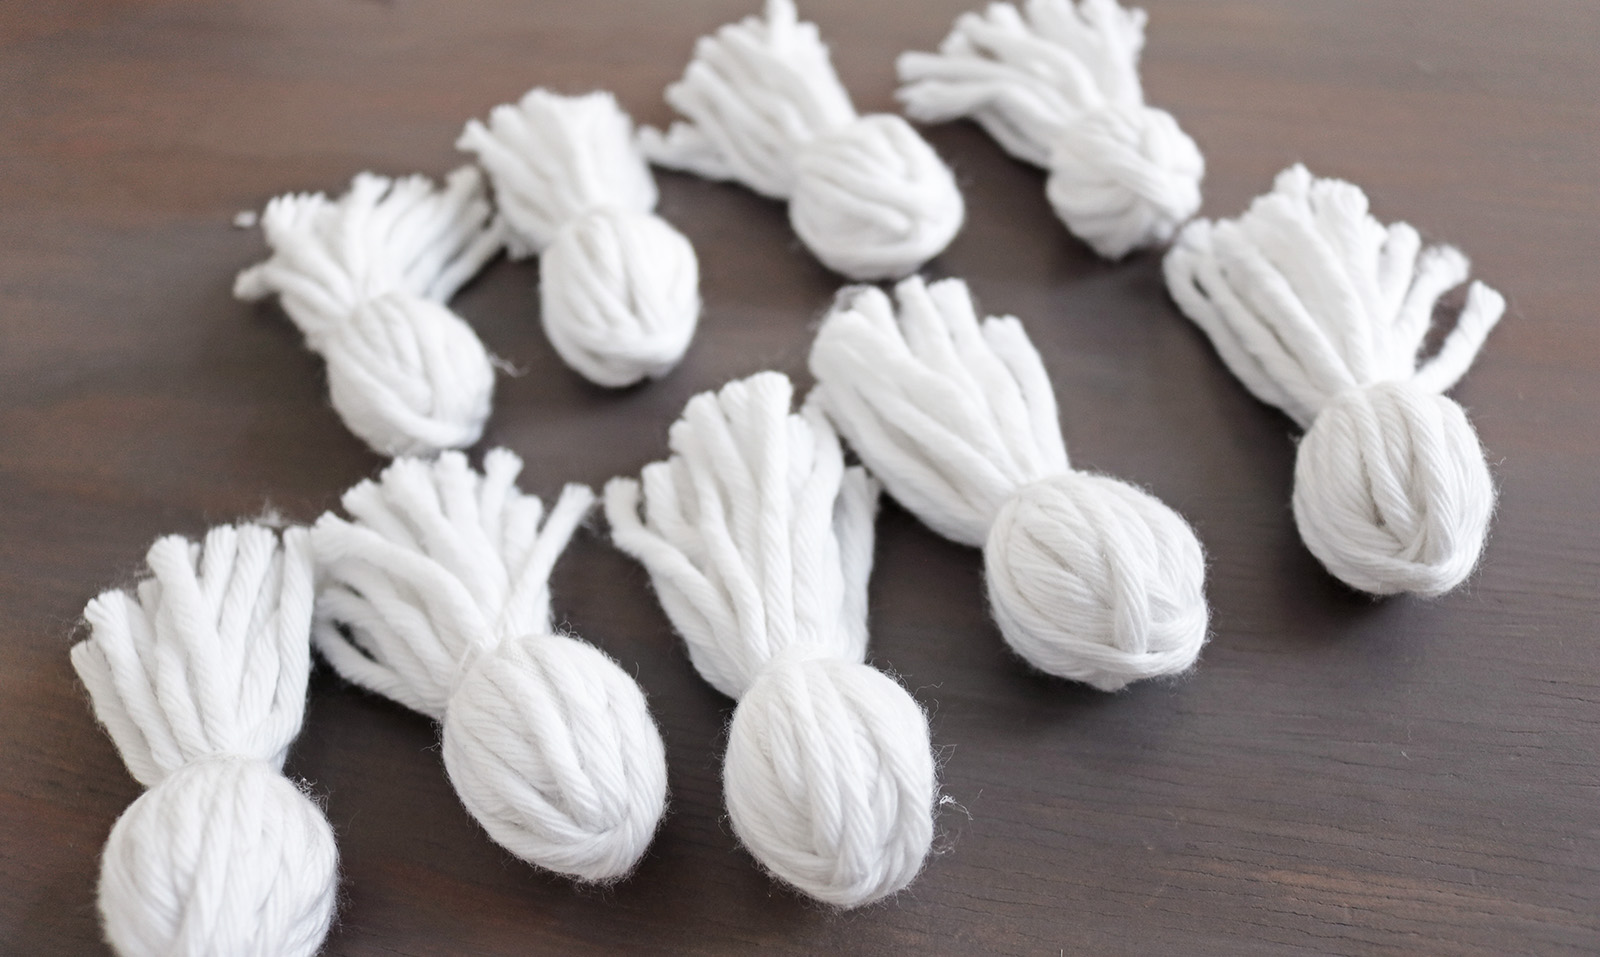
IV. One by one, I wrapped the threads around a fabric ball, with the center of the piece of thread placed at the top of the ball.
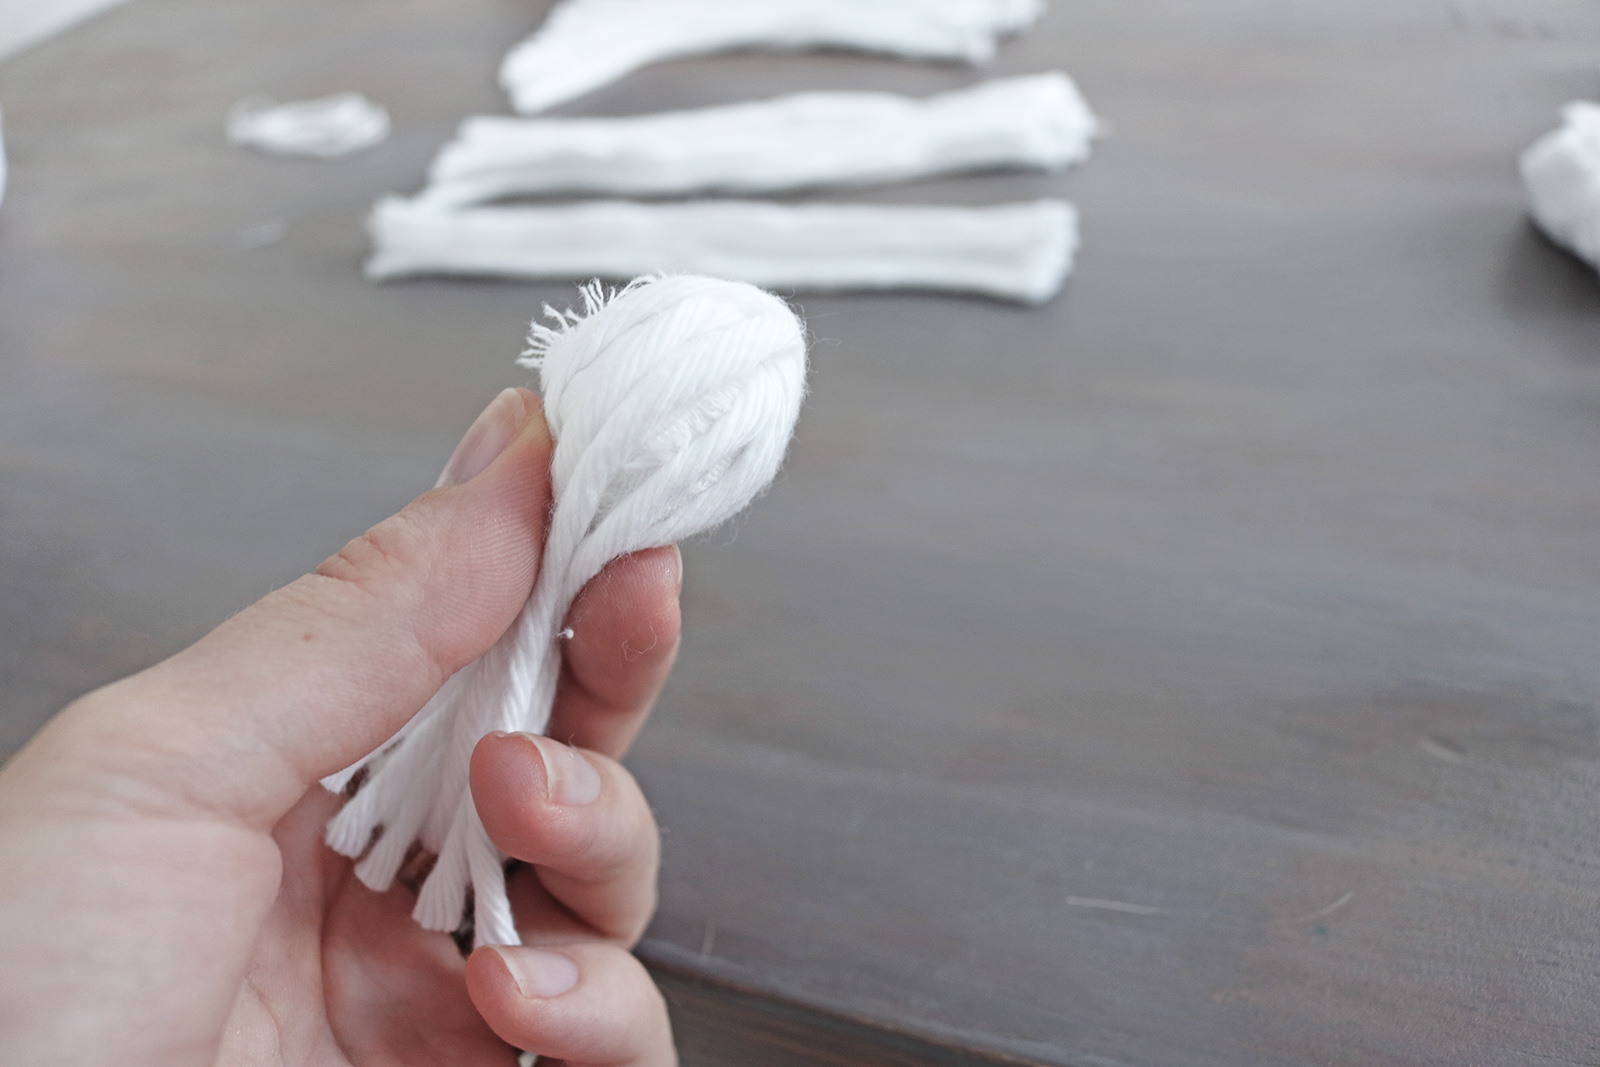
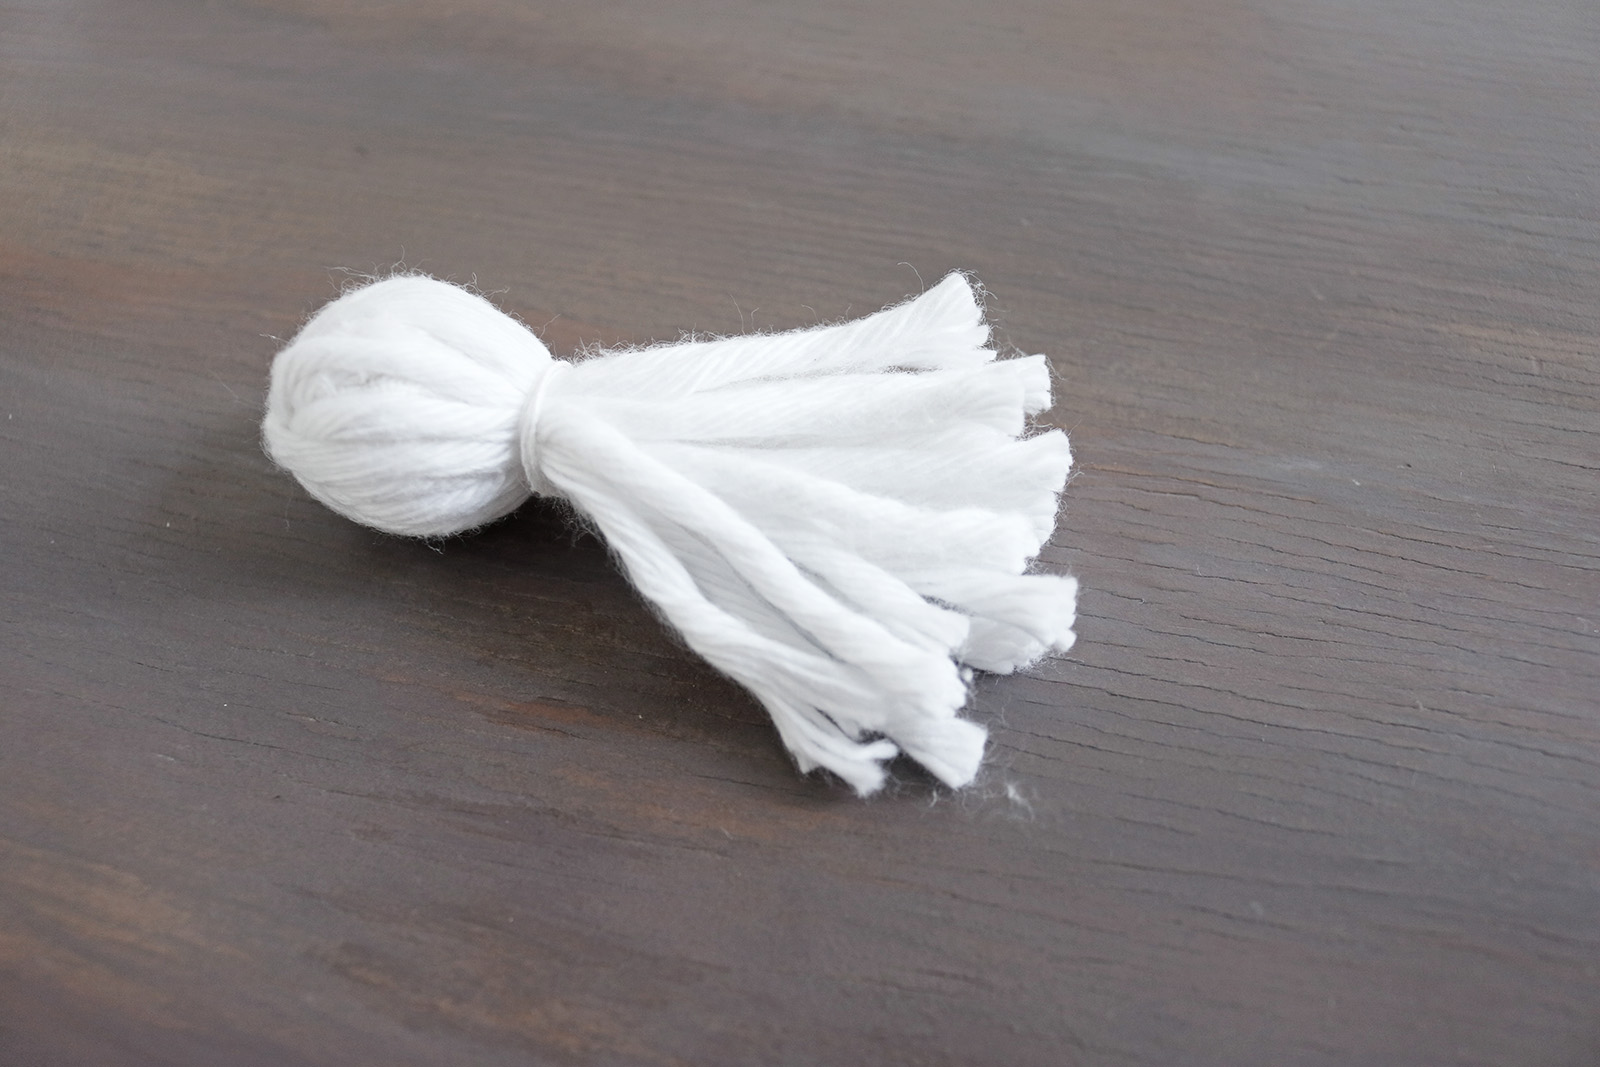
.. Once I had added all the threads to cover up the ball, I secured the whole thing by tying it up with the regular thread:
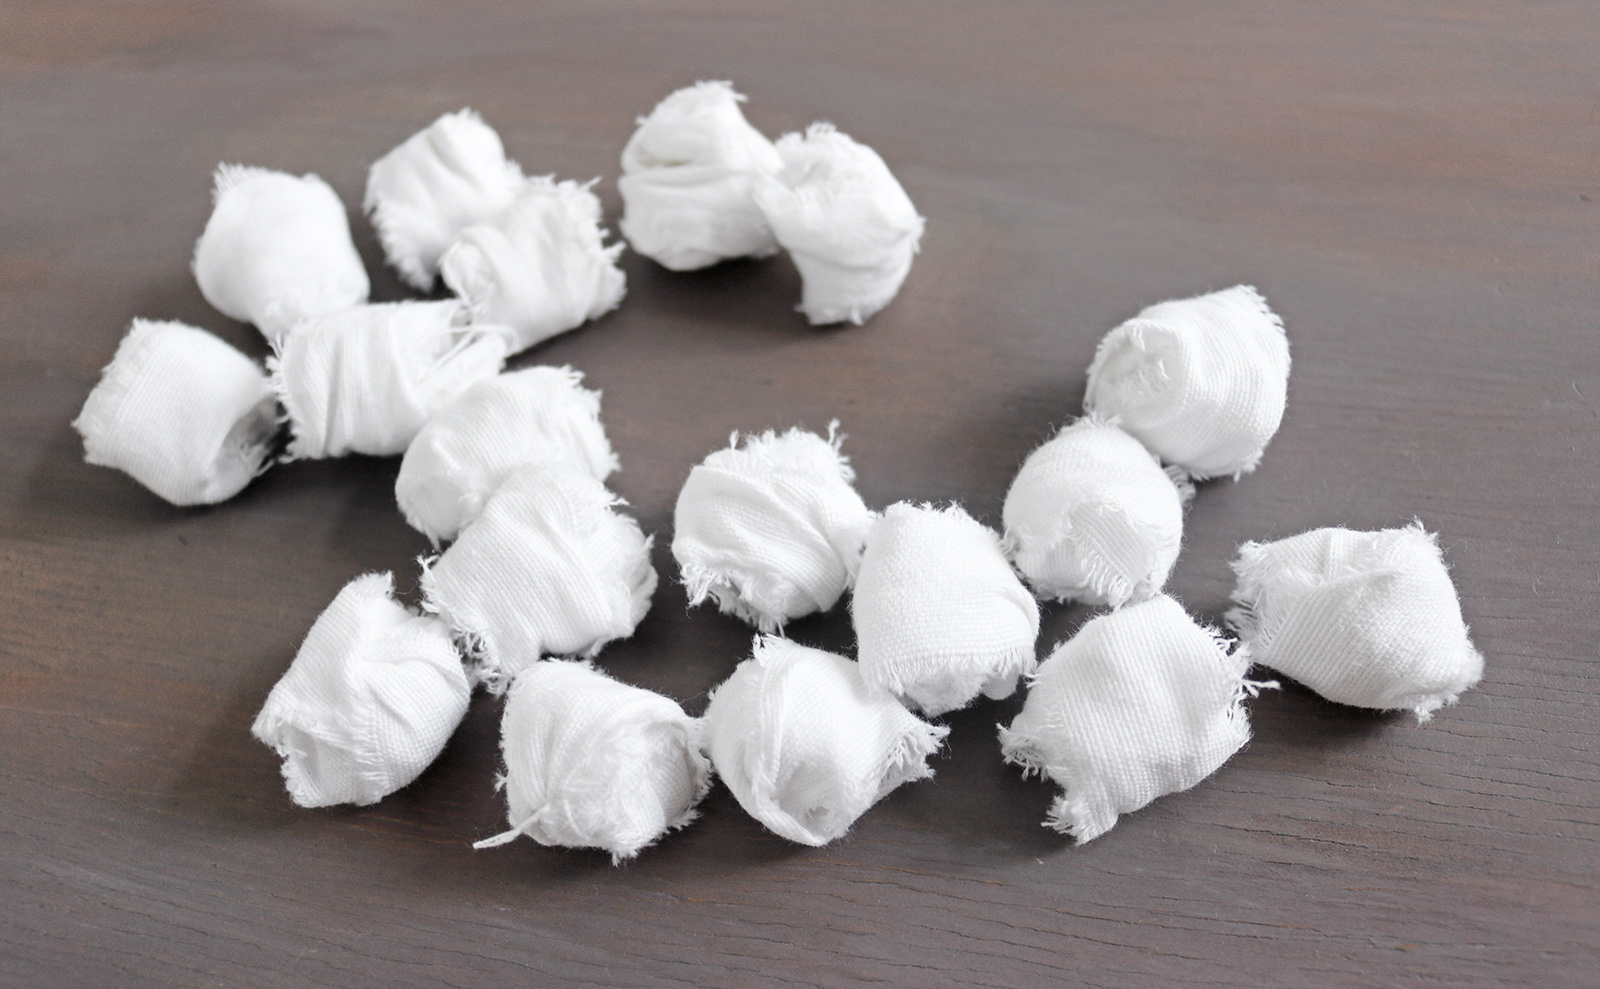
And continued to manufacture all the tassels I needed, 18 in total.
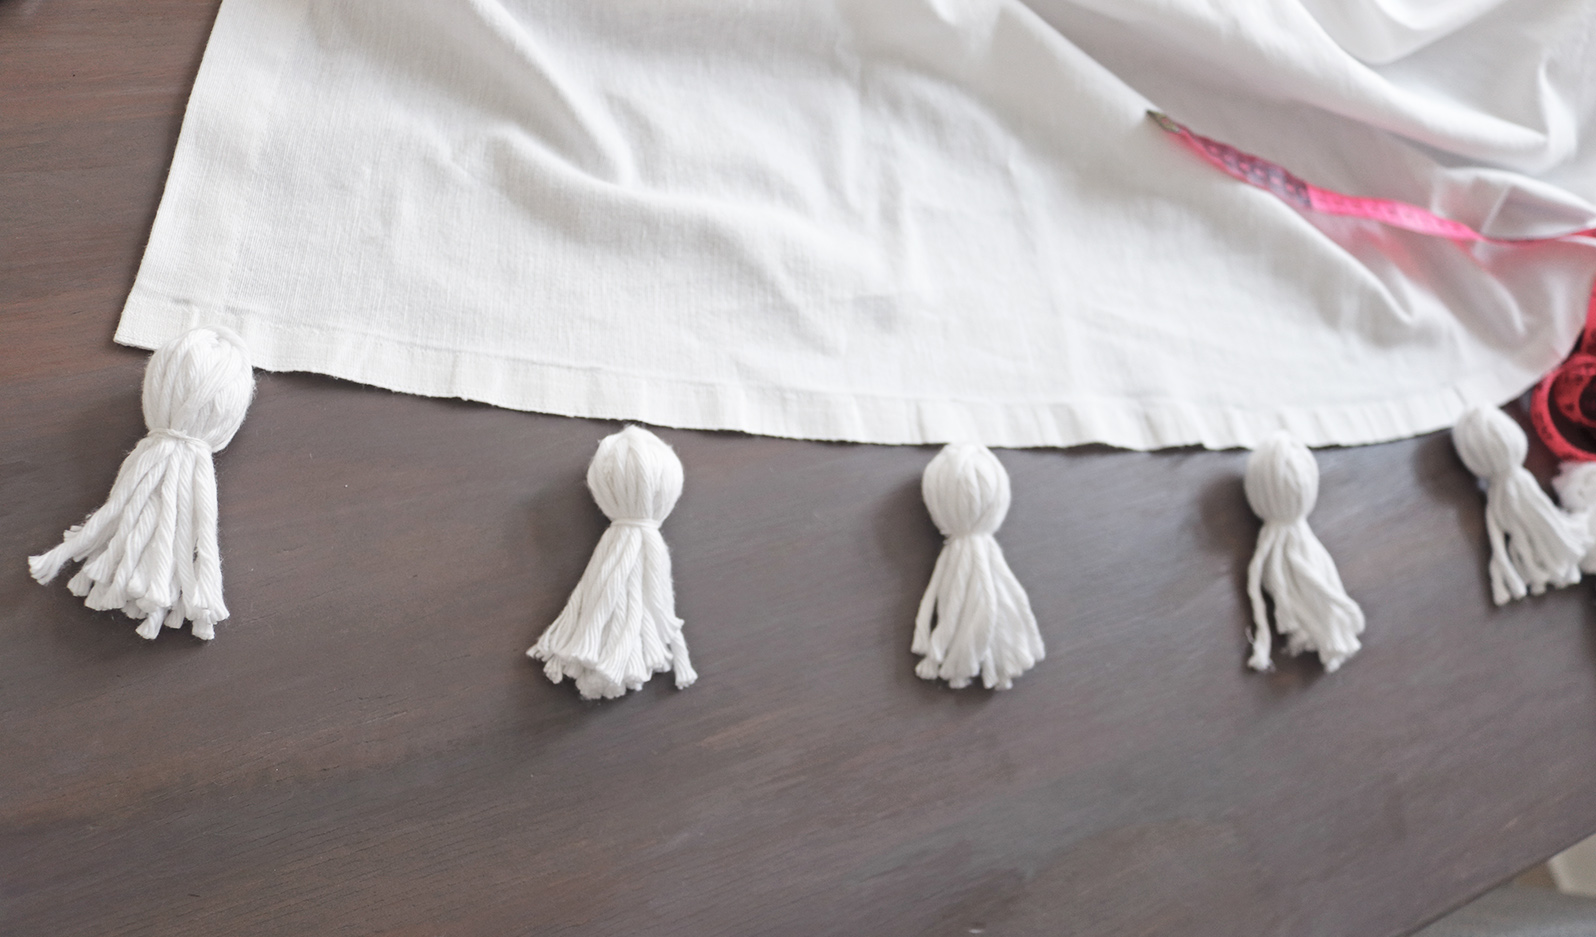
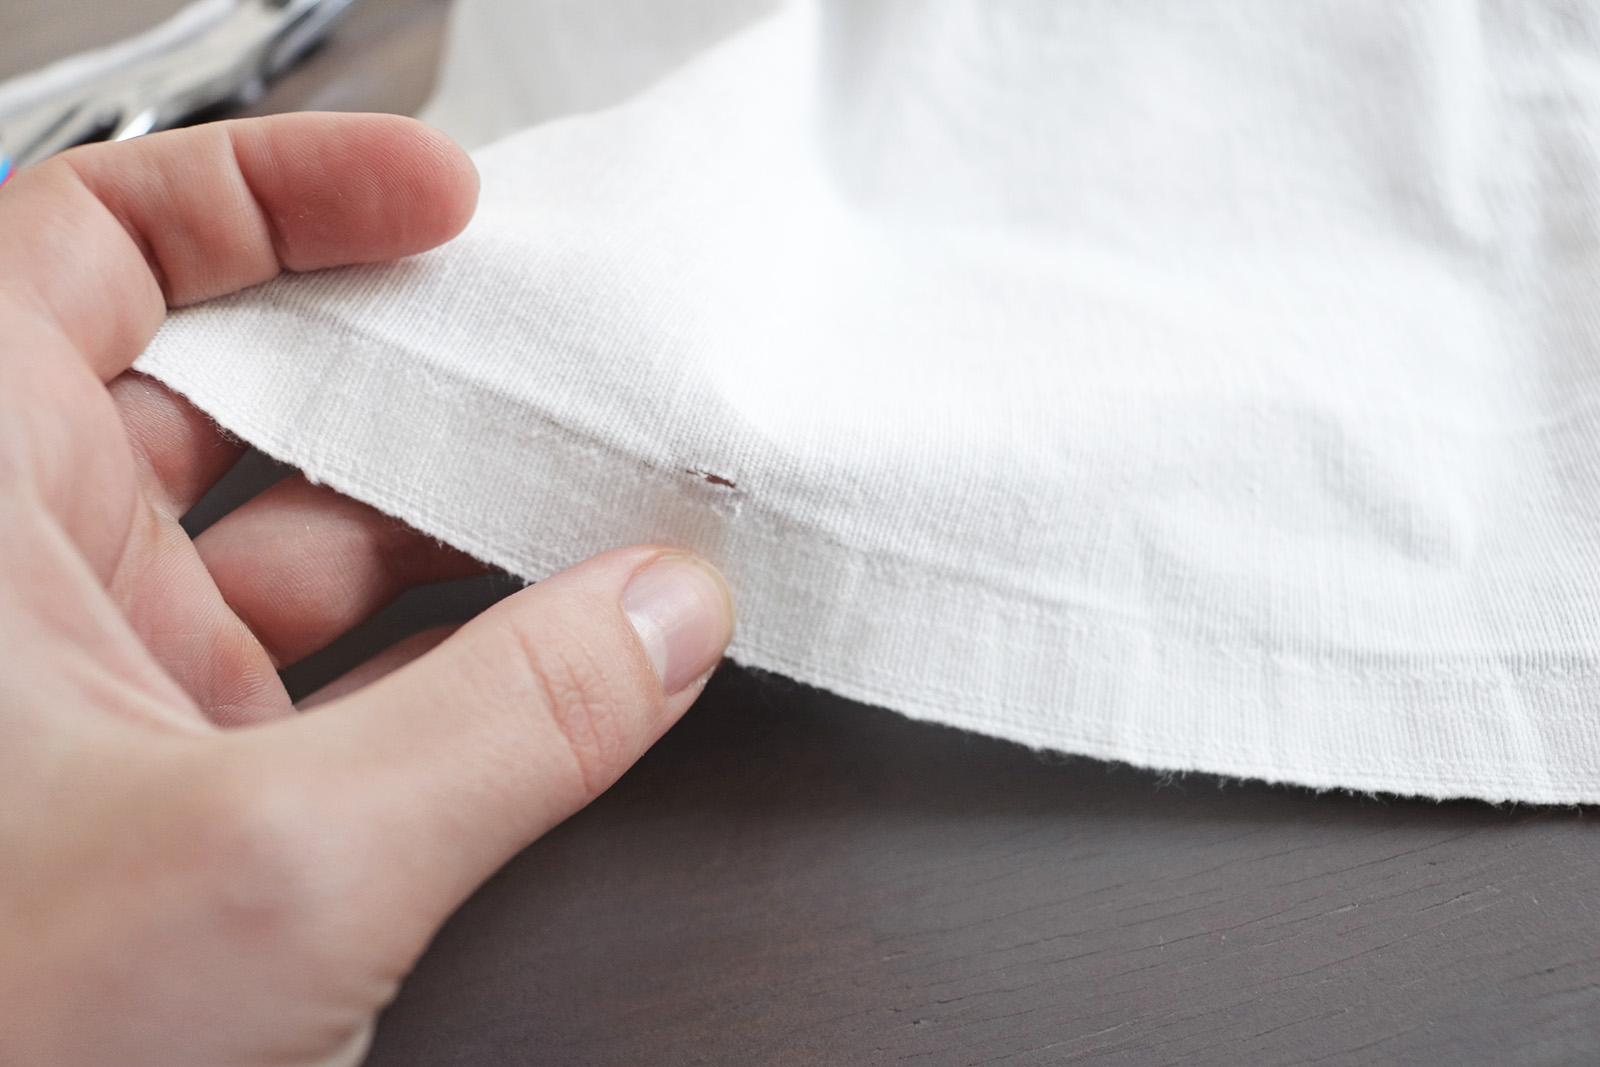
V. Then I figured out the placement which resulted in a 15-cm gap between the tassels. Marked the spots..
.. And cut little slits at the markings. Treated the slits with my fray-stop to make sure they don't get out of control over time.
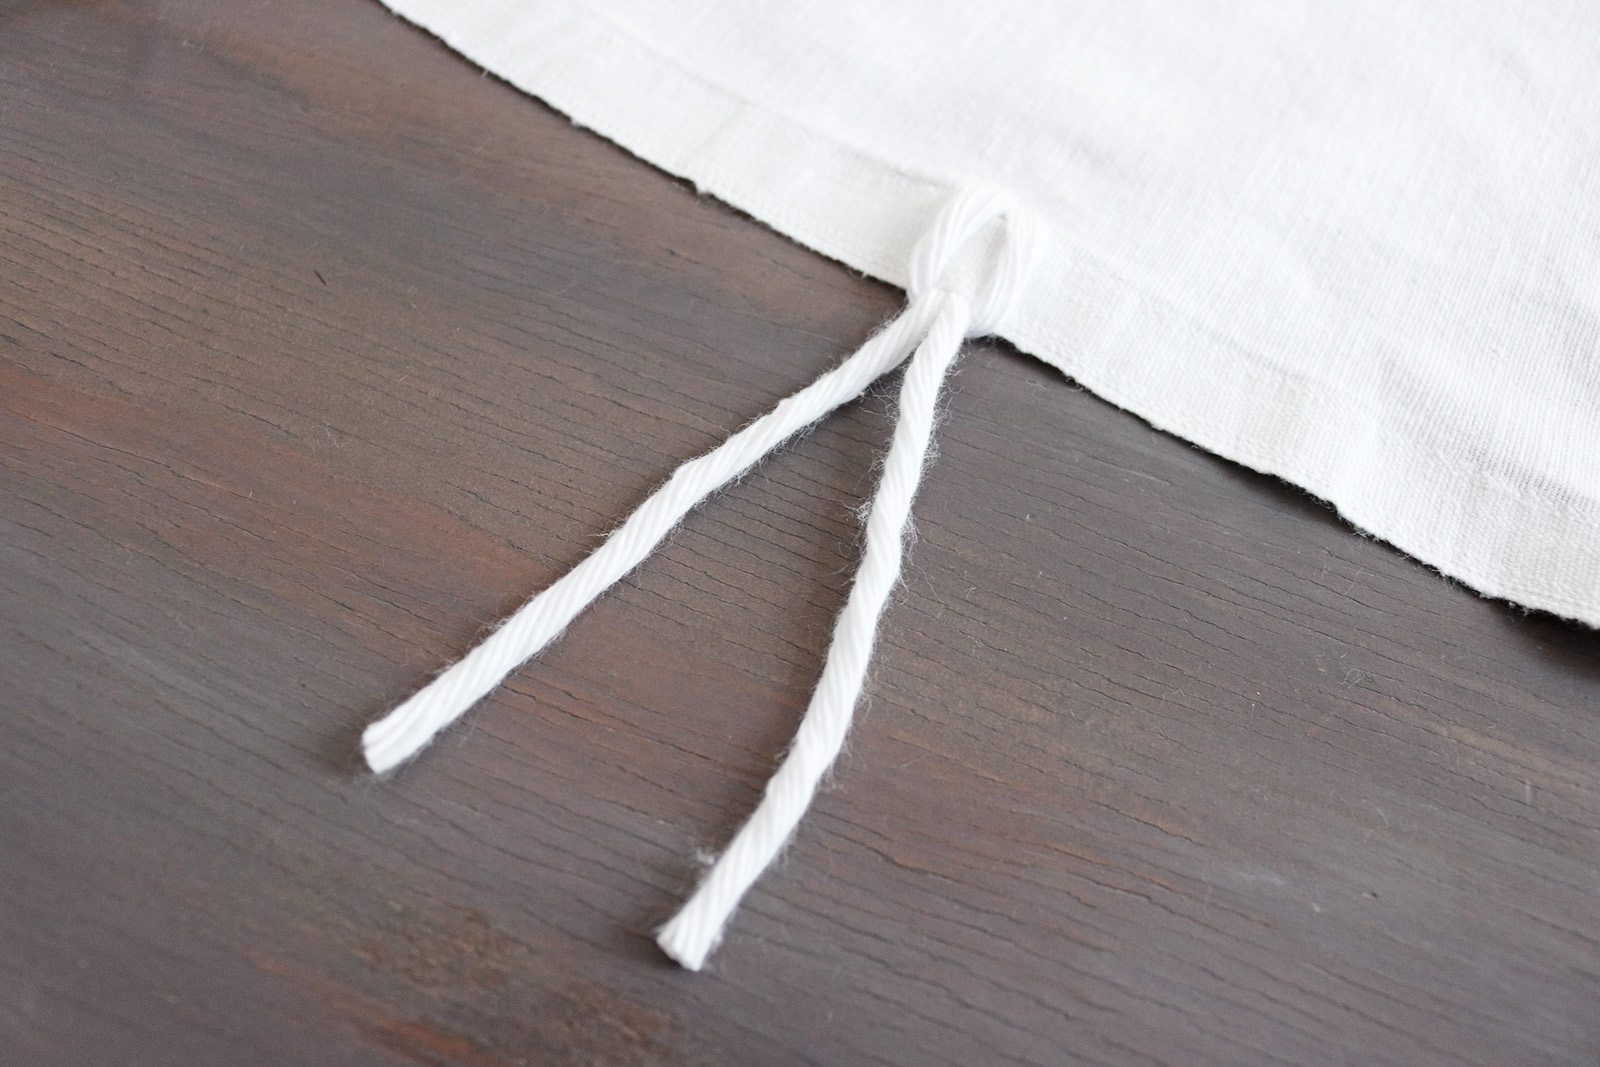
VI. Next, took more thread, folded in half, and put the folded end through my needle. The ends need to be a few cm longer than the tassel itself.
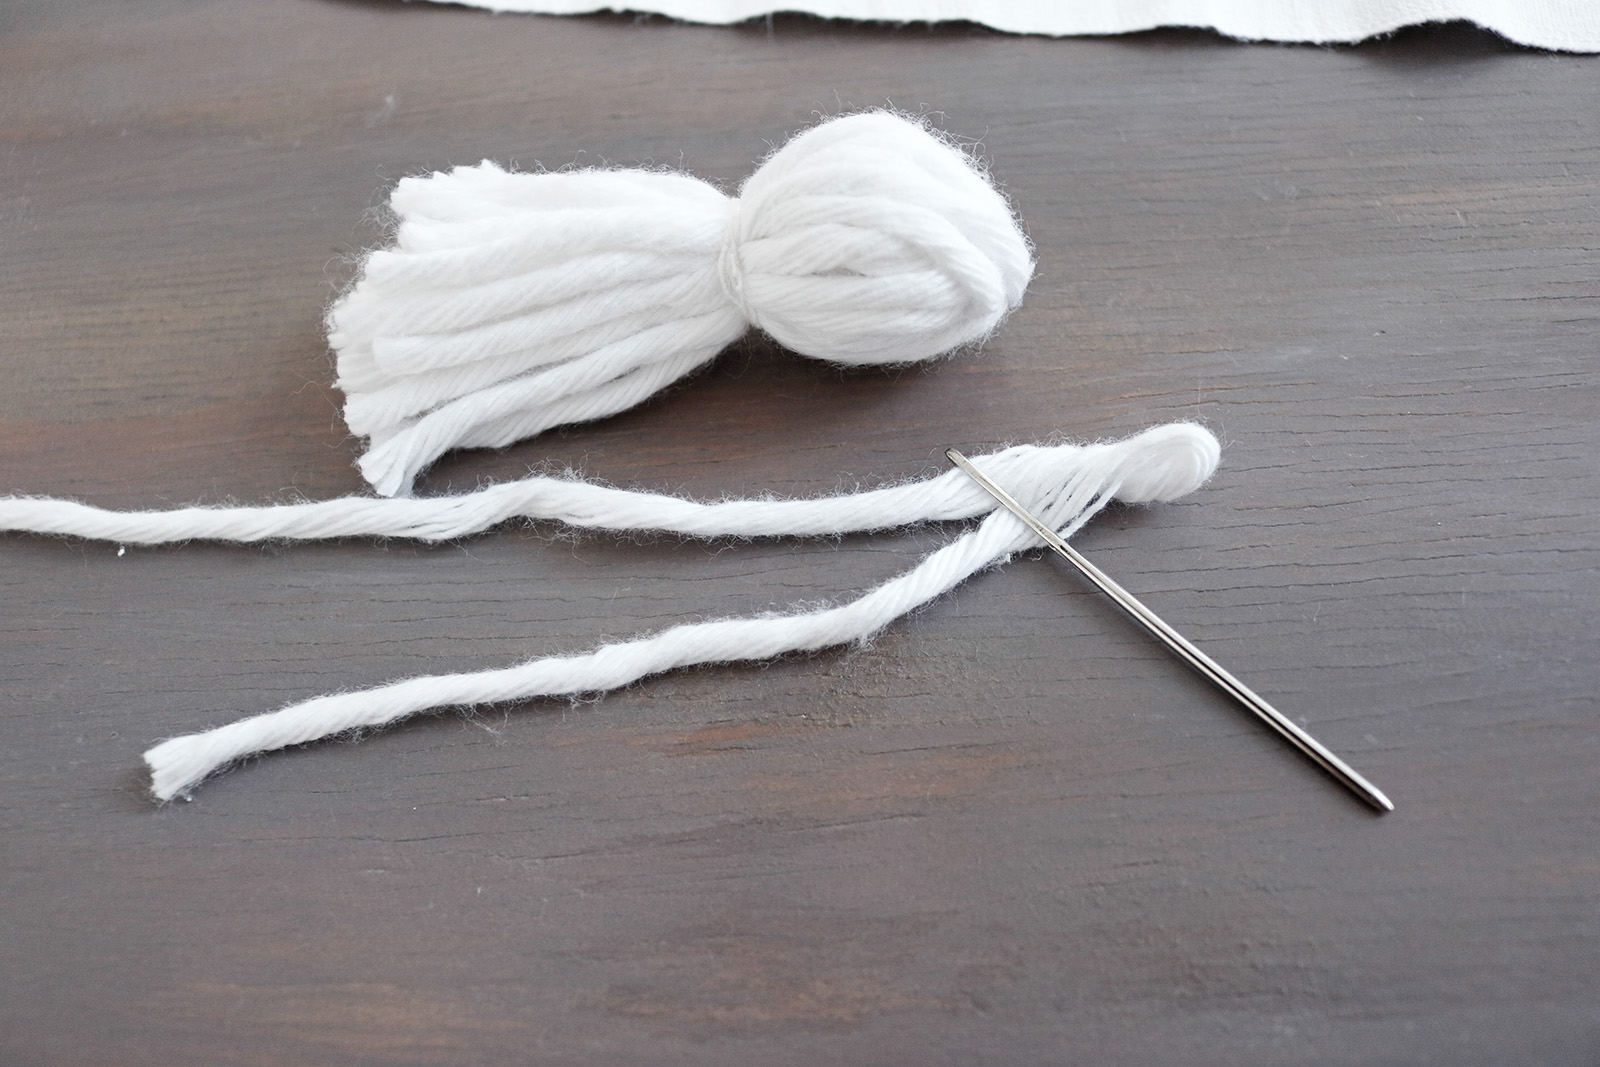
Using the needle, pulled the folded end of the thread through the slit. Then knotted it by pulling the loose ends through the loop.
VII. Then I wrapped these two threads around a tassel, tying in place over the regular thread I had used to assemble the tassel to begin with. Trimmed the extra length of the threads to match the rest of the tassel. And to avoid what's happening in the image below (the tassel head coming loose)..
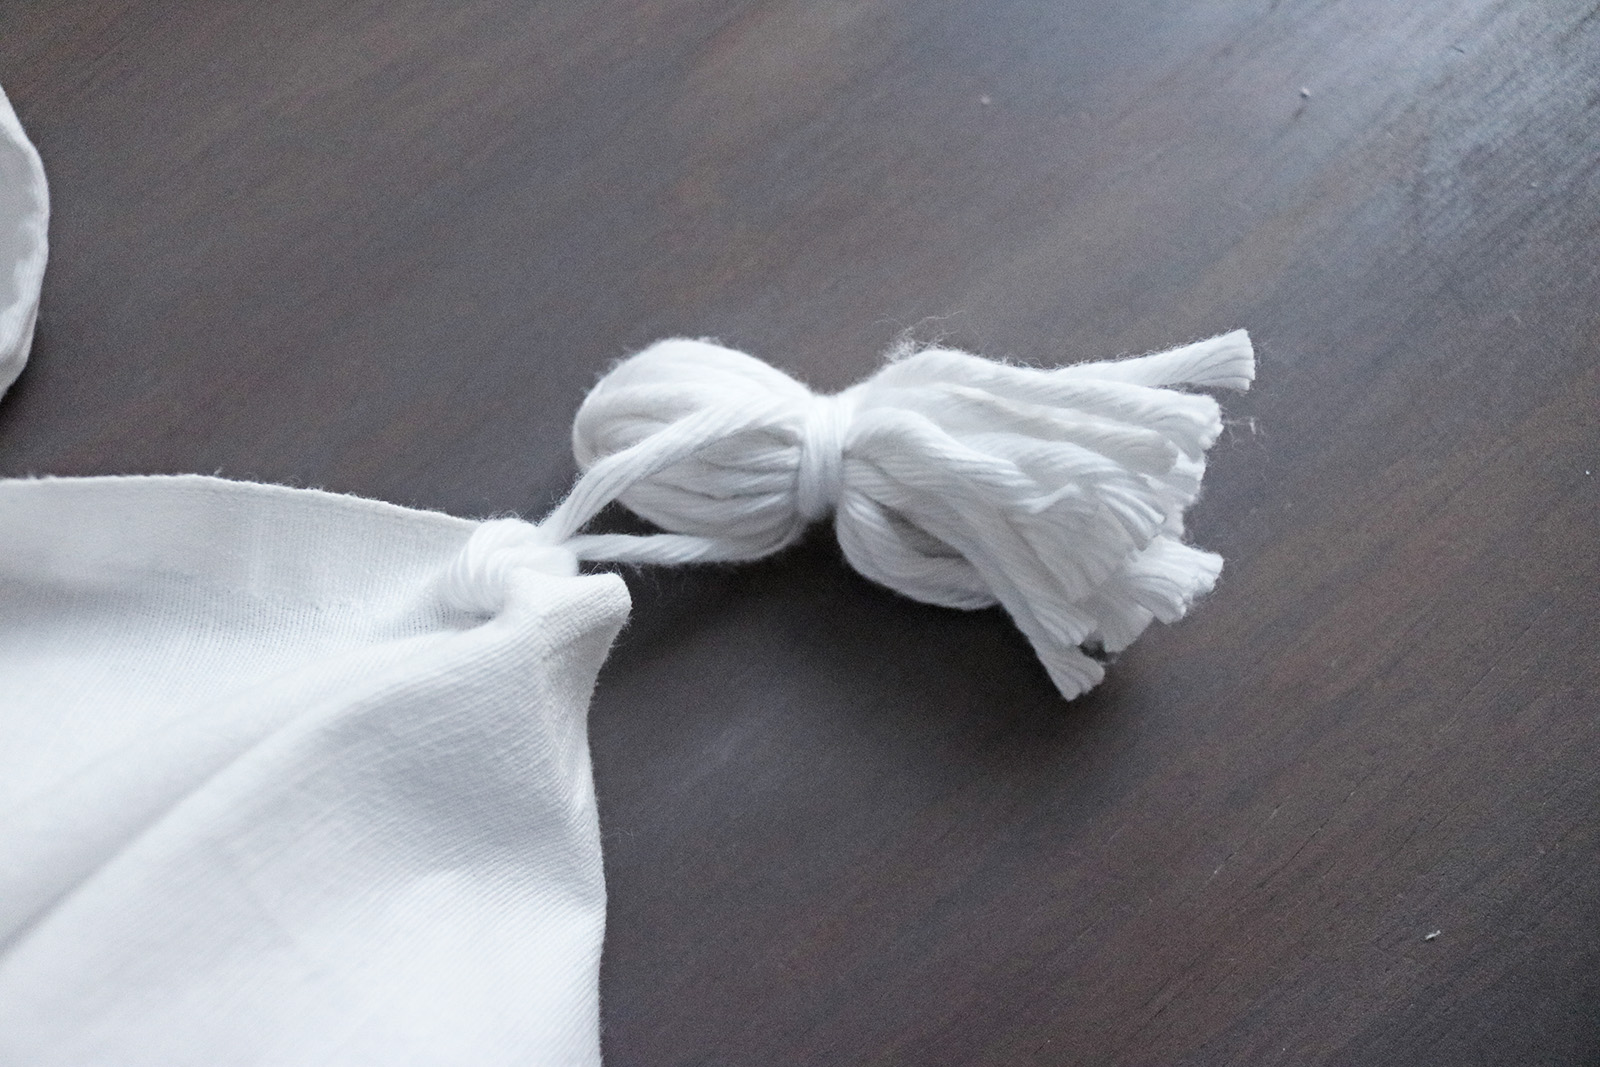
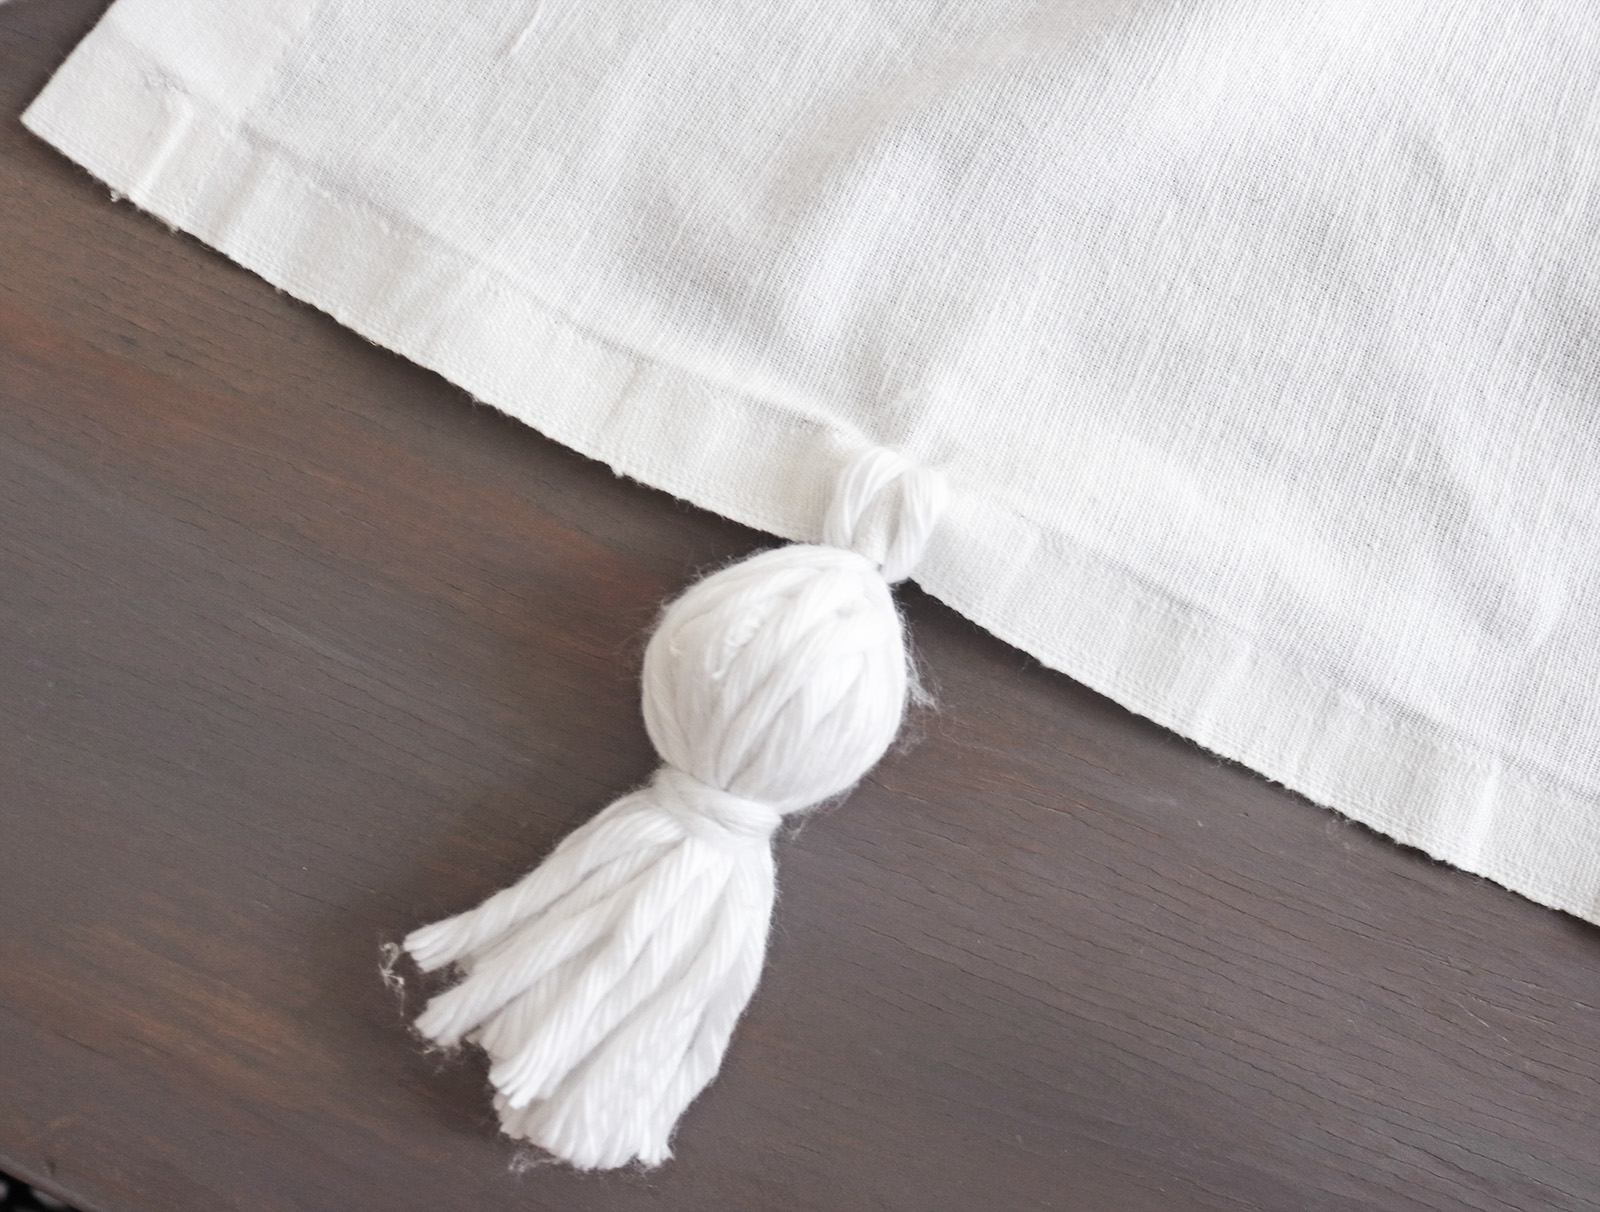
.. I used the regular thread to stitch the head of the tassel together with the loop of the thread attaching it to the blanket. Then just repeated that process 17 more times for the other tassels:)
And I had my blanket!

xo,
Julia


That is looking simple yet beautiful and it will be a good choice for us to have in the winter season. The blanket will also be a good choice to have for fashion.
ReplyDeleteThese designs look so perfect for the future improvement.There are many ways to write my paper for me canada as the people could learn more details.
ReplyDeleteThis comment has been removed by a blog administrator.
ReplyDelete