

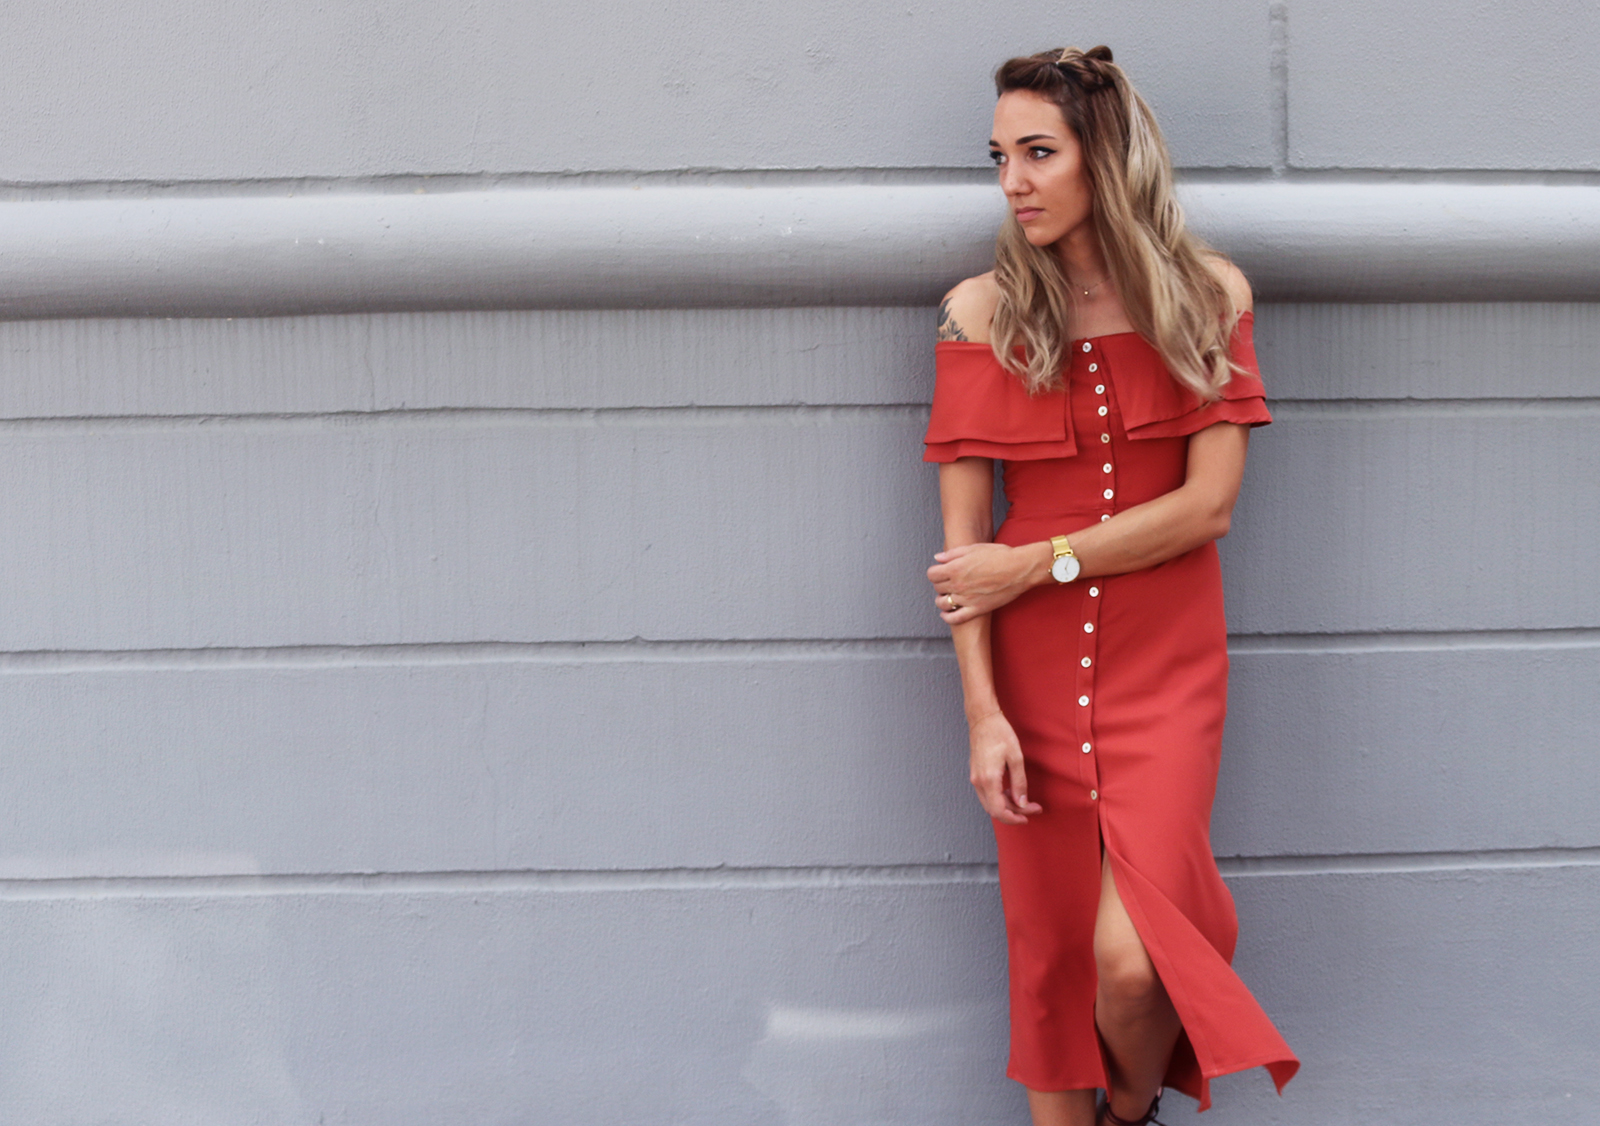
A work and travel vortex has stopped me from getting to the things that really matter for the past month, like sewing. Must figure out a way to work less and sew more. This project started out with a completely different plan, and somehow morphed into another off-the-shoulder dress. I can't help it.
Tutorials take a lot of time & effort to create, and I choose to make mine available for free. If you enjoy this guide, you can support me with a donation that feels right for you, here.
TOOLS:

Light fabric with a stretch to it (I used a lycra/beslon mix) | Scissors | Thread, needle, sewing machine | Buttons (I used 15) | Pins (Ignore the elastic, that was from when I thought I was making something different..)
I. First I cut my skirt pieces. One back piece and two identical front pieces. Measurements indicative of my US4/EU36 size.

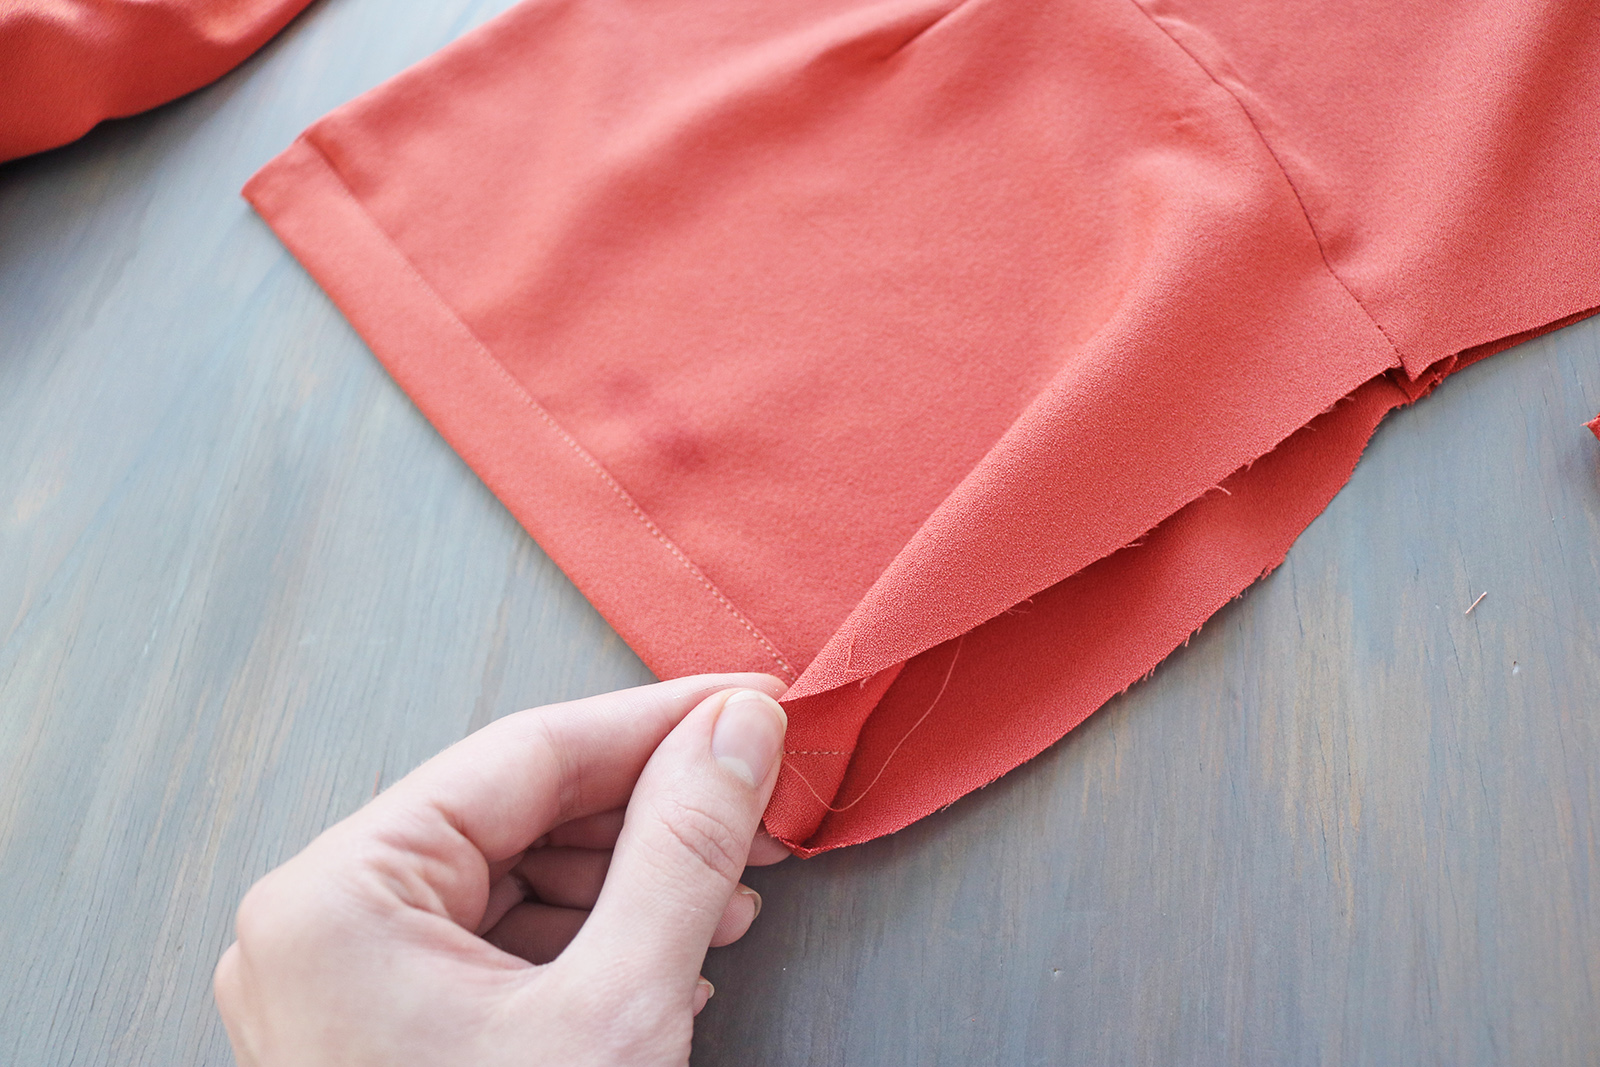
II. Then put together the skirt by sewing the three pieces together, leaving slits on both side, and added three darts to the waistline of the back piece for a good fit. At the vertical raw edges of the front pieces, I folded the fabric twice to create a button band on each side. Finally hemmed the whole thing.

III. Next cut out the top pieces. I did not know yet how low I wanted the back to be, so I cut the back piece identical to the front pieces. Note there is two of each piece to make the top double-layered for more support.

IV. First I added darts at the bust area of each of the front pieces (4 all together)..

.. And then pinned one set of front pieces to a back piece along the sides, right sides facing. Sewed the side seams together.

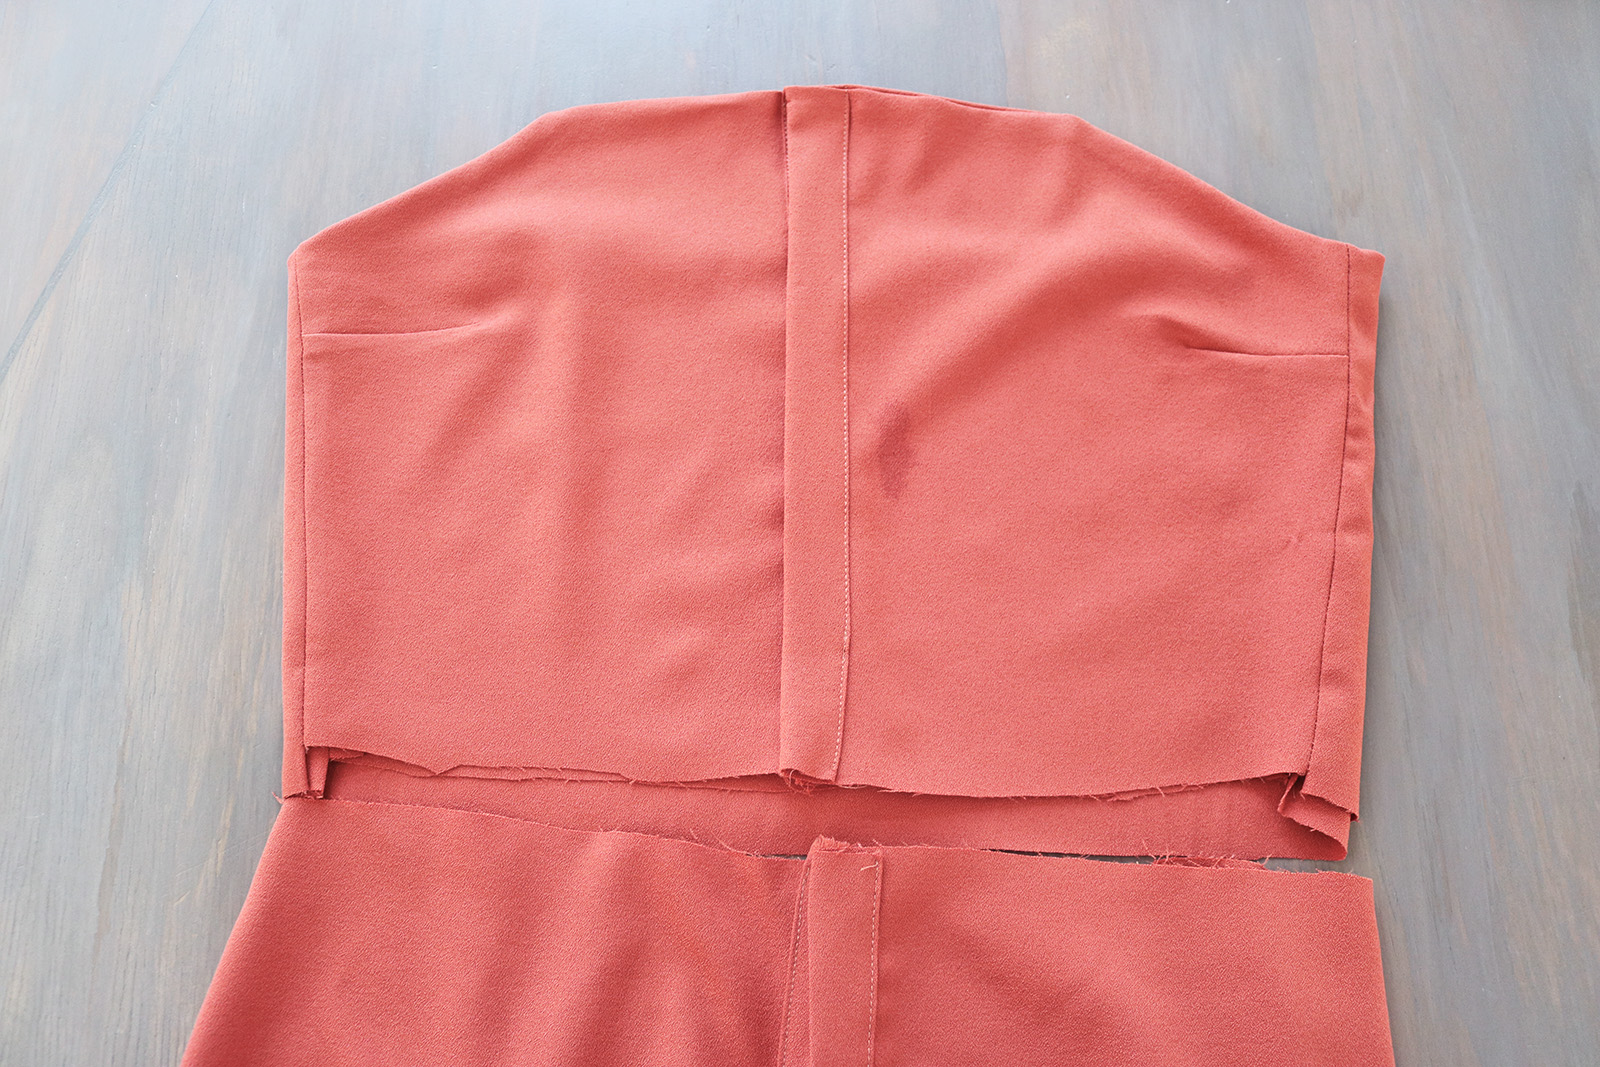
Next I trimmed the top edge of the pack pieces straight (after wrapping the top around myself confirming the spot):

And placed these assembled top pieces right sides facing, and trimmed one side so it was about 2 cm shorter than the other one.

.. So I could take that longer piece and wrap it around the shorter one, creating the button band:
V. Once that was done for both sides, I turned the top right sides facing again and sewed the top edges together. Then trimmed extra at the corners and turned right side out again, at which point I had this.
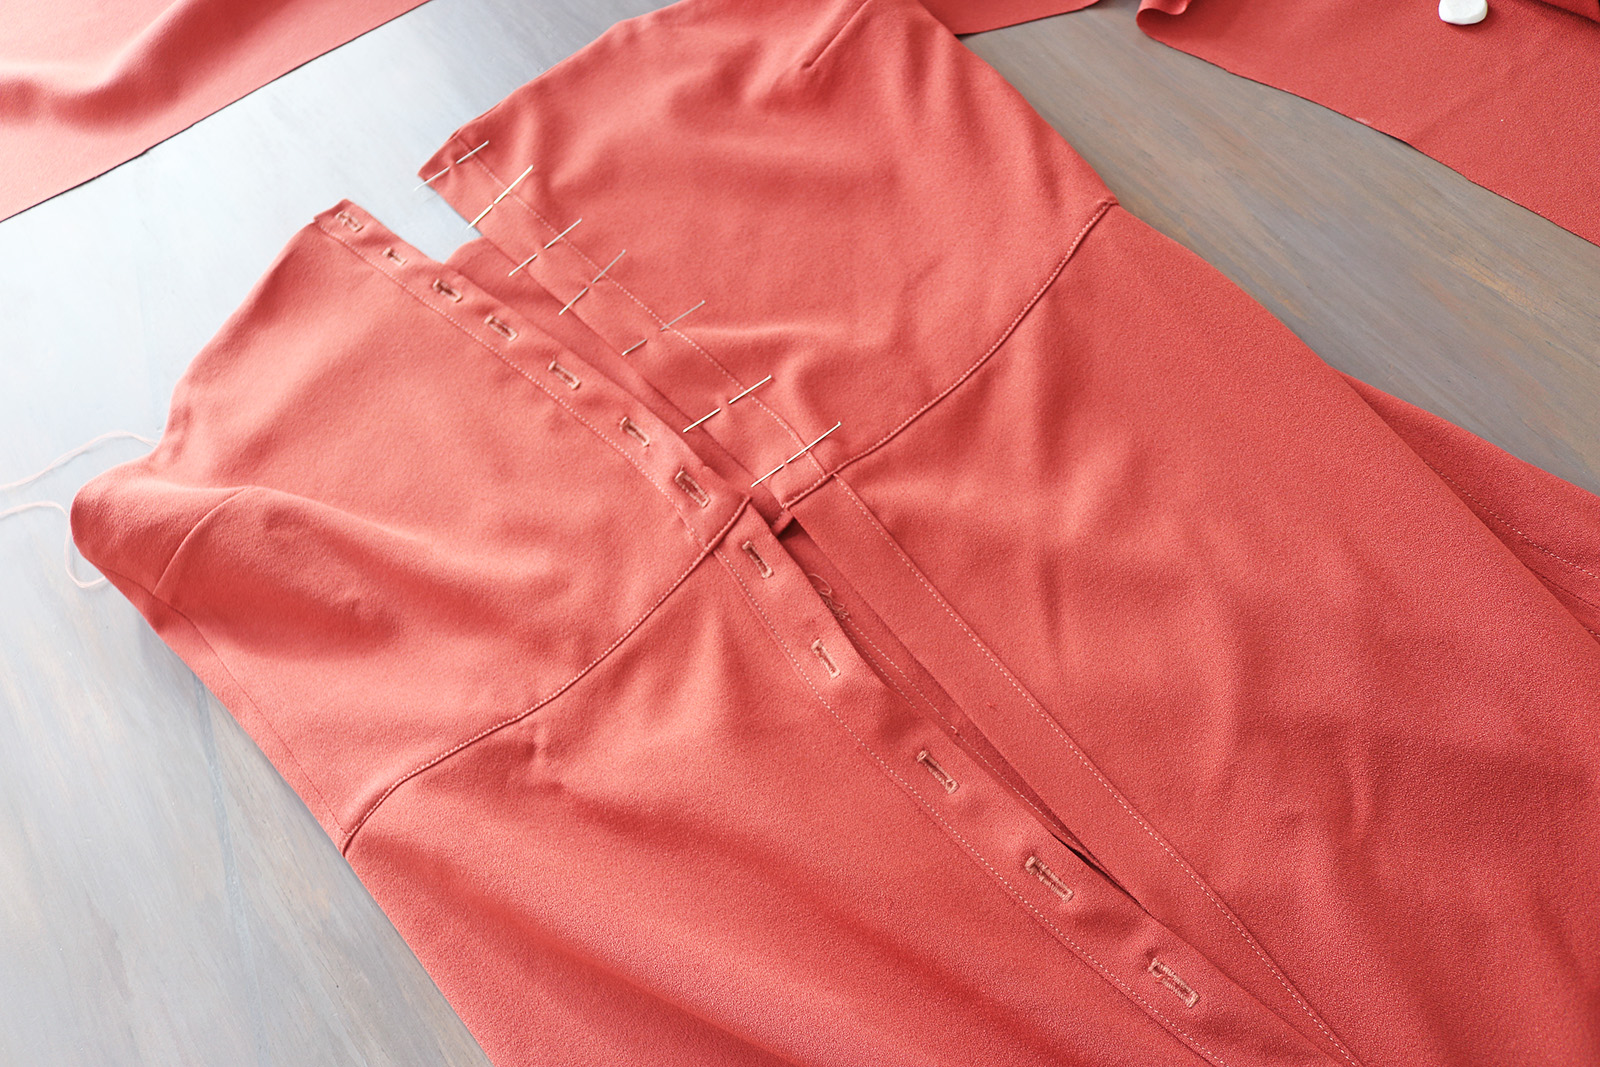
VI. To prepare to attach the top to the skirt, I folded the edge of the waistline with my iron:

.. And then pinned it onto the skirt so the skirt was caught in between. Sewed along the folded edge.

VII. Next I sewed the button holes with my machine, and marked the spots for the buttons themselves, to hand-sew them in place.
VIII. The last bit was to add the off-the-shoulder piece. I cut it as follows: first wrapped my measurement tape around my torso and arms where the dress would sit. Took that measurement and plugged it into the circle skirt calculator as the waist measurement, with the option quarter skirt selected. That gave me a radius of about 72 cm. So I marked and cut my fabric as follows, to get two curved pieces.

IX. To hem the pieces, I first added a basting stitch along the longer curved edge, and used it to create a double-fold. The shorter long edge I finished with a zig-zag.

I repeated that for the other piece as well.

For the short edges, I hemmed one pair with a double fold, looking like this on the reverse. At this point I did not hem the other short edges yet. To attach the two long pieces together, I placed the right side of the shorter piece against the wrong side of the longer piece, and sewed along the edge I had zig-zagged. Then flipped right sides up and pressed the fold I just sewed.

X. Then I placed the attached pieces along the neckline of the dress:

And pinned onto the dress by lifting the upper layer out of the way, and pinning inside where the two pieces were attached. Sewed the short horizontal part of the front neckline. Then confirmed how much of the off-shoulder piece needed to be loose before the stitch continued on the back piece, by trying the dress on and pinning the off-shoulder piece to the back at the comfortable tightness.

Then just continued the stitch to attach the off-shoulder piece to the back of the dress, confirmed again the loose bit going around the other arm, and at that point I also finished the short raw edges of the off-shoulder piece so they were exactly the right length to end right before the button band.
Finally did just a bit of hand-stitching to attach the first 1-2cm of the two layers together, down from the neckline, so they wouldn't fly about too much.


xo,
Julia


Love the result!! I really like the slits on the sides and front, gives it more of a modern feel. Out of curiosity, did you add an elastic at the top or was the fabric stretchy enough it wouldn't slip? :)
ReplyDeleteCharlotte
www.deconstrut.com
Thanks so much Charlotte! No I did not need to add any elastic, the fabric itself doubled for the top-piece was enough to stay in place with its stretch.
DeleteThis looks so good!! Love how it turned out!
ReplyDeleteThanks Kay:)!
DeleteGreat job! Looks fantastic on you!
ReplyDeleteJust want to applaud your work Julia. The amount of work you put over here is pretty evident by your posts and they are great. Keep up the great job. God Bless :)
ReplyDeleteWhat a kind thing to say! Thank you so much:)
Delete