

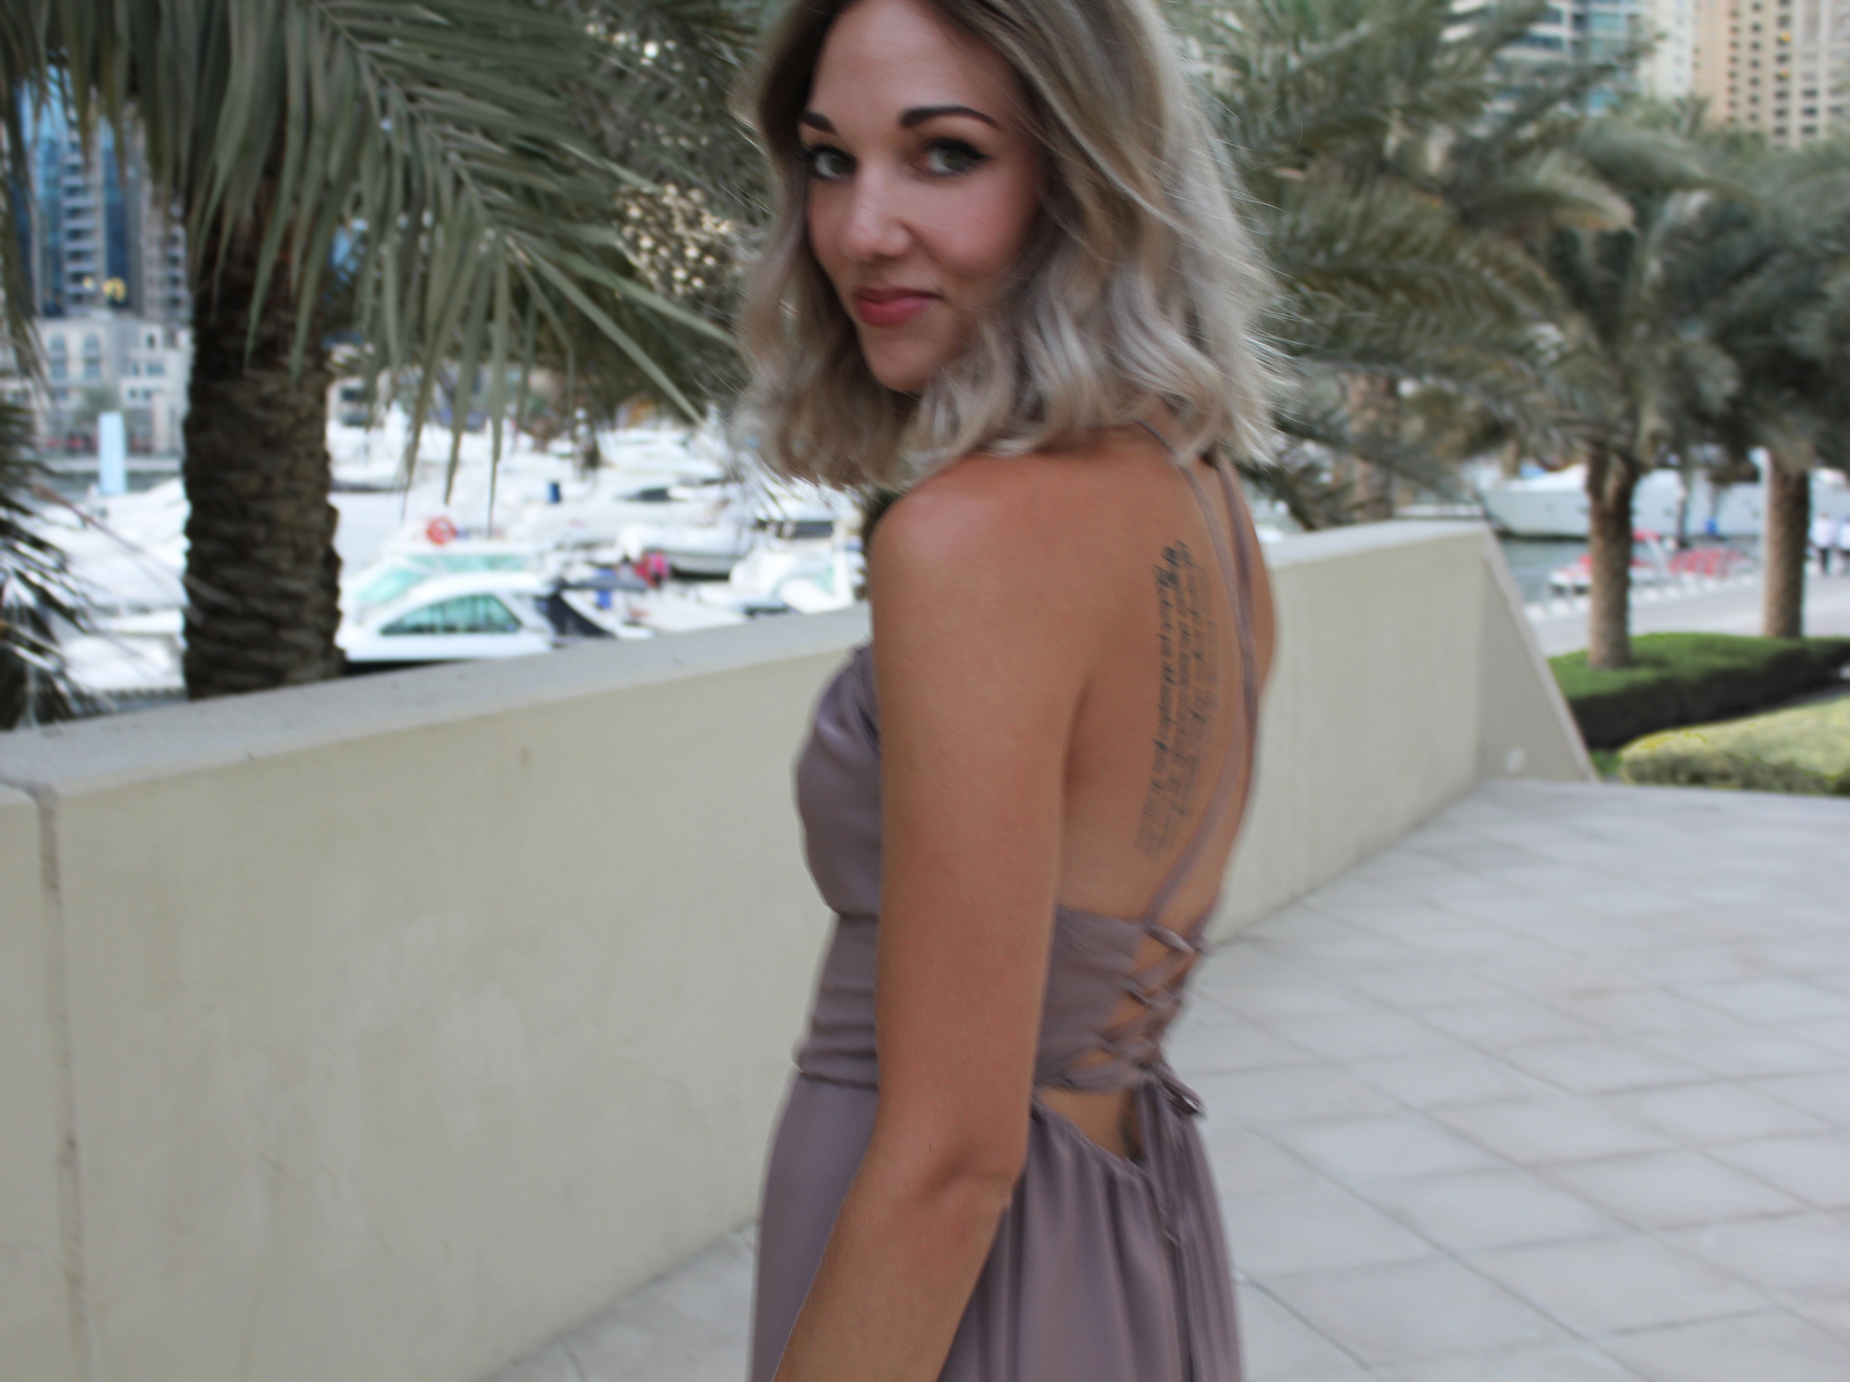
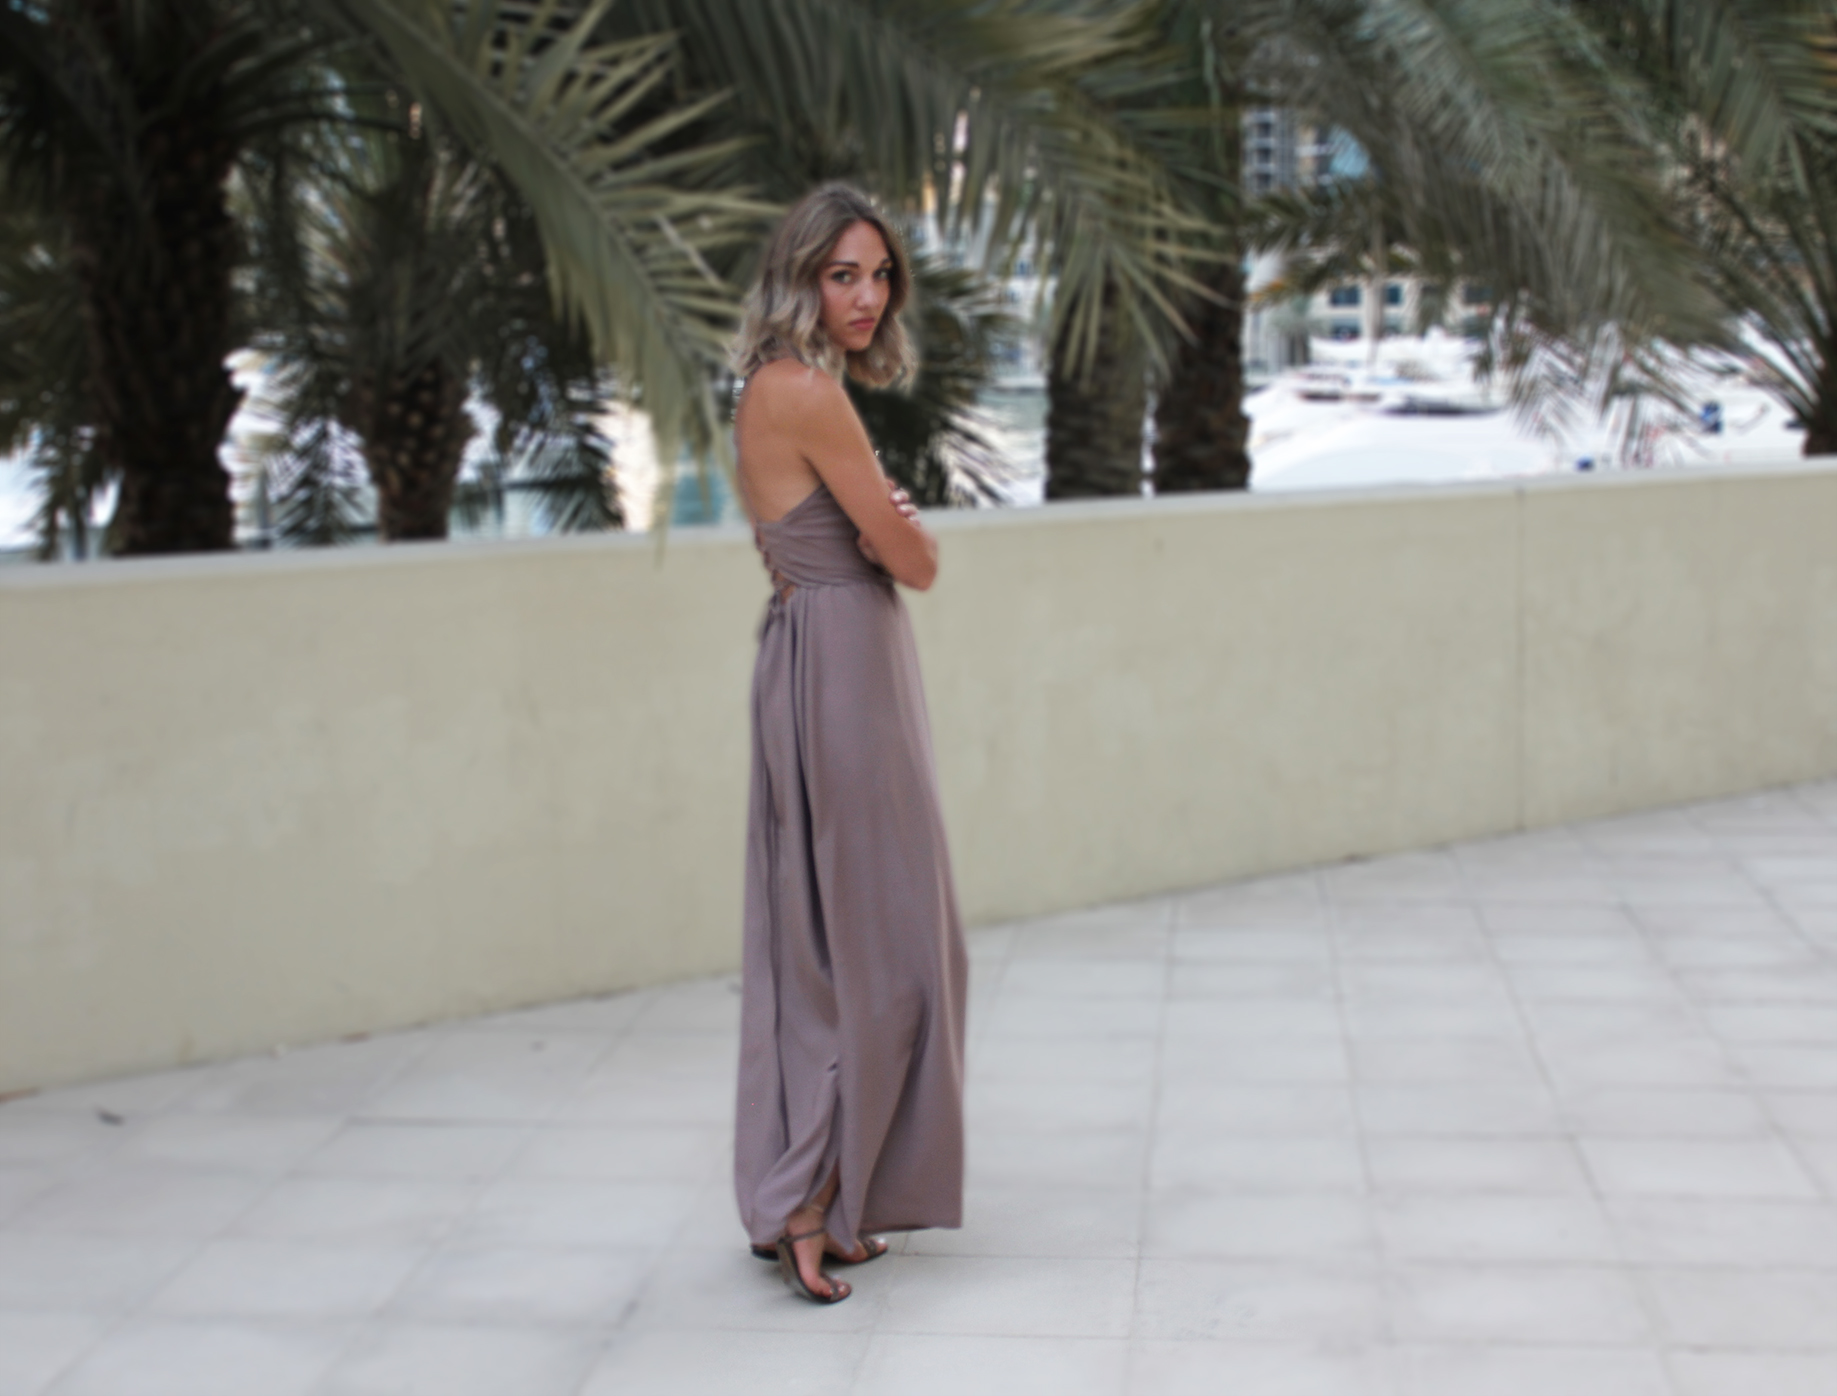
I'll always vote for sensual open back against low-cut cleavage. And judging by my inspiration board, it looks like I'm going through a strappy back phase. This dress looks much more complicated to make than it actually is.
Tutorials take a lot of time & effort to create, and I choose to make mine available for free. If you enjoy this guide, you can support me with a donation that feels right for you, here.
TOOLS:

Flowy, lightweight fabric, 3 m (worth noting that I used 3 m but my fabric was only 105 cm wide, not standard width. I used a silky crêpe.) | Thread & sewing machine | Pins | Fabric marker | Scissors | Elastic
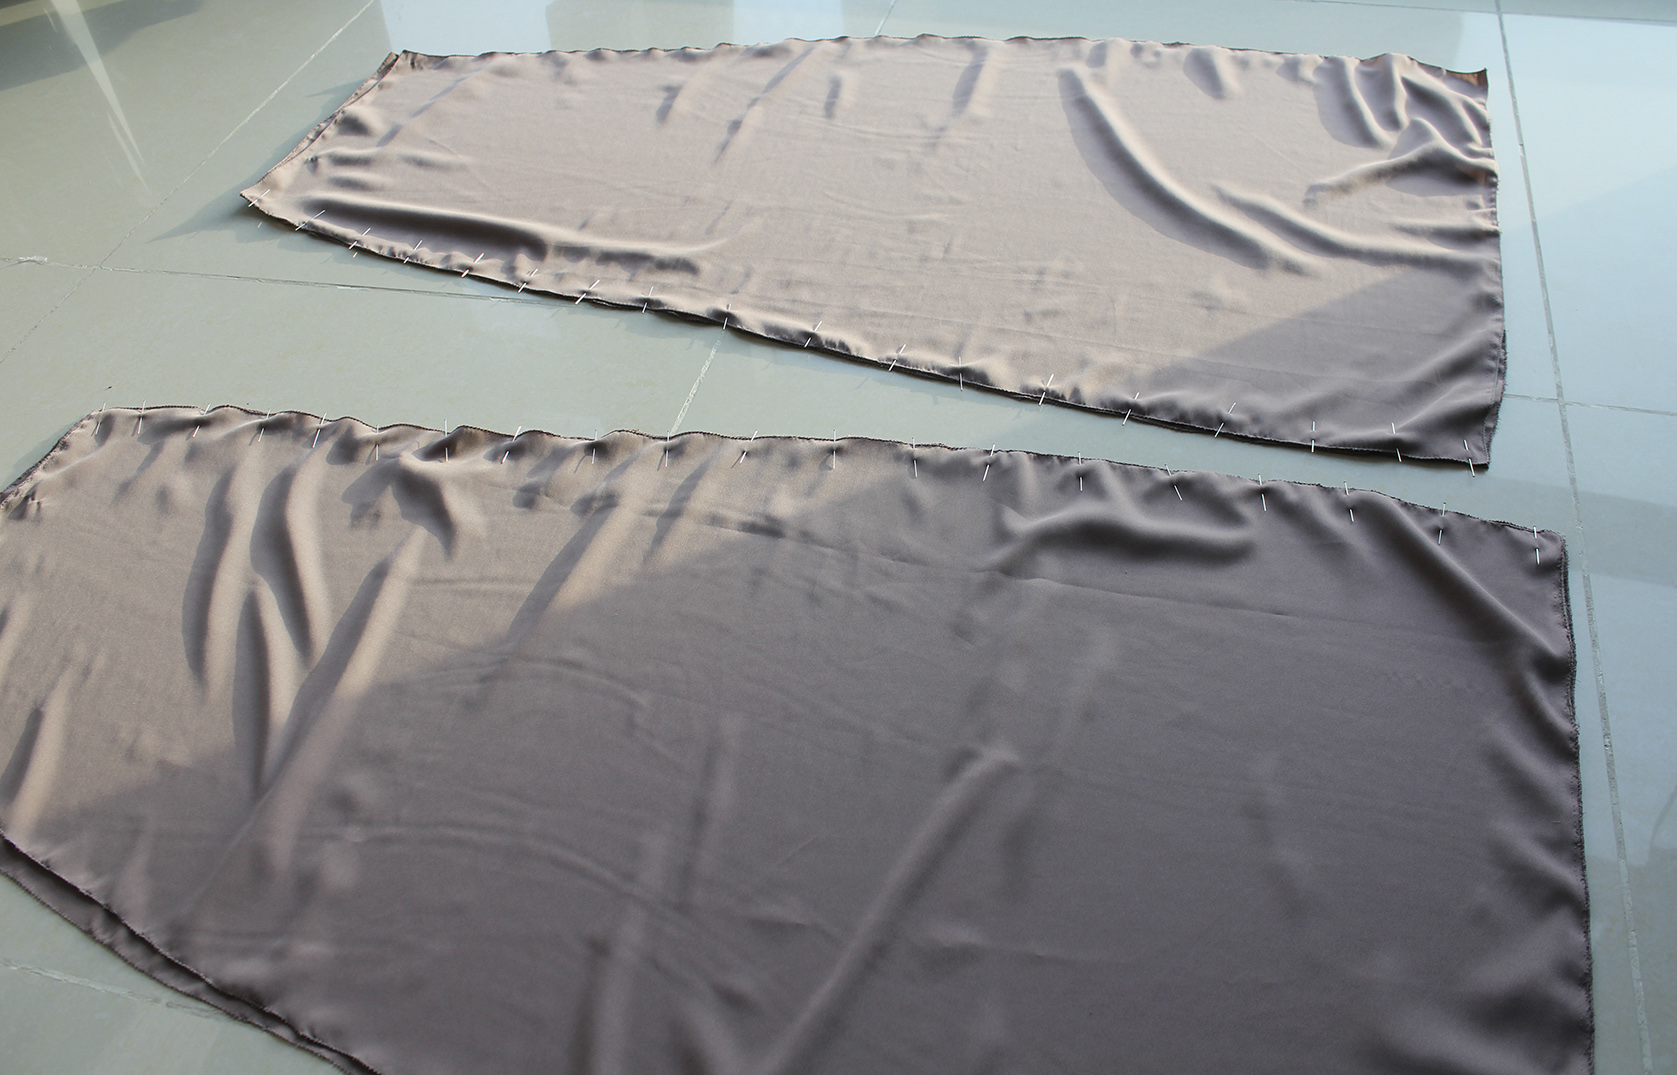
I. Cut out your pieces, like this. I am a European 36/US 4, however this dress is pretty flexible in size because of the adjustable back and elasticated waist. I'd say with these measurements it fits a size or two up from mine. Note you need 4 identical pieces for the skirt piece as shown below (perhaps a bit unclearly). Finish raw edges with a zig-zag if your fabric frays.

Start putting together the skirt by placing two and two pieces together (only on one side), right sides facing. Sew down the side.

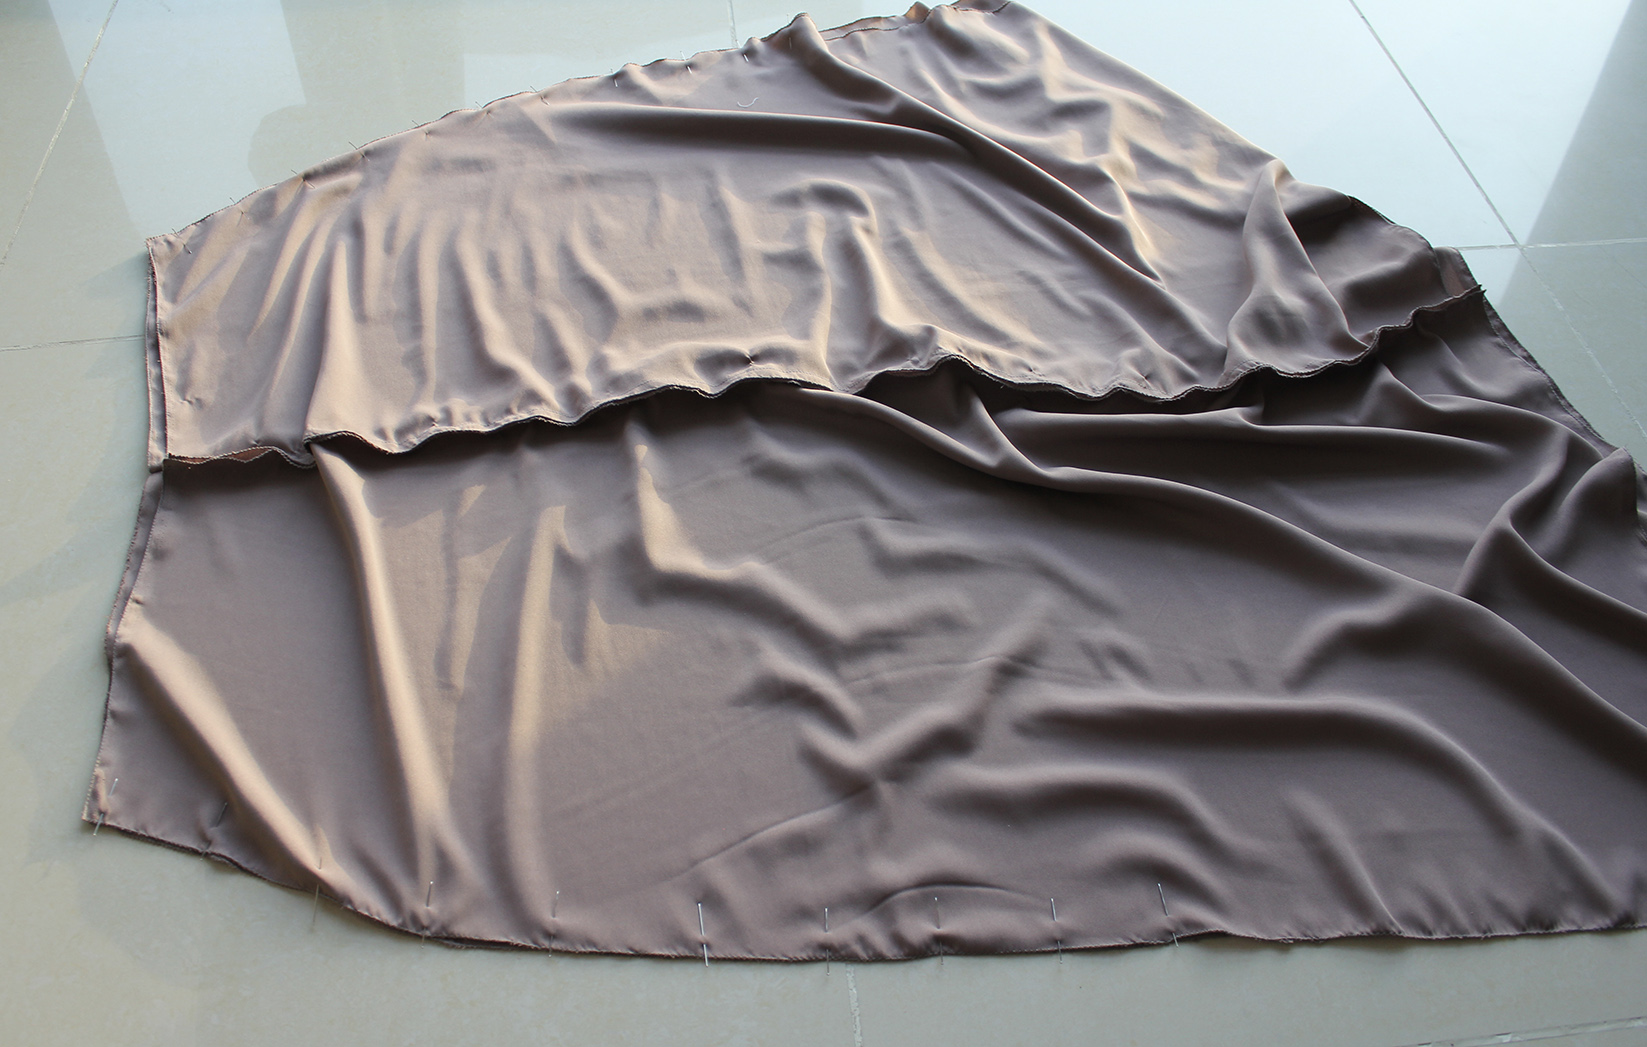
.. Then pin the front and back pieces you just created against each other, right sides facing again. At this point I only sewed down about 3/4 and left the rest open to create side slits, finishing the raw edges with a folded seam.

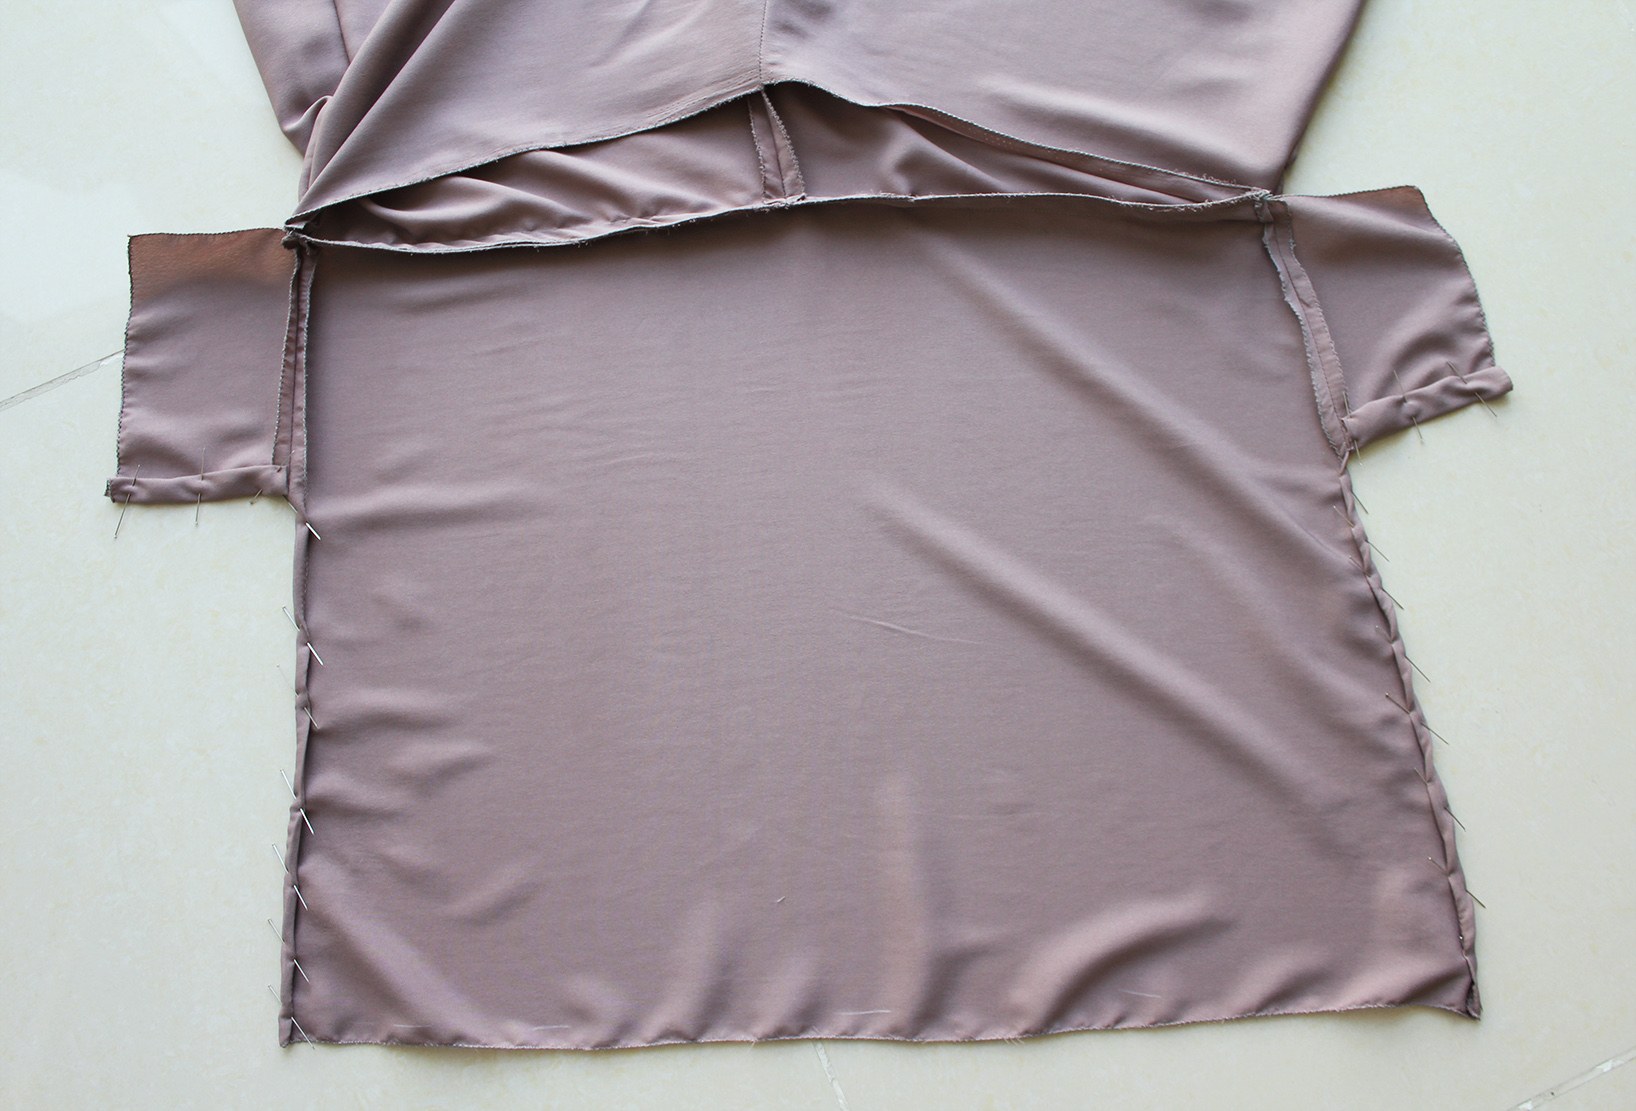
II. A lot is going on in this photo but I was a bit too excited and forgot to document each step.. I took the rectangular front piece and pinned the small side pieces to the bottom sides of it, sewed them in place (leaving the stitch open enough to create a double fold for the seam. I then sewed the big rectangle on the front of the skirt, leaving a 1 cm seam allowance. I also pinned the sides of the front top piece at a double fold to finish that seam as well. Did a basting stitch on the side seams and the top seams of the small rectangles to keep in place until I hand-sewed them.

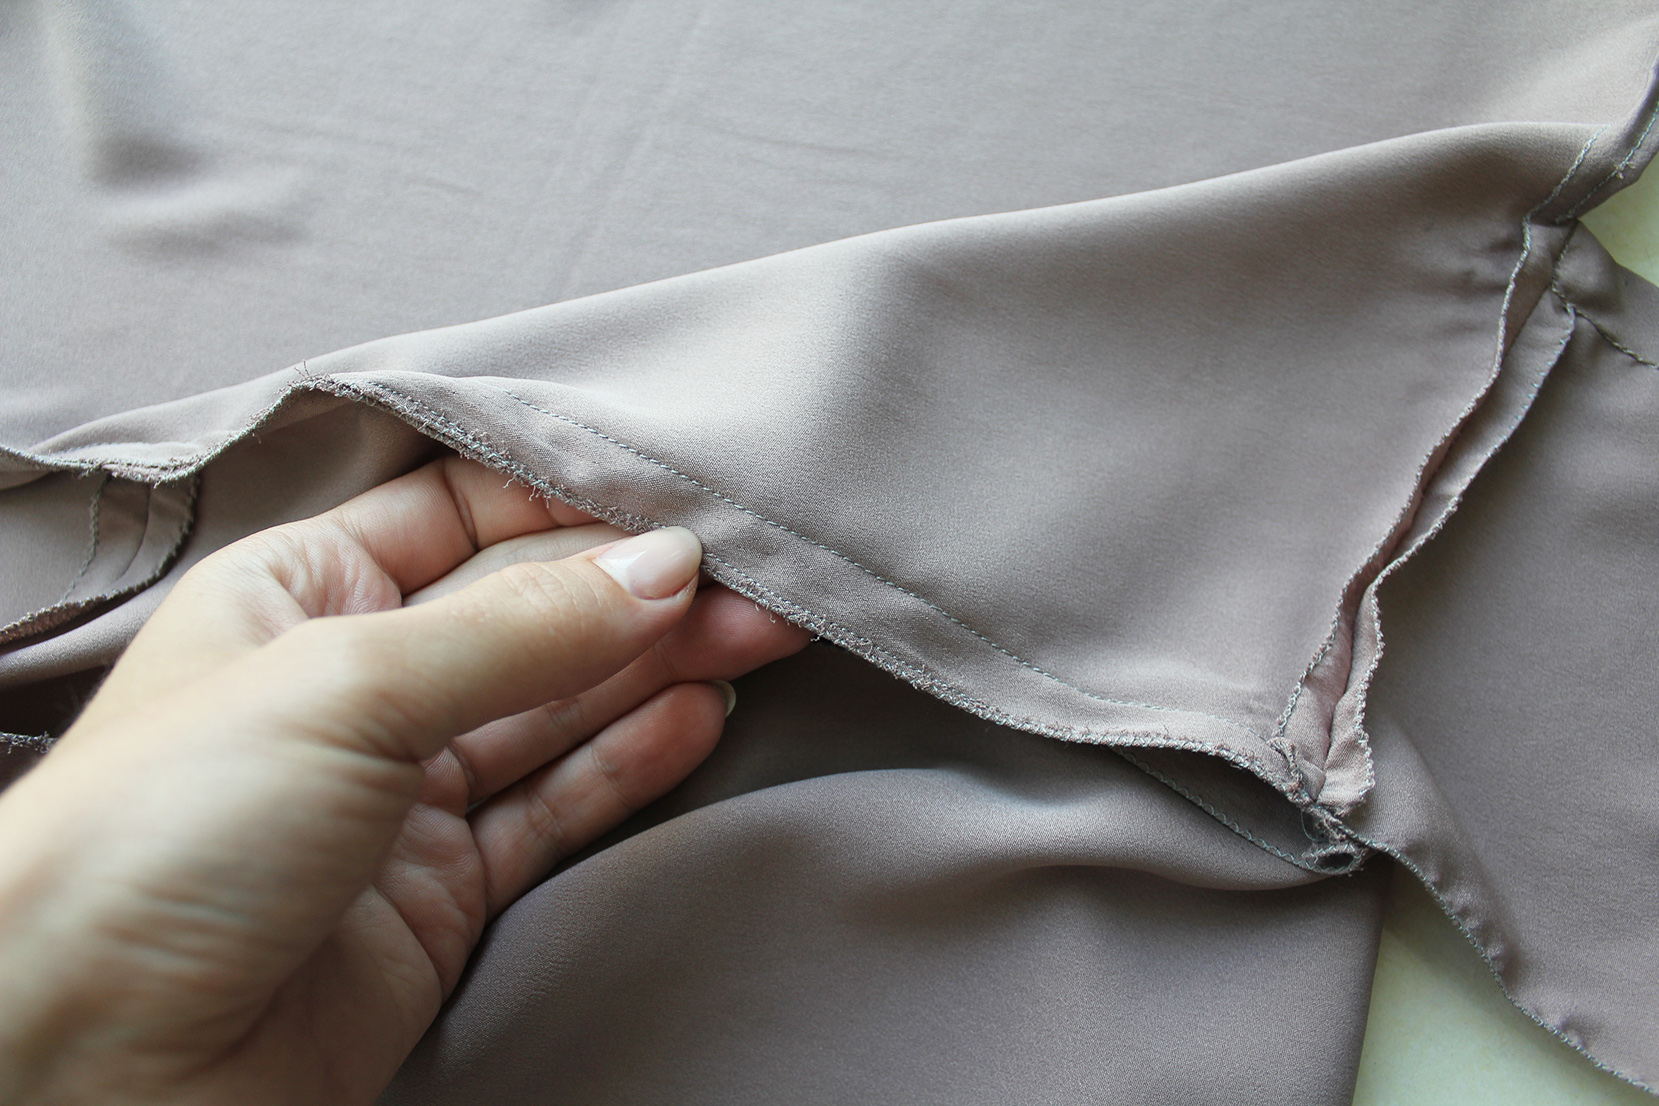
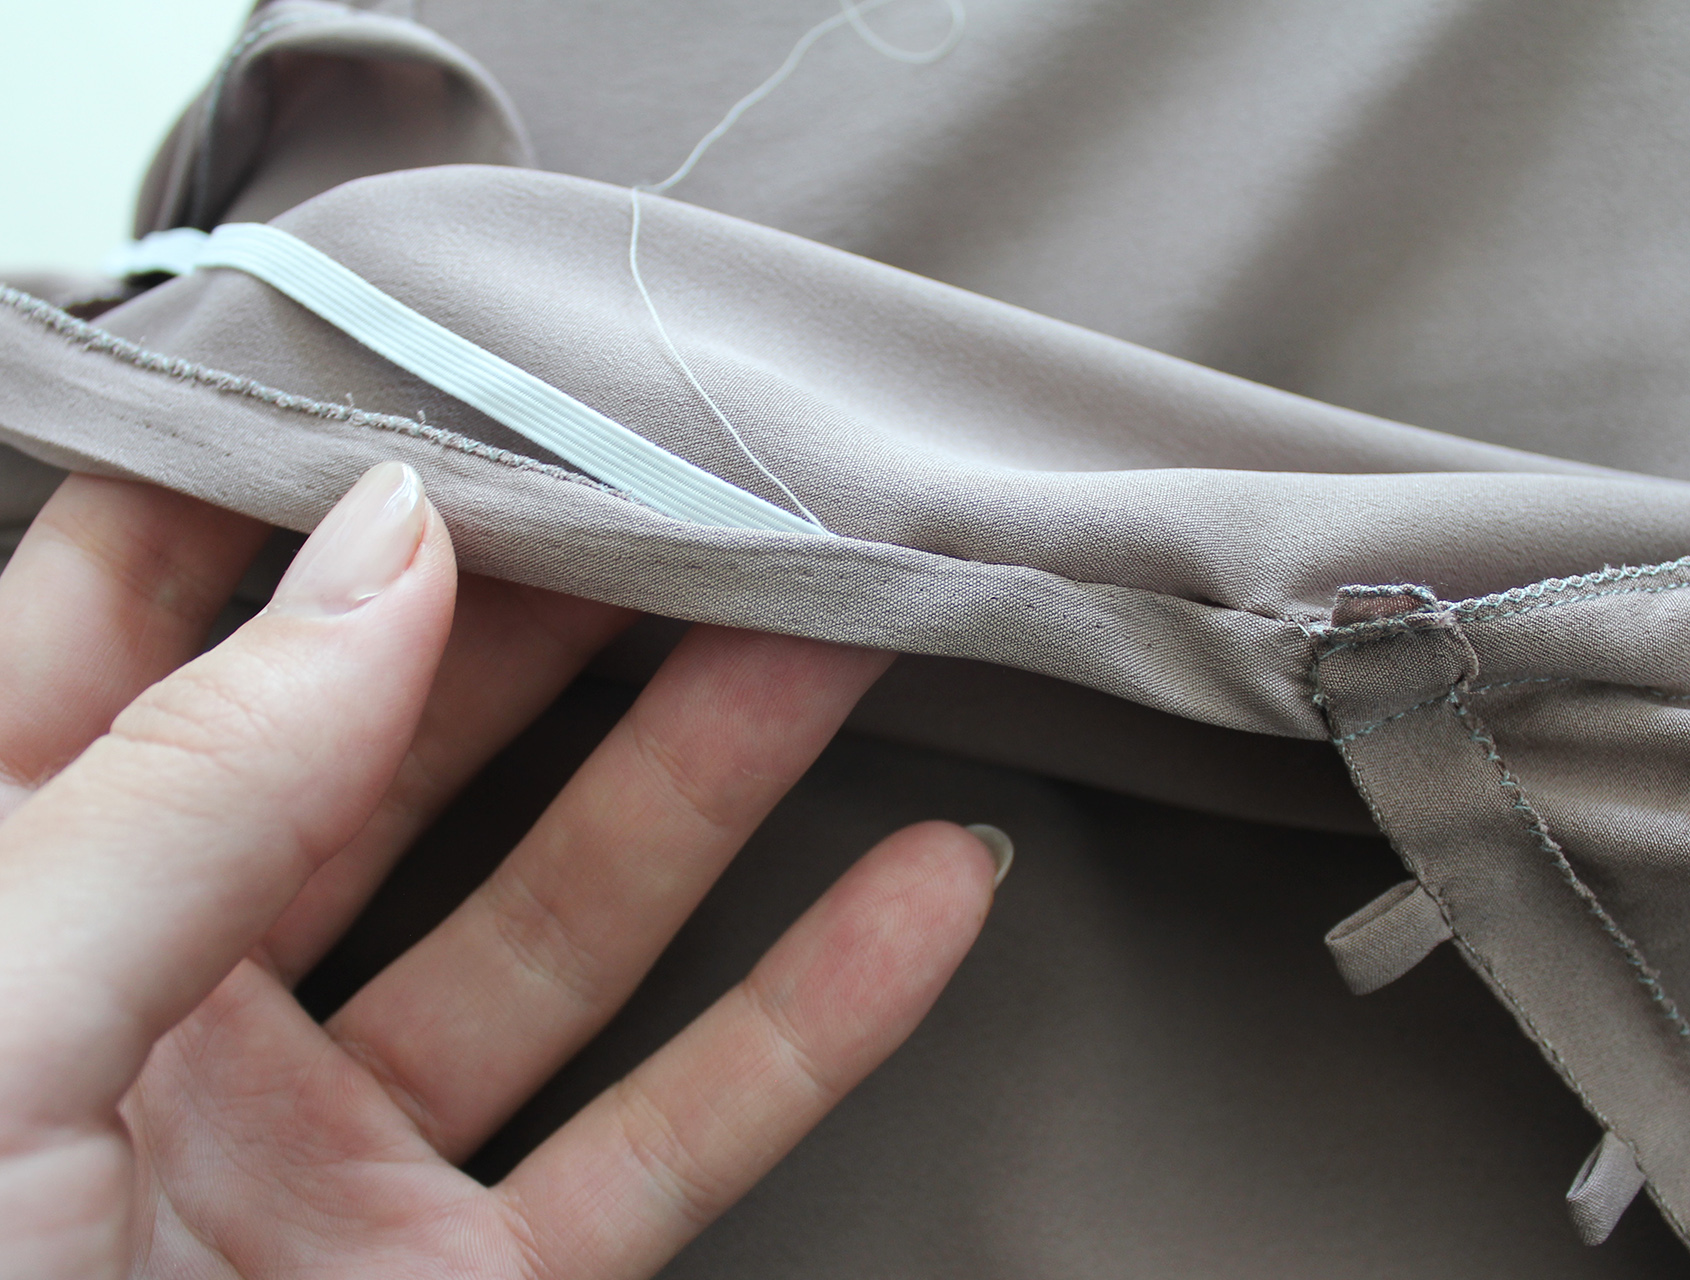
III. I then added a second stitch to the seam allowance of the stitch holding the skirt and the rectangle together. This created the tunnel for the elastic to go in.

IV. Next we need is a lot of string. I made 4 m using the method show in this post + another shorter one (you only need about 30 cm) for the loops that will hold the strap.

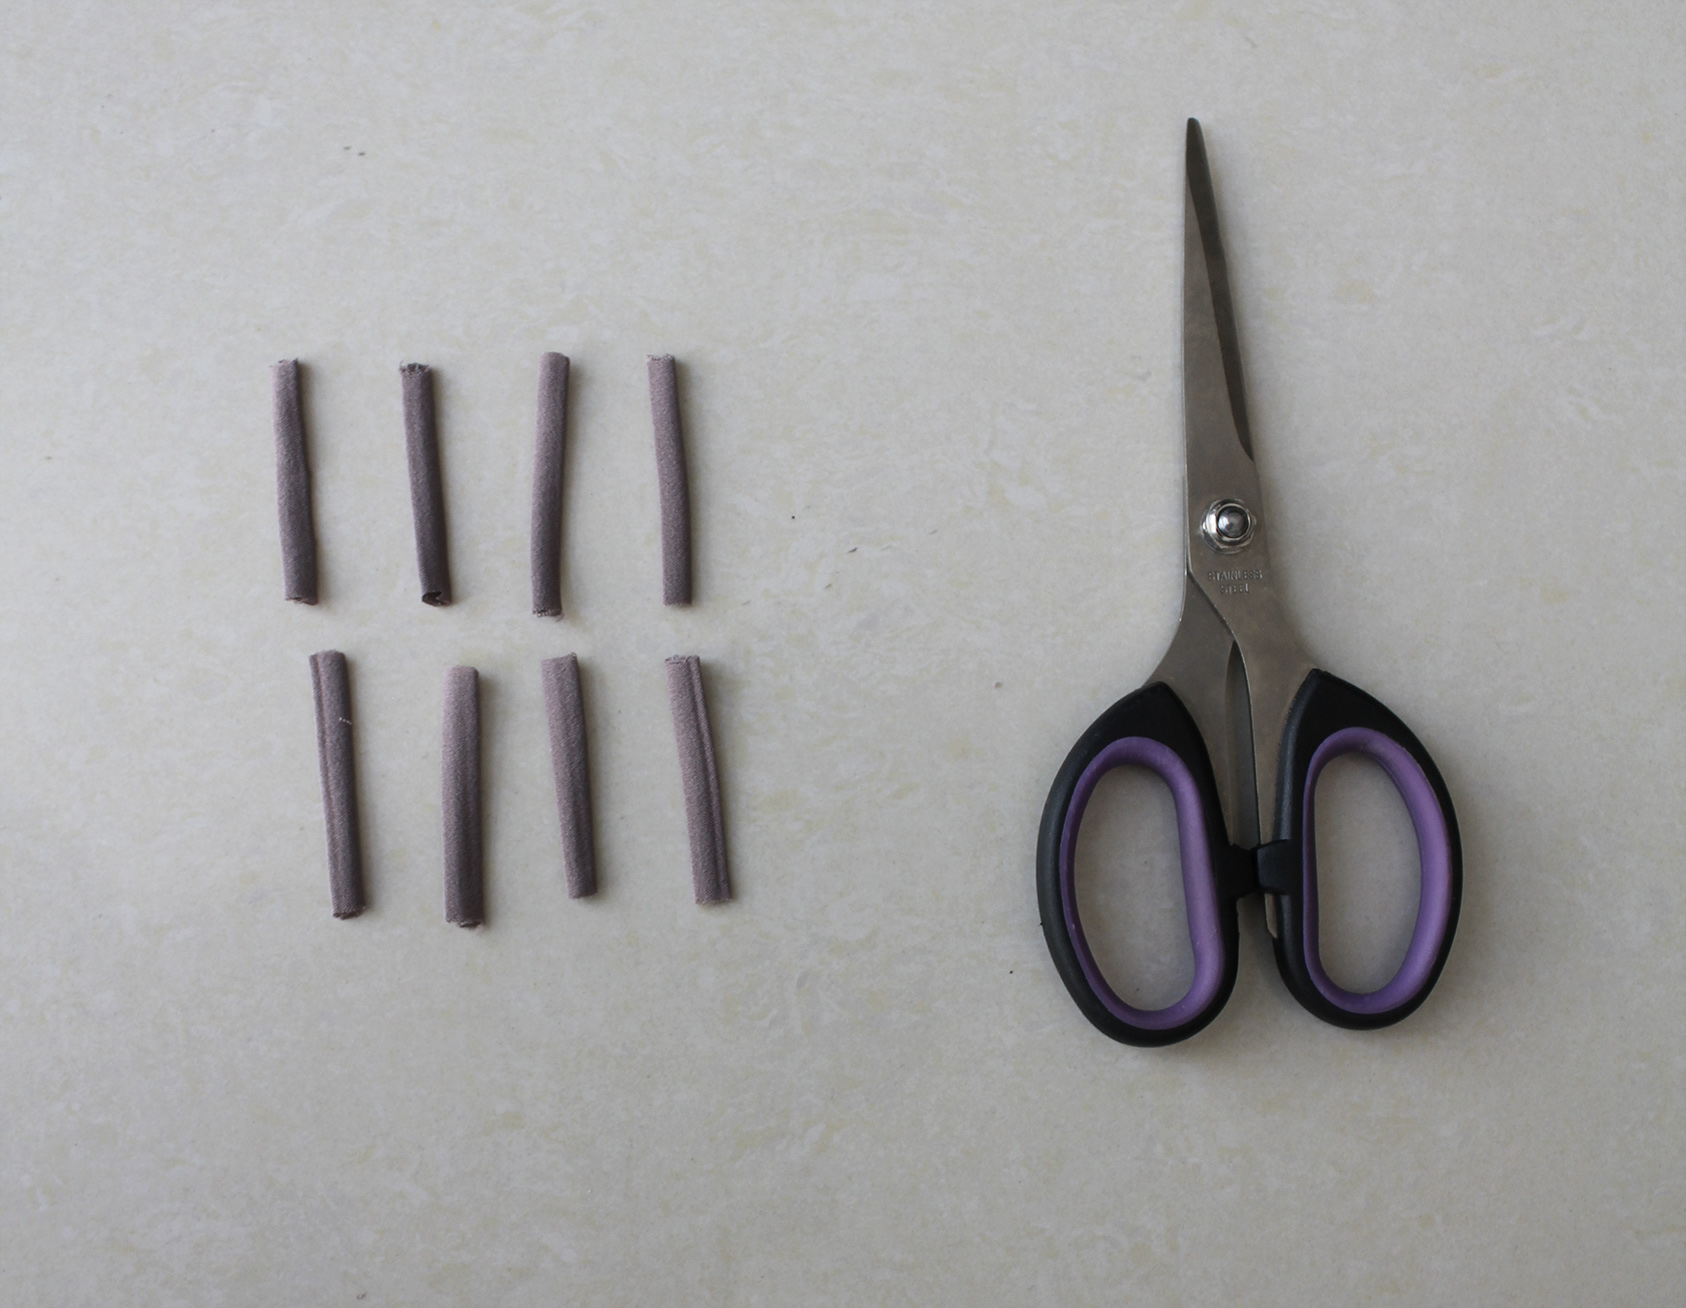
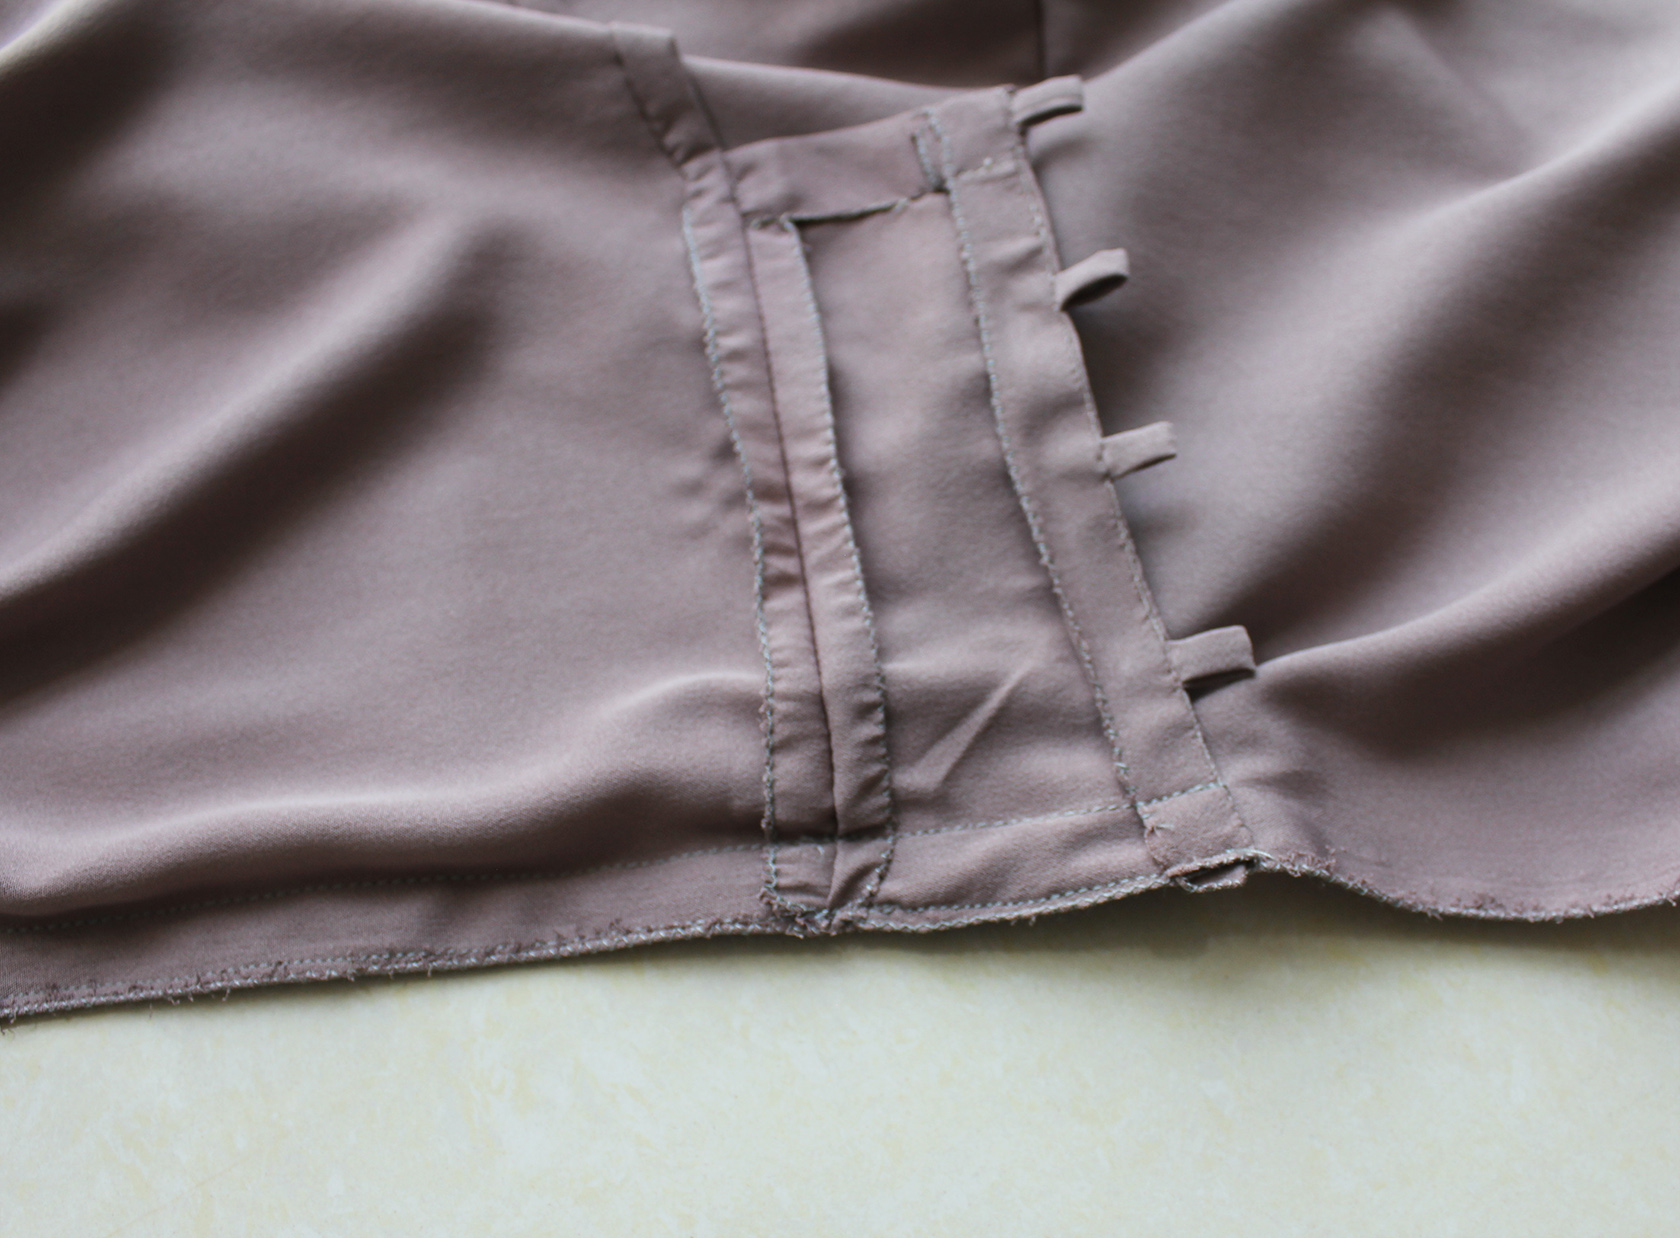
V. Cut small pieces of the shorter strap for the loops (about 3-4 cm each). I went with 4 loops on each side, so a total of 8 pieces.

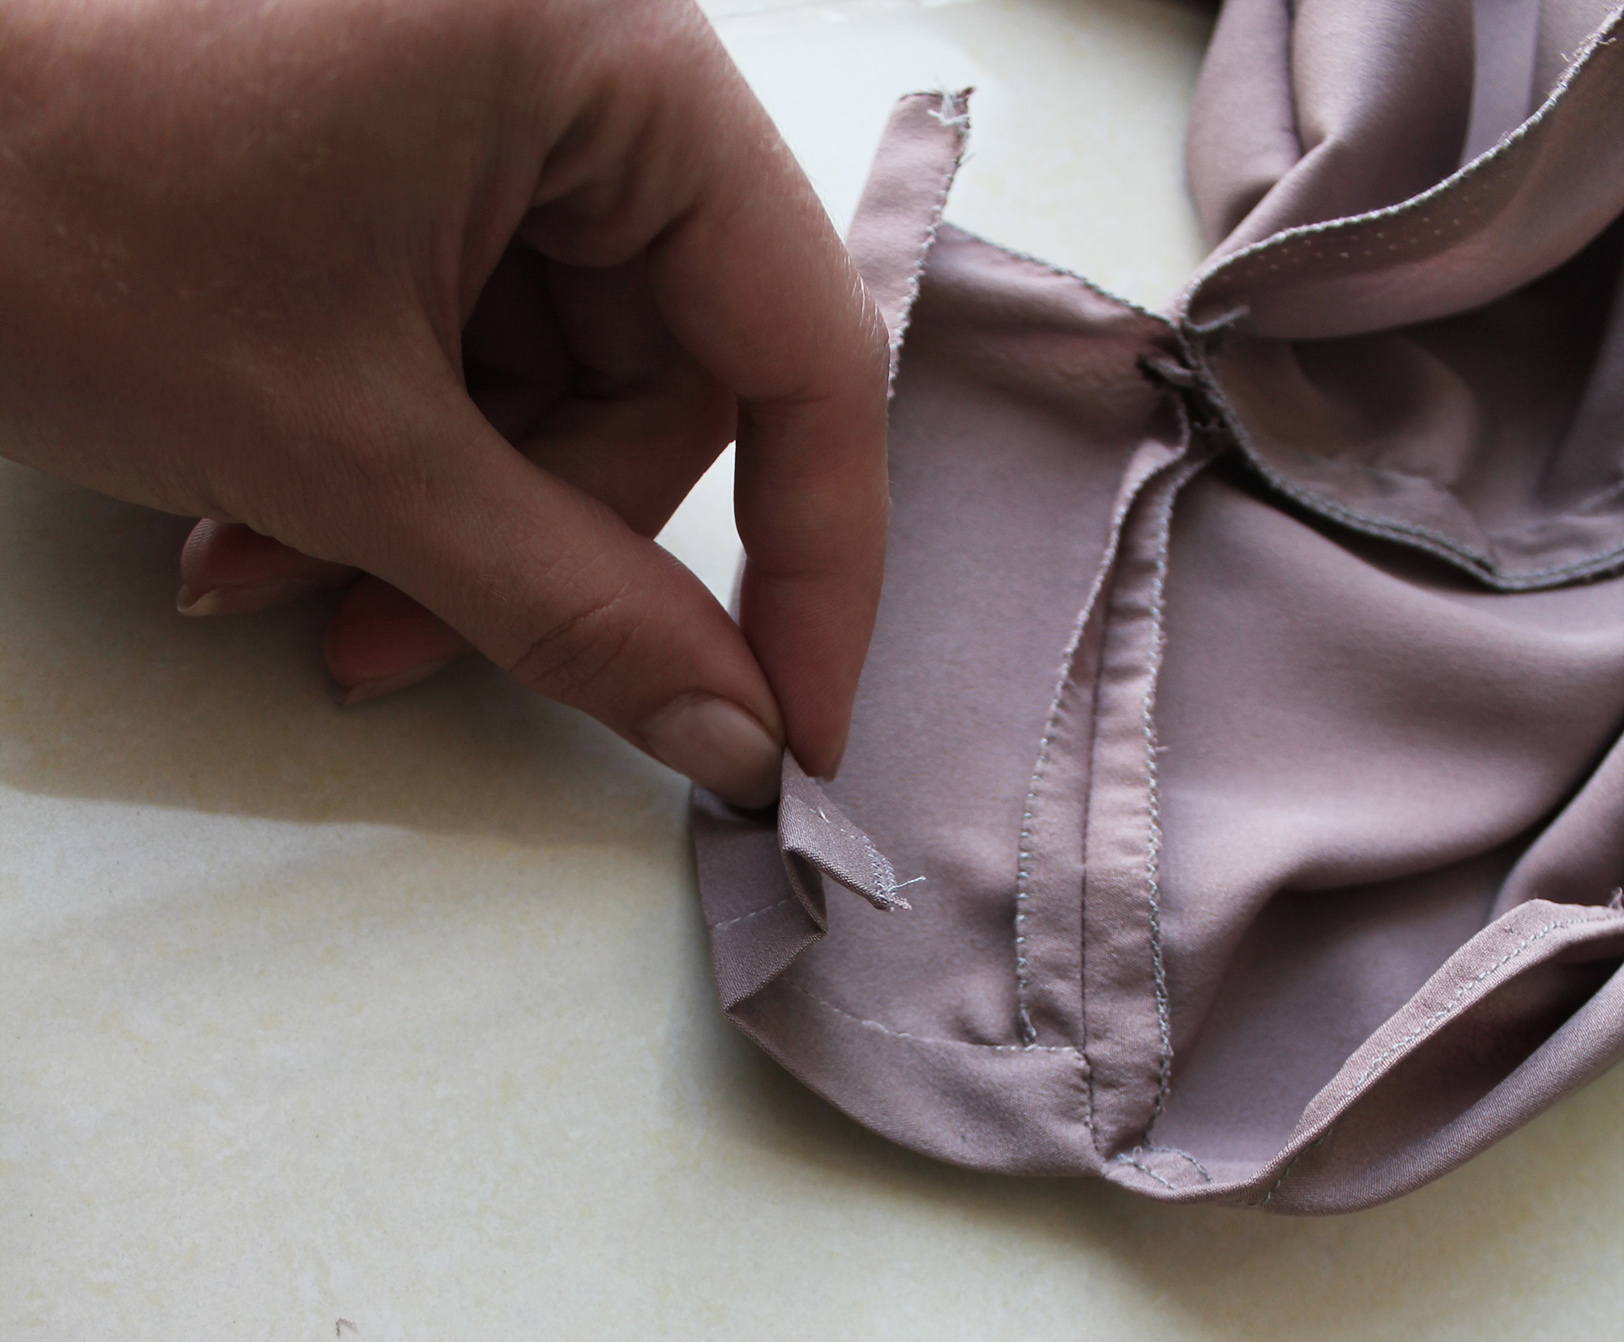
V. Press an accordion- type fold on the small side rectangles of the top..

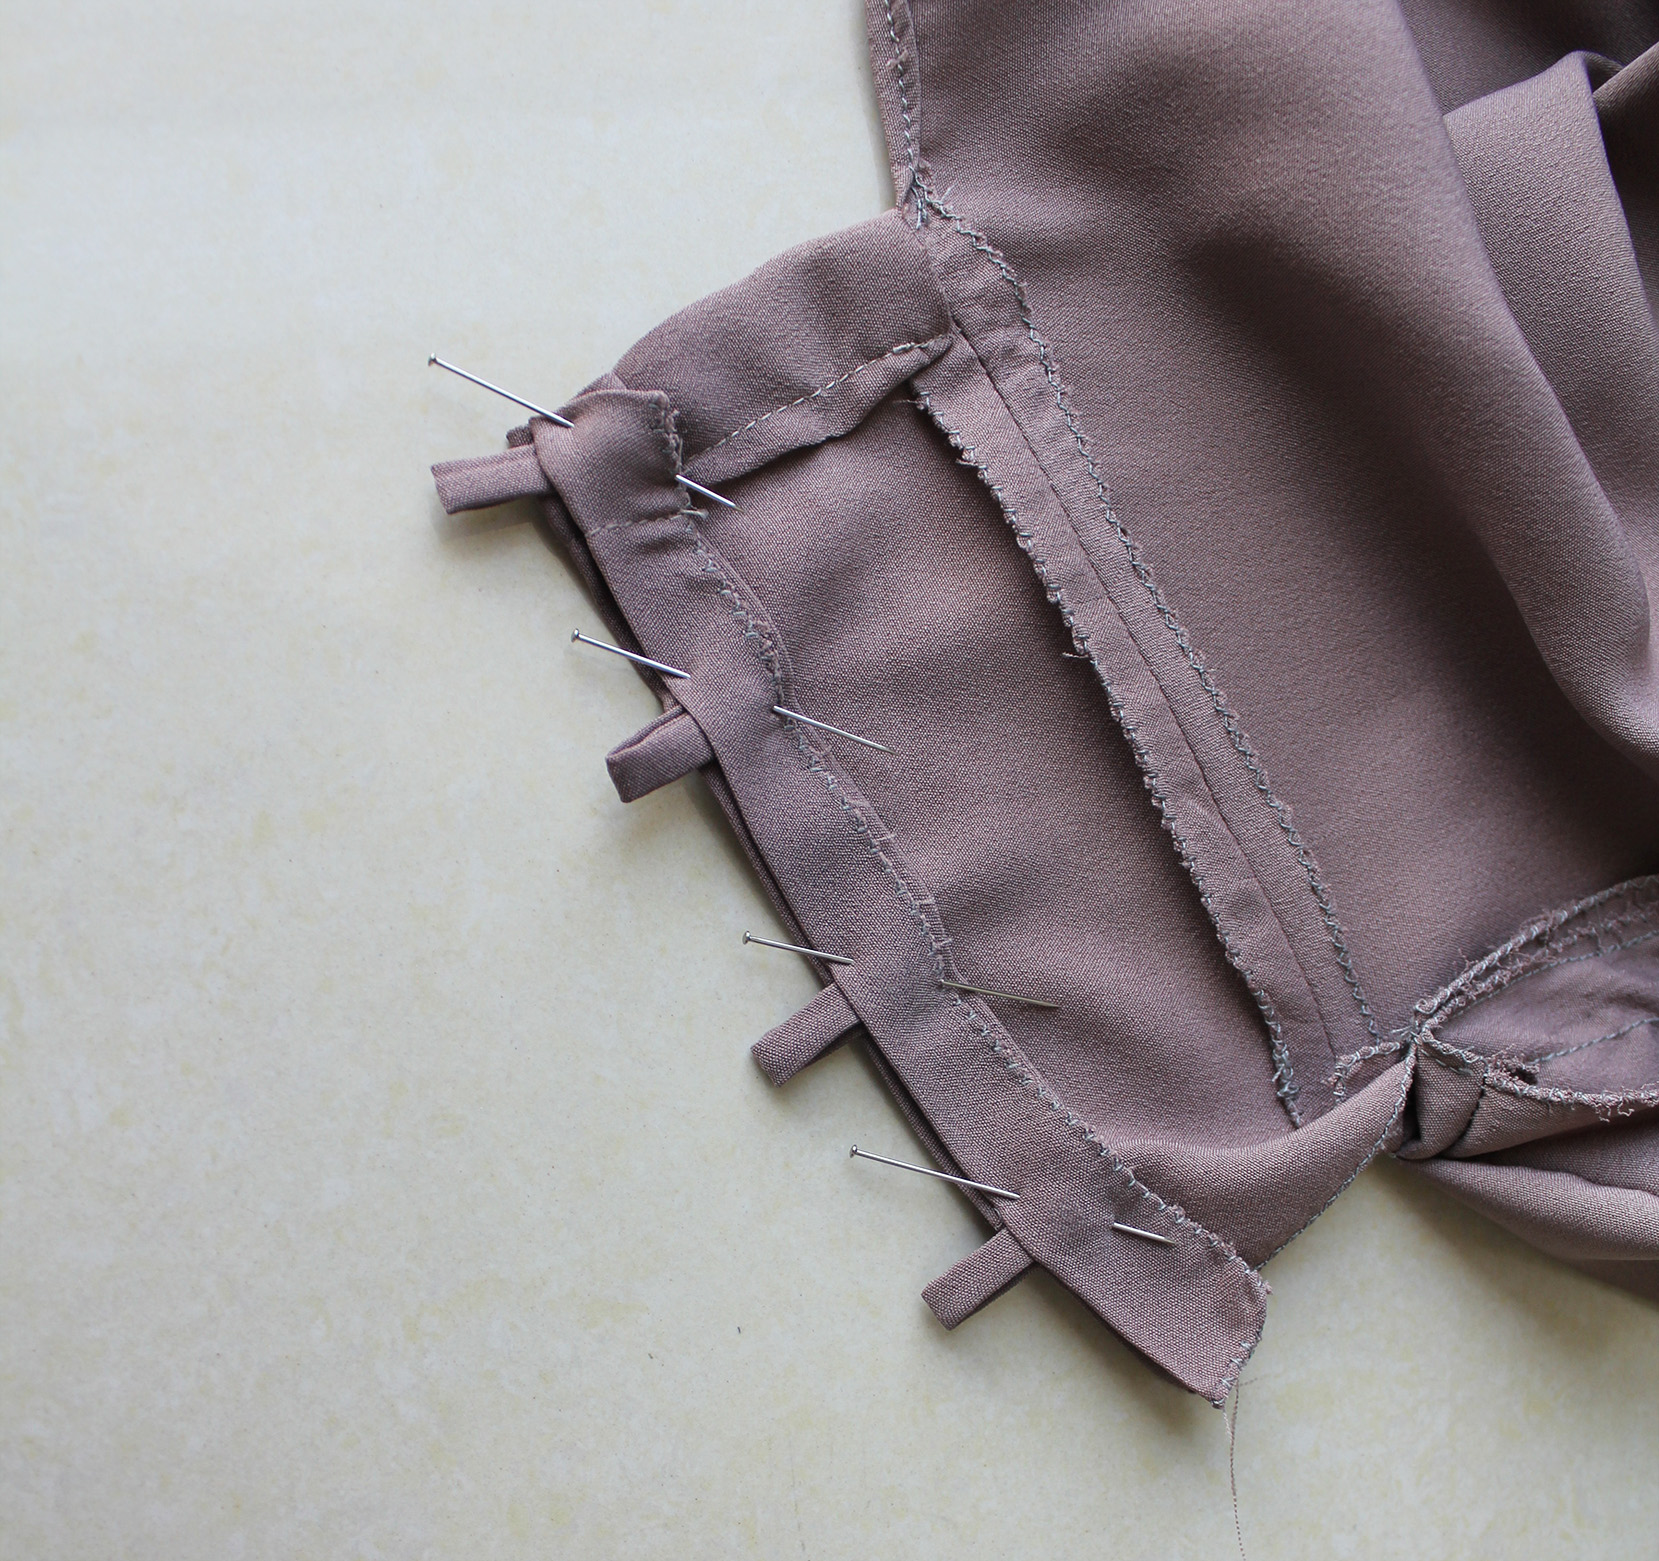
.. And insert the loops in between, pinning down.

VI. I hand-sewed it all in place not to have any stitches visible for a cleaner look, then removed all my basting stitches.

VII. Once that's done you can continue the stitch attaching the top to the skirt all the way to the end of the small rectangles. Remember to also complete the second stitch right at the edge of the seam allowance to finish off the canal for the elastic.

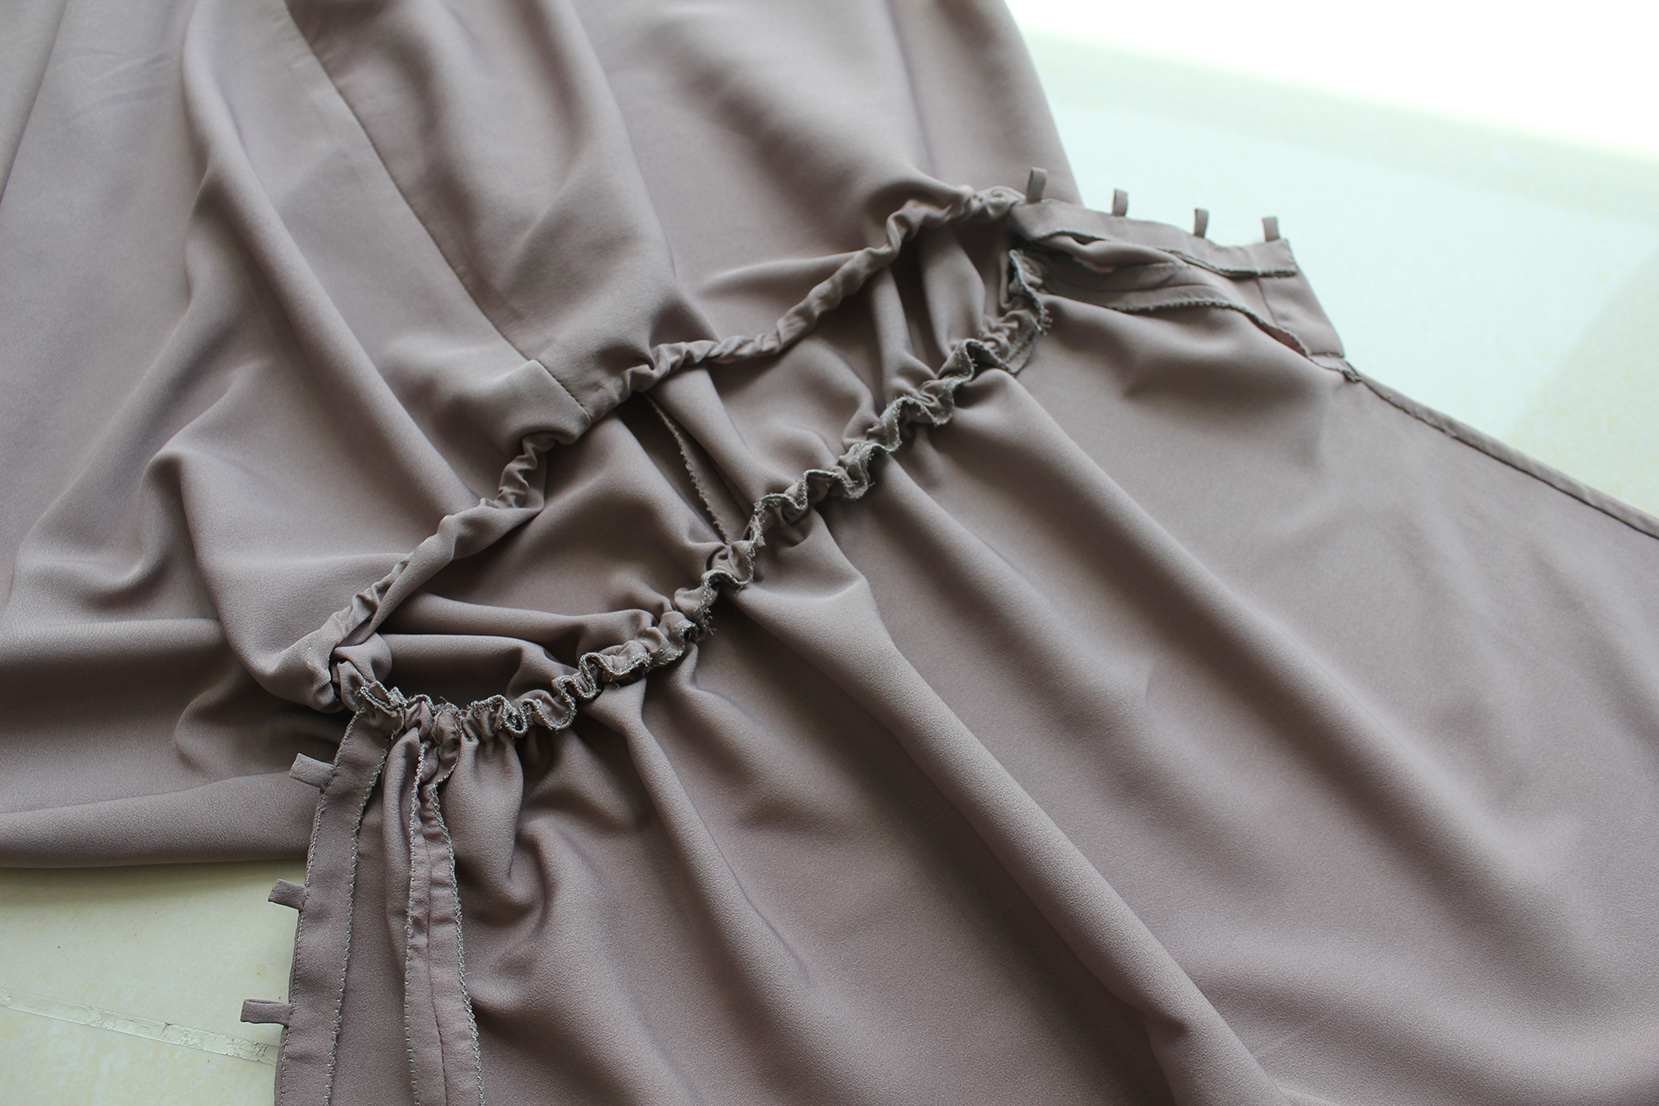
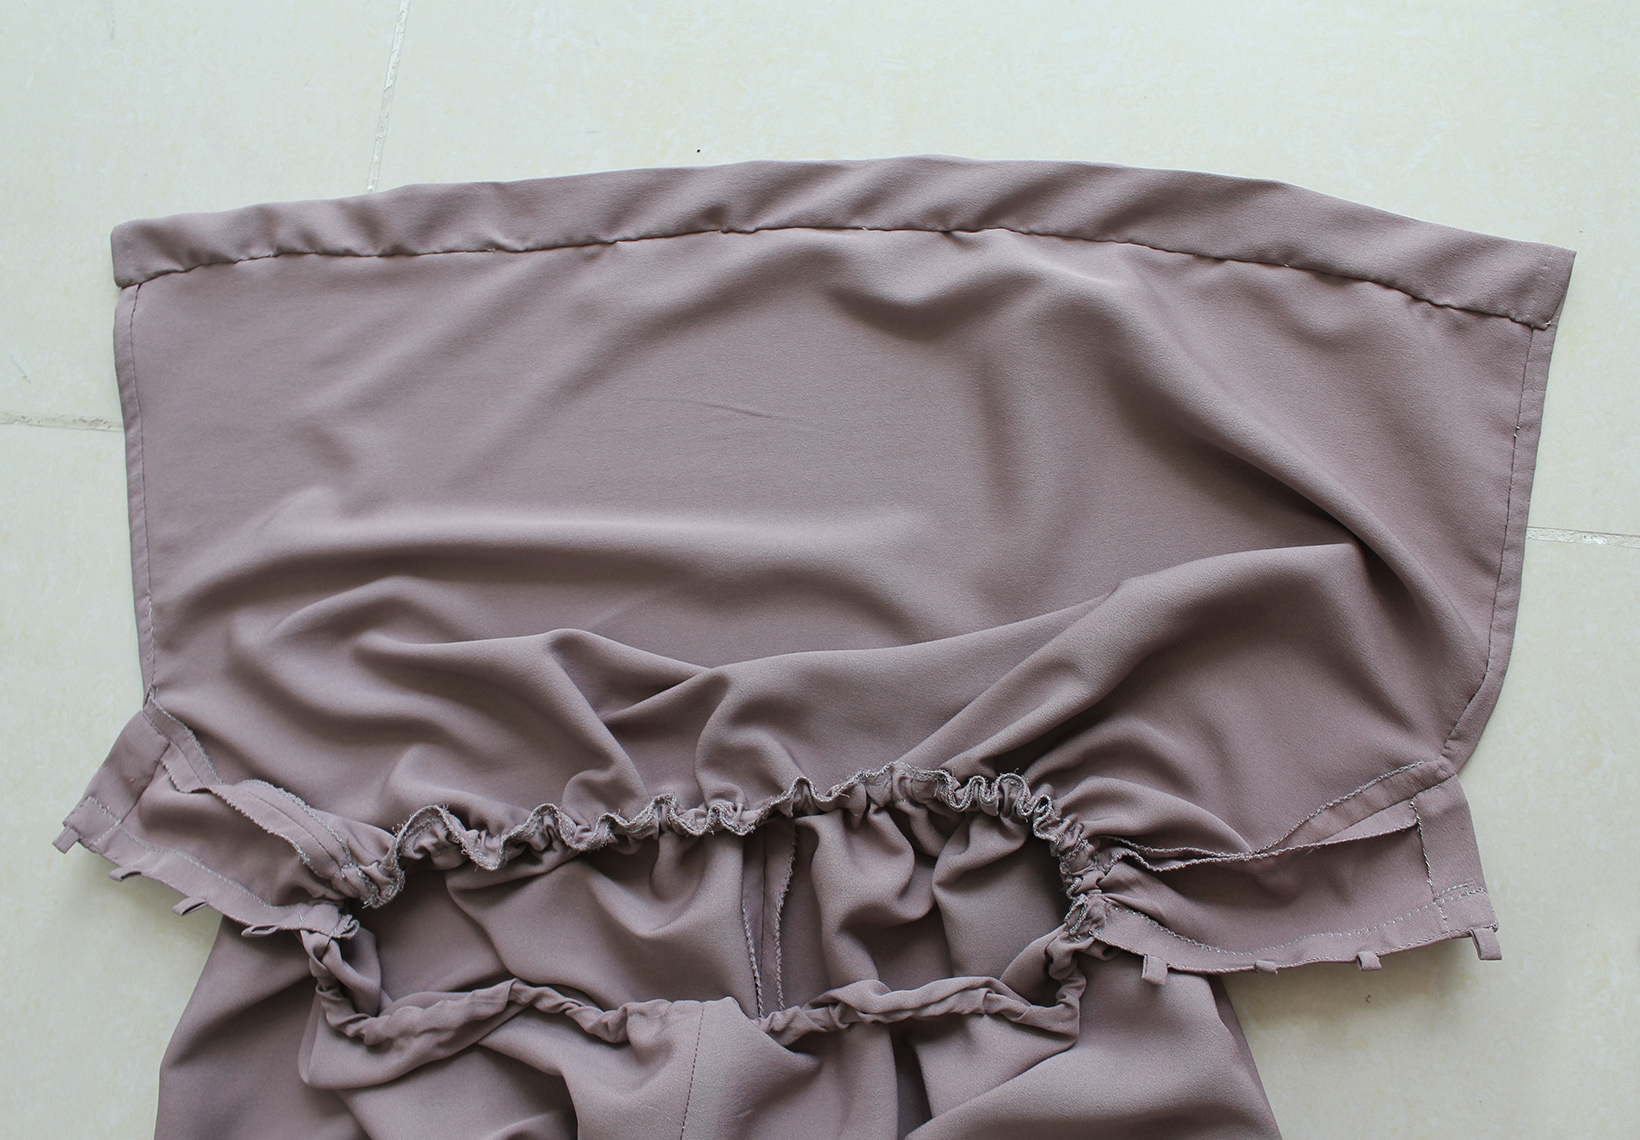
VII. I added my elastic in two pieces - one for the back sewn in place at the ends, and same for the front - I didn't want my elastic moving around and causing the amount of fabric gathered at front/back to change. For the back, I first sewed the elastic end to the side seam, then did a double-fold as I went, hand-sewing all around the back piece. I then tried on the dress to confirm the tightness of the elastic, and sewed it in place to the other side seam.

I then did the same thing for the front - Using a safety pin attached to the elastic to guide it through the tunnel I made in the seam allowance. Checked for size and fixed the length of the elastic to each side of the dress.

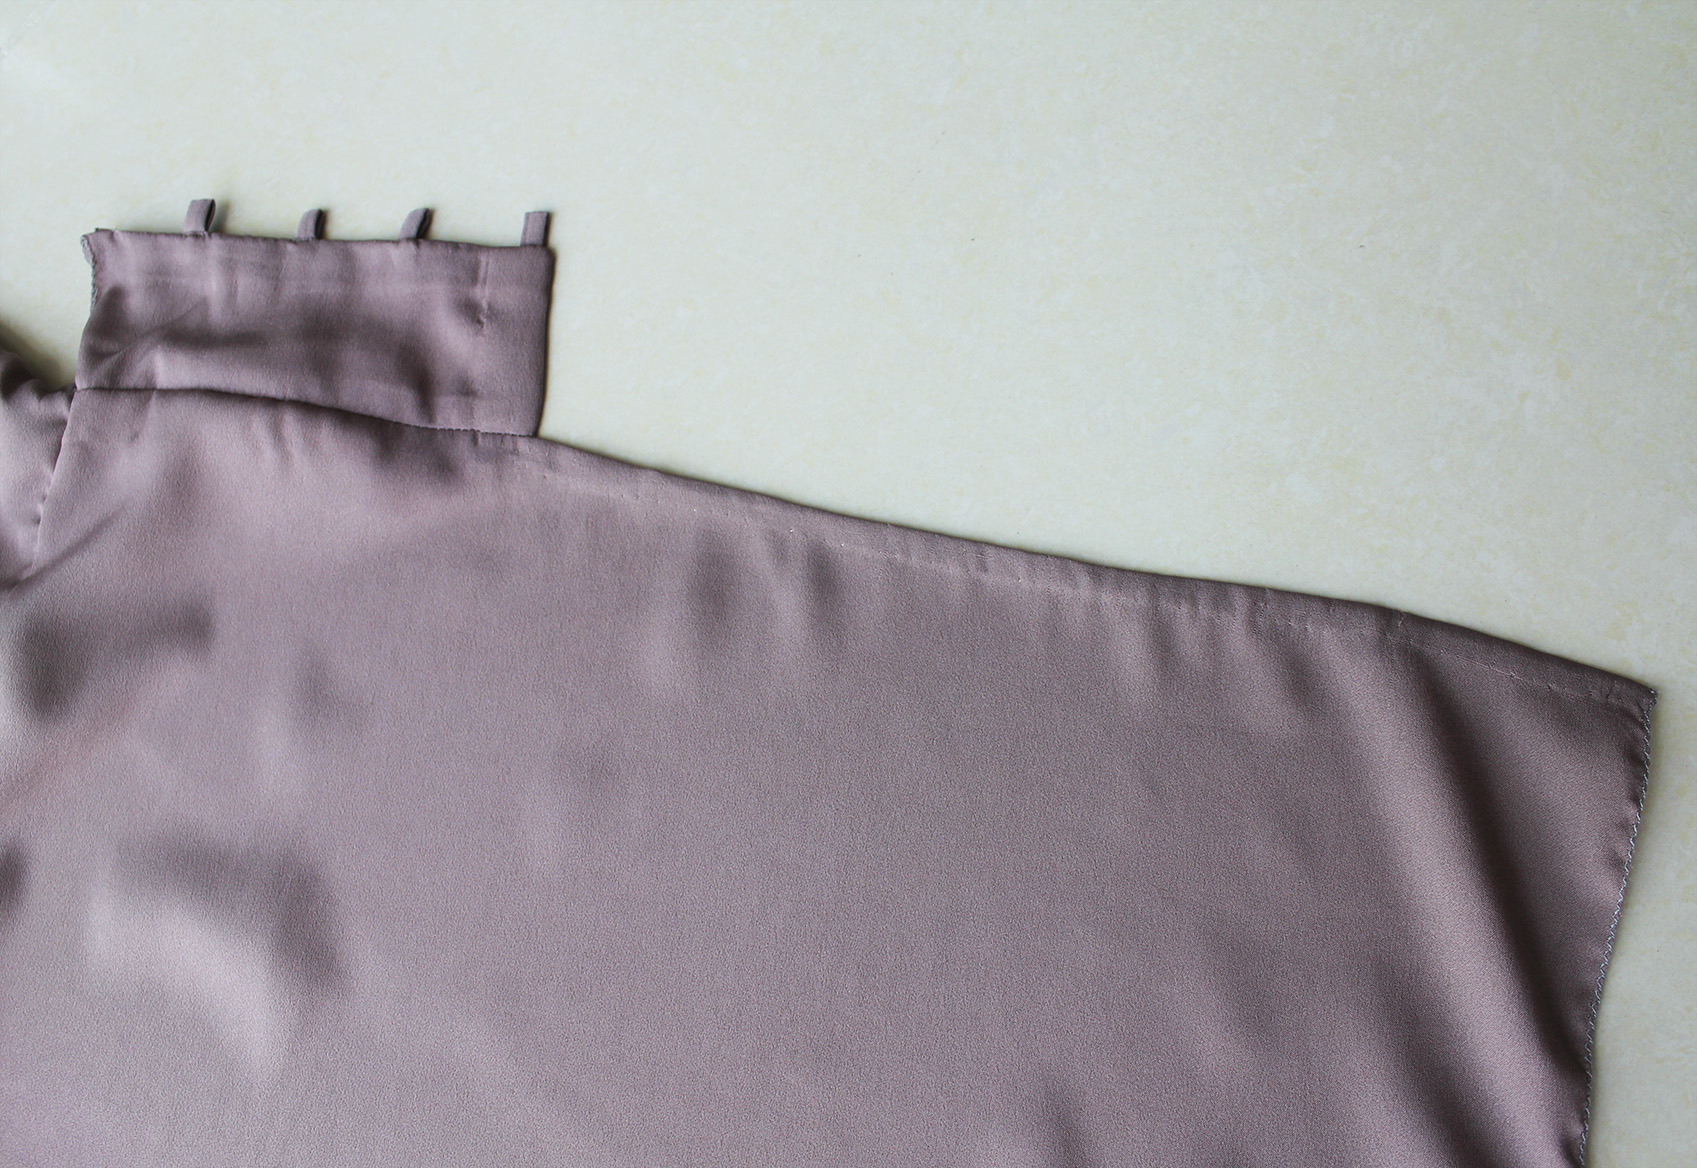
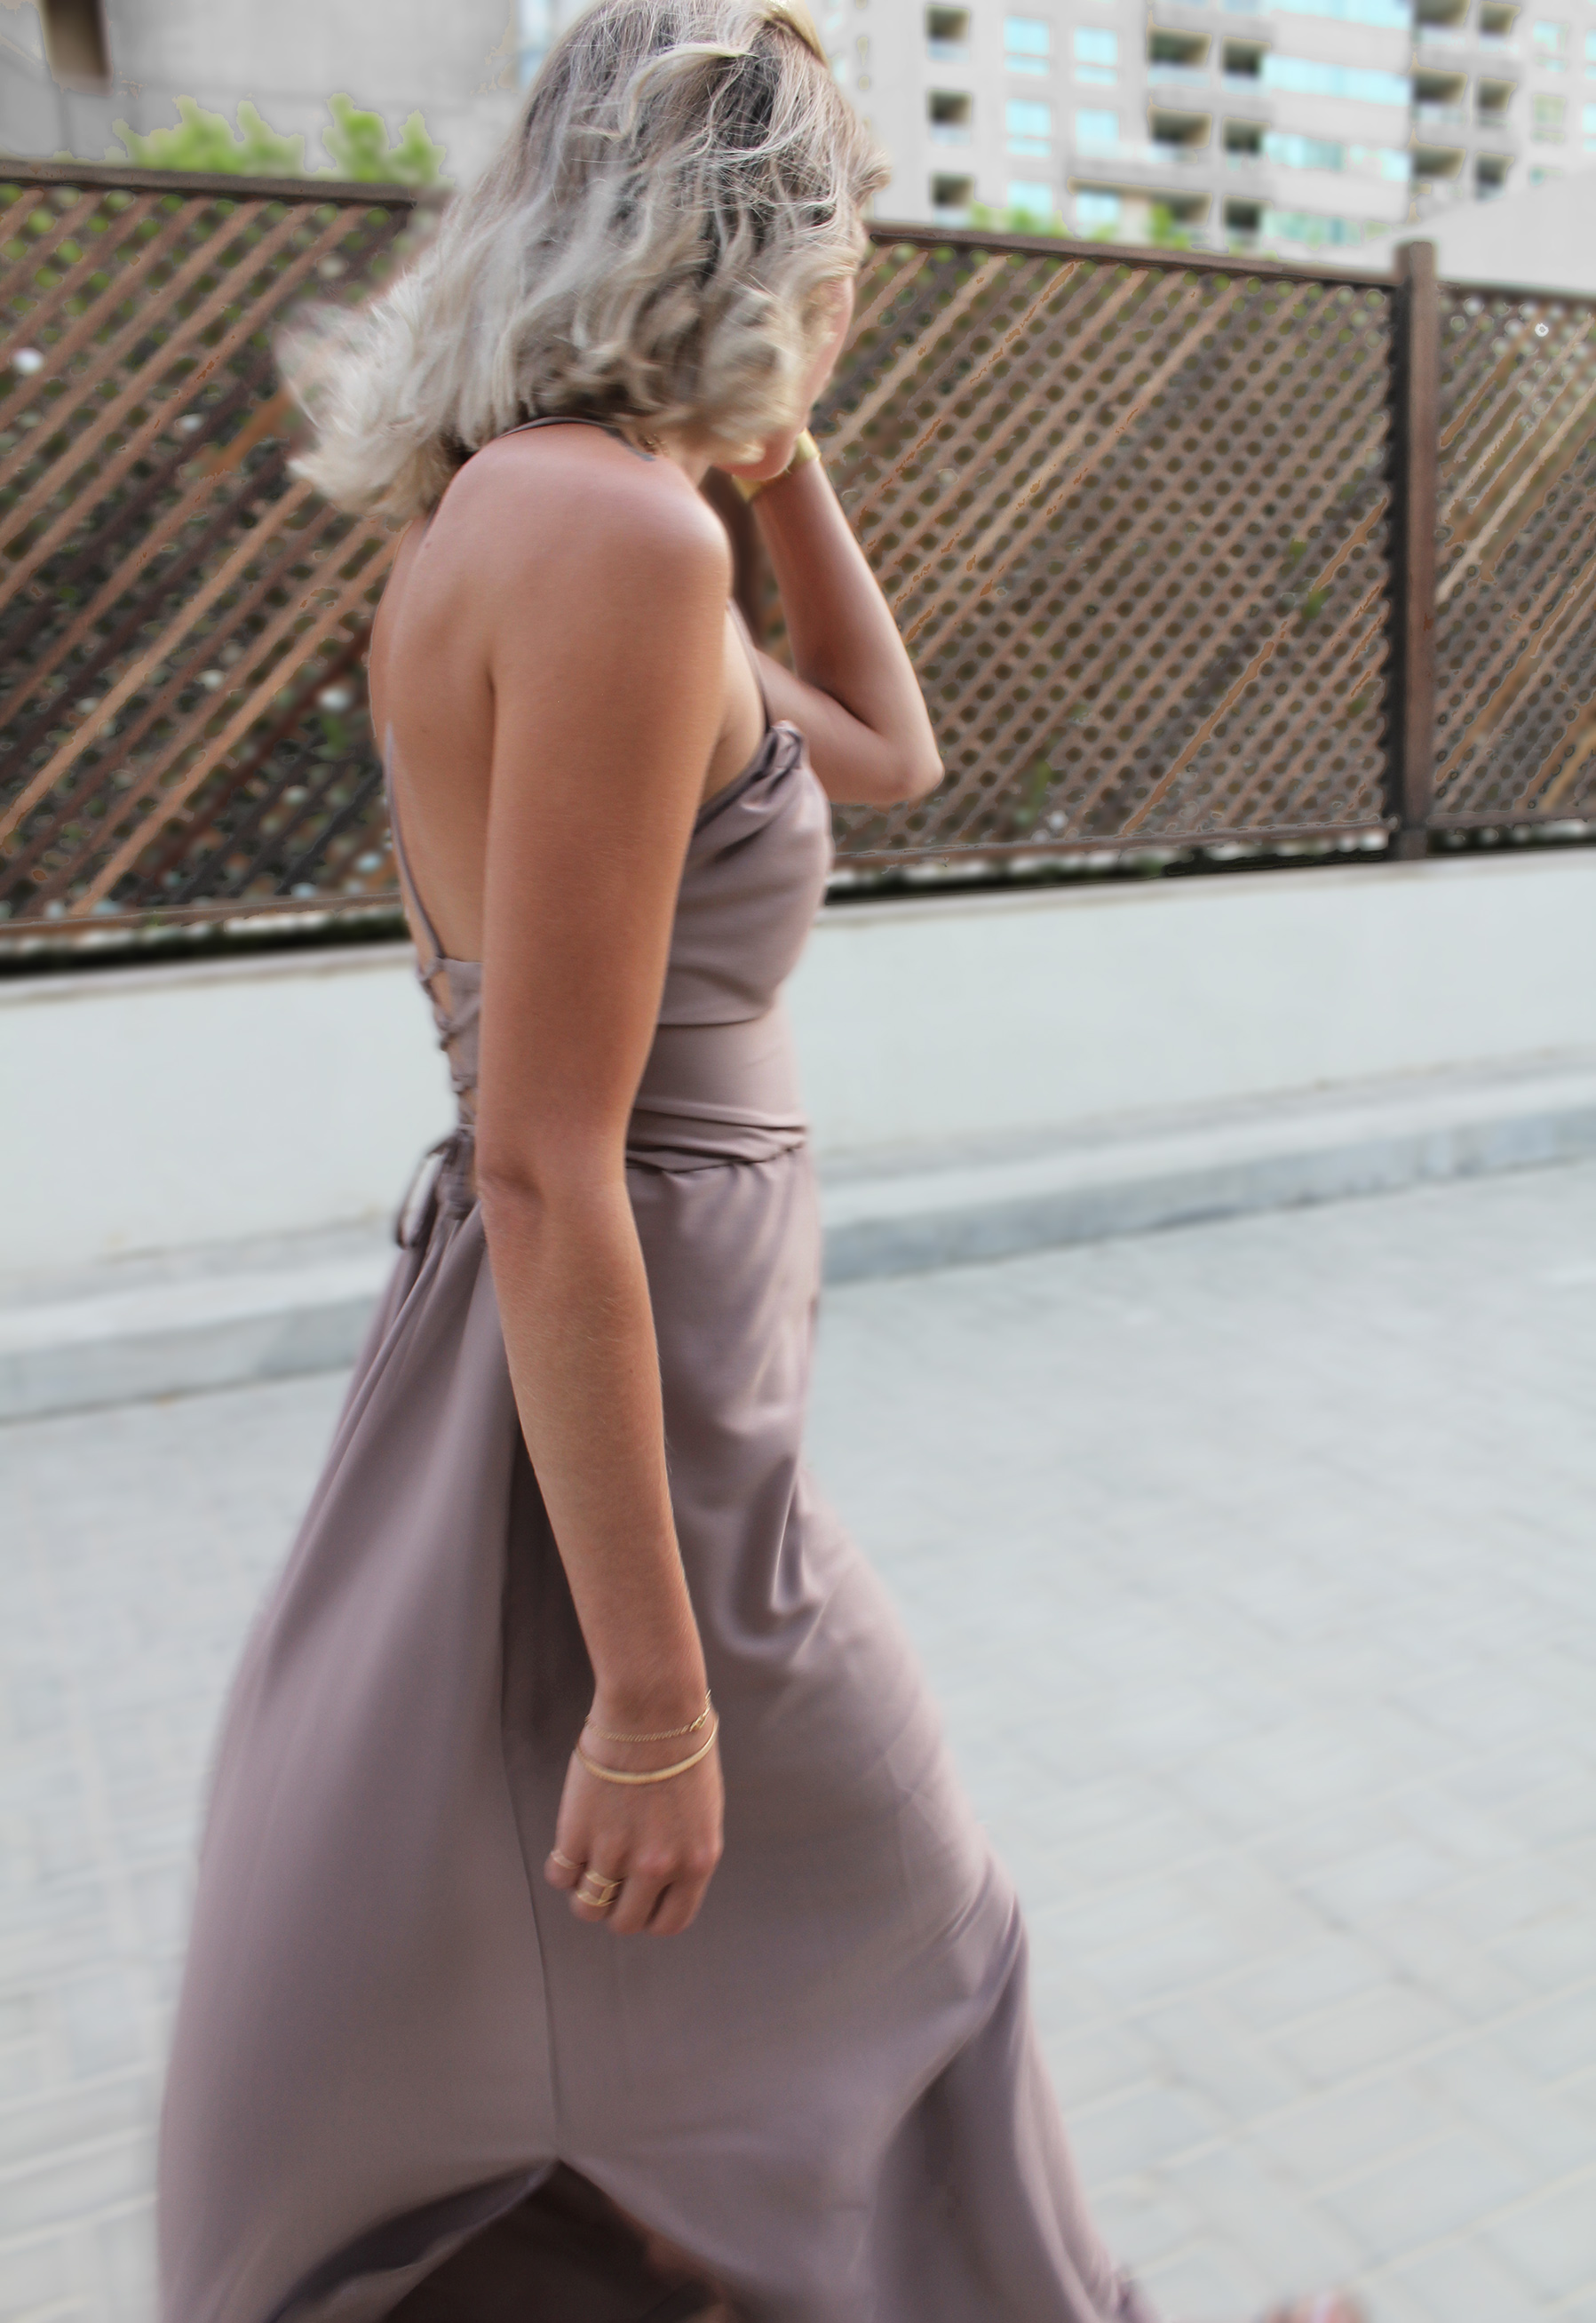
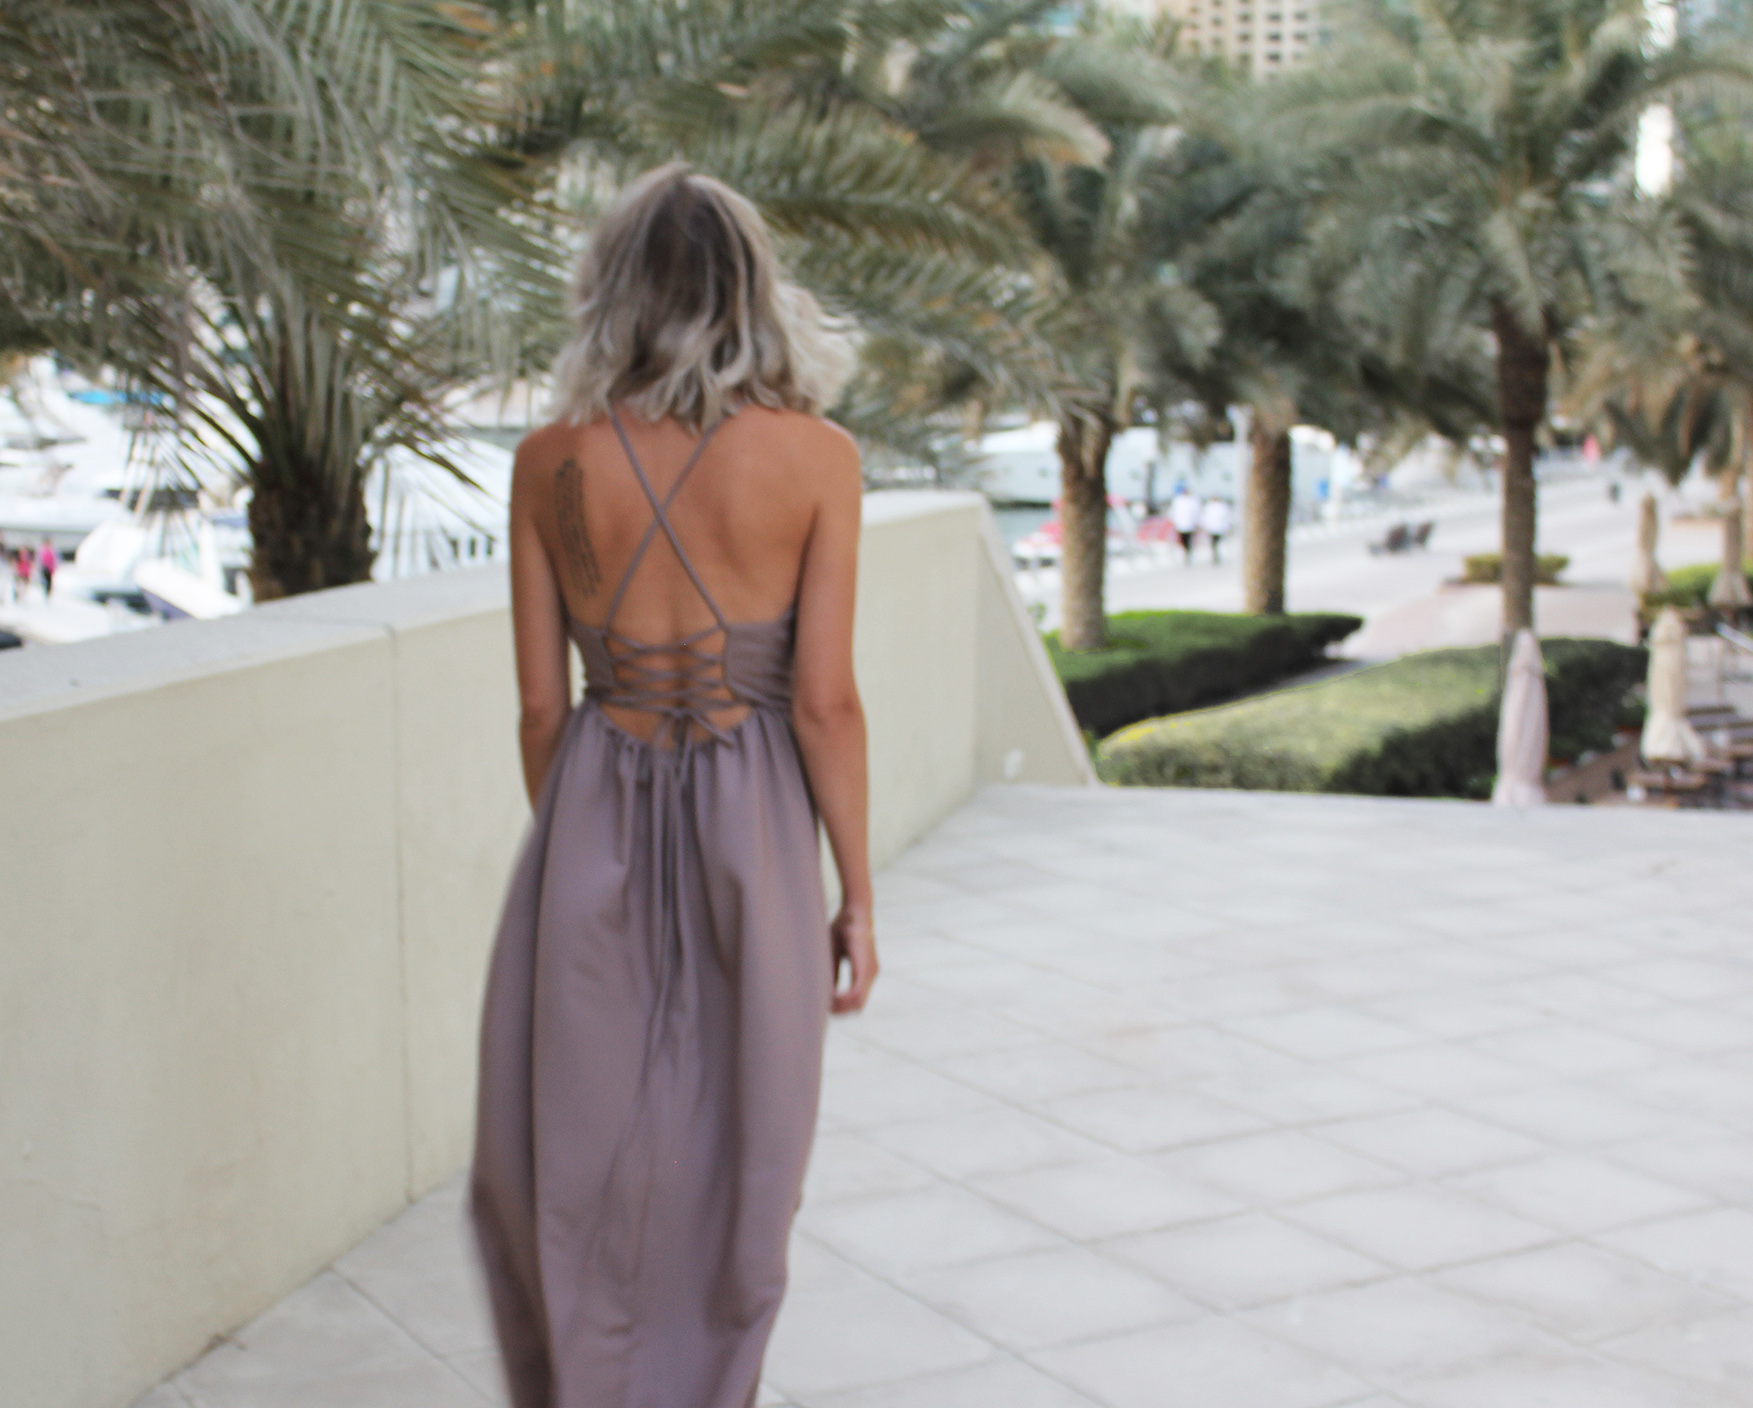
VIII. Last step was to do a double-fold at the neckline of the top, creating a place for the strap. Then it's just a matter of pulling your long strap through the tunnel, and lacing up the back! You criss-cross the lacing in a ton of different ways to change it up.

I made an X at the back before the criss-crossing for it to feel more secure in a braless situation, but you could also have the straps go straight into the first loops.


 xo,
xo,
Julia
.. Then pin the front and back pieces you just created against each other, right sides facing again. At this point I only sewed down about 3/4 and left the rest open to create side slits, finishing the raw edges with a folded seam.
II. A lot is going on in this photo but I was a bit too excited and forgot to document each step.. I took the rectangular front piece and pinned the small side pieces to the bottom sides of it, sewed them in place (leaving the stitch open enough to create a double fold for the seam. I then sewed the big rectangle on the front of the skirt, leaving a 1 cm seam allowance. I also pinned the sides of the front top piece at a double fold to finish that seam as well. Did a basting stitch on the side seams and the top seams of the small rectangles to keep in place until I hand-sewed them.
III. I then added a second stitch to the seam allowance of the stitch holding the skirt and the rectangle together. This created the tunnel for the elastic to go in.
IV. Next we need is a lot of string. I made 4 m using the method show in this post + another shorter one (you only need about 30 cm) for the loops that will hold the strap.

V. Cut small pieces of the shorter strap for the loops (about 3-4 cm each). I went with 4 loops on each side, so a total of 8 pieces.
V. Press an accordion- type fold on the small side rectangles of the top..
.. And insert the loops in between, pinning down.
VI. I hand-sewed it all in place not to have any stitches visible for a cleaner look, then removed all my basting stitches.
VII. Once that's done you can continue the stitch attaching the top to the skirt all the way to the end of the small rectangles. Remember to also complete the second stitch right at the edge of the seam allowance to finish off the canal for the elastic.
VII. I added my elastic in two pieces - one for the back sewn in place at the ends, and same for the front - I didn't want my elastic moving around and causing the amount of fabric gathered at front/back to change. For the back, I first sewed the elastic end to the side seam, then did a double-fold as I went, hand-sewing all around the back piece. I then tried on the dress to confirm the tightness of the elastic, and sewed it in place to the other side seam.
I then did the same thing for the front - Using a safety pin attached to the elastic to guide it through the tunnel I made in the seam allowance. Checked for size and fixed the length of the elastic to each side of the dress.
VIII. Last step was to do a double-fold at the neckline of the top, creating a place for the strap. Then it's just a matter of pulling your long strap through the tunnel, and lacing up the back! You criss-cross the lacing in a ton of different ways to change it up.
I made an X at the back before the criss-crossing for it to feel more secure in a braless situation, but you could also have the straps go straight into the first loops.

 xo,
xo,Julia


The back of this dress is beautiful. Do you have any pics of the front?
ReplyDeleteThank you! I added an image where you can see the front as the last pic:)
Delete