

I showed how to make a bias-bound round neck in this post, here's just a quick update on what to do differently when you're sewing a V-shaped neckline.
Tutorials take a lot of time & effort to create, and I choose to make mine available for free. If you enjoy this guide, you can support me with a donation that feels right for you, here.
TOOLS:
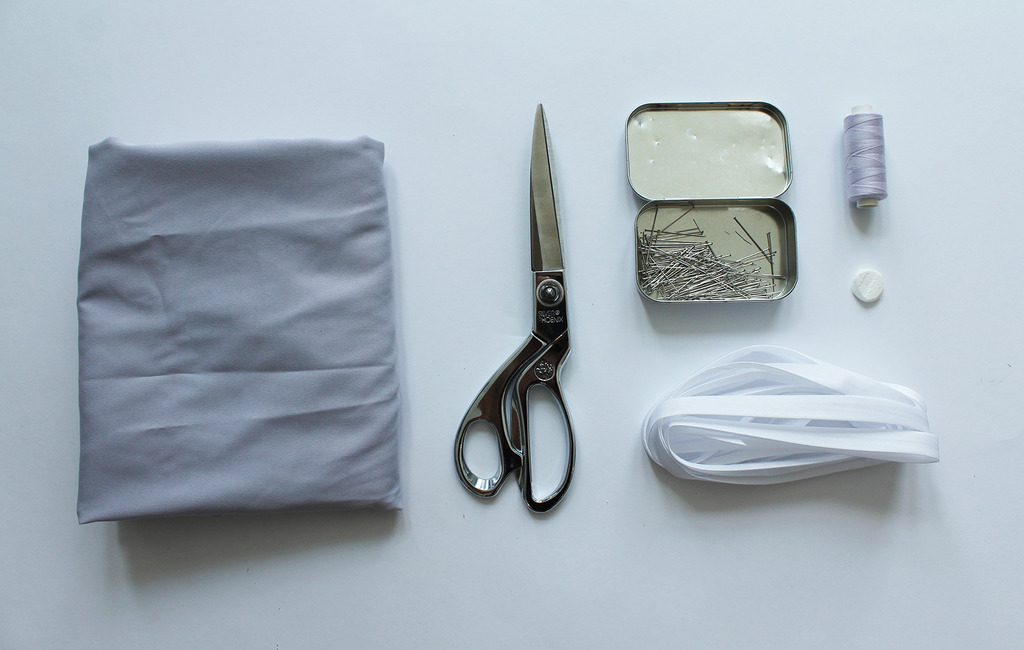
Fabric (for a sleeveless top 1 m is plenty) | Scissors | Thread & Sewing machine | Pins
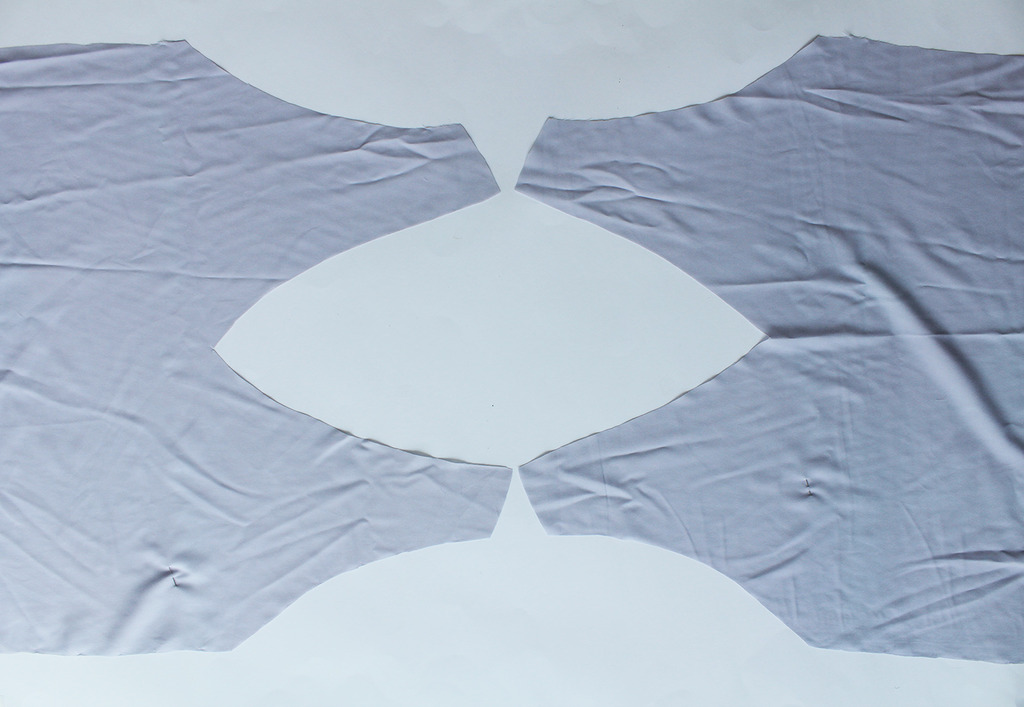
I. Here's what I started with. The first step is to pin our shoulders together and finish the seams so your neckline is in one piece.
II. Once that's done, stay stitch around your neckline (just sew a regular straight stitch about 0,5 cm from the edge). This prevents any distortion while working and adds stability to the area.
III. Start pinning the bias tape on the right side, by first folding it as shown below, and making sure the opened crease is just below your stay stitch.

IV. When you get to the bottom of the V, pin slightly past it:

.. And then fold and pivot the bias tape to continue pinning back up the other side of the V:

V. When you get back to where you started, overlap the bias tape with your starting point by about 1 cm.

VI. Sew a straight stitch right along the crease of the bias tape:

VII. Then fold the bias tape in half, and fold again to turn it onto the reverse side of the fabric. Pin in place as you go.

.. This is what it will look like on the reverse:

VIII. When you get to the V, before folding, make sure you clip the bottom of the V like this to avoid puckering:

.. And just fold the bias tape around the bottom of the V neatly like this:

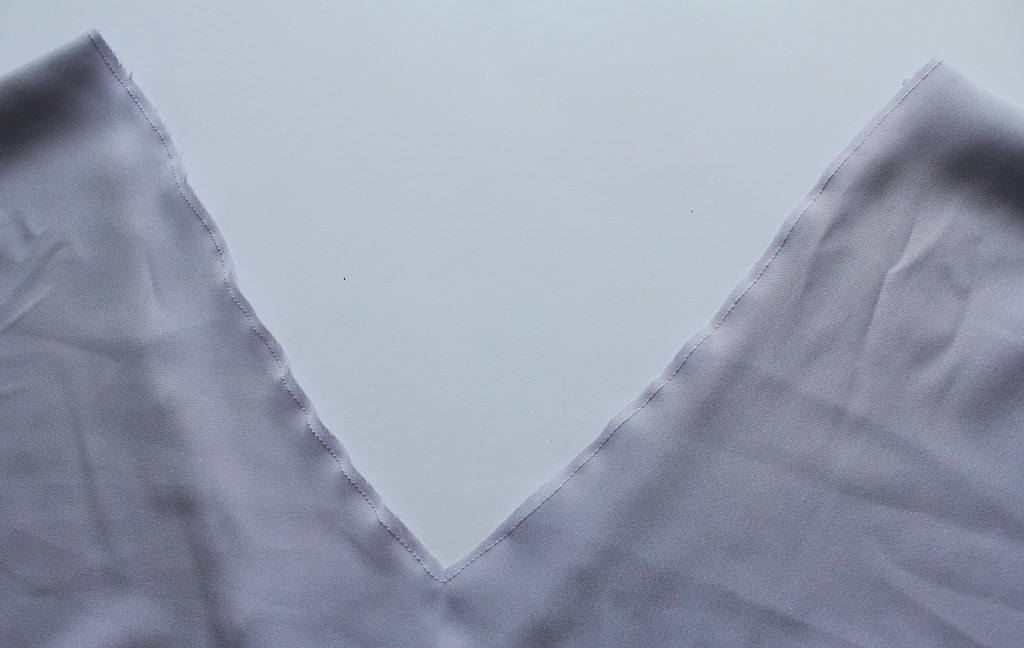
IX. Finally, top stitch all around your neckline on the right side to get a nice, clean finish. Press well, and you're done.

xo,
Julia


Thanks Julia this is just what I was looking for a week ago. I just completed a top with a V-neck and had to finish it with a facing because I didn't know of this technique. It looks very neat I will try it very soon.
ReplyDeleteThanks again
Hyacinth
Thanks Julia this is just what I was looking for a week ago. I just completed a top with a V-neck and had to finish it with a facing because I didn't know of this technique. It looks very neat I will try it very soon.
ReplyDeleteThanks again
Hyacinth
Hi Hyacinth! Happy to hear you found it useful:) Happy sewing!!
DeleteThanks for sharing this. You have explained it very well. Sandra from Canada.
ReplyDeleteThanks darling. I have been stuck with a v neck project but this post seems the one that is gonna help me in finishing the garment. Question: do you start applying the bias on the wrong side of the garment right?
ReplyDeleteHi there! you start by pinning the bias tape on the RIGHT side of the fabric - once you've sewn it, you will flip it onto the reverse side:)
Delete