

There is really no need to explain this one. Love camel, love grommets, love lacing, love suede.
P.S. Another project bites the evening darkness of the North.. Images of the process are what they are not only due to lack of sunlight, but also the fact that the camera I was borrowing while in Finland had been set to accommodate for its users myopia, and the button was stuck on that setting.. So I couldn't really tell what was in focus and what was not:D
TOOLS:


Suede or suede-look fabric (mine was the latter), 1 m or so | Matching zipper | Grommet kit (I used 11 mm diameter ones) | Matching thread, sewing machine | Scissors | Fabric marker
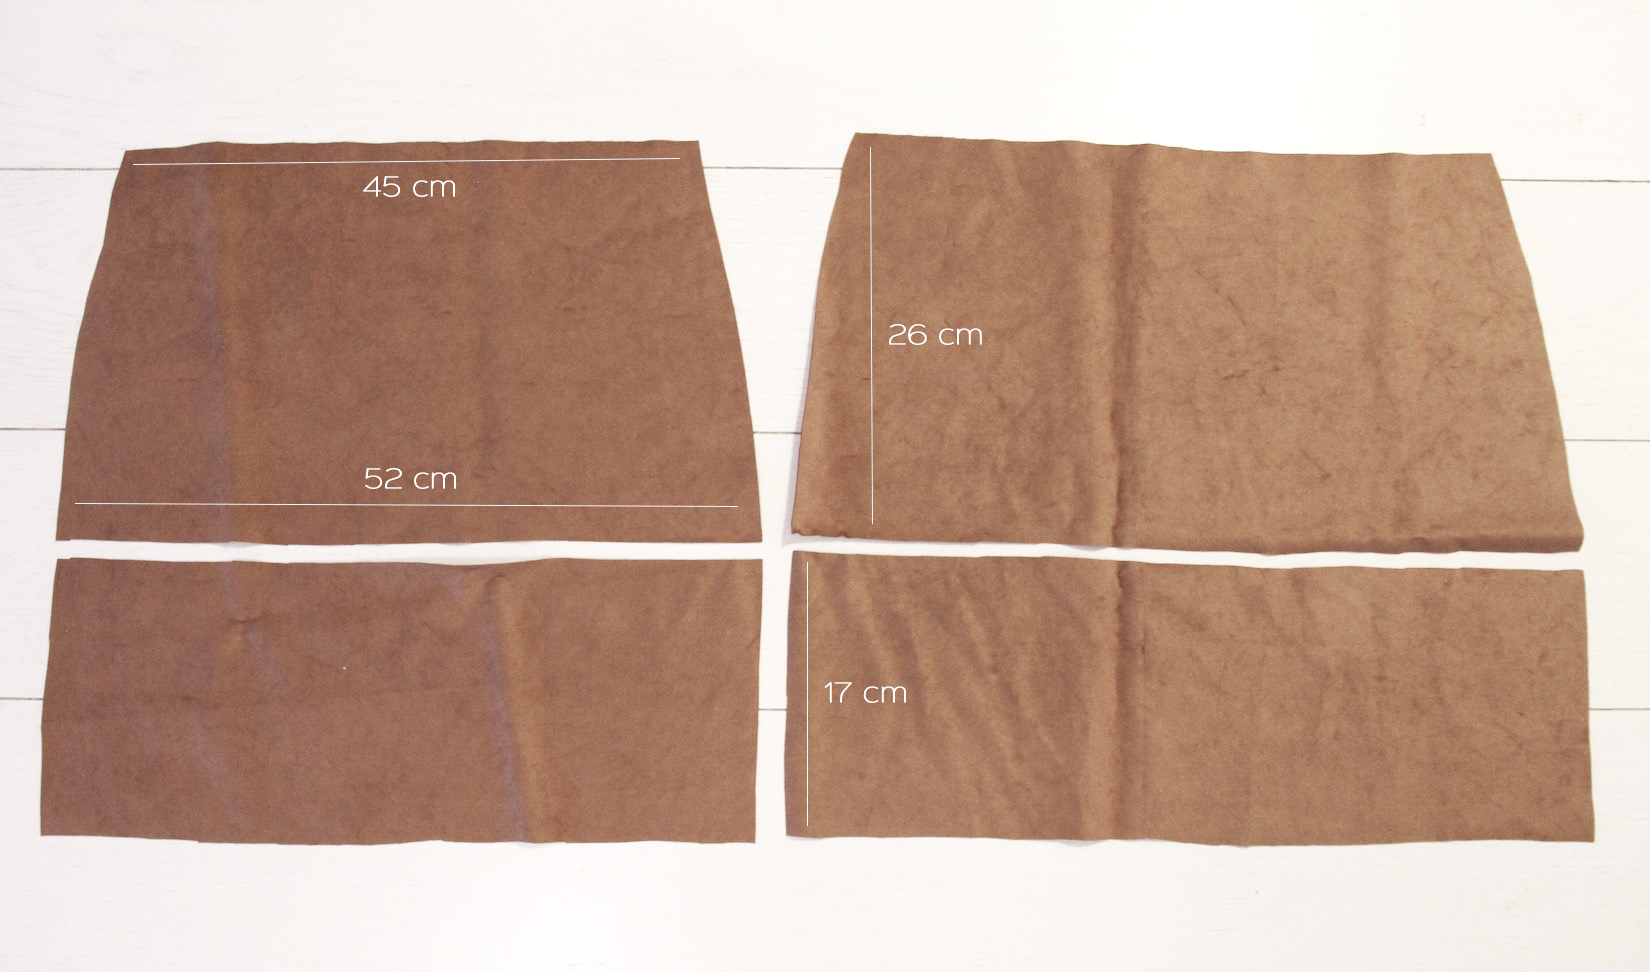
I. I Here are the measurements for my pieces that reflect a EU size 36/US 4. I did two separate pieces for both front and back because I wanted the detail of a horizontal seam, but you could cut the front and back in one piece.
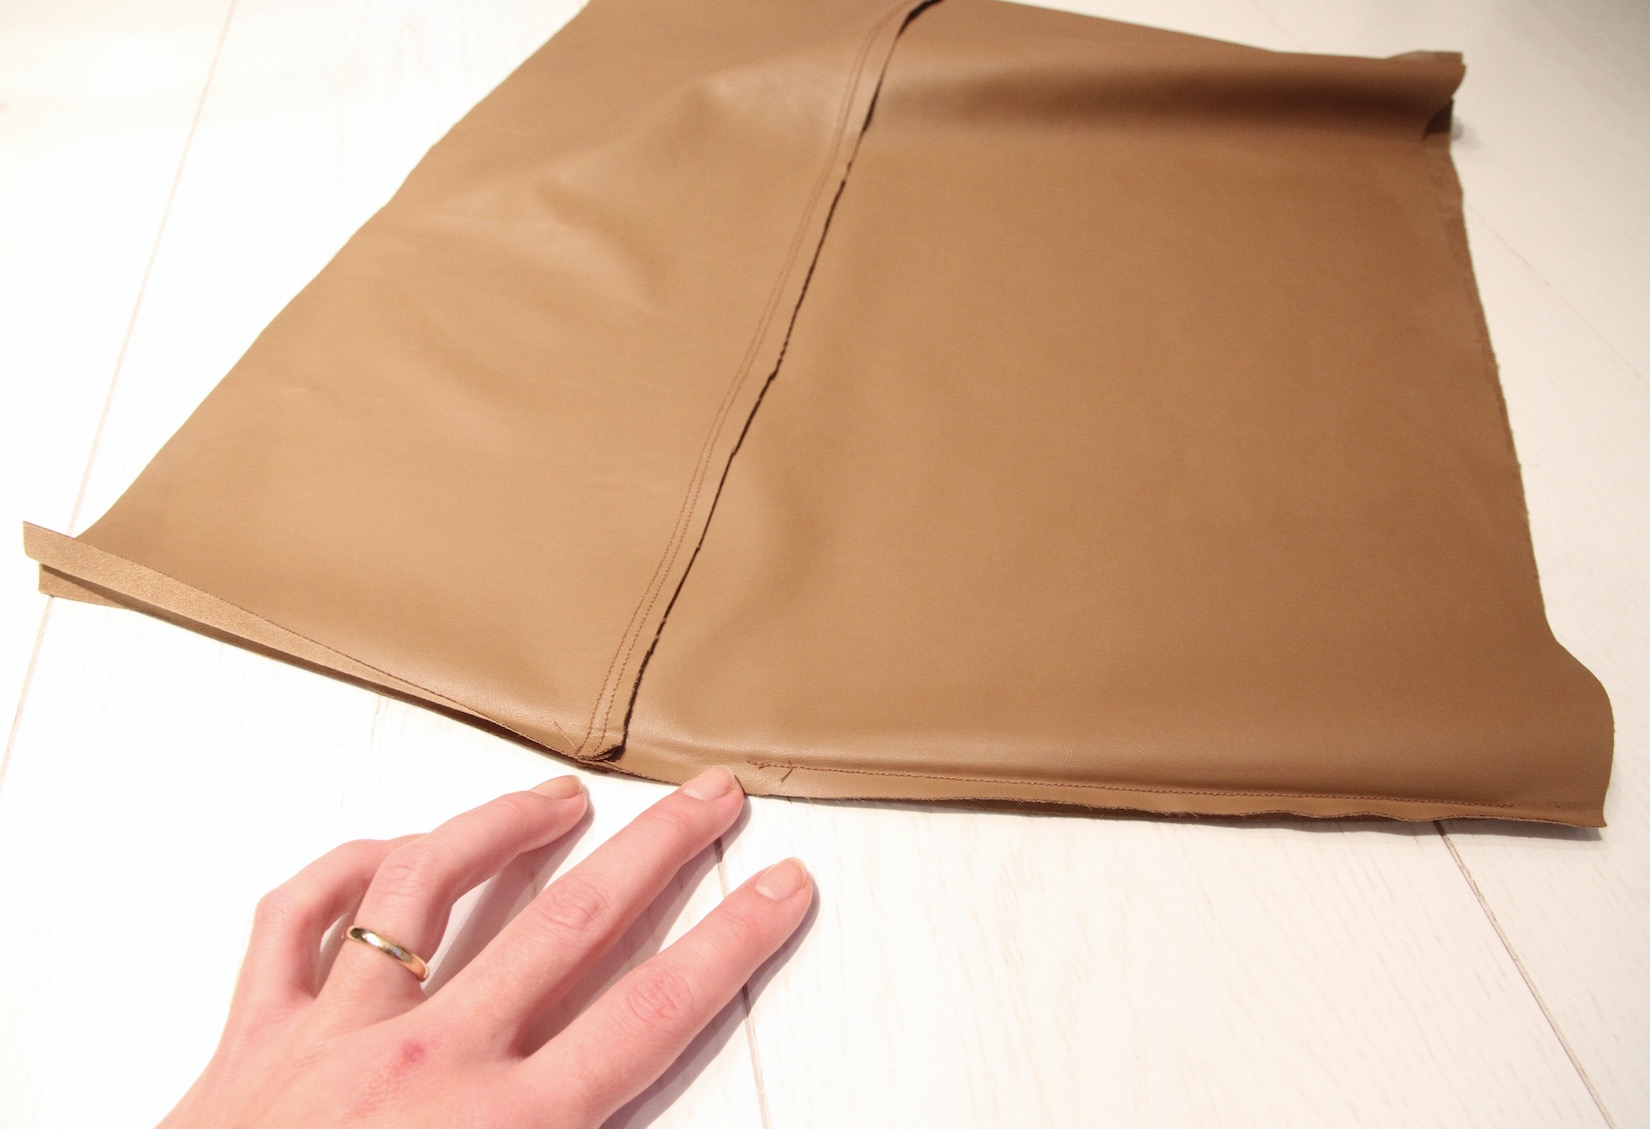
 II. I then sewed the top and bottom pieces together, pressing the seams..
 .. And top-stitched those seams.
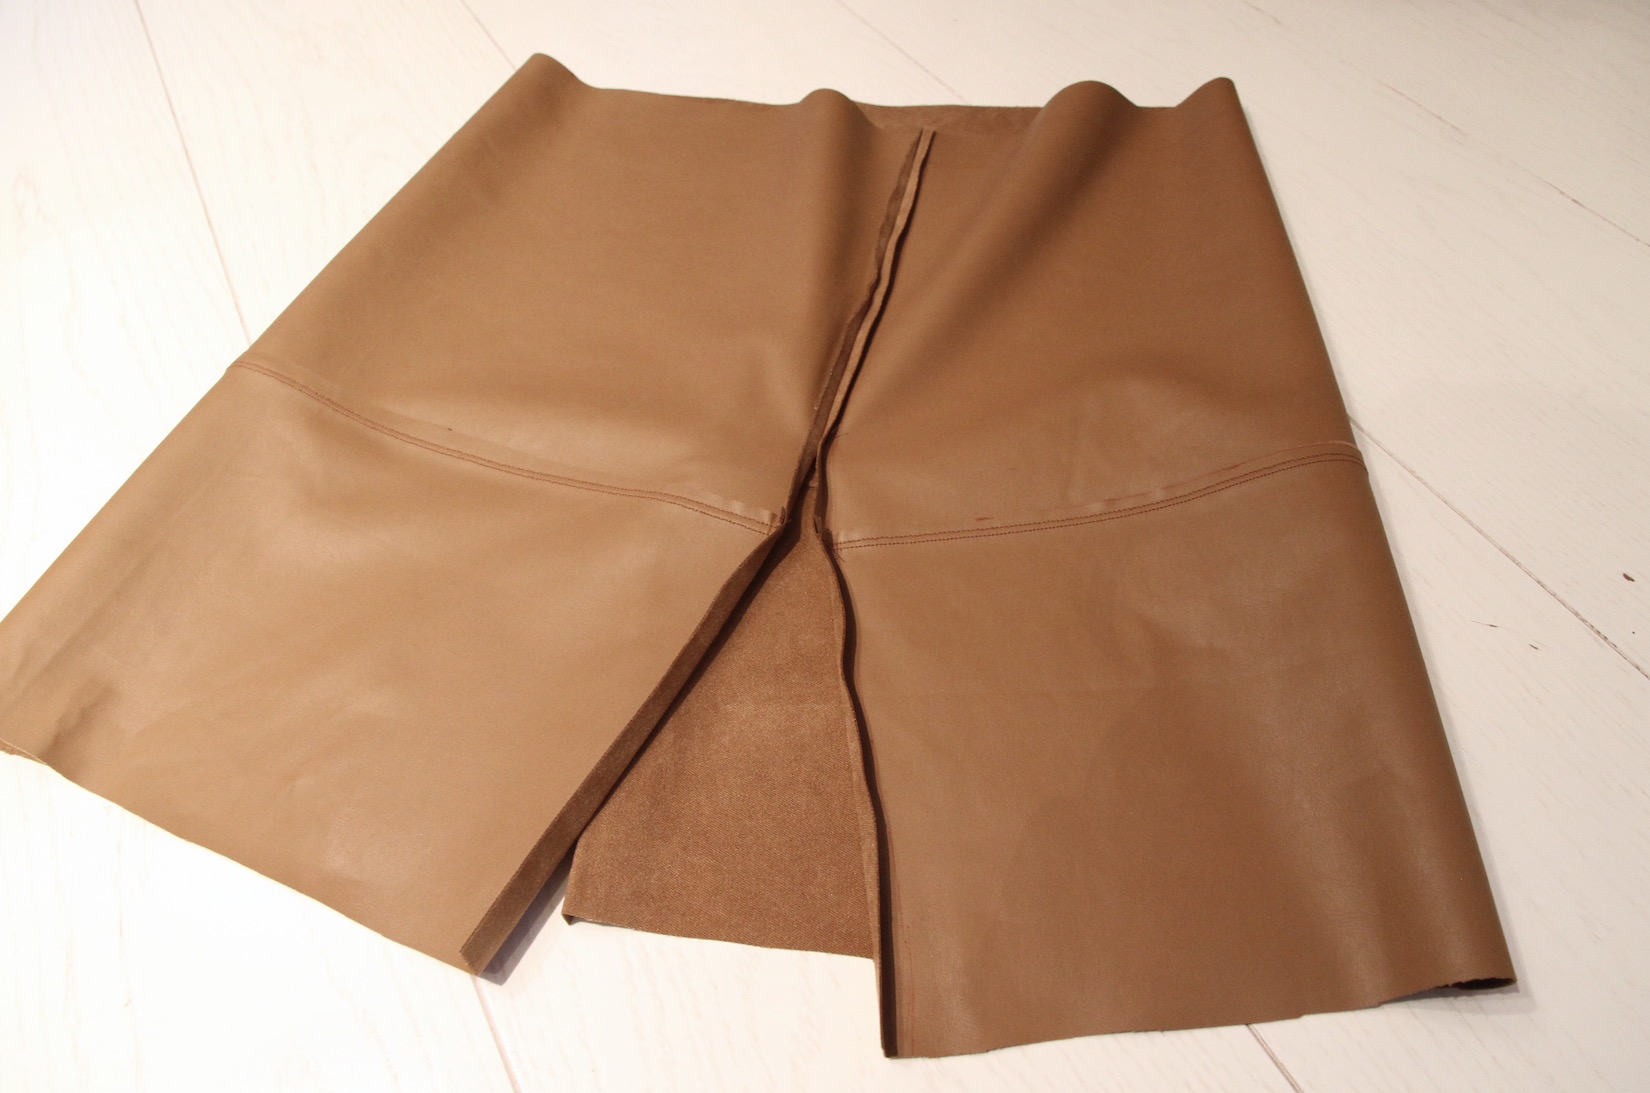
III. Next I confirmed the size by pinning one side together and wrapping the rest around myself, marking the correct spot for the side seams. Then just sewed 1 cm from the edges, stopping about 25
cm from the bottom (the distance I wanted the lacing to cover).
.. And pressed the seam, continuing pressing the 1 cm fold along the un-sewn edges. I then opened up the stitch about 4 cm at the top since I forgot I was doing a folded waistband..
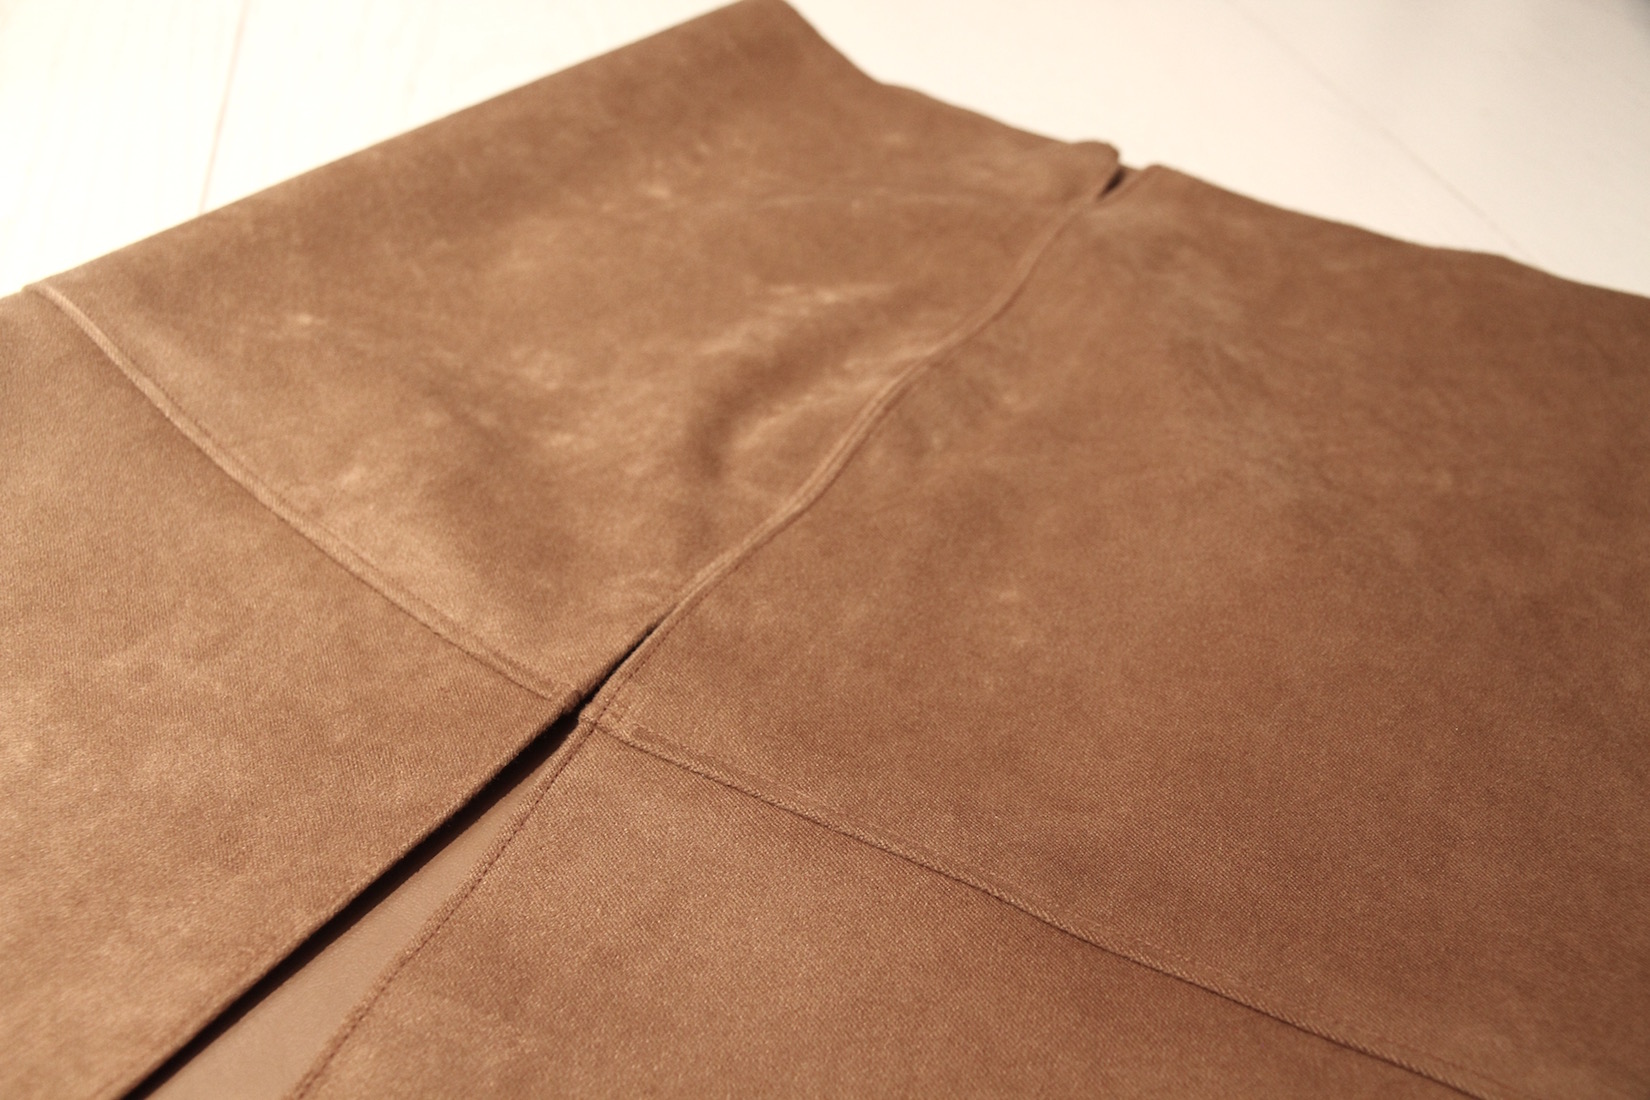
IV. To finish the side seams I top-stitched each side to match the stitching I did for the horizontal seam:

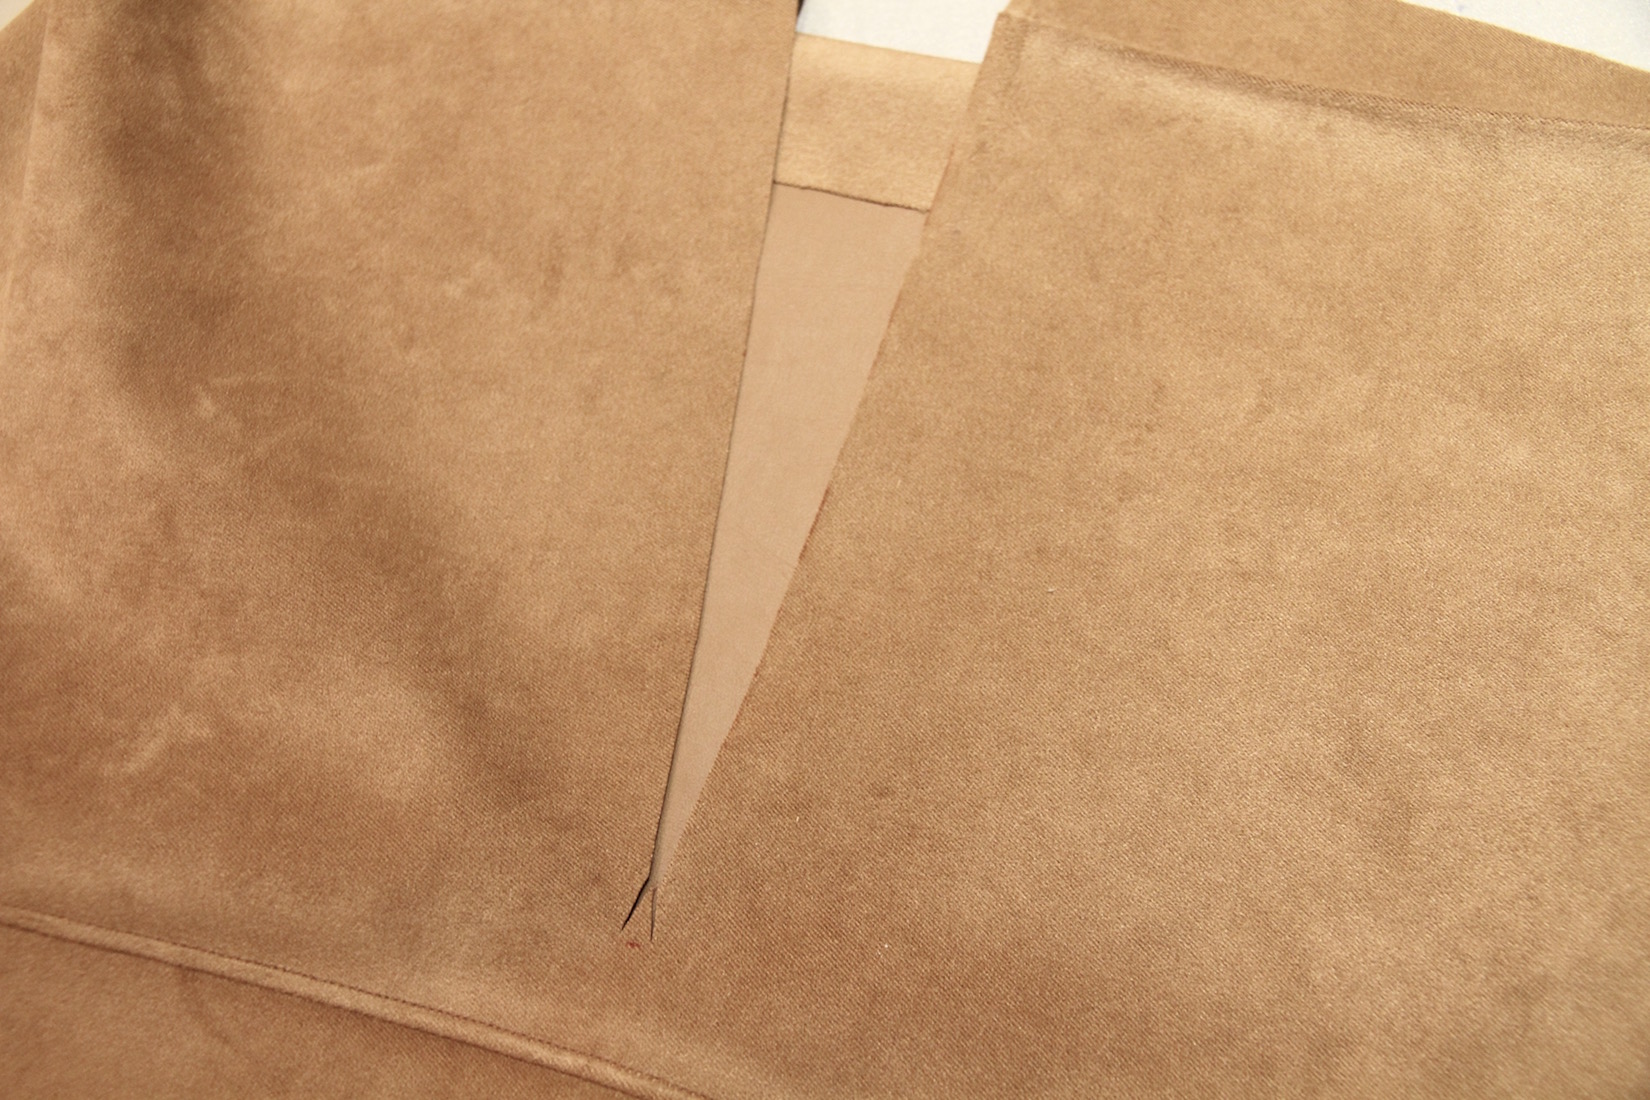
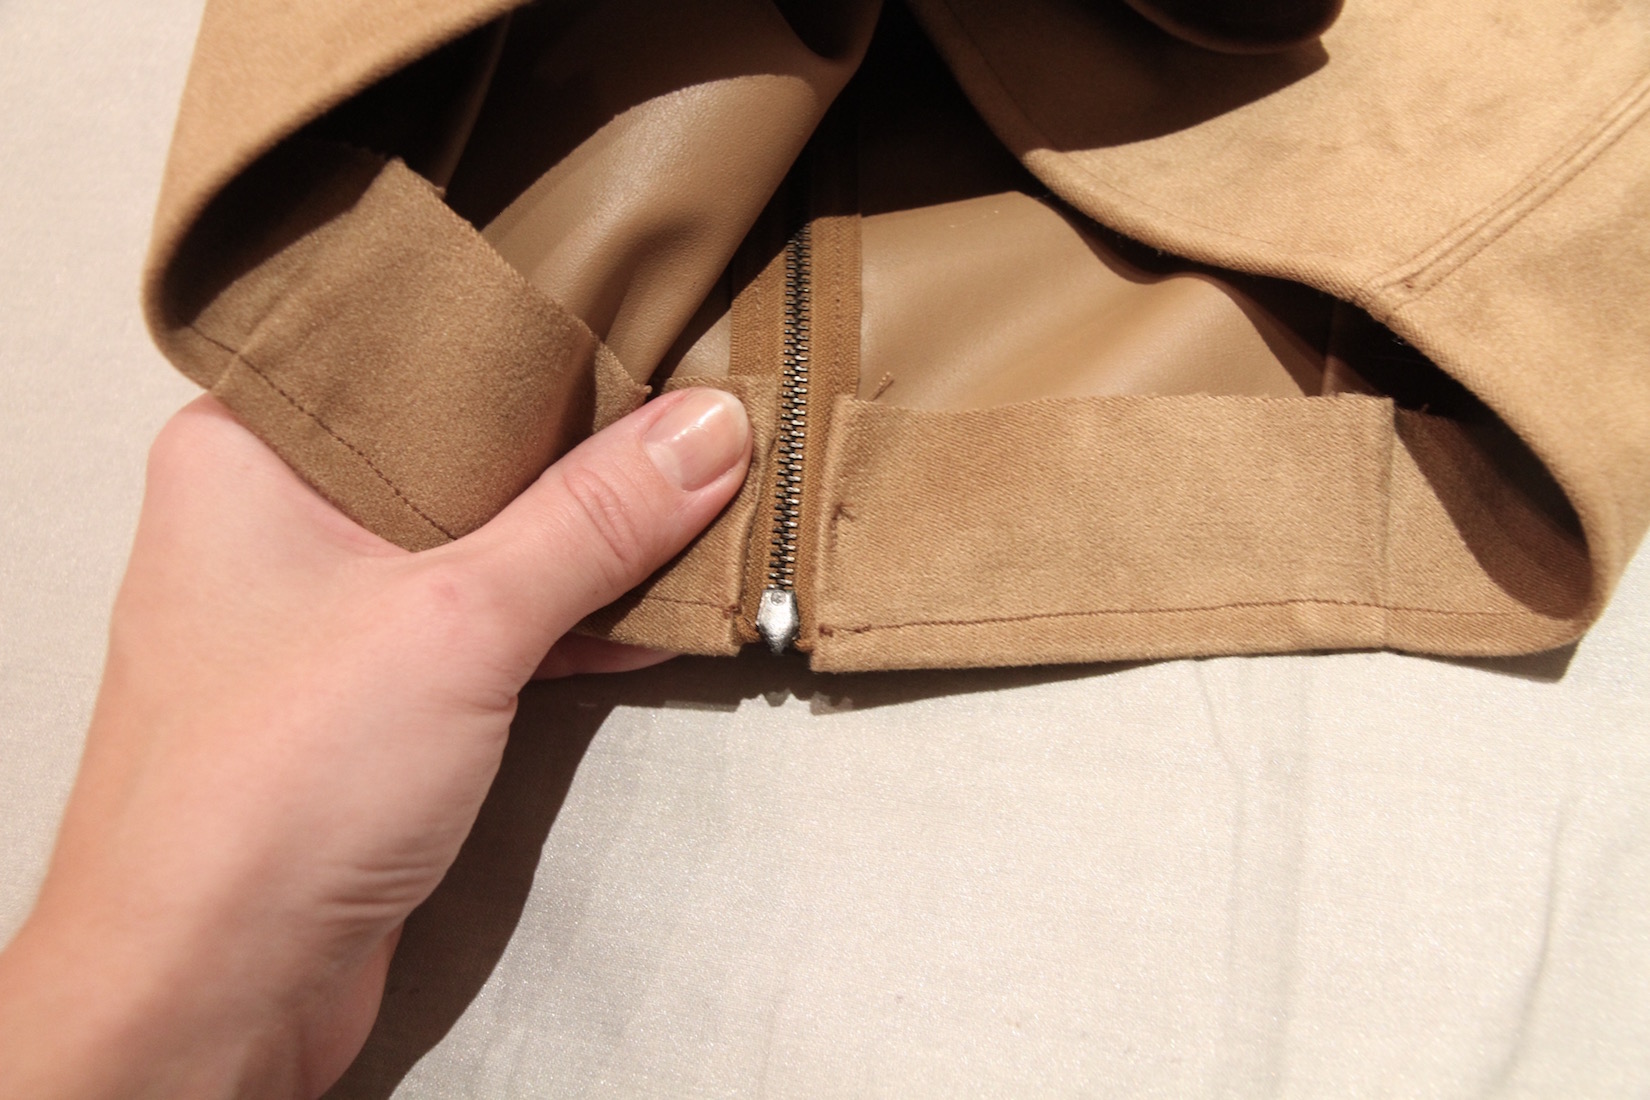
V. Then for the zipper. I marked the centre point of the back of the skirt and placed the zipper there, marking the point where it ended at the bottom, and cutting a mark at the top through the waist band fold I had pressed visible.

.. Continuing to cut down to my mark, ending with a triangle like so:
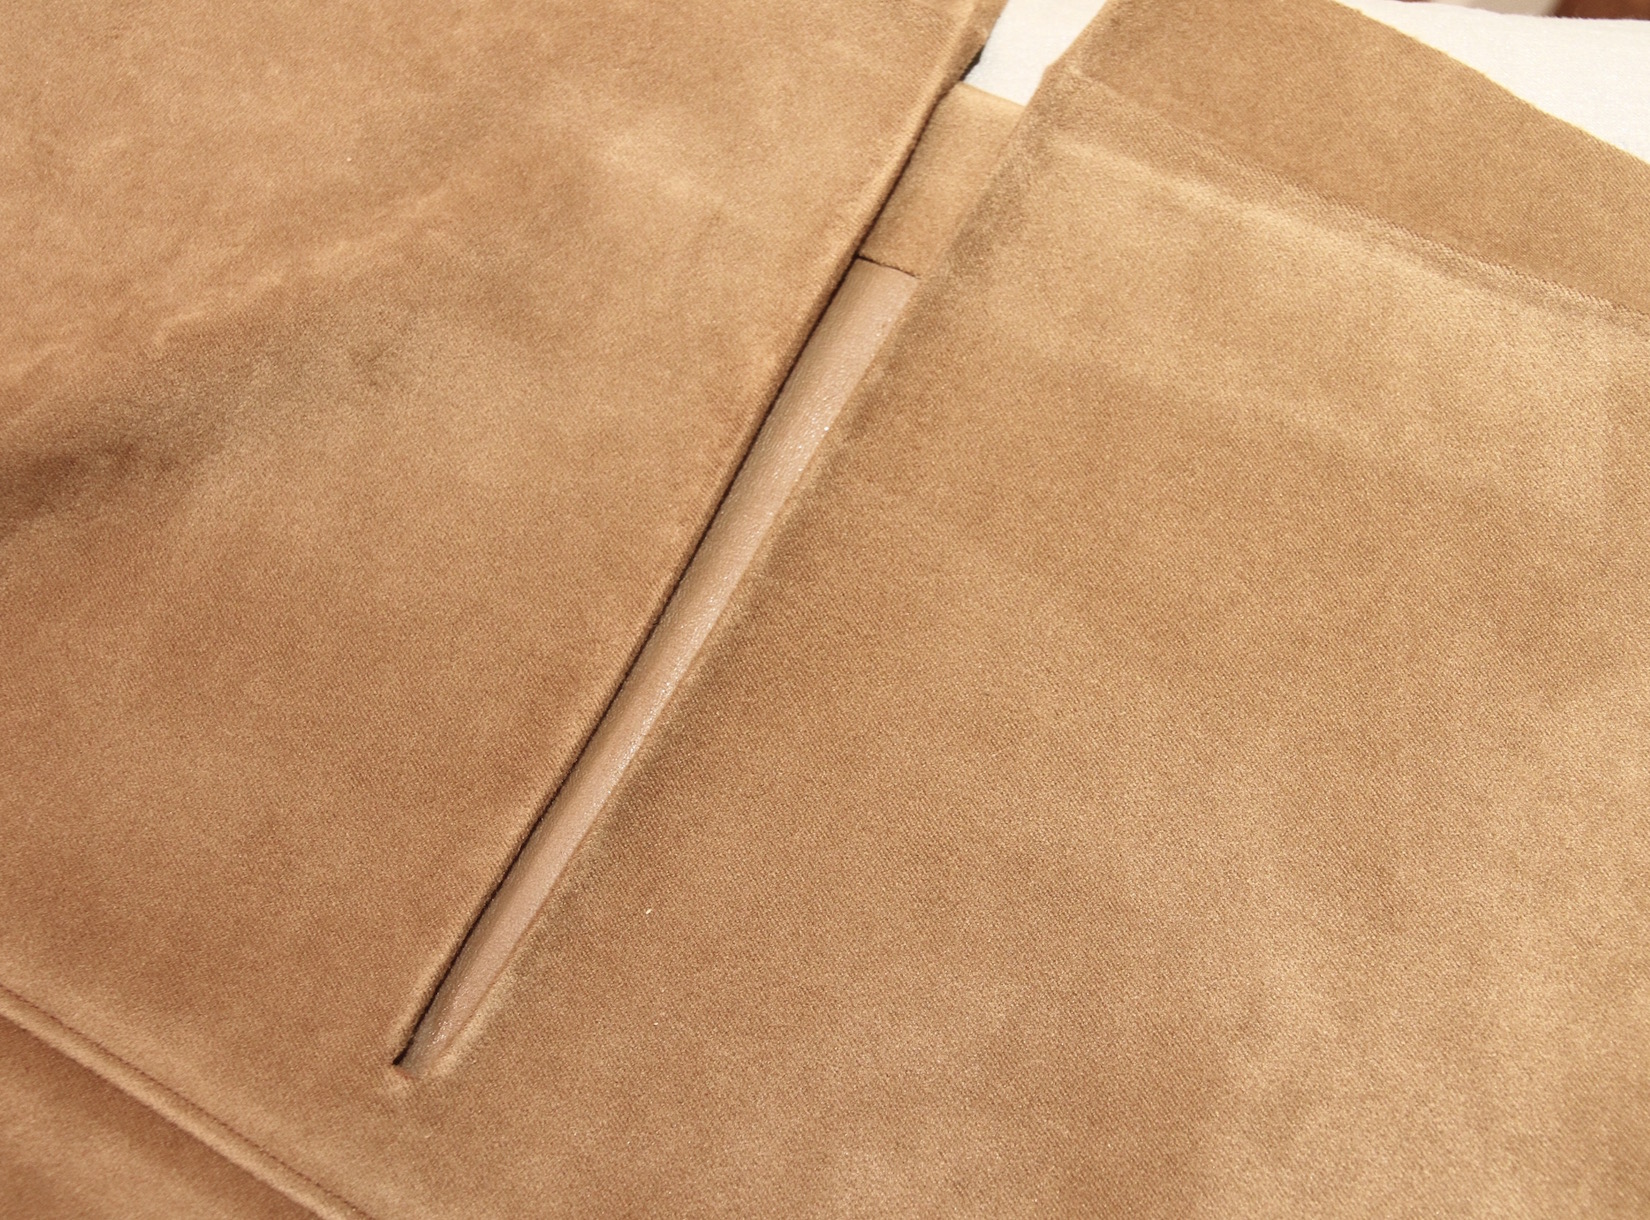
Then pressing the folds on the reverse to create a clean spot for the zipper.
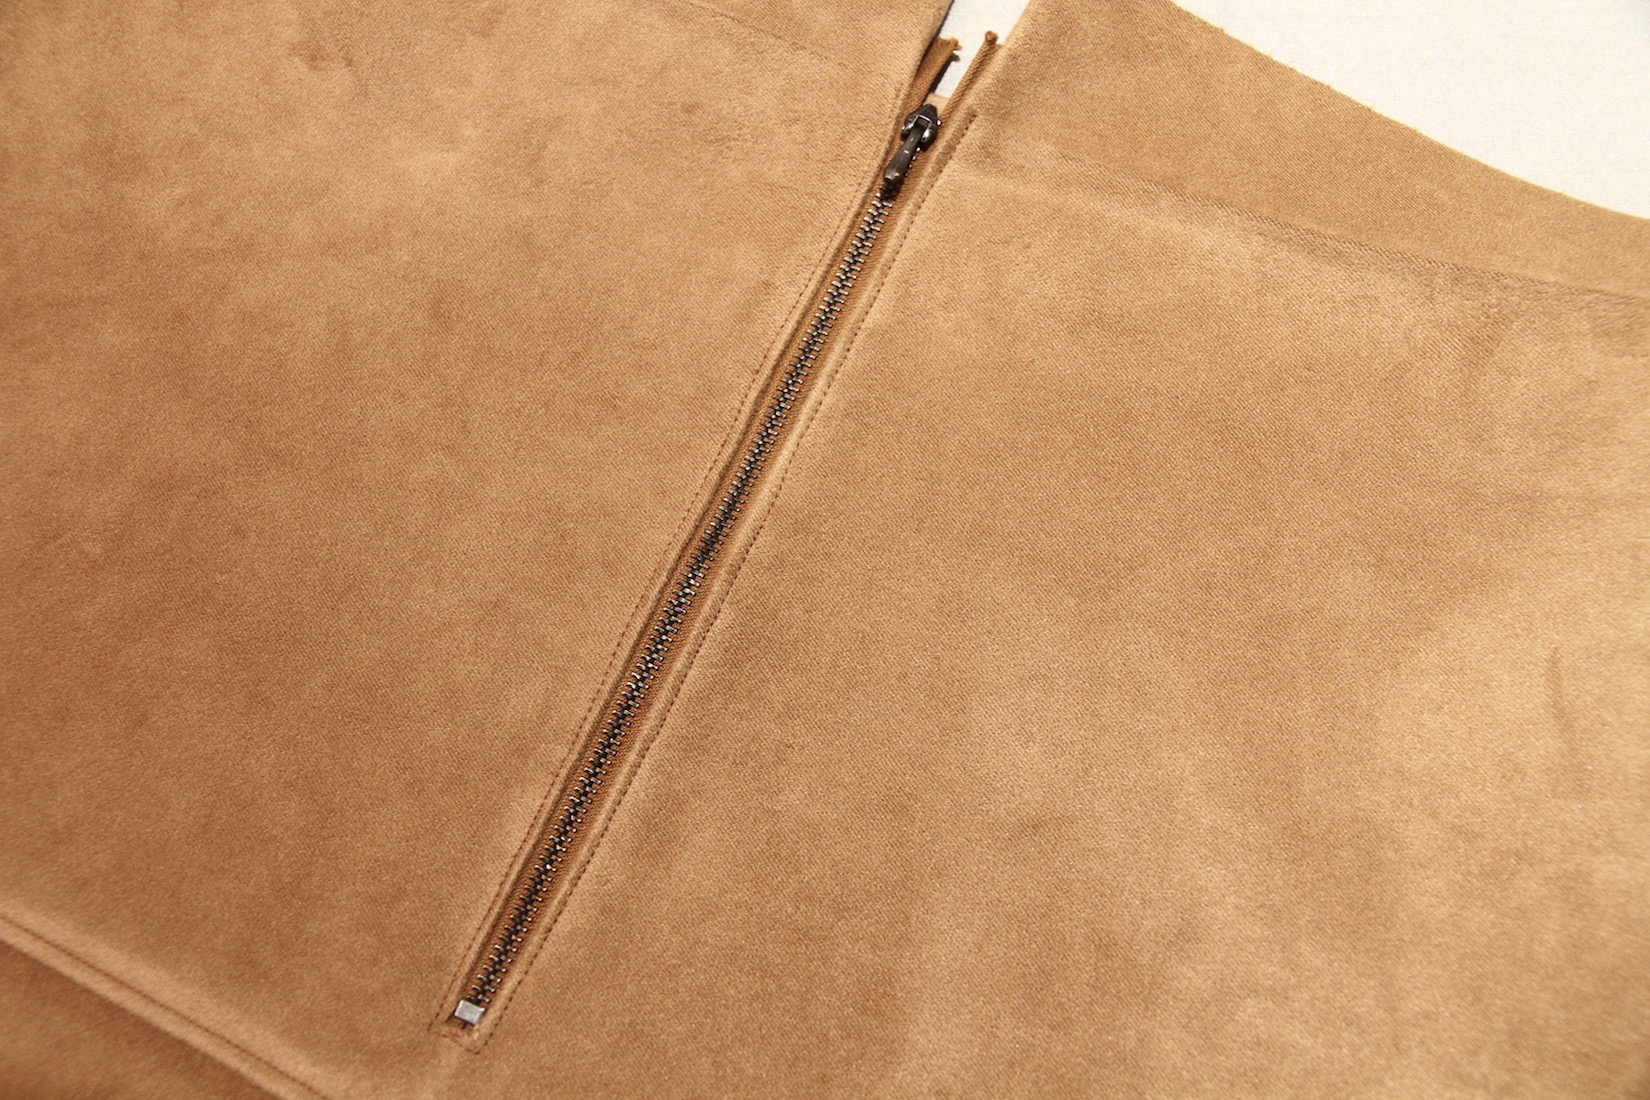
Then just pinned the zipper in place and sewed a box around it.
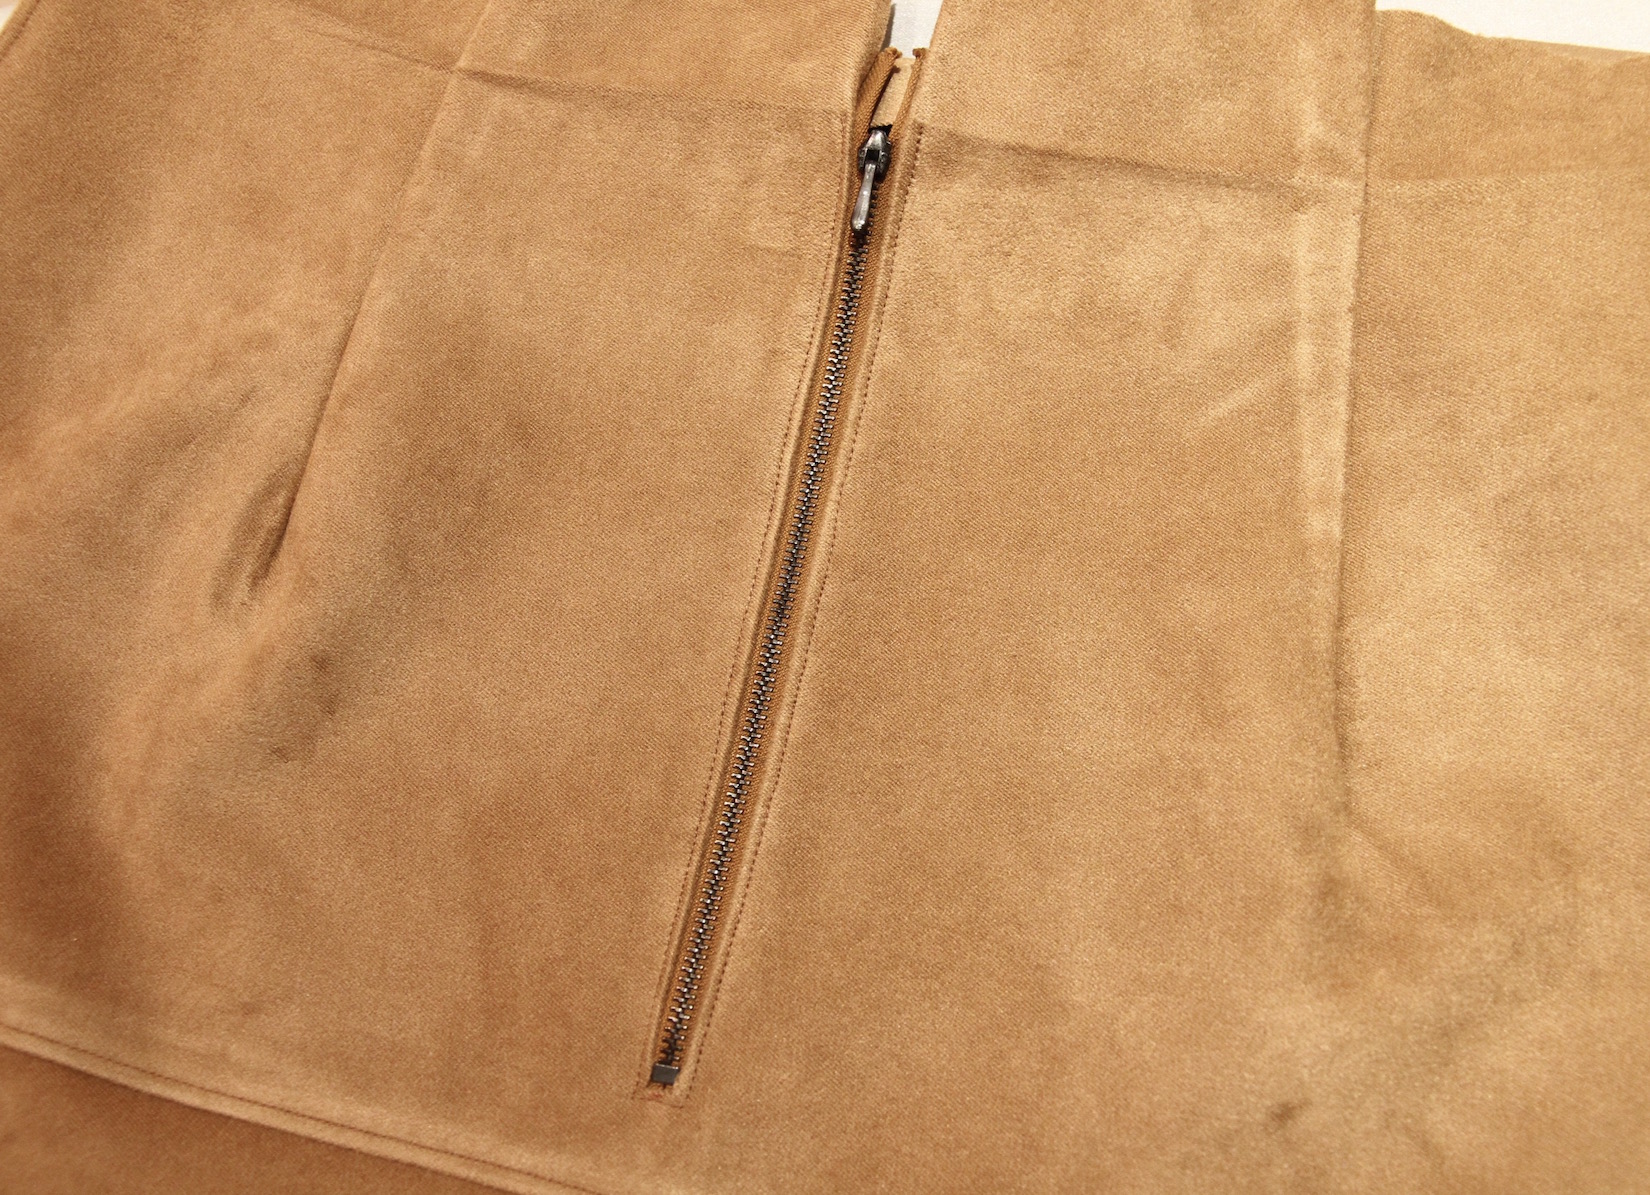
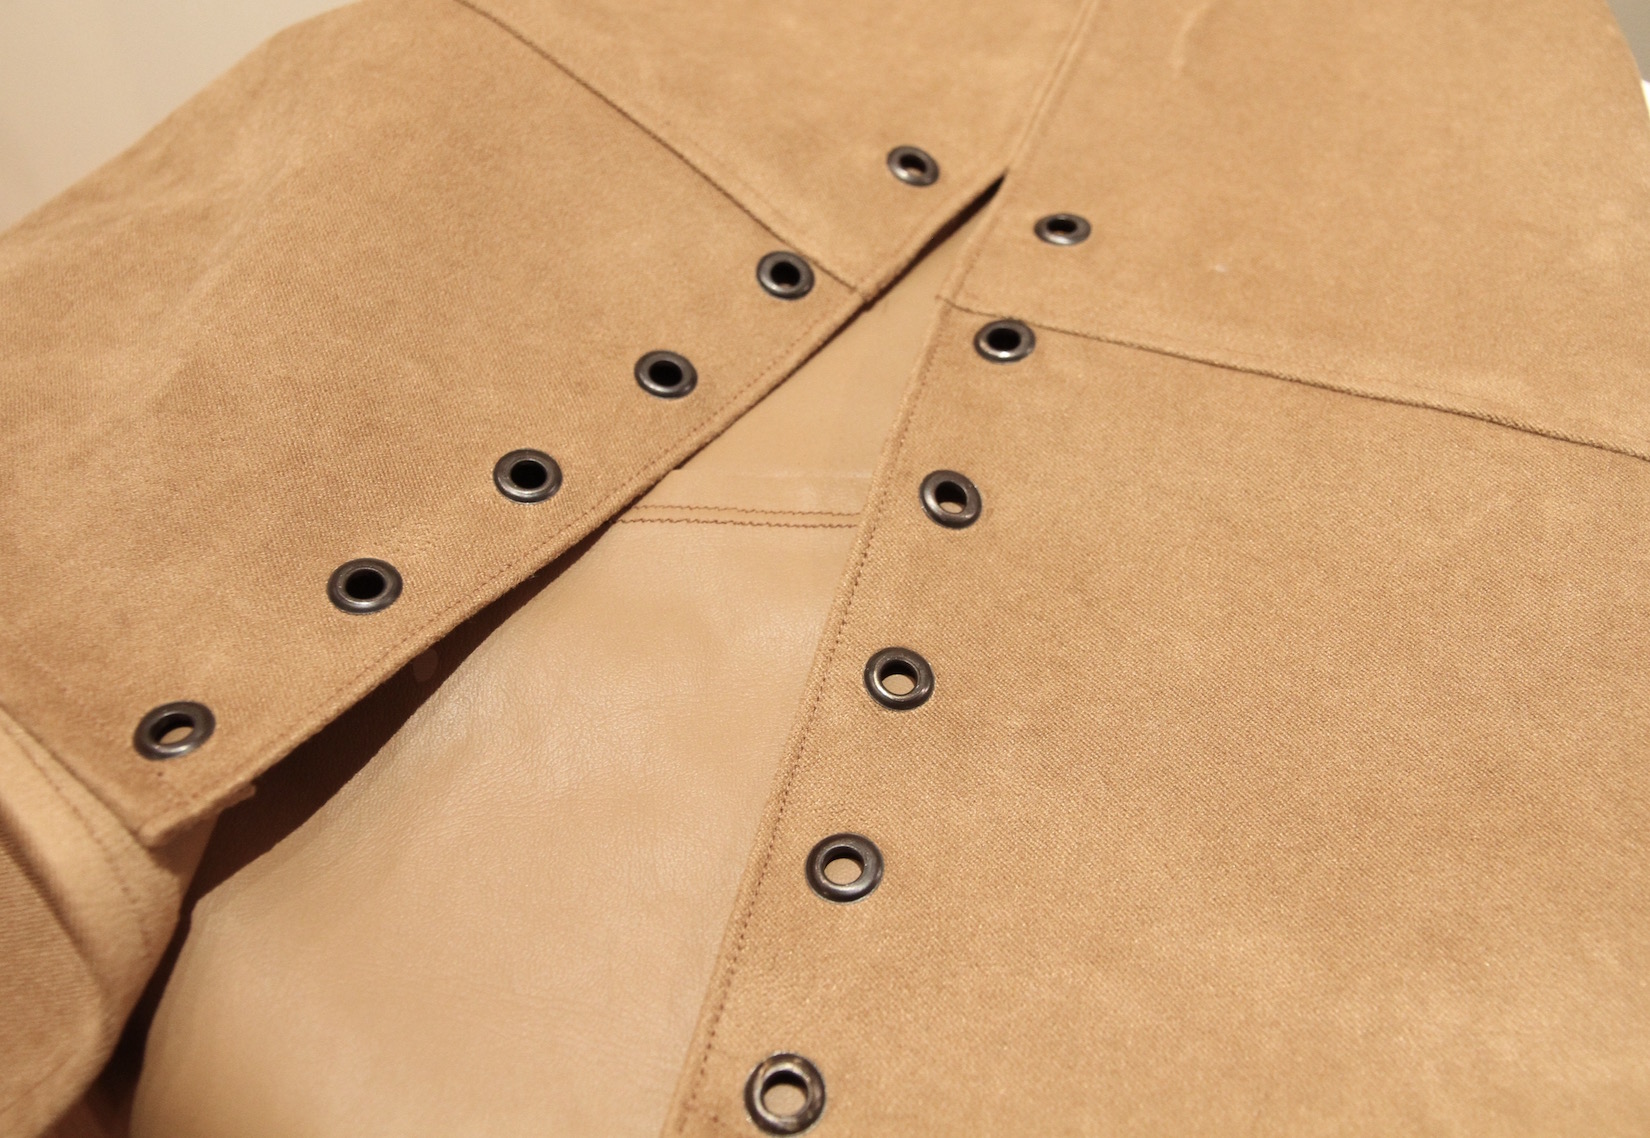
VI. To add some room in the back I sewed a dart on each side of the zipper.
VII. To finish the waist I sewed the 4-cm fold I had pressed there in place (yes, a pretty hack-y waist band but you can do these things when working with a fabric that doesn't fray at all:)
VIII. For the hem, I just did a single fold and stitched along the edge - again a benefit of a non-fraying fabric.

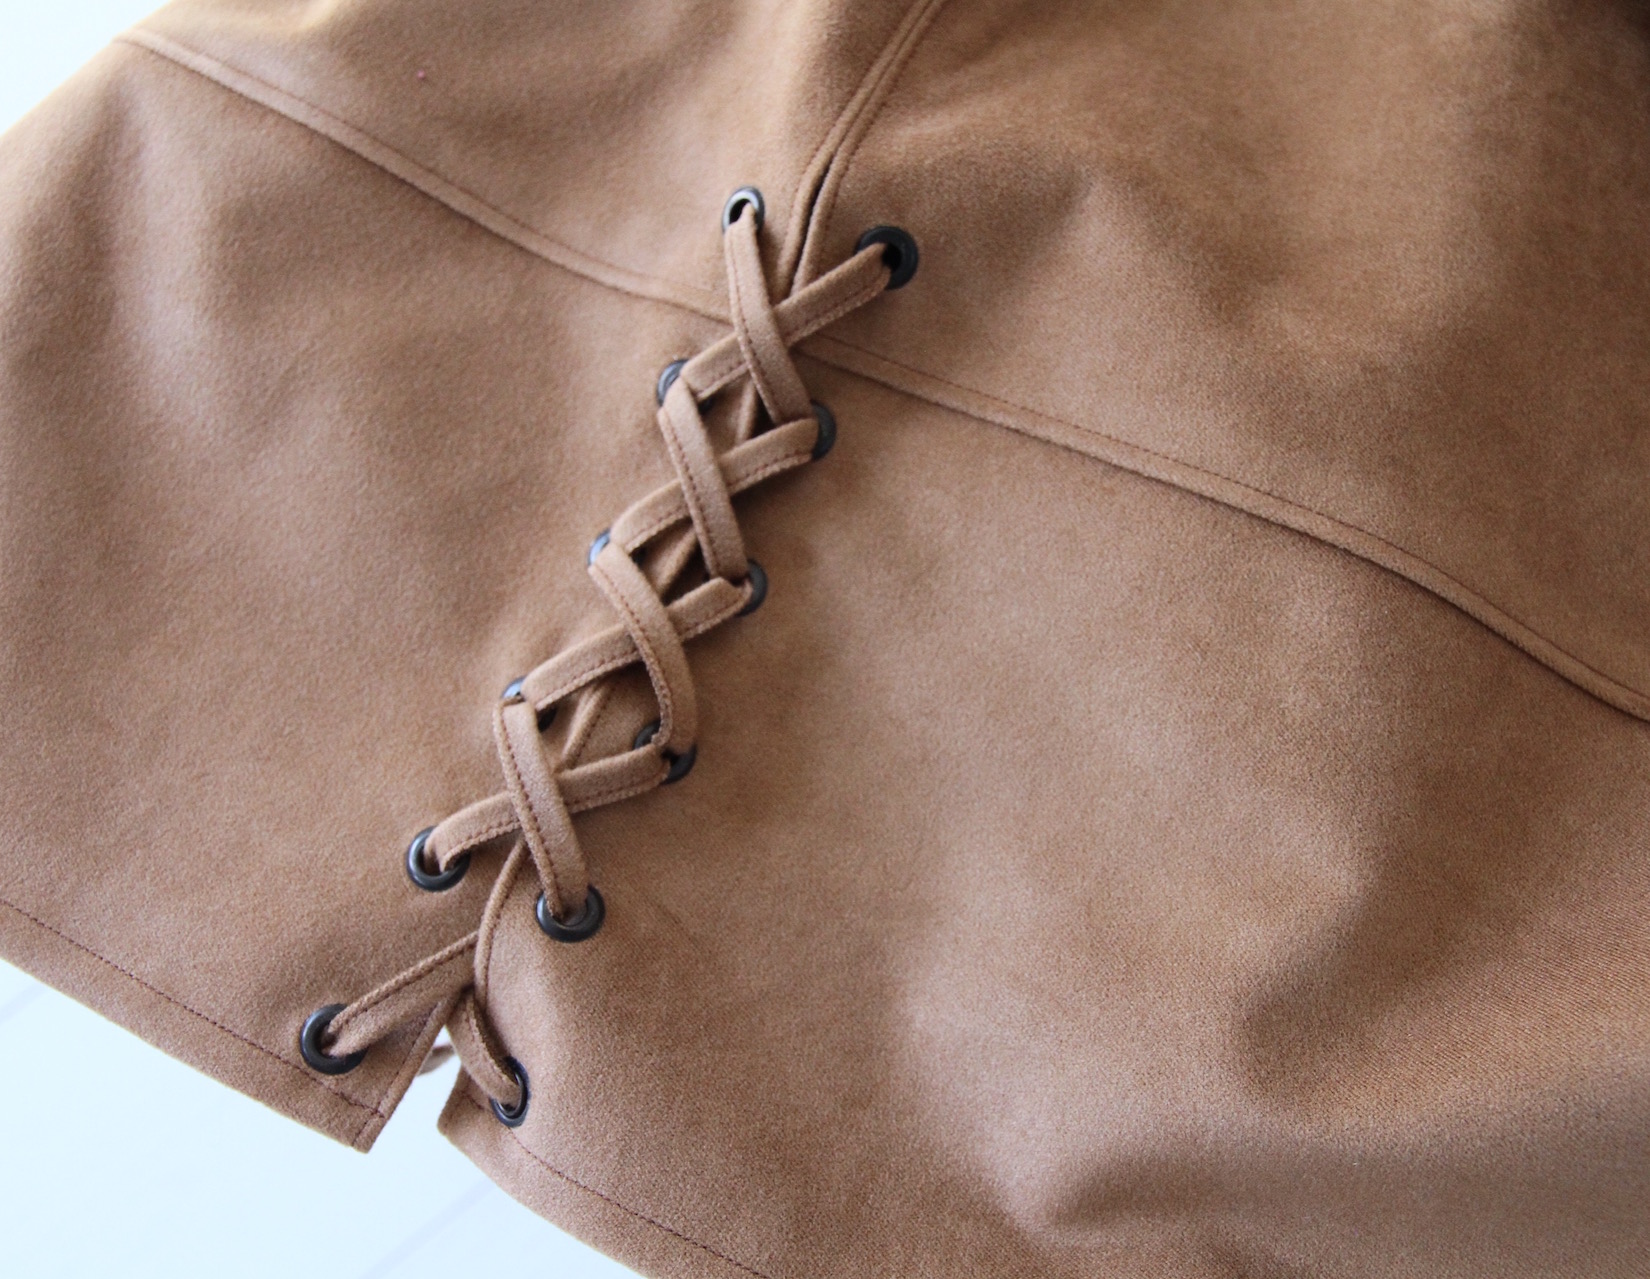
IX. Finally, marked the spots for the grommets and banged them in place! I go over this in more detail here.
X. Then just laced it up. I tried a couple leather strings for the lacing but couldn't find one that matched the color of my fabric exactly, so I just made the cord from the leftover fabric by folding a long, 2-cm wide piece in half, sewing a few mm from the folded edge, and trimming the excess just next to the stitch. To stop the lacing from coming undone, I just tied knots at the ends so the string does not escape back through the last grommet.


xo,
Julia


0 comments:
Post a Comment
I would love to hear what you think and learn about your DIY adventures! If you use one of my tutorials, tag me on social @contour_affair, I'd love to see!