

The sizing for these starts big and I work it down to my size EU36/US 4 by taking in from the sides and adding darts - so with the measurements you could make culottes up to EU40.
Tutorials take a lot of time & effort to create, and I choose to make mine available for free. If you enjoy this guide, you can support me with a donation that feels right for you, here.
TOOLS:
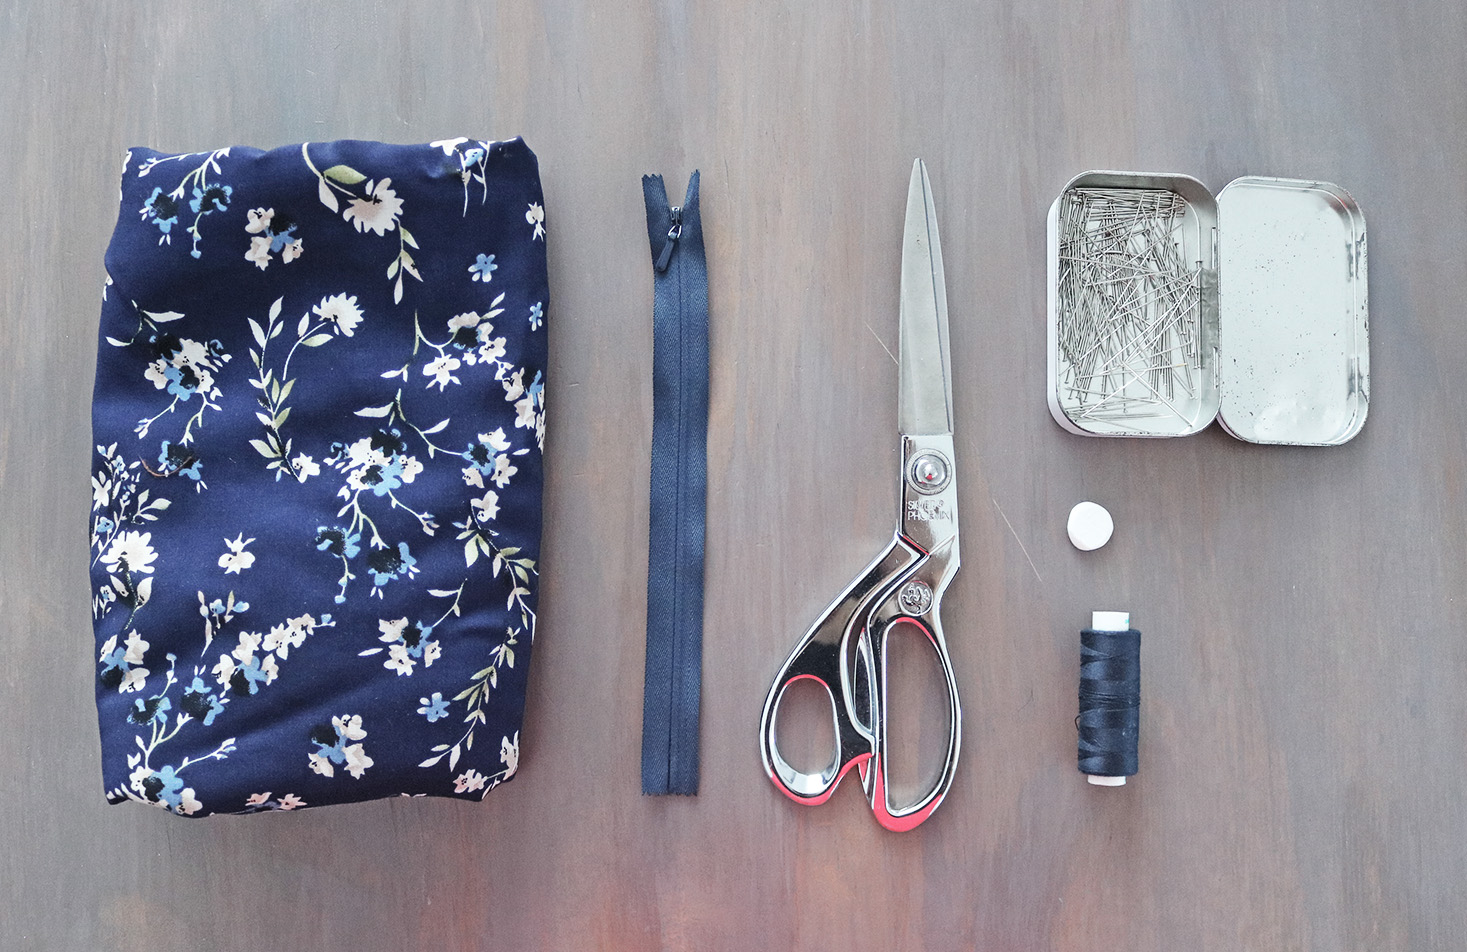
Lightweight fabric (I used a thin 100% cotton) | Scissors | Invisible zipper | Pins | Thread, sewing machine, needle | Optional but gives nice firmness: interfacing (10cm wide piece to go around your waist +15cm)
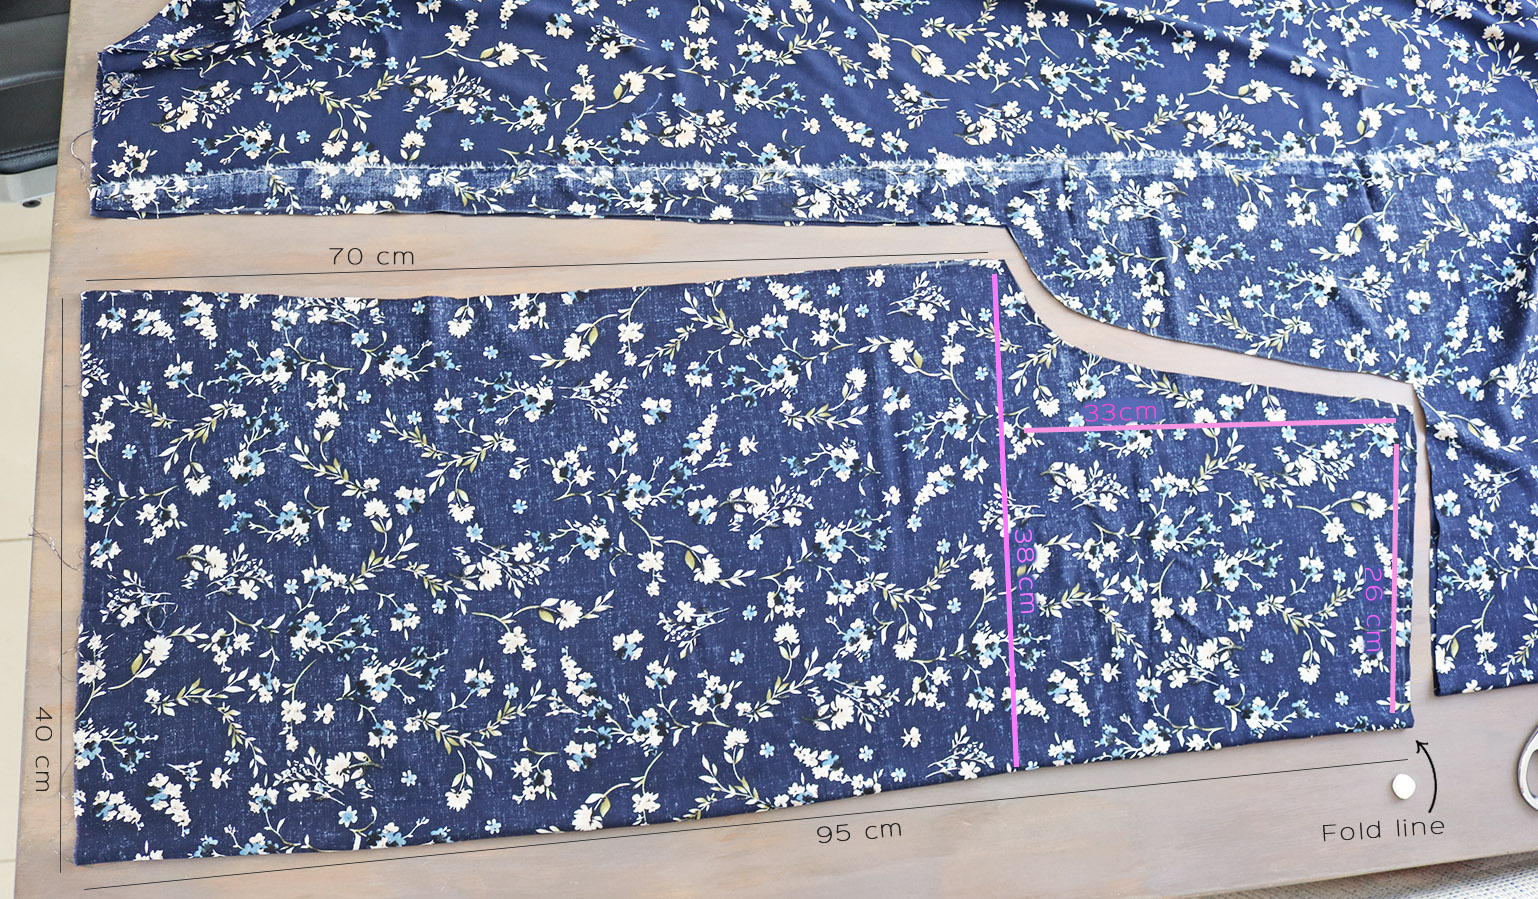 Same deal for the front pieces:
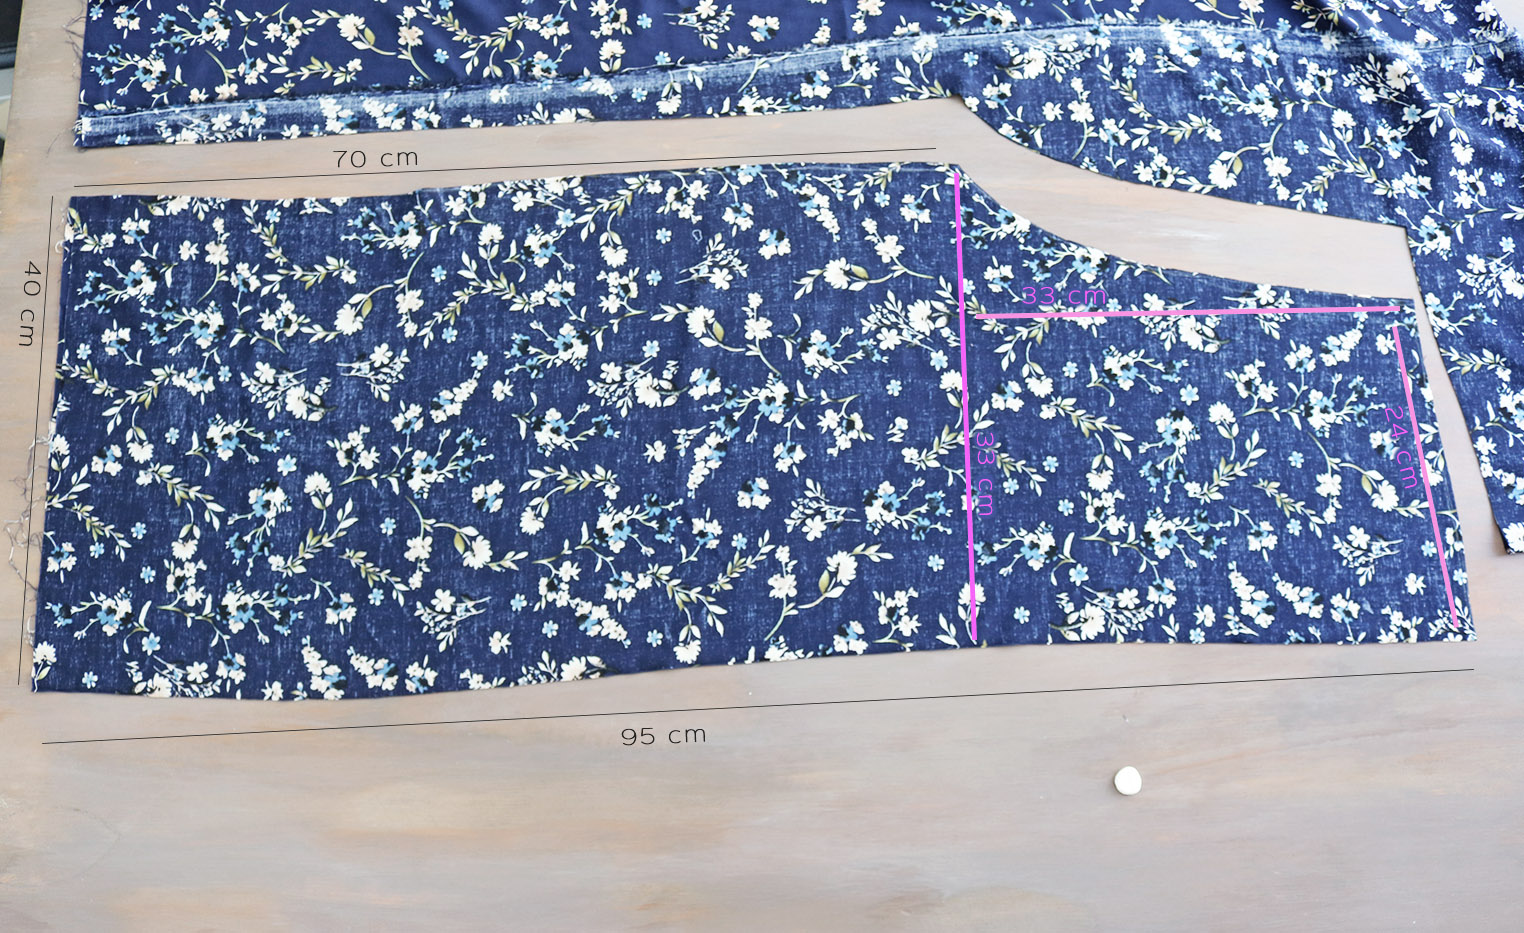
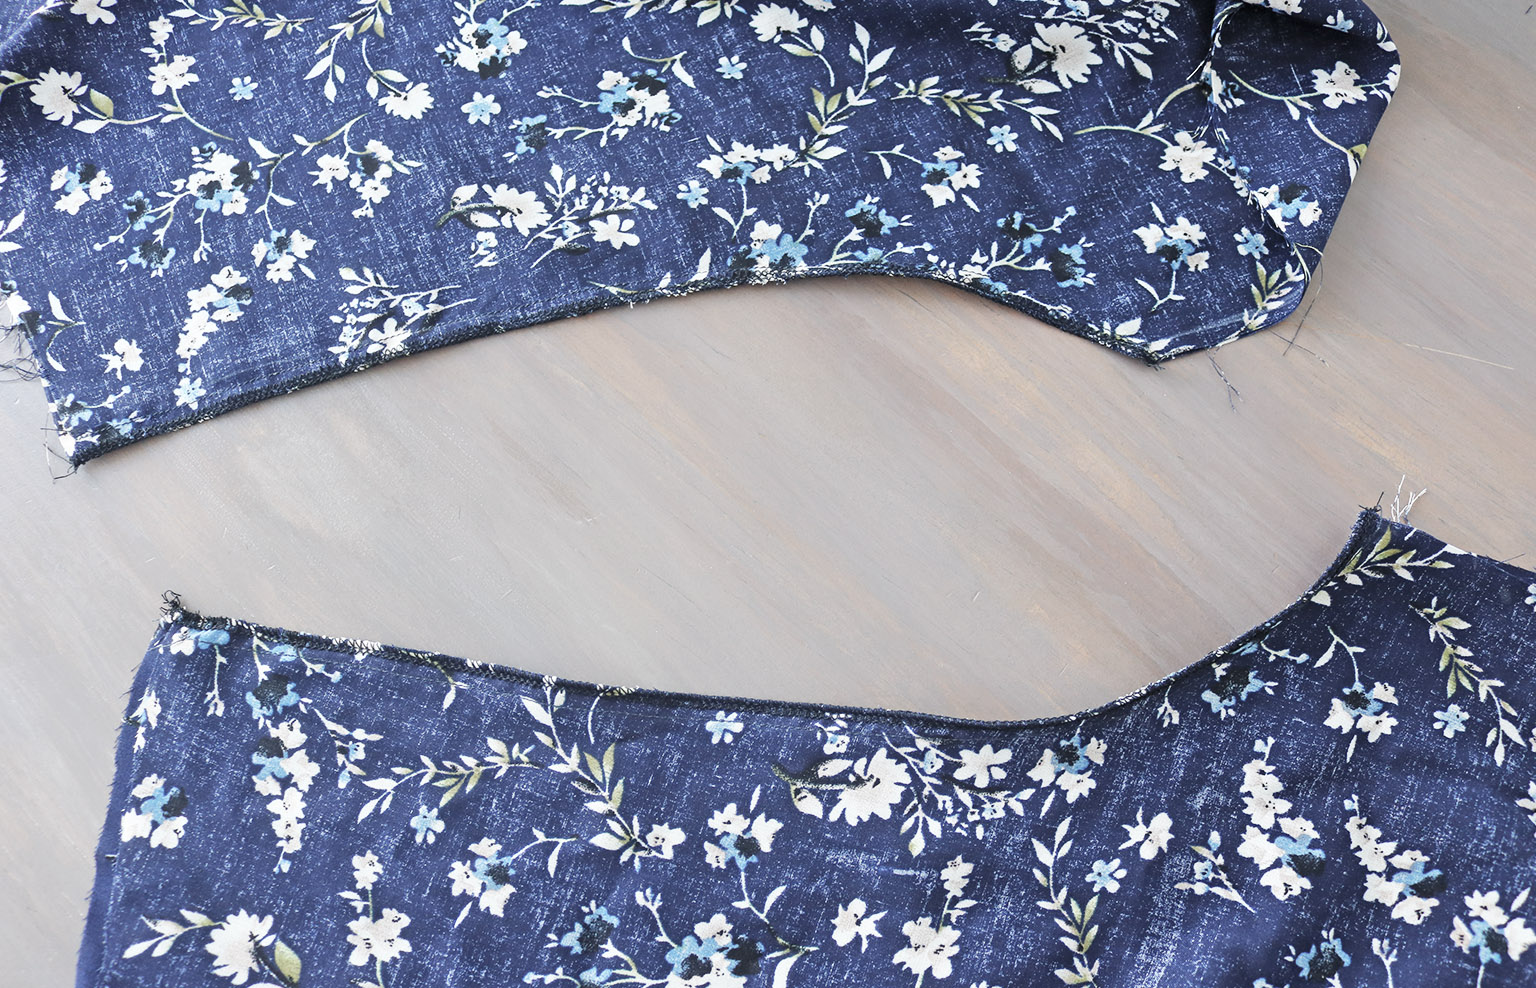
As you can see from the pics, the only key difference between the front and back pieces for loose-fitting culottes like these is: on the front piece, the curve that will make up the center front seam is more gentle.
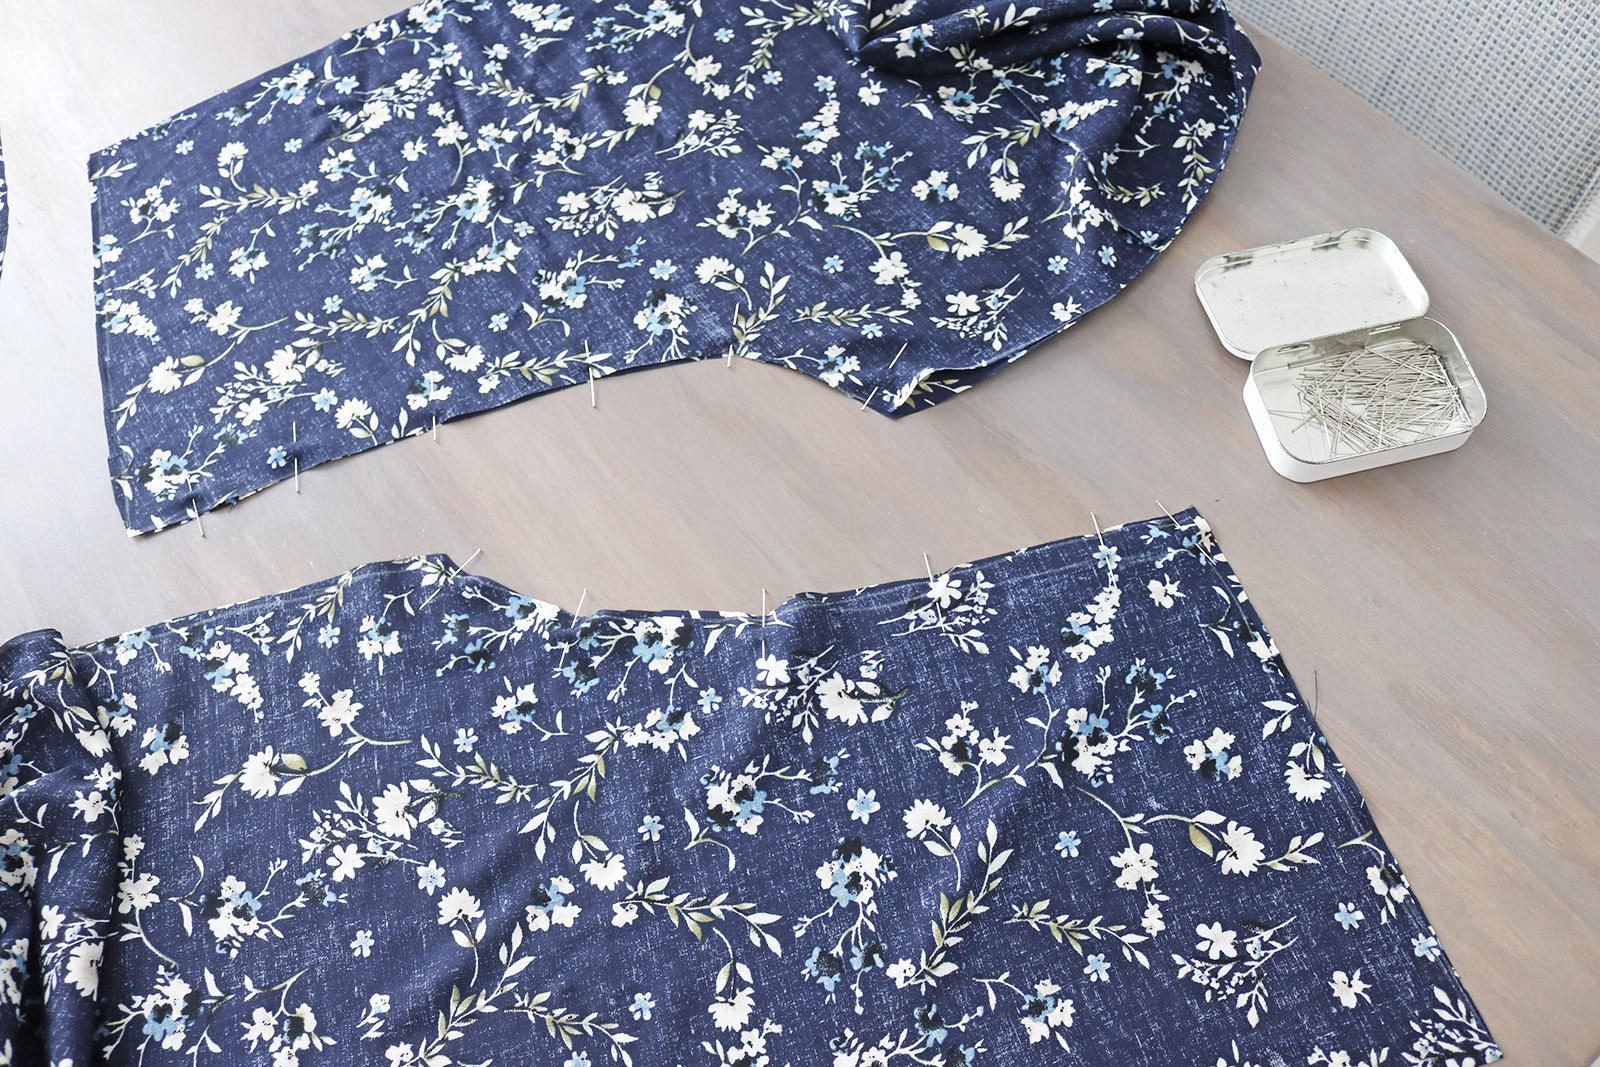
II. Then keep the pieces as they were, right sides facing, and pin along the curved lines, then sew.
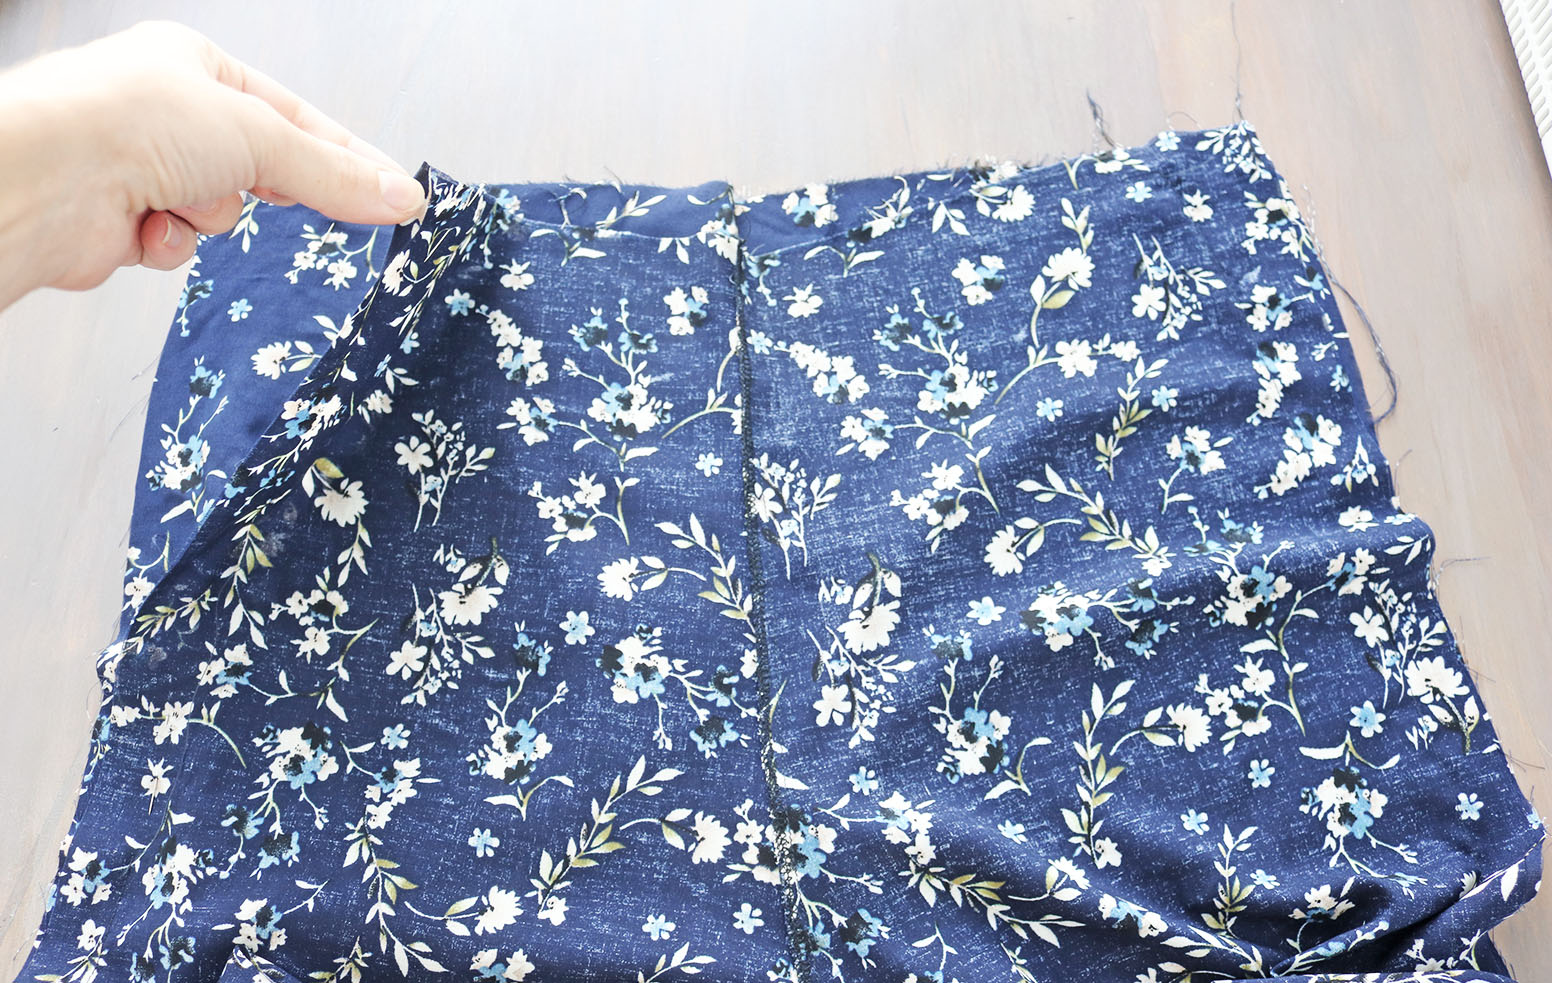
III. Next I pinned the crotch and the leg inseam together, right sides facing, and sewed that so the pants started taking shape. Then I pinned the sides together and did a quick test to check for the size. Pretty close with the pinning I had done. You want them to be loose at this point, so you have waistline to work with to add darts to give the culottes shape.

Next I sewed the sides as I had pinned them, leaving a length equivalent to the zipper open on one side:
IV. To finalize the waistline size, I wore the pants again, and determined the size of the darts:
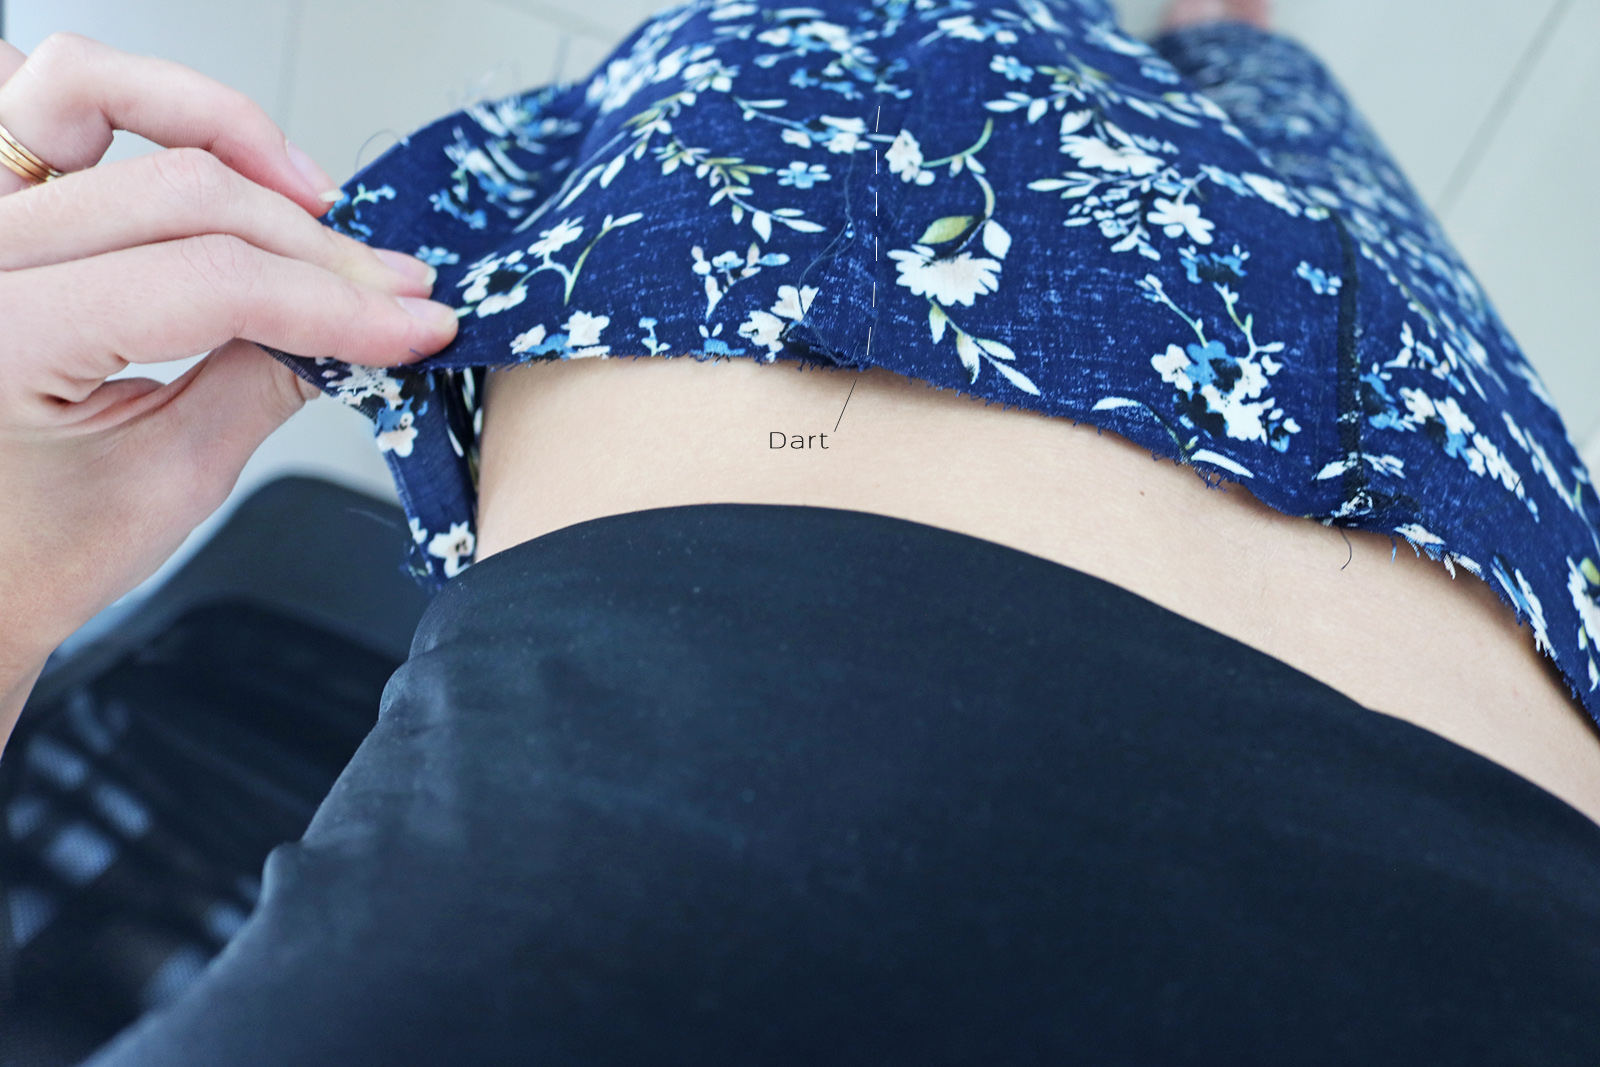
I put two darts in the front and two in the back to get the perfect fit. When holding the side mark that spot - it's where the zipper will go later.
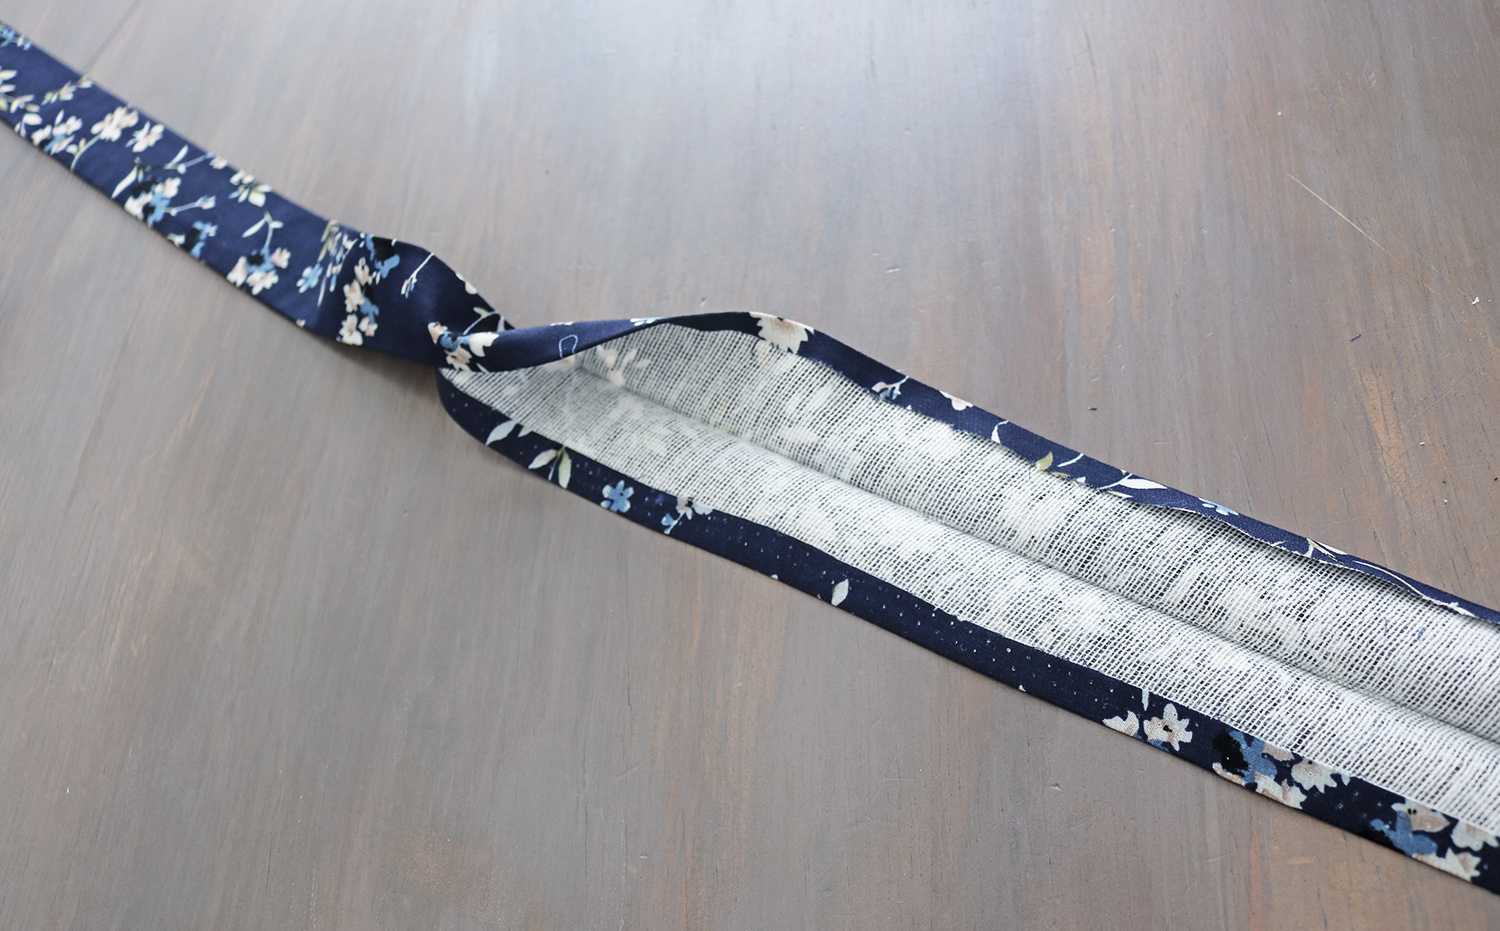
V. On to the waistband. I cut out a piece the length of my waist + about 10-15cm, and 10cm wide, out of both the fabric and interfacing. Ironed the interfacing onto the reverse of the slither of fabric.

Then prepped the waistband by pressing it first in half width-wise, then folded the edges in like this:
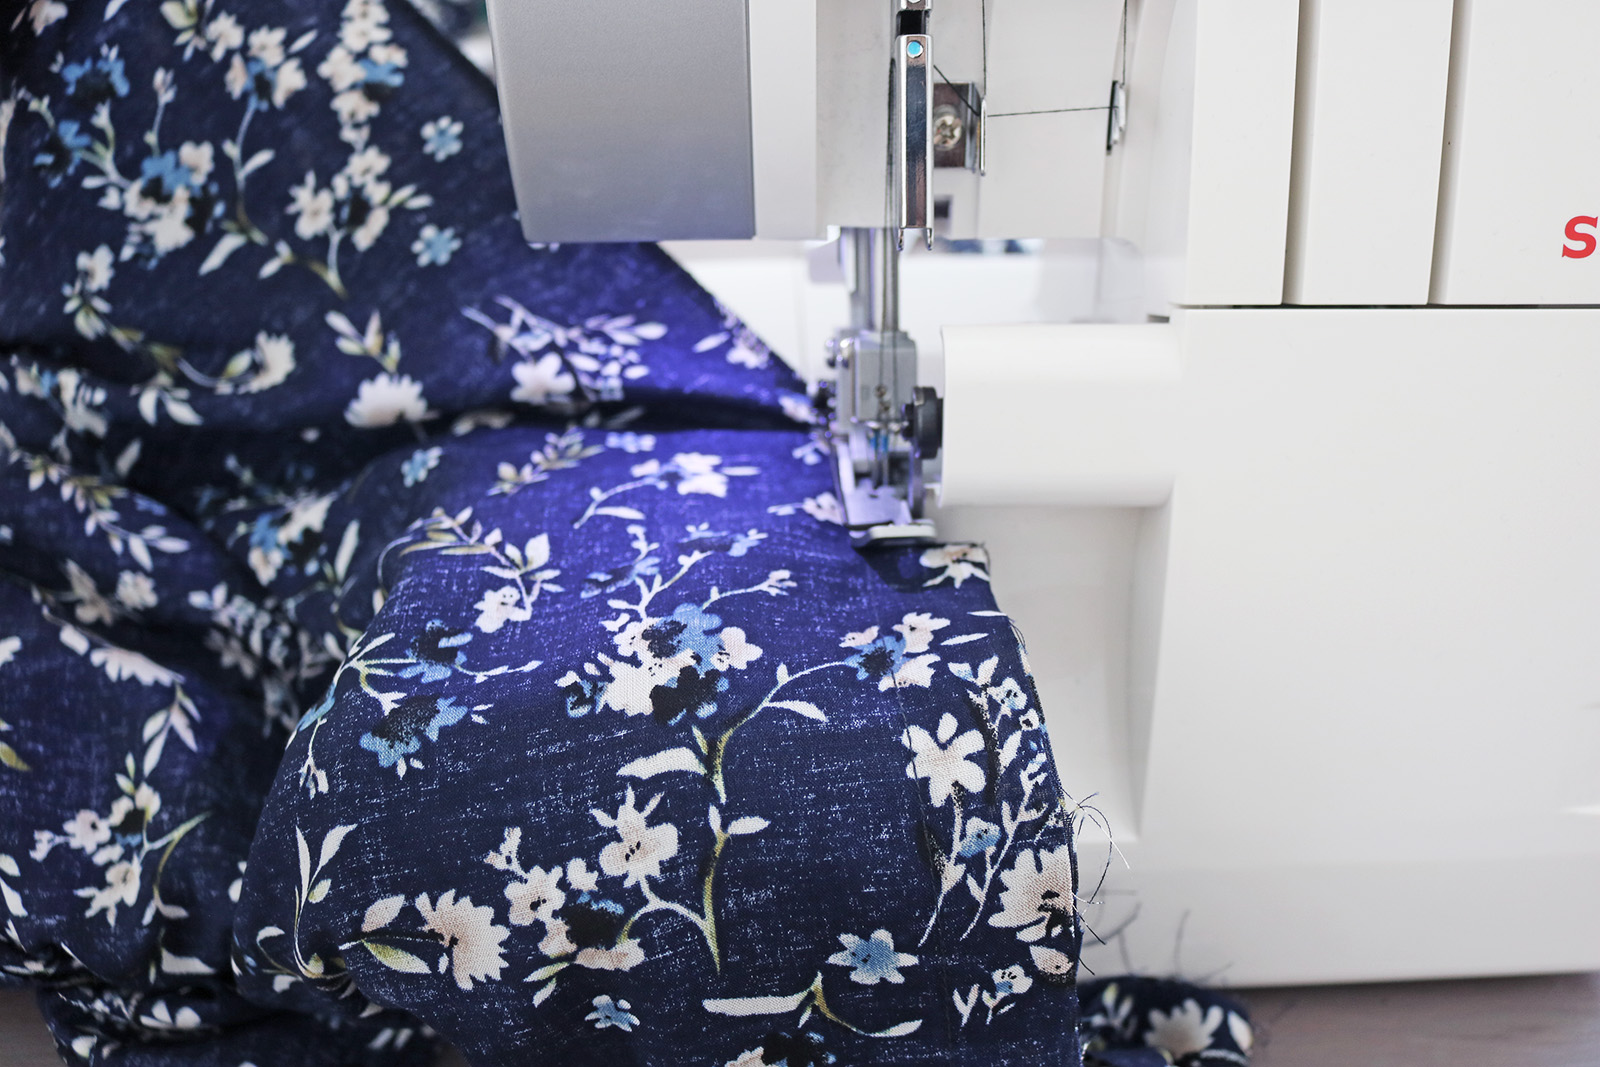
Before starting to attach the waistband to the pants, I first finished the side seams with my SERGER (keeping the top where you left it open for the zipper, still open). Did I mention I got a serger for my birthday????? LIFE CHANGING. No more zig-zagging edges for me.
Then pin the waistband onto the waistline of the pants, starting where the stitch was left open for the zipper. Next stitch along the fold line as shown below with the dashed lines. Stop the stitch at the spot you marked in step IV trying the pants on.
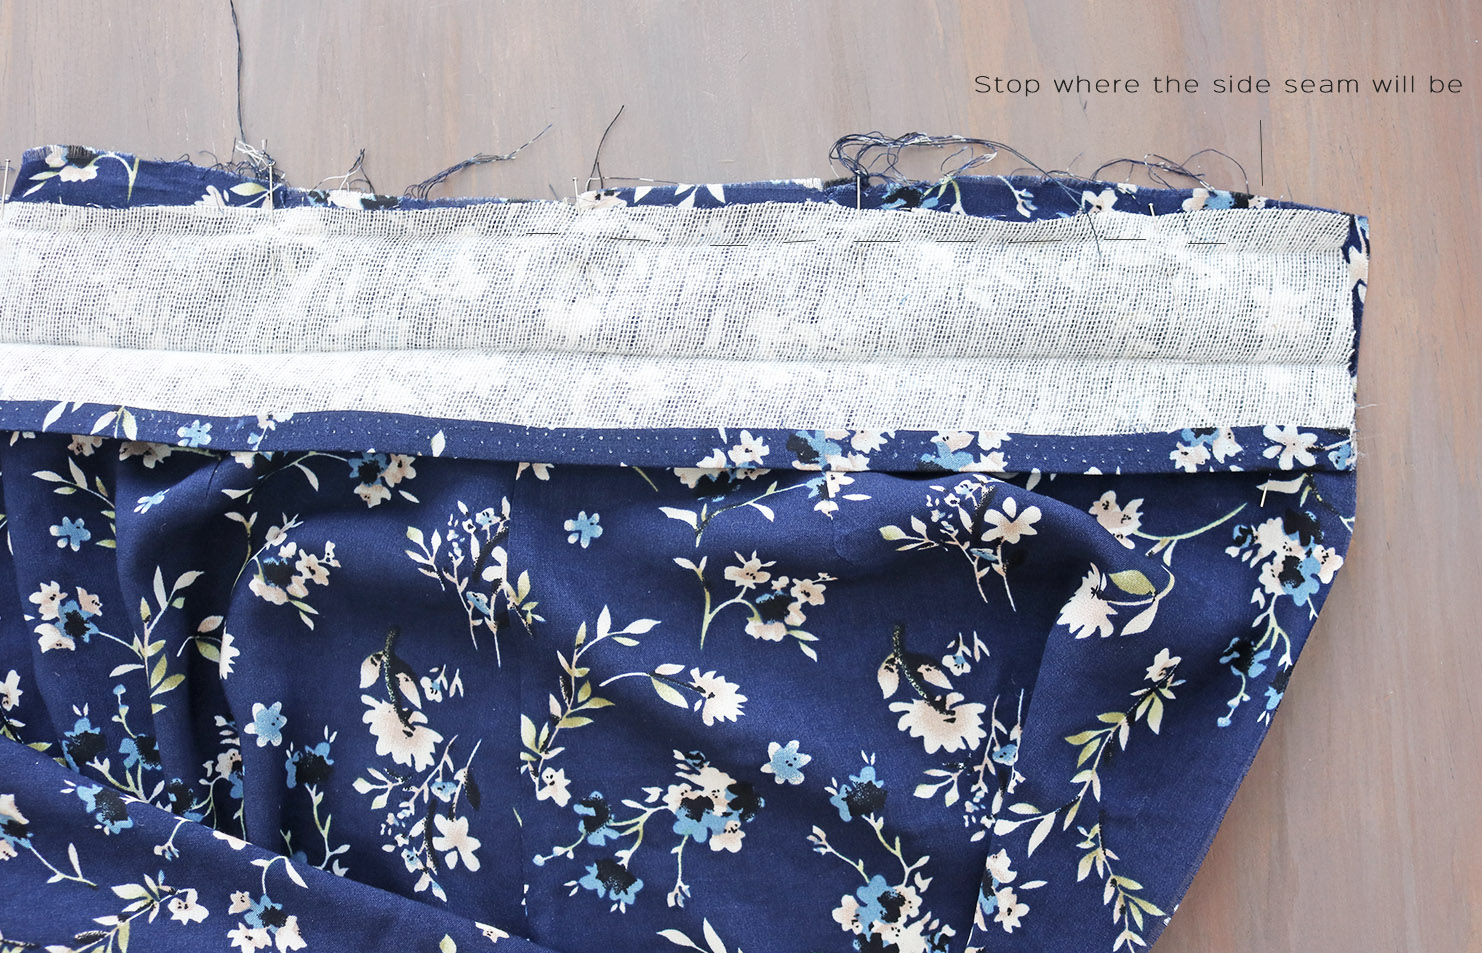
Now press like so, so all the seam allowances are pointing up:

Now you can finish the ends of the waistband. I did this by folding the waistband over itself and sewing so you make a 90 degree angle. Trim the corner and fold right side out, press.
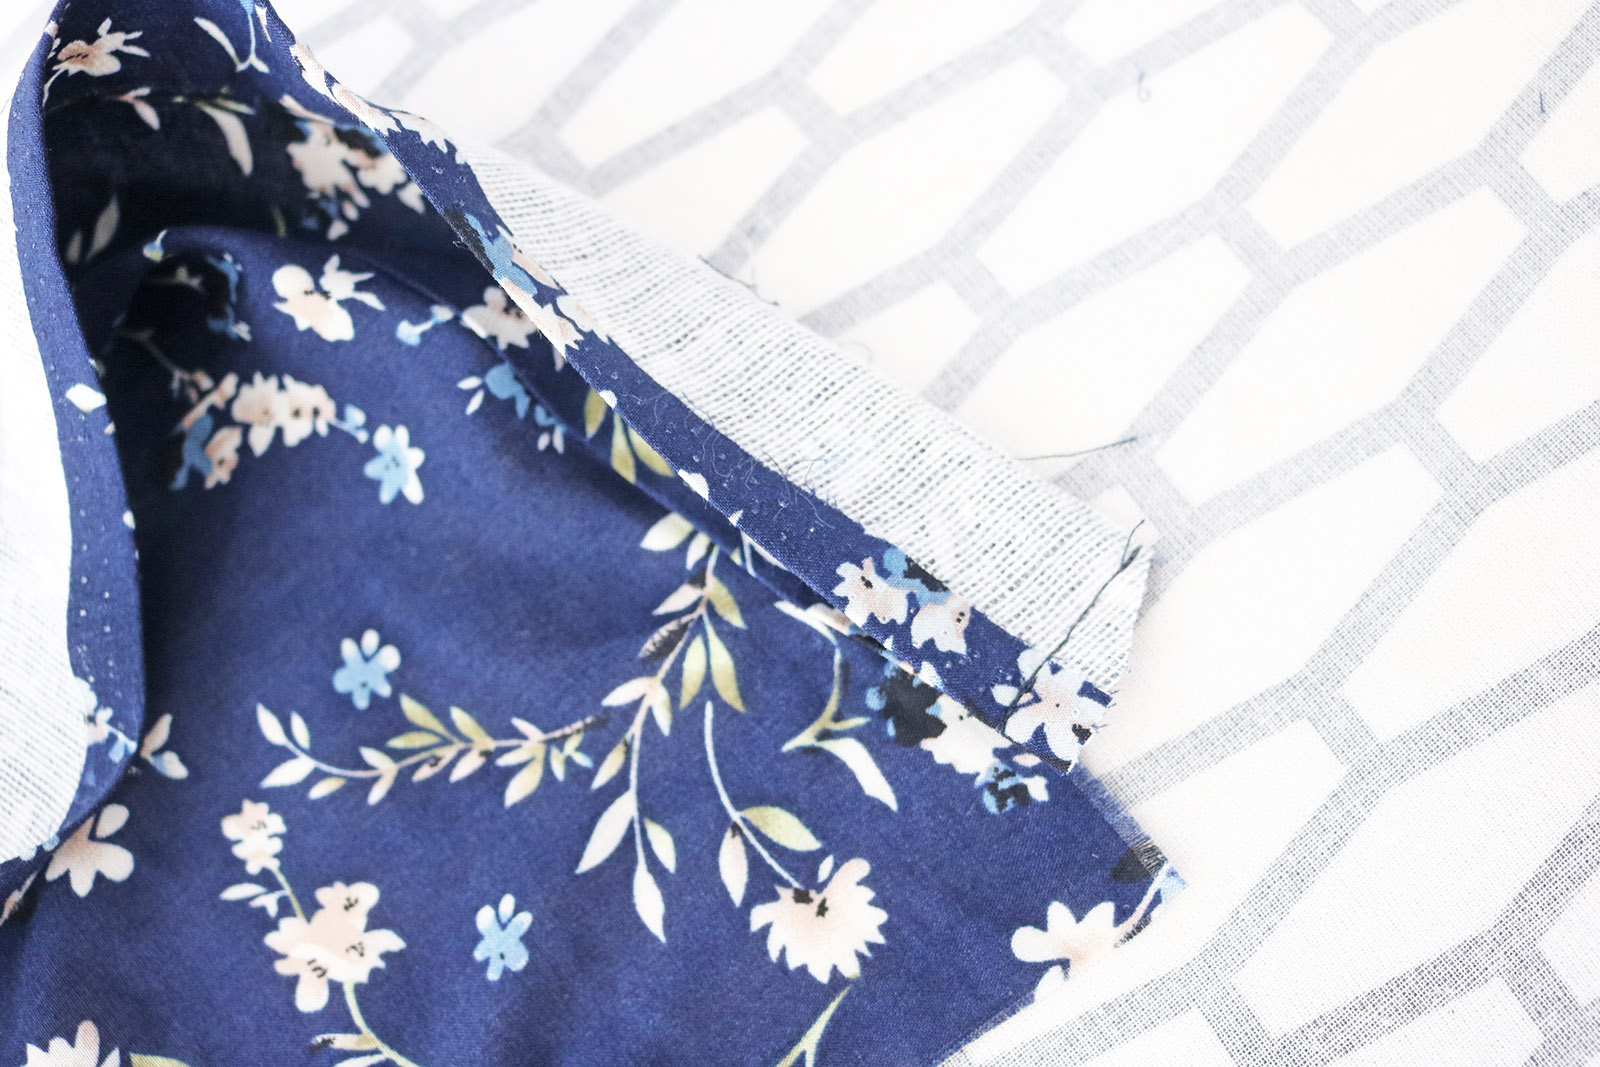
Next you'll want to trim the excess off the side of the pant part that's still open, and finish that with either a serger or a zig-zag, and you'll have:

To finalize the waistband, just hand-sew it on the reverse:
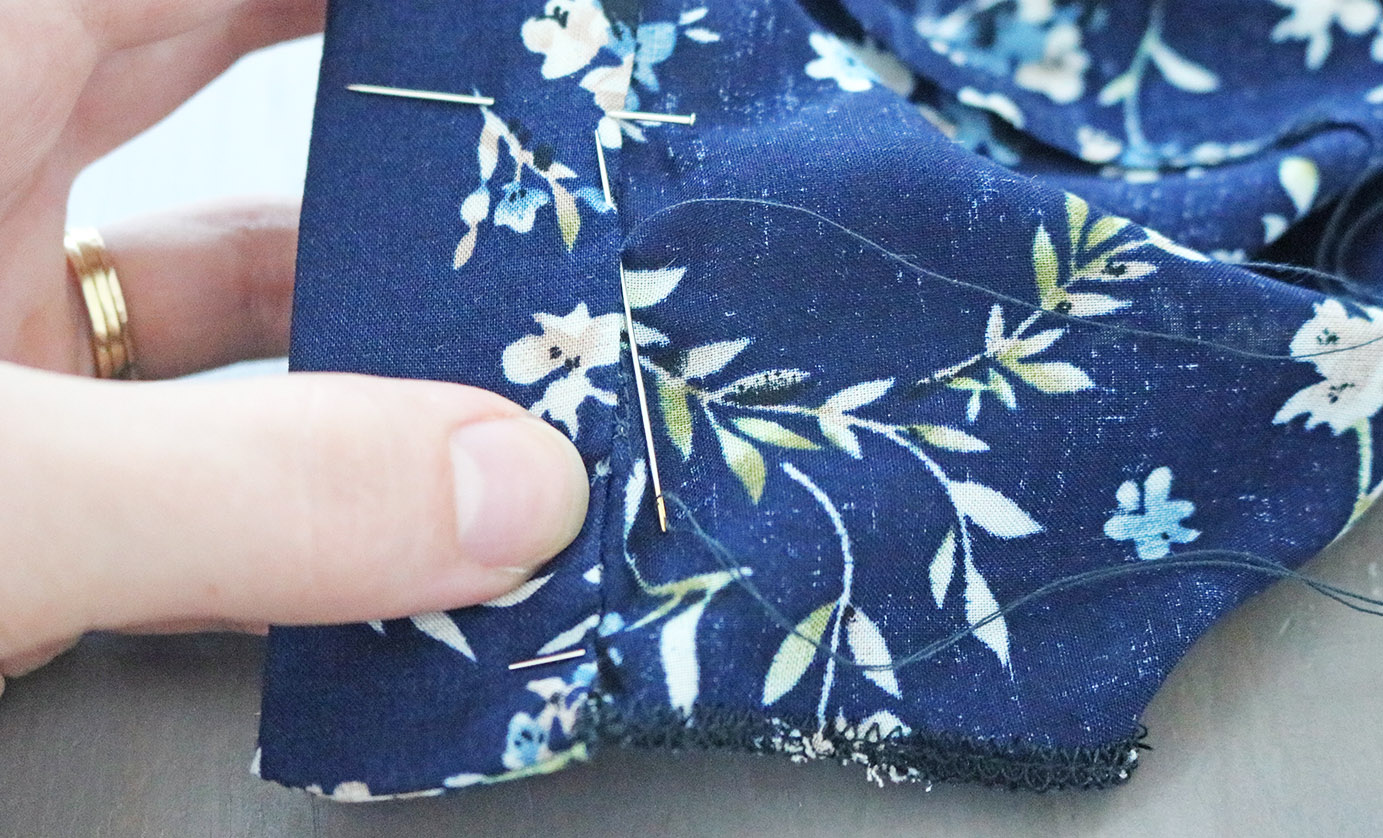
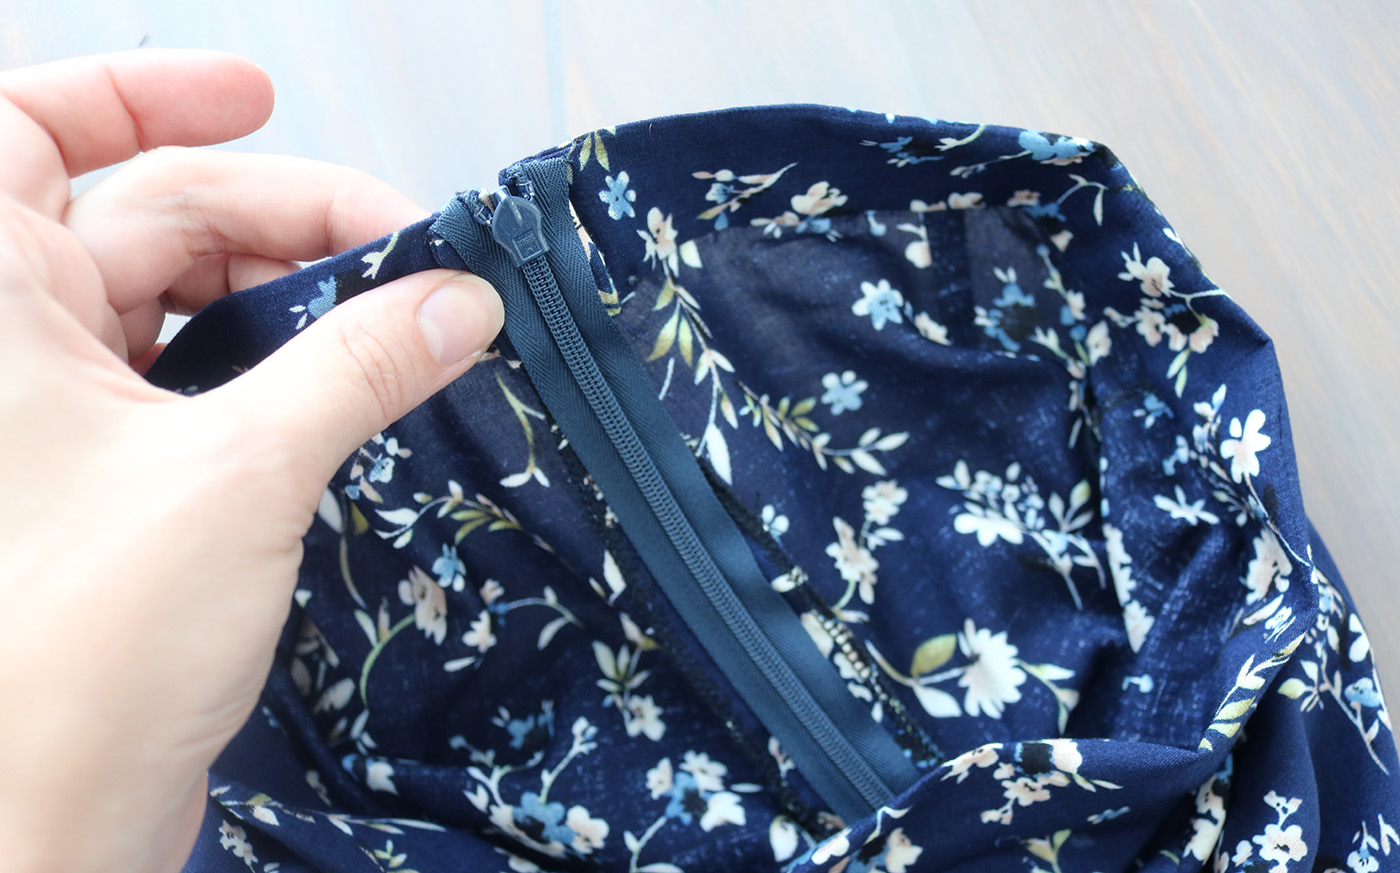
VI. The second-last step is to add the invisible zipper - if you haven't worked with invisible zippers before, a video is the best way to learn. This one is legit if you don't have the special zipper foot.
After adding the zipper, just tuck the ends of it under the folds at the top and hand-sew to secure.

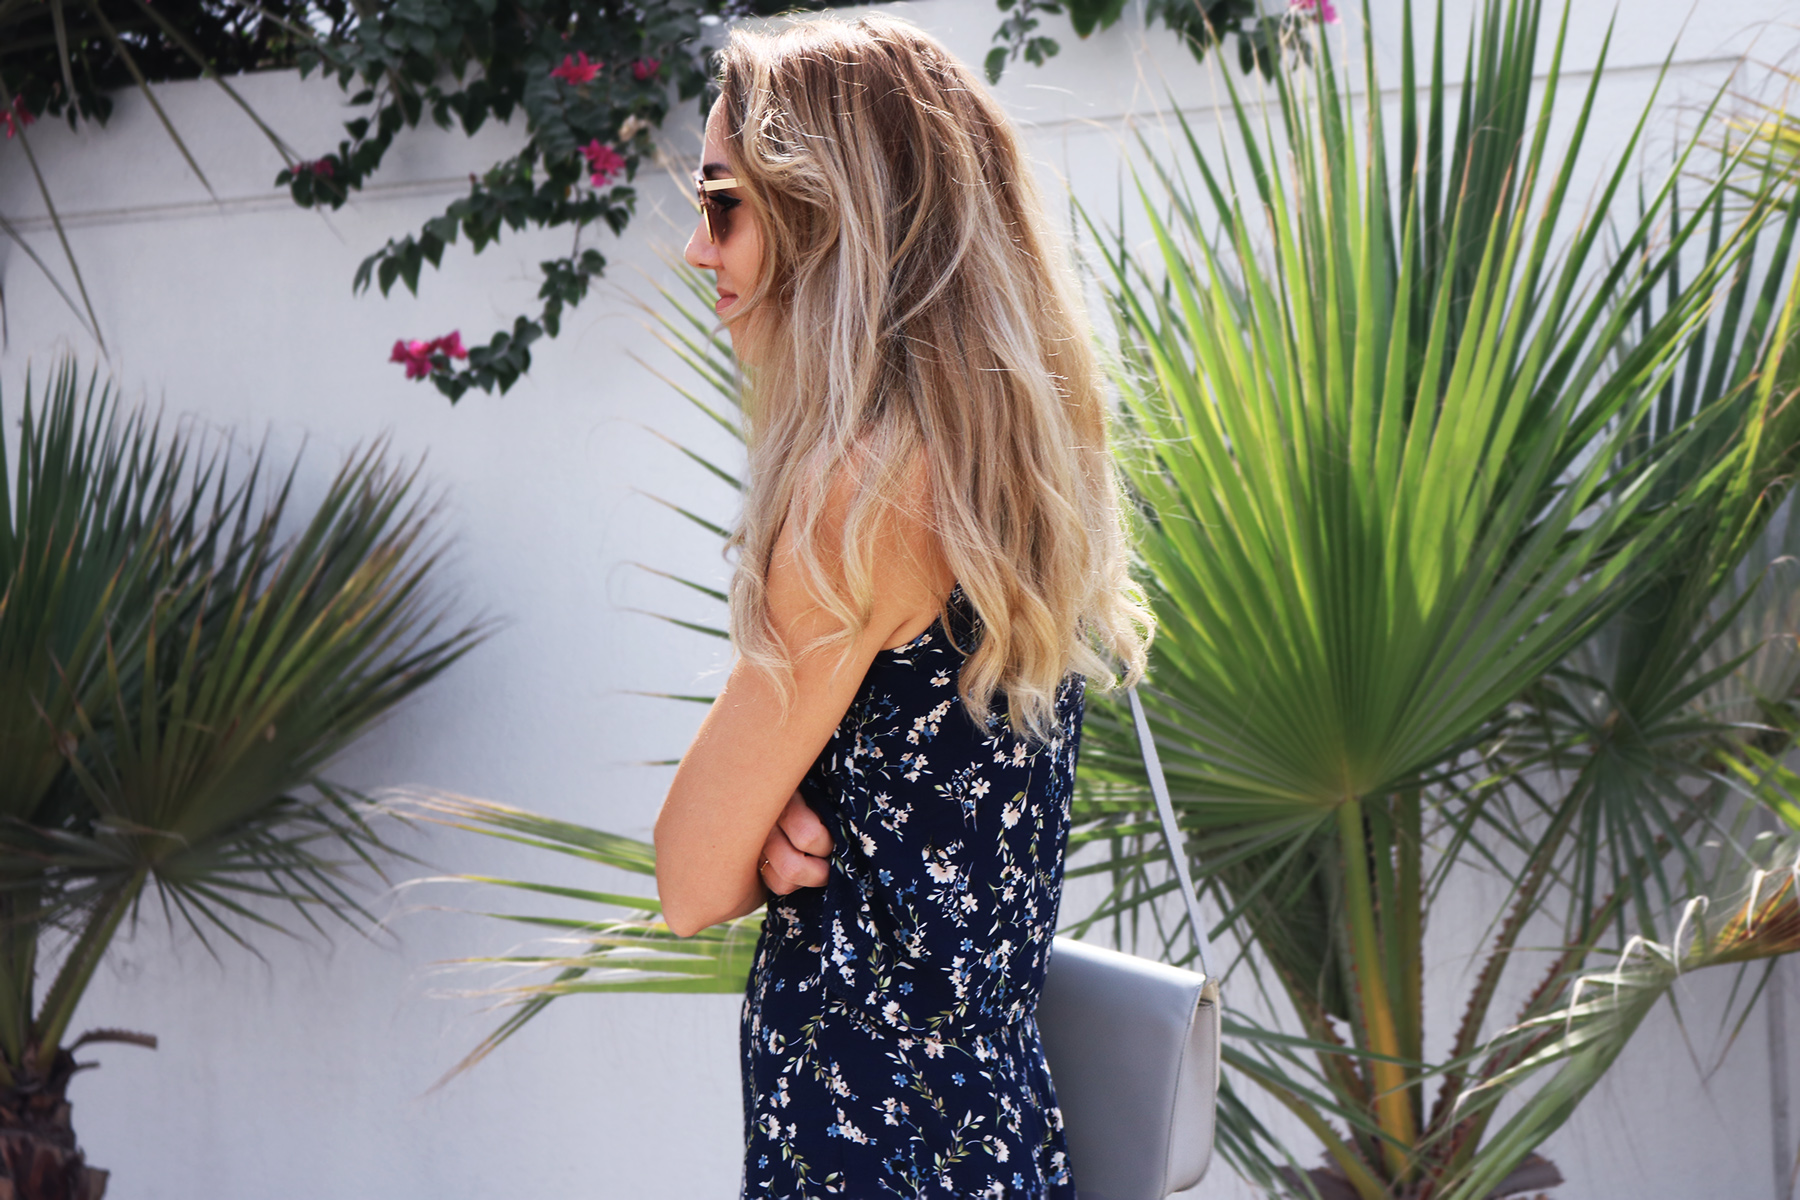
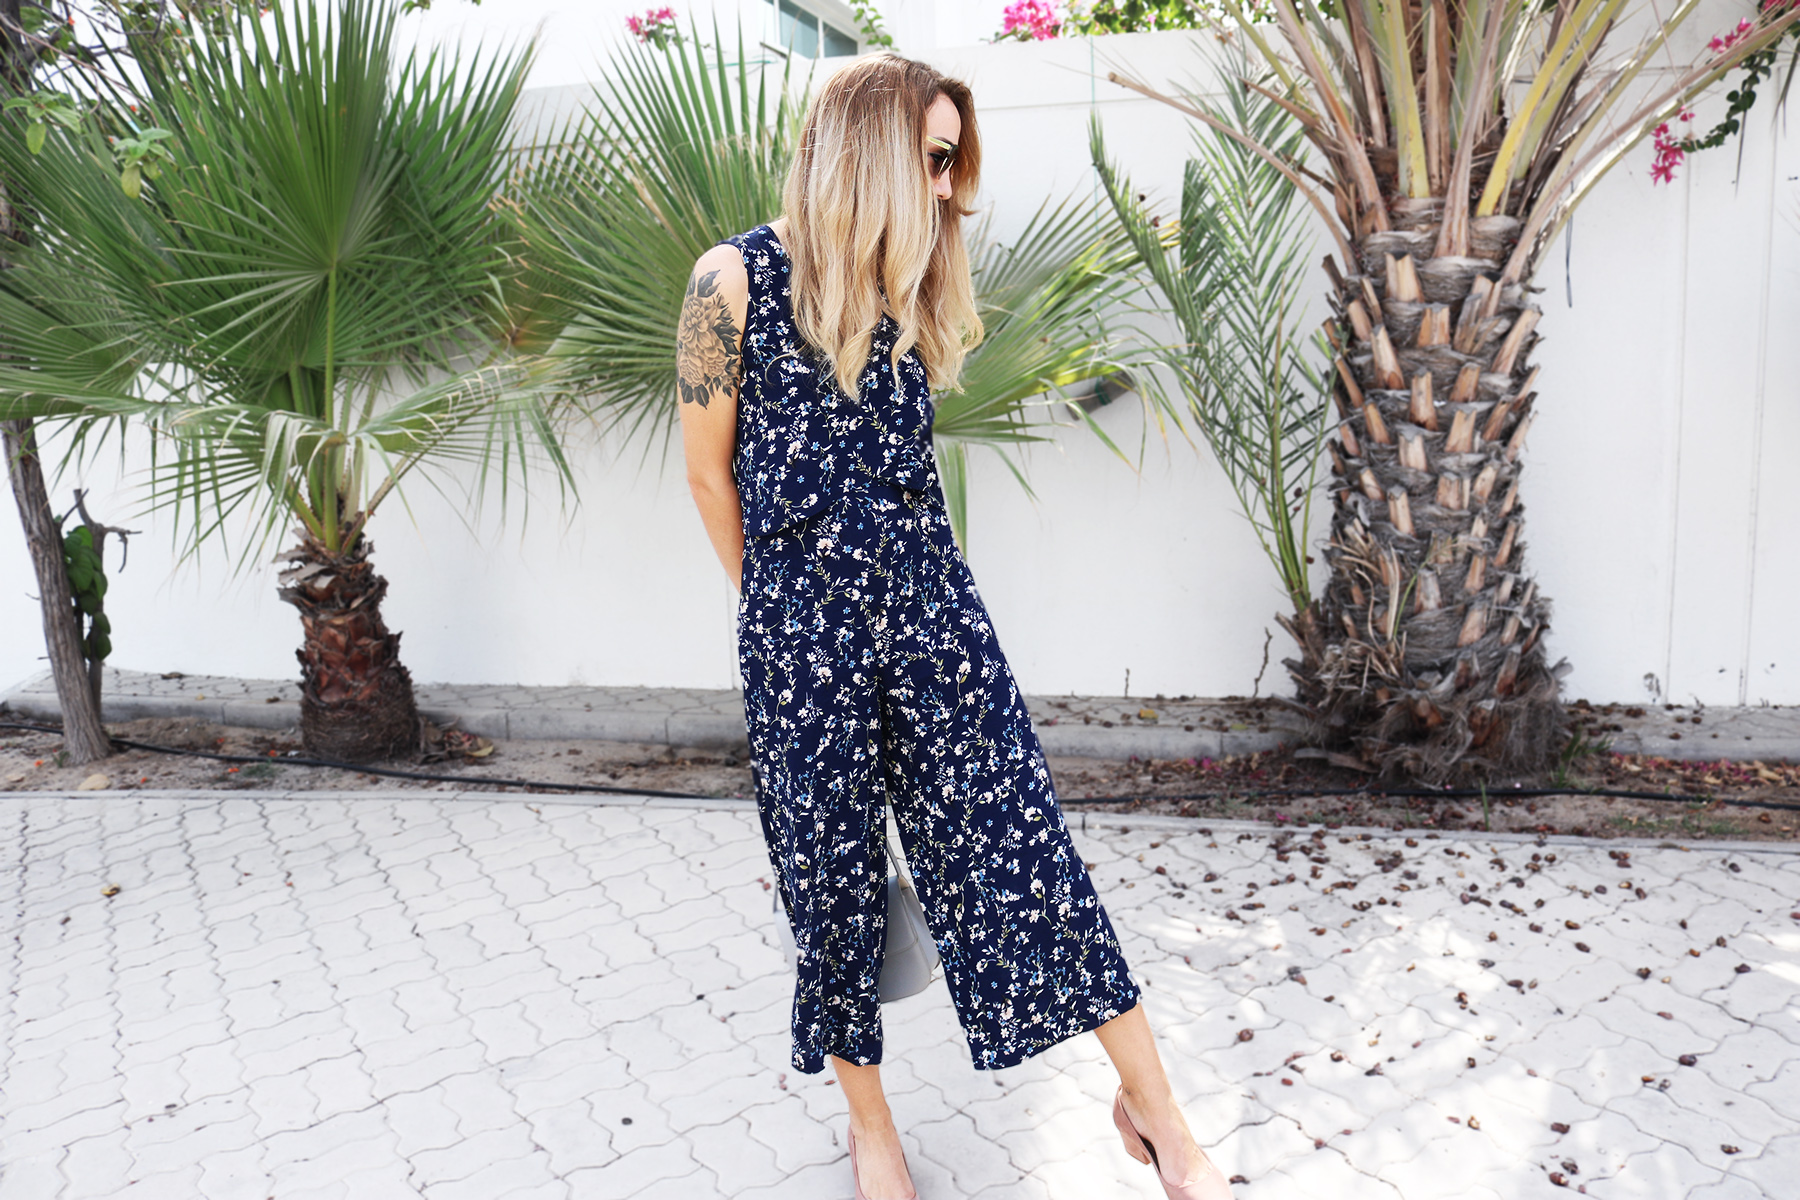
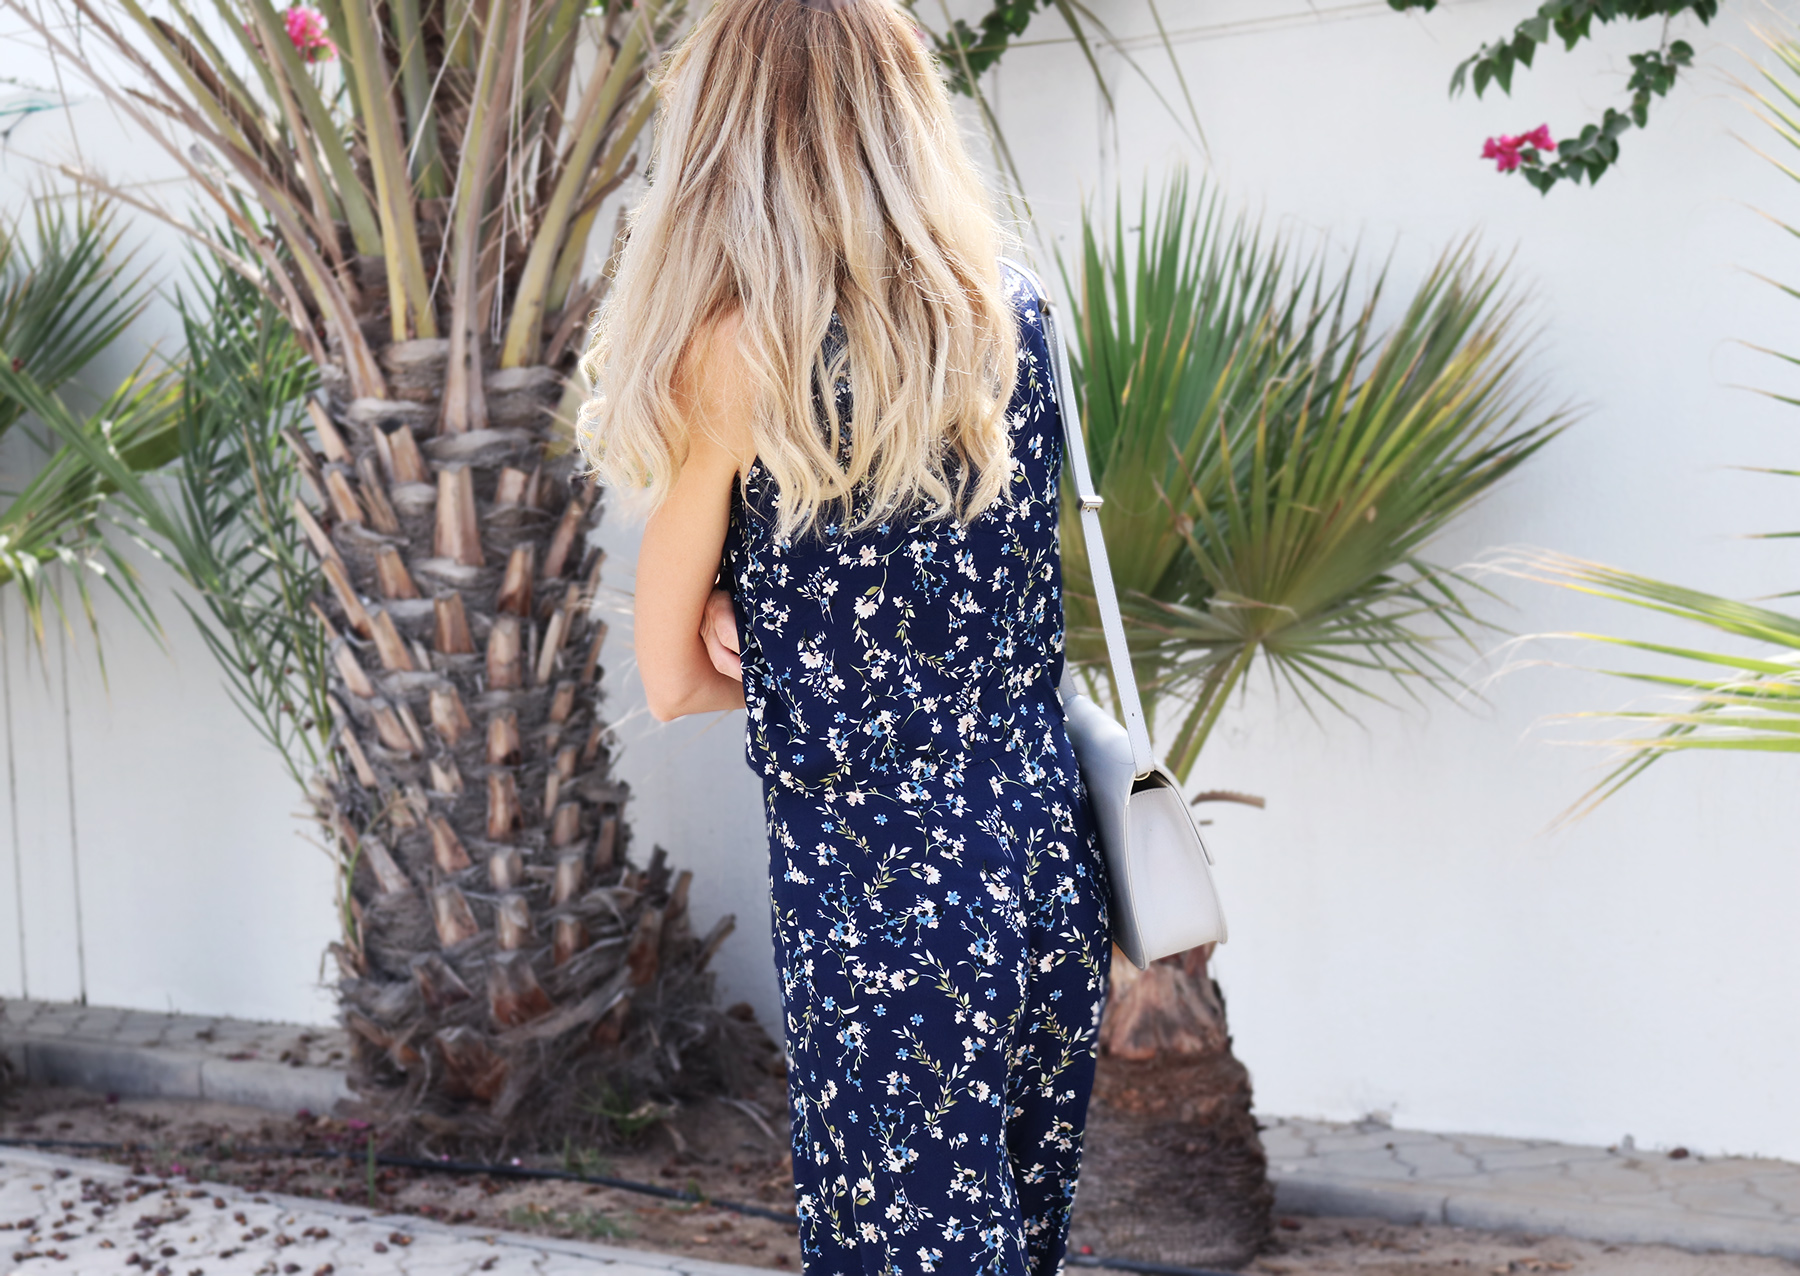
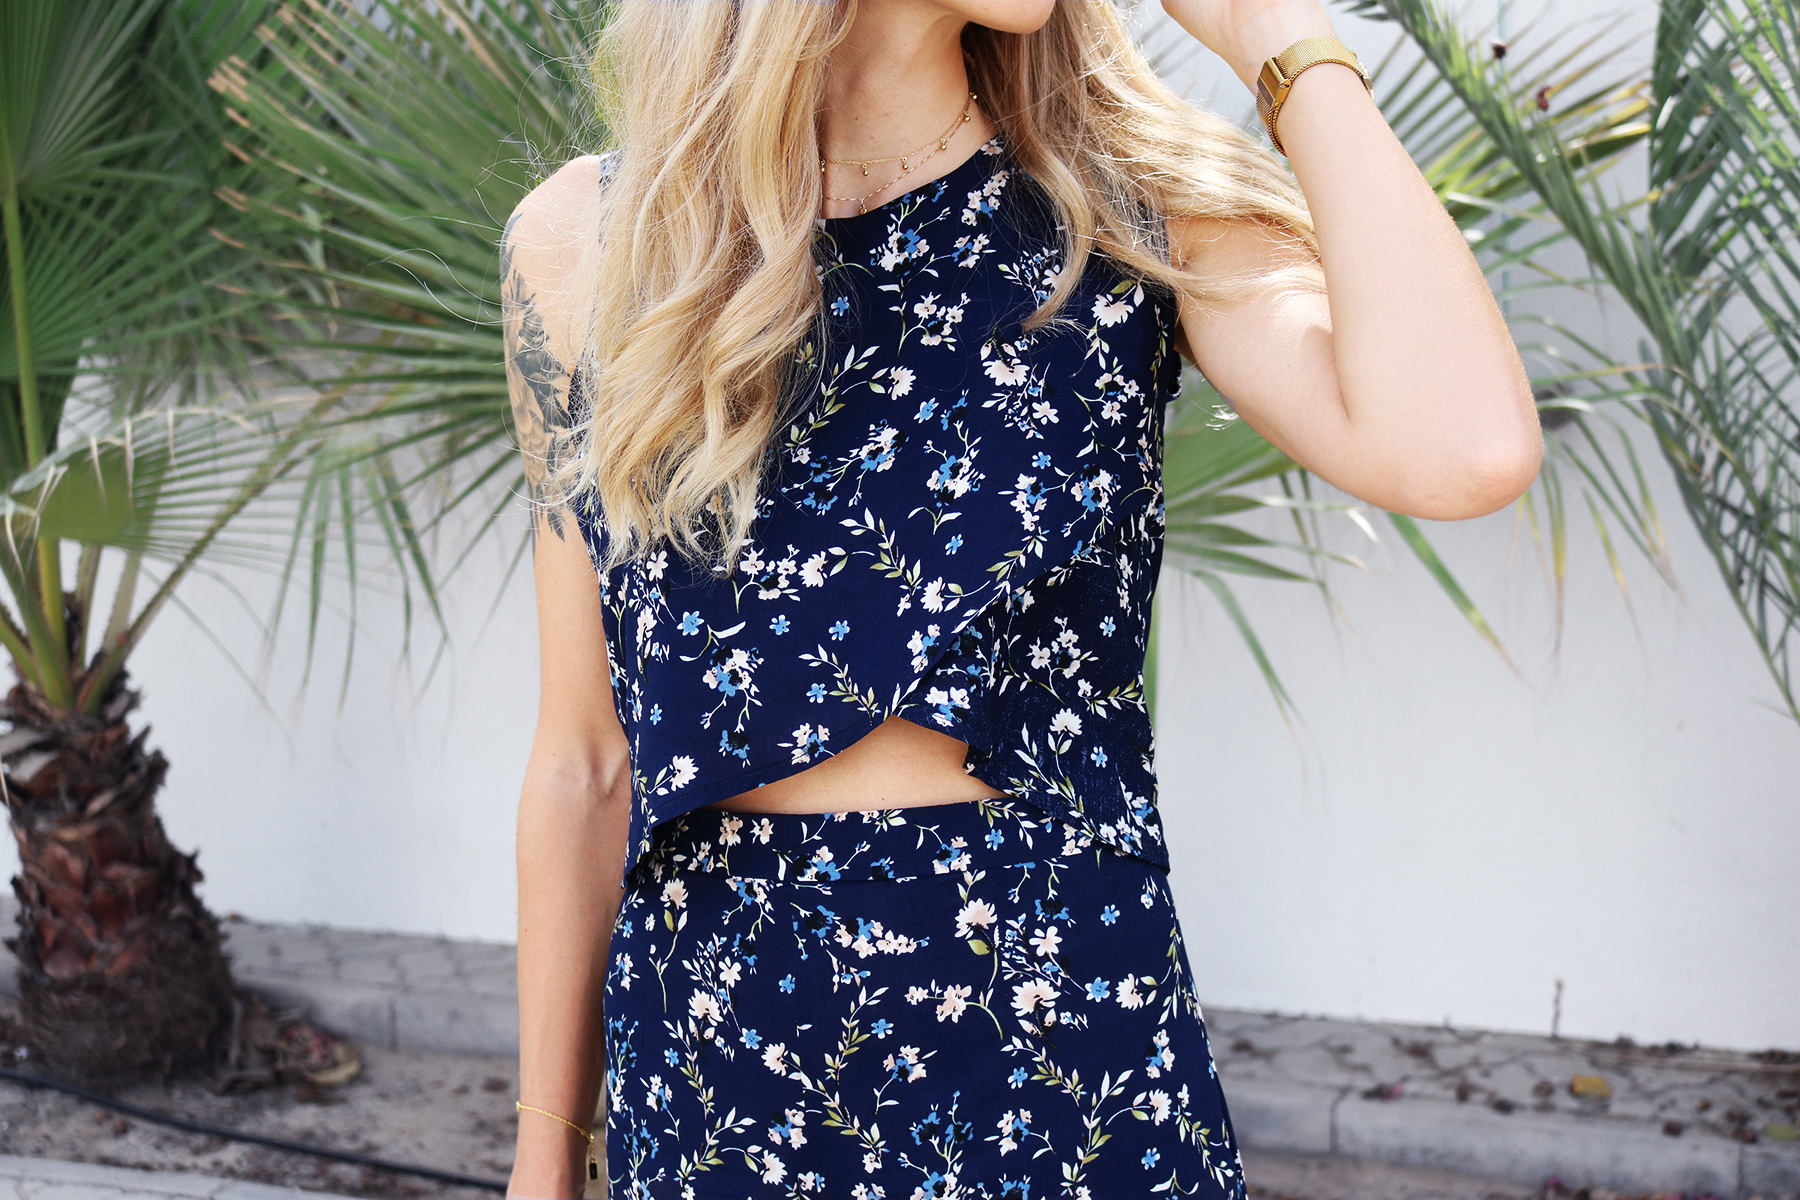
Finally, just hem the culottes to the desired length. I also made a top since I had fabric left over.
xo,
Julia


This is a very informative blog and I learn very good ideas over here. The instructions also look simple enough. But i am so clumy with this that I have never tried it. cause I know I will mess it up
ReplyDeleteBeautiful! May I ask how tall you are?
ReplyDelete