I've always been anti-raglan sleeves, probably because when I think of them, I visualize the 'Someone I love went to Texas and all they got me is this t-shirt' crap at Walmart. Or some atrocity like
this. It was high time I conquered my phobia. Which turned out to be completely unfounded, I actually love the look of this kind of sleeve on a
non-sportswear item. There will be MANY raglan sleeves appearing here going forward!
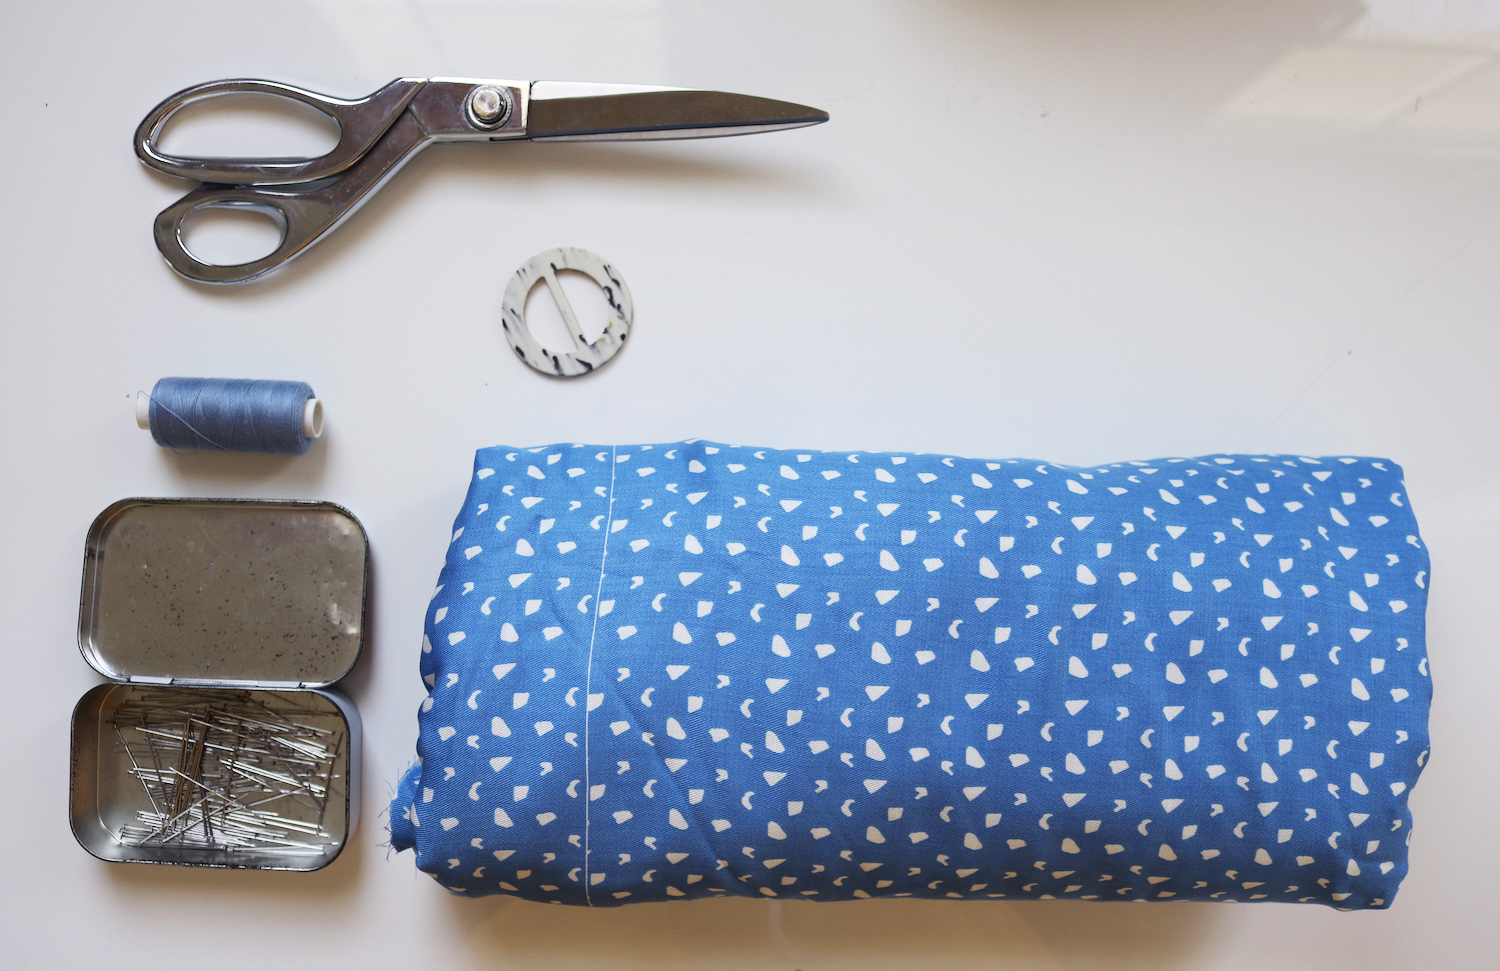
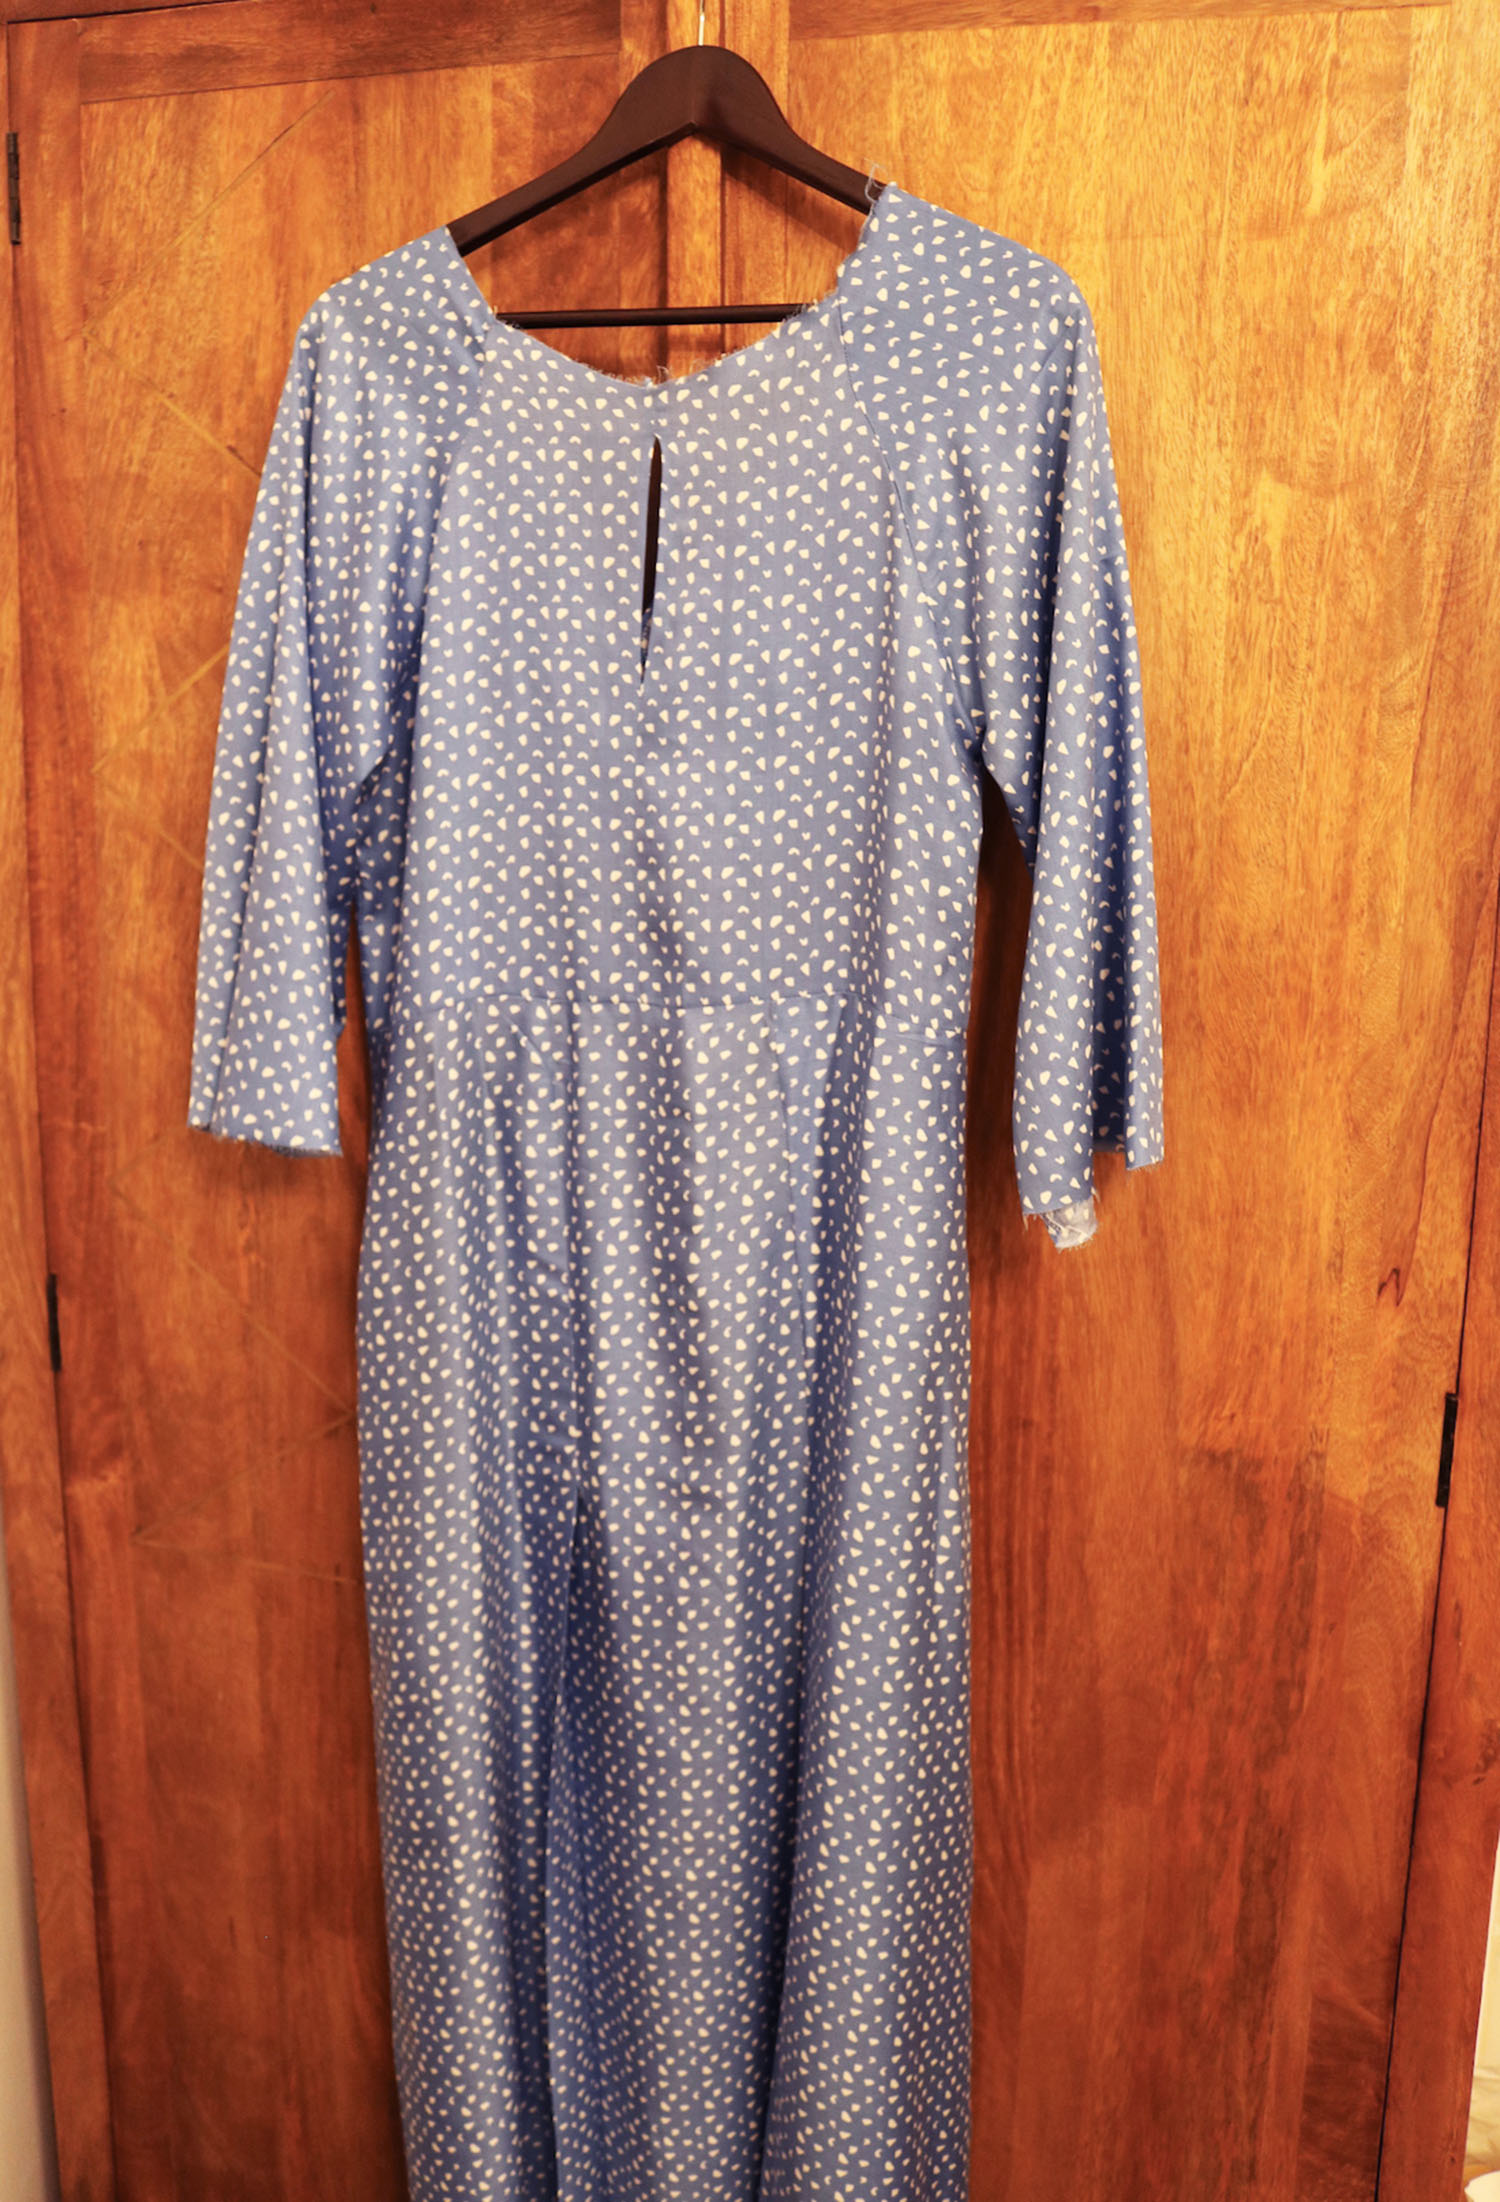
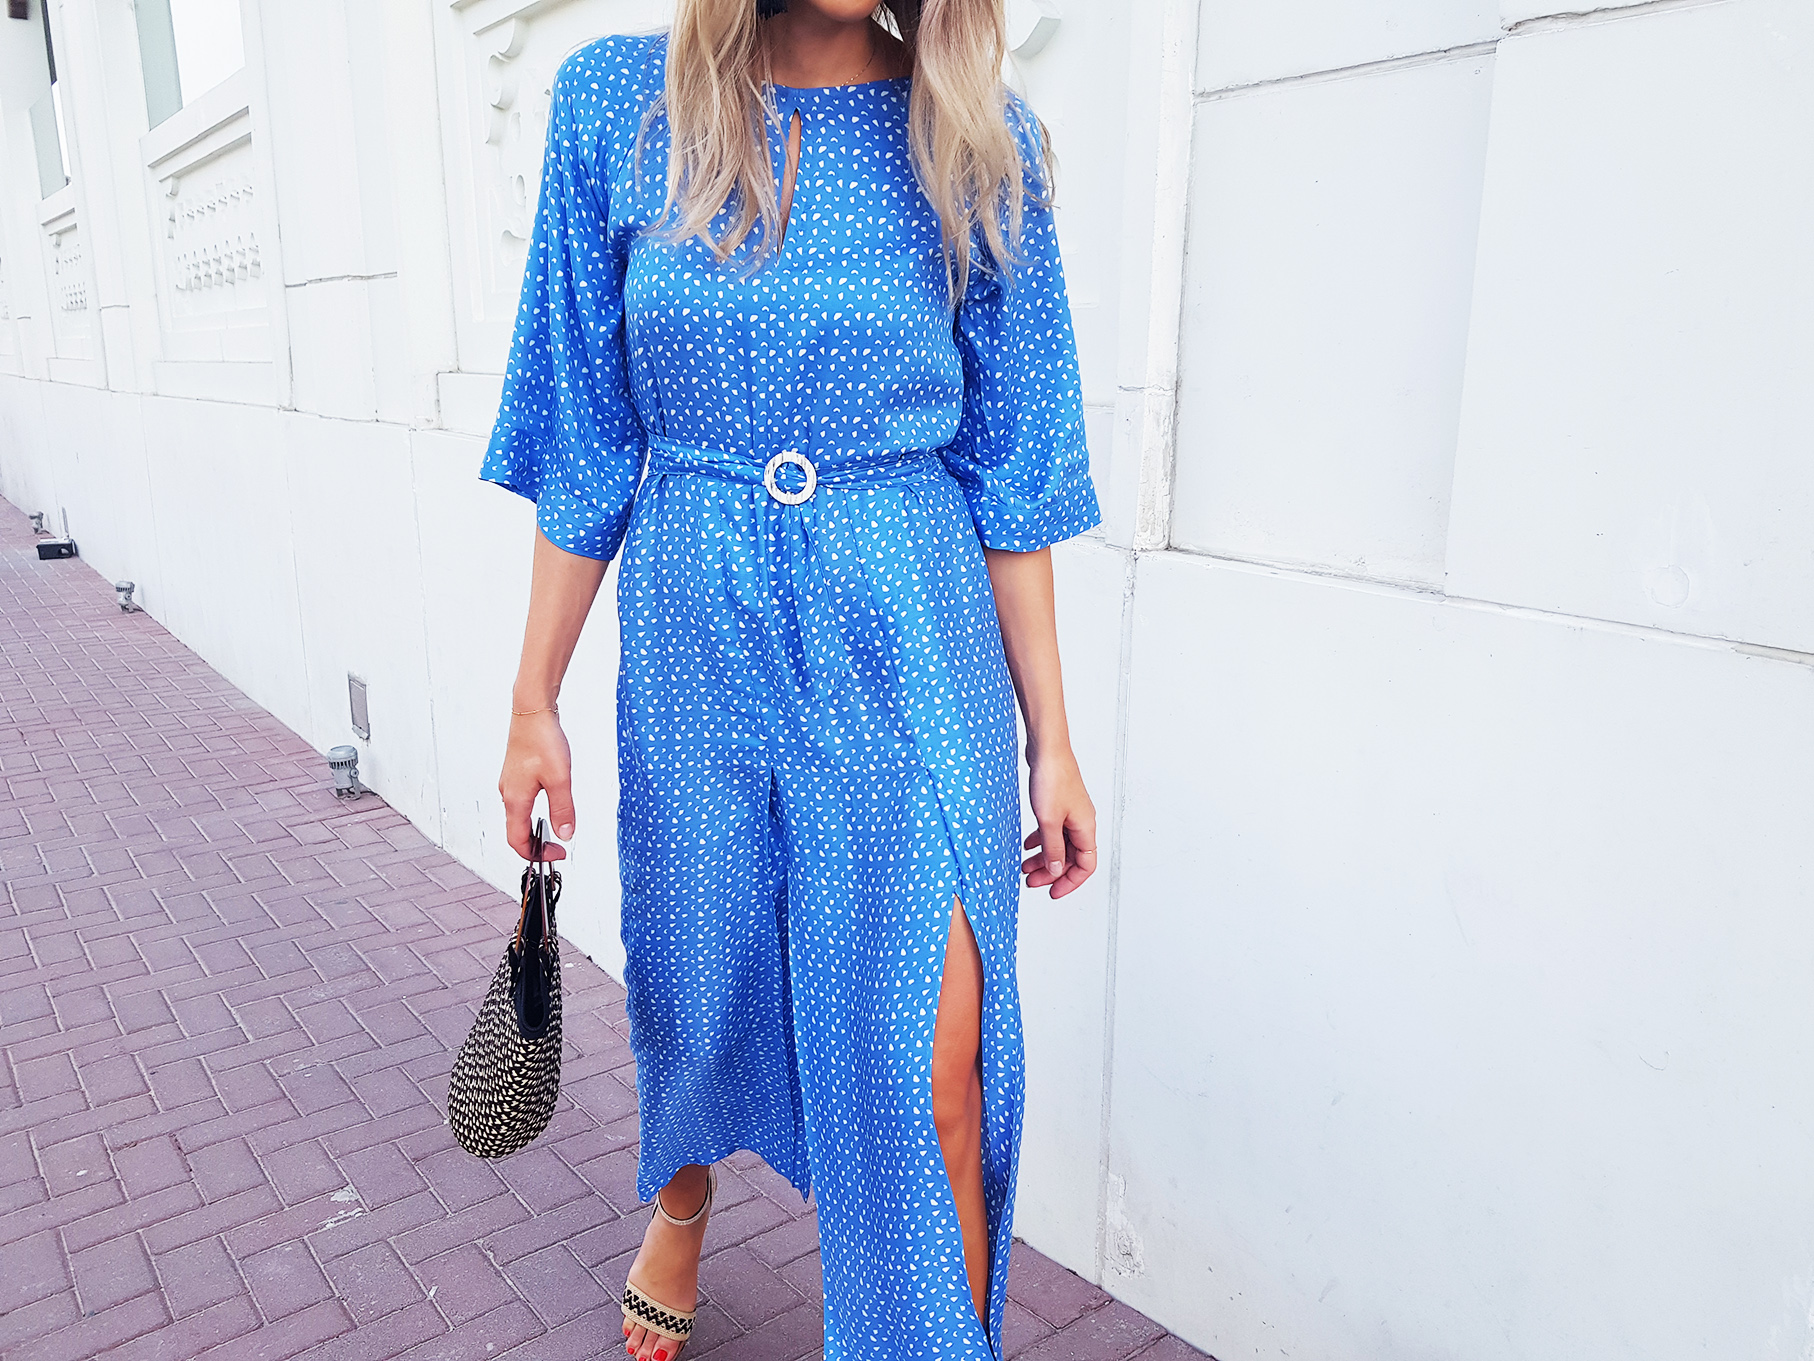
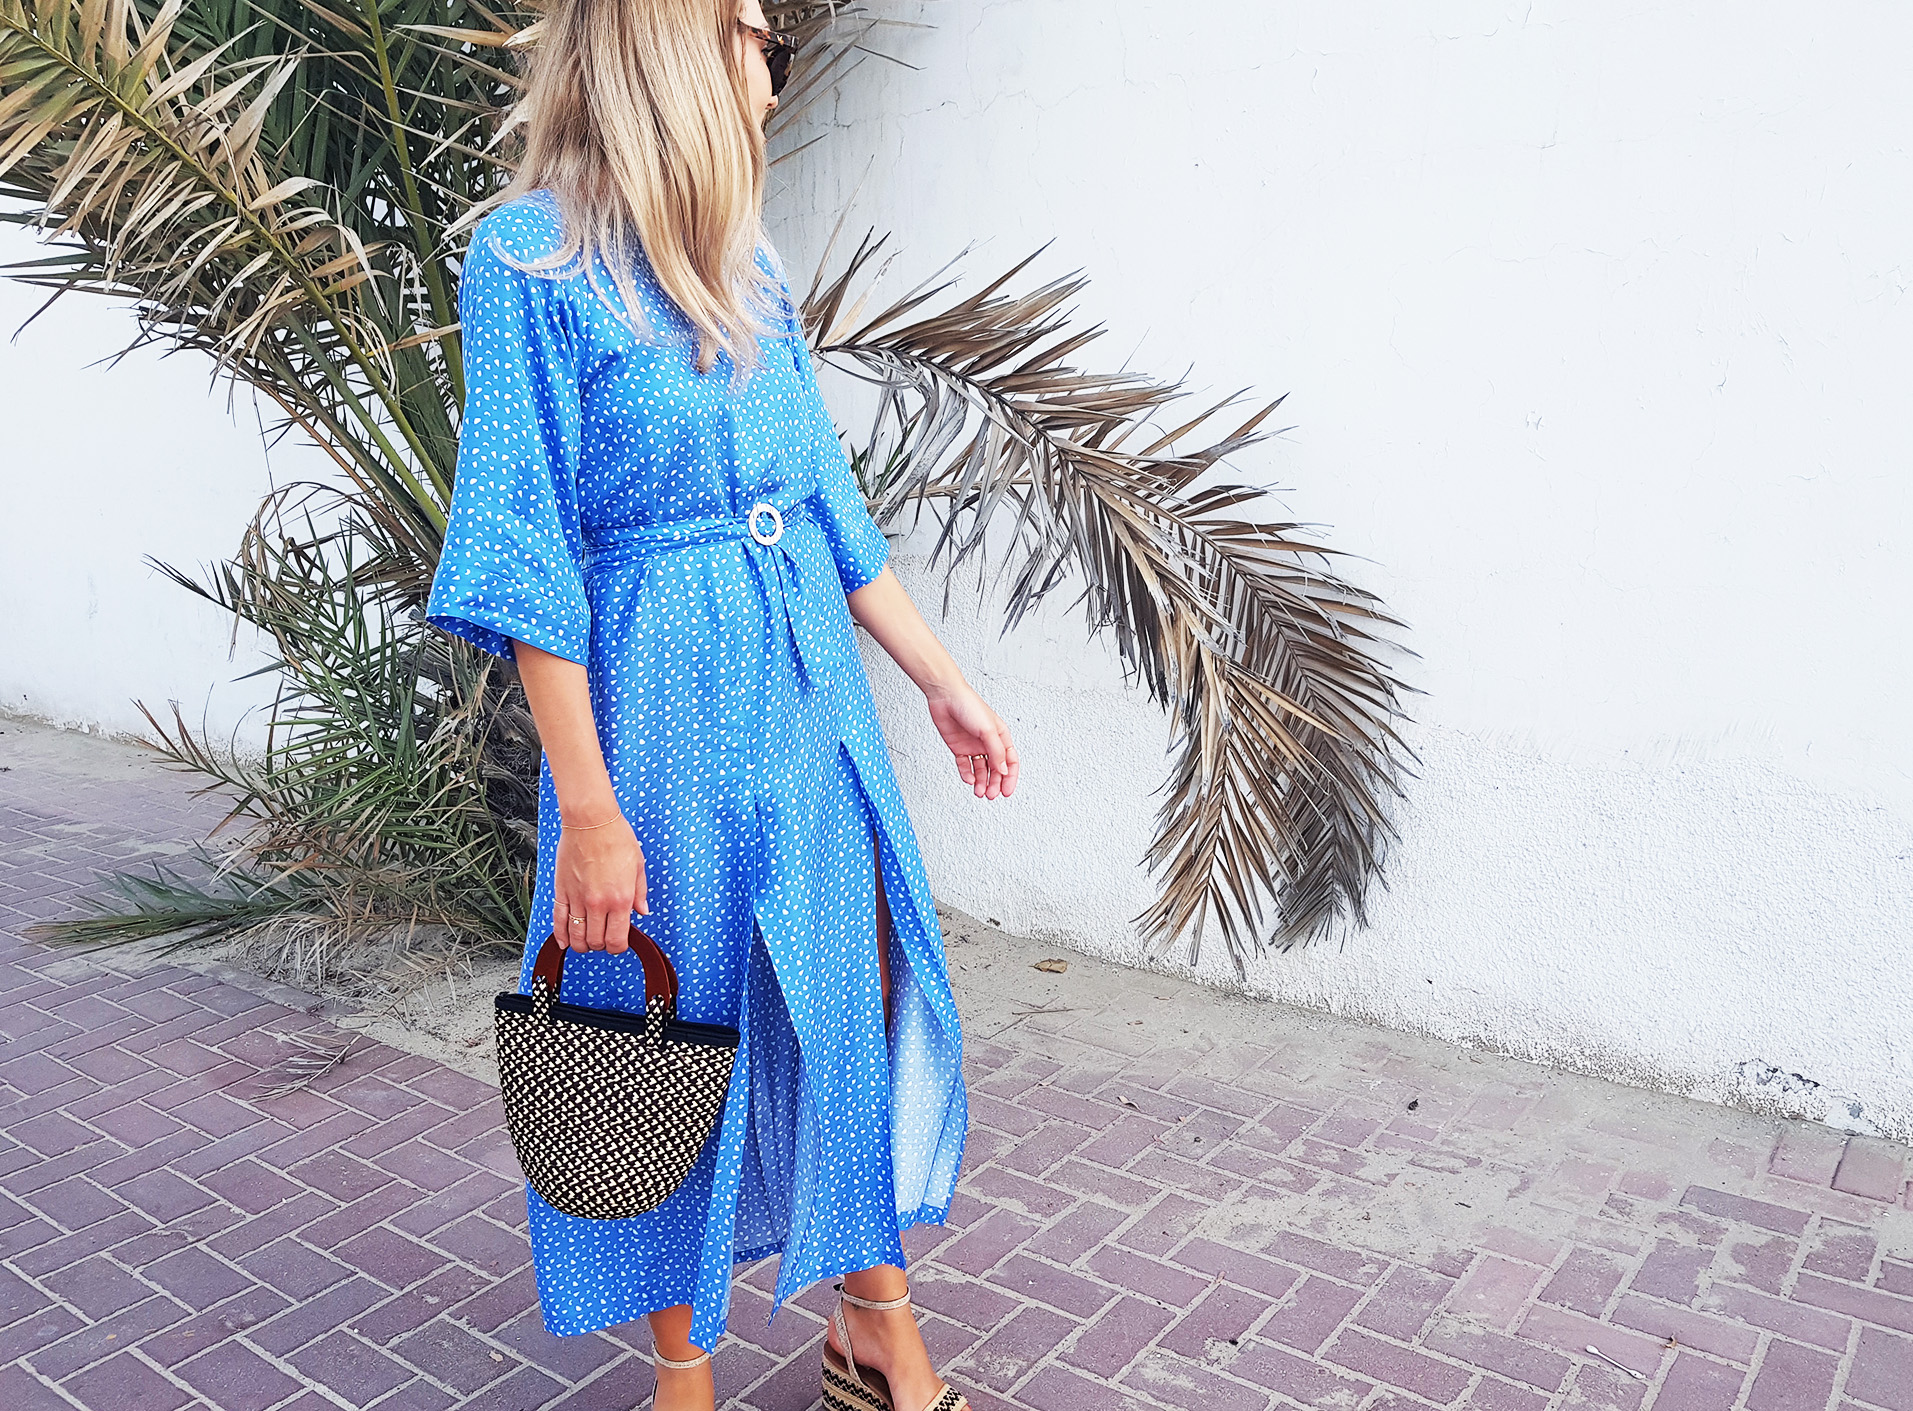
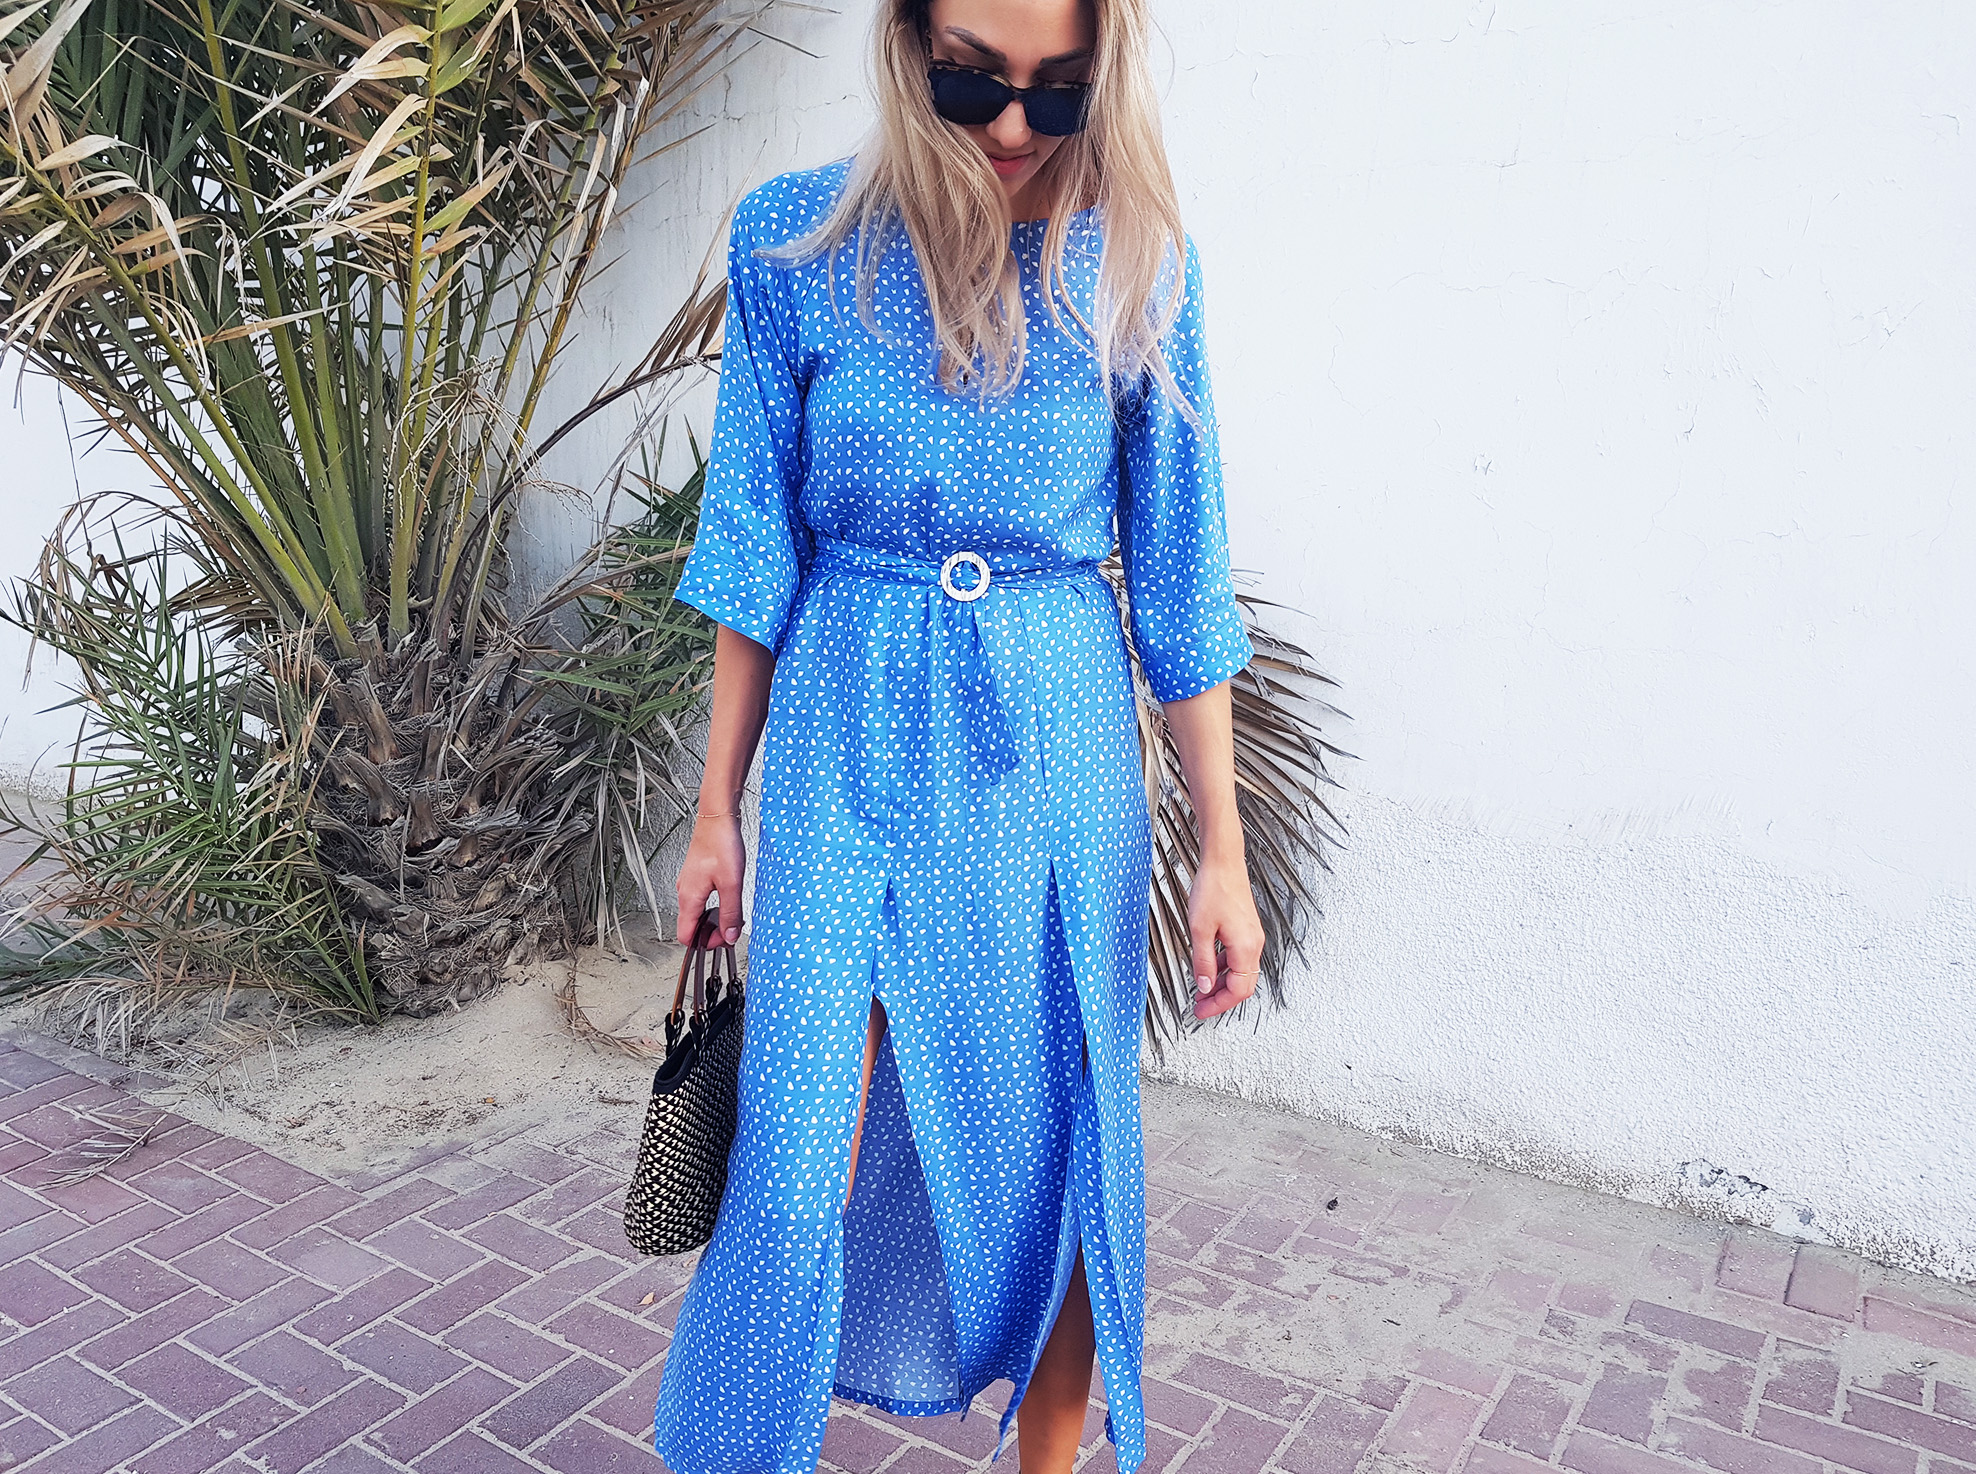
I got both the fabric and the buckle from Cartagena. Softest of cottons! I have about 1 meter left, what else should I make of it??
TOOLS:
Lightweight fabric (I used 100% cotton) 3 m full 150 cm width | Belt buckle | Scissors | Thread & Sewing machine | Pins | Not pictured but also used 1 button and bias tape for finishing the neckline
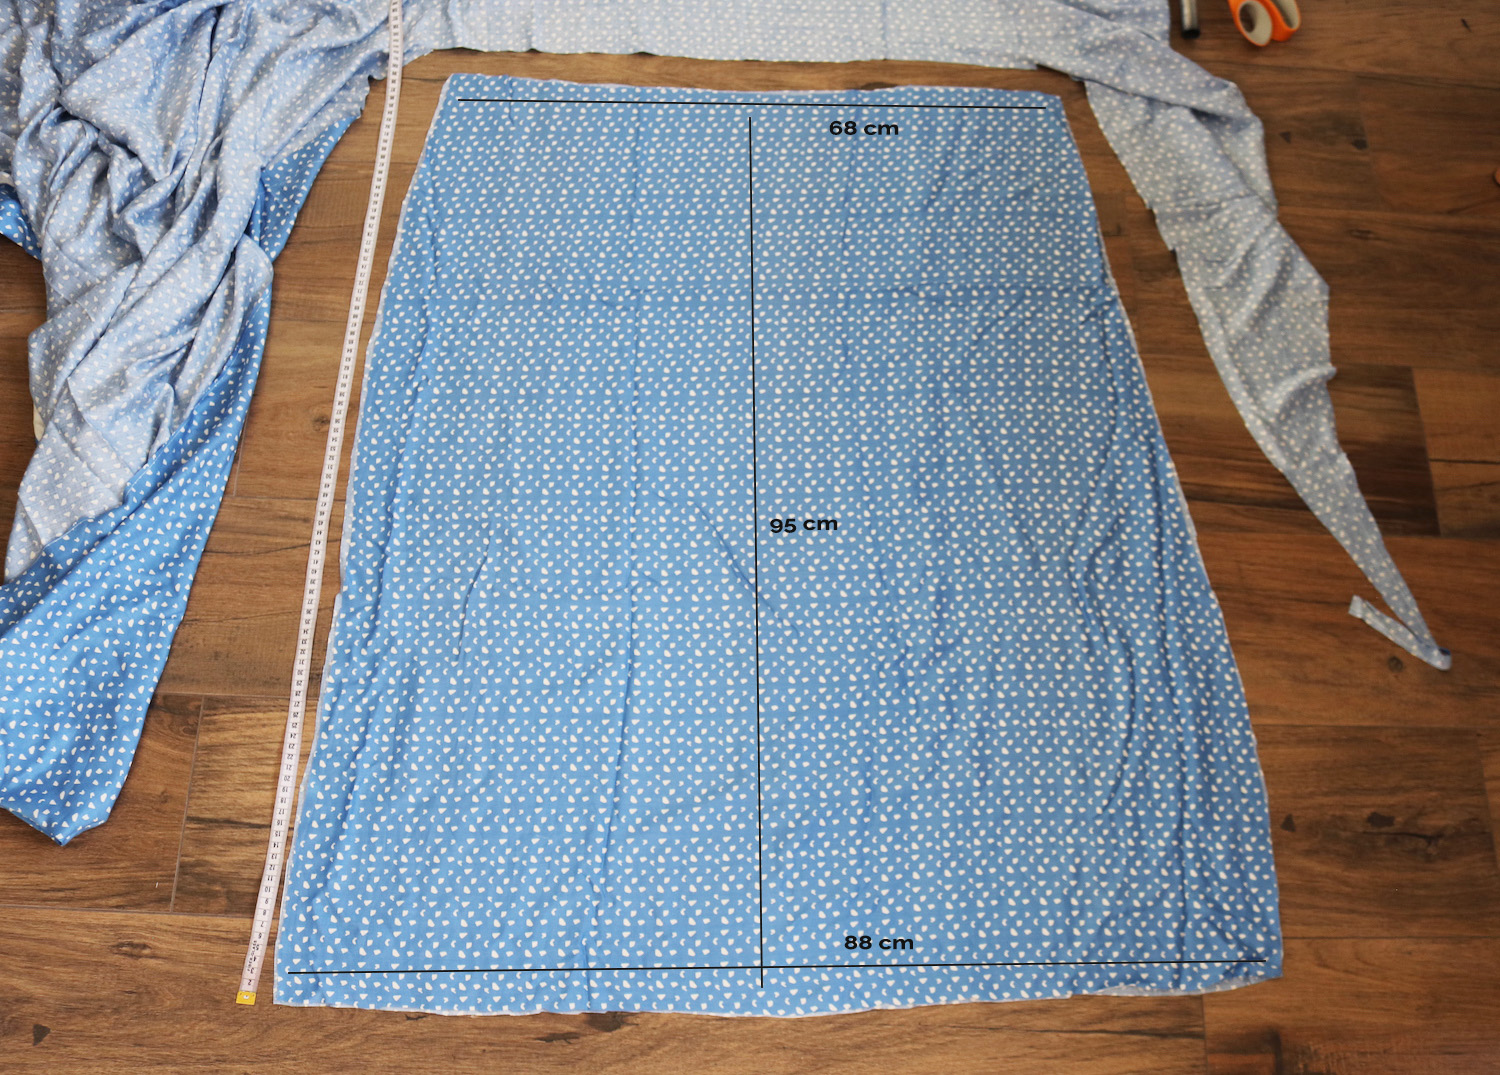
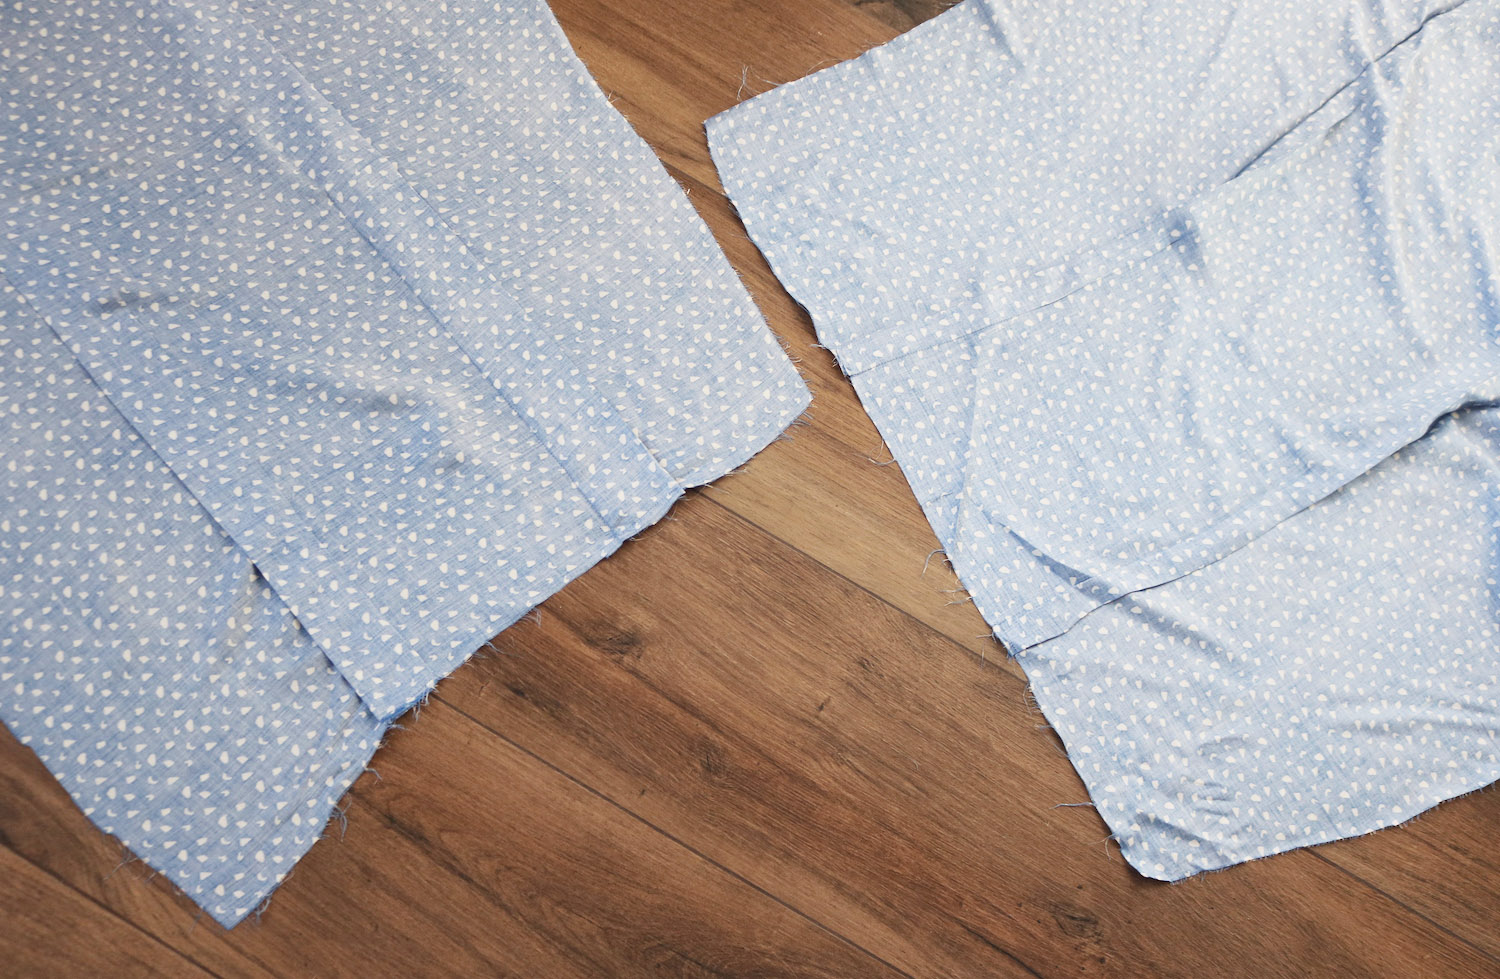
I. First I cut my skit pieces (2 identical). I cut them big - I've made the mistake of cutting a dress with no zipper too tight before, so wanted to be sure I had enough to get into. I took it in later. The loose fit you see in the finished dress was the result, I'm EU36/US4, 175 cm tall.
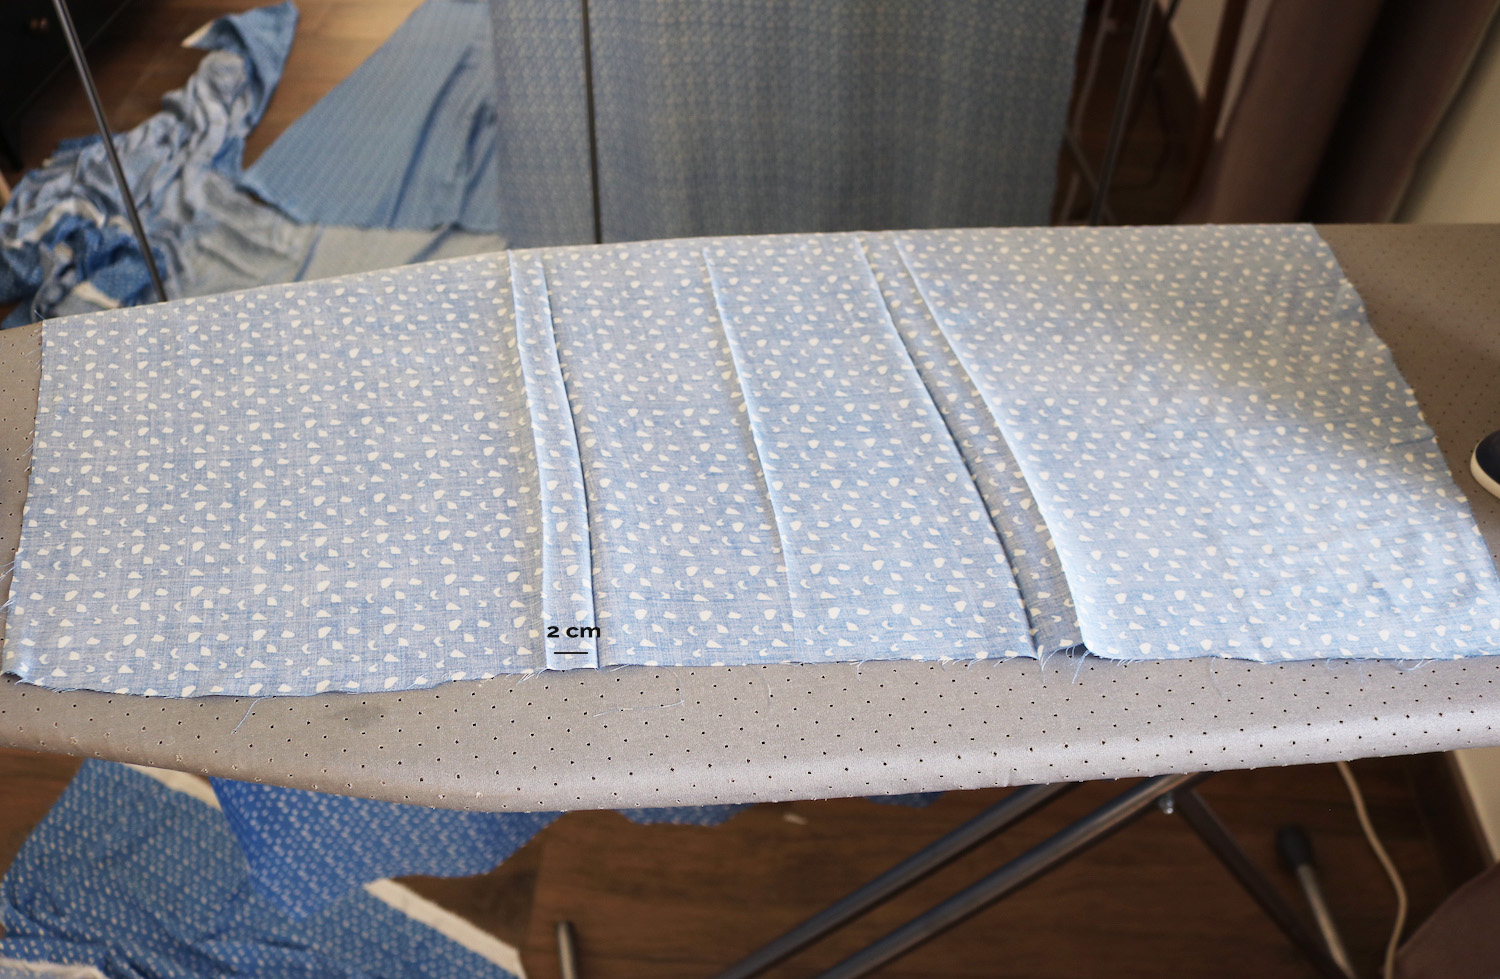
II. First I started making pleats on the skirt pieces. I marked the center line by pressing with my iron. Then I pressed 2 pleats like so, distance between them about 1/3 of the width, 2 cm wide press:
Then I pinned the pleat layers together like this, and sewed about 30 cm down along the fold.
That was my front piece pleated:
I repeated the same for the back piece, but did a slightly less wide pleat there, just over 1 cm. I also sewed the pleats shut a bit further down on the back piece, about 40 cm.
III. Then I sewed the side seams of the skirt, and added a couple more darts to the front and the back.
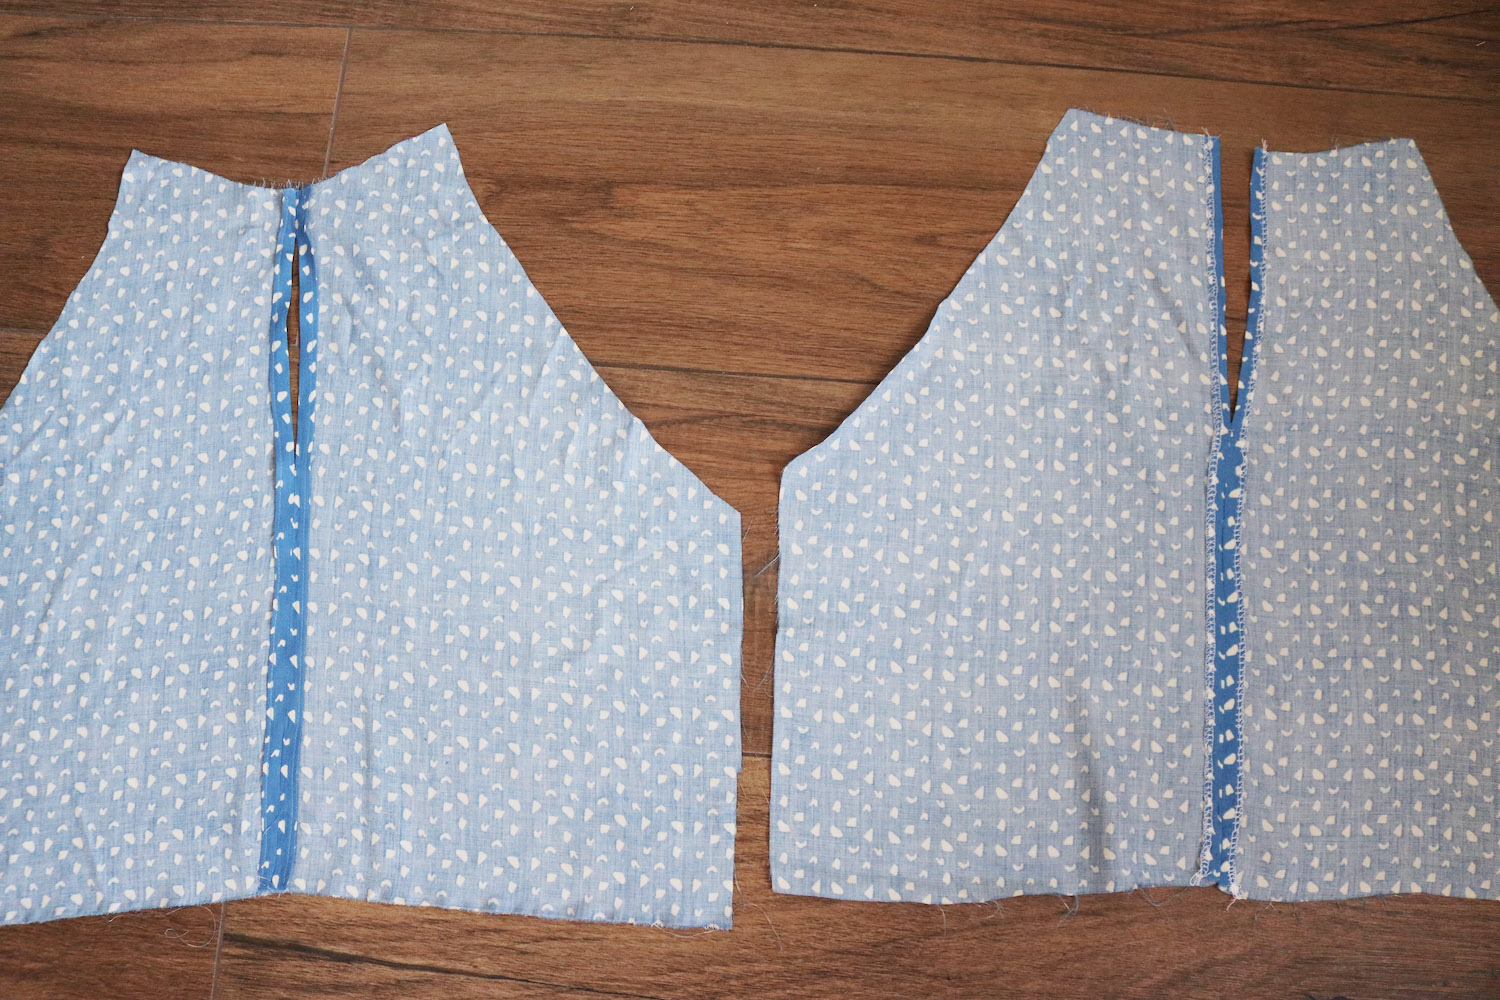
IV. Moved onto the top. I first cut my pieces:
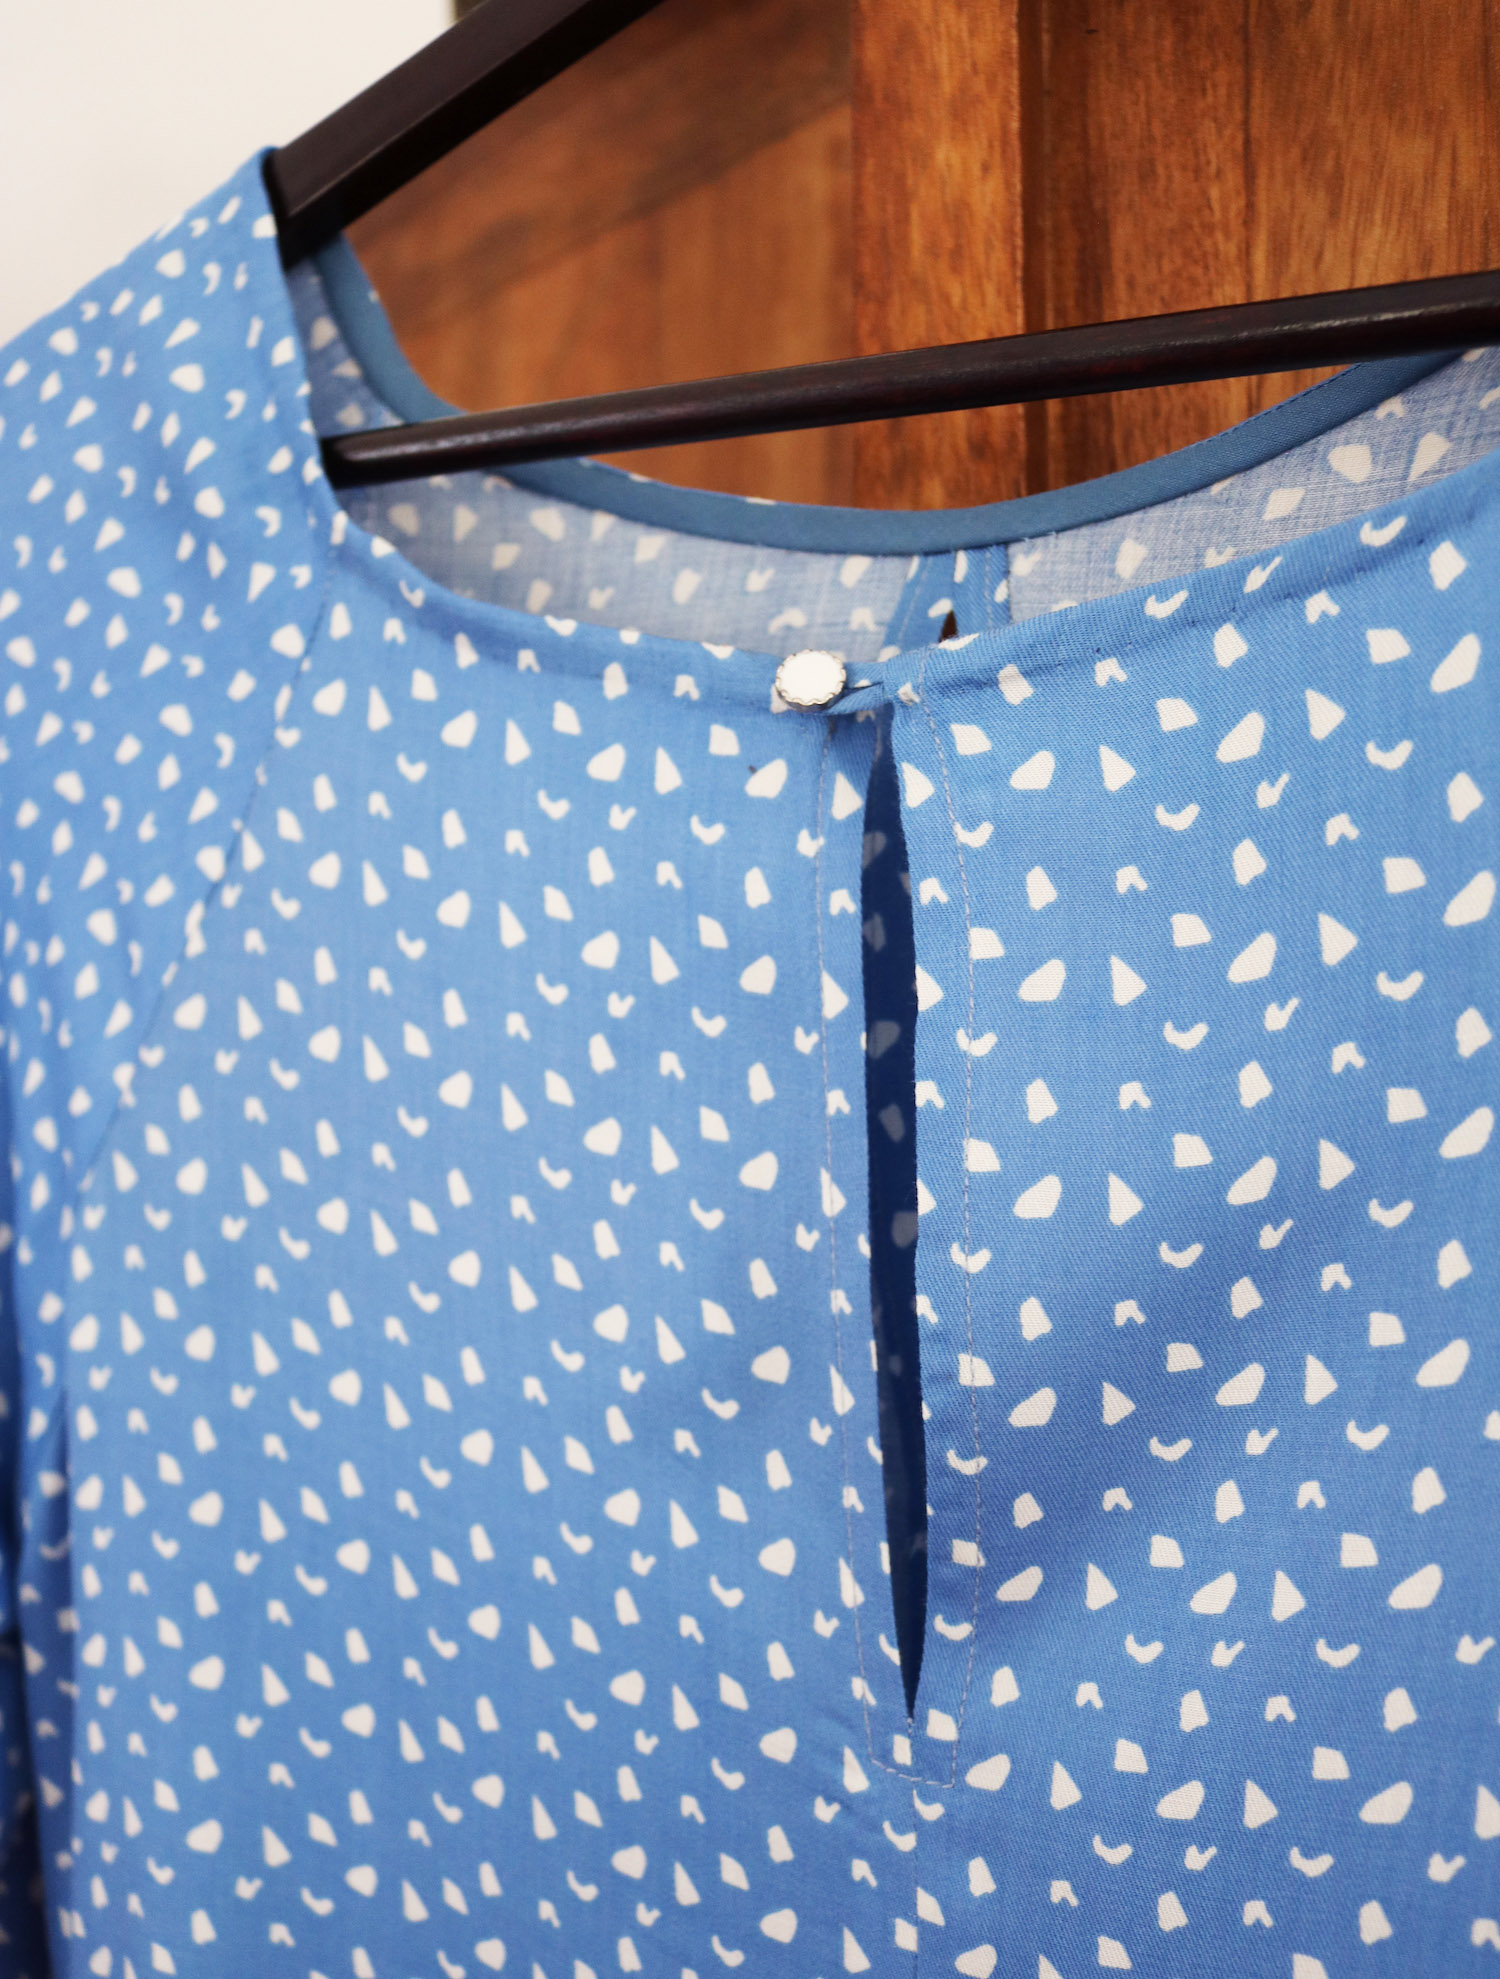
And cut each of them in half, so I could make the keyholes. More detail on the keyhole steps
in this post, difference was that for the front piece, I did a double fold on the seam allowance to make sure it would look clean in case you caught a glimpse through the keyhole. For the front piece, I sewed the center seam back together about 3 com down from the neckline, then left a 11 cm hole, and continued the stitch down. Finished hand stitching.
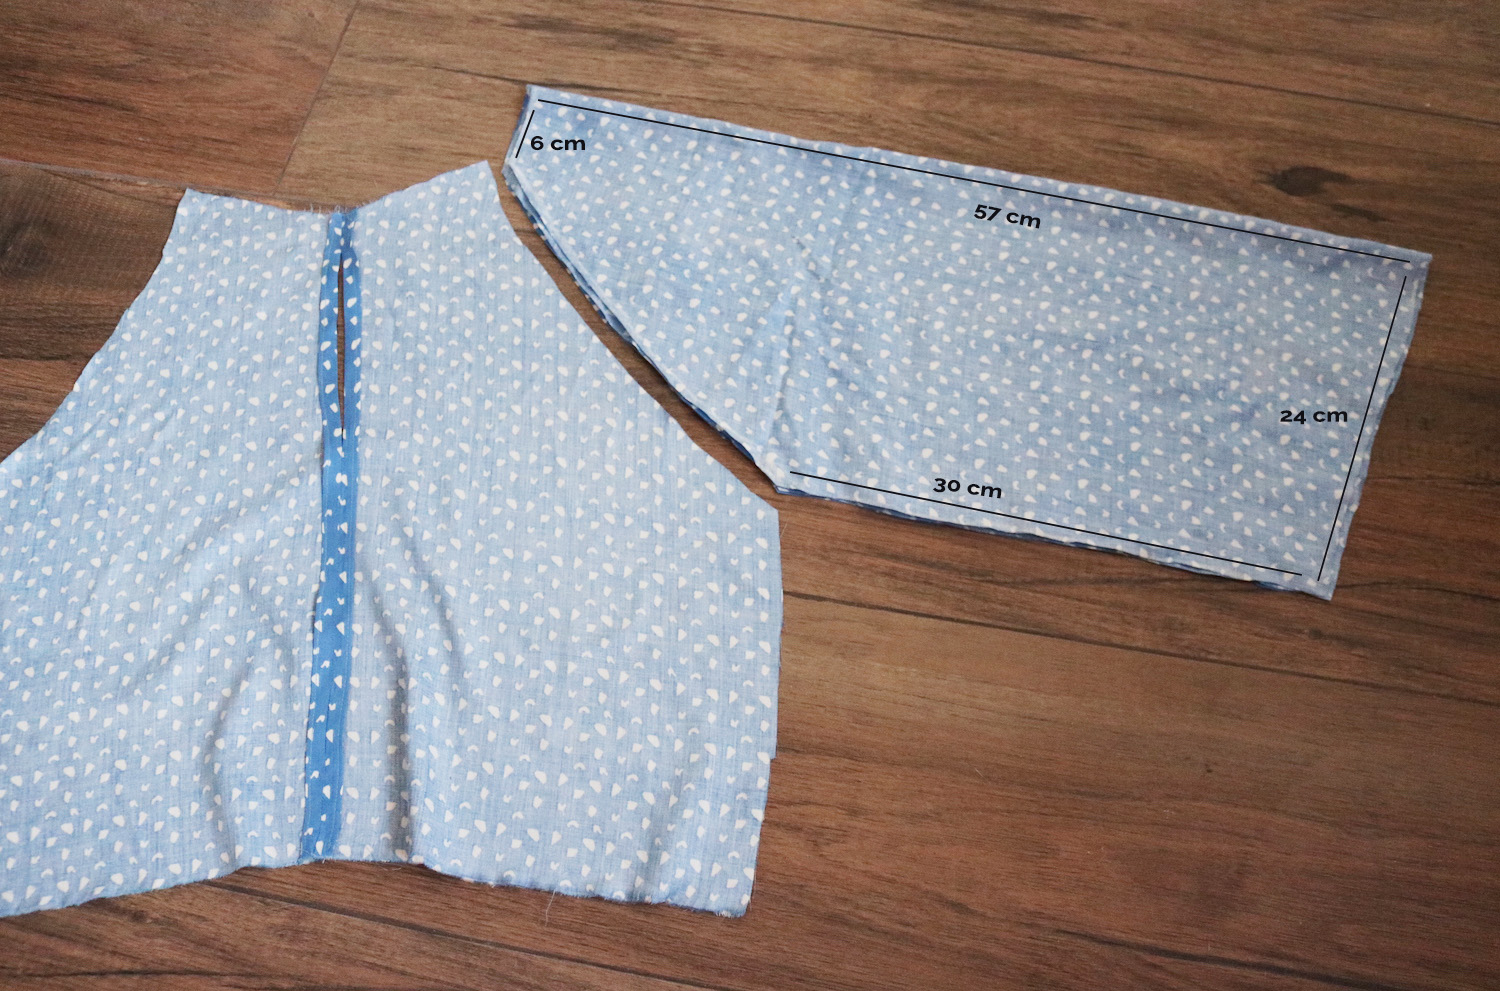
V. Next I cut out my raglan sleeves like so:
This is what my sleeve looked like opened up:
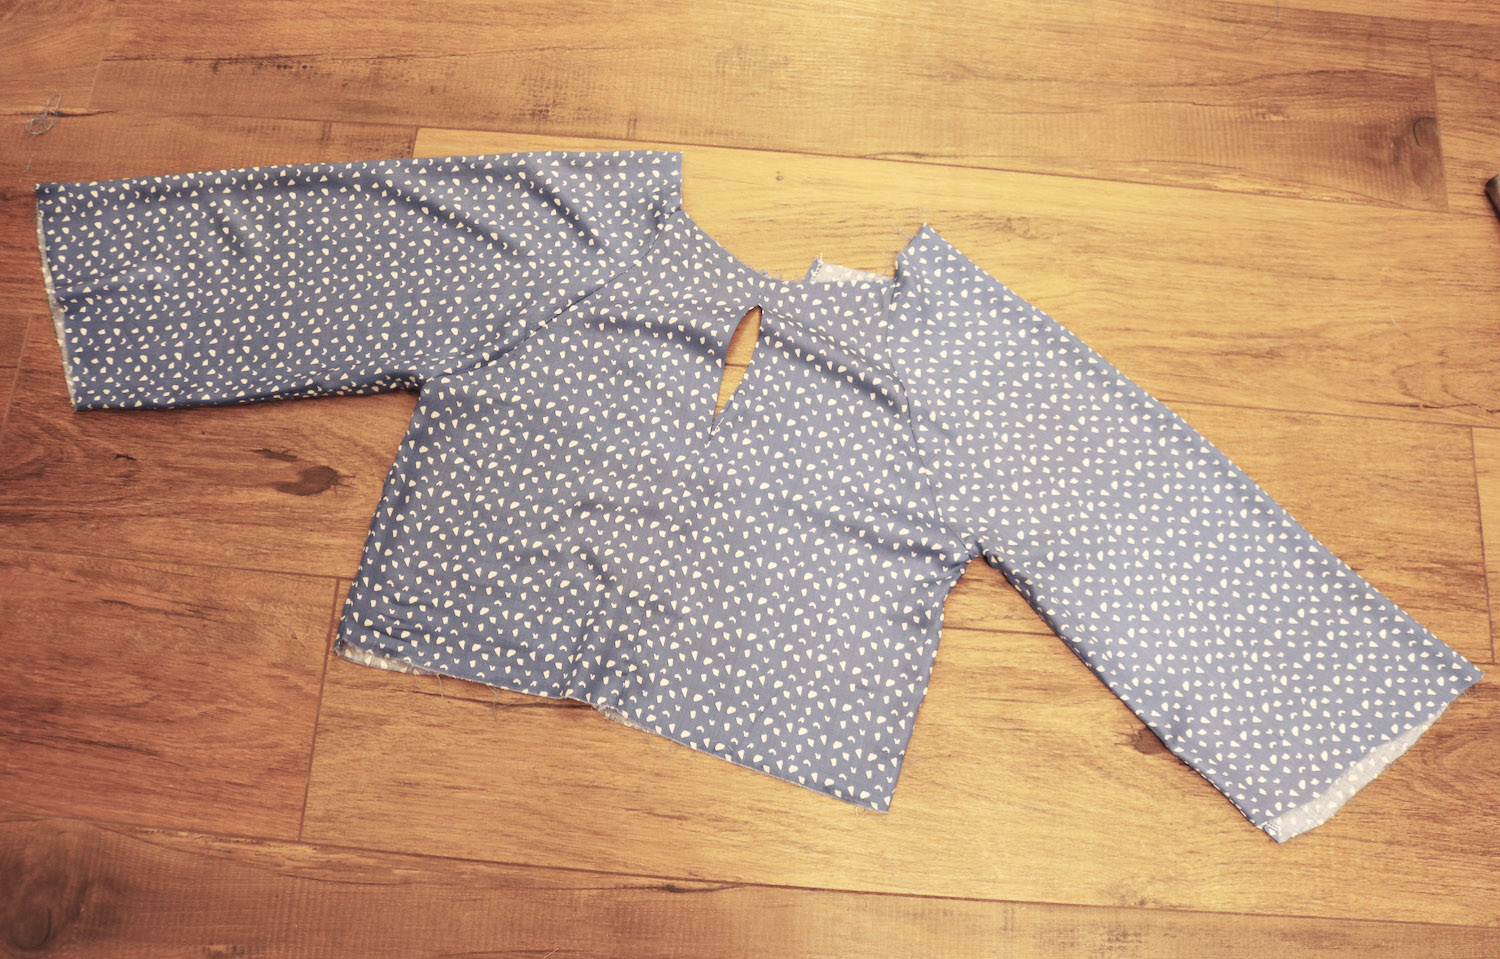
I pinned them into their place and sewed:
By that time it was already dark but my top was constructed:
VII. So I had to attach it to the skirt before going to sleep. I first checked the width of the skirt waistline and took the top in a bit to match then just pinned the two together rights sides facing, and sewed along the waistline. At this point I tried the dress on, and took it in about 3 cm from both sides throughout (sleeves and sides) for the fit I wanted.
VIII. Next up was the neckline. Finished with bias tape + hand sewing, and added a button + matching fabric loop for it.
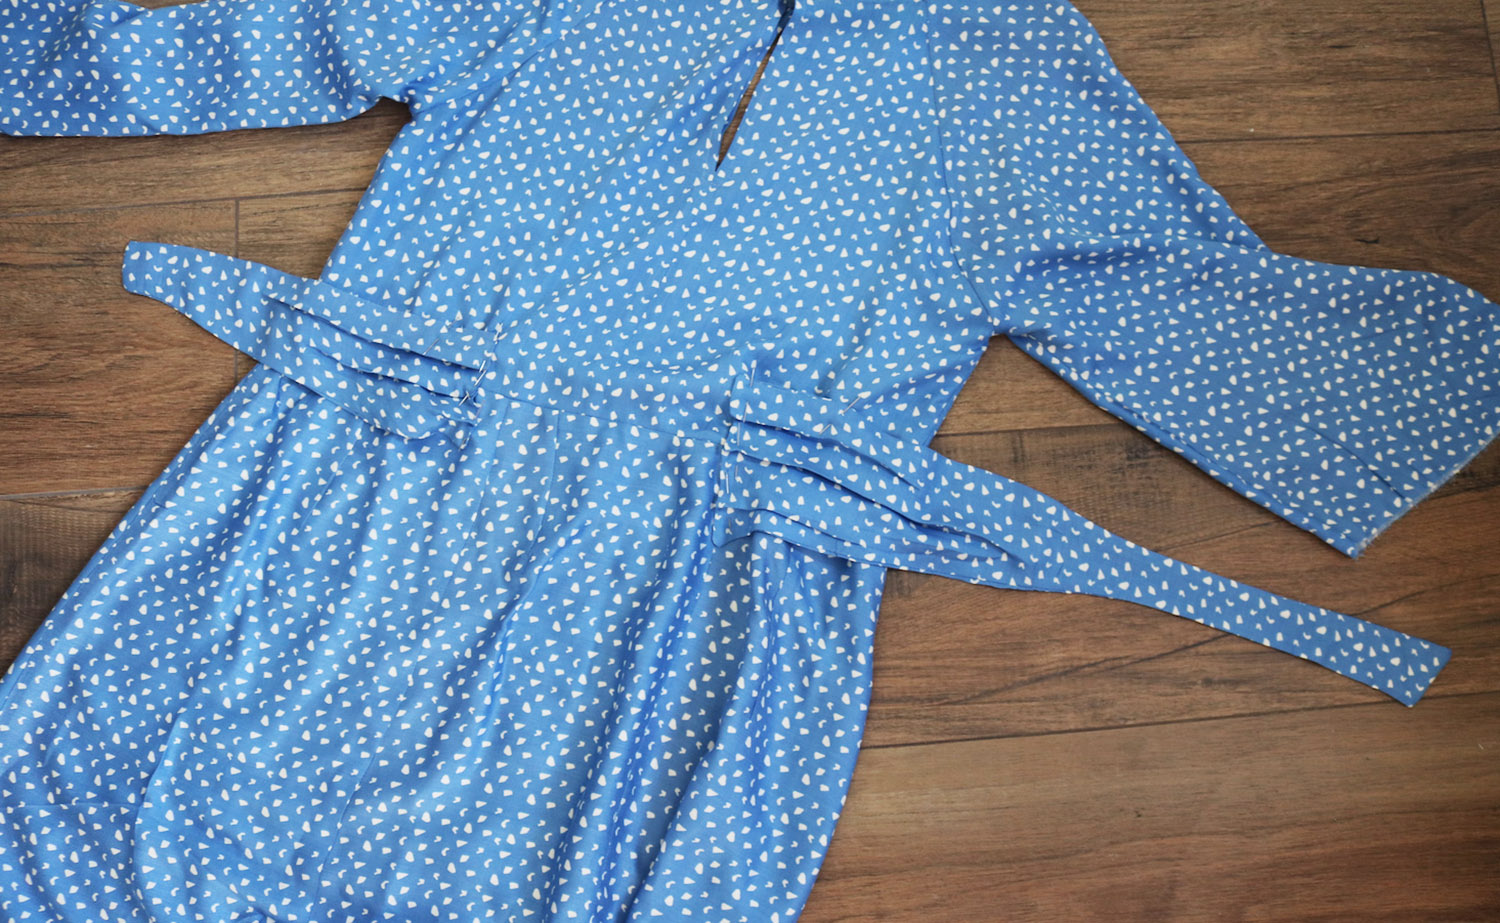
IX. Last structural step was to add the belt, which I made in a sort of triangular shape and a bit too wide at the base, so I could add pleats:
Close up of how I pinned it at the back before hand sewing in place. Then just attached the buckle to the short belt side.
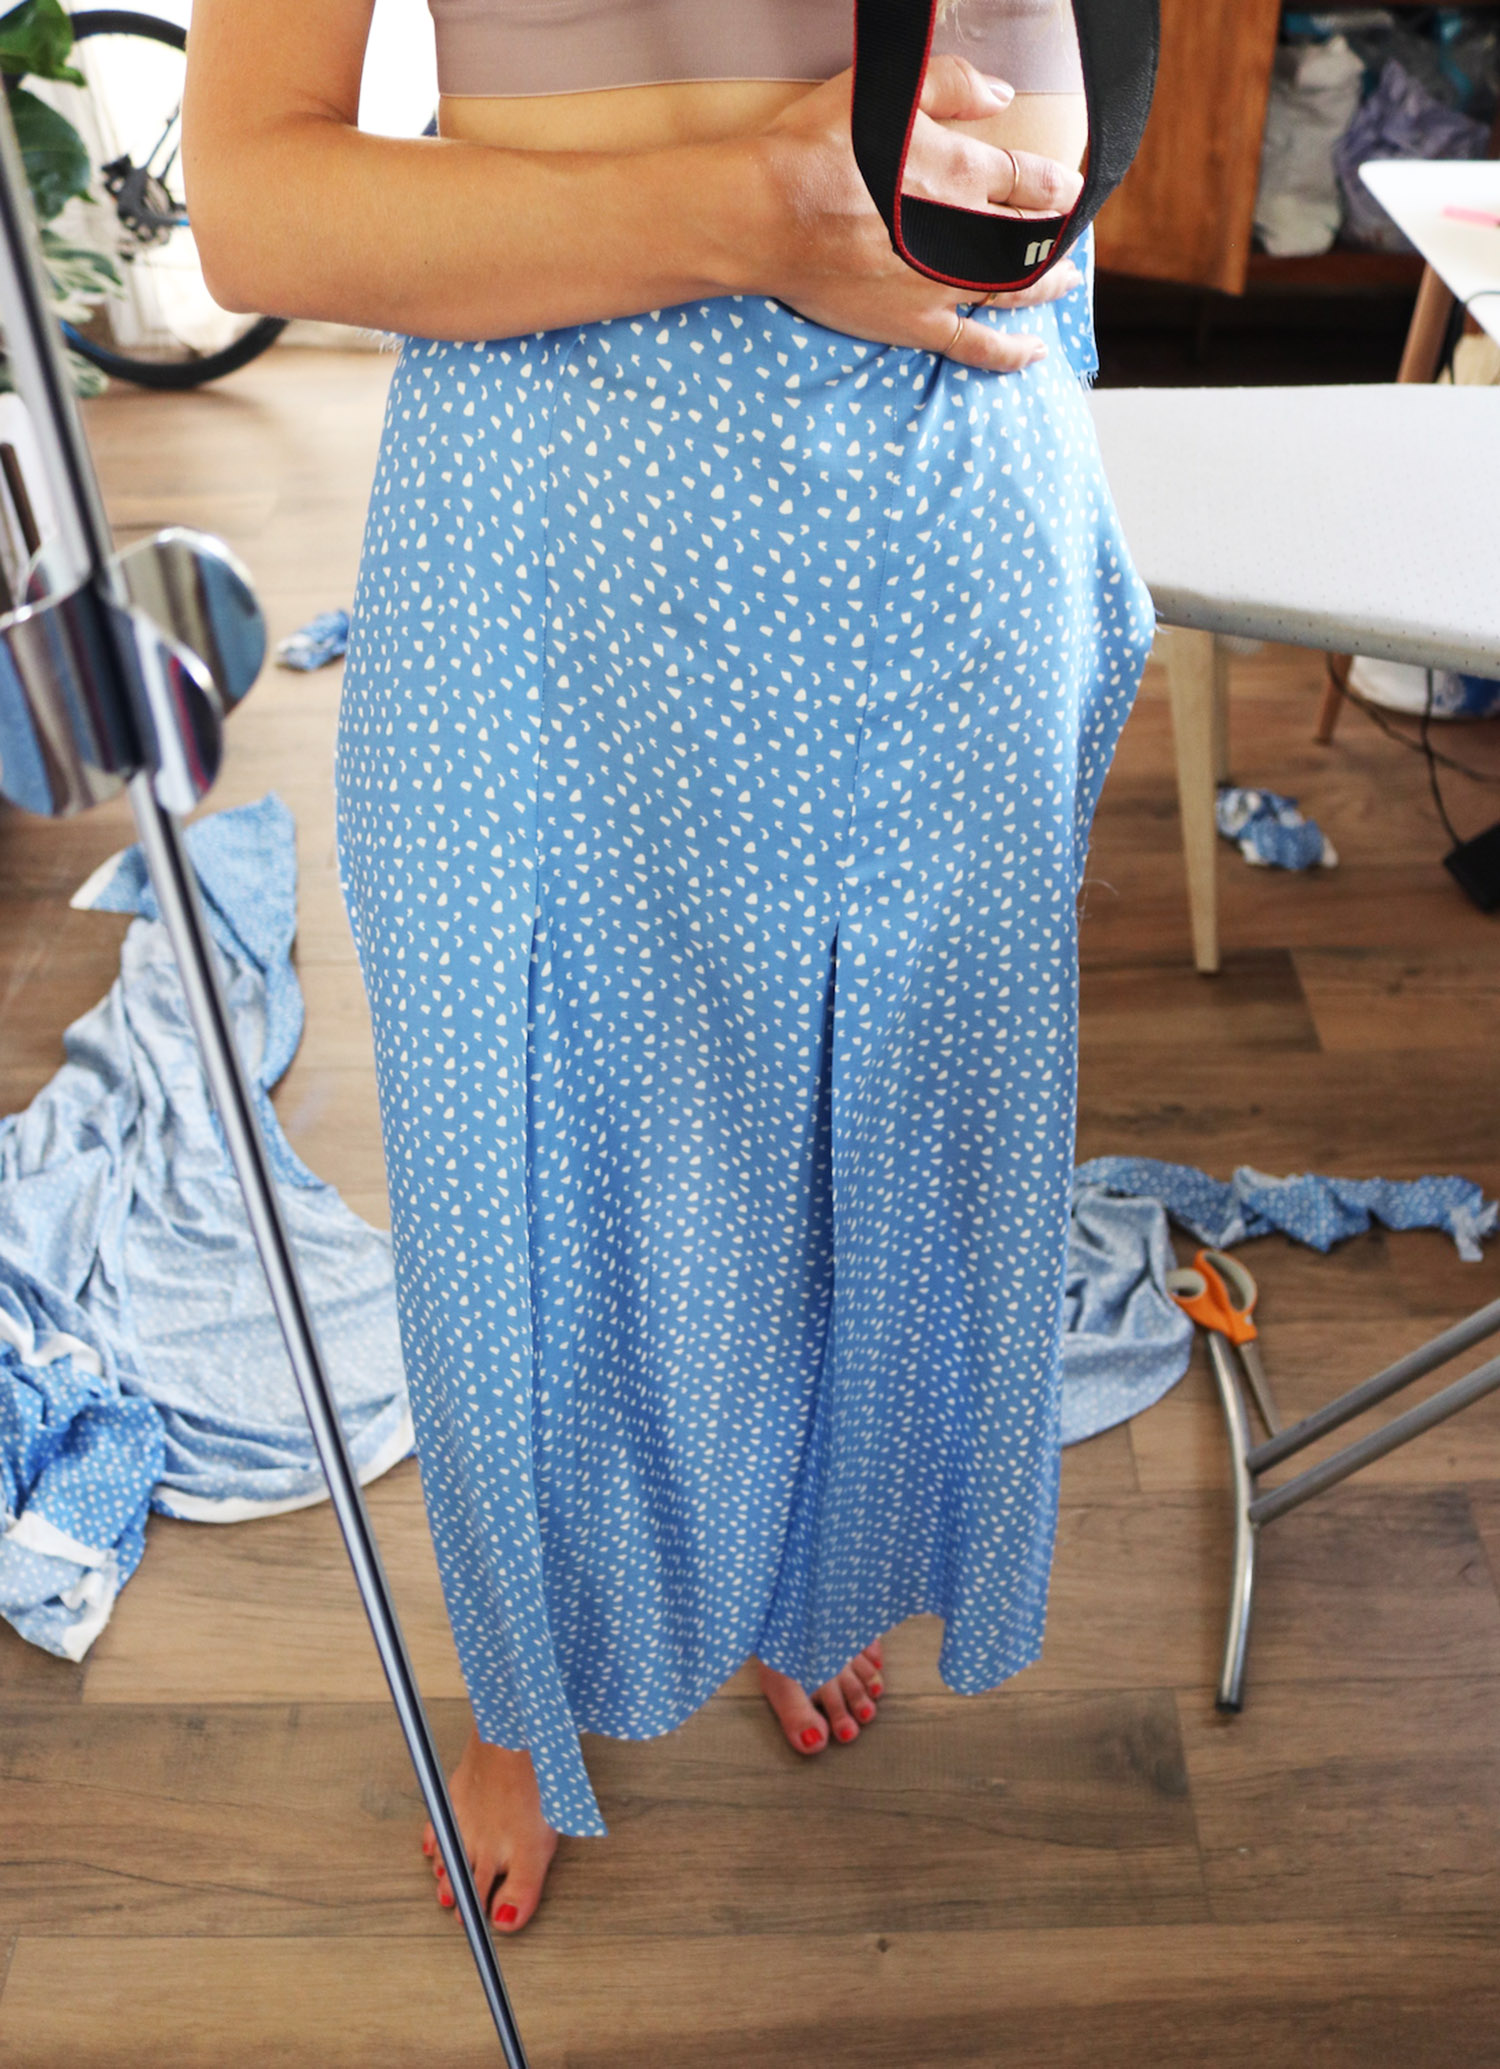
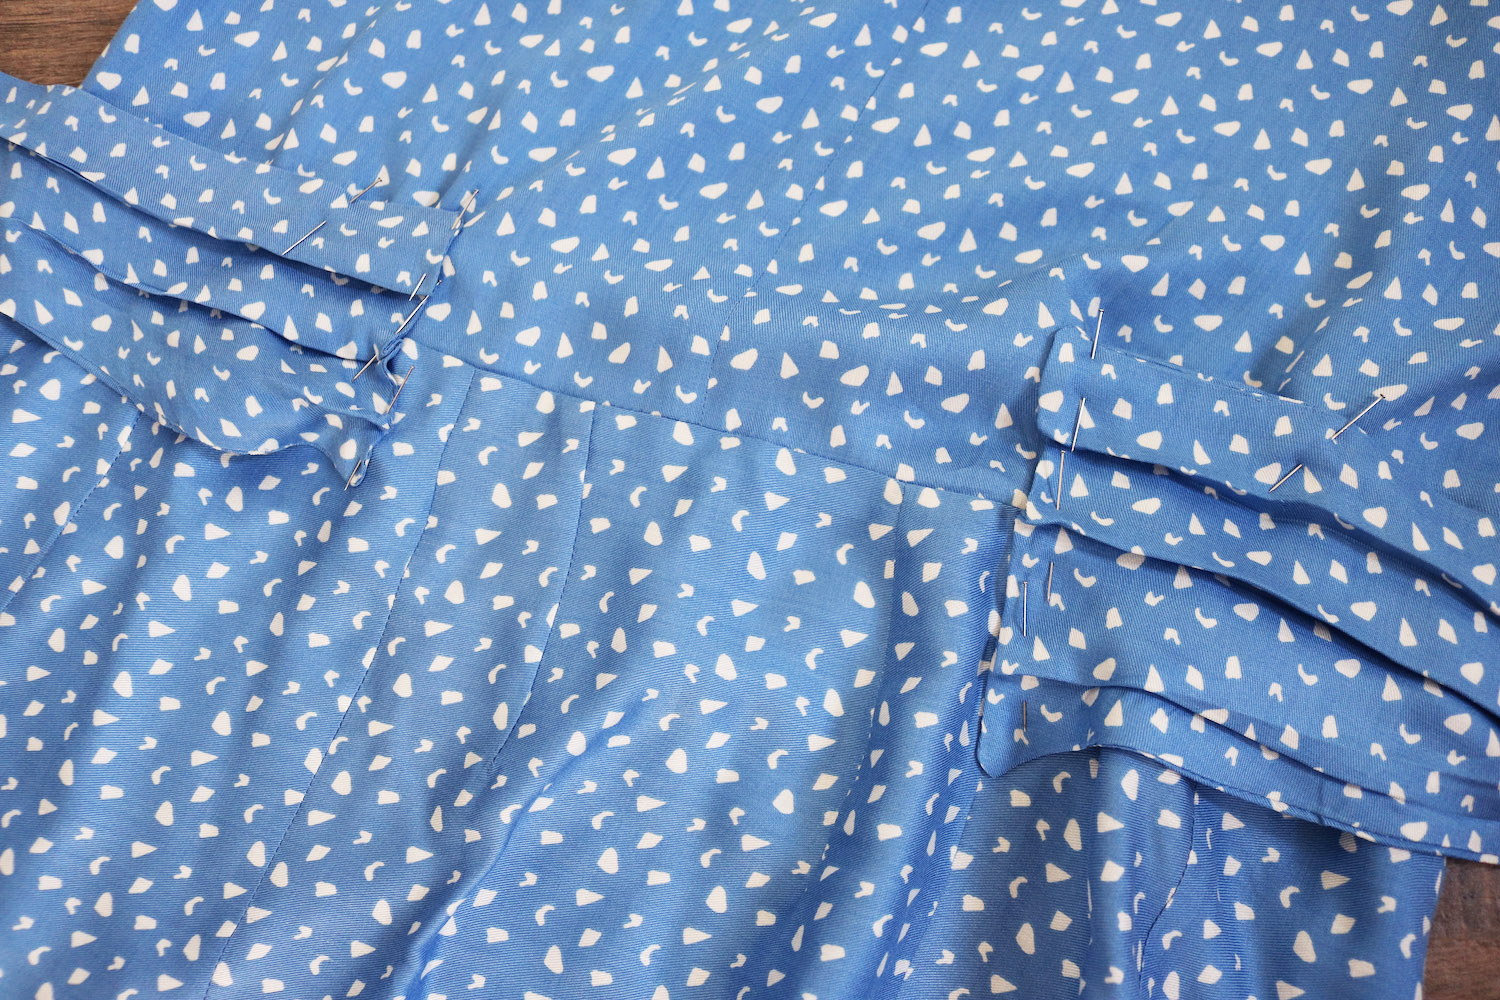
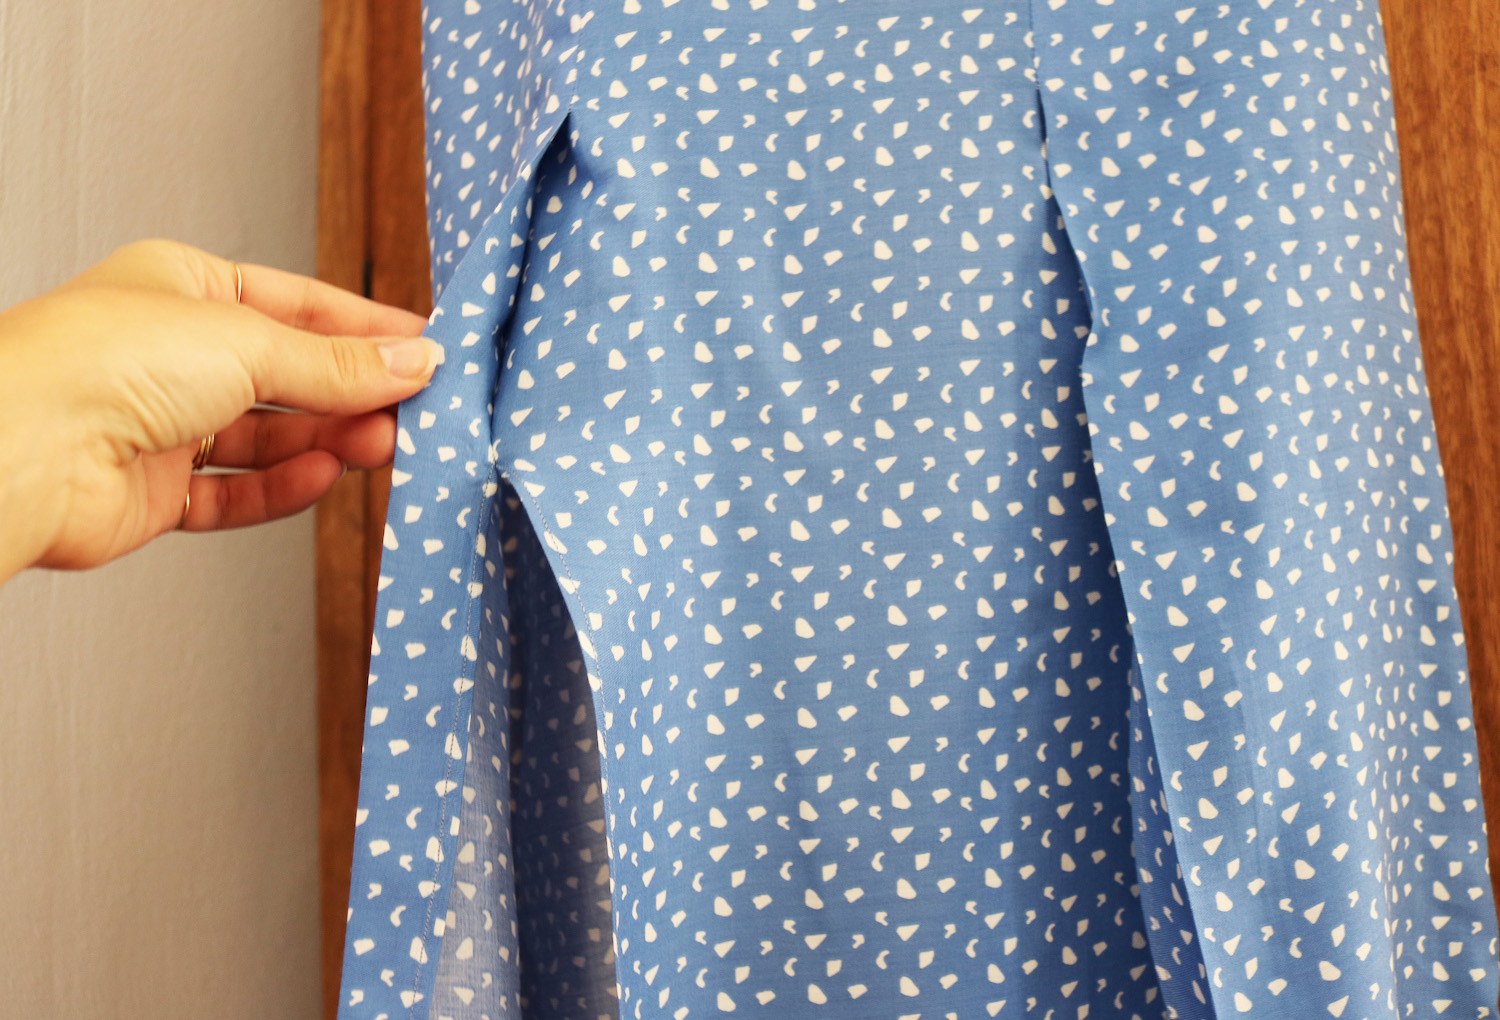
X. I was almost ready but felt the dress was a bit too conservative for my tastes, so I decided to cut the front pleats open along the fold.
Finished those with a very narrow double fold, smoothed the ends by taking them in just slightly.
The sleeves I finished with a simple wide cuff, and the hem with a double fold.
xo,
Julia


0 comments:
Post a Comment
I would love to hear what you think and learn about your DIY adventures! If you use one of my tutorials, tag me on social @contour_affair, I'd love to see!