

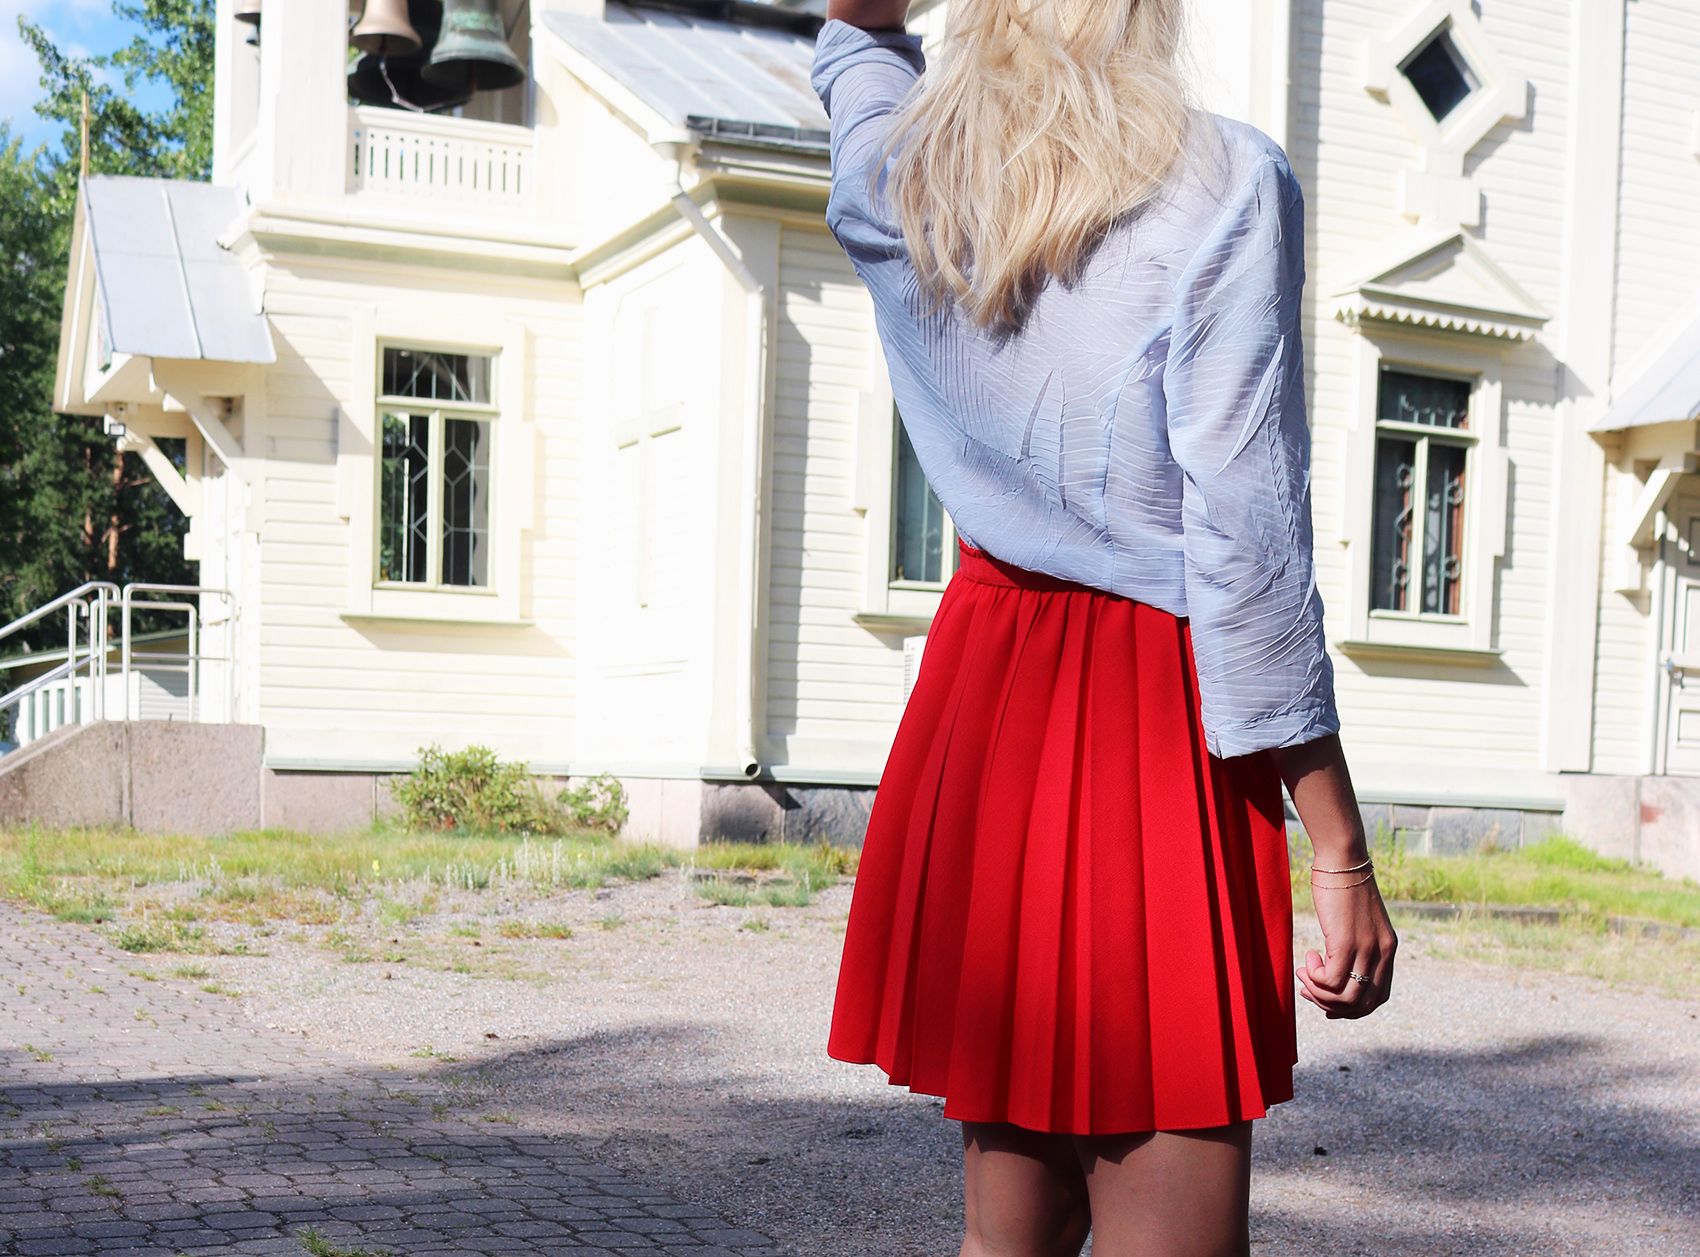
I love a good pleated skirt, but have never bought pleated fabric due to the hemming process. To get a nice crisp hem on pleats, you either need to have a pleating machine (although I'm very pro more sewing equipment, that's where I draw the line) or get the help of a good dry cleaner to press the pleats on properly (not a big deal but somehow always been enough of a barrier for me).
HOWEVER. I have come up with a way to chop a pleated skirt, that is 100% self-sustained. No machines, no dry cleaners. Just:
- A skirt you want to chop (second hand stores are usually full of pleated skirts - the one I chopped is a vintage skirt from the 60s). I used a skirt that originally had an elasticated waist (which I re-did) but you could also start with a skirt that has zipper closure
- Elastic for your waist (I used 2.5 cm wide)
- Scissors & Pins
- Sewing machine & thread
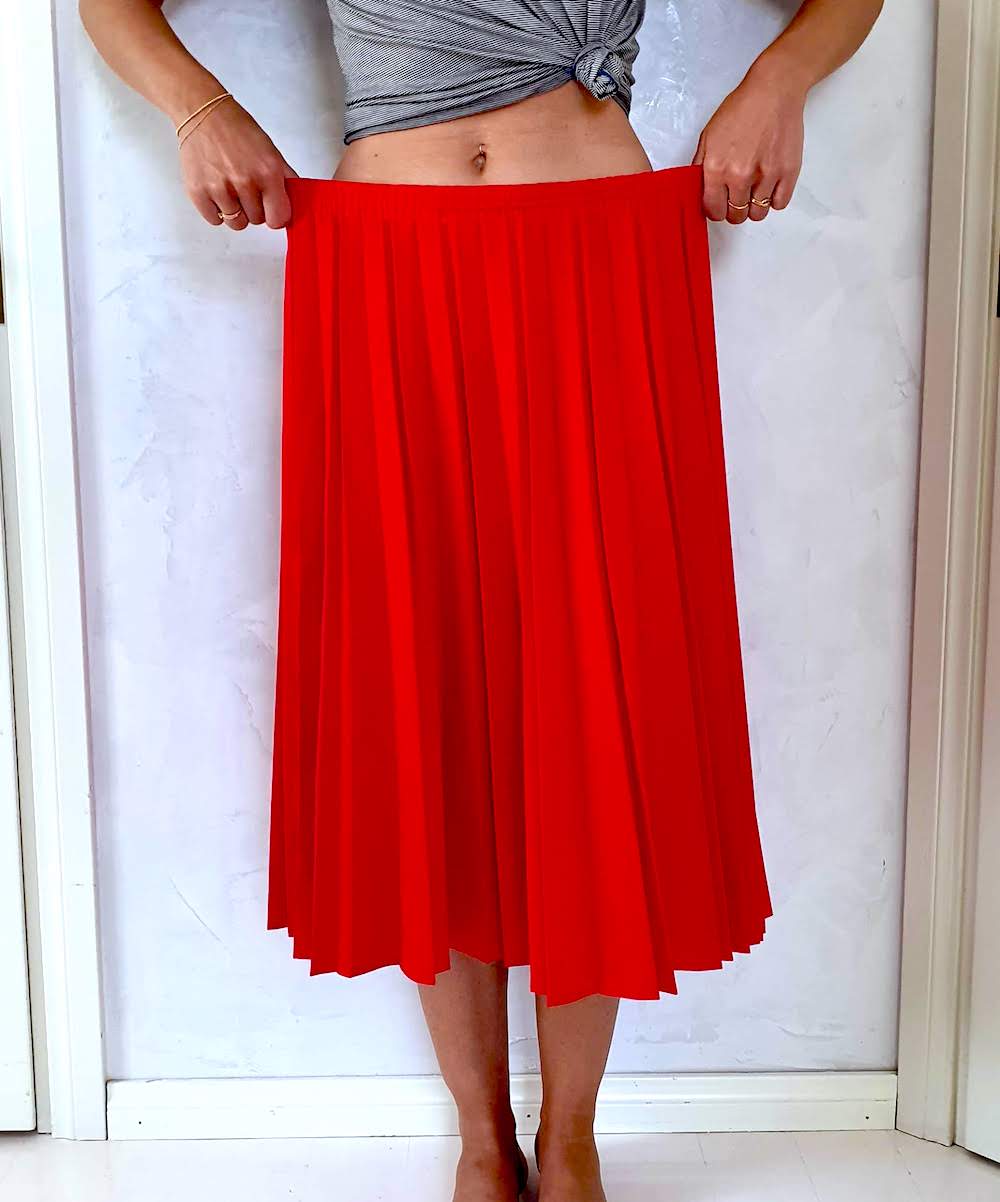
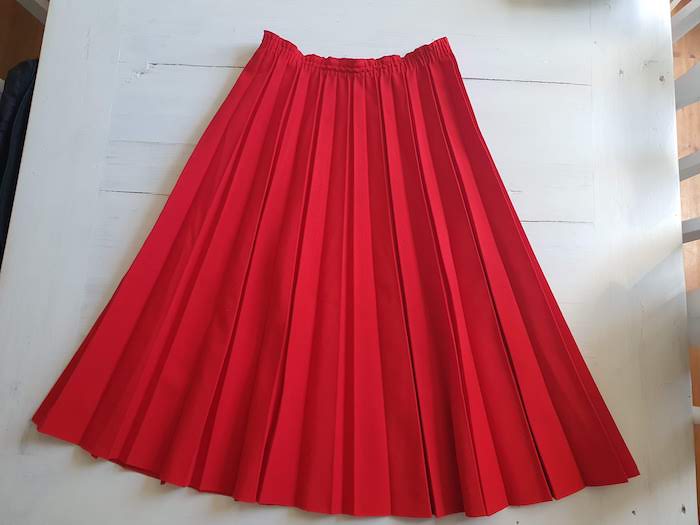
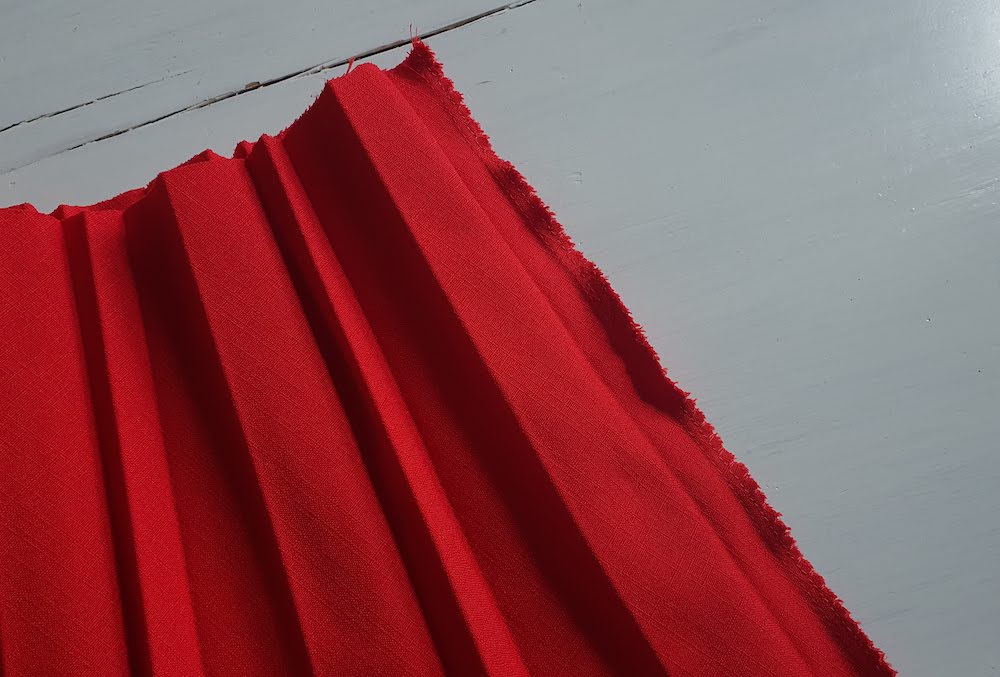
To be fair, I'm pretty sure I'm not the first person to come up with this, but judging by a quick google, there at least isn't a clear tutorial easily discoverable online. The key is to chop the skirt not at the hem, but at the waist. Here's what I started with. A too large skirt, calf length, elasticated waist.
Tutorials take a lot of time & effort to create, and I choose to make mine available for free. If you enjoy this guide, you can support me with a donation that feels right for you, here.
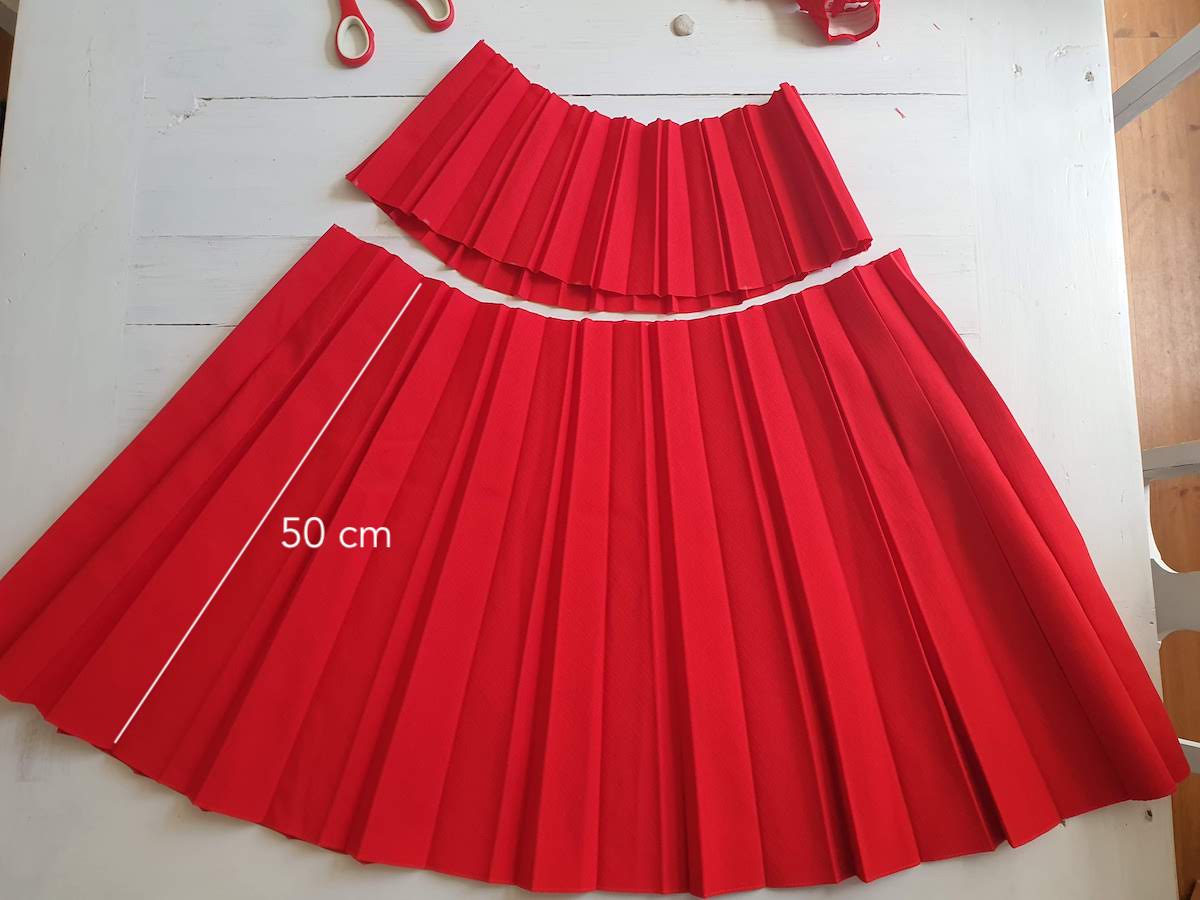
II. Next, to see approximately how wide I needed to cut the waistline, I flipped the original top piece on its head, and used that as a gauge. In my case I needed to take in about 10 cm from both sides. If your original skirt size is totally out of whack and you can't use it as a guide, then measure your hip circumference and add at least 10 cm to that - that's what you need the waistline circumference to be at a minimum so 1) it comfortably slides over your hips when you pull the skirt on 2) there's some fullness to the pleats when worn.

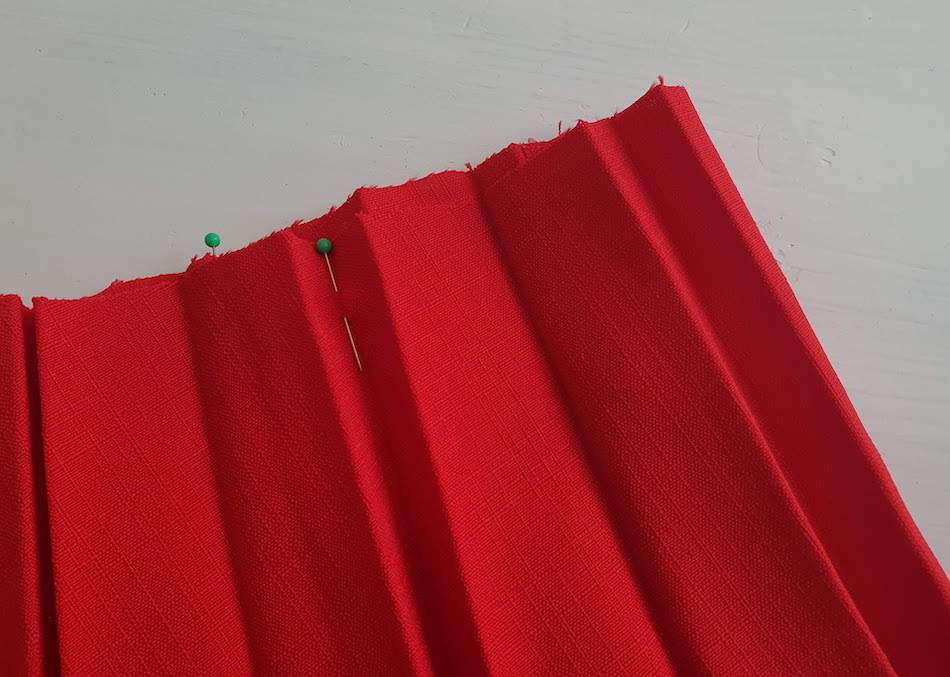
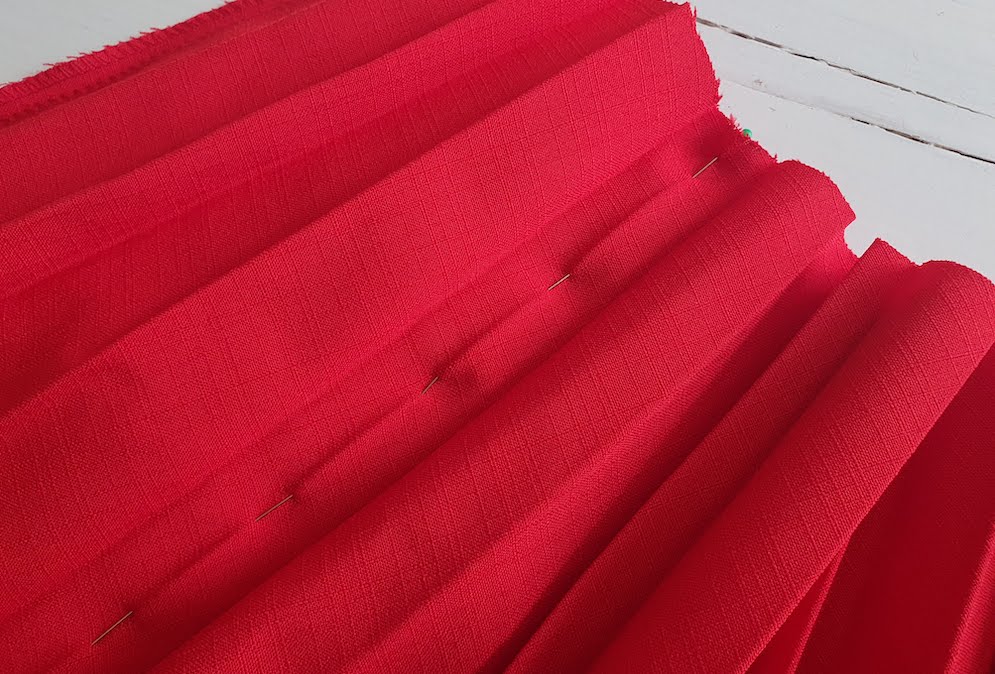
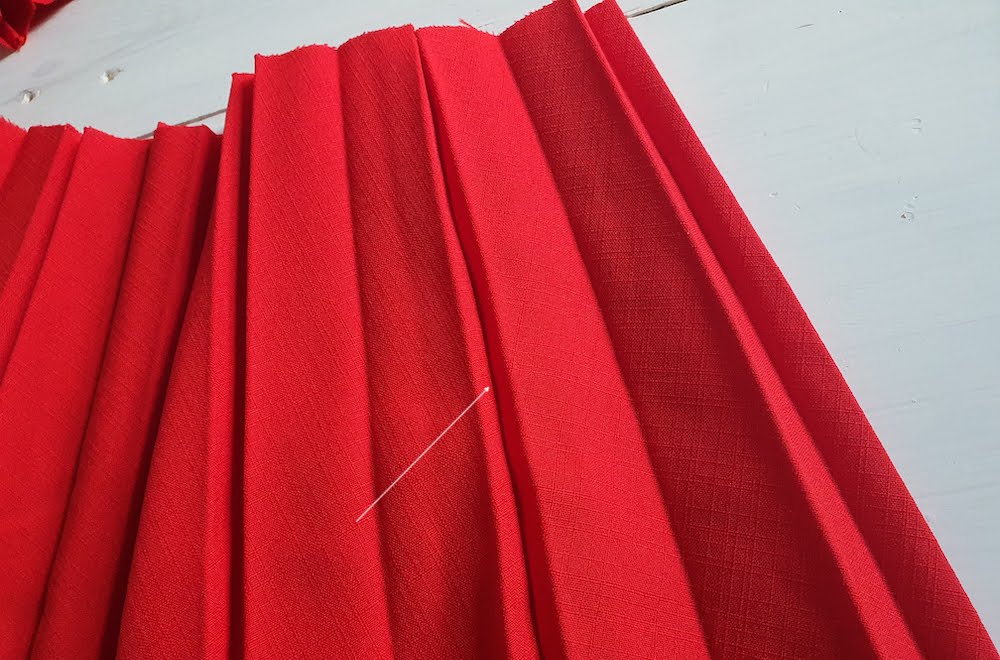
III. I marked with pins where I was going to take the skirt in. The key is to put the pins in the ditch of the pleat - that's where you want your joining side seam to be. When the seam is in the pleat ditch, it won't be visible in the end result. Do this marking on the right side of the fabric, if you turn it reverse out, it will be very mind-boggling to understand what is the ditch and what is the peak of the pleat.
Next turn the skirt right sides facing, and pin the two pleat ditches you marked together. Make sure you follow the same pleat on both sides the entire way down (somehow if you work on only one side, the other side will try to travel on to the next pleat. So check as you go that you are pinning the same two pleat ditches together all the way, and that the pin is exactly in the fold the entire way. This will be your guide as you sew.
IV. Next sew along the fold, trim and and sig-zag your seam allowance..
.. and once done, you'll see your seam is beautifully in the pleat ditch, hidden and unnoticeable.
V. Only thing left is re-doing the waist. I first cut my elastic and sewed it into a circle based on my waist measurement.
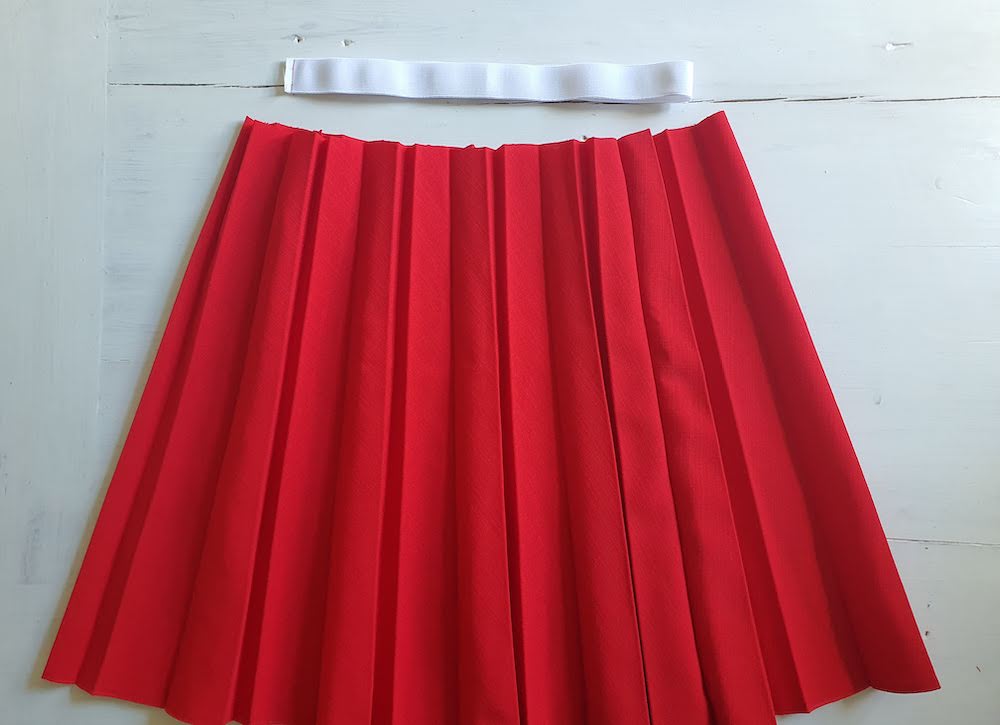
I then folded the skirt down about 1 cm onto the reverse, and started pinning the elastic onto the folded edge, just a few mm lower than the edge on the reverse. NOTE: Do not press the fold in the fabric prior to pinning. It will be difficult not to have the iron ruin the pleats. Just fold with your fingers and pin as you go. I recommend you start by marking the halves, then quarters (and potentially even 1/8's) of both the elastic and the skirt waistline with pins. Then align those on the elastic and the waistline, and then after that the remaining parts are easy to stretch and pin. Or you can use my hack involving your ironing board from this post.
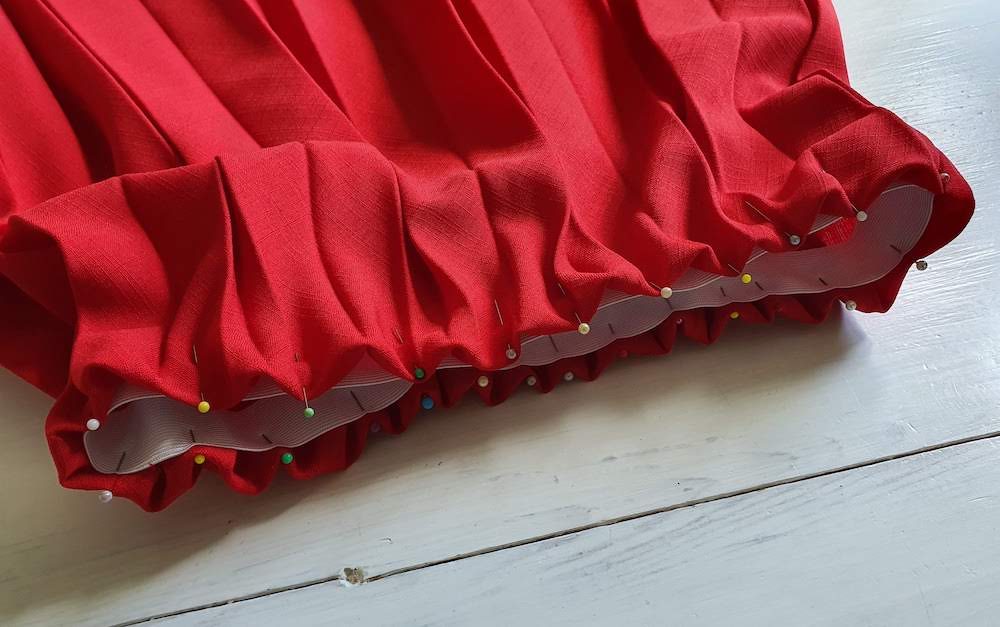
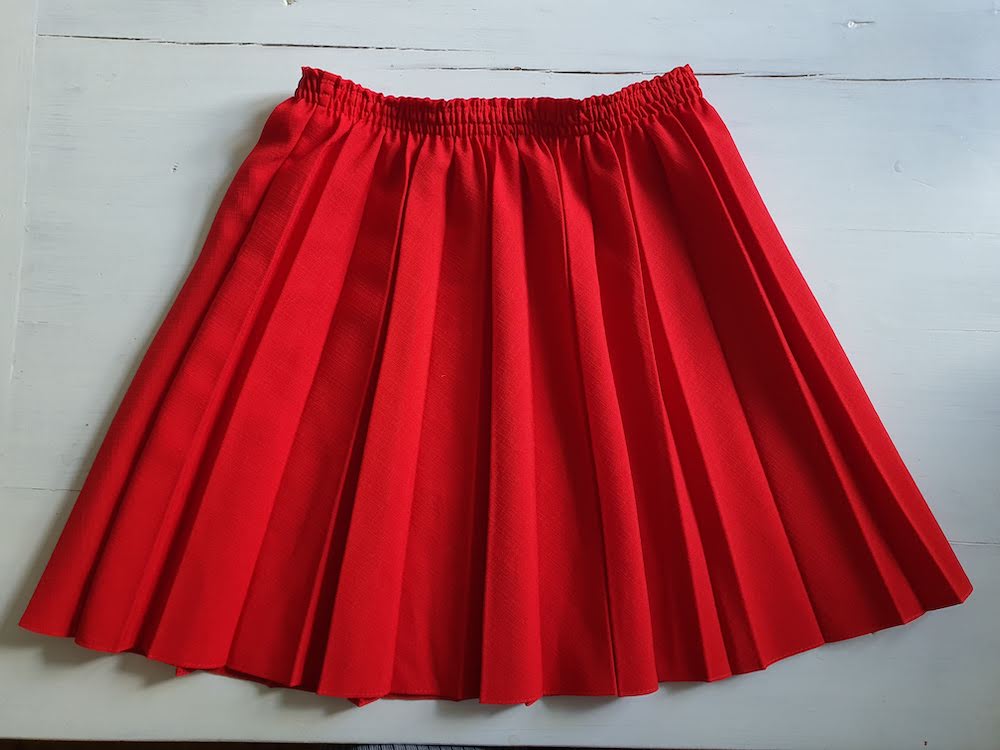
VI. Once you're done pinning, start sewing your first top stitch from a side seam. As you sew, stretch the elastic enough so the fabric is fully extended with no gathers, and sew over one section at a time. I added 3 top stitches to gather the elastic nicely, and at the end, very carefully pressed the elasticated area with my iron (being super meticulous not to press on the pleats). All done!! I also discovered I had a belt from another vintage dress I found this summer, that perfectly matches the tone of red. I might do a thrift flip post on that one at some point too..


Skirts, Techniques explores different styles, patterns, and sewing methods to create stylish and unique skirts. On new dp 2026 , detailed visuals showcase fabrics, stitching, and finished designs, inspiring creativity and fashion craftsmanship.
ReplyDelete