

Here's a story about a typical DIY project that doesn't go as planned and accidentally ends up kind of working. Precondition is to go to the fabric store with a clear plan in mind, not find anything you were looking for, and instead find a random fabric you have no clue what to make out of. Then come home and refuse to accept that good results usually do require at least some kind of a blueprint - Instead decide to immediately make a top out of this random fabric. Cause when you got to sew, you got to sew.
I intended to make a simple 3/4-sleeved blouse with a lined front, but as you can see the end result was far from it. Sometimes these work out, sometimes not.
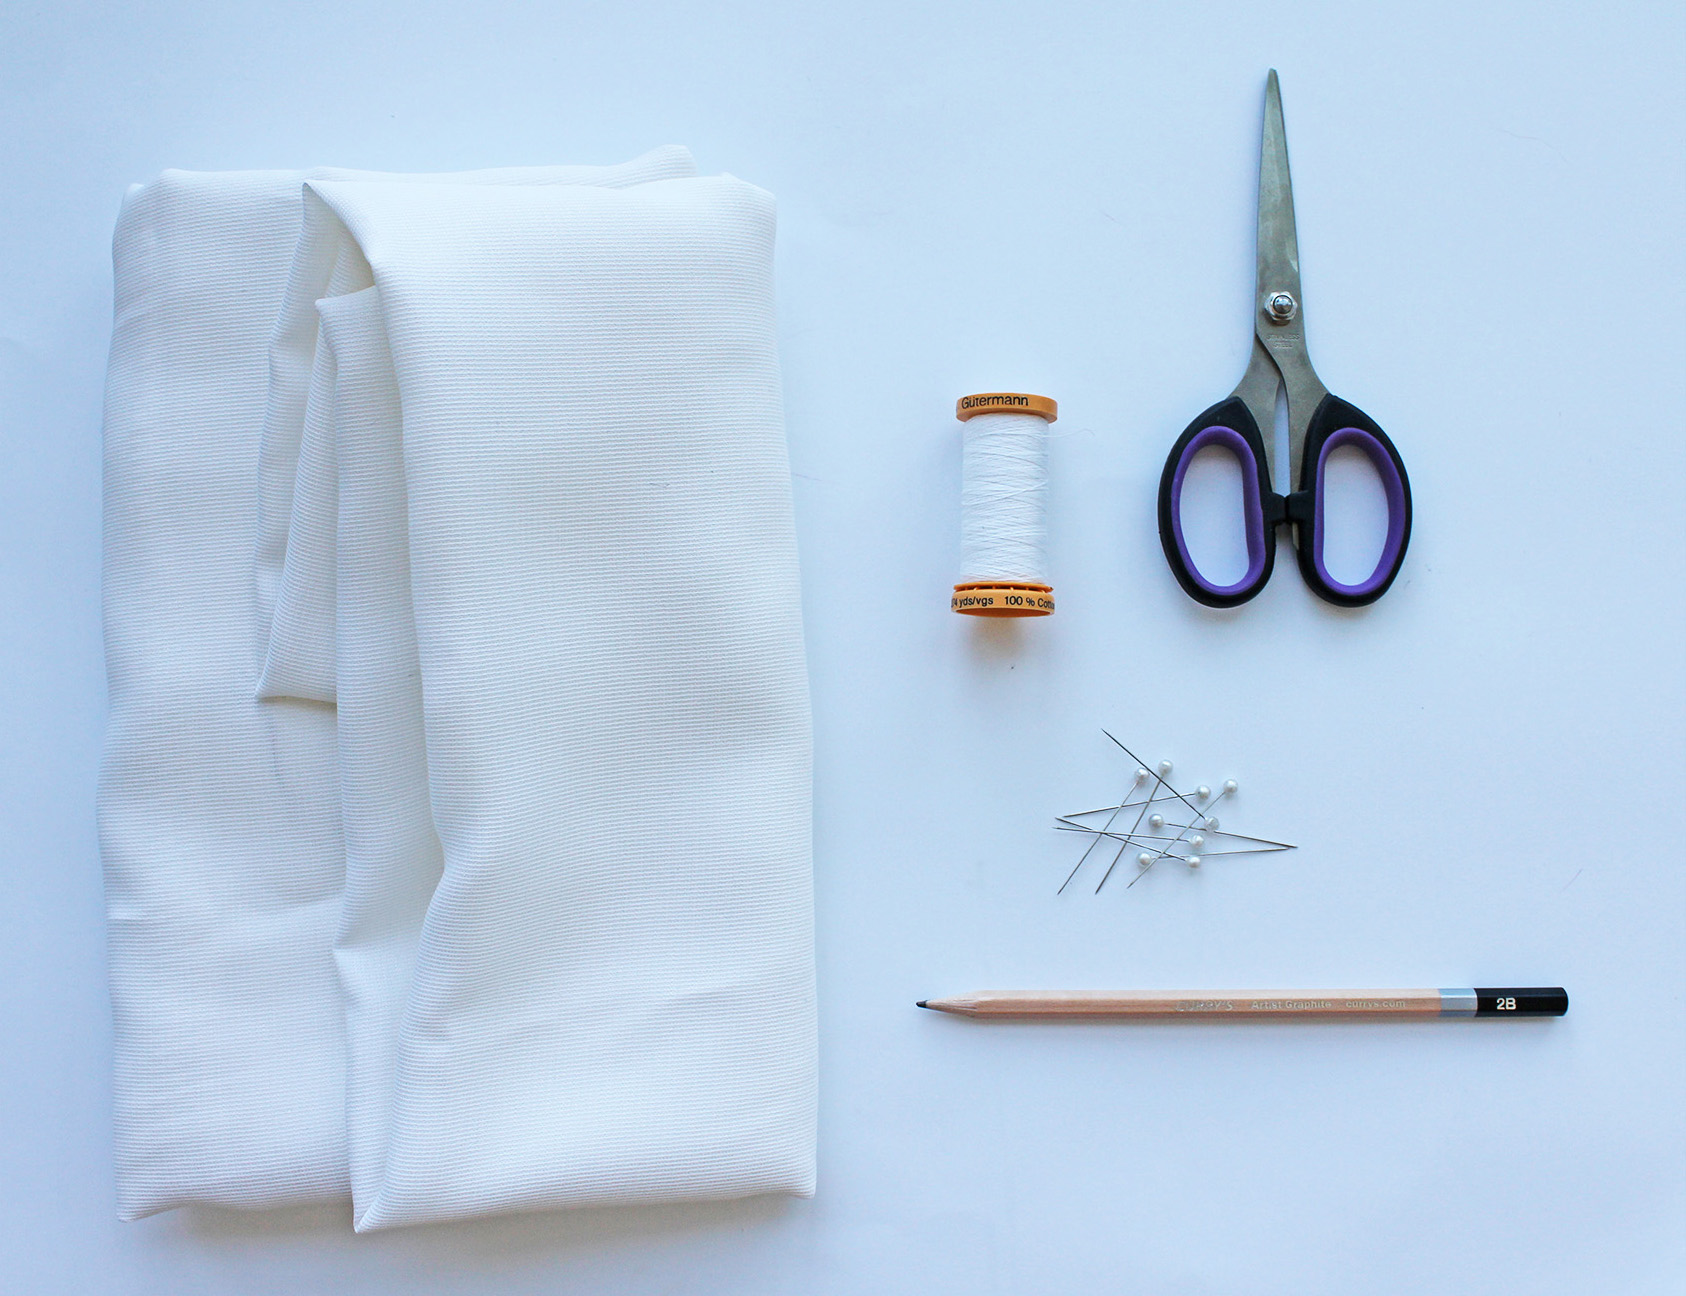
I USED:

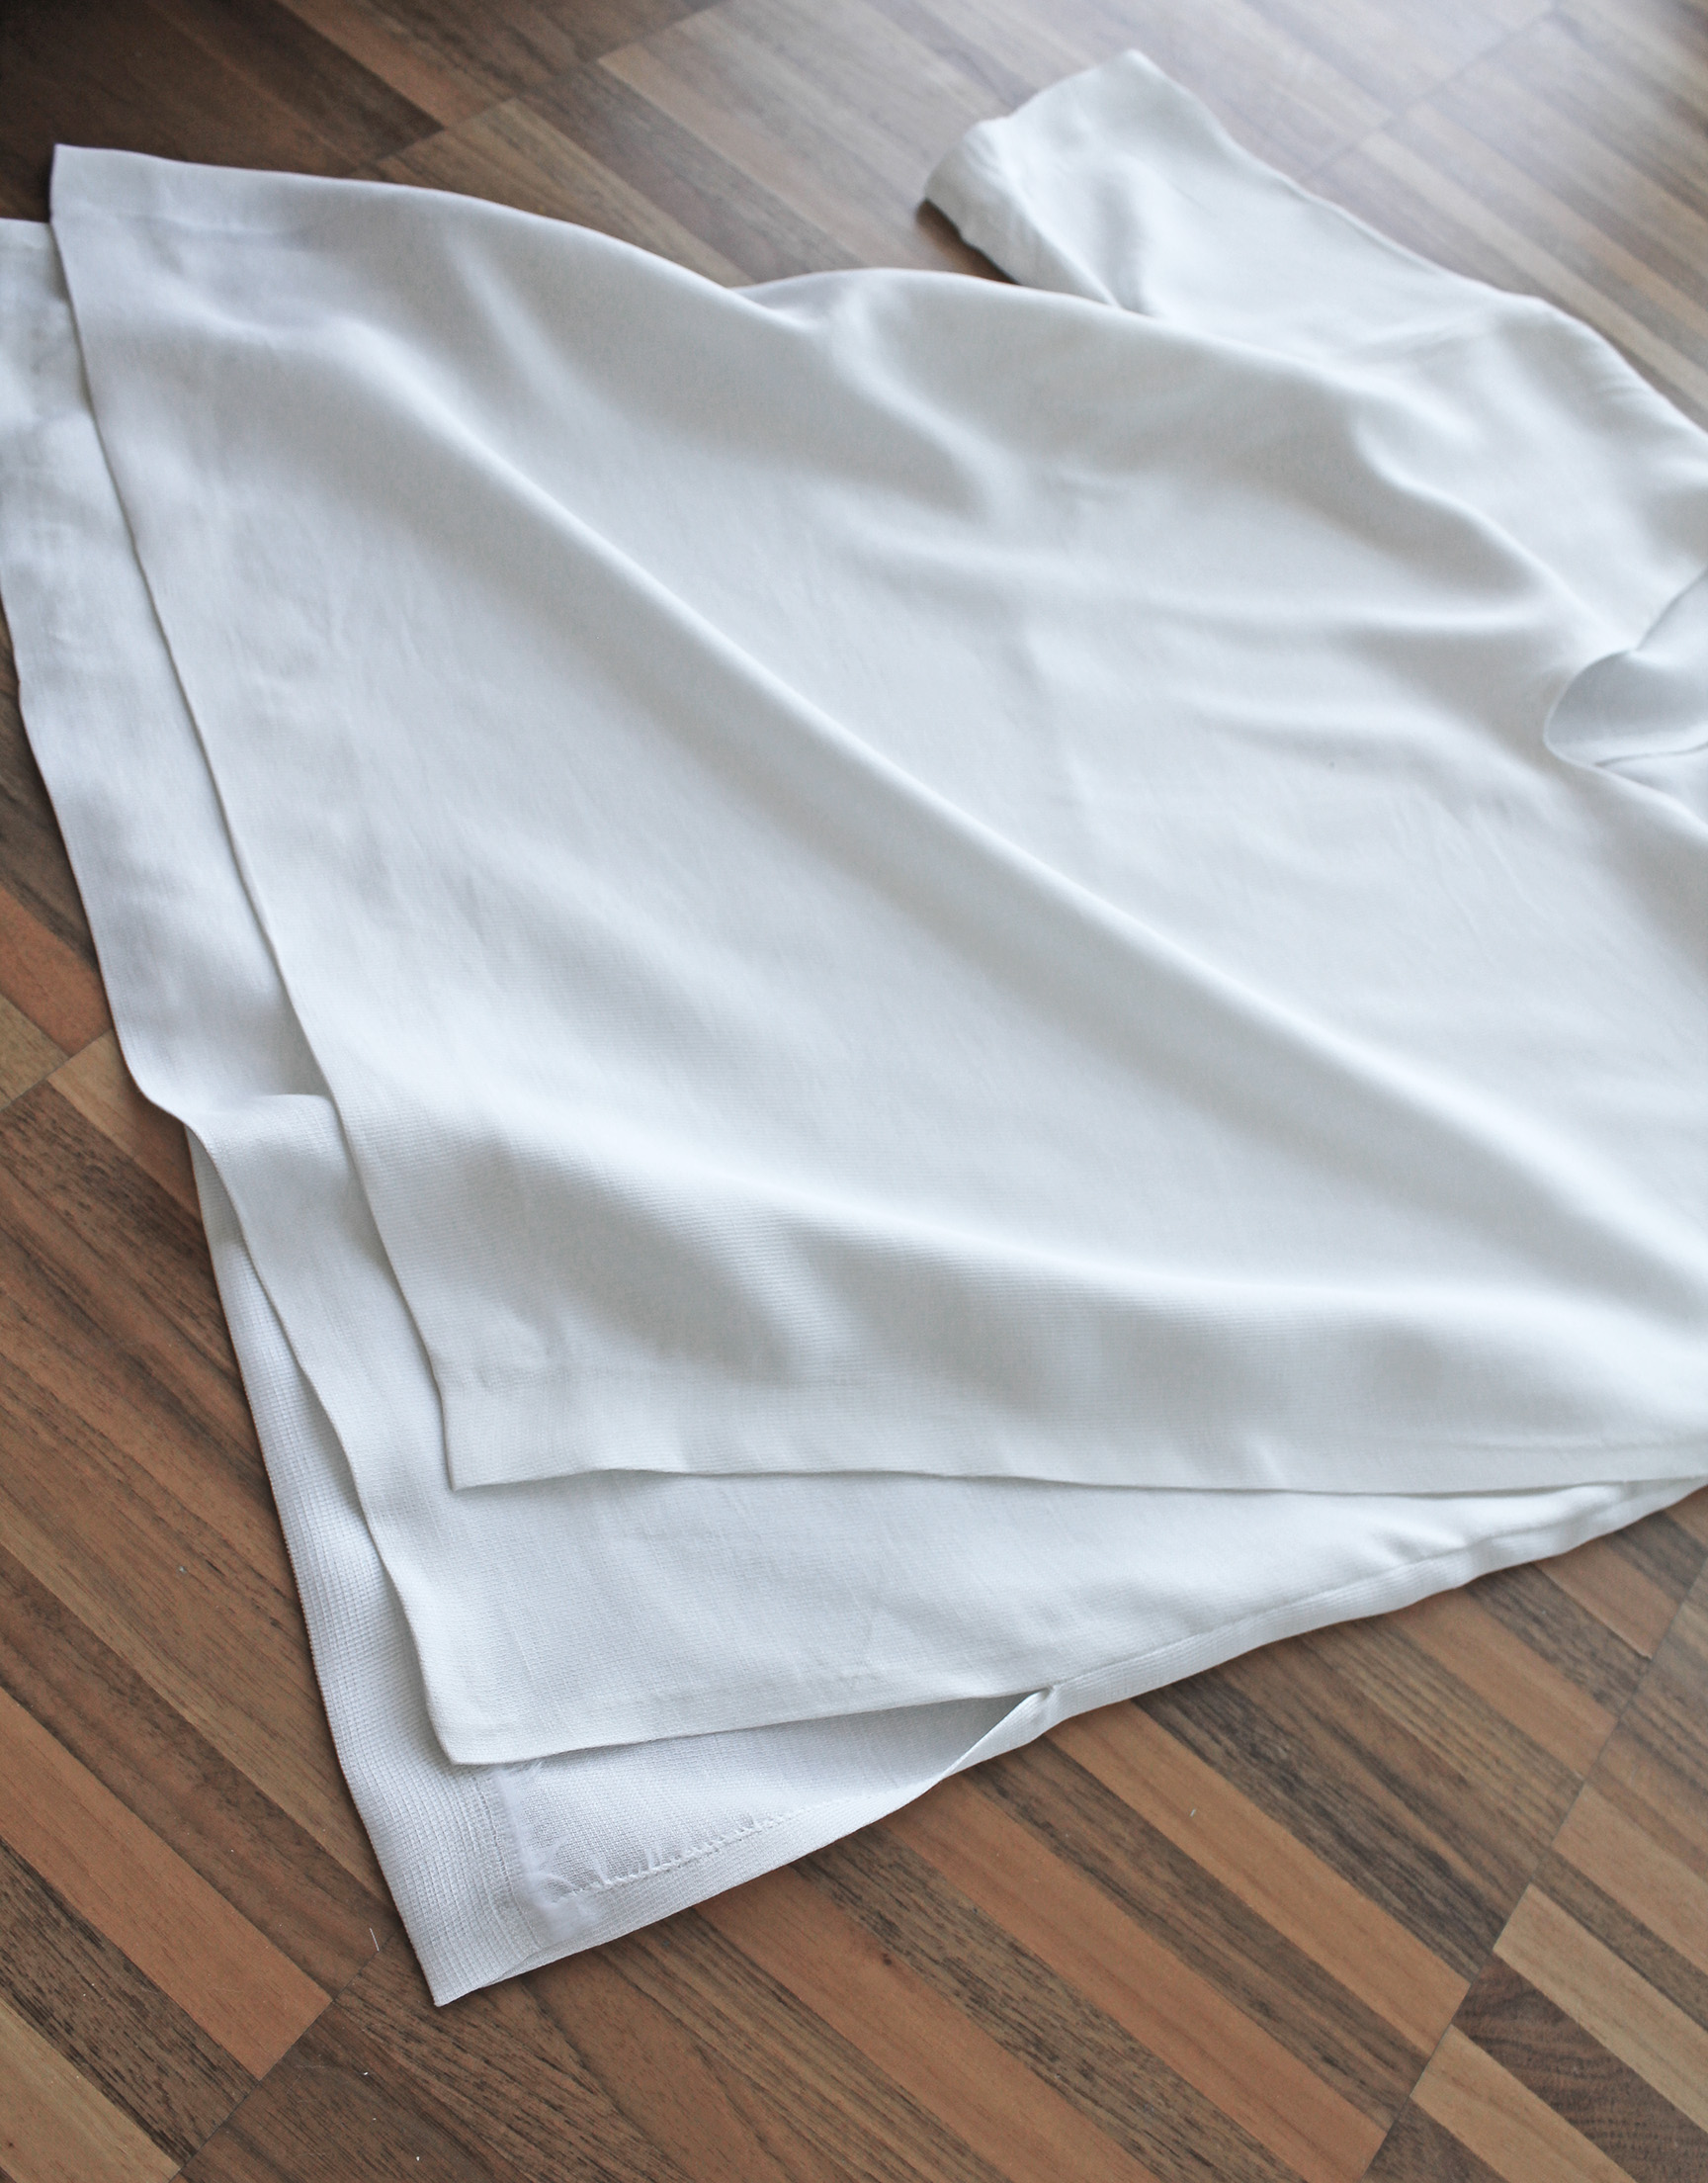
90 cm of the softest cotton mix ever (the main reason why it had to be bought) | Pencil | Pins | Scissors | Thread & Sewing machine | Also iron-on hemming tape
90 cm of the softest cotton mix ever (the main reason why it had to be bought) | Pencil | Pins | Scissors | Thread & Sewing machine | Also iron-on hemming tape
I. I cut two identical front pieces, a back piece, and two pieces for the sleeves. At this point the plan was still to make cropped sleeves. Zig-zagged all edges. Also added a center seam to the back piece but cutting the piece in half vertically, and sewing back together.

II. Then pinned the neckline together, right sides facing, and sewed 0.7 cm from the edge. Cut a little notch at the bottom of the V, turned right side out, pressed with iron.
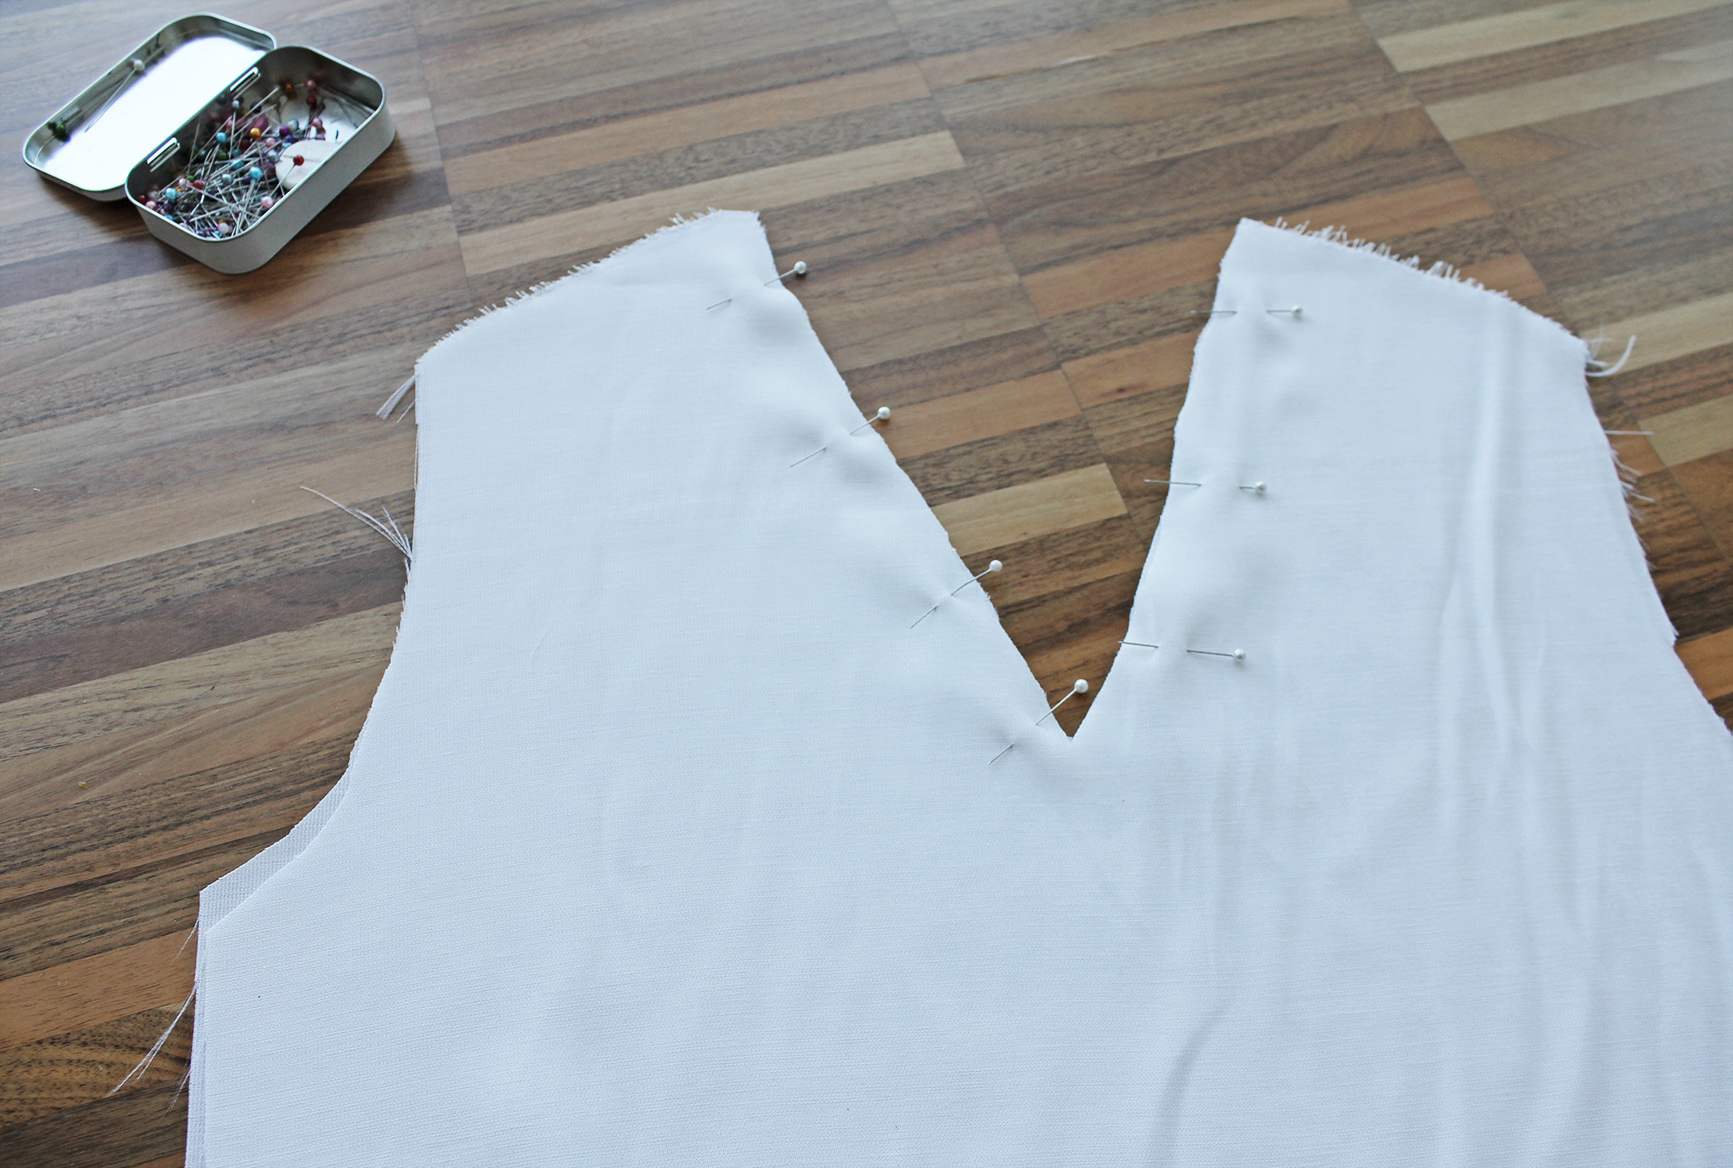
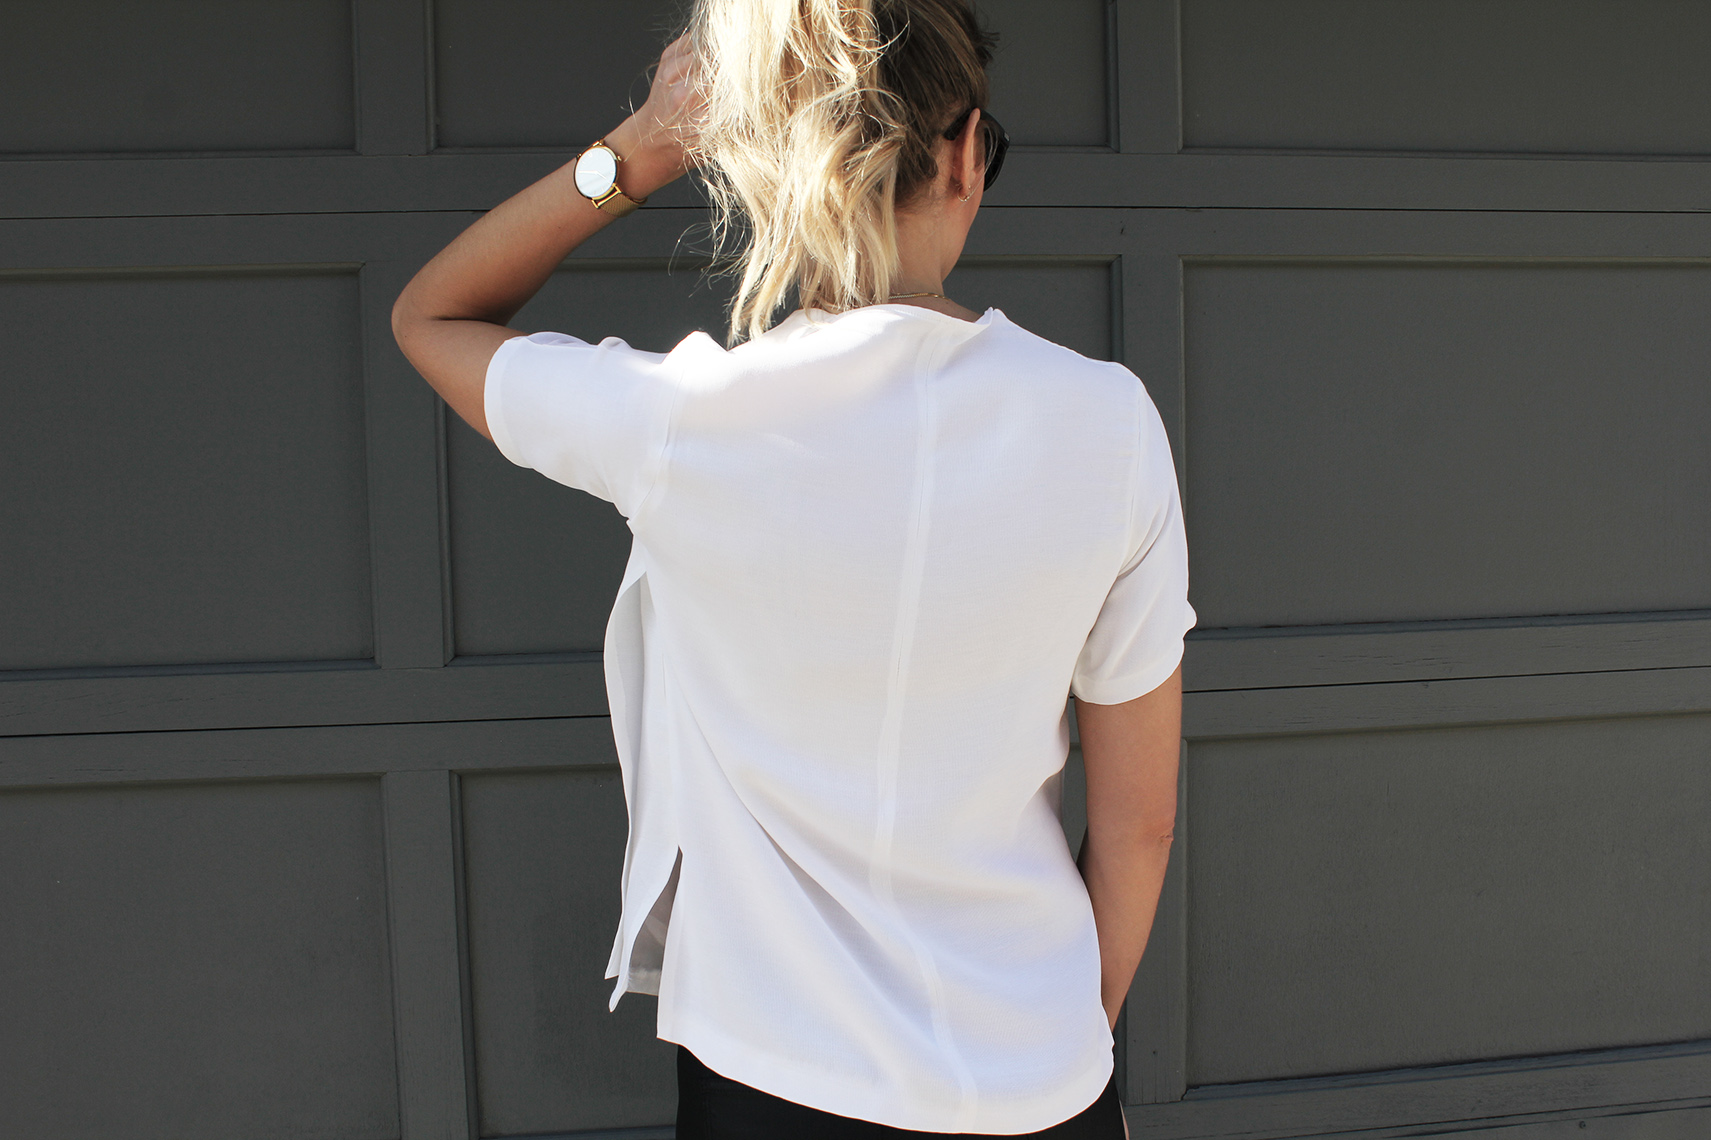
III. Finished the back of the neckline on the back piece with a double-fold seam.
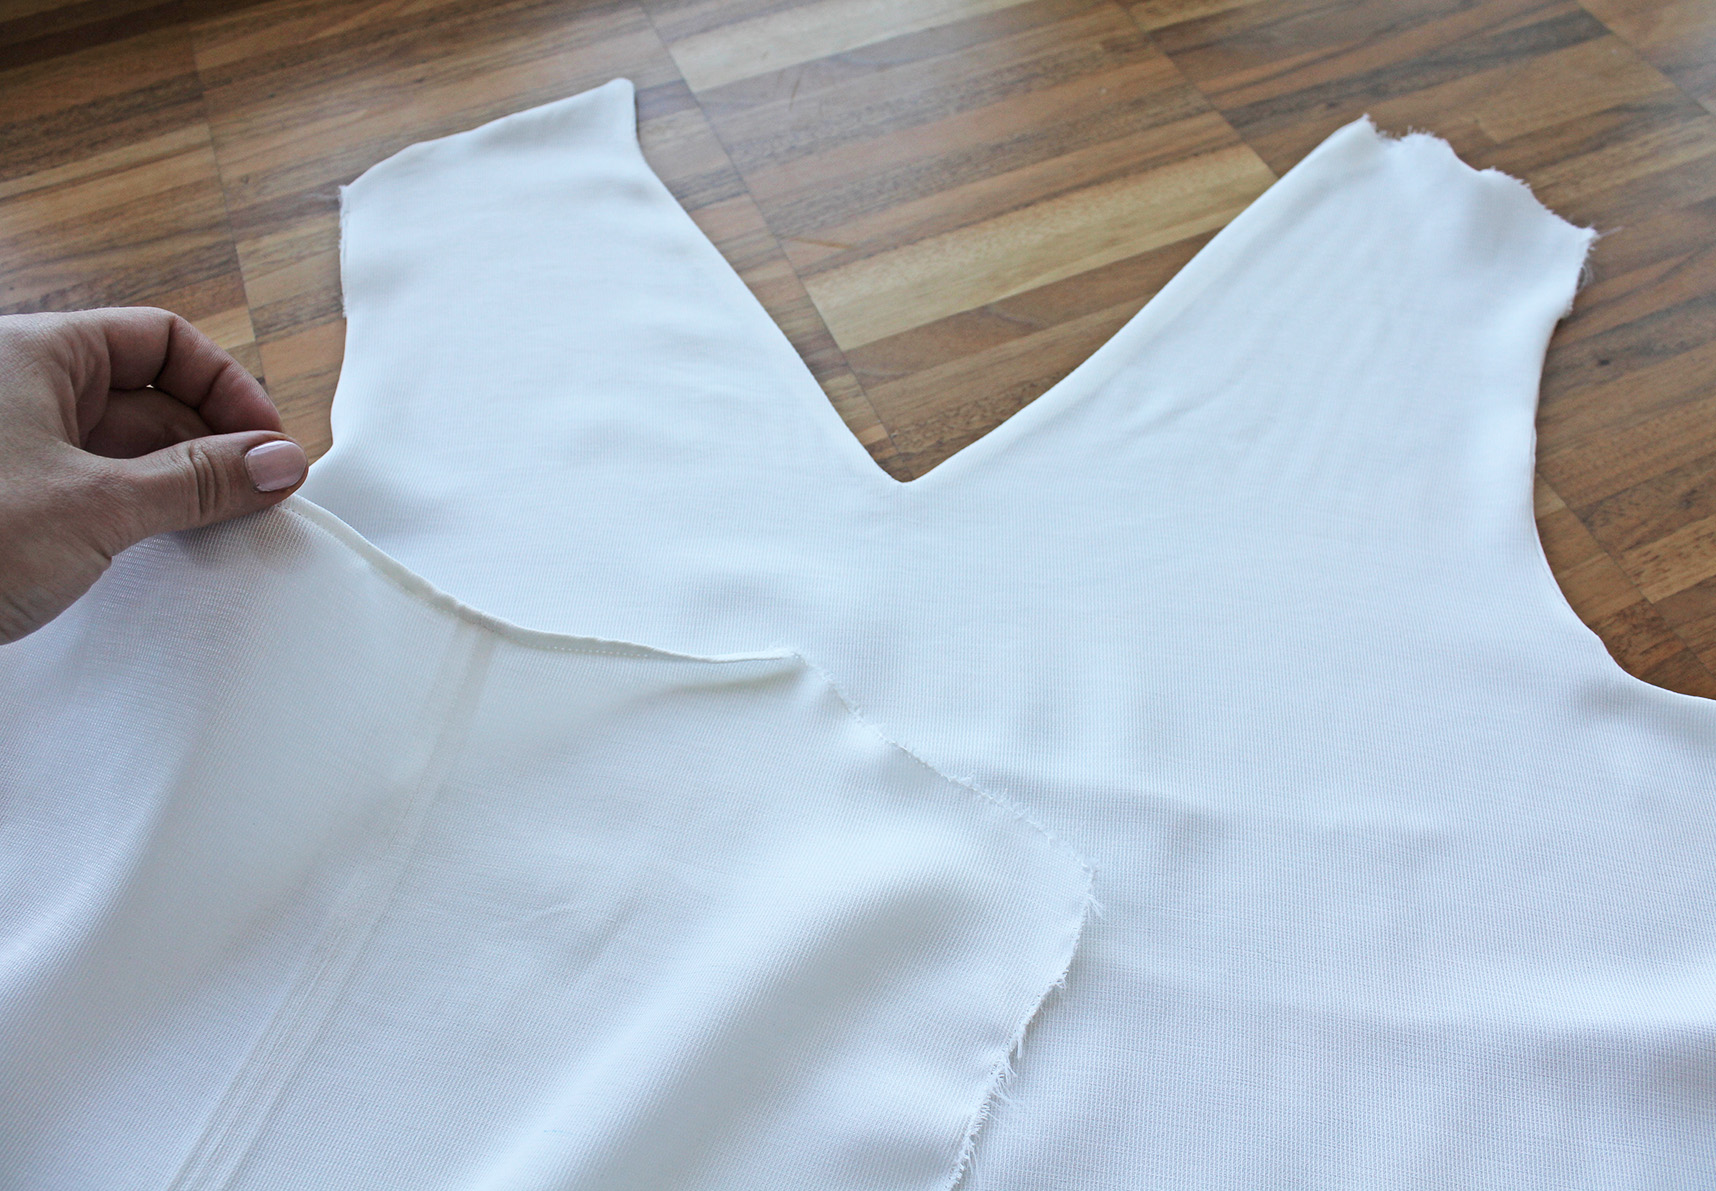
IV. Attached the double-layer front piece to the back piece at shoulder seams with a semi-flat felled seam.

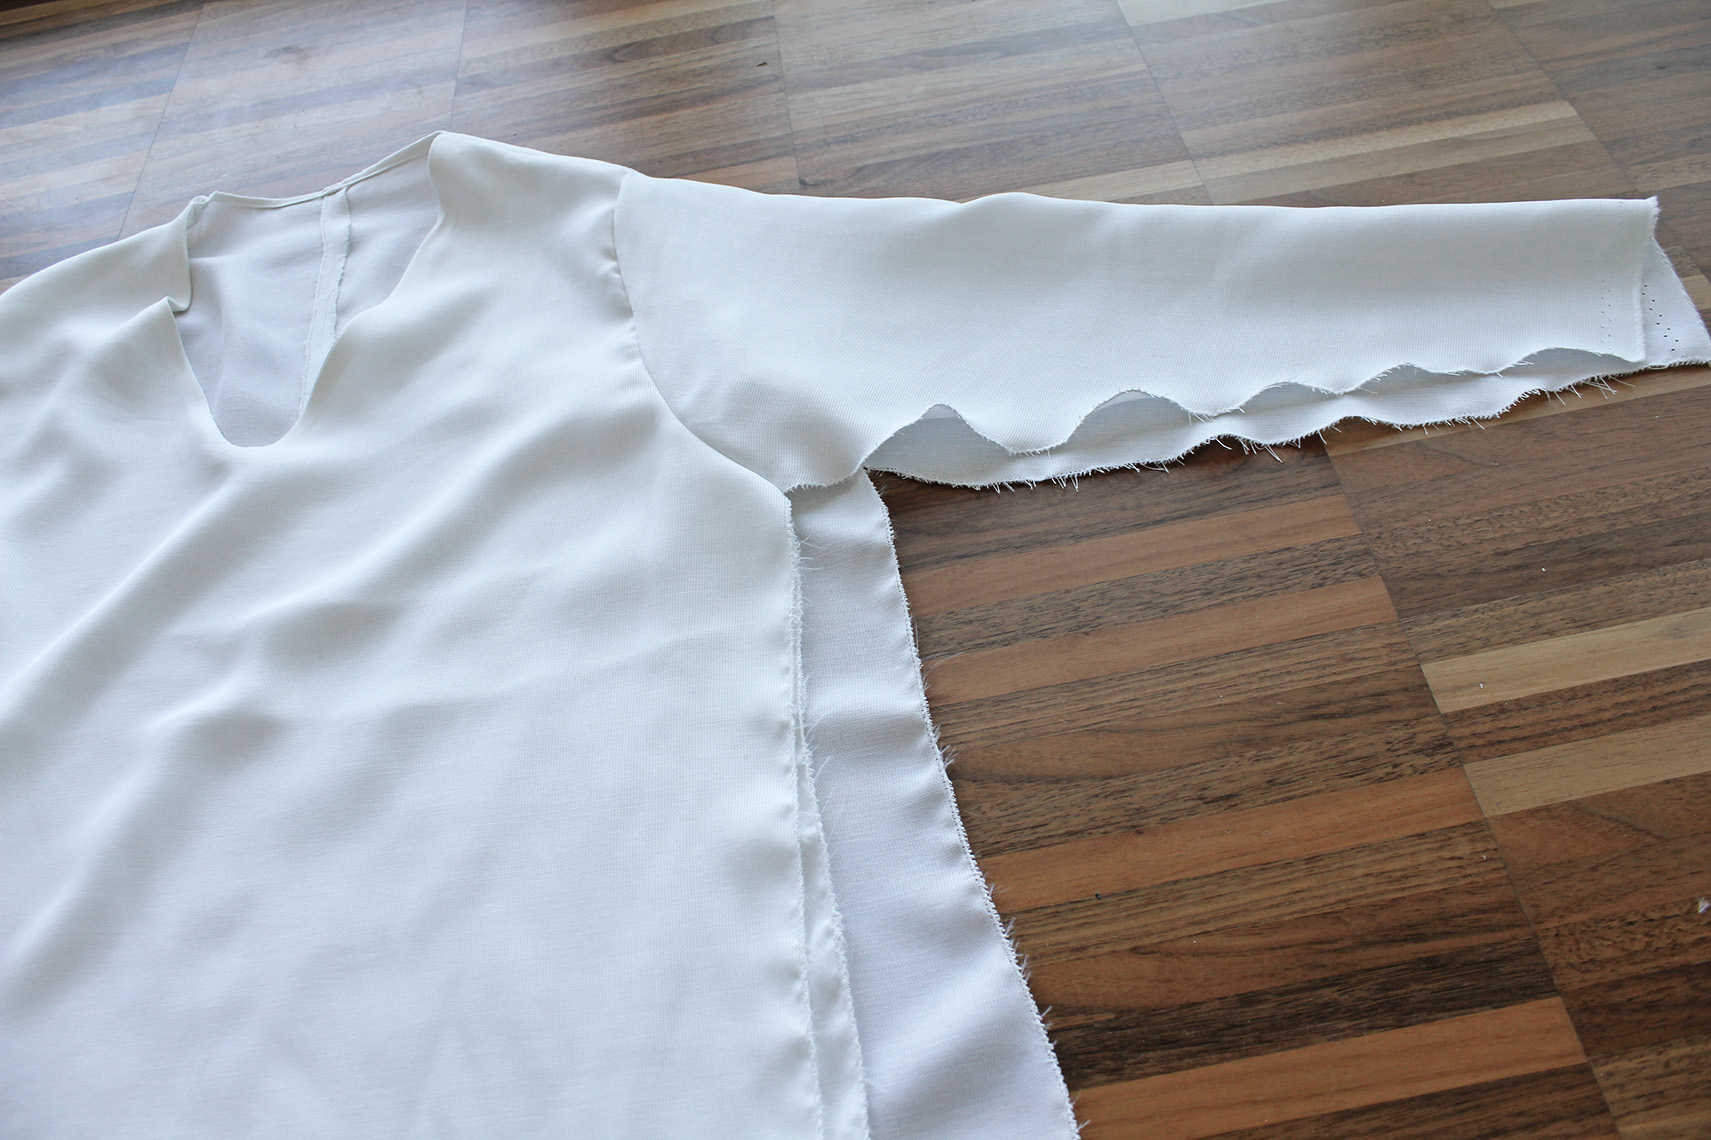
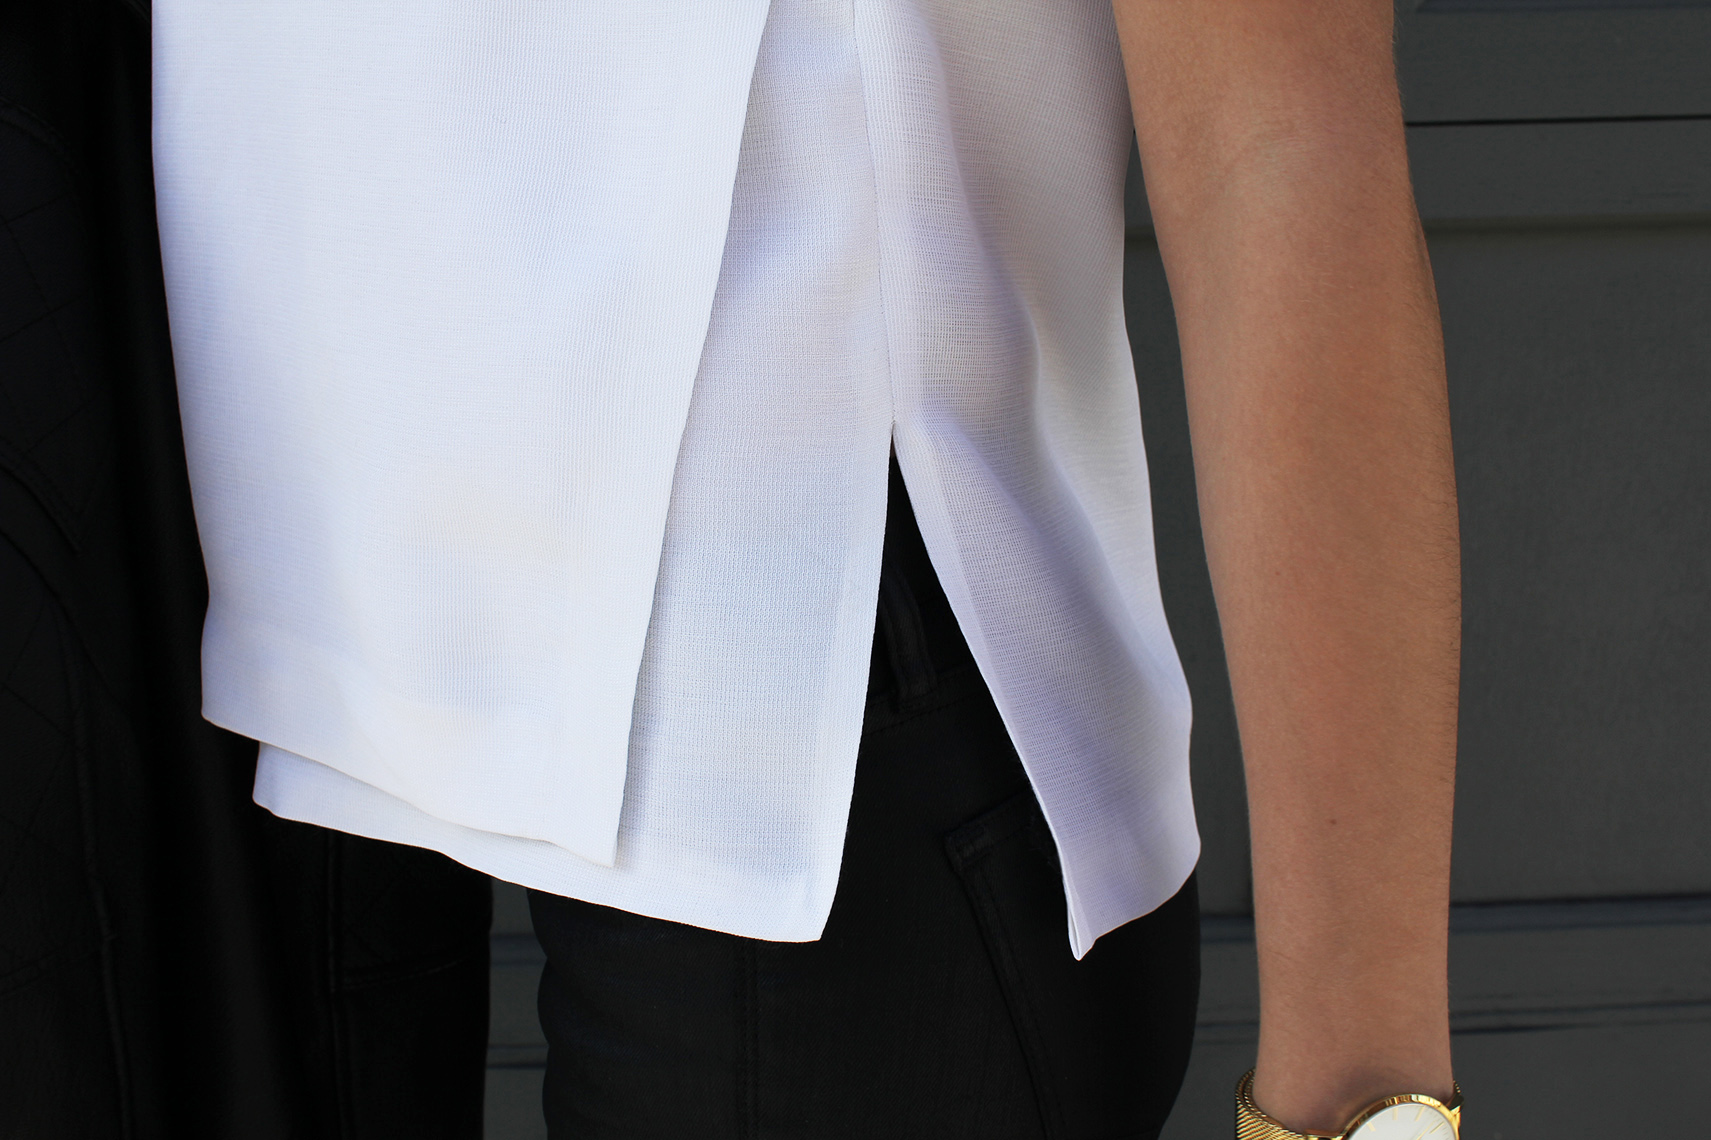
V. Pinned the sleeves to the top, sewing along the curved arm hole seam. Here's where plans changed. I realized that due to working a lot with stretchy fabrics recently I had just winged the width of the sleeves, forgetting this fabric does not give.. Resulting in my arms being just a tad too big to fit into the sleeves. Oh well! summer is coming and T-shirts will be in much higher demand than long sleeves anyway. Clipped half of the sleeve length off. Also decided to leave the outer layer of the front piece loose, to avoid ending up with just another basic white top. Also didn't continue all the way down when sewing the side seams, leaving a 15 cm-slit on both sides. When it doesn't work, make it work.
VI. Finished off the edges with iron-on hemming tape.
The lesson is, if you're not feeling your project, don't freak out. Winging it might sometimes lead to something you end up liking.


xo,
Julia


You wrote this post very carefully. The amount of information is stunning and also a gainful article for us. Keep sharing this kind of articles, Thank you.primary school leavers shirt suppliers
ReplyDeleteThis is a very informative article. I appreciate the effort you put into explaining everything so clearly. Highly recommended for those who want to Design Your Own Rugby Jersey with ease.
ReplyDelete