

It's actually been nice to sew some more wintery things for a change! Soon it's back to making summer dresses for me, but this one still made it through. Something very Union Jack meets bedouin about this fabric, how could I not.
Tutorials take a lot of time & effort to create, and I choose to make mine available for free. If you enjoy this guide, you can support me with a donation that feels right for you, here.
TOOLS:

Stretchy wool mix, 2 m | Scissors | Thread, sewing machine, needle | Fabric marker | Pins | Zipper (15 cm) | Elastic to go around your waist
SKIRT
I. The right fabric in my opinion is essential for this one. I found an amazing, thick wool-mix with just the right amount of stretch to make it super comfortable at a second hand store. They don't make them like this no more..
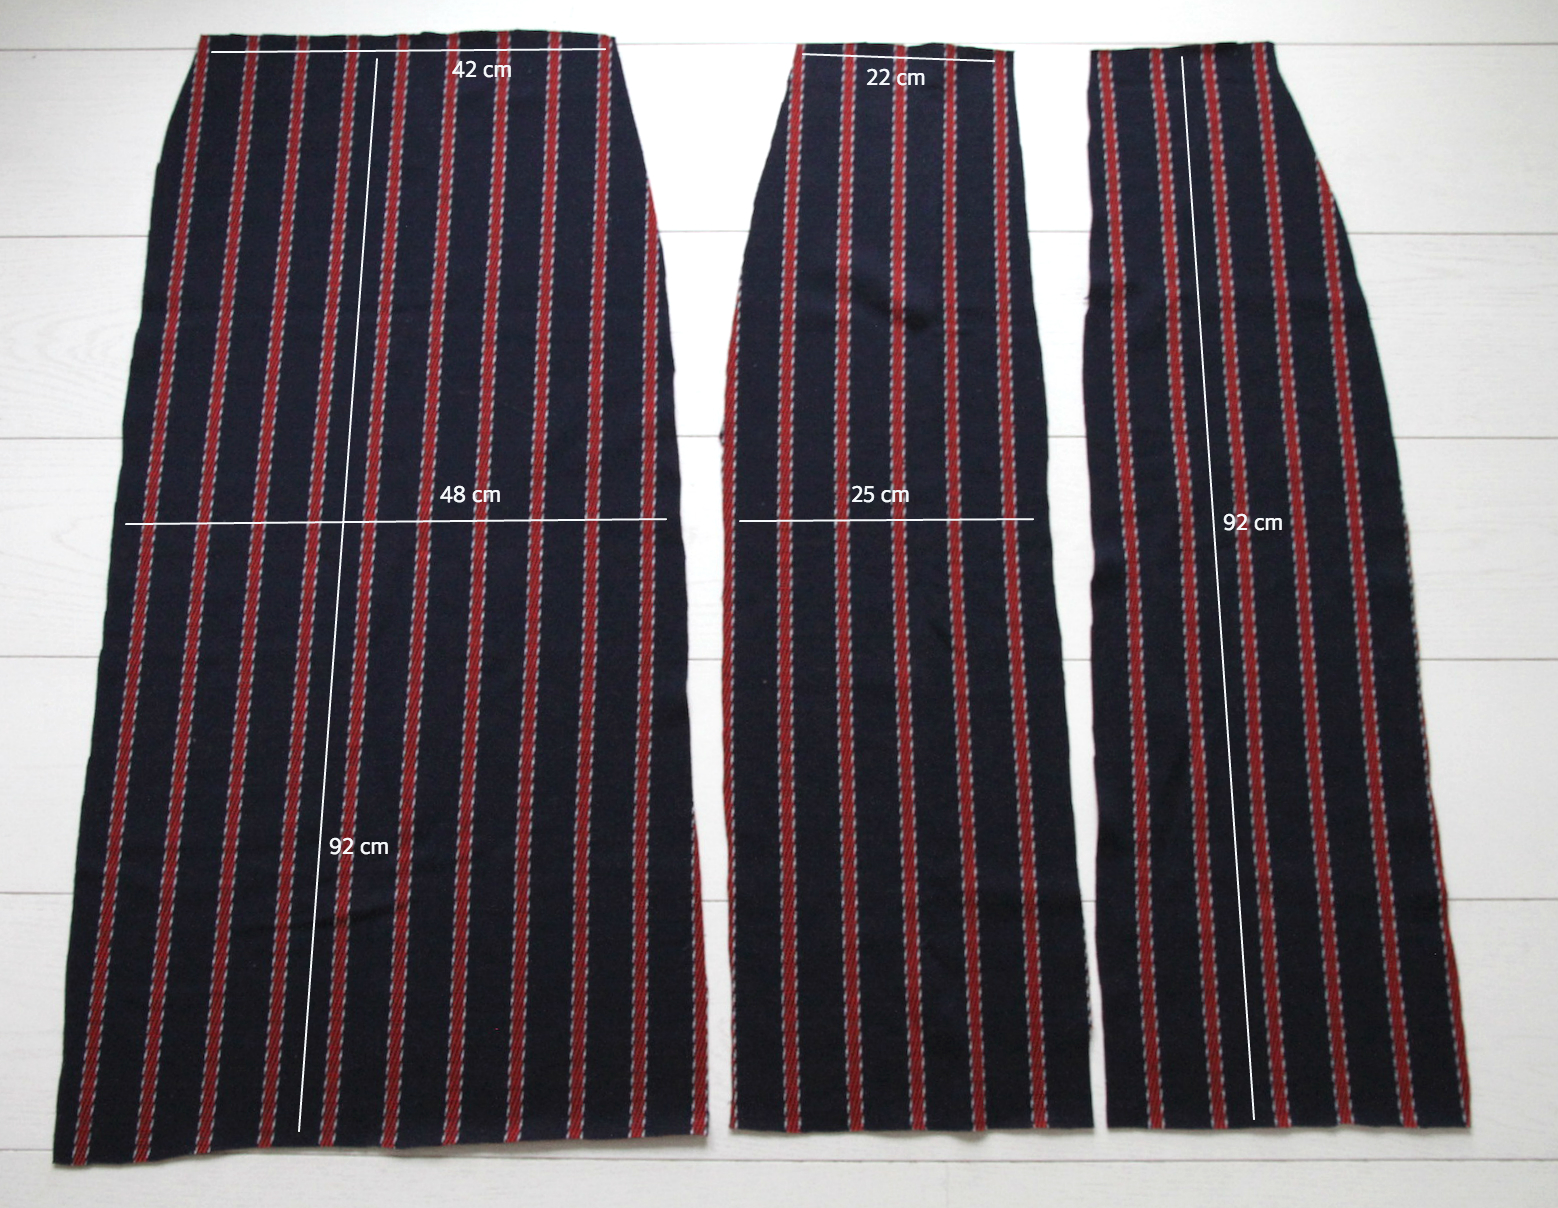
Here are my measurements for the pieces I cut out for the skirt - one front piece and two back pieces, which put together are identical to the front piece. I'm a EU36/US4 with a waist of 70 cm. I could've gone a bit smaller with the stretch, but didn't want to risk a too tight look.
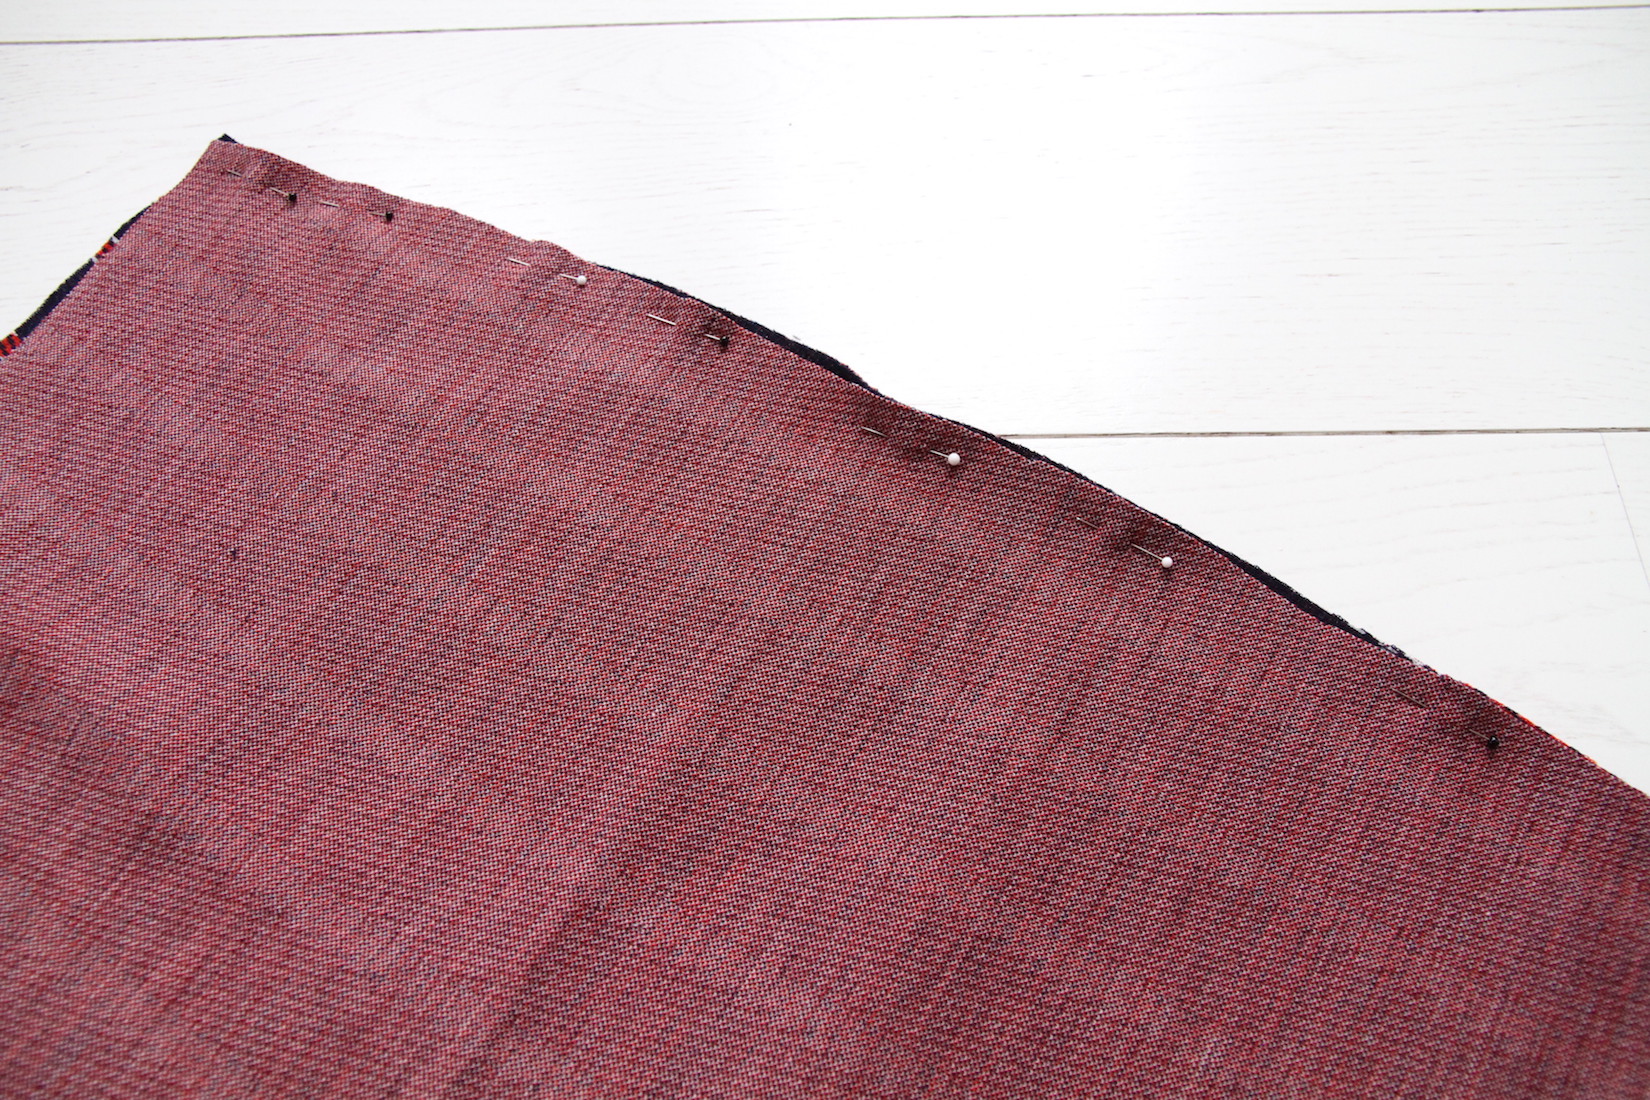
II. First I pinned the two back pieces together along the center seam. I also measured where I was going to sew at this point: I placed my elastic at the top, adding 1 cm to its width and then placing the zipper to see how far down it went. I marked those spots by starting my pins where the zipper starts, and placing a different colour pin where the zipper ends. I also placed my last pin towards the bottom where I wanted by back slit to start (about 25 cm up from the hem).
Then I sewed a basting stitch (the longest stitch on your machine) from the first pin to the blue pin, and a regular stitch from the blue pin down to the last pin.
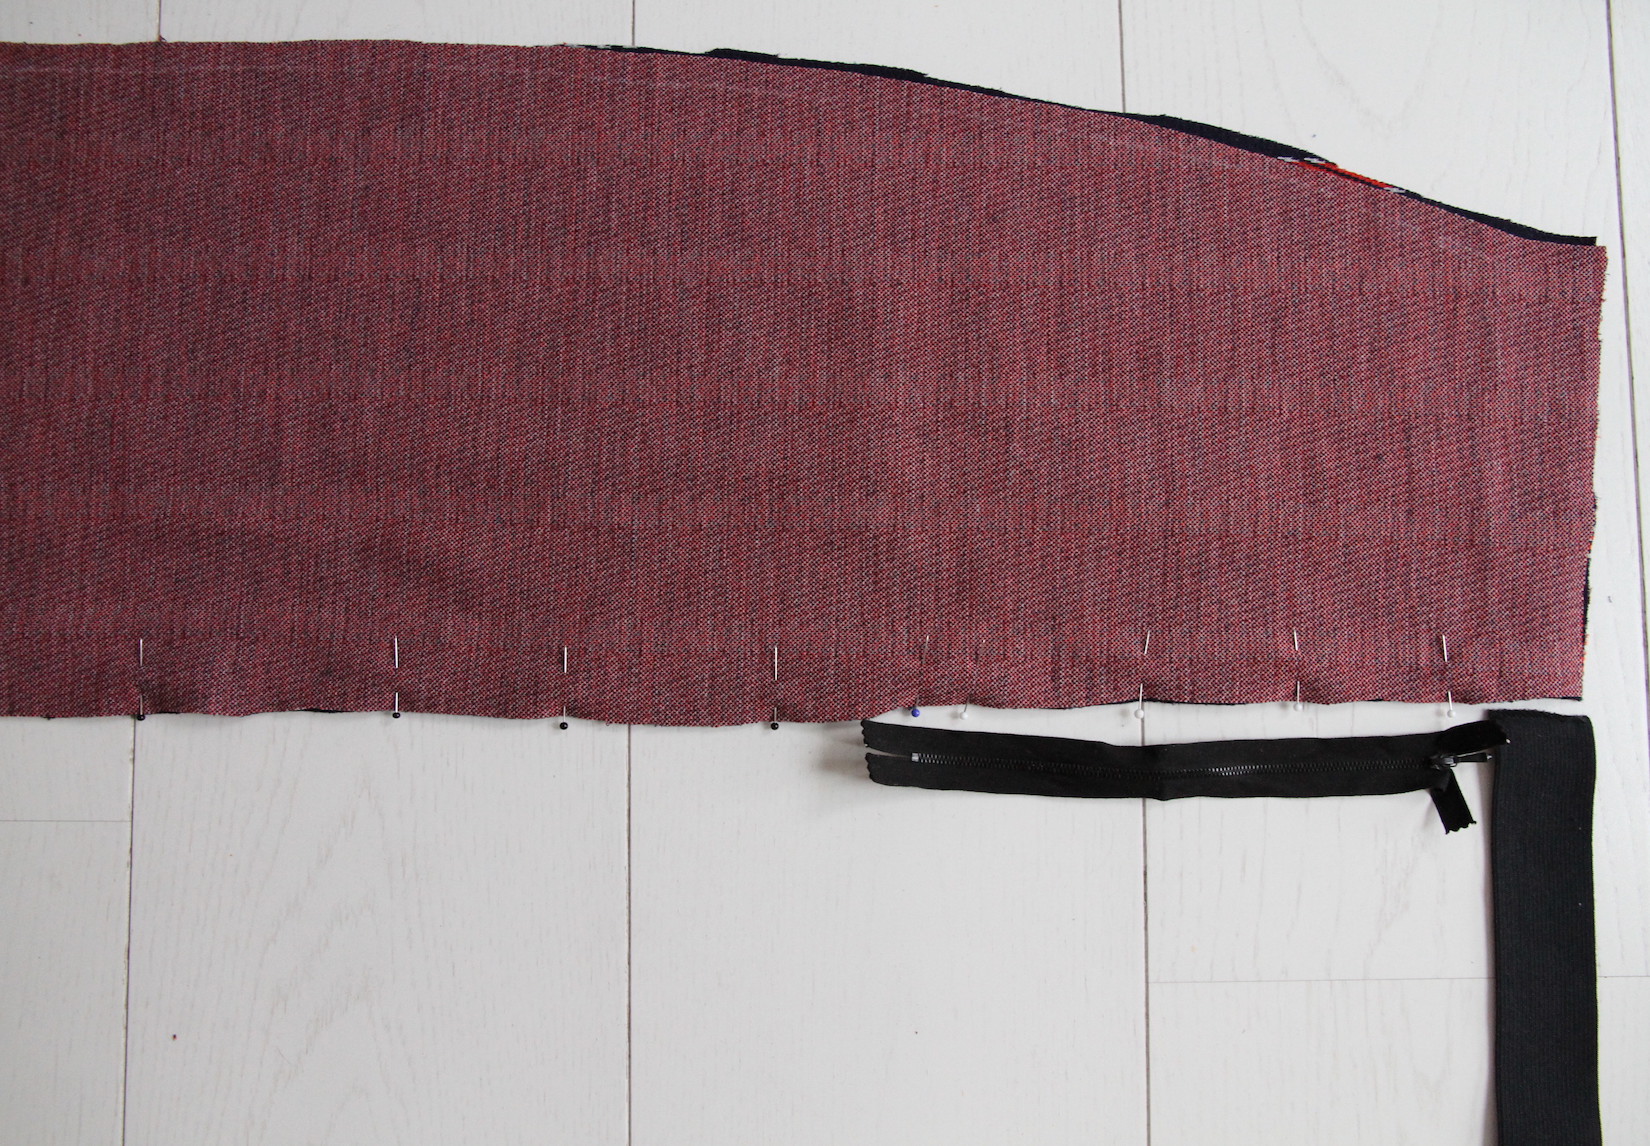
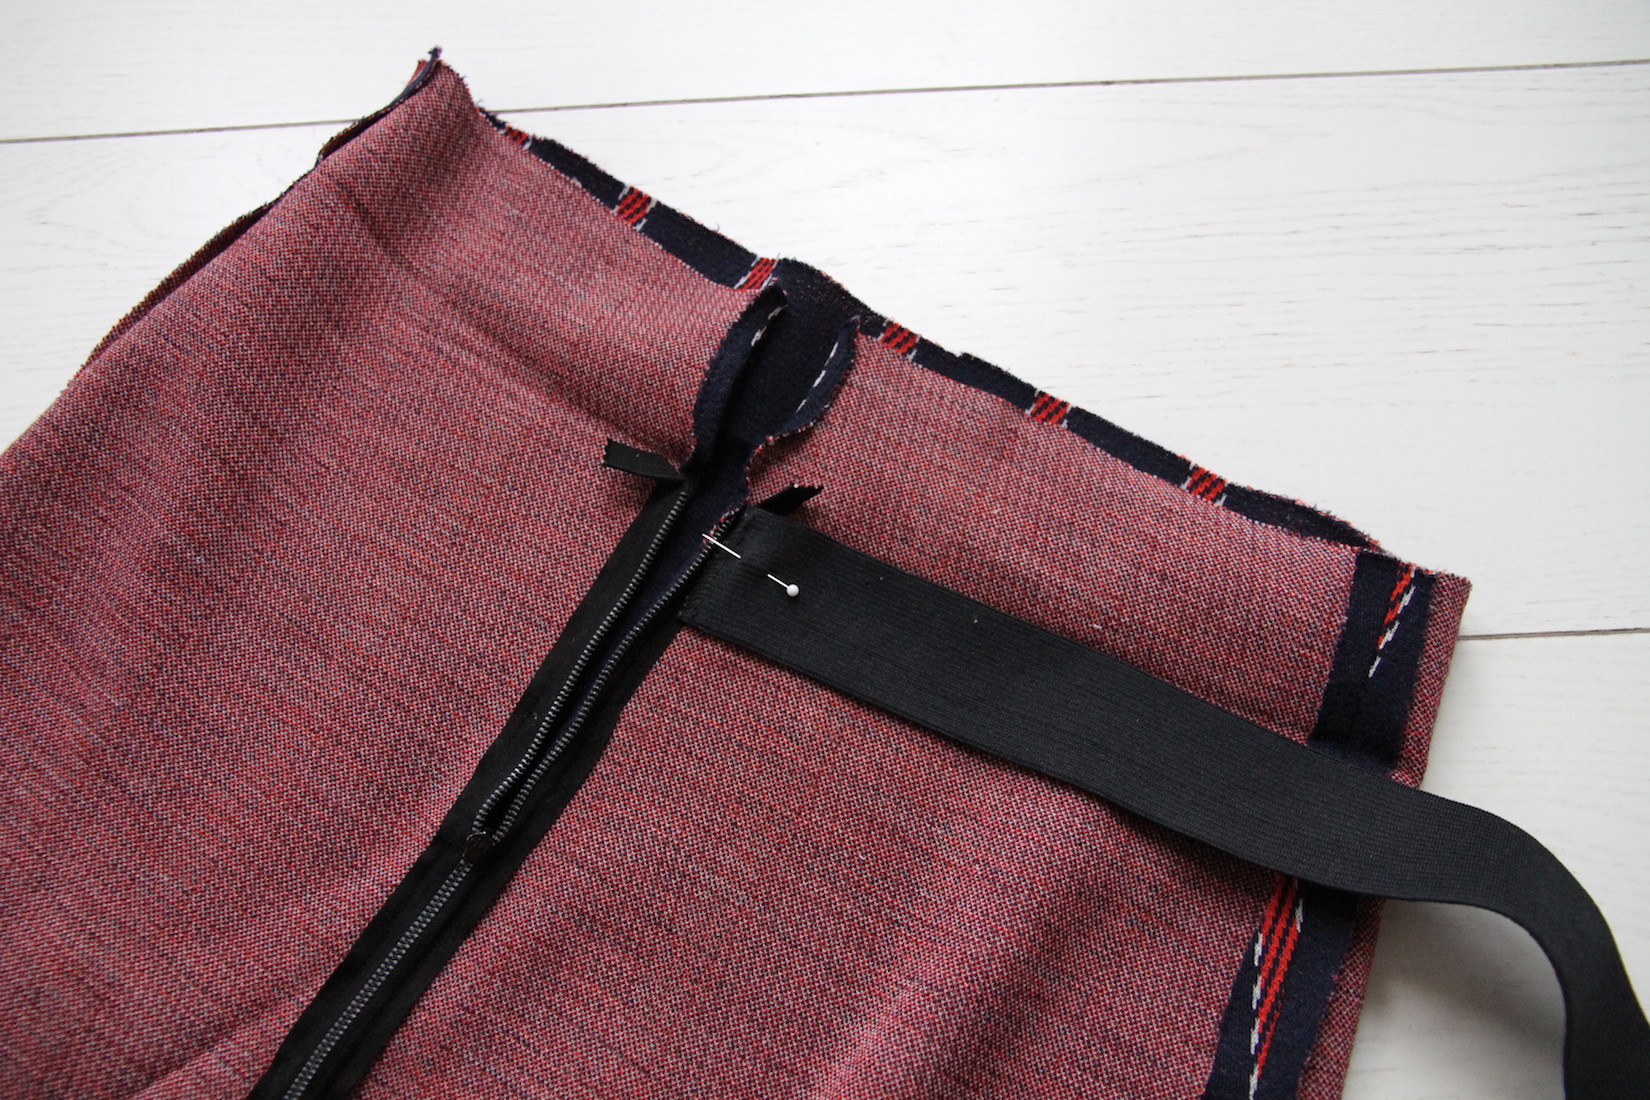
III. To insert the zipper, I first pressed the seam open. Then pinned the zipper carefully so that it starts from where my basting stitch started, and so that the zipper teeth are exactly on top of the seam.

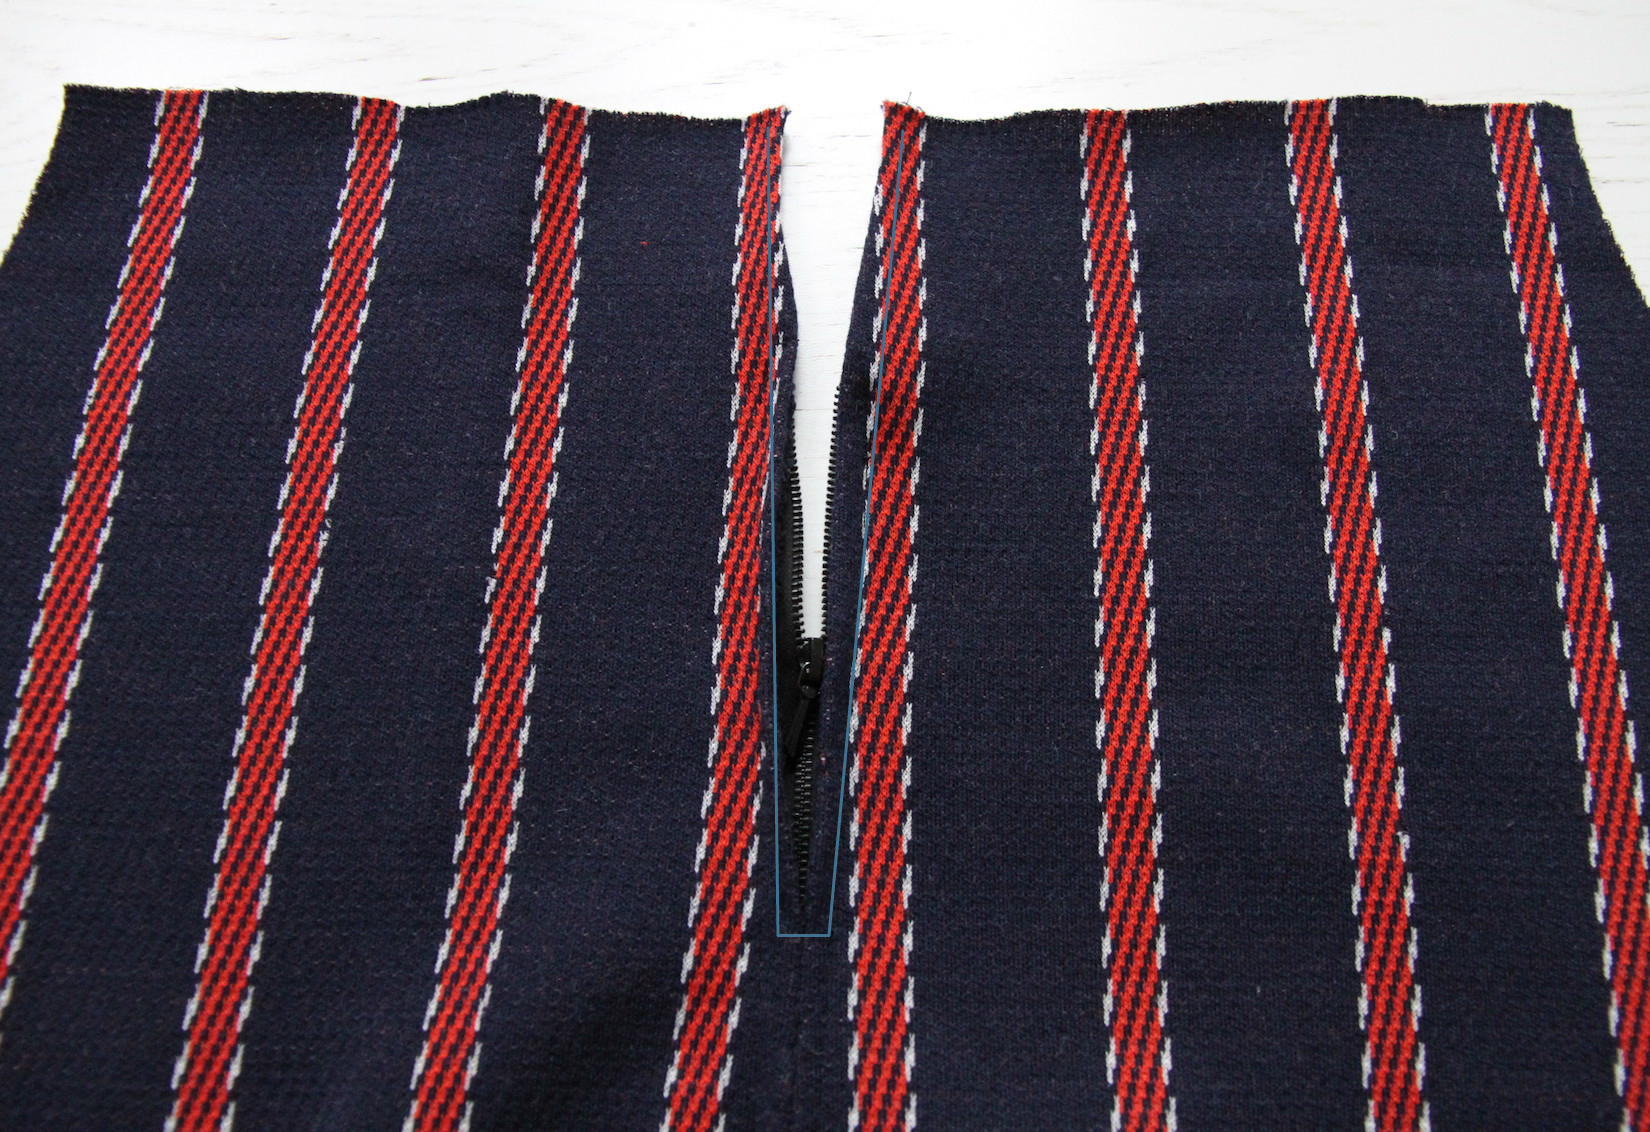
.. Then sewed a box around the zipper on the right side. You can't make out the stitch in this fabric, but it's where I've added the blue line. After stitching you can carefully open up the basting stitch and the zipper's done.
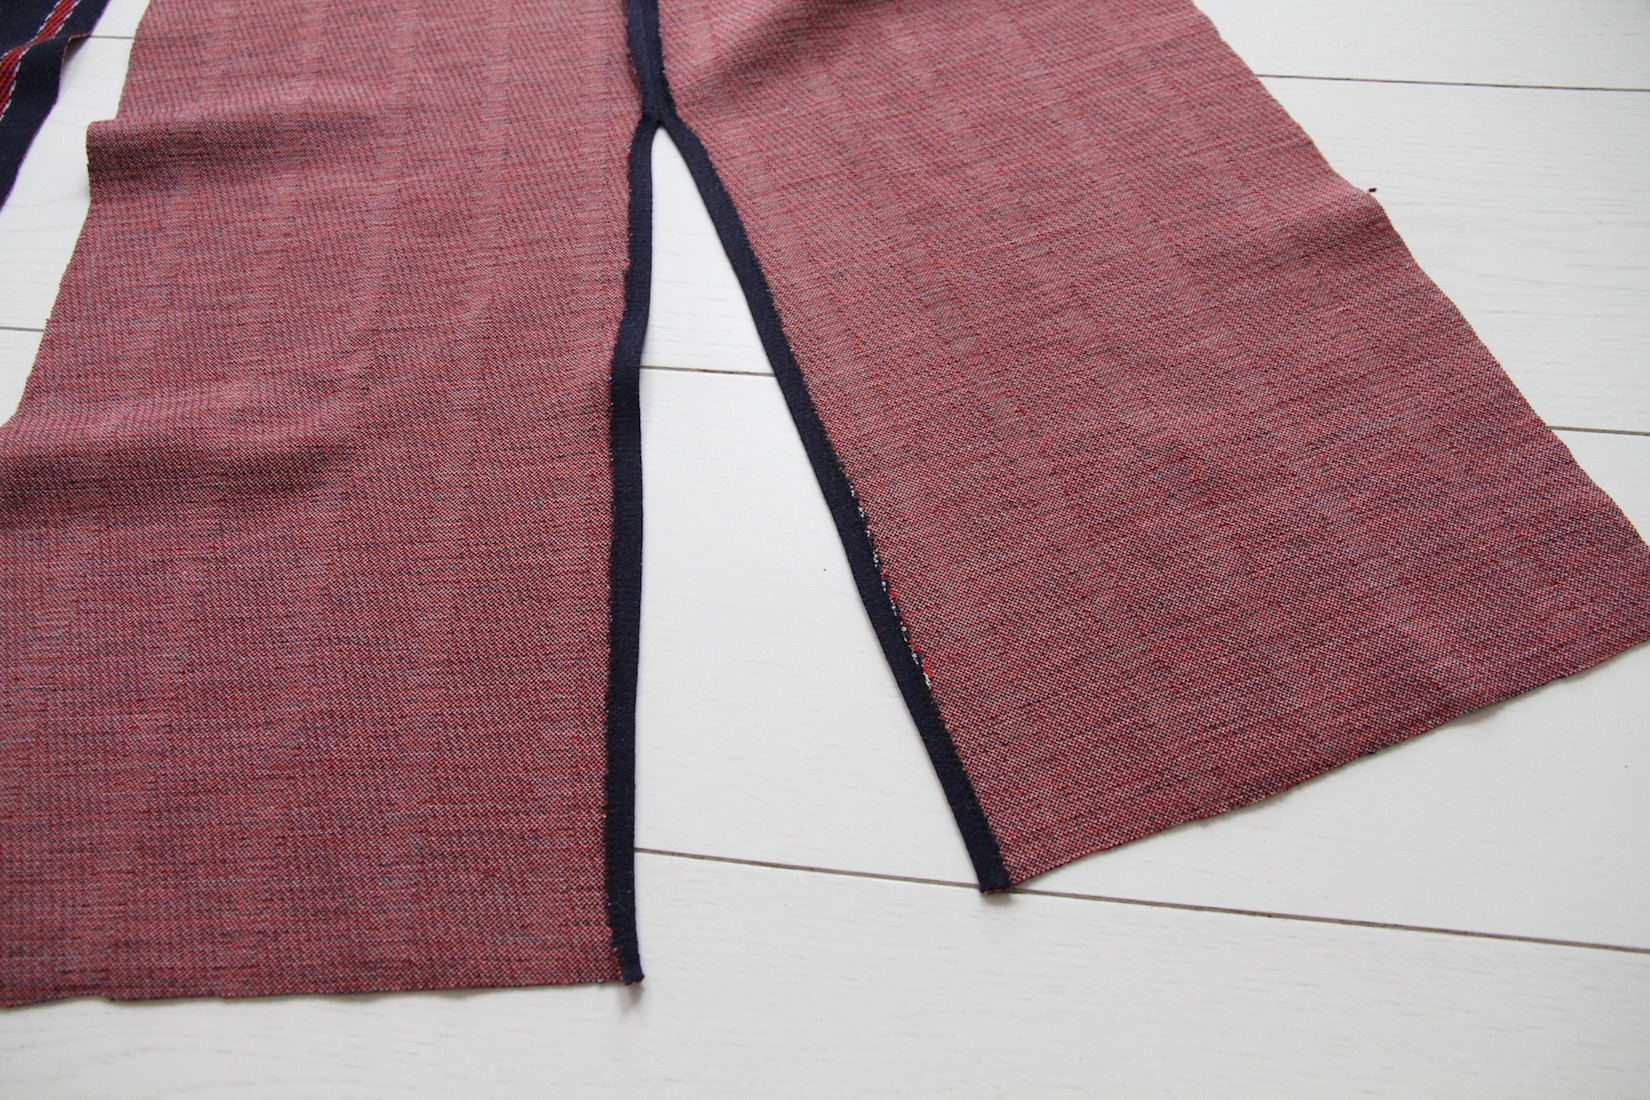
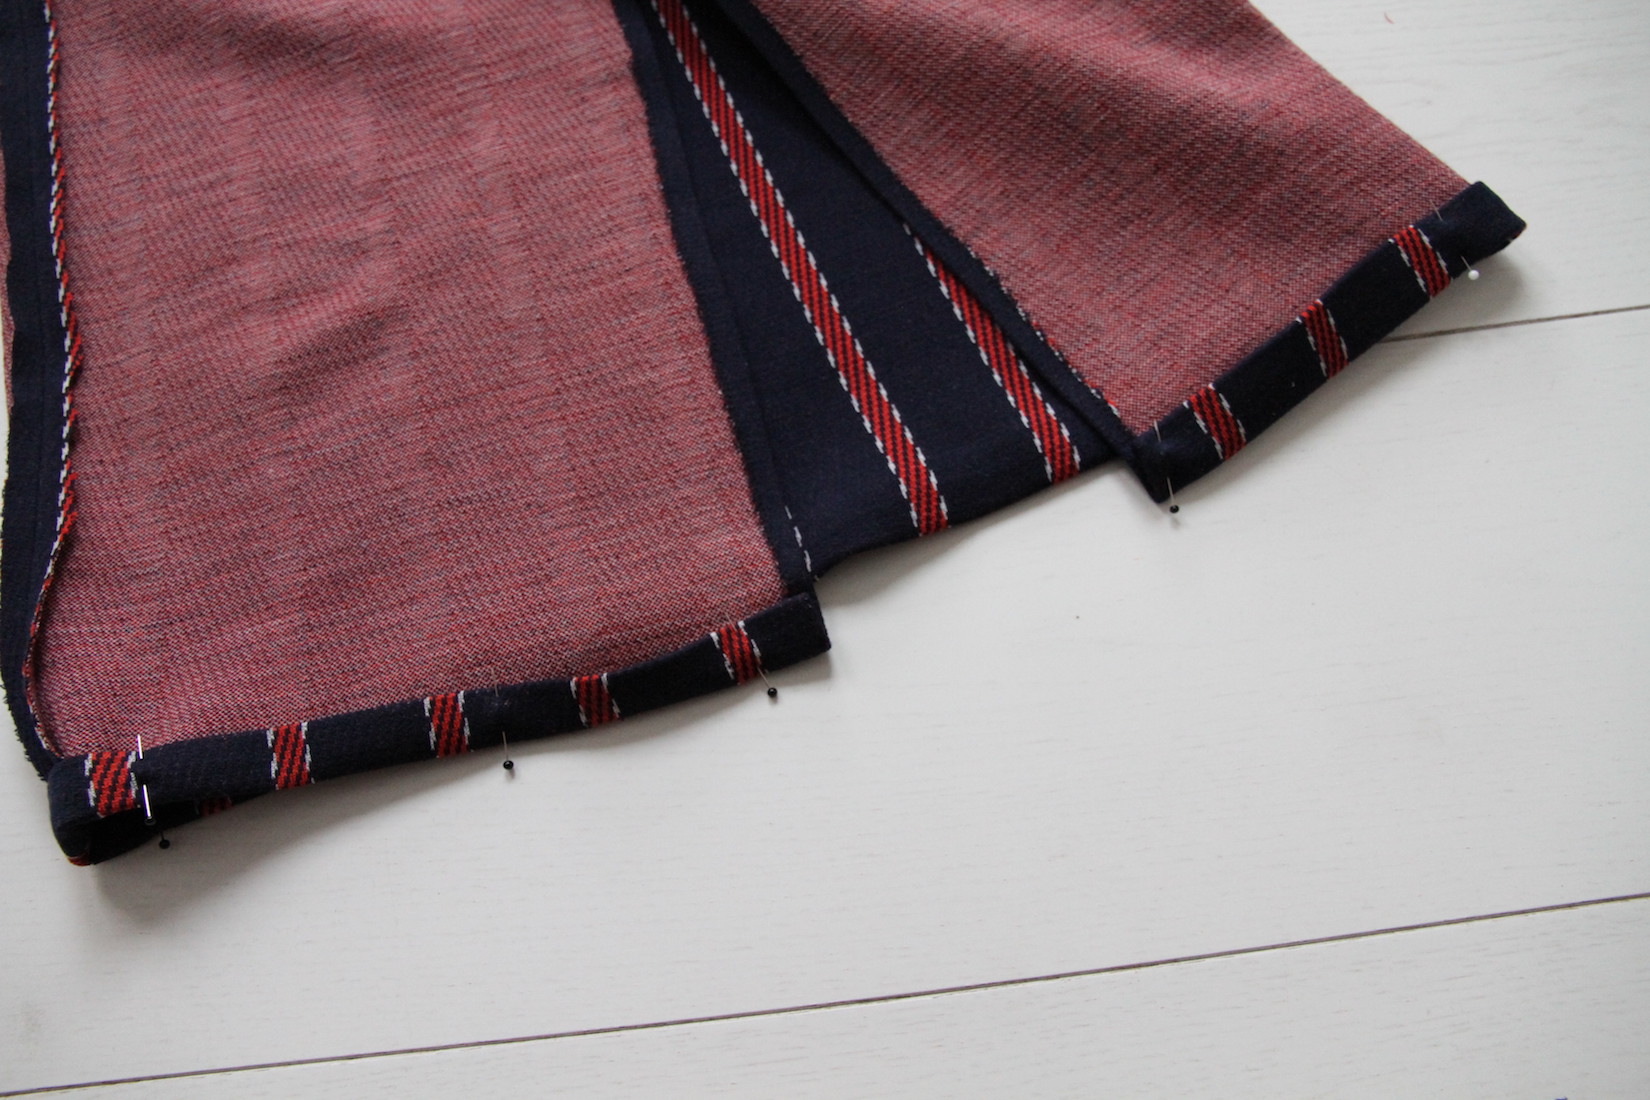
IV. To finish my back slit, I continued pressing the same size fold as my seam allowance, and hand-stitched it in place. (I did very little finishing of any kind the raw edges in this project since my awesome fabric did 0 fraying. If yours does you'll want to zig-zag the edges).
V. Next I pinned my sides together, right sides facing, and sewed down, pressing the seams open.
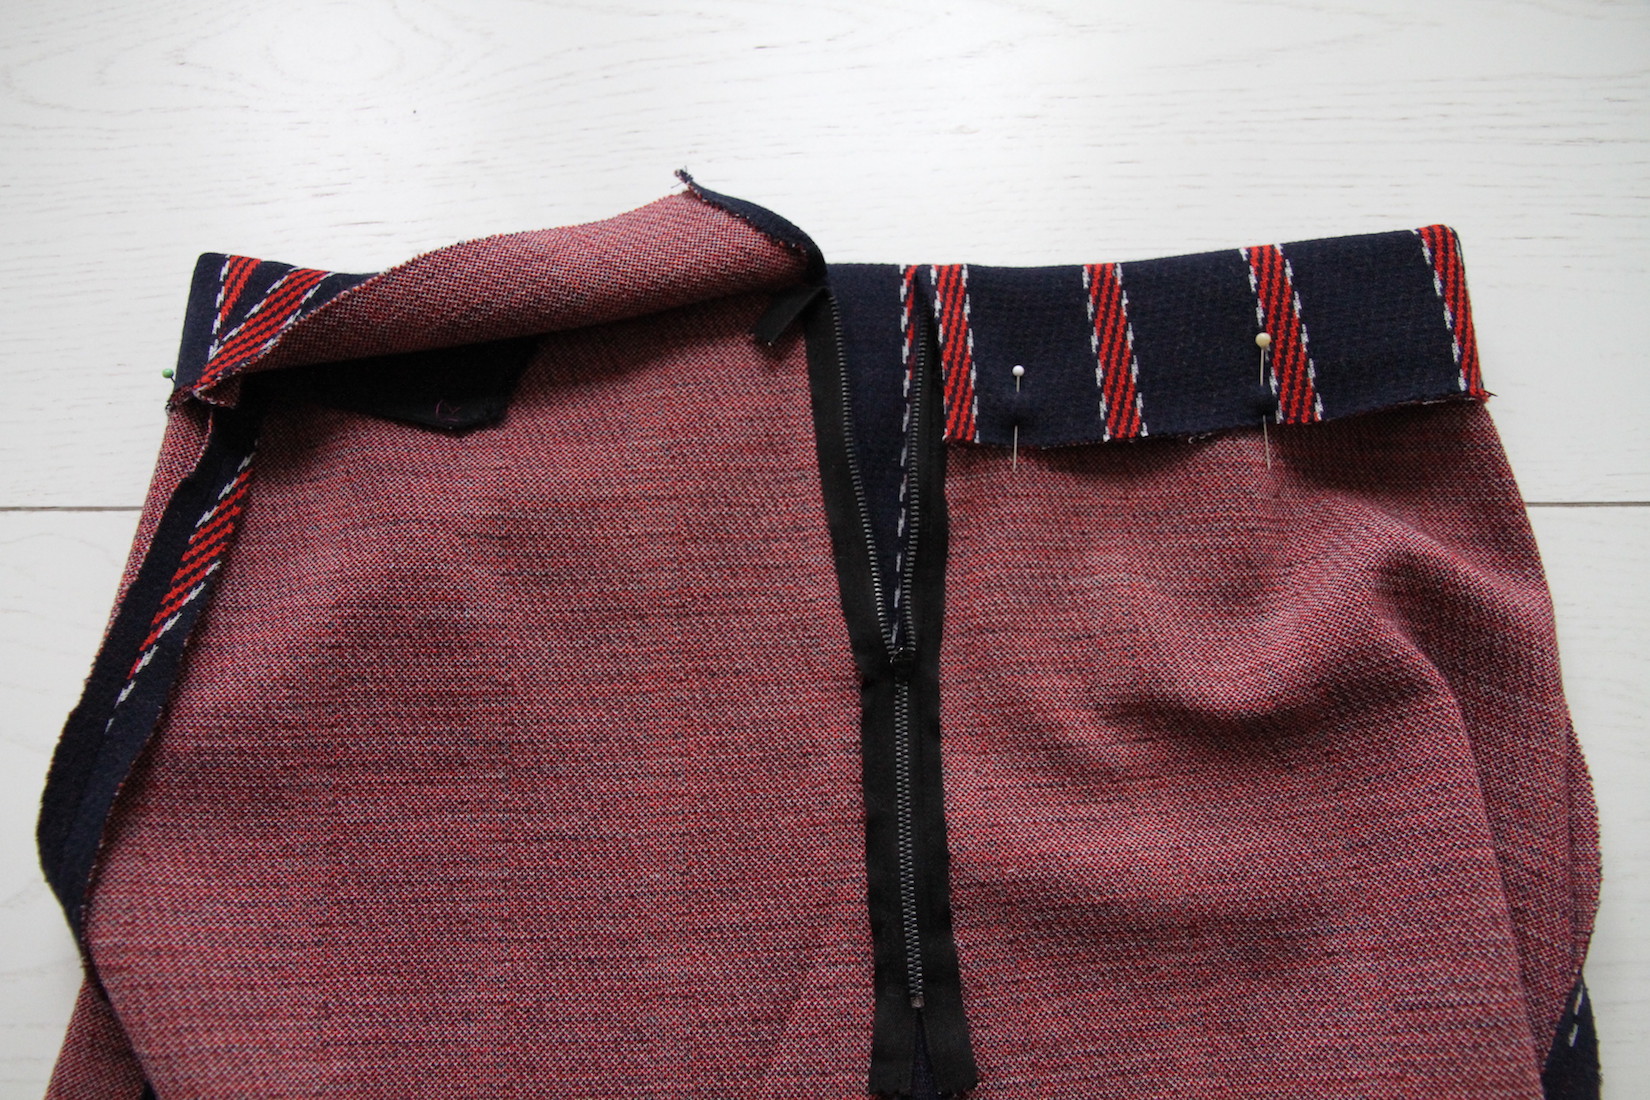
VI. For the waistline, I could've even done without the elastic if I added some darts to make the waist fit snugly, but I felt like getting some firmness out of the elastic. First I sewed one end of the elastic (cut to the right length to go around my waist) to the zipper tape. I then pressed a fold onto the skirt waist line...
.. and folded it down over the elastic, hand-stitching in place. When I got around to where the elastic was going to end without stretching it, I pulled it to the other zipper tape, sewed in place, and then continued to sew the fold in place all the way until the end.
VII. Lastly, I pressed a double fold of about 2 cm at the hem, and hand-stitched that as well.
TOP
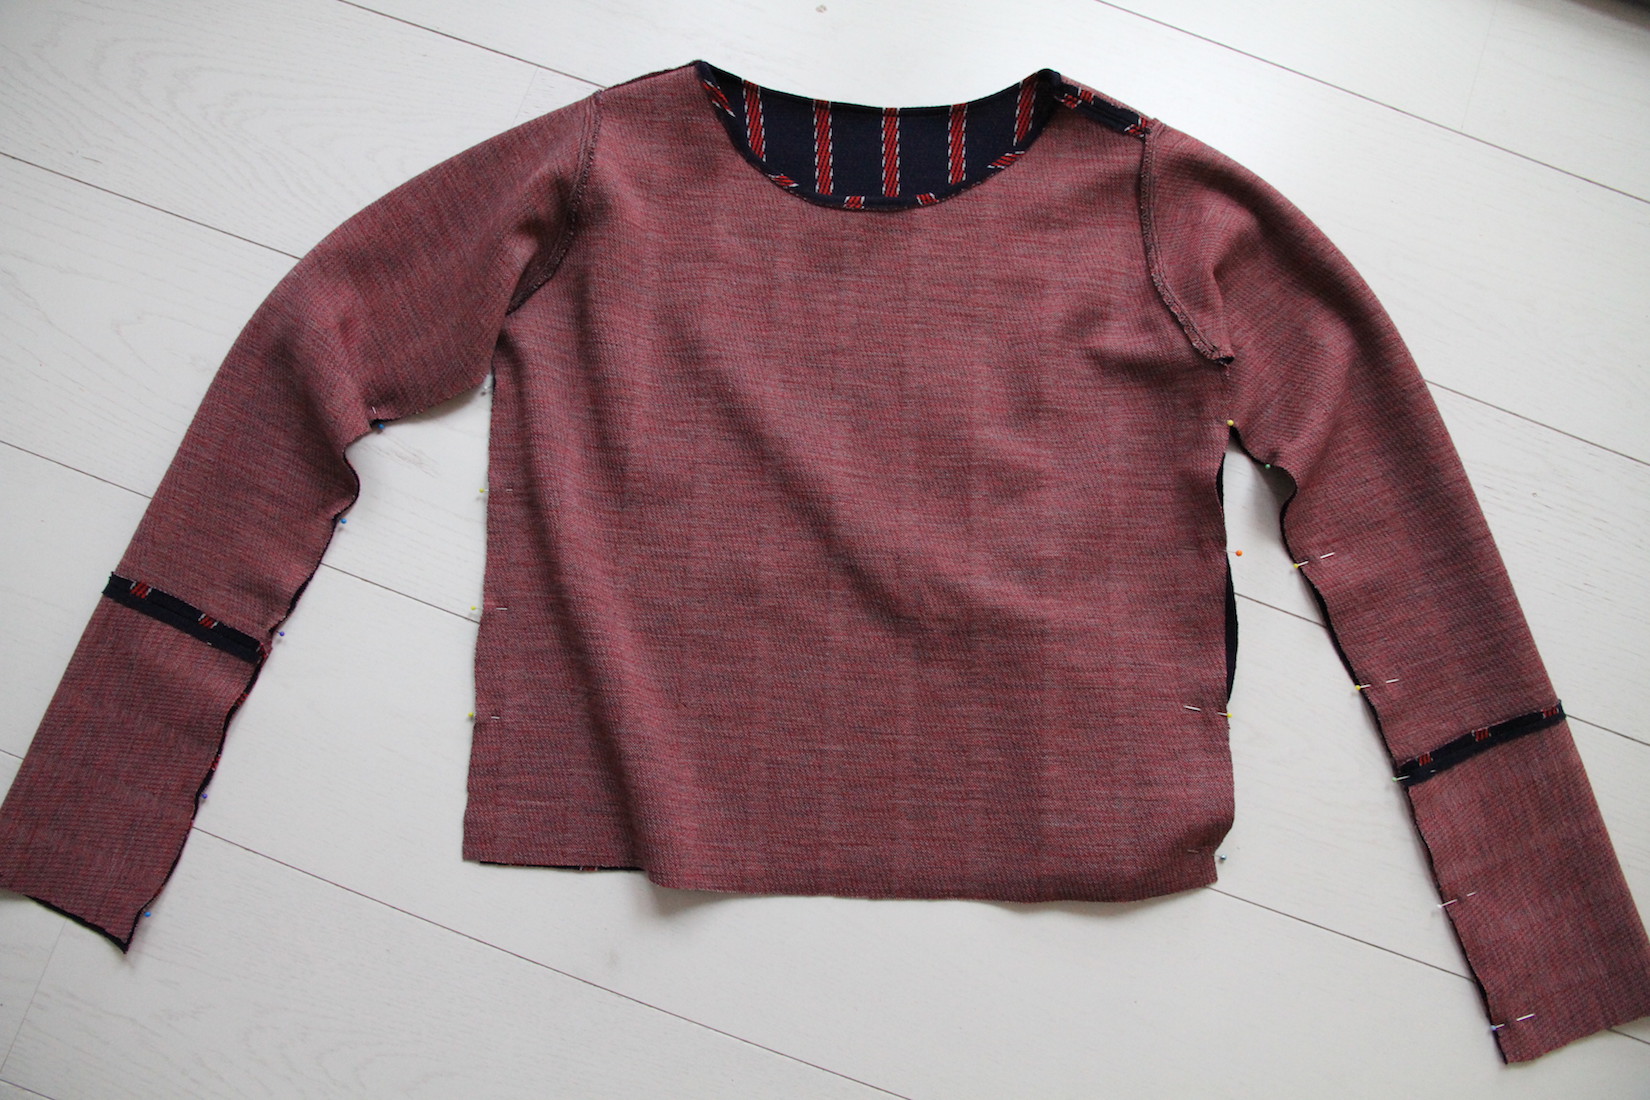
I. Top pieces cut out looked like this. Sleeves could of course have been cut out in one piece, but I wanted to add some detail with the stripes in the opposite direction for the ends of the sleeves.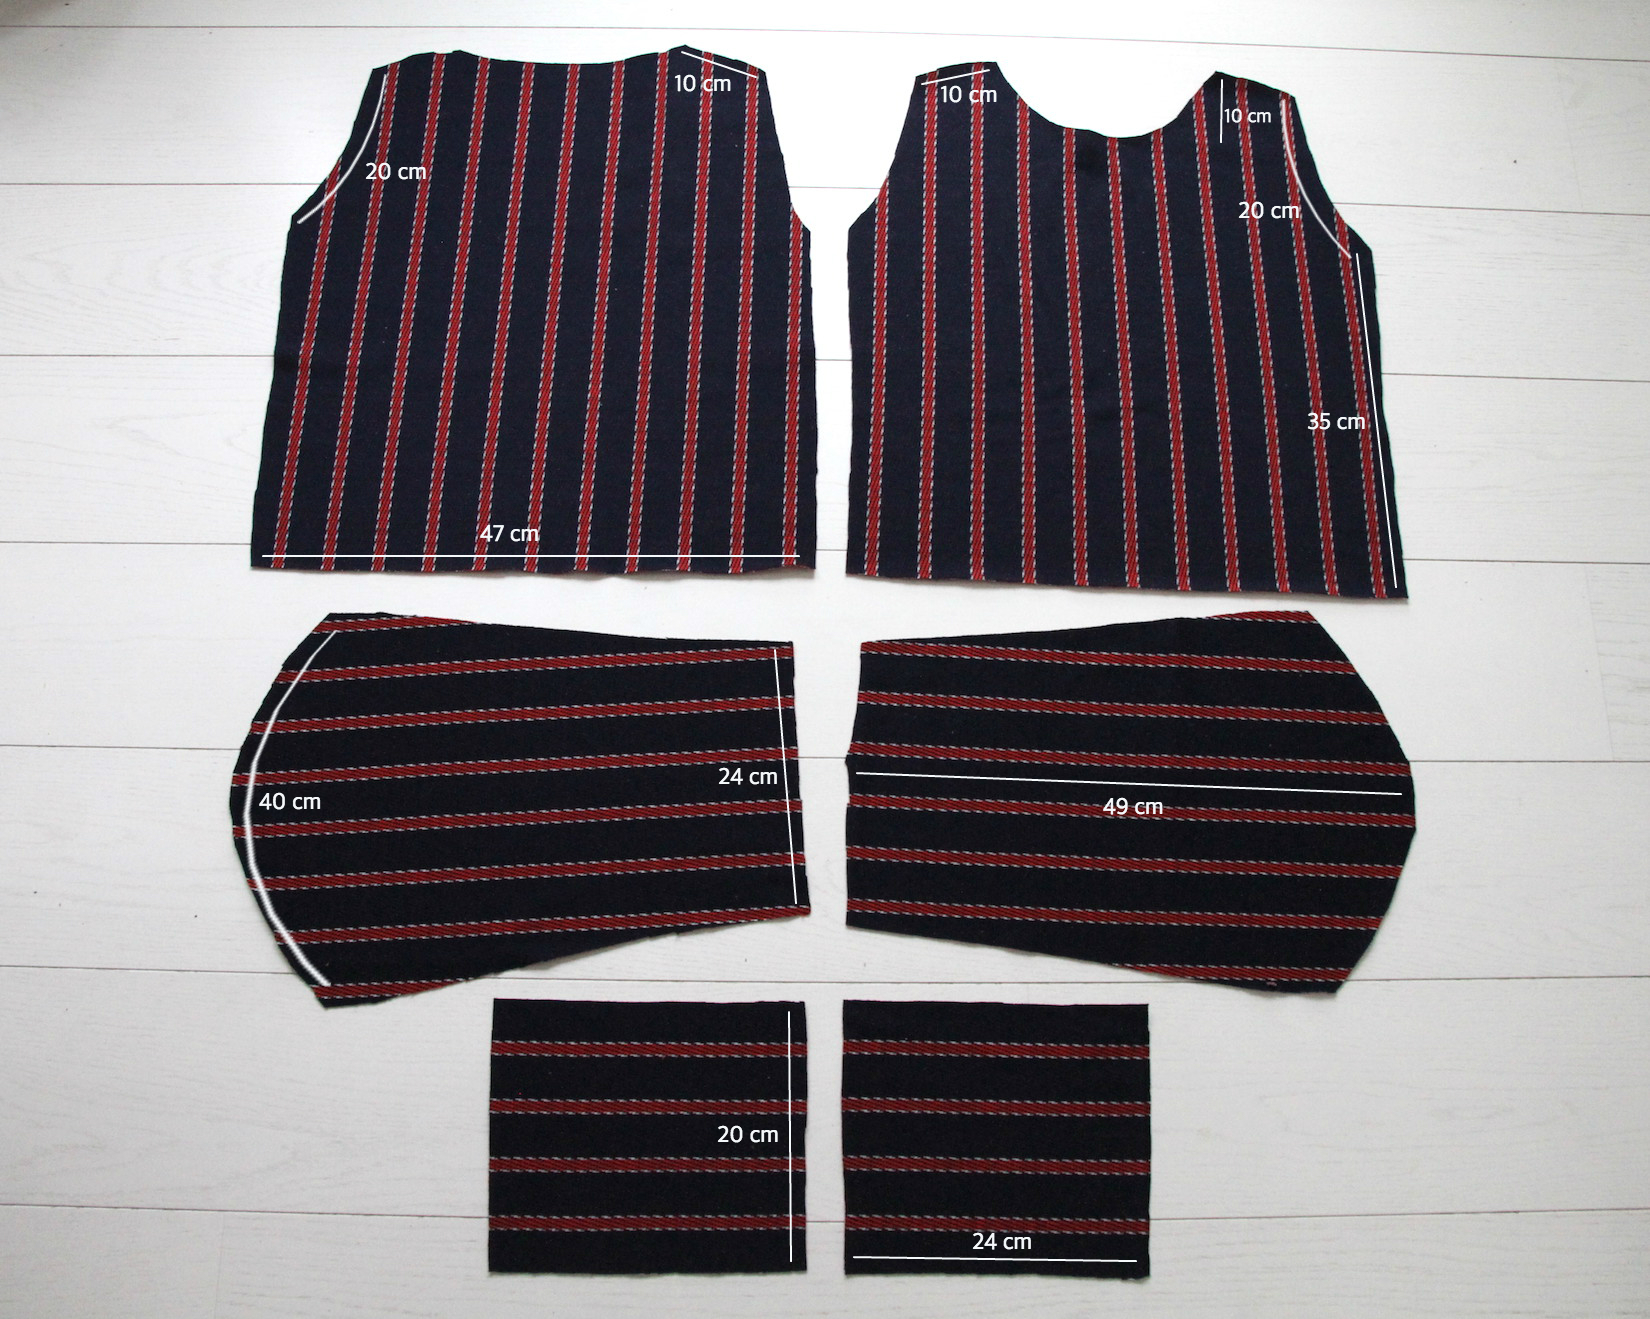
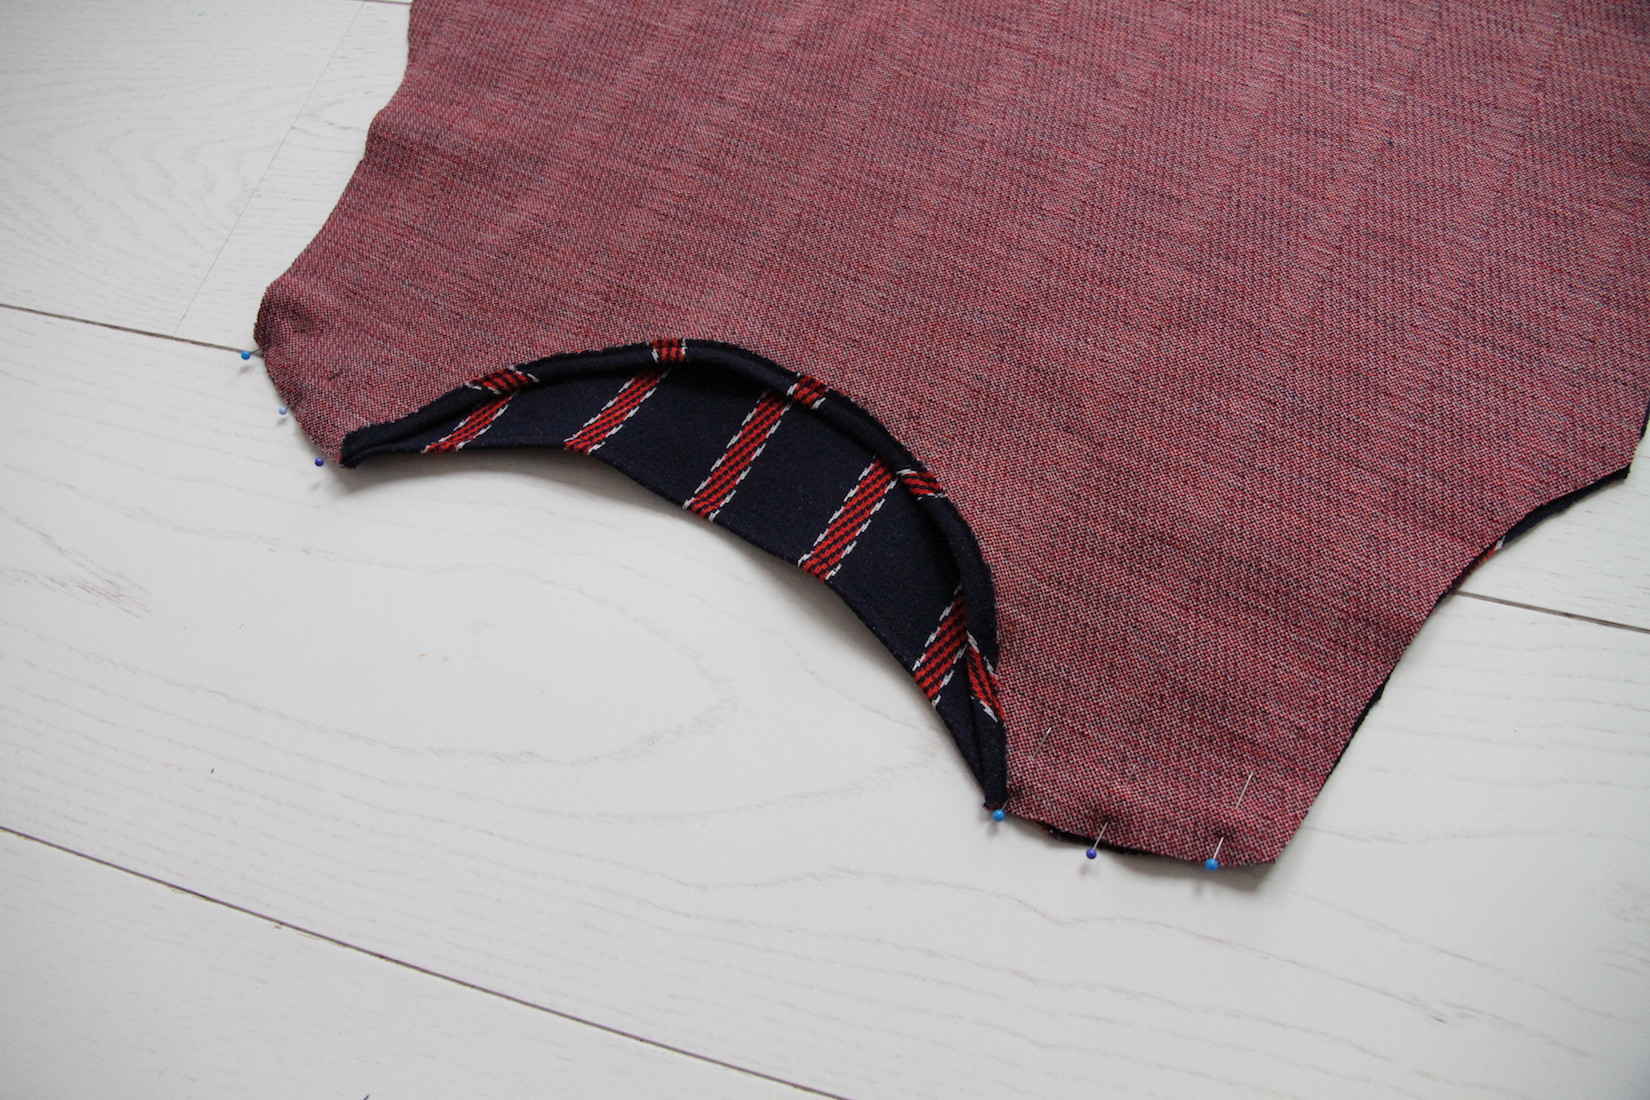
II. After doing a 1 cm fold at the neckline and sewing that in place, I pinned the shoulder seams together, right sides facing, and sewed them together.
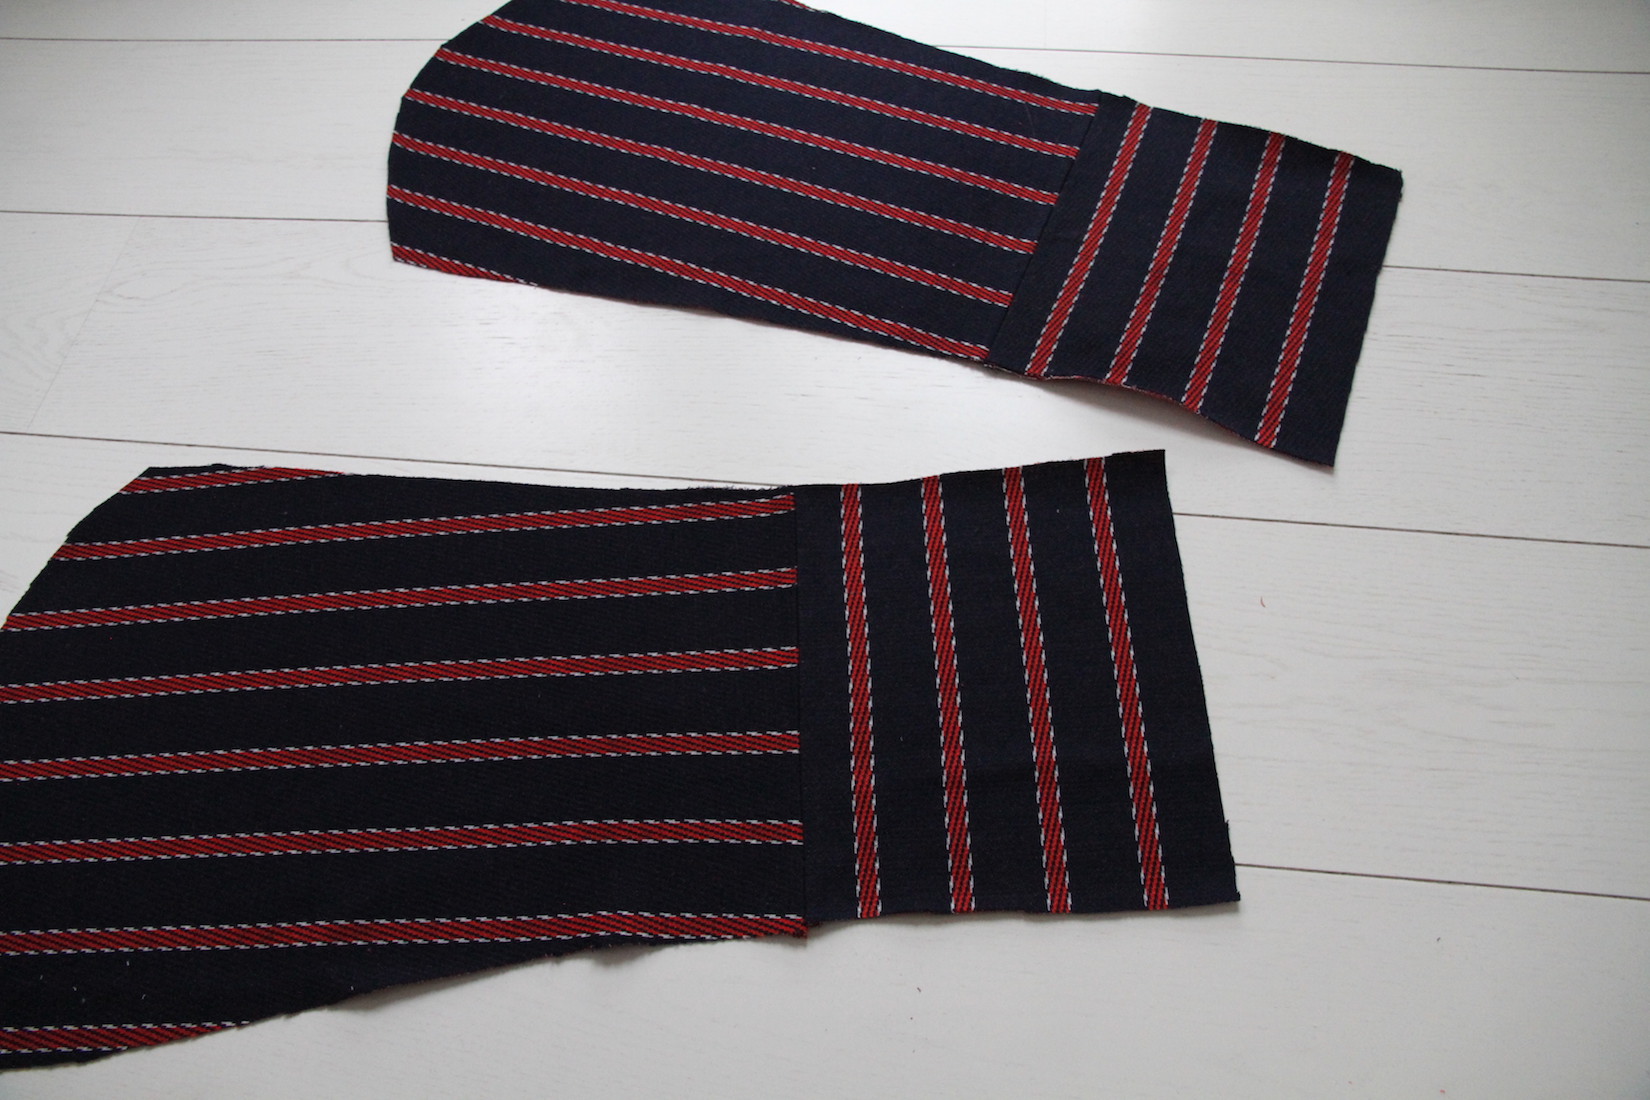
III. Then prepped my sleeves by sewing the extension pieces to the main sleeve pieces, pressing the seams.
IV. Next I pinned the sleeves to the arm holes and sewed them in place. I did zig-zag the seam allowances together at this point, and press them towards the top, away from the sleeves. Also top-stitched the seam allowance in place on the right side.
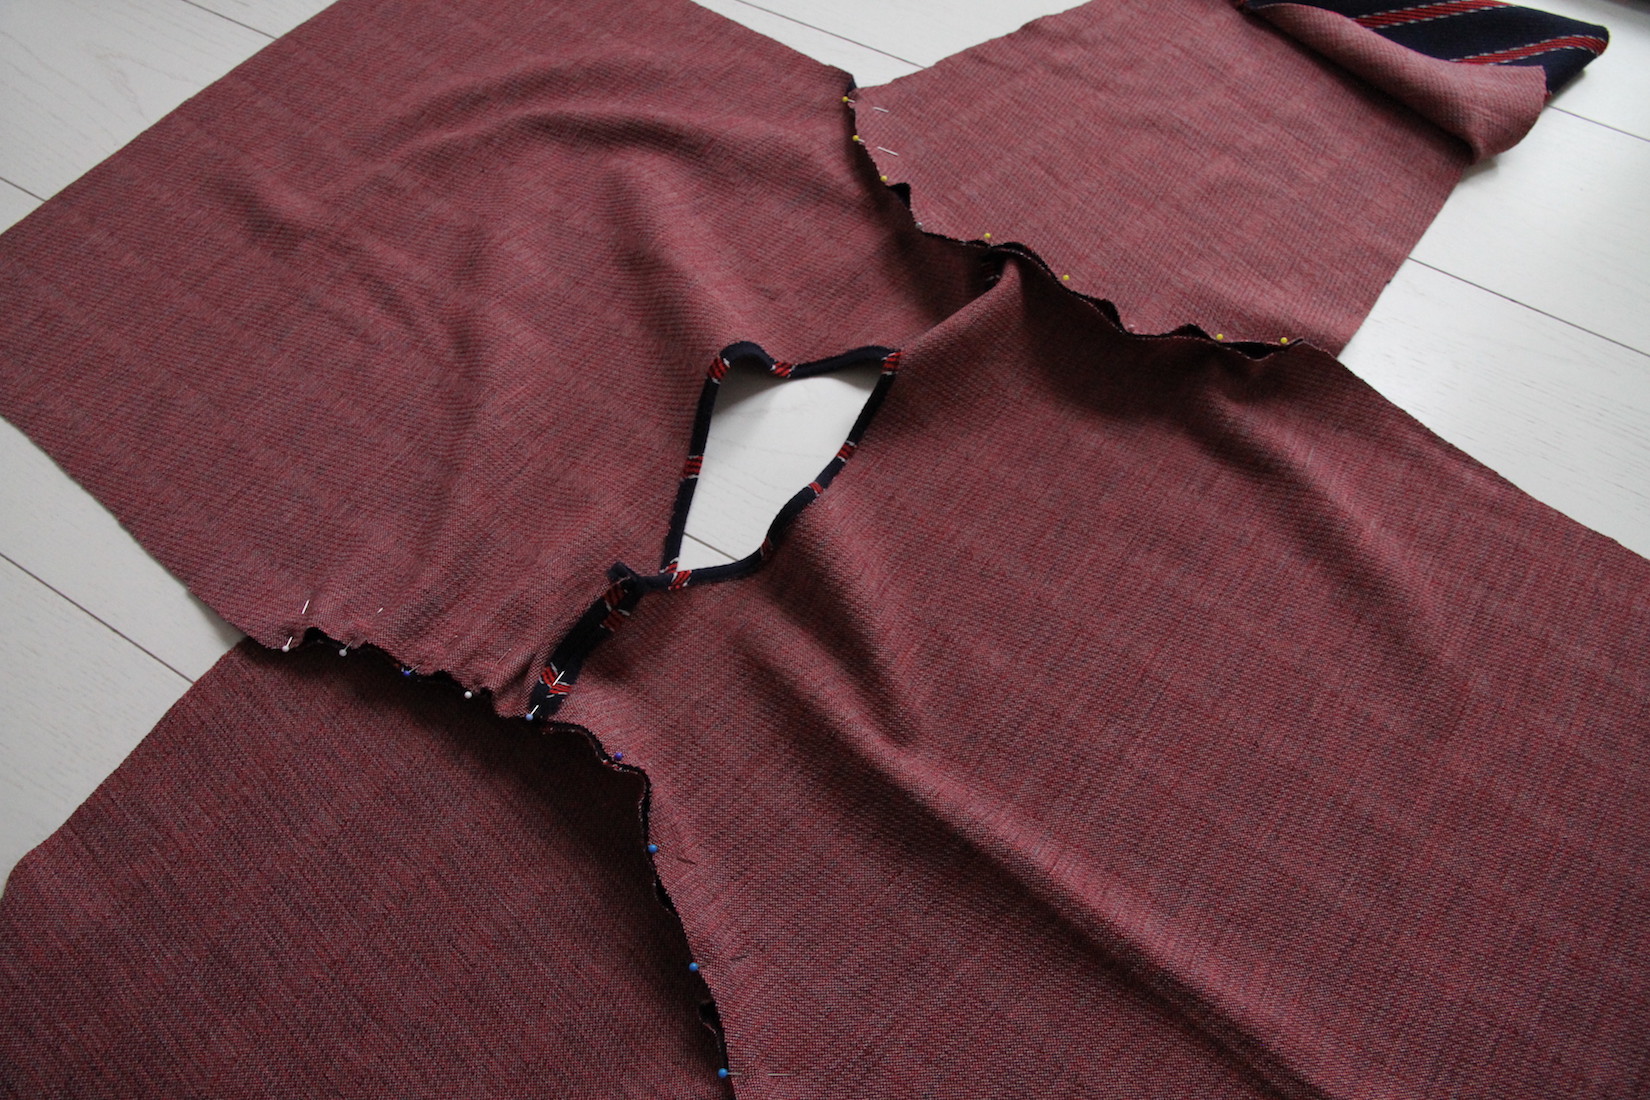
V. Then pinned the sleeve under seams and the sides together, sewed all the way except for 7 or so cm at the hem where I did small slits like with the back of the skirt. Pressed the seams open. Finally hemmed the top with a quick hand-stitched fold, same thing for the sleeves.
Straight up into the top 3 most comfortable things I own.


xo,
Julia


Je te suis déjà sur Instagram depuis un bon bout de temps, et je tiens à te dire que toutes tes créations sont magnifiques, bravo. Je ne sais pas coudre mais tu me donnes vraiment envie d'apprendre, merci Julia. Keep up the good work.
ReplyDeleteMerci, c'est trop gentil! Je suis super contente qu'il y a quelqu'une qui trouve mes petits projects inspirants:)
DeleteThis comment has been removed by the author.
ReplyDeleteThank you:)
ReplyDelete