

This project comes with a funny story about me forgetting I have hips.
I had this amazing tassel-covered Jonathan Simkhai dream waiting in my inspiration folder. I started with the skirt, and completely messed up the measurements. I basically calculated the fabric to have 25% more stretch than it actually had. As a result, when I was trying the skirt on halfway through, it fit perfectly everywhere... Except around my hips. I stared at myself in the mirror, contemplating all the different ways in which I could salvage the project (extra fabric insert? not needing to cover the other half of my bum?) but finally accepted defeat. At this point I had also realized I didn't have enough fabric to re-do the skirt, since I really still wanted to make the top. So I decided to forget the skirt, and make shorts out of its remains. My only regret through this process is not taking a photo of that epic ass-less skirt - I'm sure you all would have appreciated it.
So that's the story on why this 2-piece tutorial became a 1 top tutorial. After the skirt debacle, it was really late and dark by the time I got to making the shorts - documenting was not a priority..
So back to the point. In this tutorial I also finally documented the burrito method for sewing a lined top - hands down my favourite sewing term.
Tutorials take a lot of time & effort to create, and I choose to make mine available for free. If you enjoy this guide, you can support me with a donation that feels right for you, here.
TOOLS:
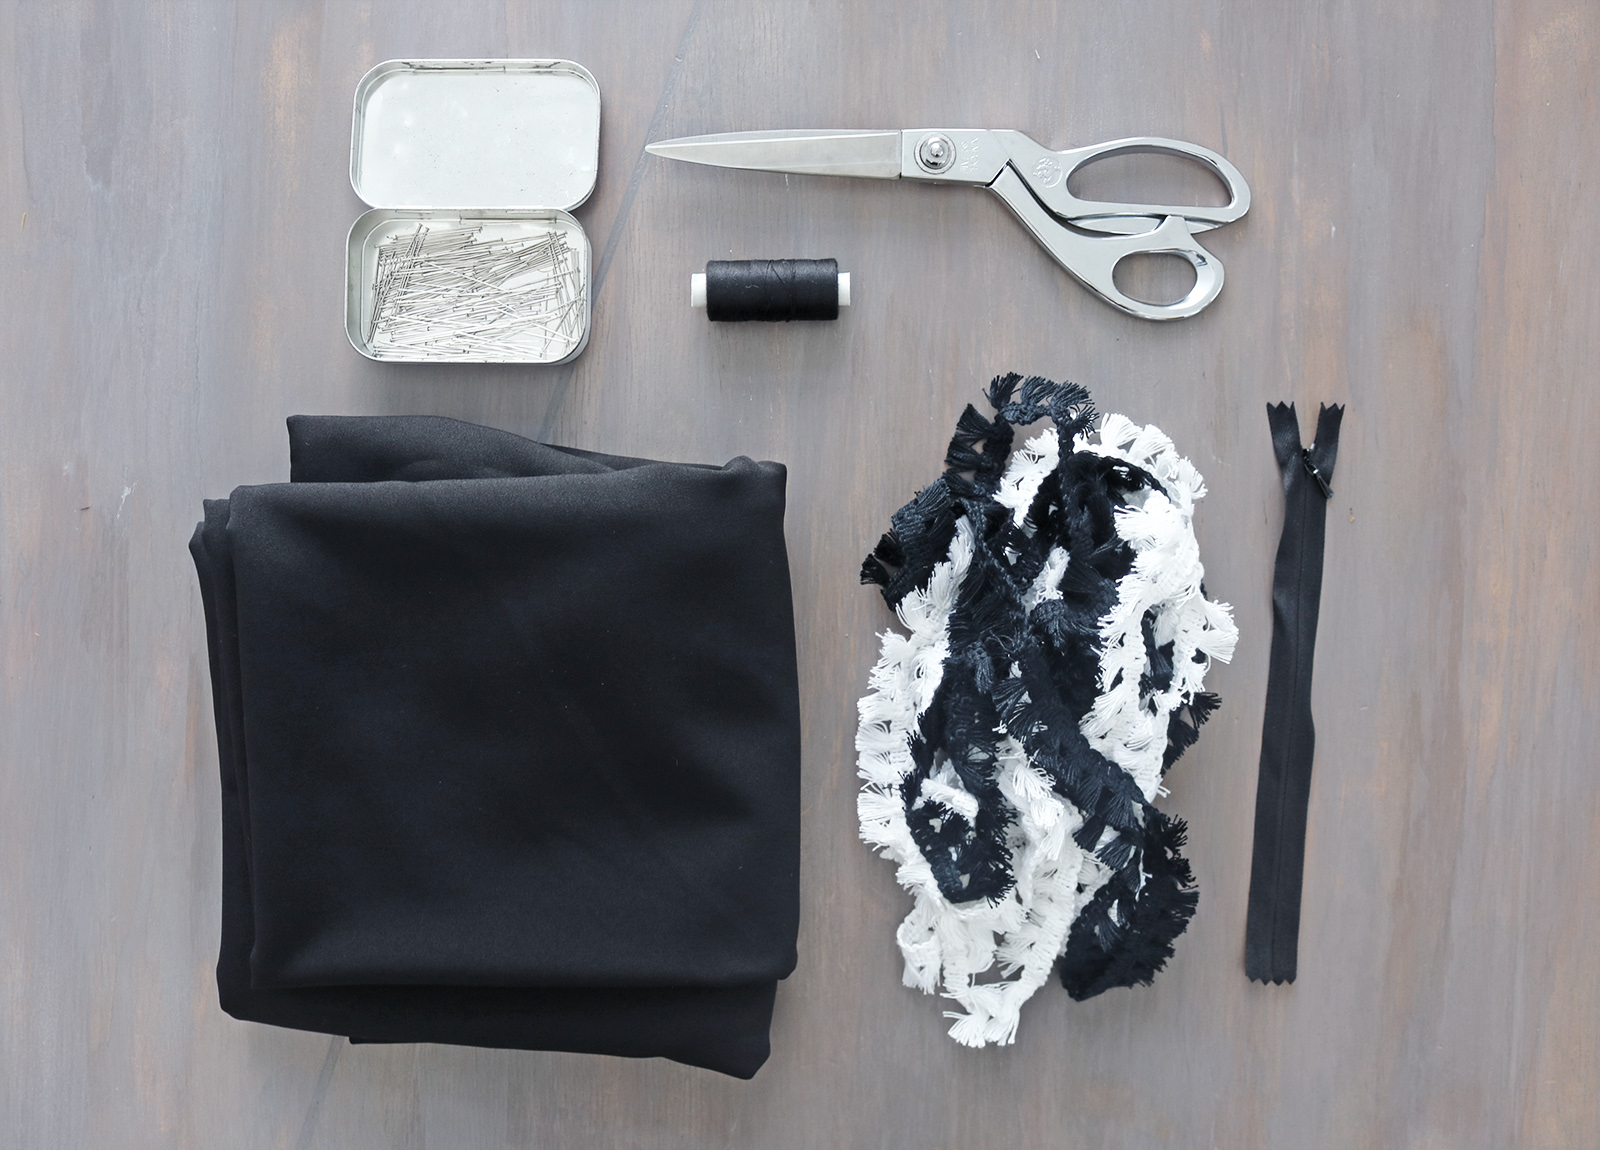
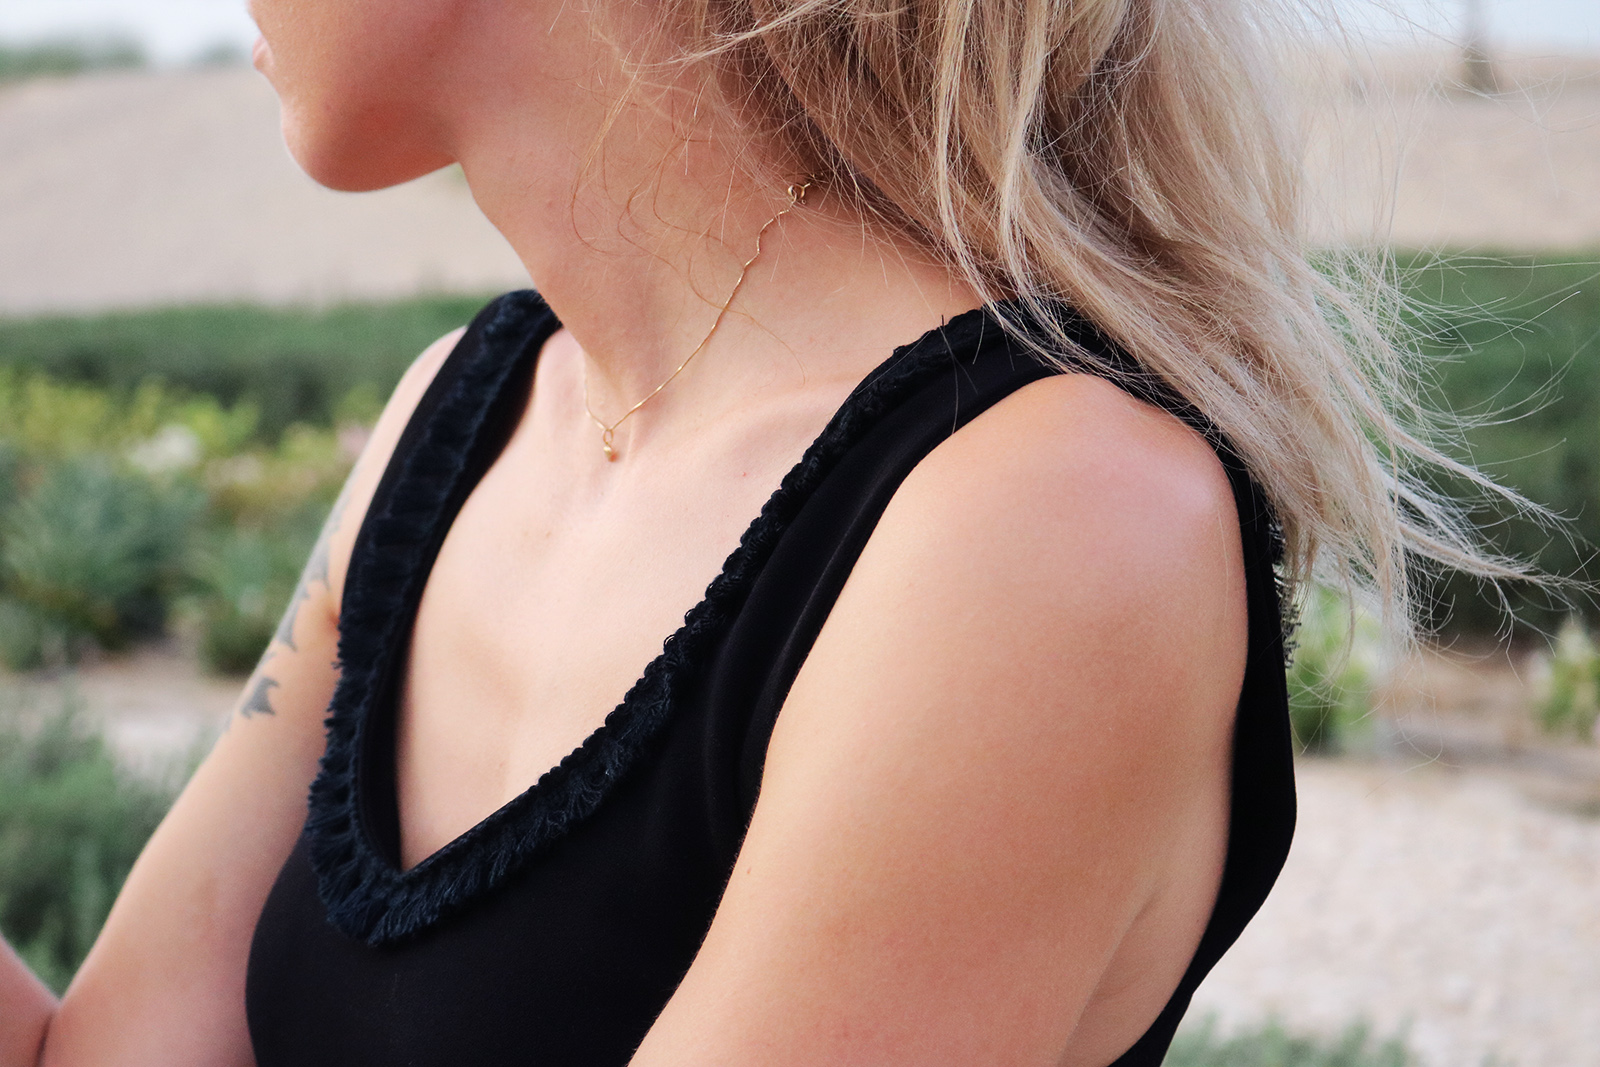
Fabric (I used a stretchy, medium-thick lycra mix) 1m or so for the top | Thread & sewing machine | Scissors | Pins | Tassel trim, two colours (Ignore the zipper, I also made shorts which I used that for)
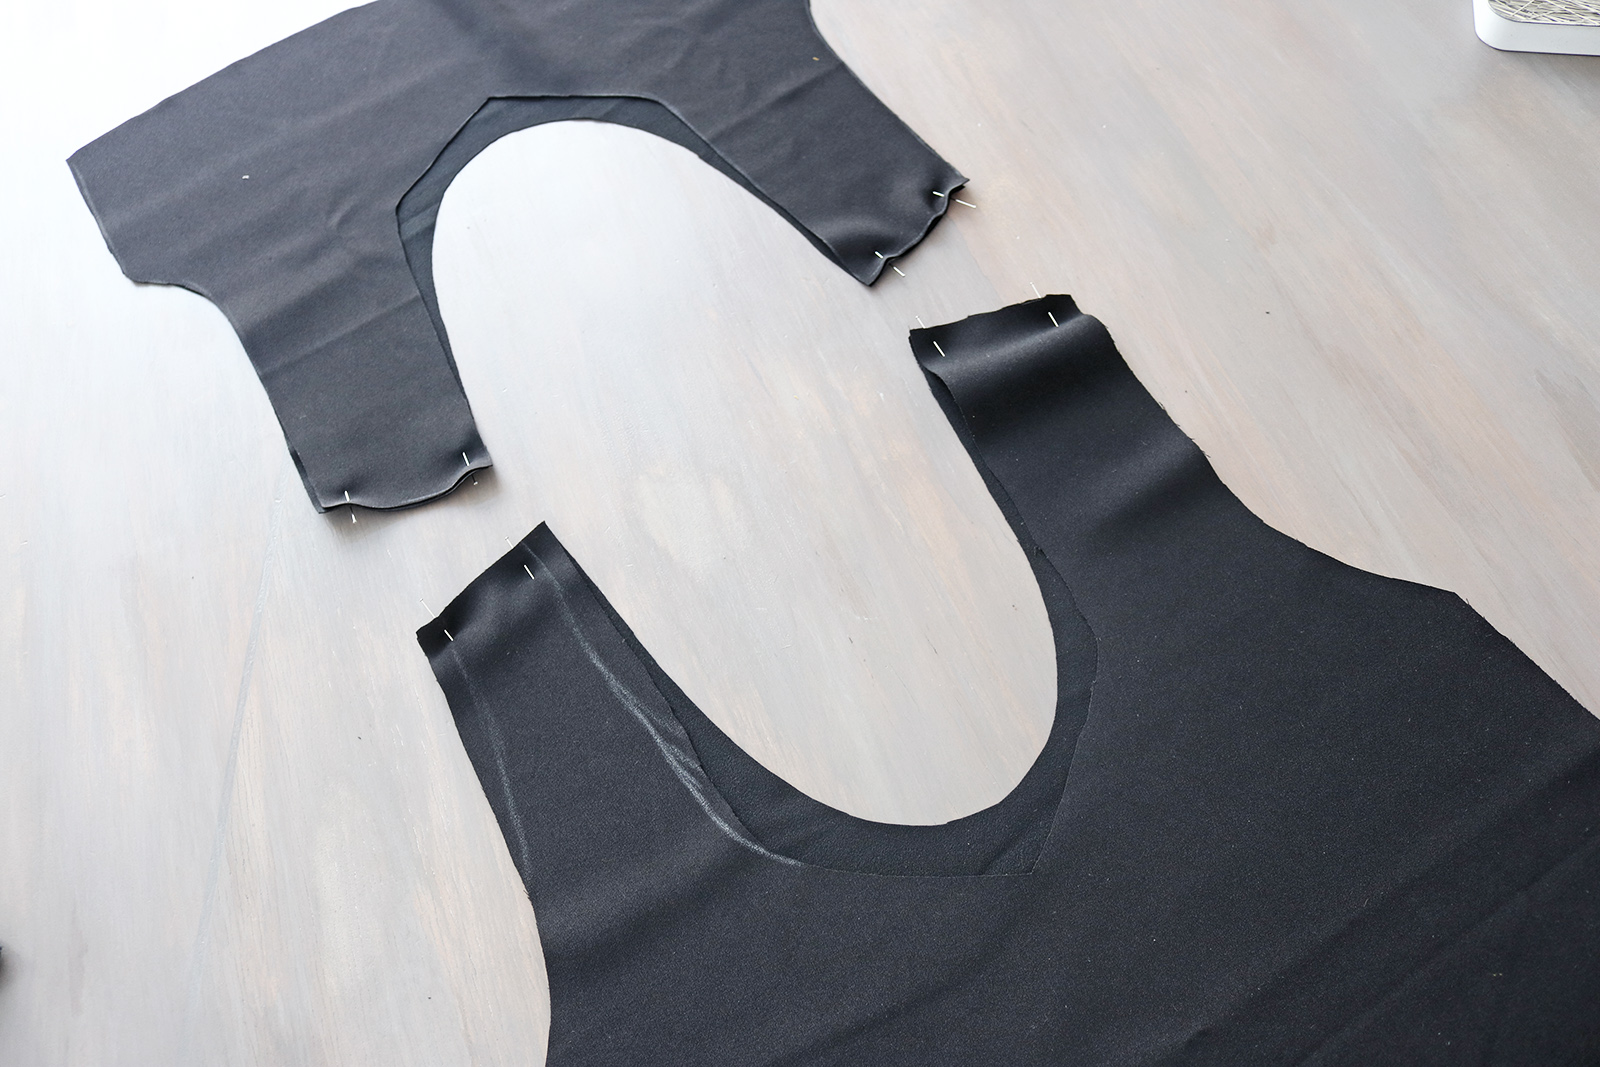
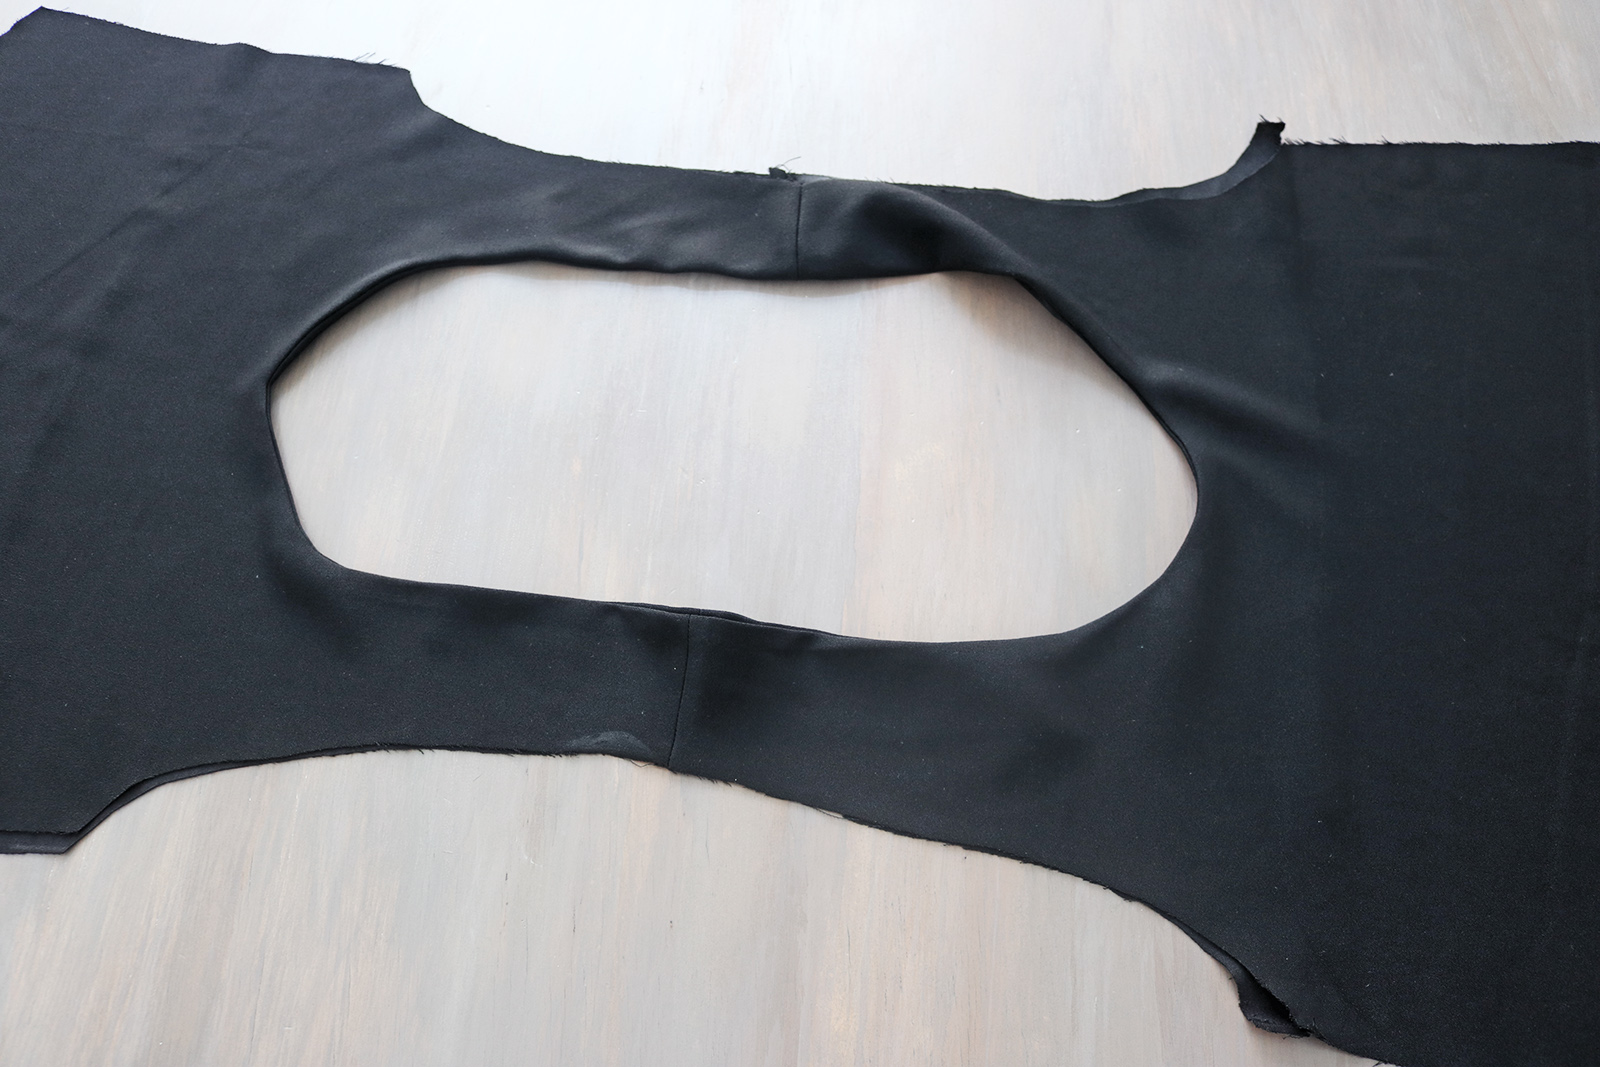
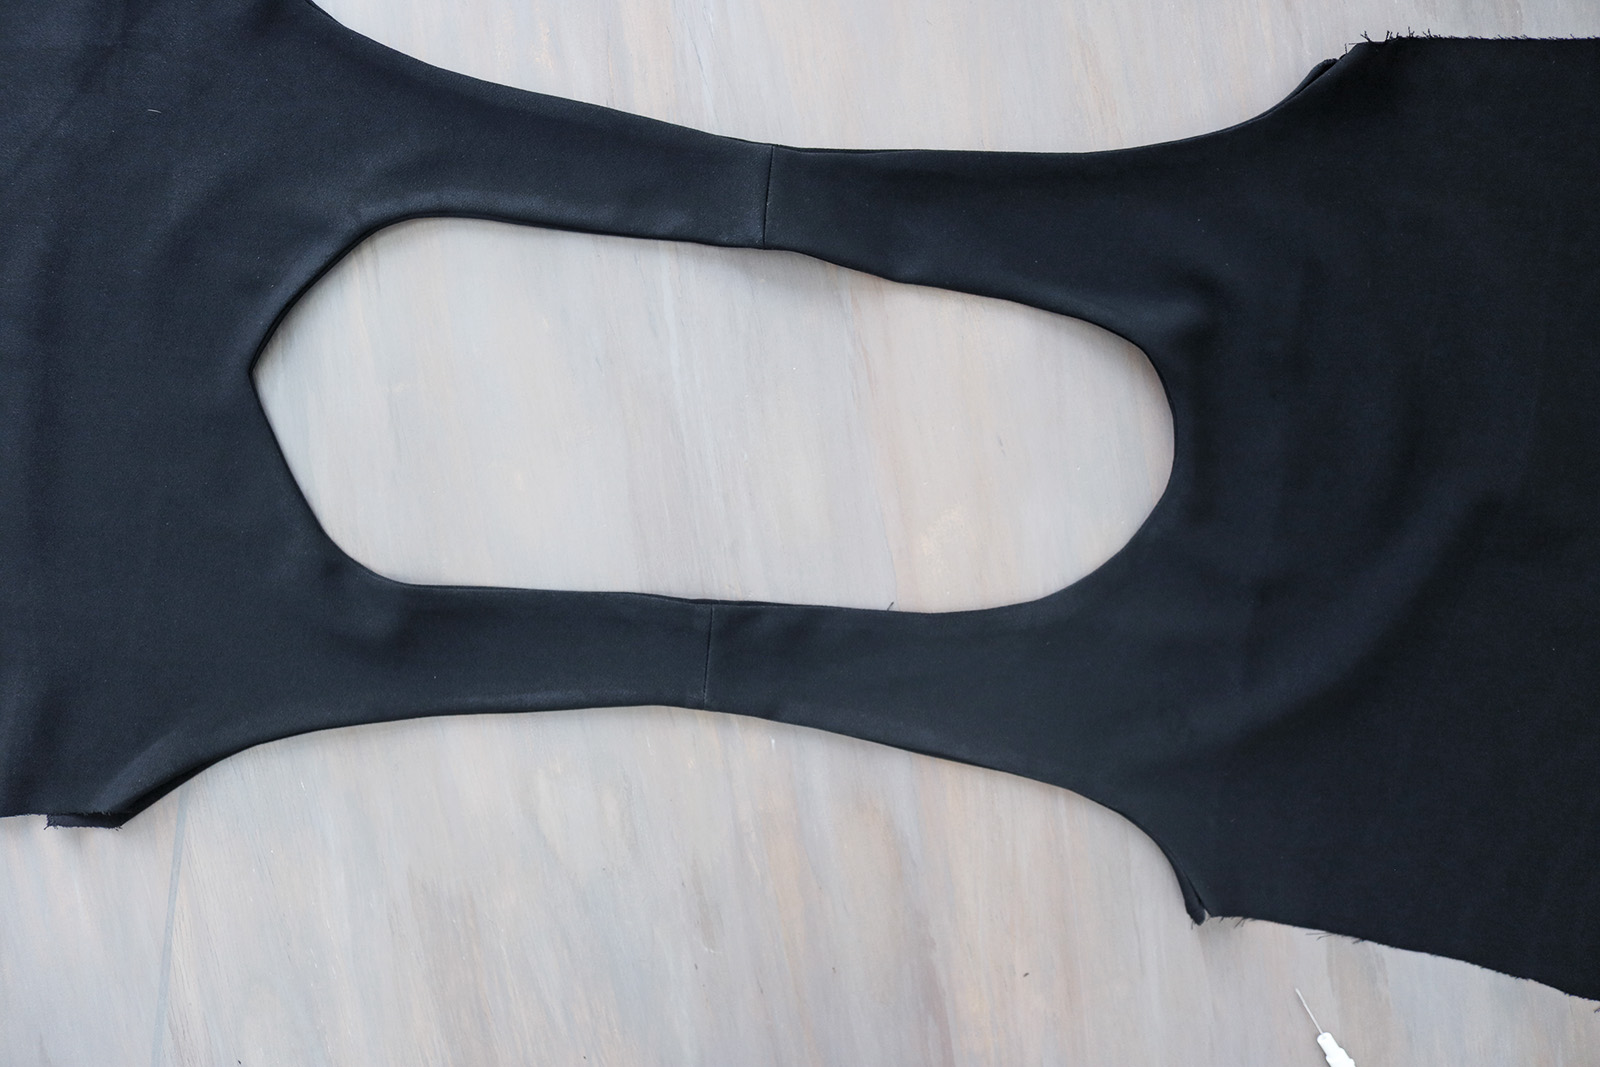
I. My cut pieces (for my size EU36/US4) below. As you can see, I had run out of fabric and this is what I could scrape together to make the lining... If you had a proper amount of fabric you'd of course make the lining piece for the front and for the back equal length...

III. Then placed the lining against the main top piece, right sides facing, pinning the neckline:
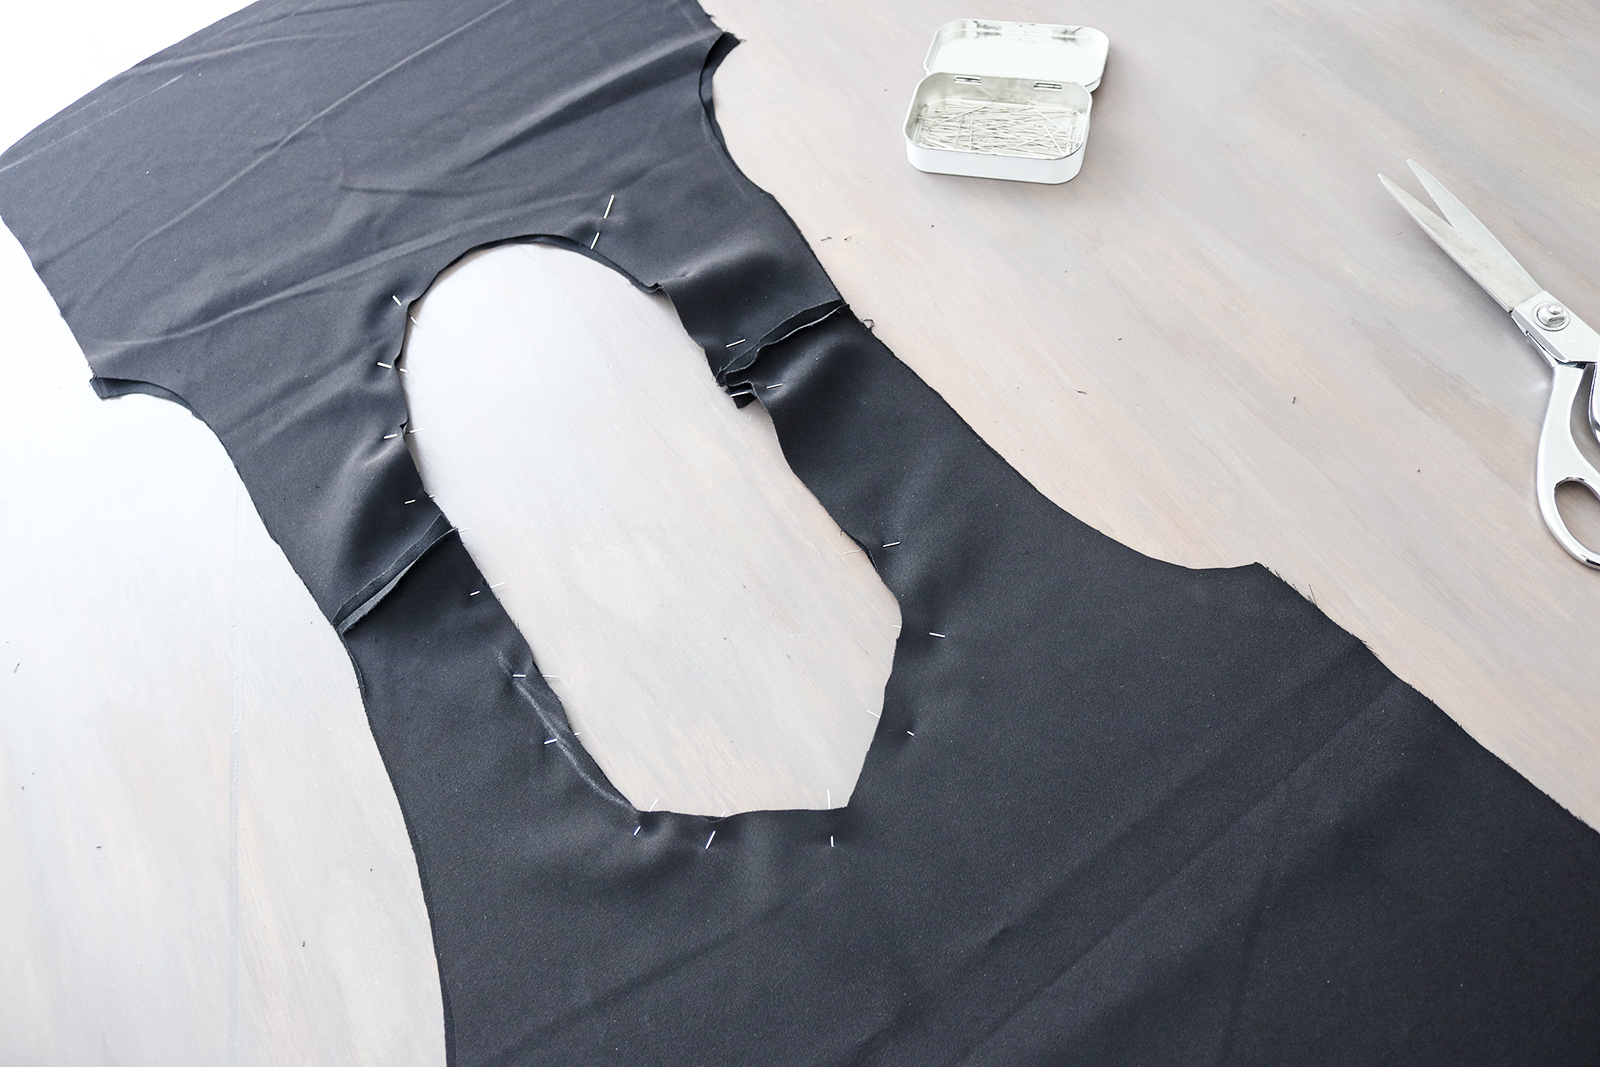
.. Sewing around it, and clipping the round edges (and the bottom of the V-ish shape, if that's the shap you have):
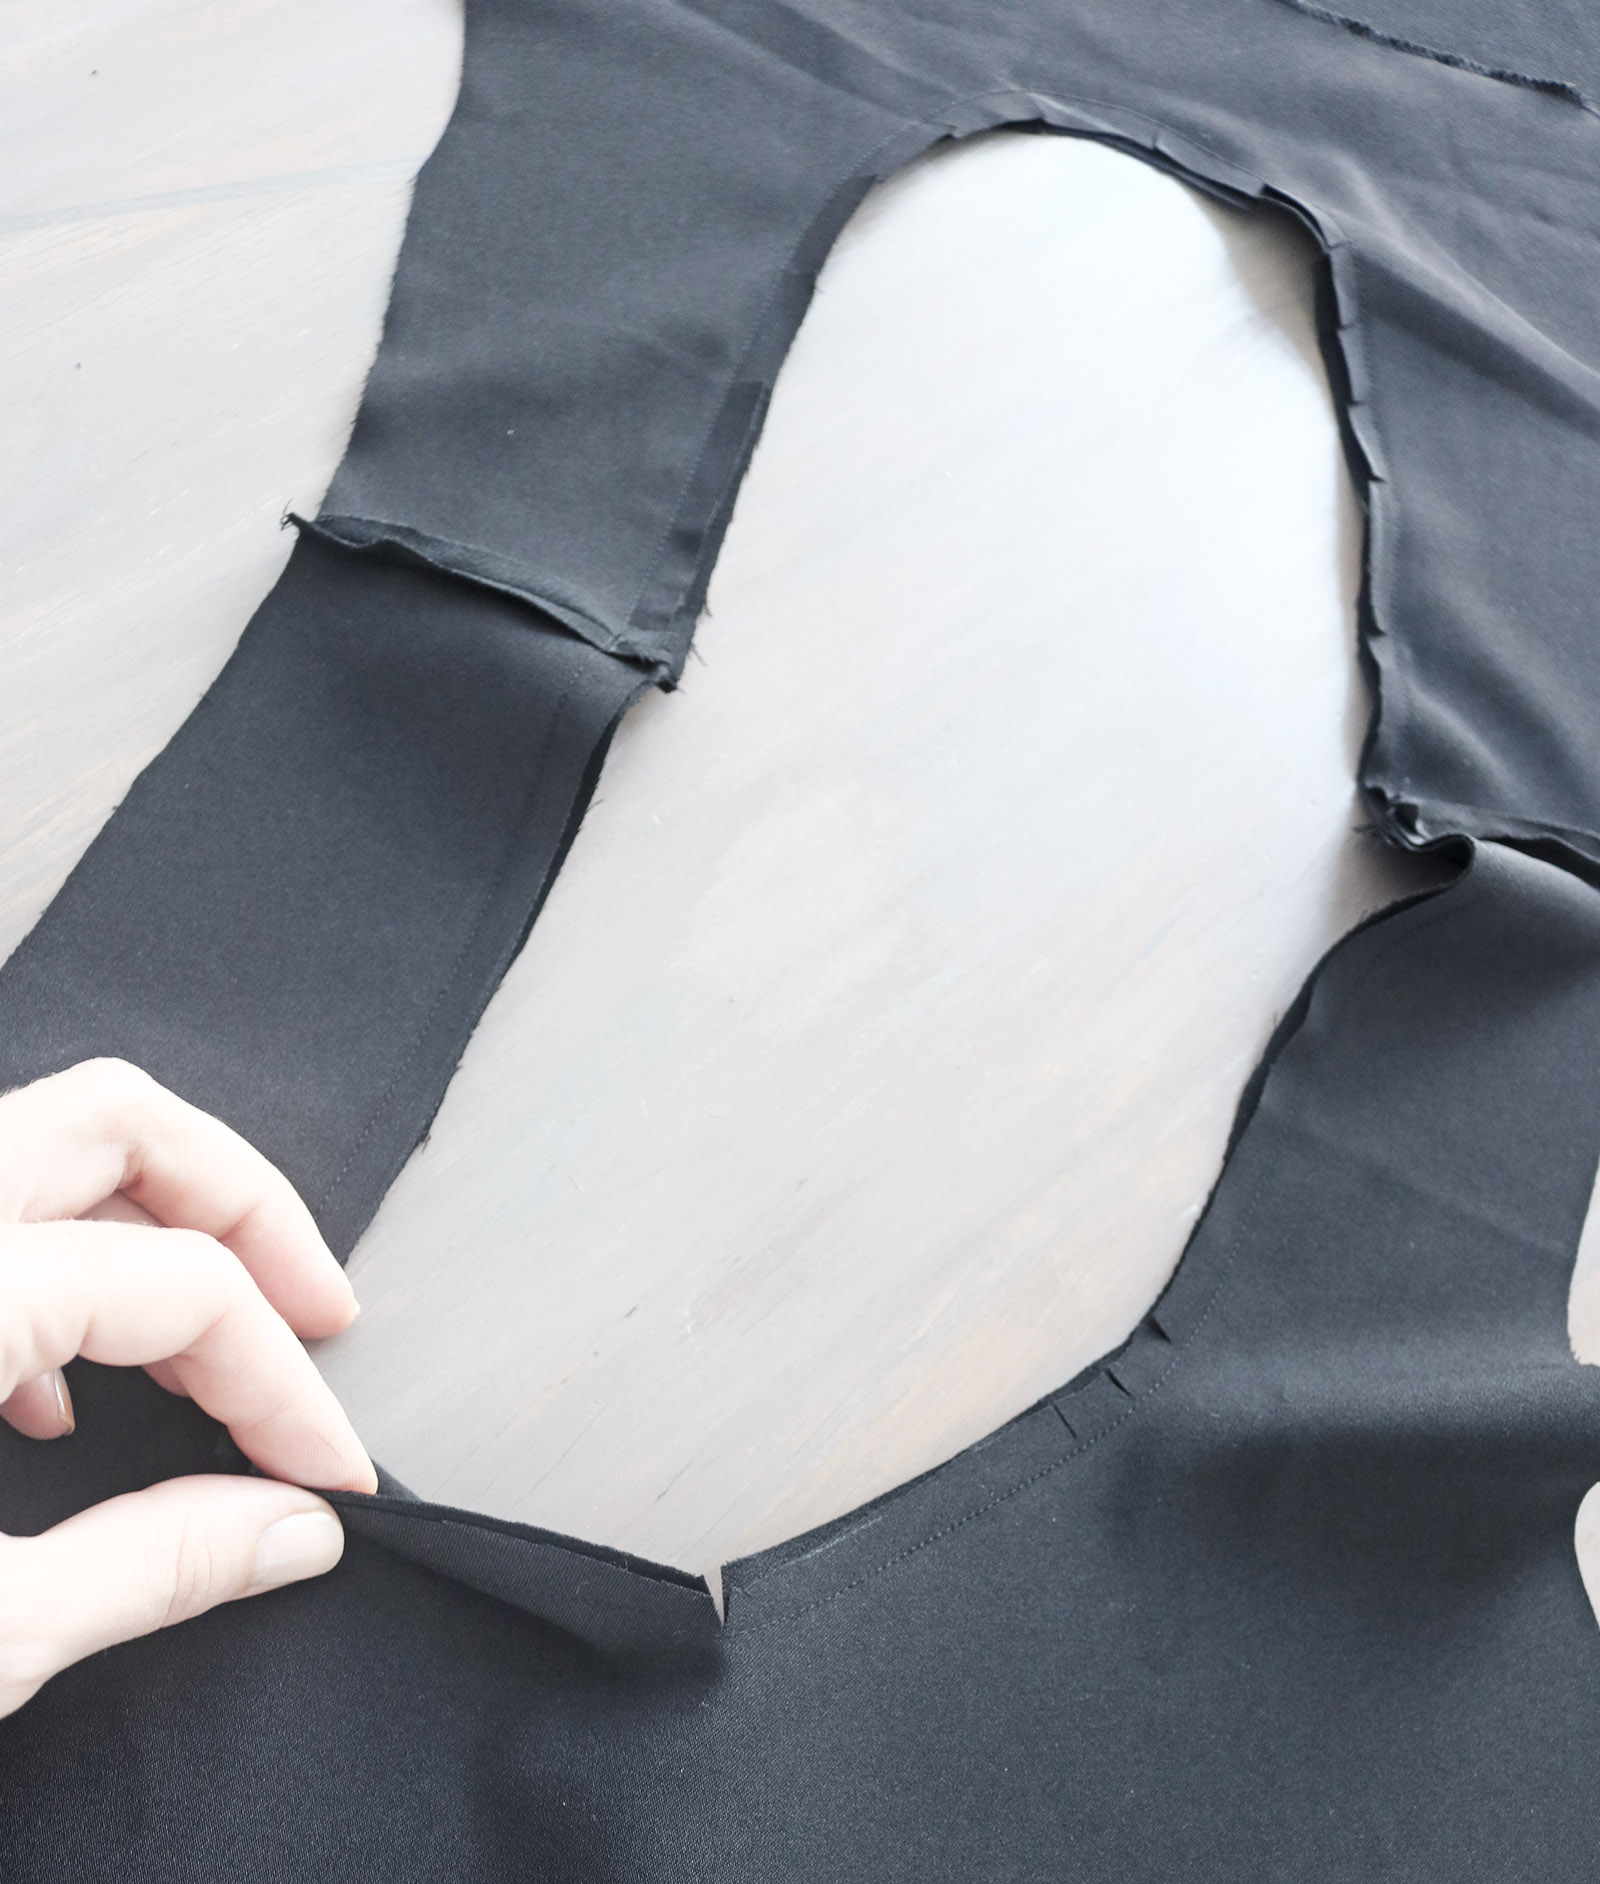
Flipped the lining on the reverse and pressed the neckline. If you are very curvy now would be a good time to incorporate a couple of darts around the bust area.
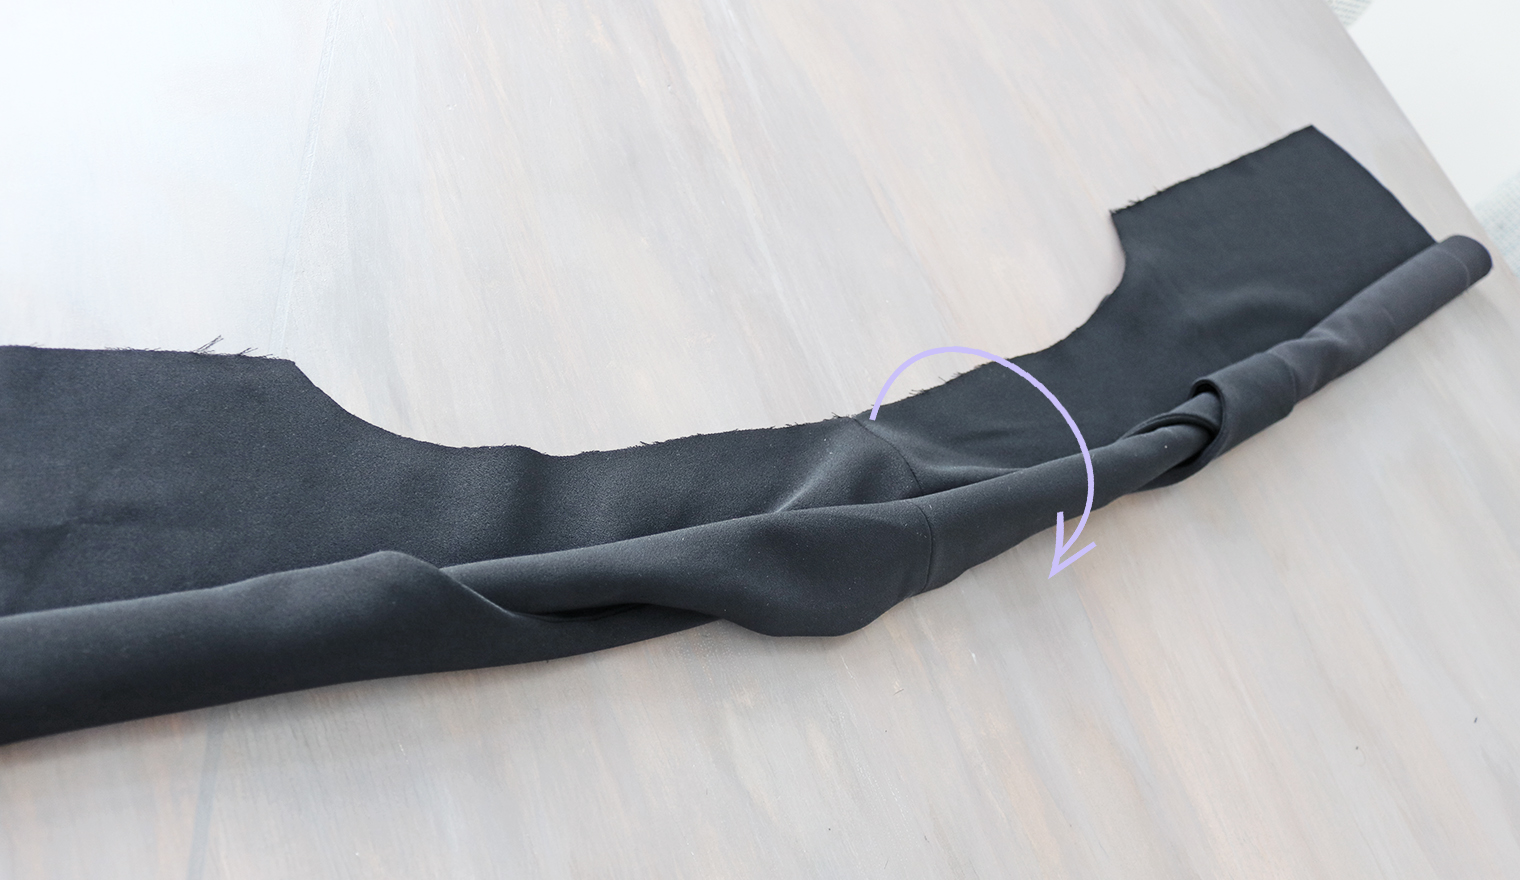
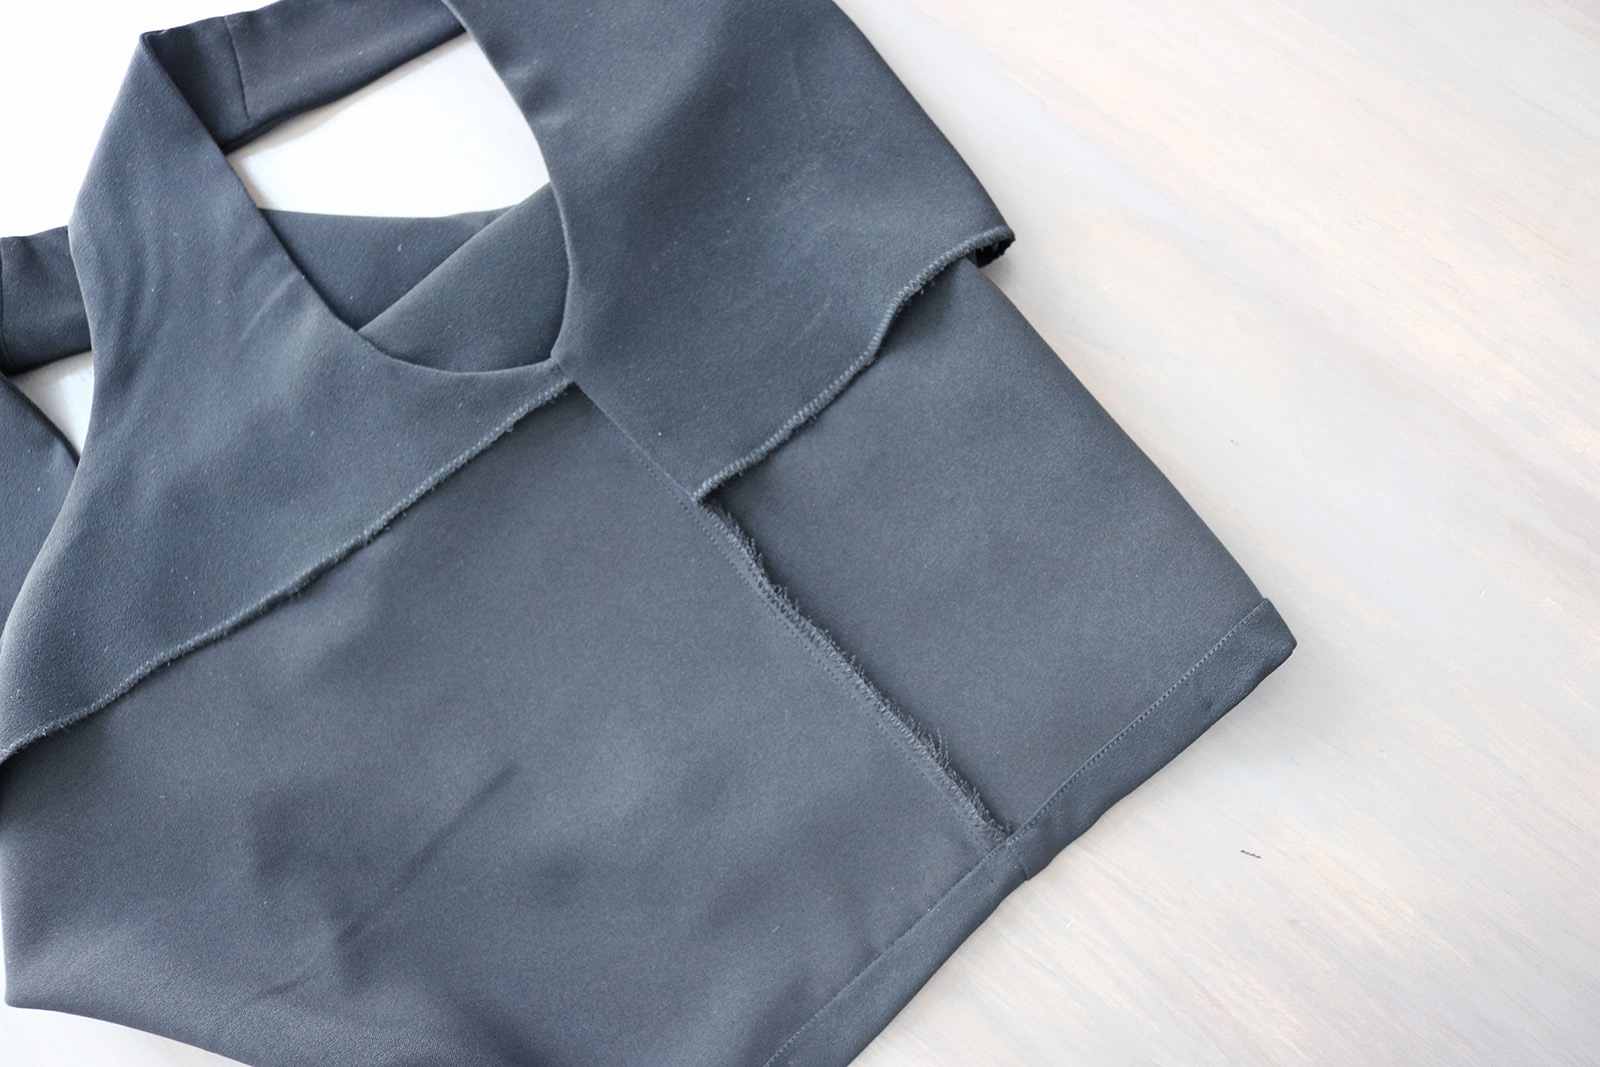
IV. Now the exciting burrito part!! If you would like video to support your endeavour, this one is clear in showing the steps. Start by rolling from one side, until you have rolled the whole thing into a burrito as shown below. Then grab the main top layer at the shoulder seam, where the purple arrow starts, and flip it over and under the burrito...
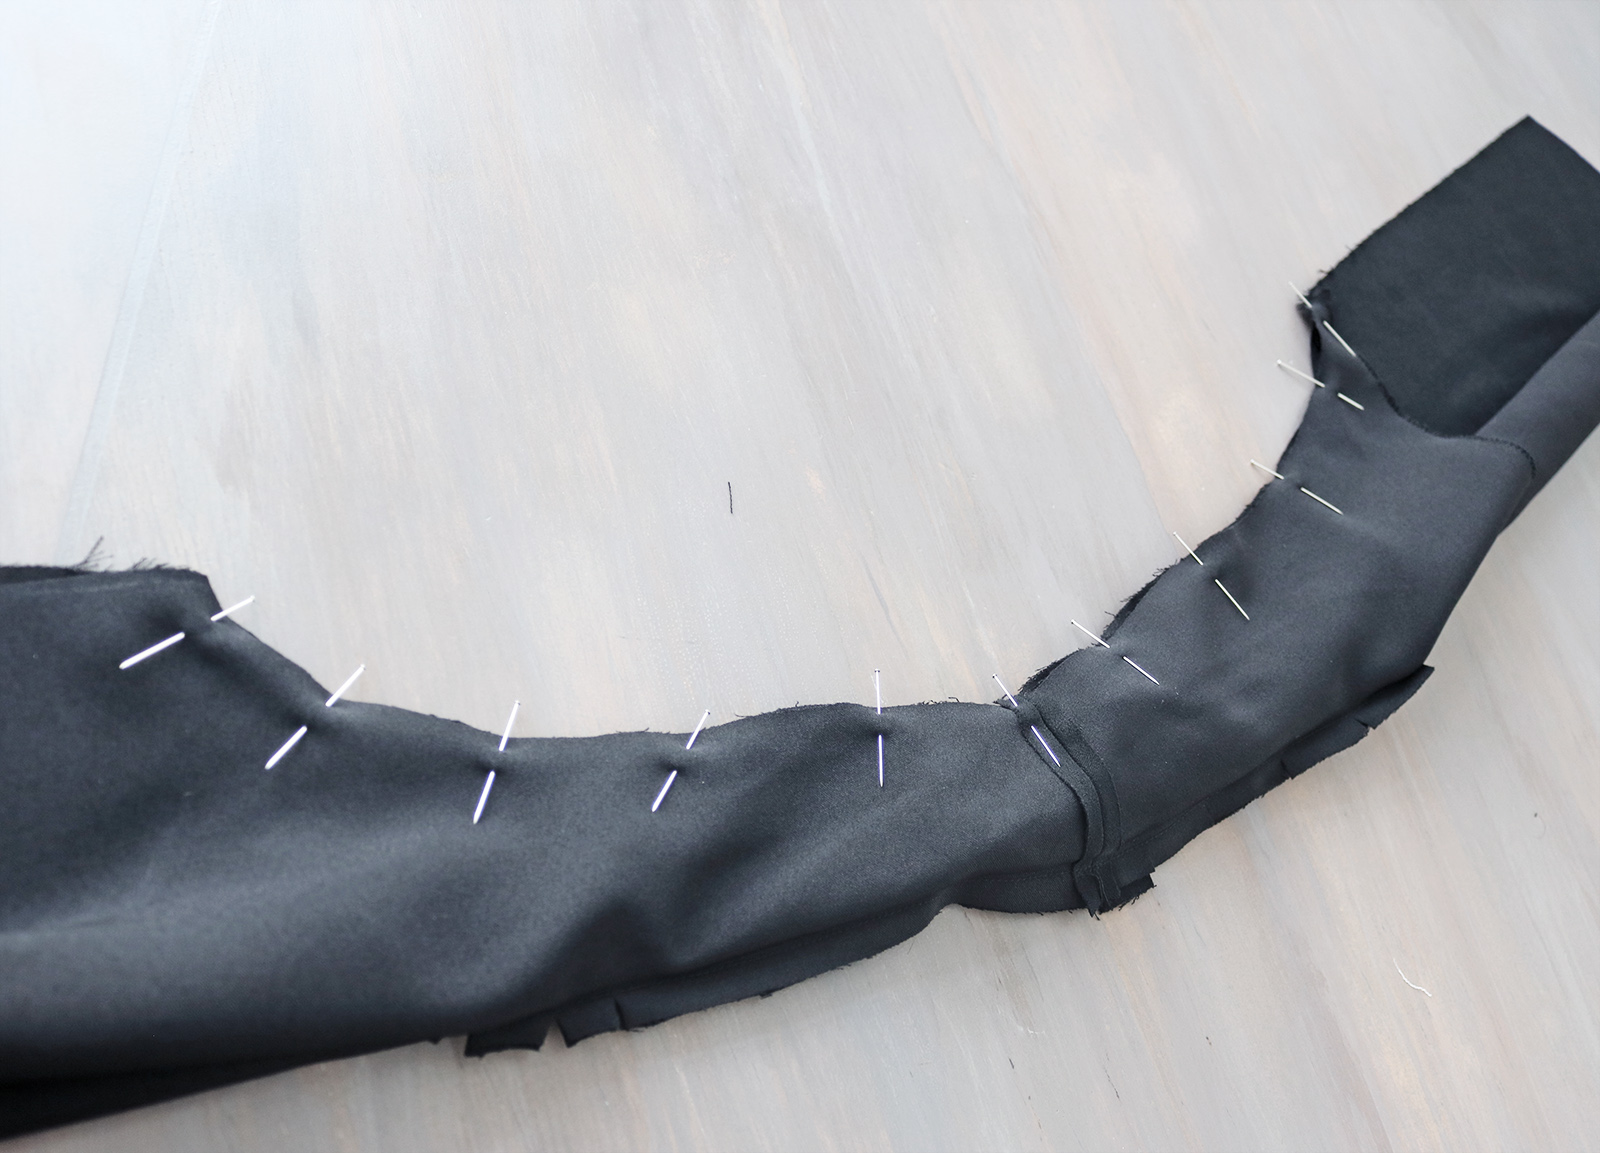
.. To bring it back around, so the shoulder seams meet again, right sides facing. Secure with a pin.

Then just continue pinning the arm hole, so that the burrito stays secured inside.
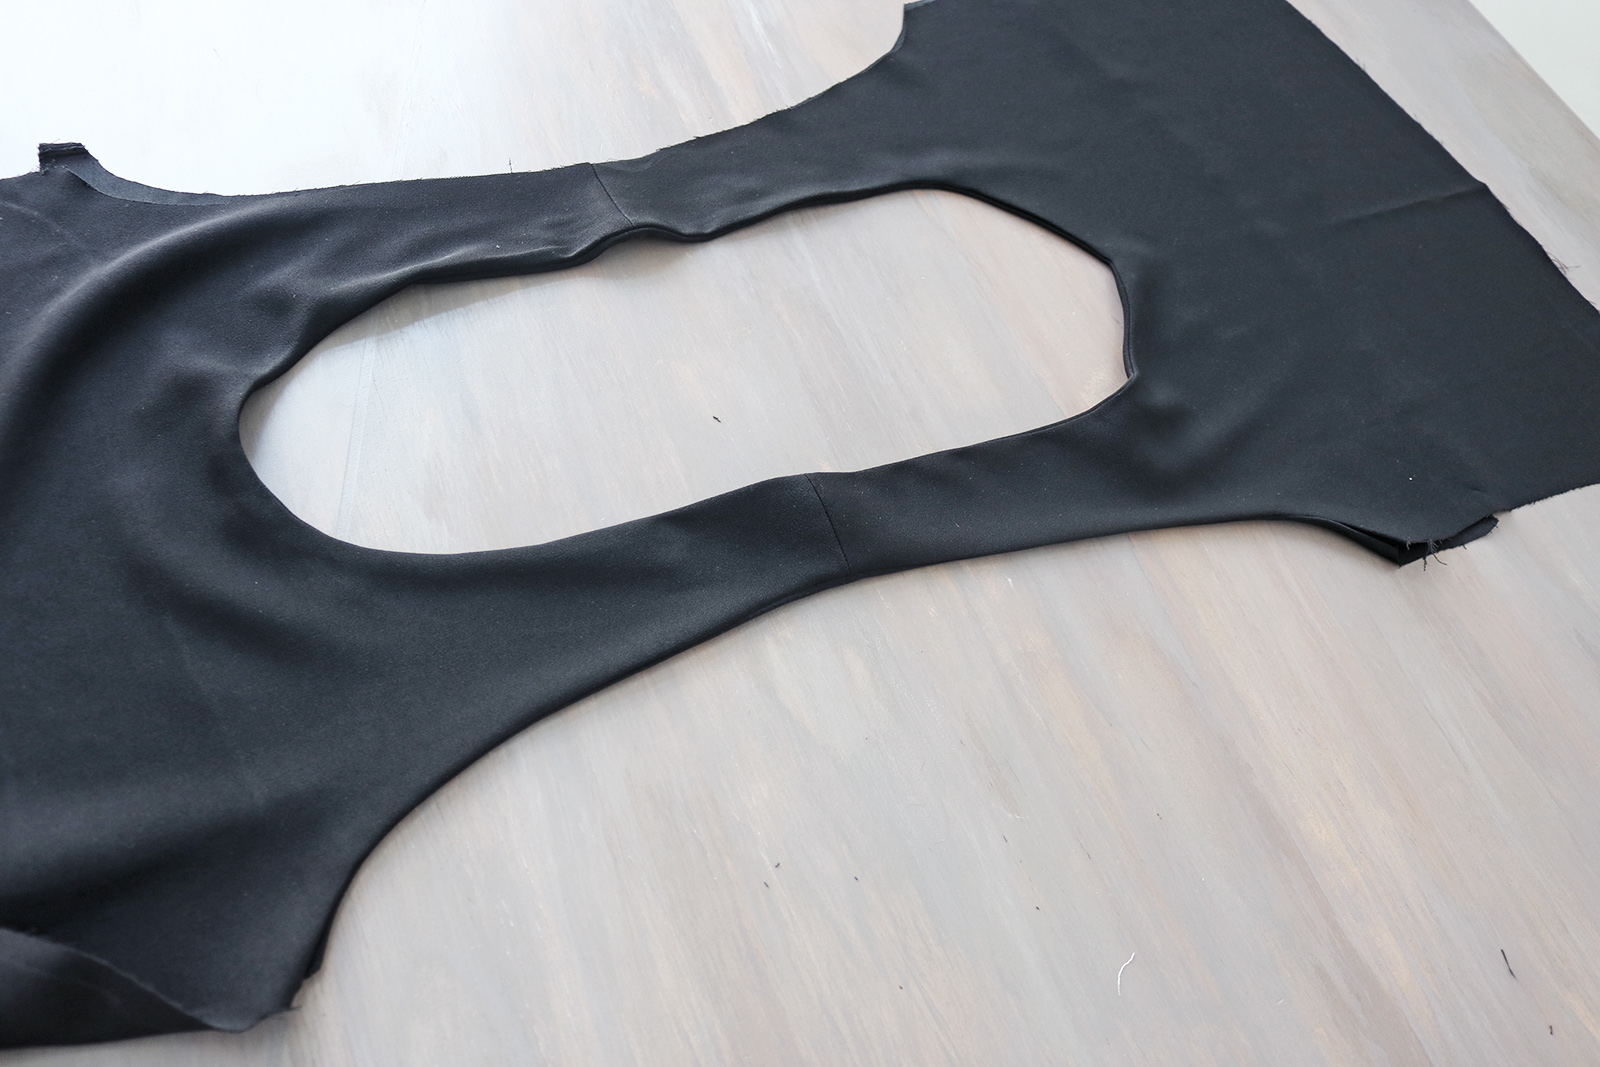
Next, sew the curved arm hole and clip to relieve the tension. Then just grab the burrito inside from either side of the 'tunnel', and pull it through!

Ta-da!! Mind. Blown. Now just repeat the same thing for the other arm hole - start rolling from the side that is already completed.


xo,
Julia


You have done a useful diy by joining the two sleeveless shirt to form a single cool top.Next time when I get bored of my same shirt,will transform it to a cool top.
ReplyDelete