

Tutorials take a lot of time & effort to create, and I choose to make mine available for free. If you enjoy this guide, you can support me with a donation that feels right for you, here.
TOOLS:

Fabric (I used 100% cotton, a 1.5 m piece (mainly for the length of the straps) | Pins | Scissors | Needle & Sewing machine | A stick (e.g. a pencil) to push through your straps
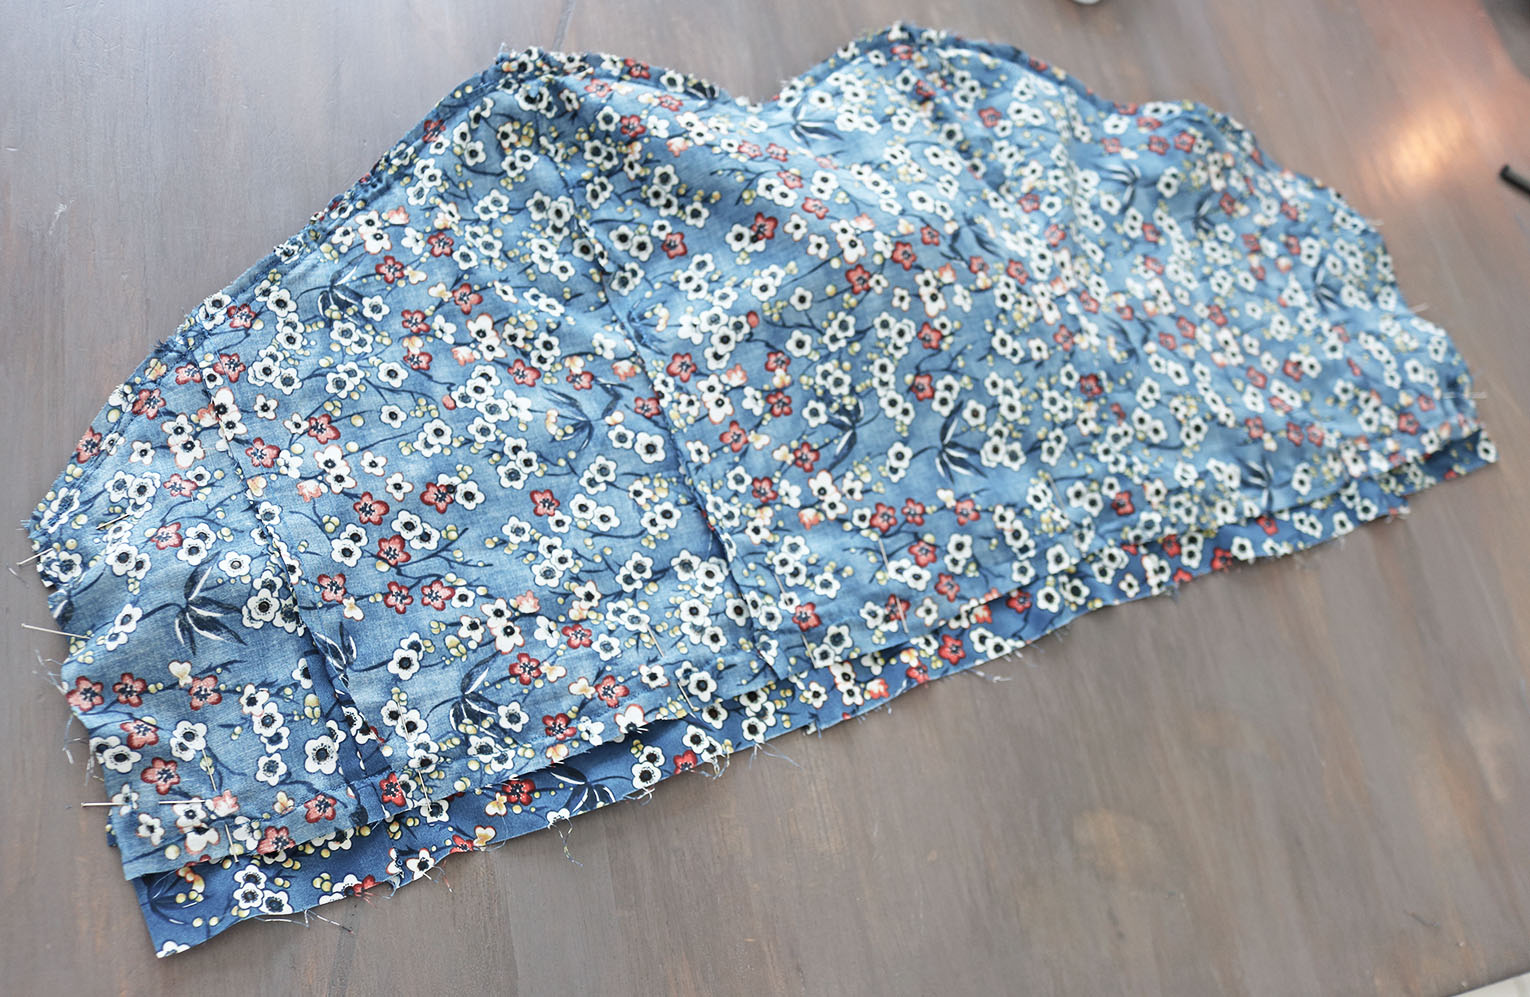
I. The measurements for the below pieces (2 x middle front, 2 x right side, 2 x left side - since I made a double layered top) and the first few steps to assemble them are in this post. The only thing I changed..

.. Was: instead of the back pieces that tie up, I did just a small side piece about 7 cm wide and left the rest of the back open.

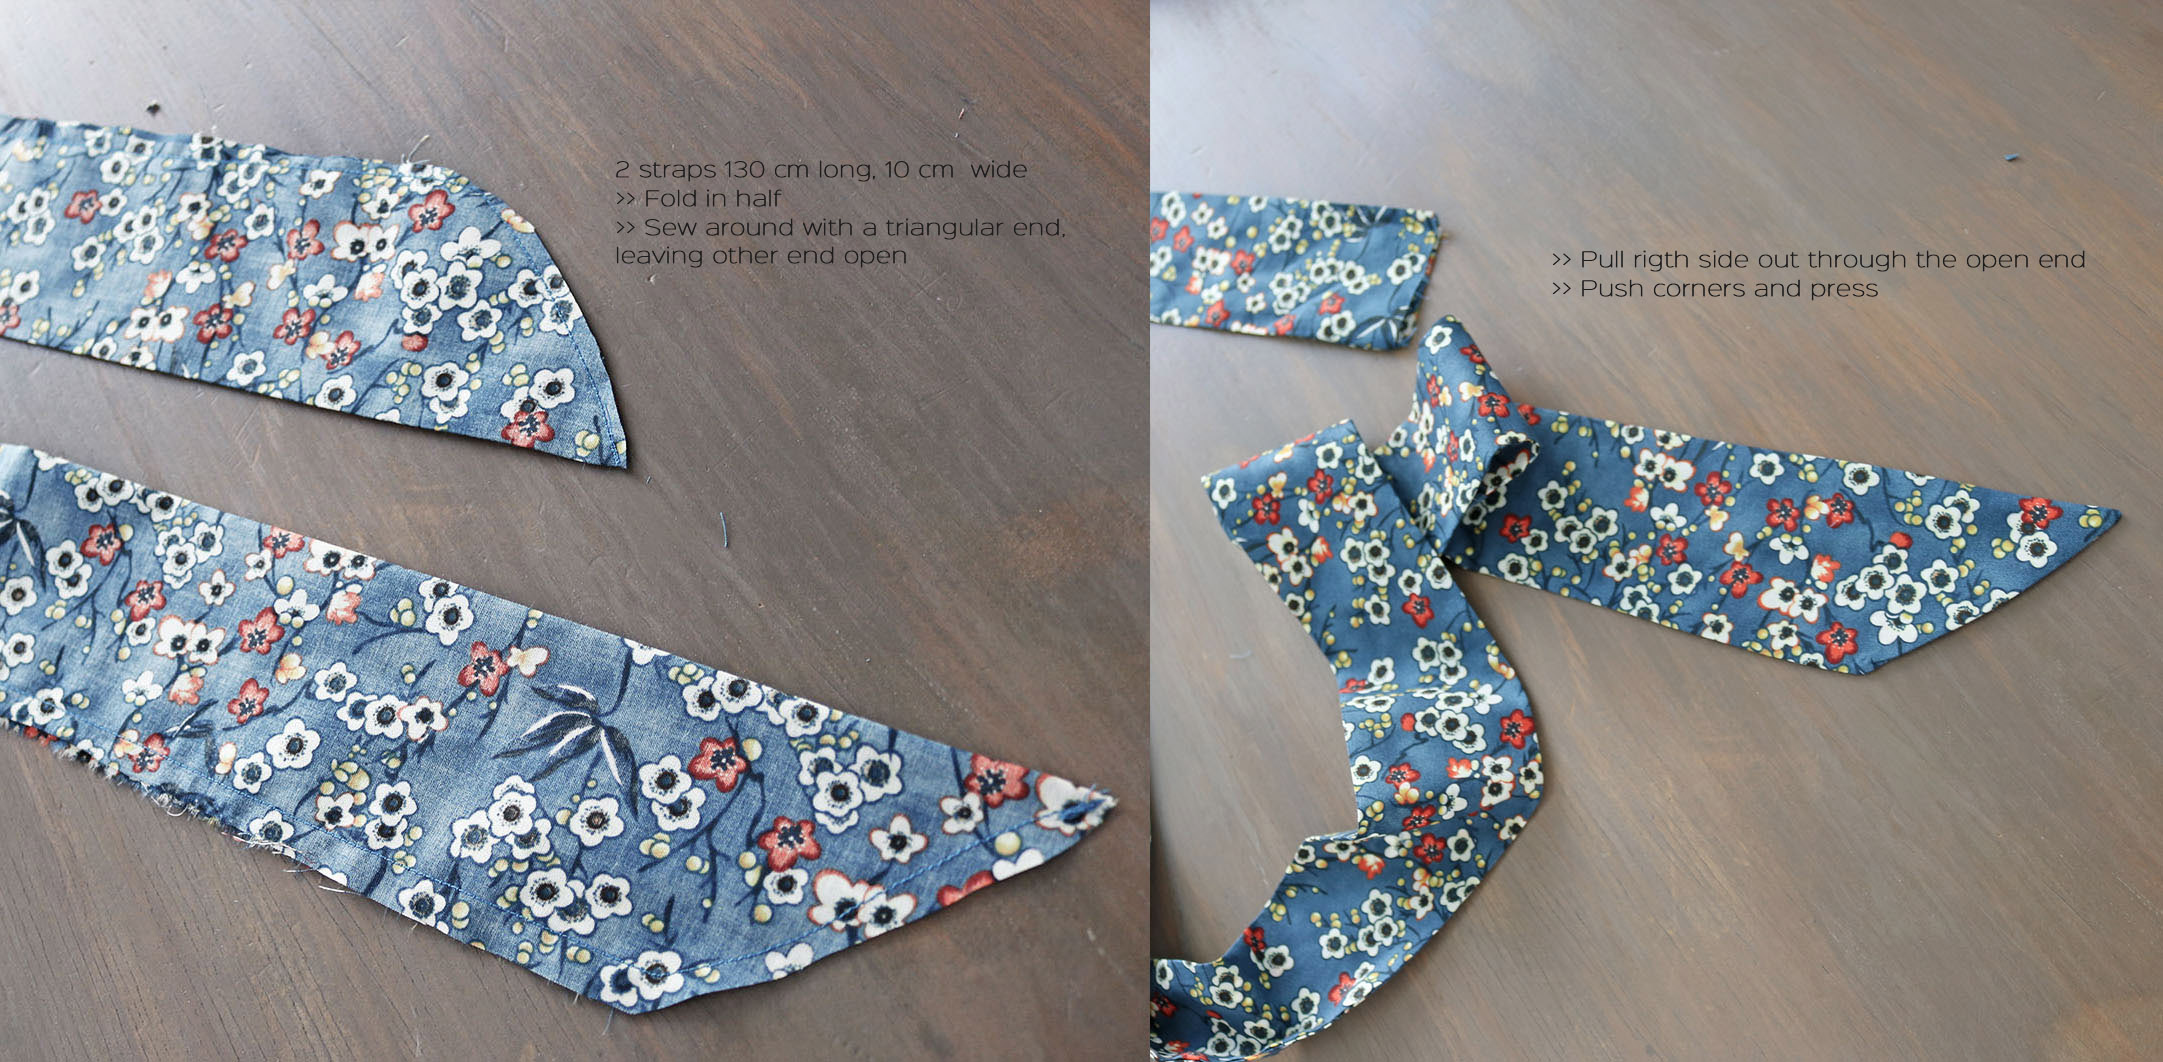
II. This top took lots of straps. First I made the two shoulder straps like so (they only needed to be finished at one end):
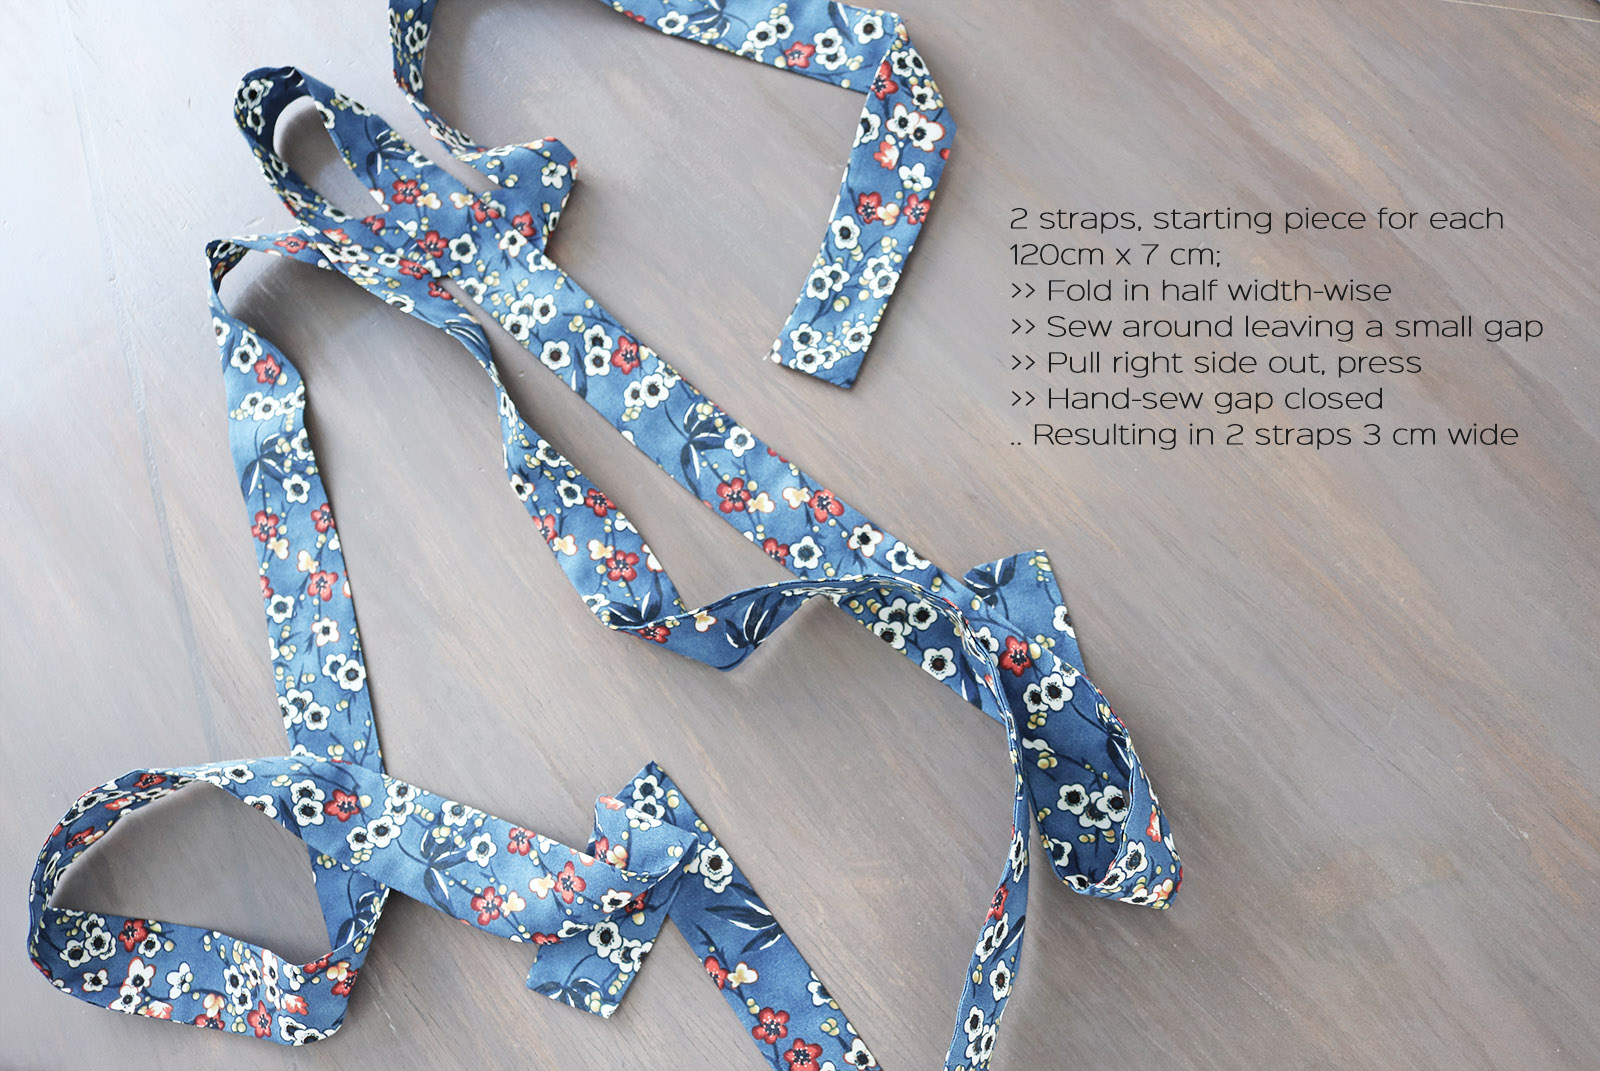
III. And then two more narrow ones for the ruffle details. These needed to be finished with a square end at both ends. I got the length by first measuring the length of the top's neckline and hemline, multiplying by 1.5 and rounding up (neckline was 75 cm, hemline 62 cm, so I got 113 cm and 97 cm, and to make it easy I cut two straps 120 cm long each).
Then I sewed a basting stitch (longest stitch on your machine) along the side of one of those narrow straps where the seam is (it ends up looking more neat when the folded edge is the one that shows). Then I gathered the ruffle until it was the length of the neckline. Repeated for the other strap, matching the length of the hemline. NOTE: gathering is WAY easier when you keep pressing the strap with generous steam every now and then. The fabric glides on the string much better.

IV. Next I pinned the gathered ruffle onto the top's neckline, the folded edge pointing down. Sewed it in place along the edge..

.. And placed my shoulder straps in their spots, secured them as well with a stitch.

At that point, flipping the ruffle upwards this is what I had.

V. More strap! I made a more narrow one (about 1.5 cm) and cut 4 pieces from it, about 7 cm long each.

And folded them in half, pinning onto the top, aligning with the side, one right next to the neckline, one right above what would be the hem. When I tried the top on at this point I realized I wanted it just a bit shorter, so when I pinned the hem ruffle in its place, I put it bit higher than the top's hem. Sewed in place the ruffle and the folded strap hoops.

VI. Then I added the top's lining piece on top, right sides facing, pinned it first and then sewed all around except for a small gap in the middle of the hem. Trimmed corners and excess seam allowances, and pulled the top through the gap in the stitch, right side out.
After pressing and hand-sewing the gap closed, this is what I had. And that could have been it, but I did a couple of small adjustments.

I folded the hoops on the reverse and hand-sewed them in place (I just liked the look more when tied up).

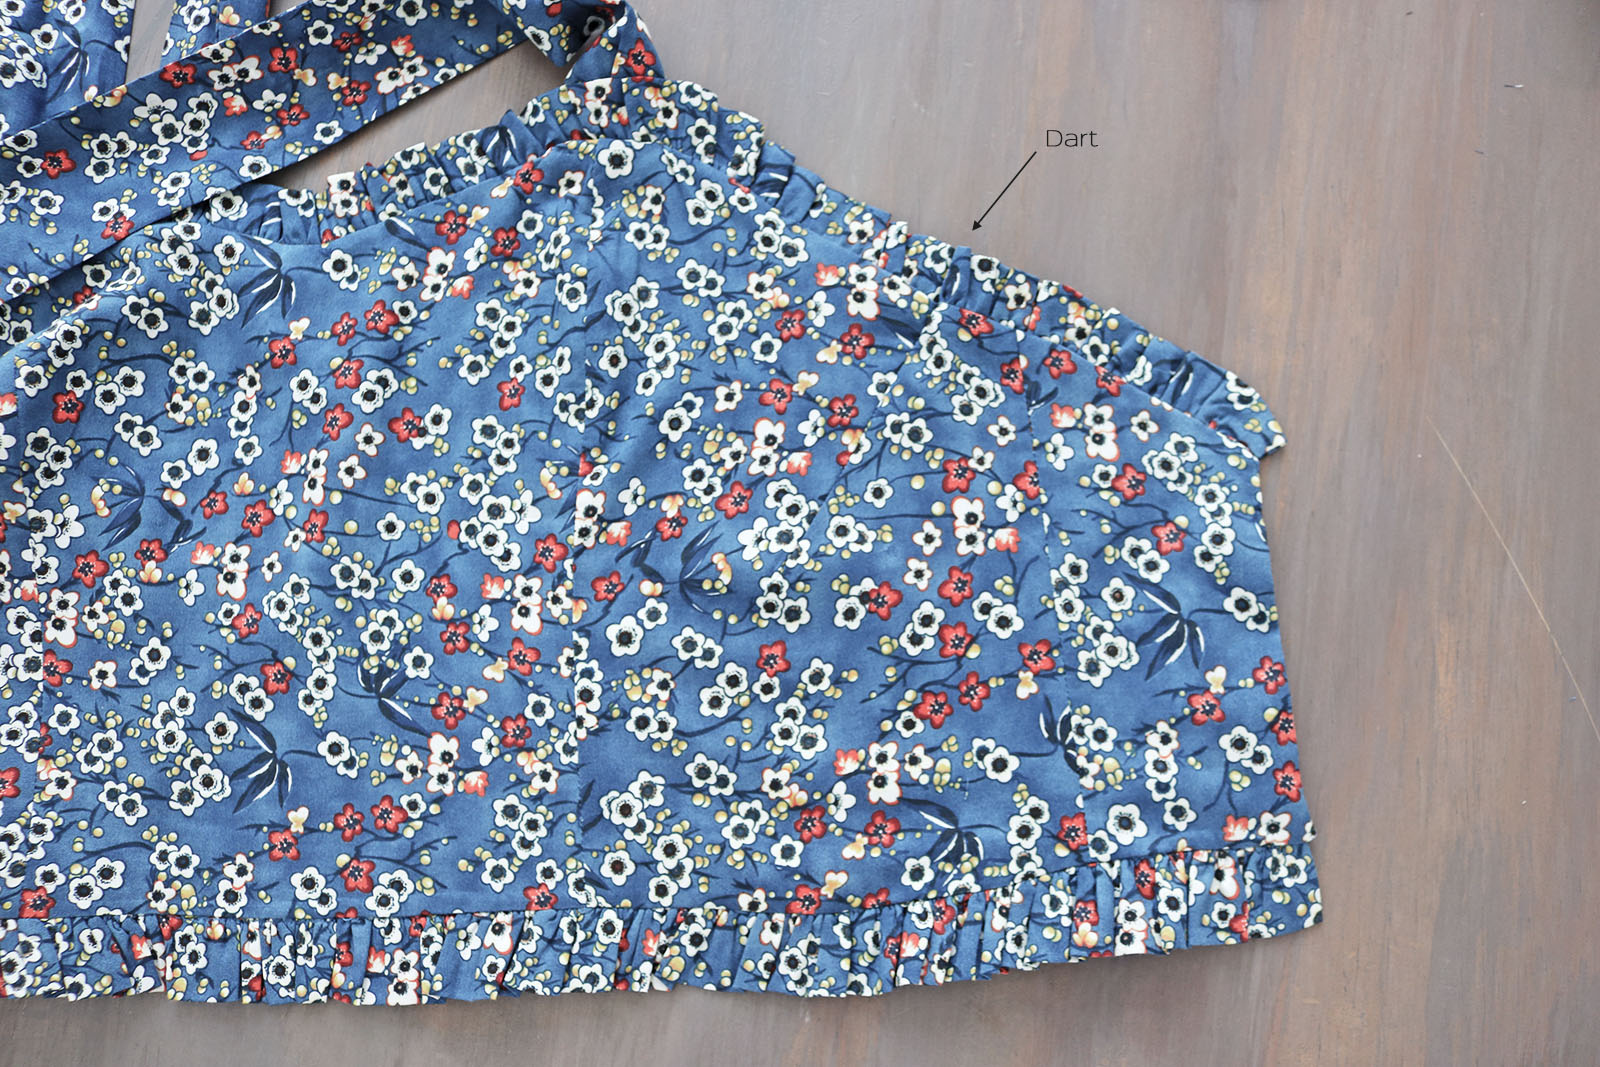
And finally, I wanted the top super secure so I added a quick dart on both sides (this is obviously a massive faux-pas and should have been done right at the start, but when you don't use patterns, this is life).
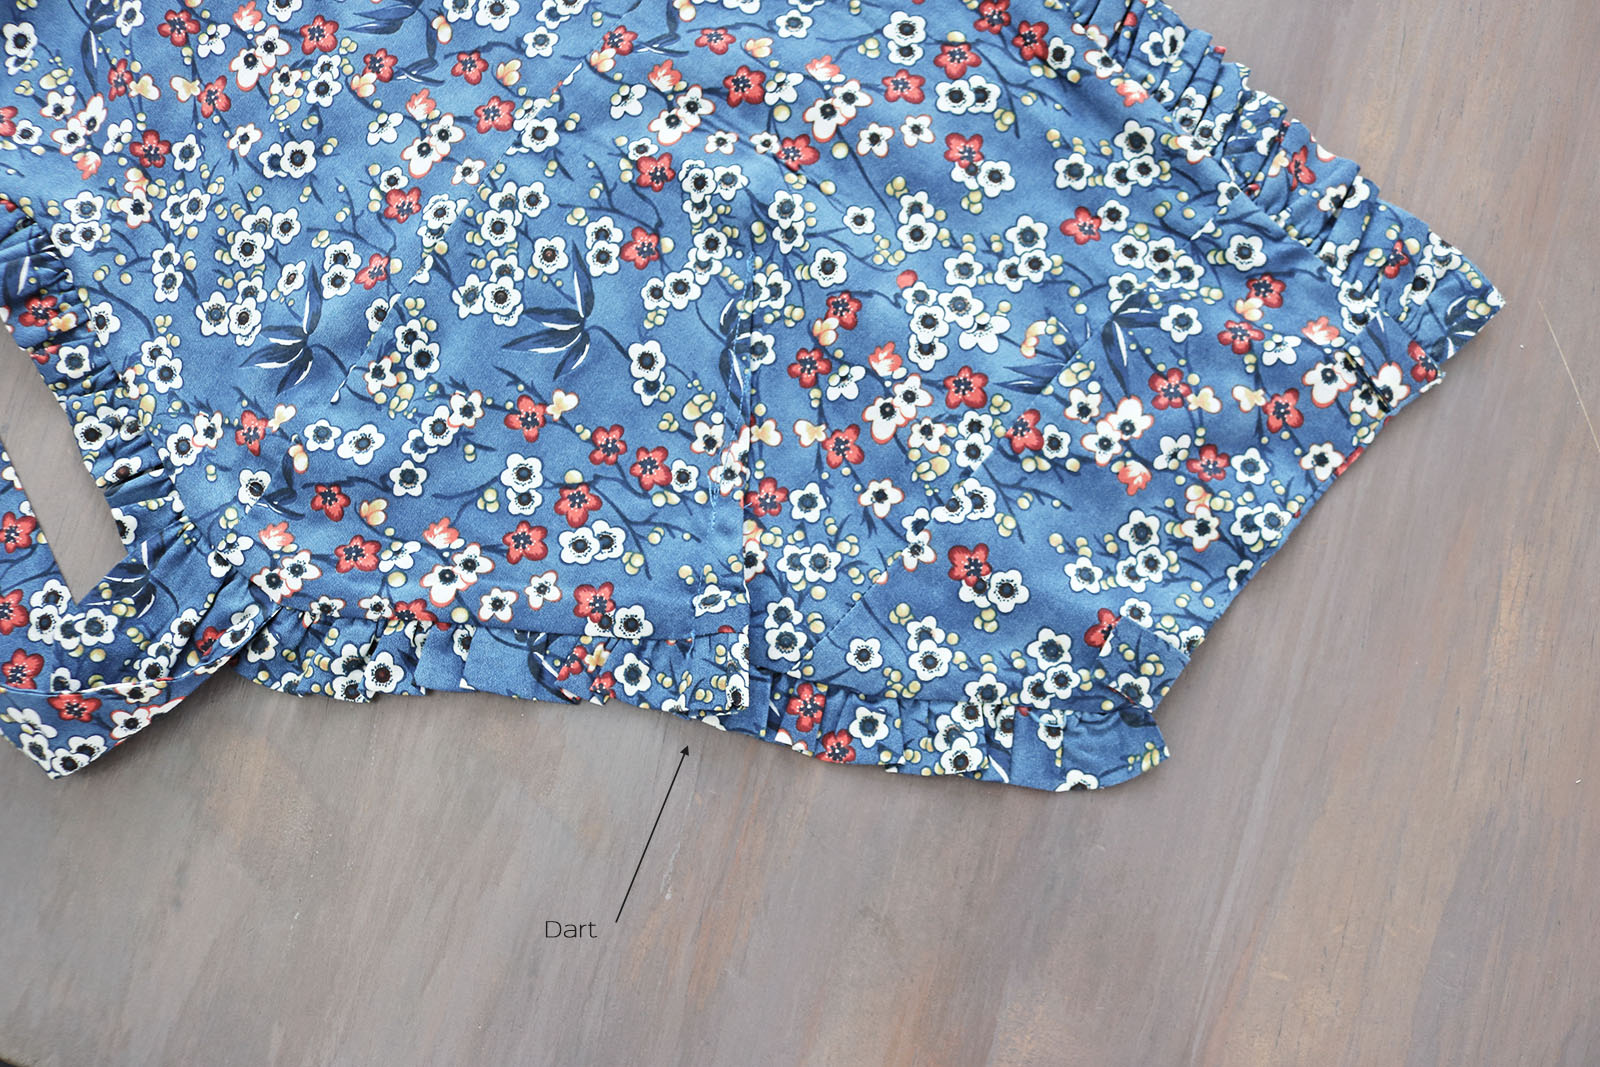
I wasn't too upset about it since it was virtually unnoticeable on the right side.


xo,
Julia


this is SO CUTE!!!!
ReplyDelete