

I've made these shorts 4 times now I think - they're an awesome project if you have about 1 meter of fabric and want a quick project (also very comfortable for hanging out at home, but can be dressed up for when we can all go out again). Here's the original tutorial where I made them out of silk - I've also done another linen pair - and you can see how different the look is based on the material. I won't duplicate the full tutorial for the shorts here, just showing the mods for the belt-hooped version.
Tutorials take a lot of time & effort to create, and I choose to make mine available for free. If you enjoy this guide, you can support me with a donation that feels right for you, here.
TOOLS:

Fabric, about 1.5 m (1 m width), 1 m for the shorts, 0.5 m for the top | Elastic (3 cm wide better, I only had 1.5 cm wide so had to use that) | Scissors | Pins | Thread & Sewing machine | Not pictured: Bias tape
TOP
I. My cut top pieces (I'm a EU36/US4). I cut the neckline in the front 15 cm deep. If your fabric does not have stretch or you are very curvy, you'd definitely need to do bust darts - I'm not, and my fabric had stretch, so I didn't need them.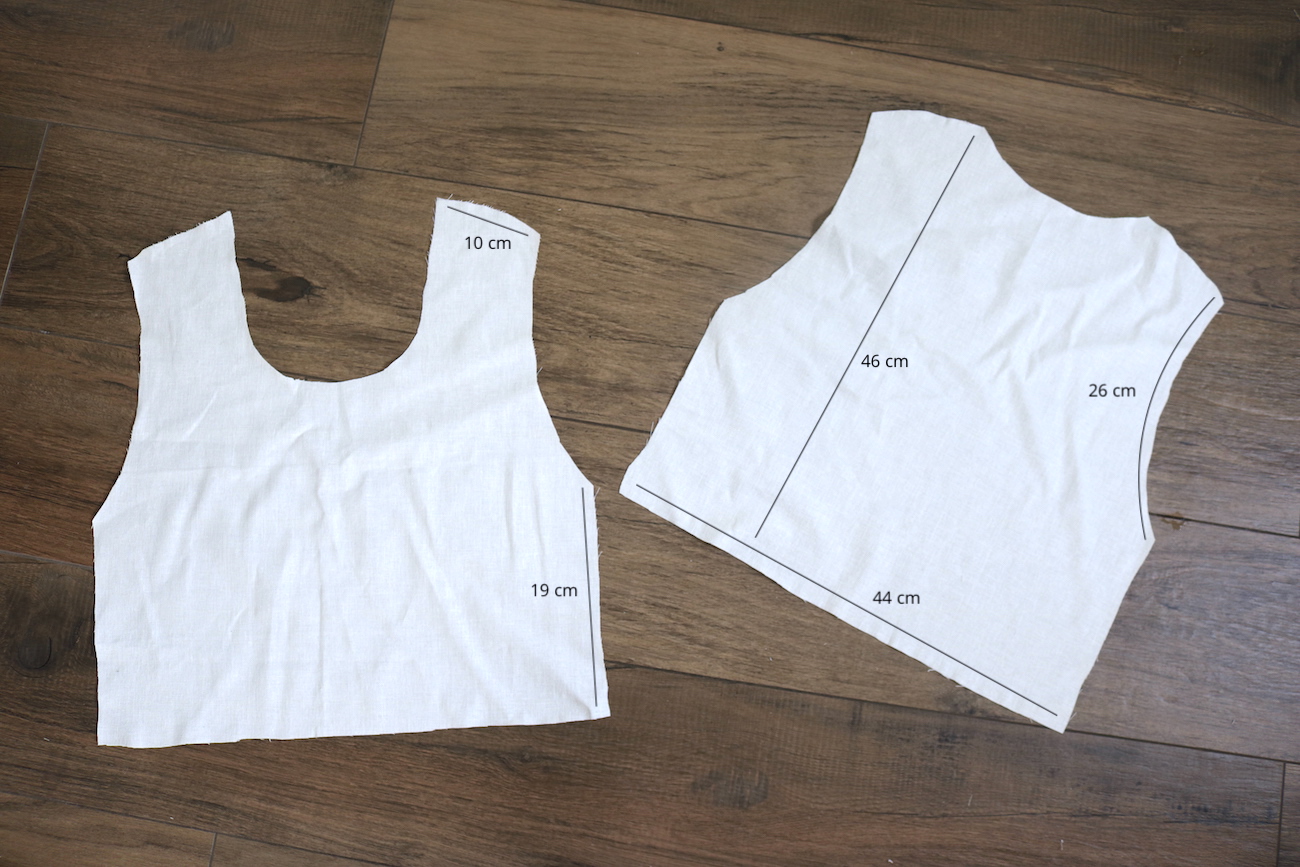
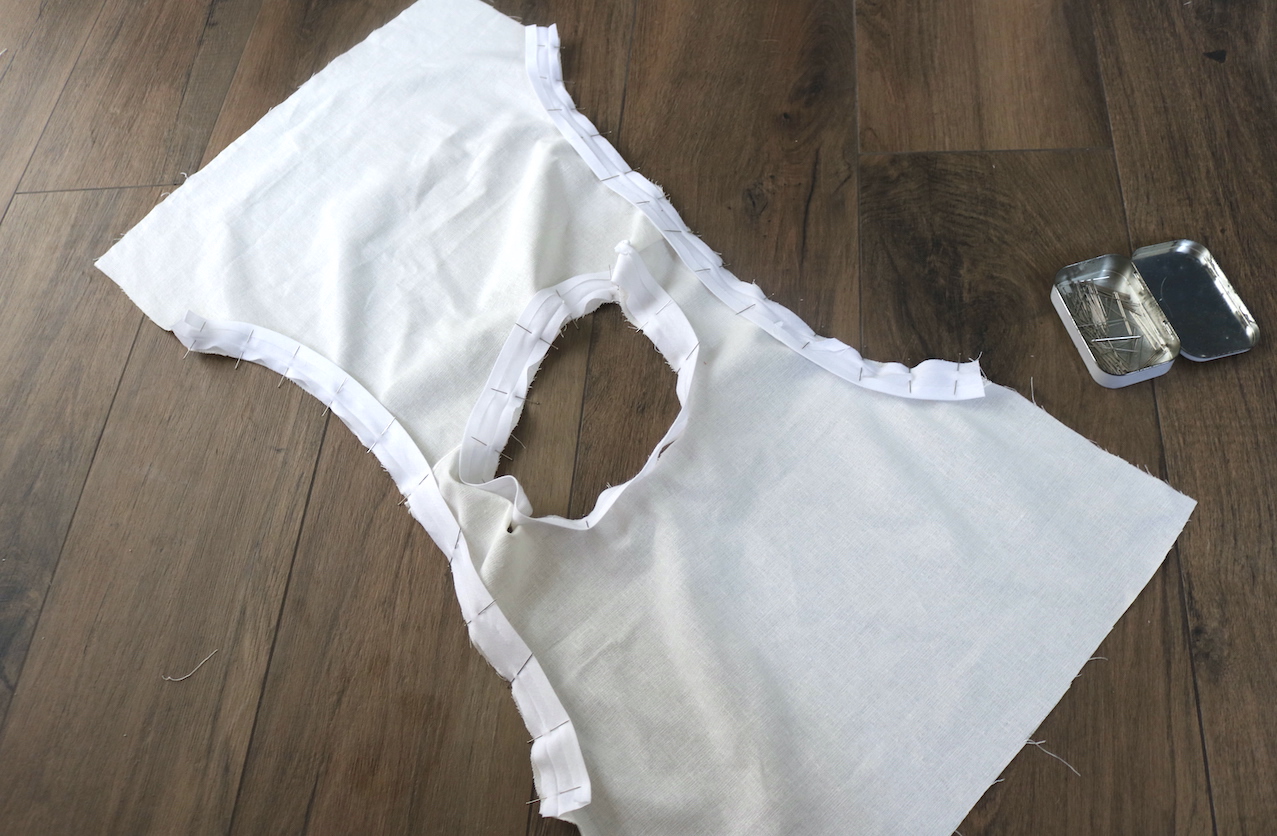
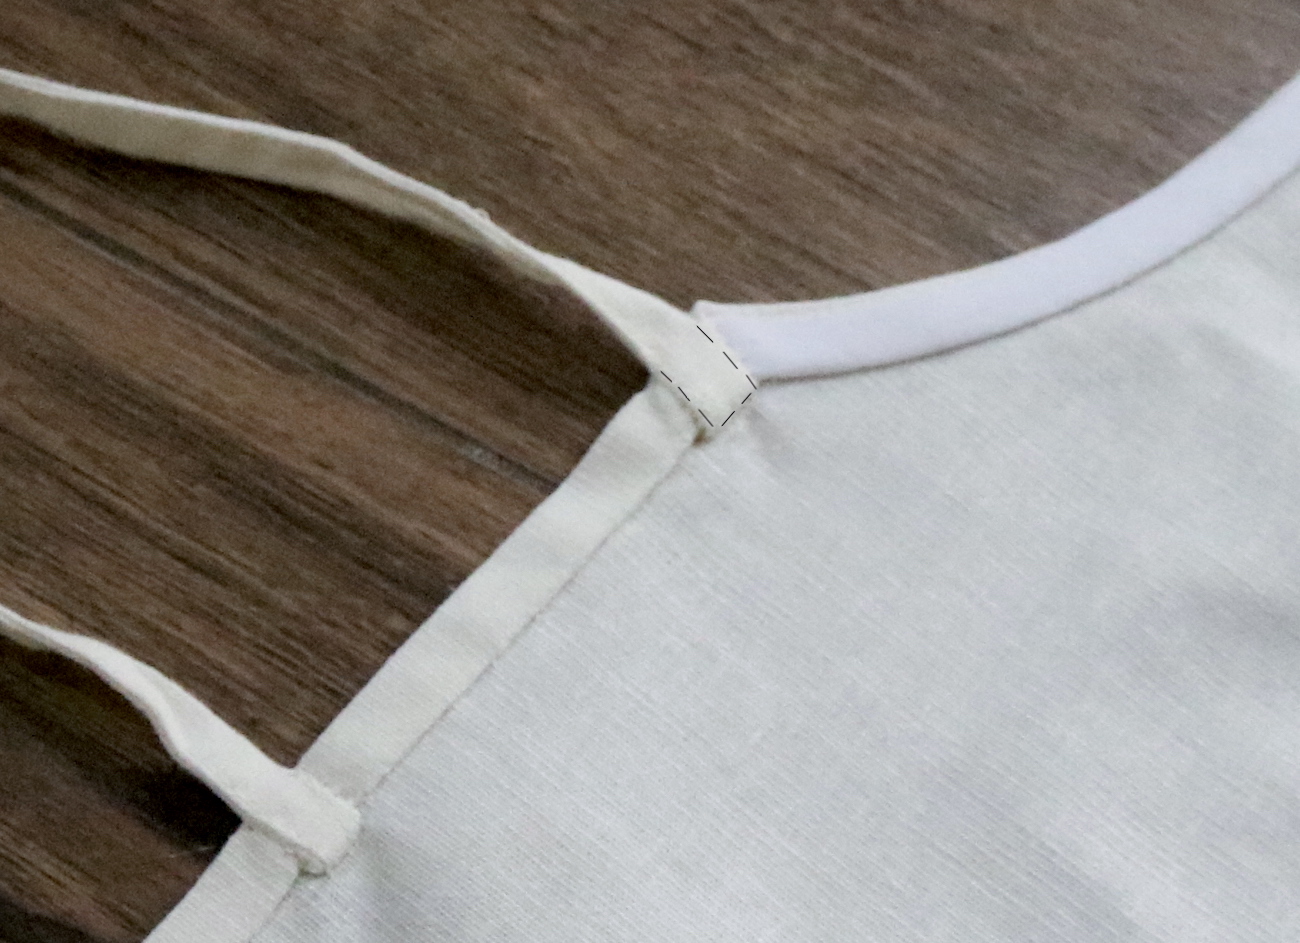
V. Last step was to attach my straps to the top and hem. I did a double fold along the edges, and tucked the ends of the straps under the fold, and hand-sewed the whole thing down.
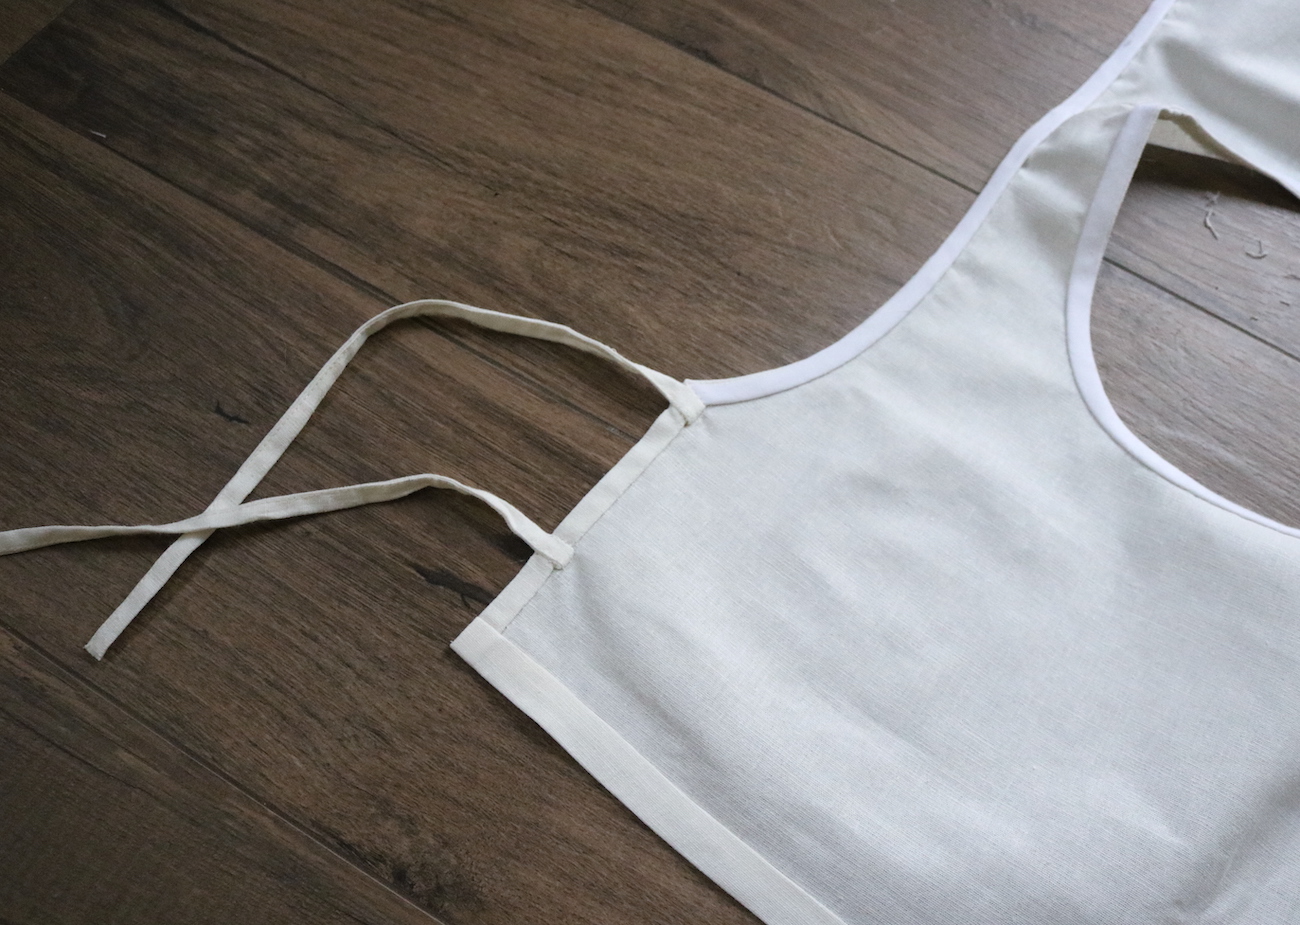
I also hand-sewed all around the base of the strap to secure it super tightly, as they'll be pulled every time they're tied.
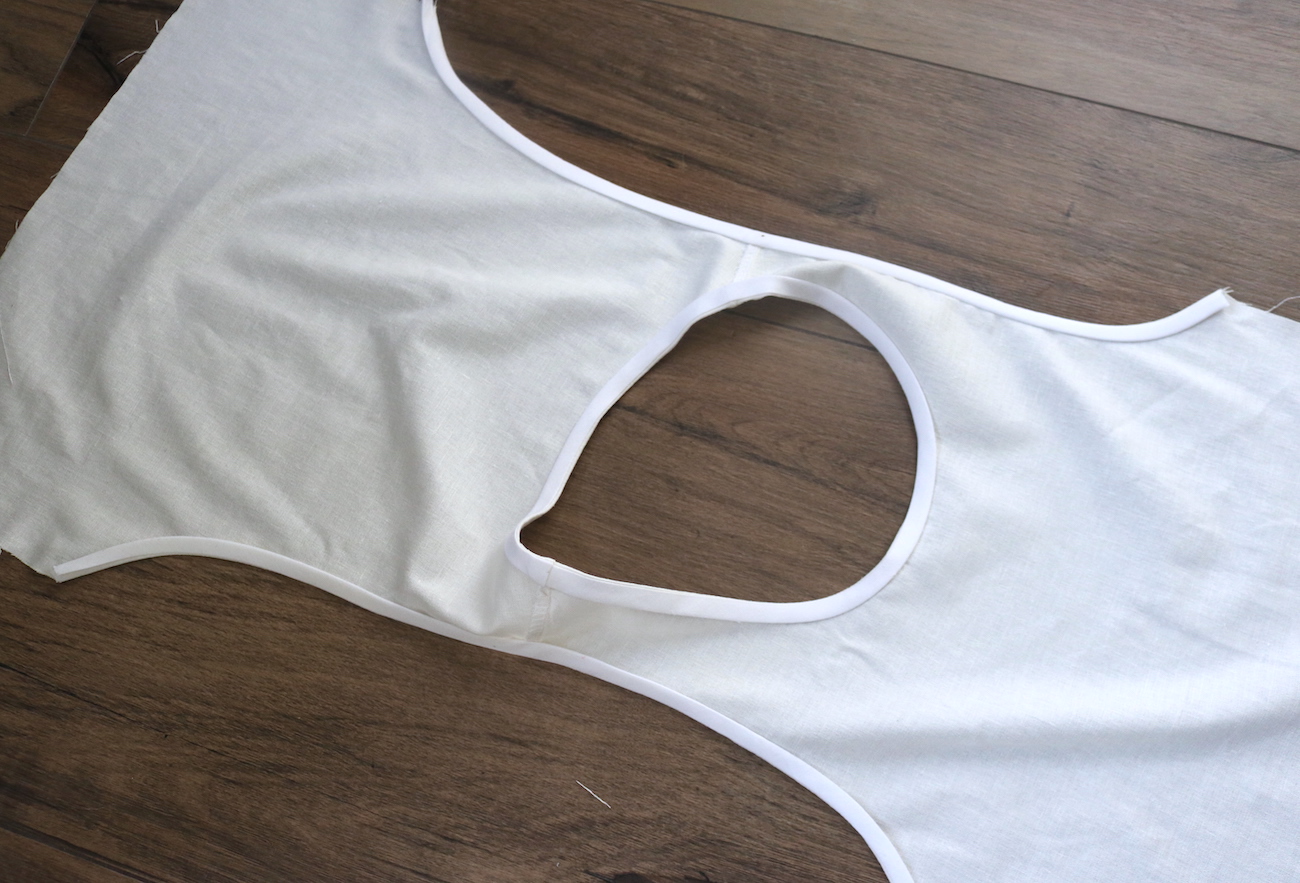
The hem I hand sewed as well, to stick to the no stitch look on the right side.

SHORTS
I. The first steps (up until IV) I did the same as here. In this version, once I had cut my waistband and sewn it into a loop, I pressed the seam allowances onto it (I cut it so I had room for 2 times my elastic, so just over 3 cm of width in the finished band).

.. Pinned my waist band to the shorts, right side facing the reverse:

.. And folded it over to the right side, pinning in place:

II. Next I had to make the casing for my first elastic. I checked the width, and sewed all around twice (right along the edge, and another stitch just a bit more than the elastic width from it), leaving a small gap to insert the elastic from..

.. And put my elastic in with a safety pin, sewed the ends of it together, and closed the gap in the stitch.

III. Next I added the belt hoops. First I made the hoops themselves (using the same method I did for the side-tie straps on the top). I made 5 - two in the front, two on the sides, one center back (length needs to be your waist band width + 1.5 cm or so).

Then I pinned the hoops onto the shorts:

And sewed right at the edge of the waistband, at the same time securing the hoops in their spots (and again leaving a small gap to put in my second elastic).

After inserting it, I stitched over both of the elastics along the middle (you need to stretch them out as you sew, so the fabric gets evenly distributed.)

The only thing left was to fold the belt hoops up and hand-sew the loose ends on the reverse of the waist band + hem the shorts.


xo,
Julia


Hi - thank you very much for making this pattern available! :)
ReplyDeleteI found your website on Pinterest and I really love your tutorials!
I’m quite new at sewing and I tried to change the pattern so that it’s close to an EU 38/40 but I’m lost - do I have to multiply the different lengths with a certain factor (f.e 1.3 for one size up)?
Hi! Delighted you enjoy my blog! Given these measurements will get you EU36, you would need to go up one size, which means adding about 2 cm all around (meaning, for example your new top width will be 44 cm + 2 cm + 2 cm = 48 cm. I would recommend taking an existing top pattern or actual top you have with the fit you are looking for, and comparing measurements to make sure you get to the desired sizing.
Deletedo you have a link for the pattern? or a PDF?
ReplyDeleteHi, my blog is about self-drafting without patterns. The guides include measurements to draft.
DeleteThis comment has been removed by a blog administrator.
ReplyDeleteIs there a link for the pattern in PDF?
ReplyDeleteHi, my blog is about self-drafting without patterns. The guides include measurements to draft.
DeleteI’m so excited to do this!!! I’m thank you for sharing this 🤍🤍
ReplyDelete