

So here I was thinking I'd come up with something a bit original for doing a gathered/elasticated bust, but @alissahthreads educated me quickly on IG that there is a McCall's pattern (m7946) that is very similar to this. No new ideas in the world 🤷🏼♀️I still prefer mine:) Here's how I made it in case you don't want to invest in a pattern.
Tutorials take a lot of time & effort to create, and I choose to make mine available for free. If you enjoy this guide, you can support me with a donation that feels right for you, here.
TOOLS:
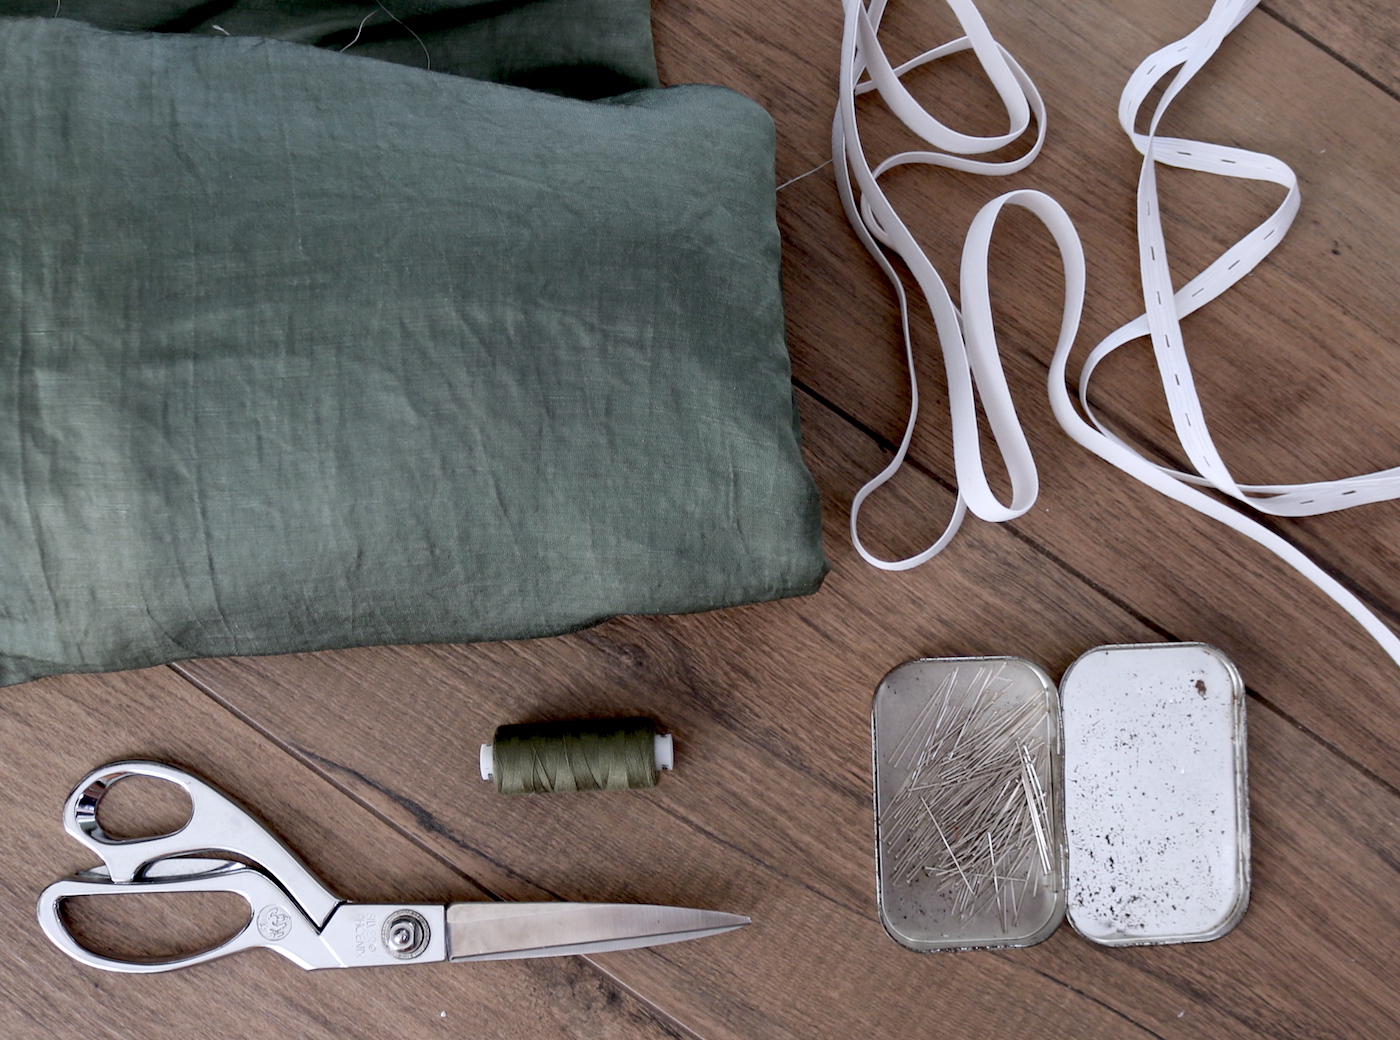
Fabric, 3m full width (I used a cotton-linen mix) | Elastic (enough to go around your torso 3 times + both your arms) | Pins | Thread & Sewing machine
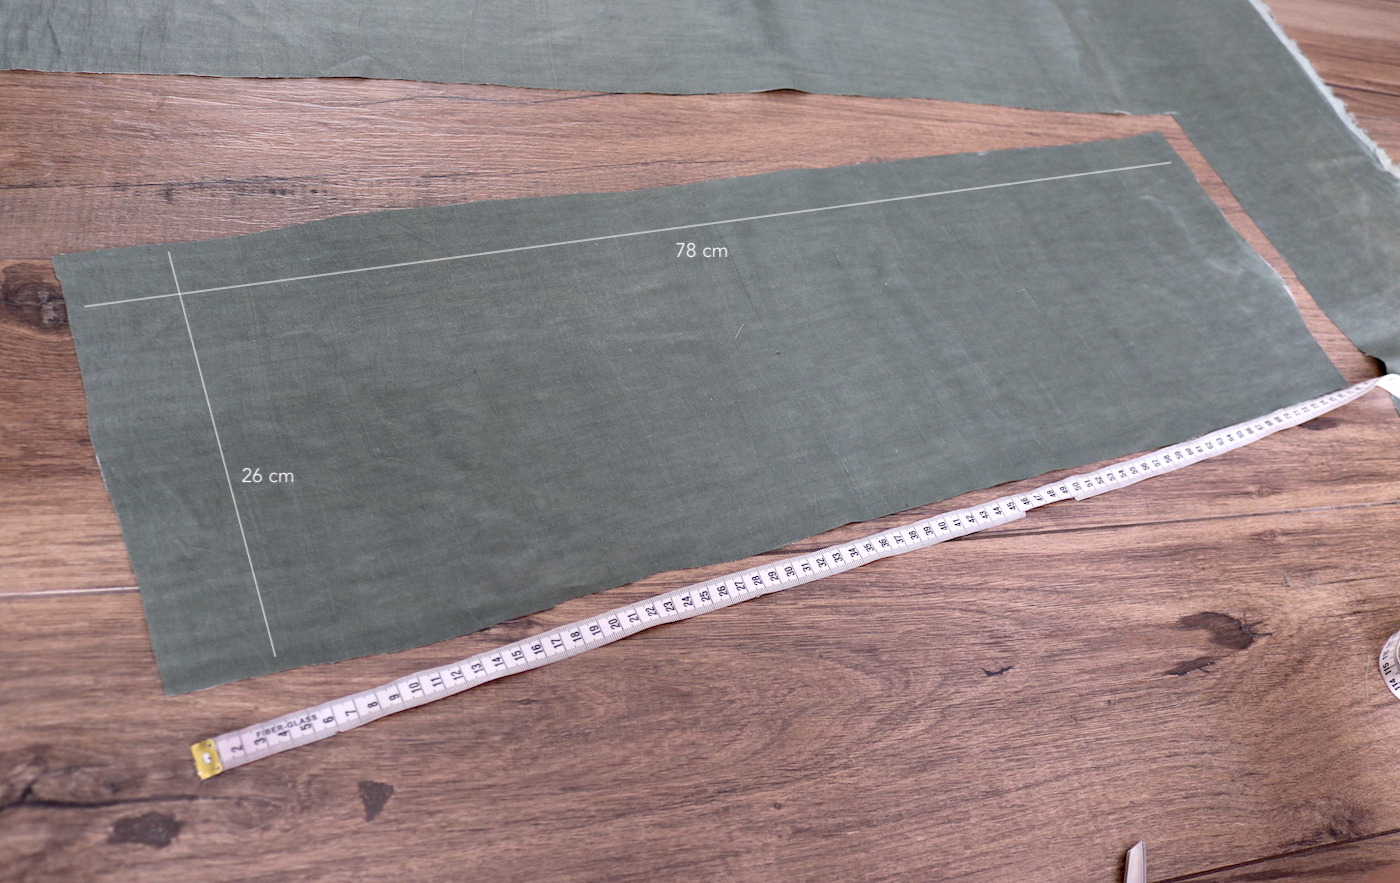
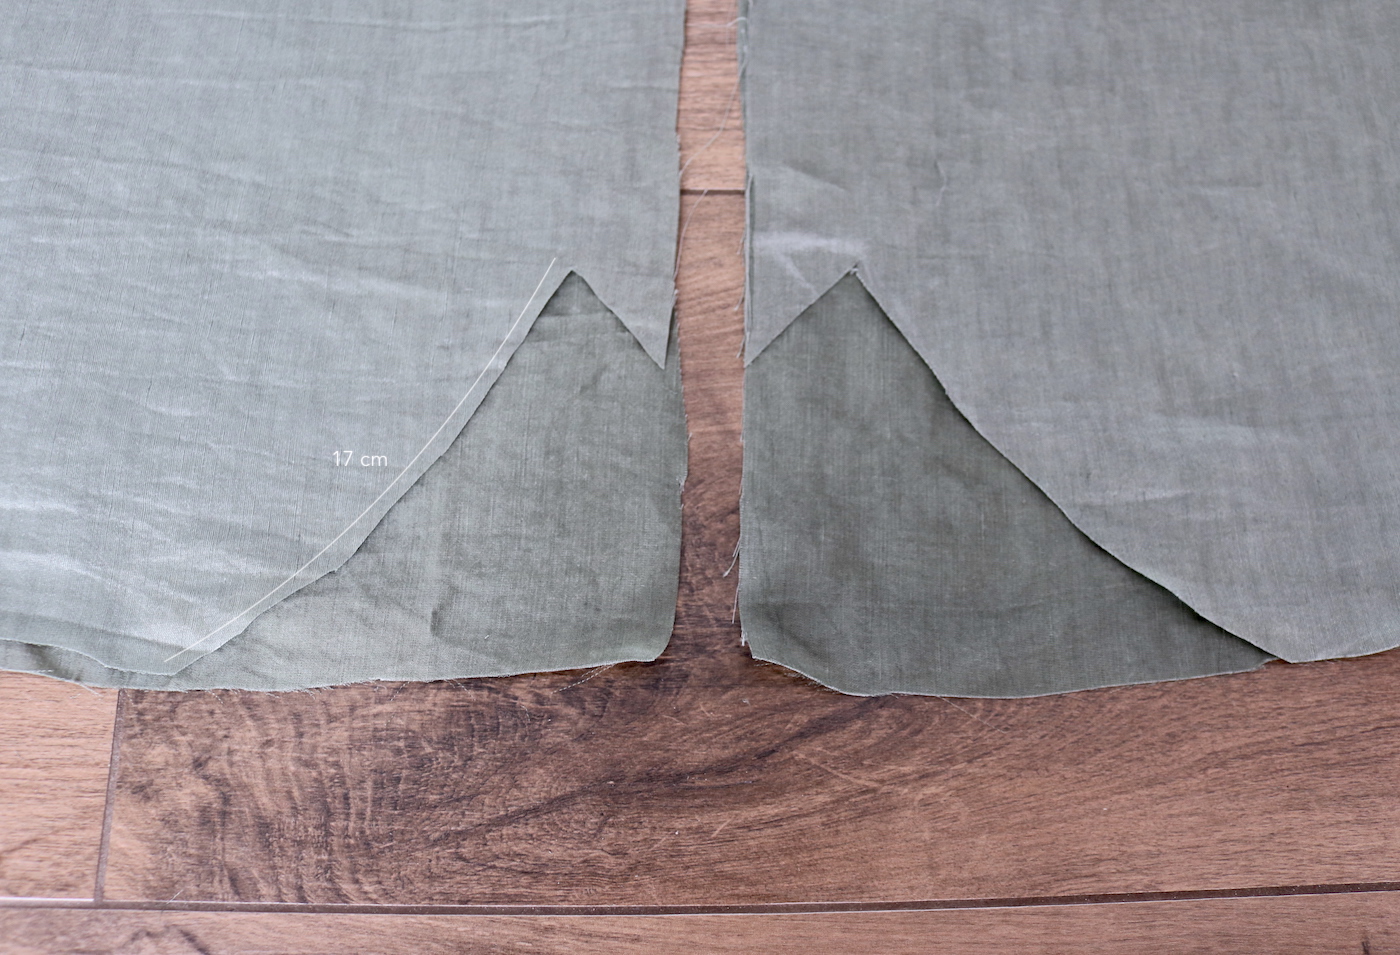
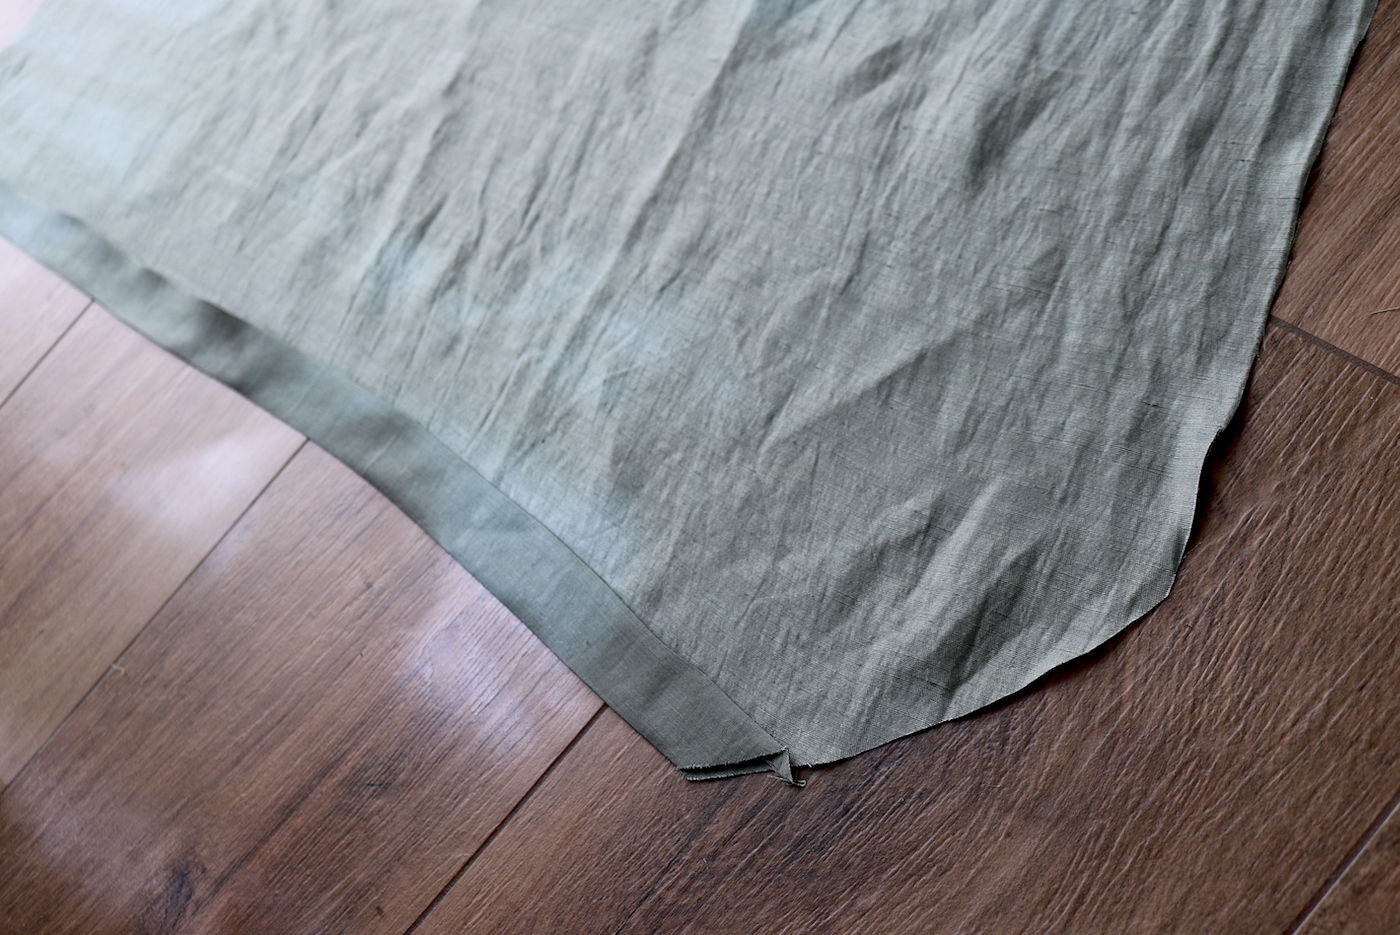
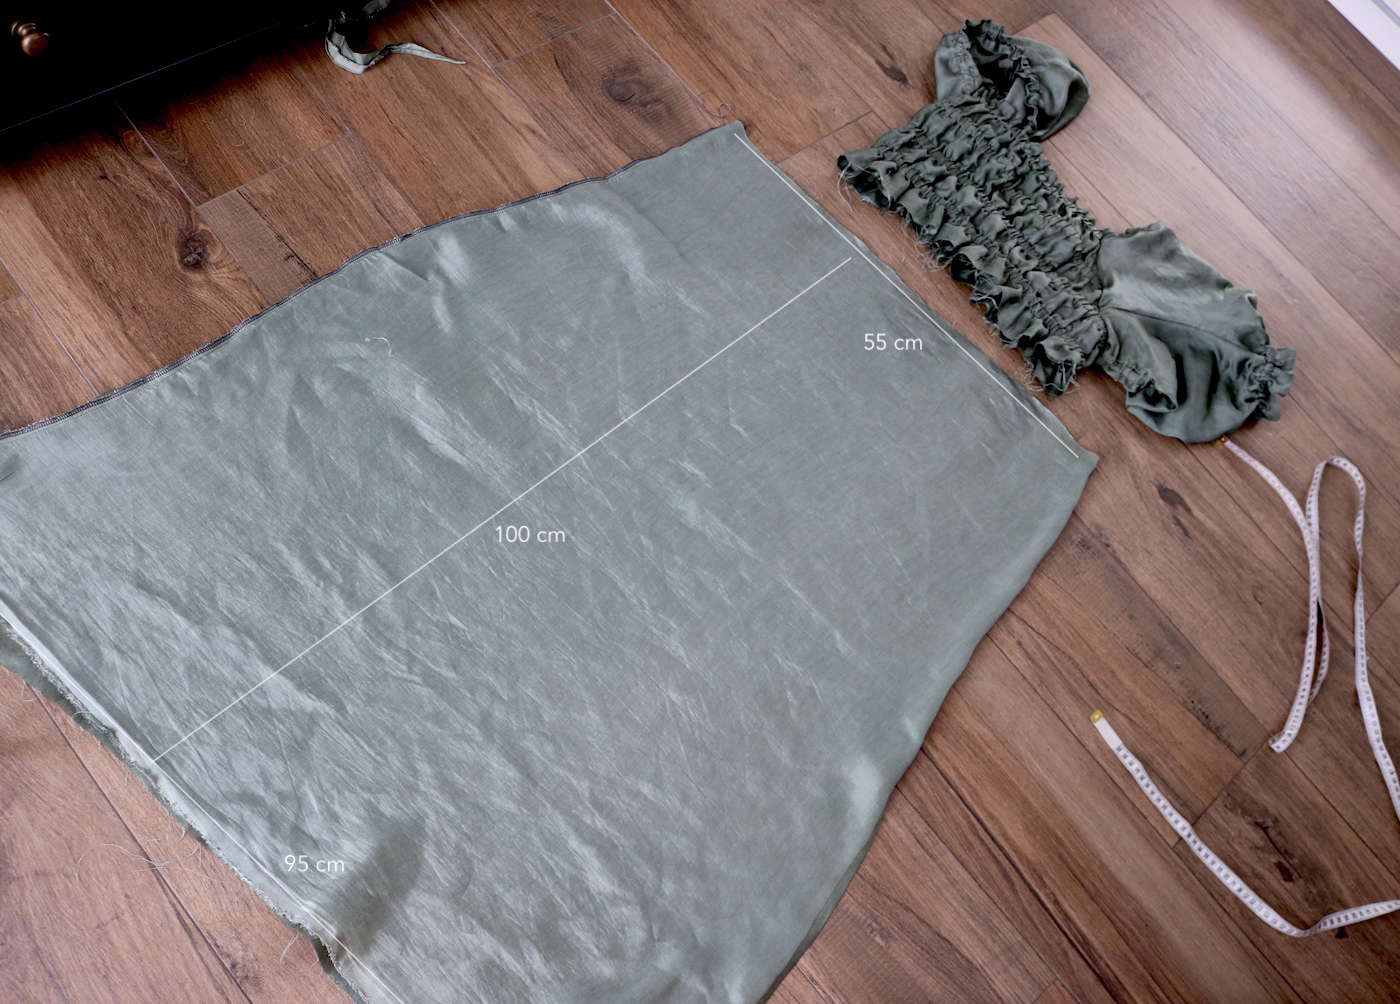
I. I'm EU36/US4. Given that this is an elasticated style, you could use my measurements for one size down to 1-2 sizes up. Just play with the elastic lengths. You need two of the front pieces cut as below, one rectangular strip to make the neckline ruffle. I wasn't sure how I was going to make this dress or attach the top to the skirt at this point, that's why I cut the top piece a bit long. I ended up trimming about 4 cm off at the point where I attached it to the skirt.

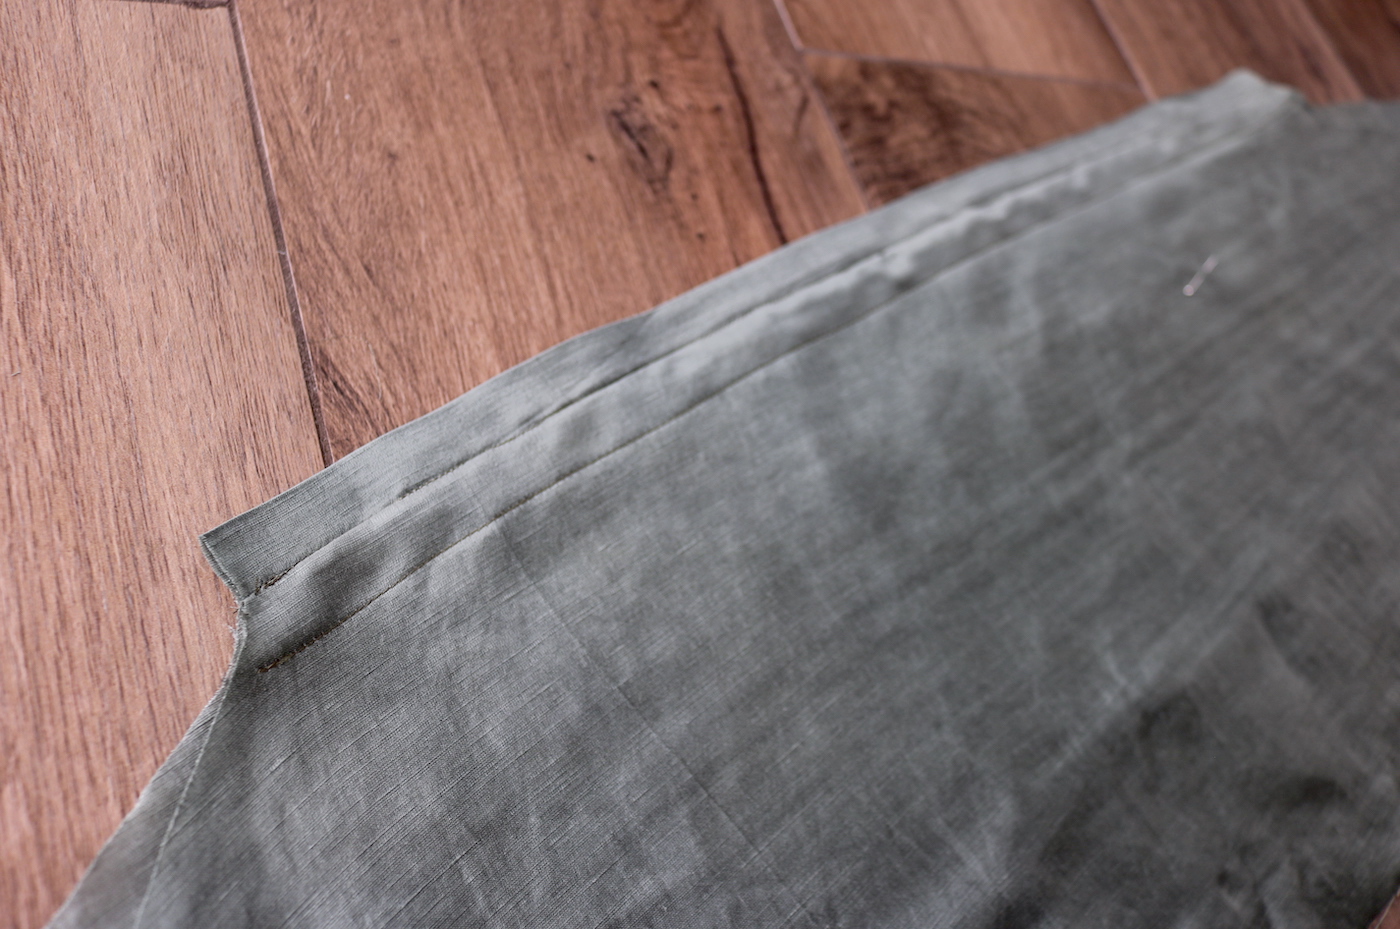
First press the ruffle strip in half width-wise, right side out..

.. And pin onto one of your top pieces, folded edge pointing down, then pin the other top piece on top matching the neckline, right sides facing.

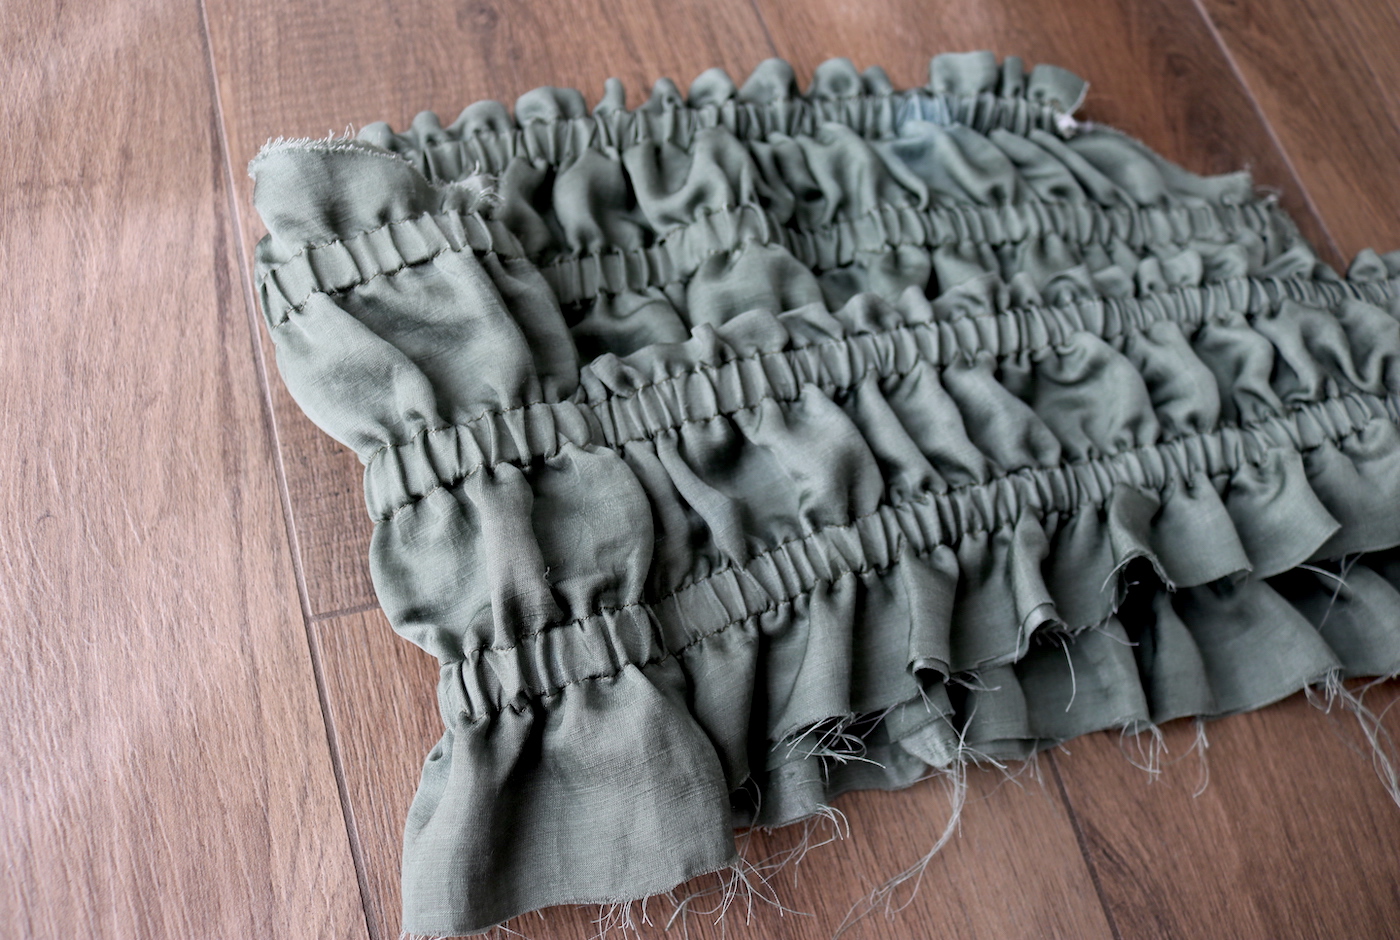
After sewing, turning right side out and a press you'll have this.

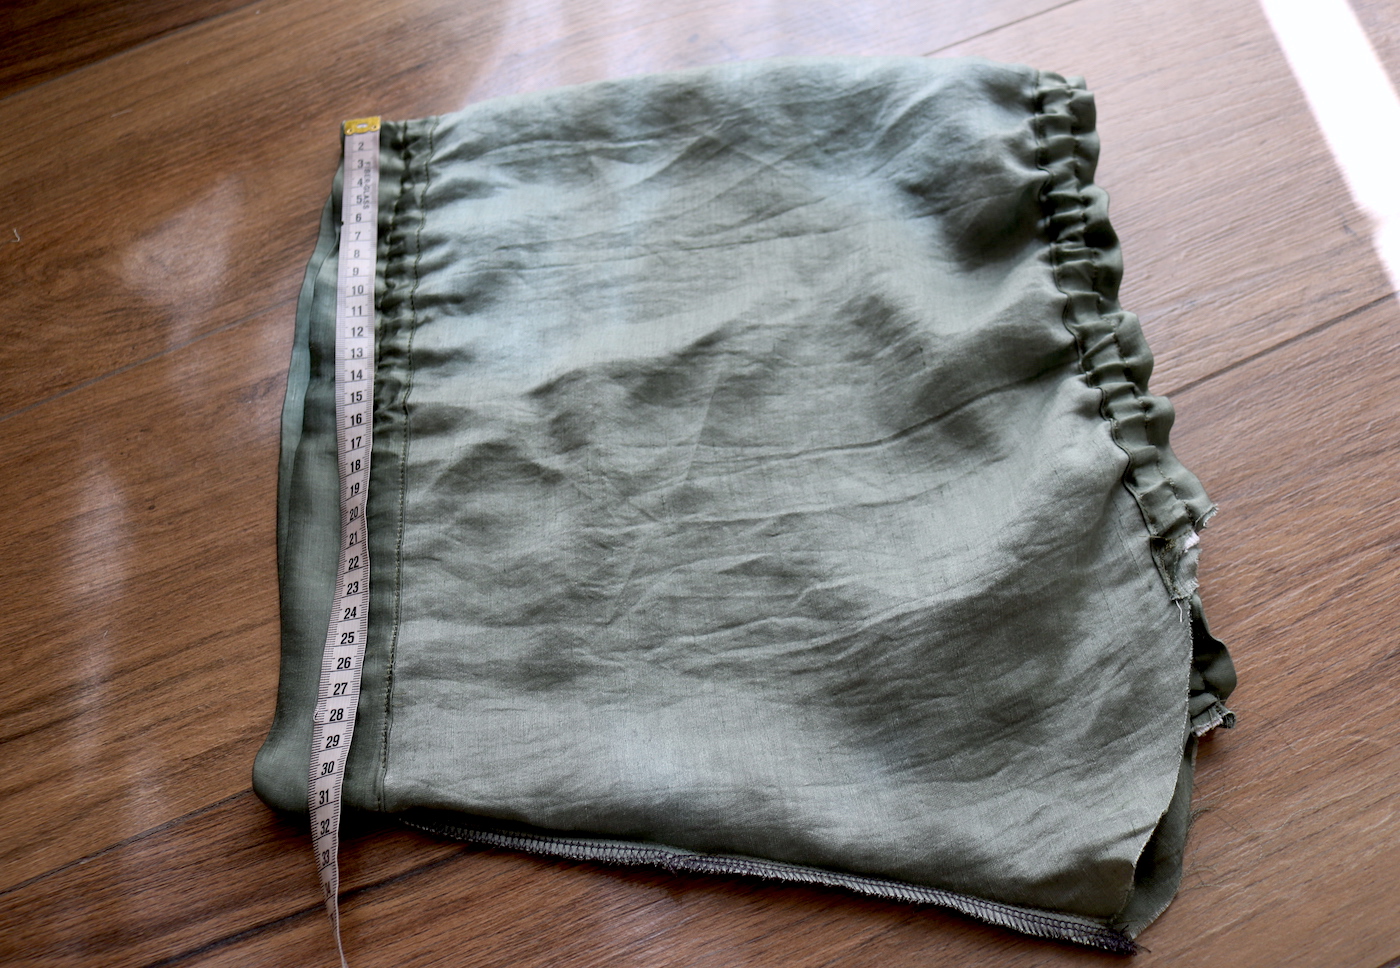
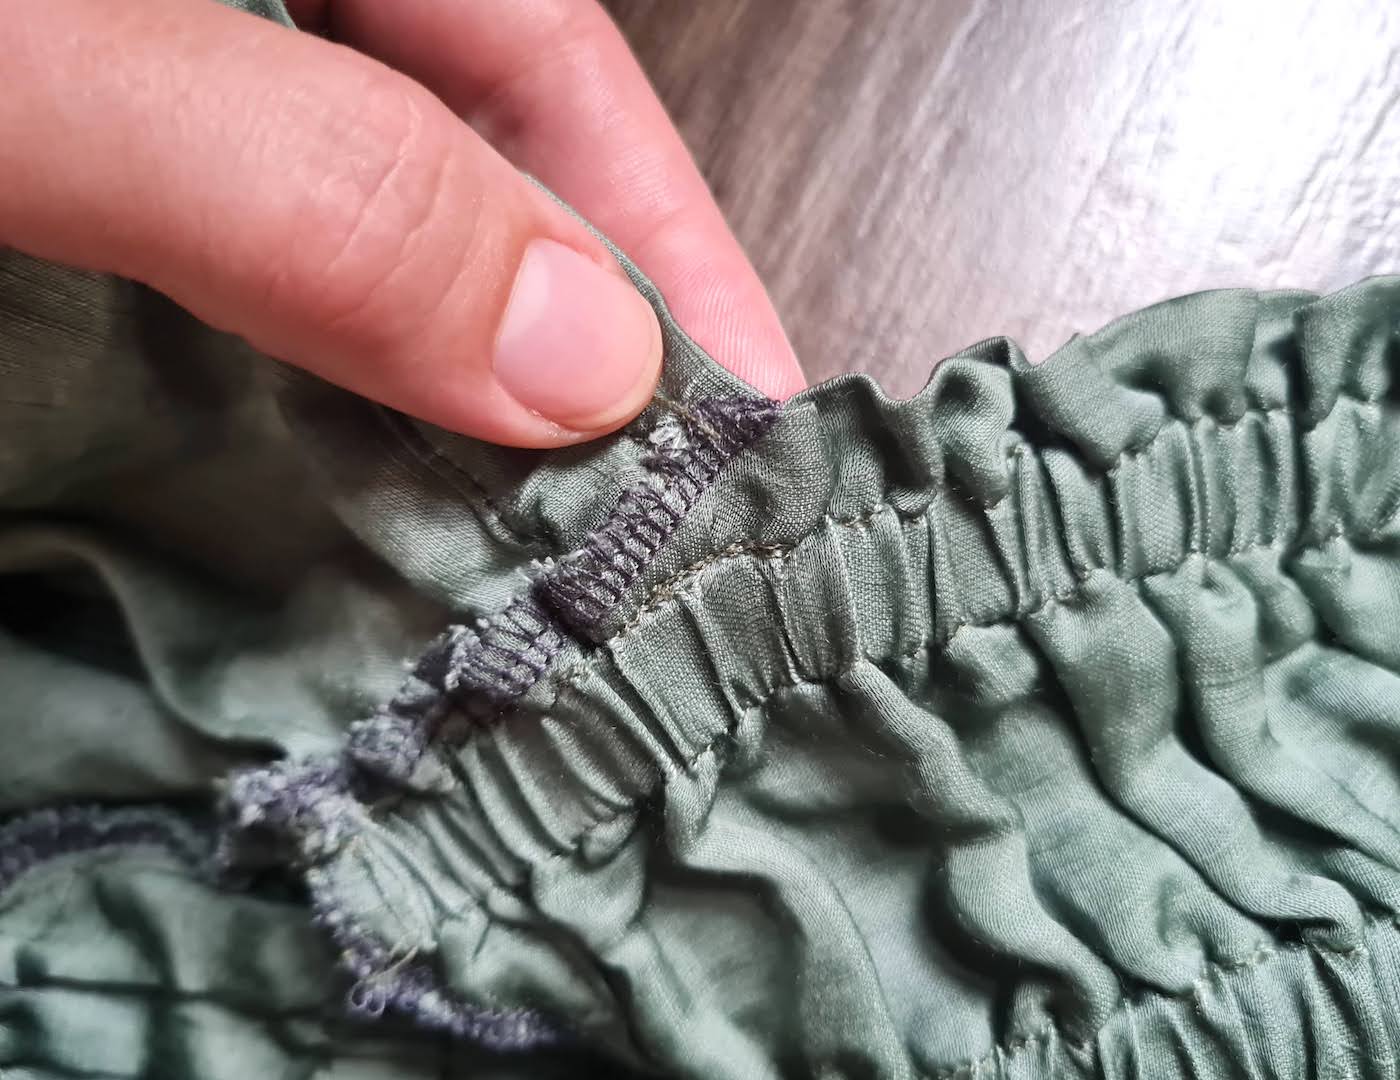
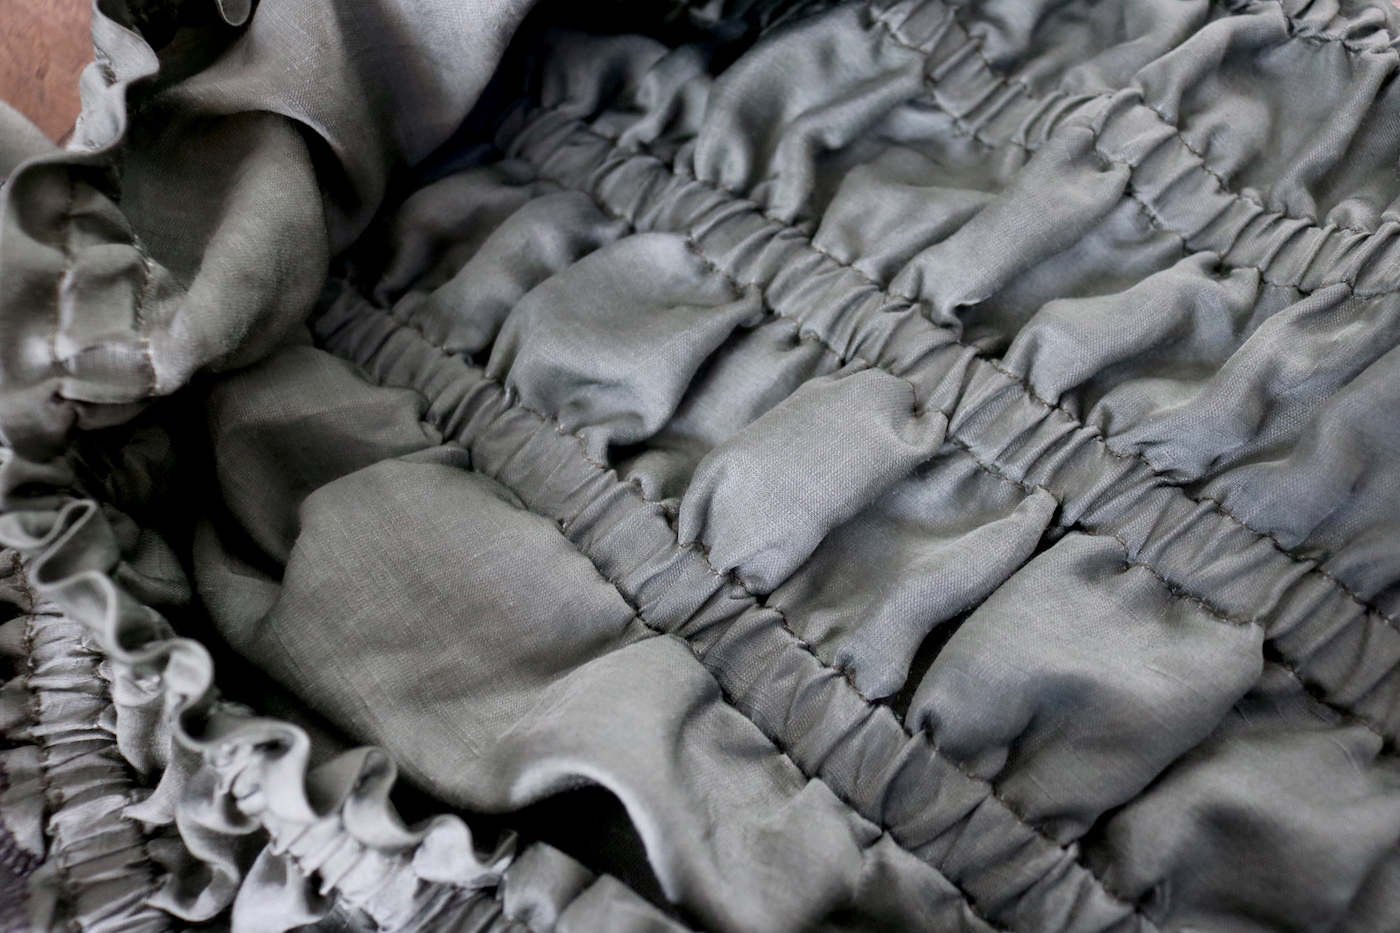
II. Then start making the casings. I did my first stitch in the ditch I had just created, and the second just a little further than the width of my elastic.
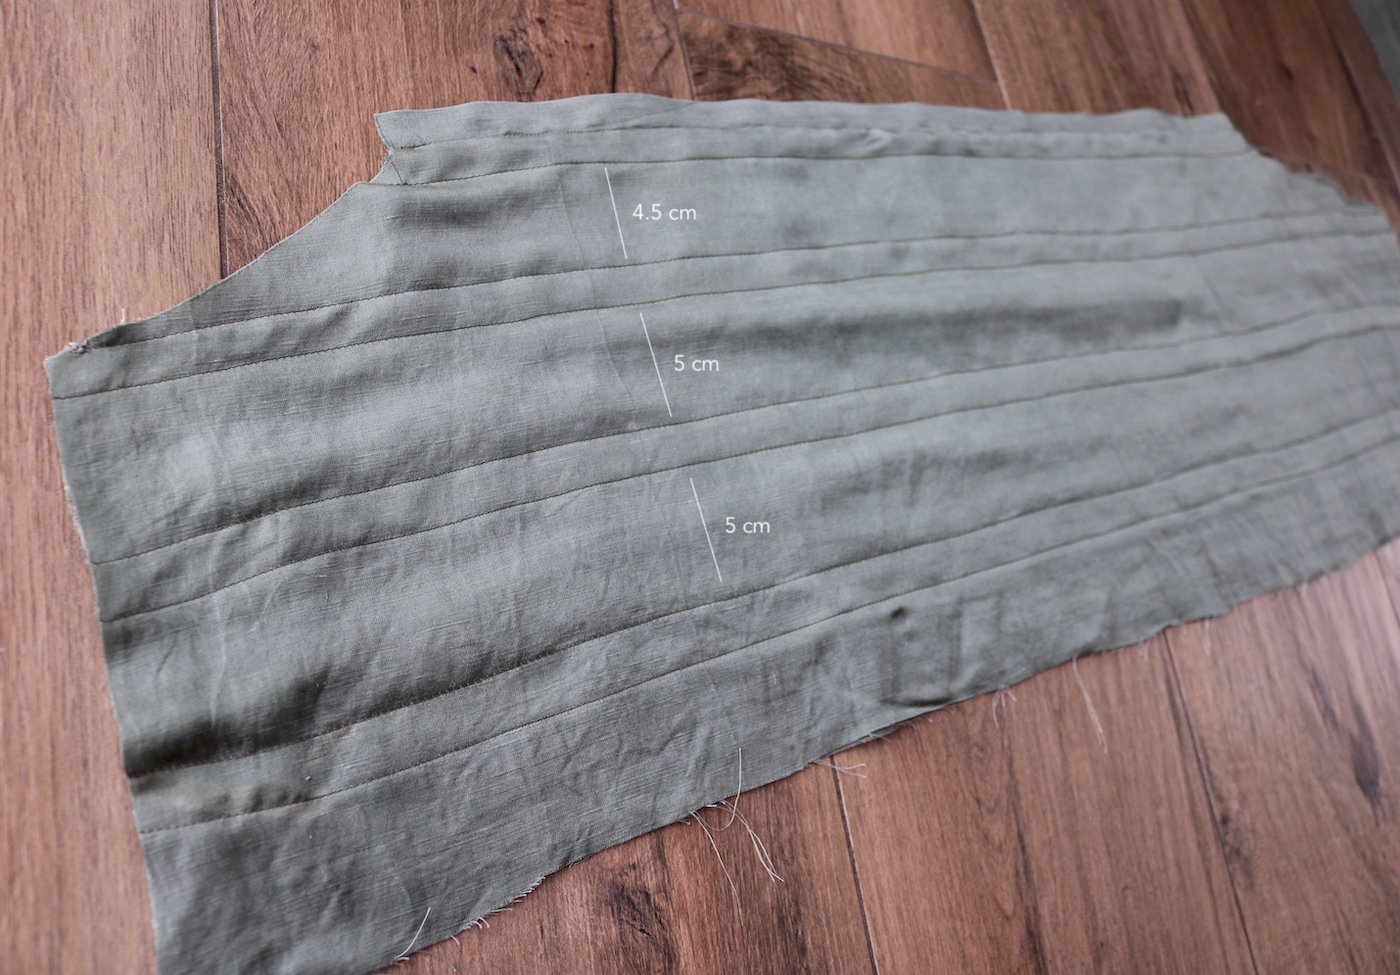
Then added my elastic pieces. The first one I cut about 27 cm long, corresponding to the width of the neckline I wanted. Inserted that with the help of a safety pin..
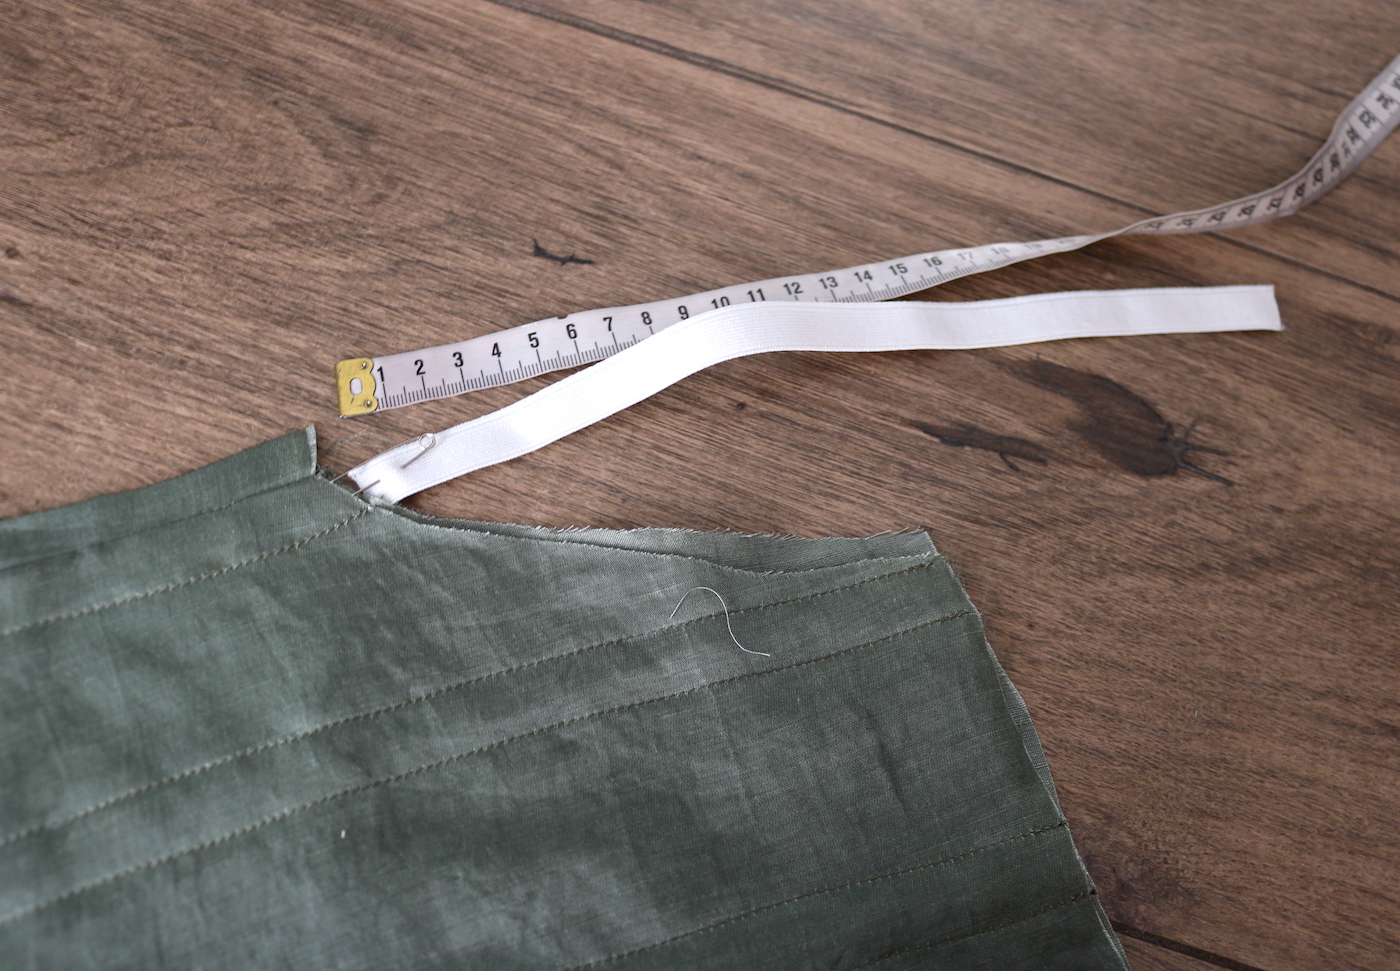
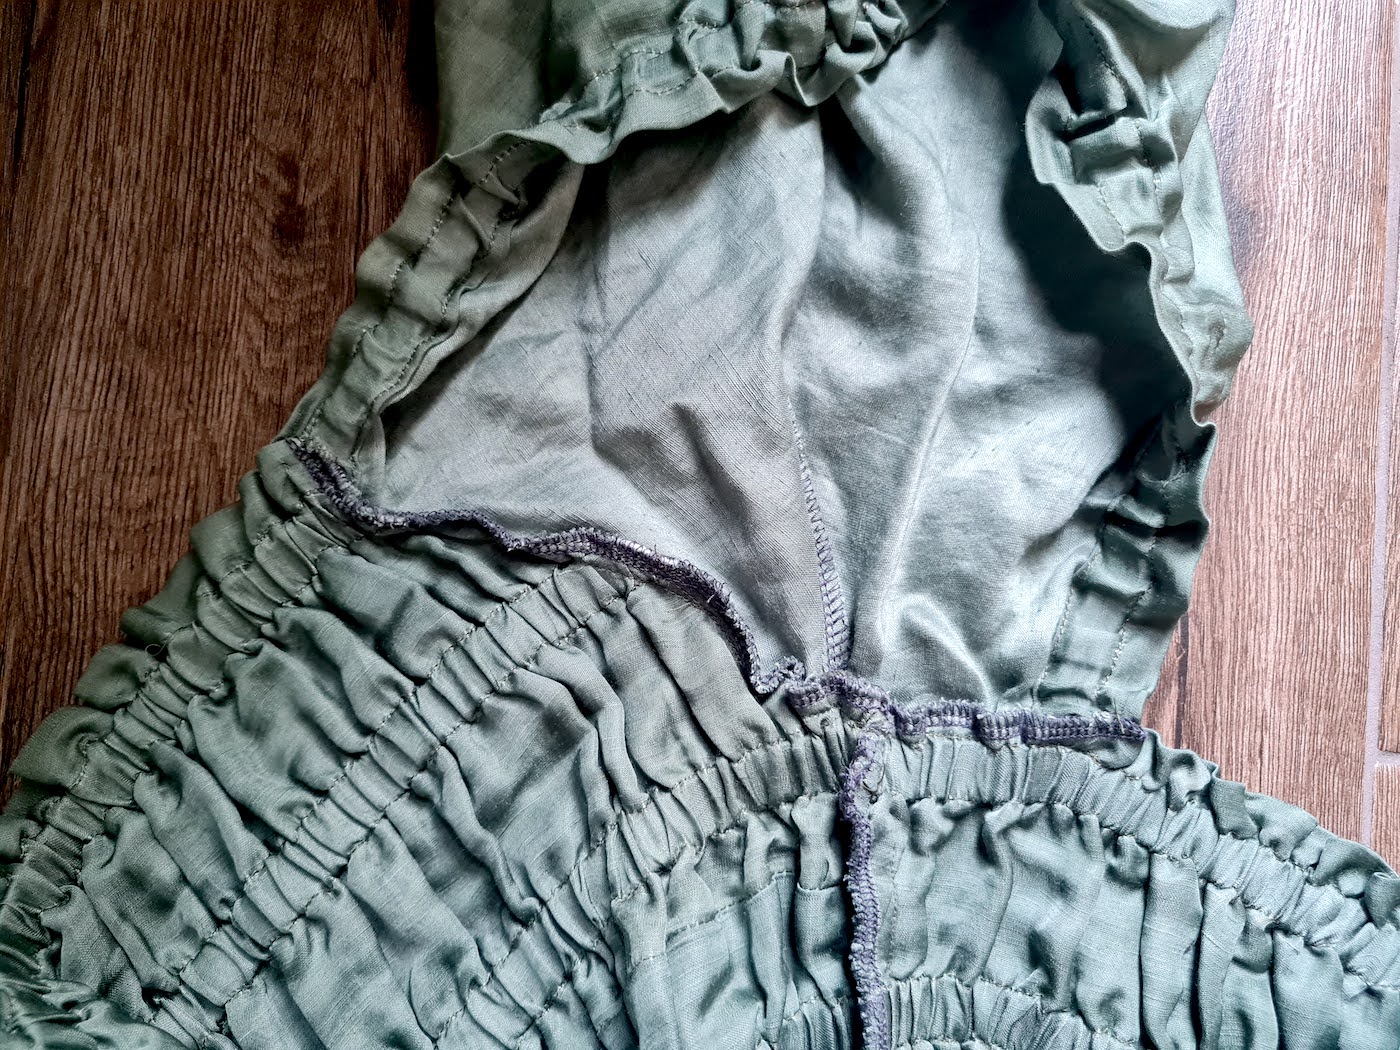
.. And once it was far enough inside I sewed the end to secure it, then pulled the safety pin all the way through and secured that end with stitch too.

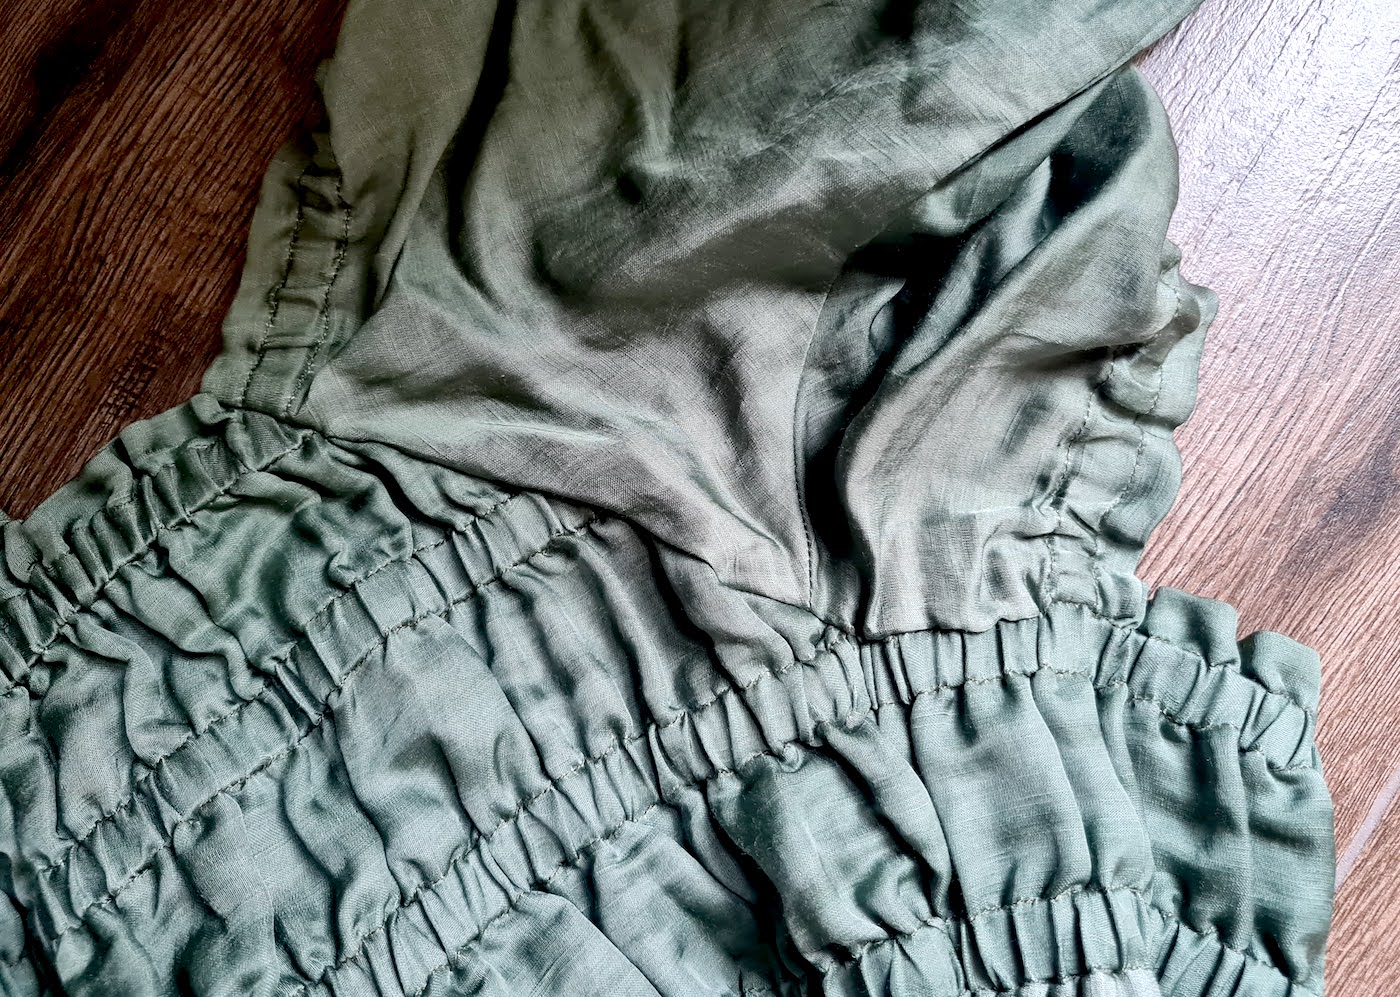
Repeated for all casings. I figured out the lengths of the elastics by measuring across my torso at the point that casing would be located (first one down: across the bust, second one down: side to side under-bust, third one down: side to side at natural waist).
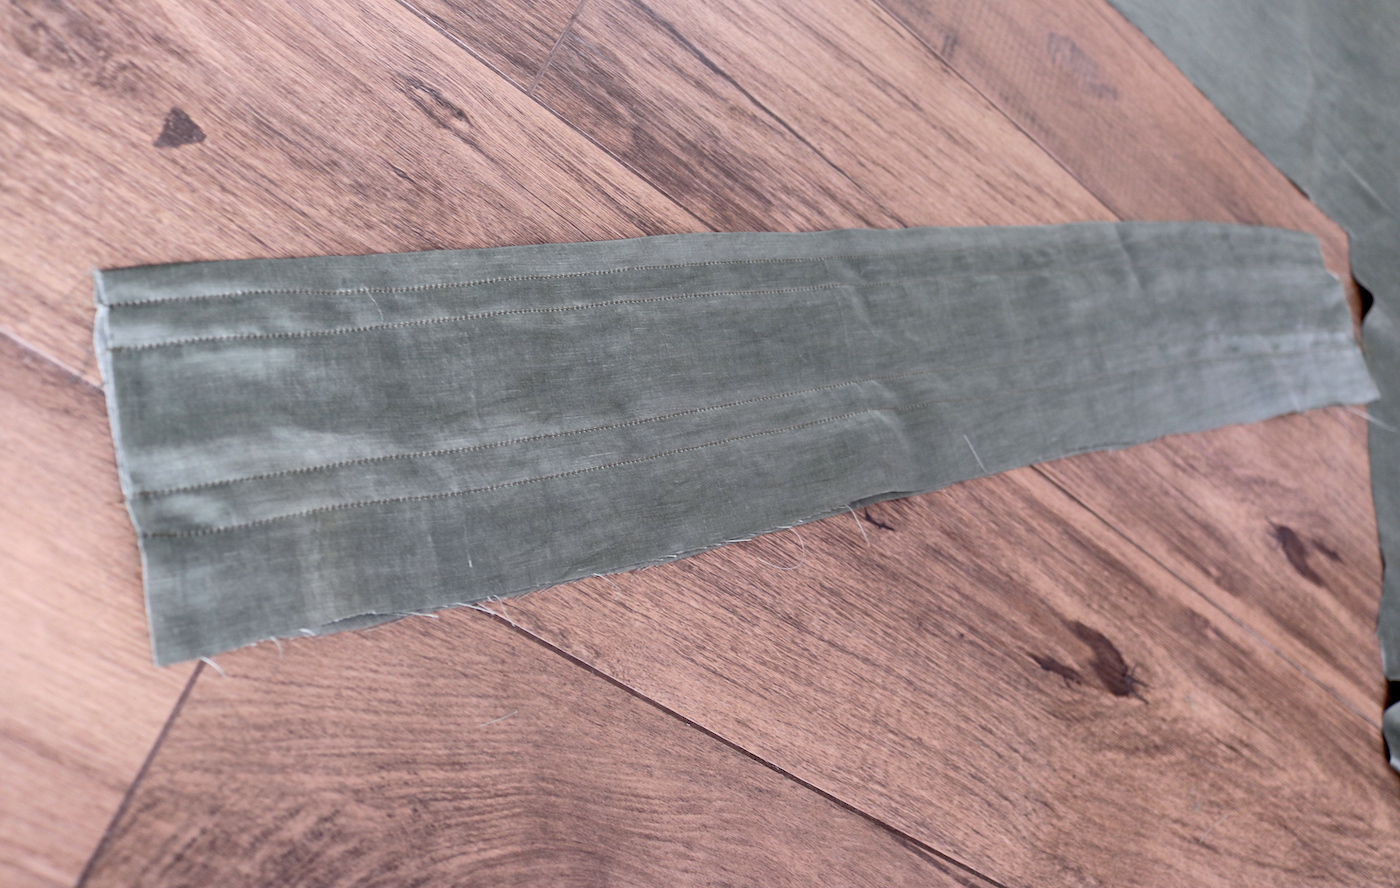
III. Moving on to the back piece. For that I just cut one rectangle, double in width what I needed in the back piece height.
I folded the rectangle in half width-wise, pressed, and then added my casings to it (same distance apart as the two lower casings on the top piece). Inserted elastic (side to side back measurement).
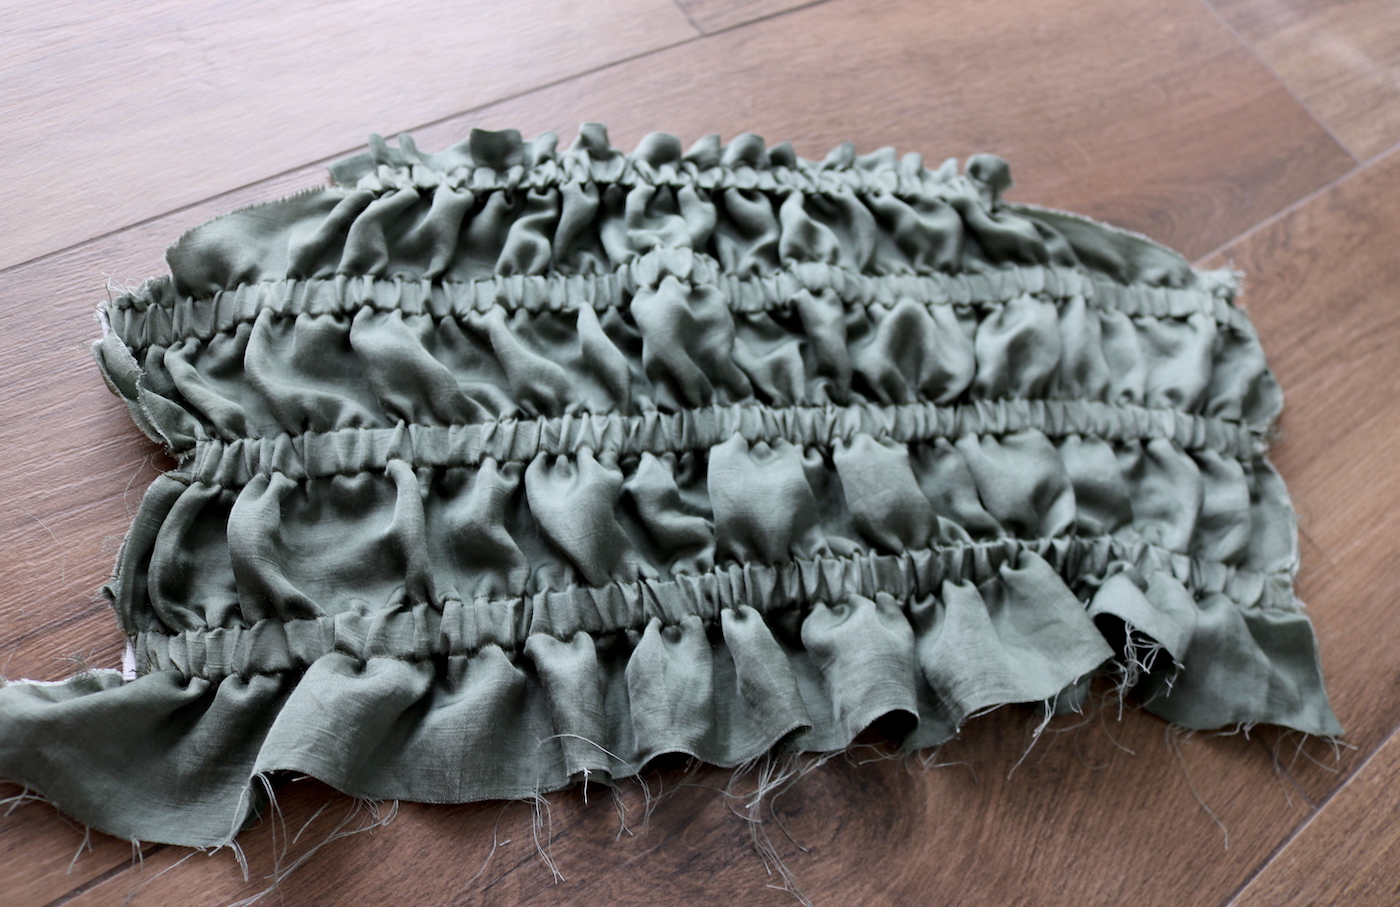
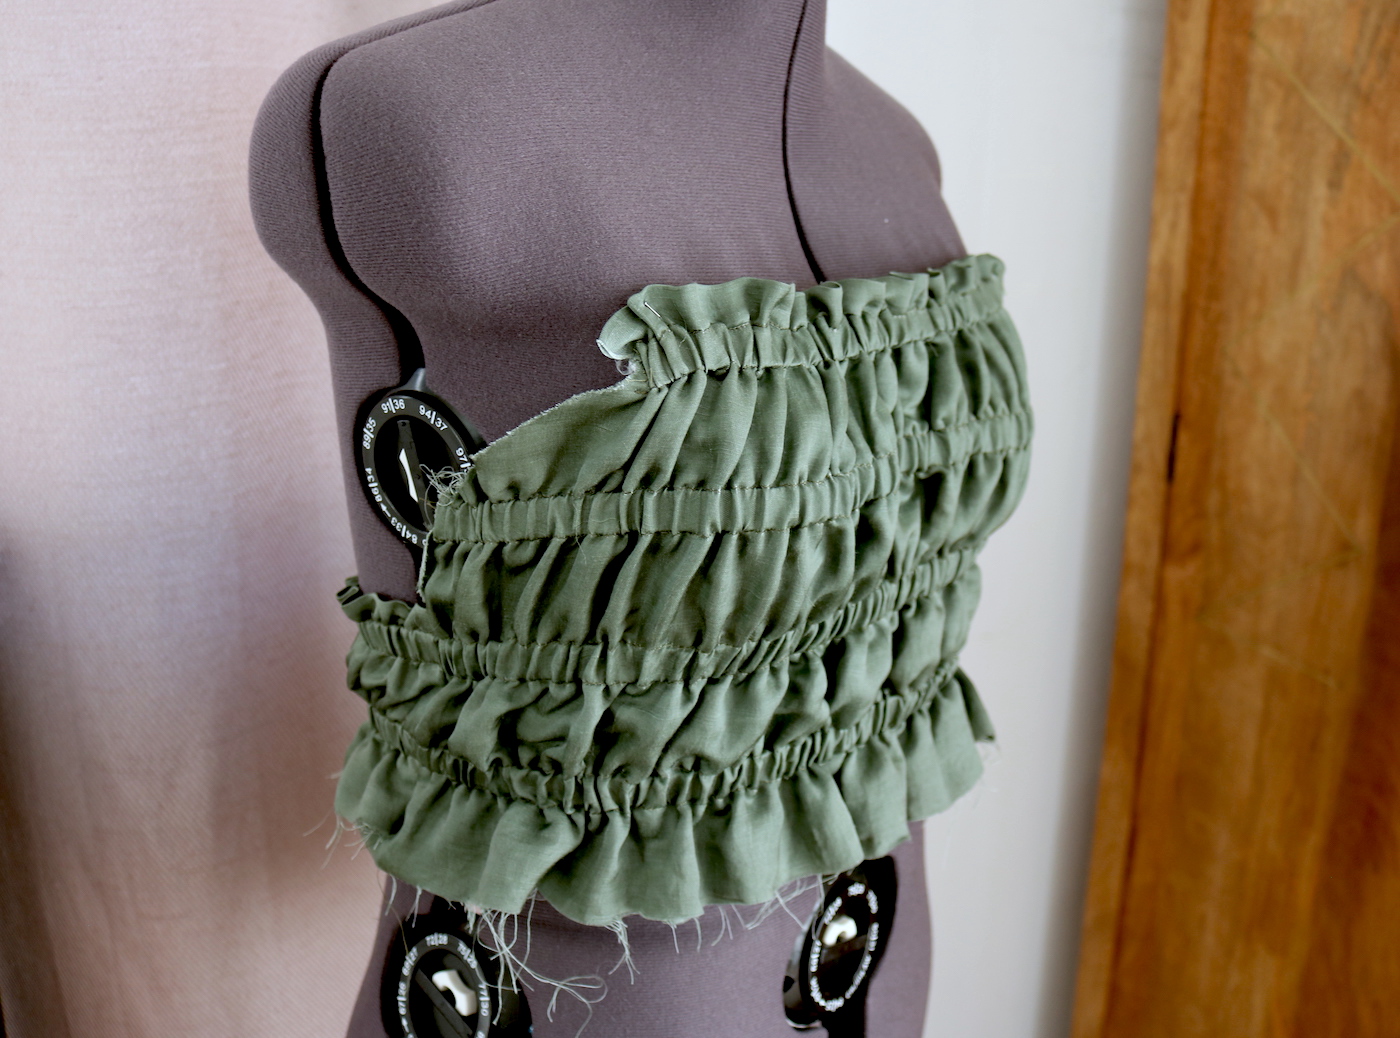
IV. So then I had the front and back pieces all gathered up. I pinned them together at the sides, right sides facing, and making sure I aligned the elastics..
After doing my side seams they were almost invisible due to all the gathering.
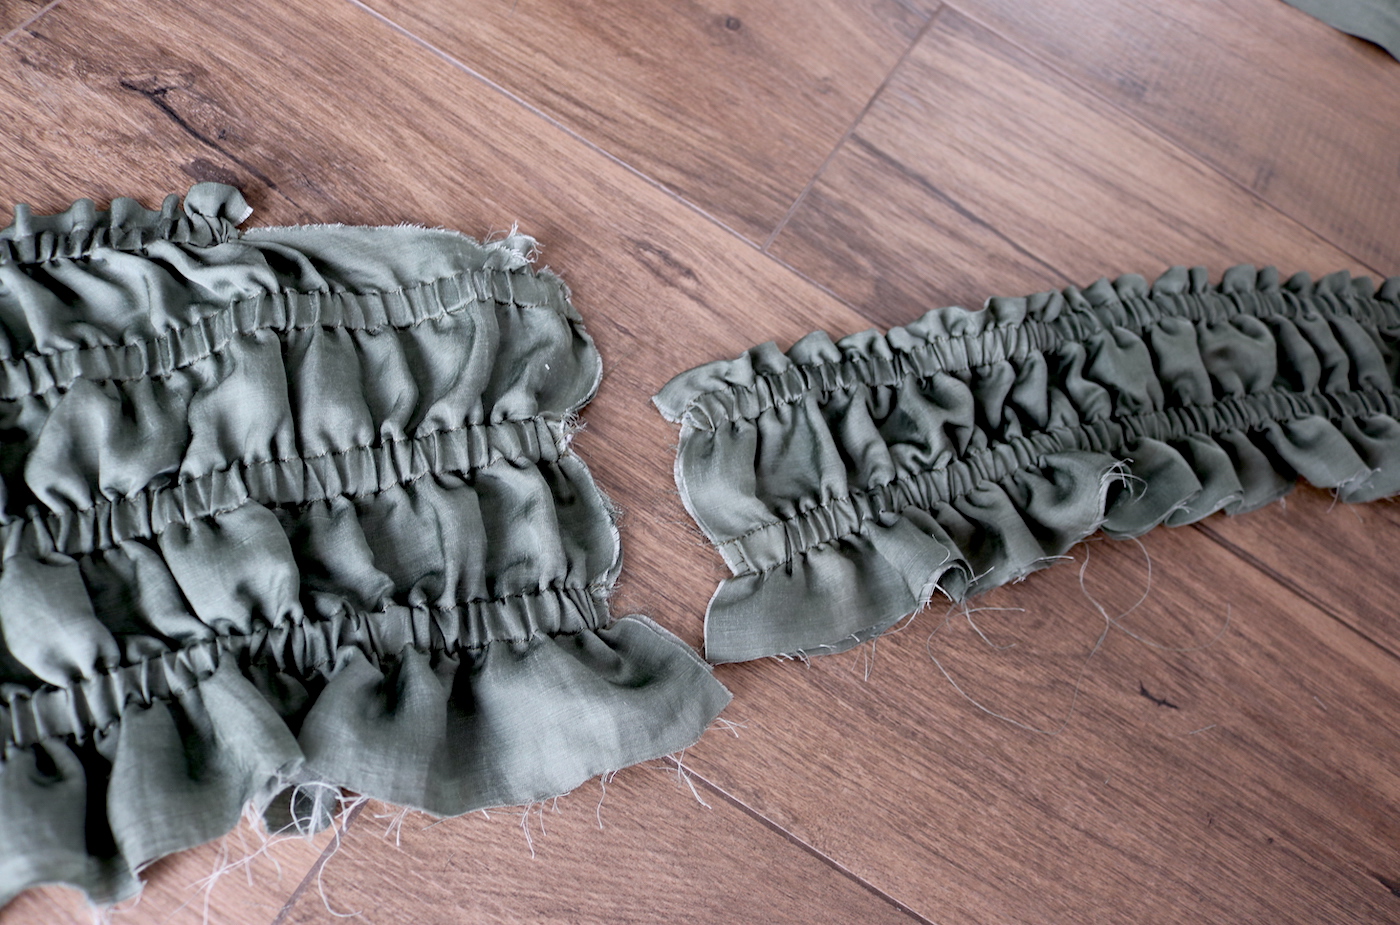
.. which I did after stitching the elastic in place where I was going to cut the excess off. Then I measured the arm curve from the side seam to the neckline. The back of the sleeve was not going to have a curve.
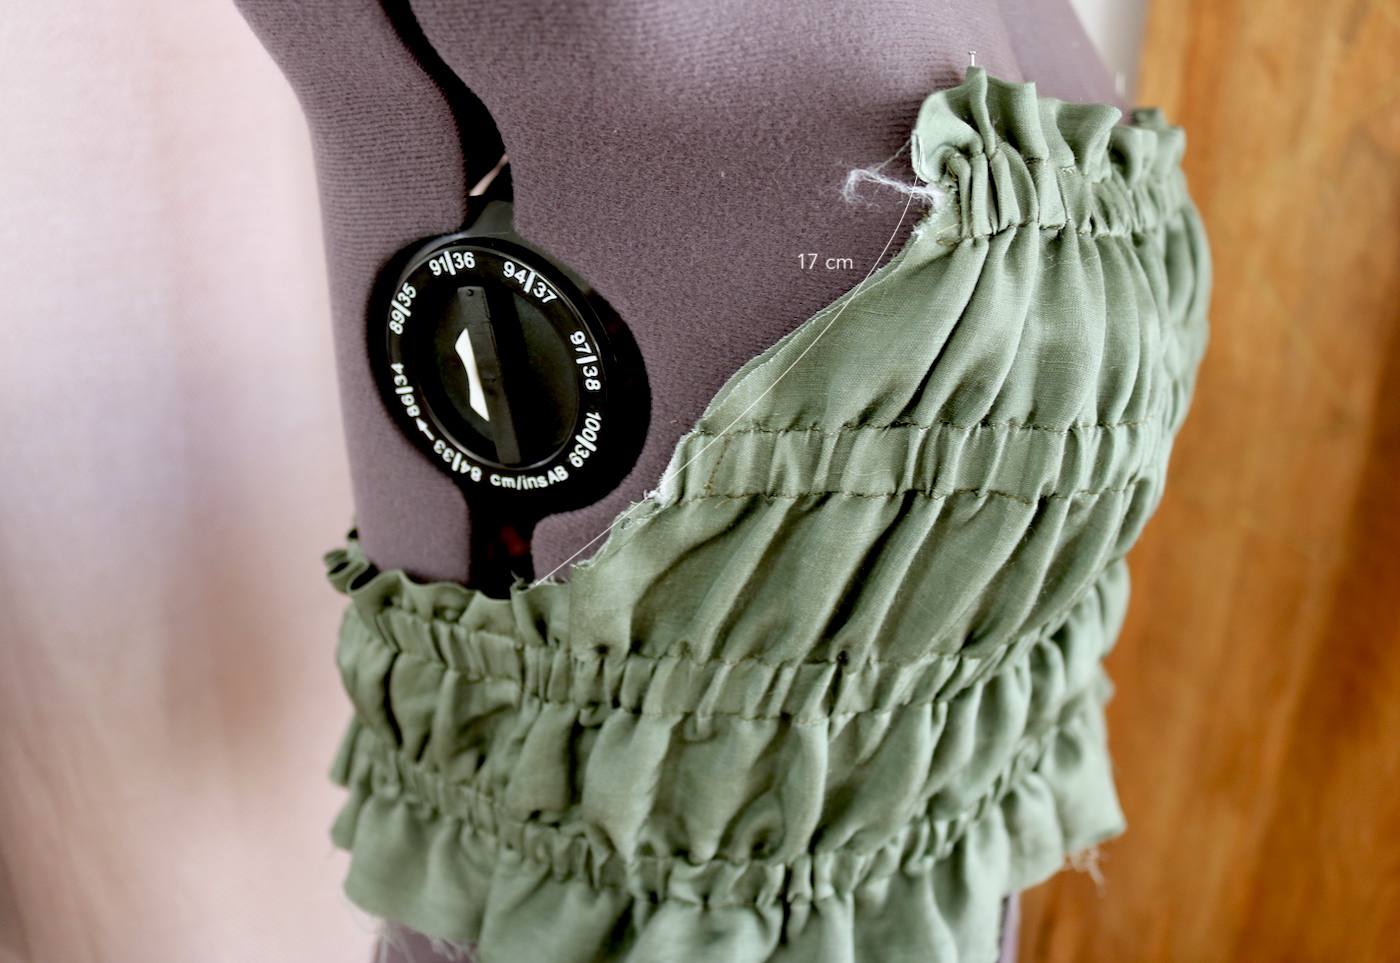
VI. I cut my sleeves out, two almost squares (note fabric is folded at the top of both pieces).

Here's a closeup of how I cut the front piece arm curve. The same curve as on the bodice, and then a mirror image of the curve to make a clean end to the casing for the elastic.
Makes more sense in this photo where the casing is folded & pressed.
Added my elastic, once again. Measurement needs to be from the neckline, over your shoulder, to the back of the top. Easiest to try on the bodice and then measure.

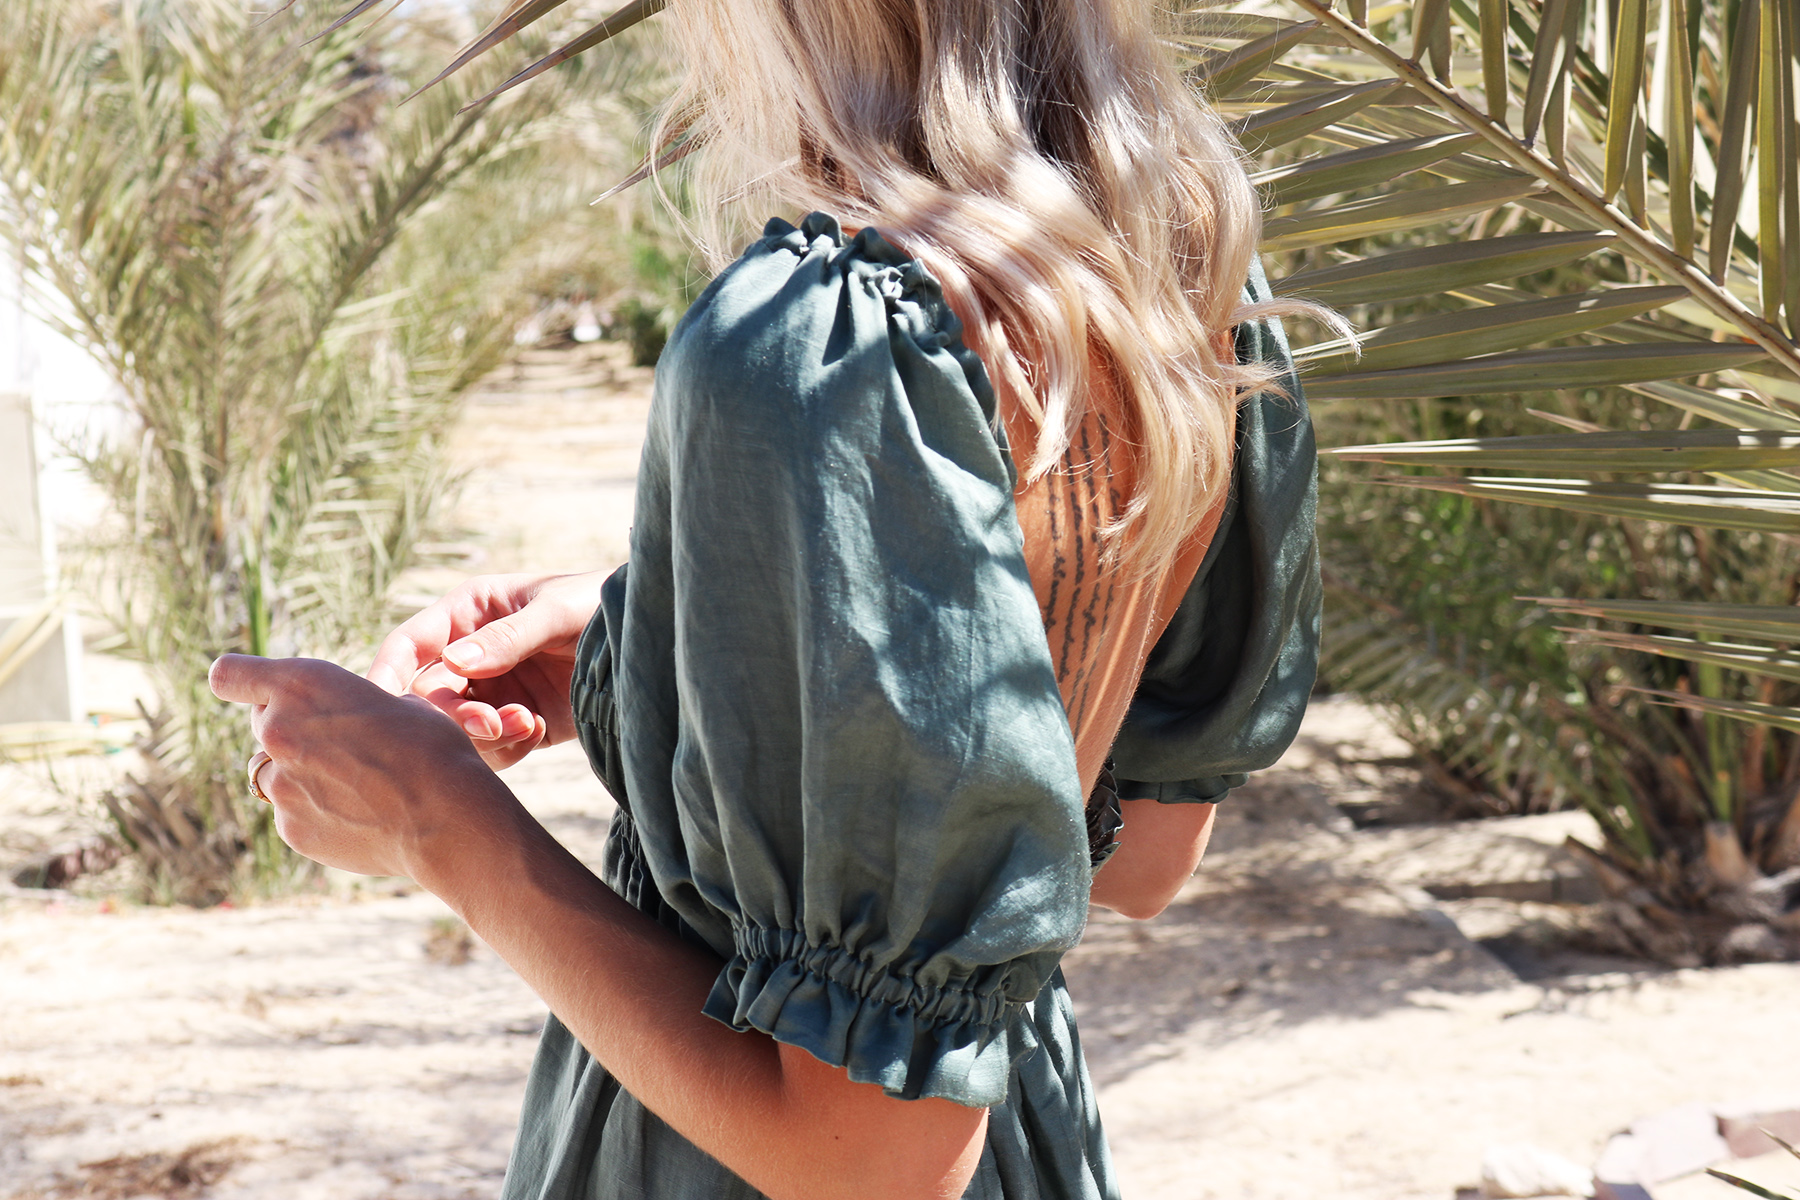
VII. To finish the sleeves, I ended up taking in a bit towards the hem, for a width of about 31 cm (I tried, and the initial 39 cm I had was going to be too full). After sewing the underseam I did a final casing for the elastic at the sleeve hem (4 cm from the hem), where I added an elastic to measure comfortably around my arm.
To attach the sleeves to the bodice, pin them right side to right side - the straight side will attach to the back, and the curved side along the curve you cut on the bodice. After sewing, finish with serger or zigzag.
After sewing, press the seam allowance towards the sleeve, tuck any serger thread tails under, and hand-sew down with a couple stitches.
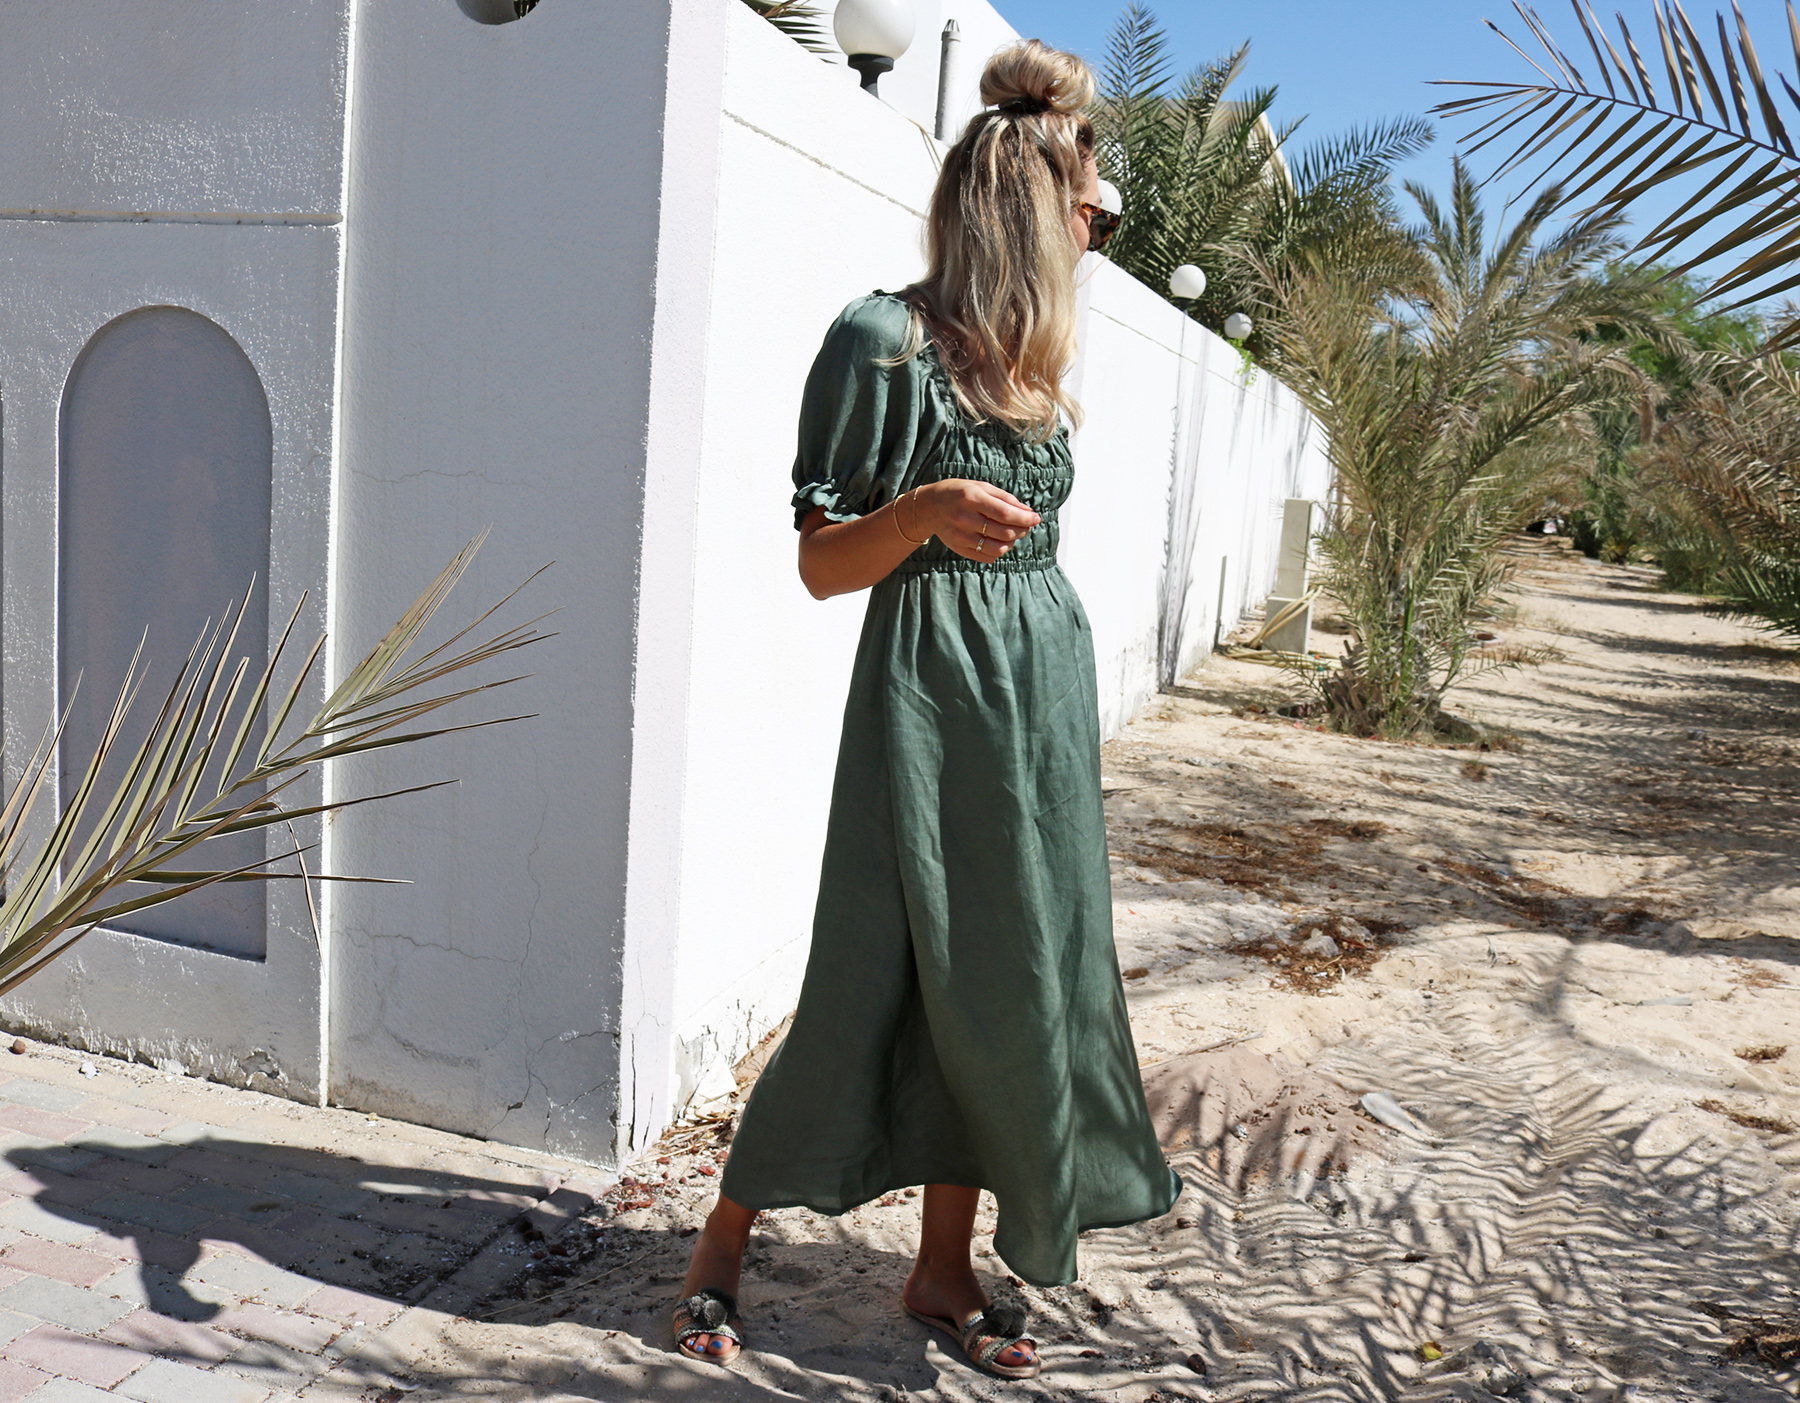
VIII. Last step, the skirt. I cut a very basic A-line skirt, sewed one side normally and on the other side did a slit.
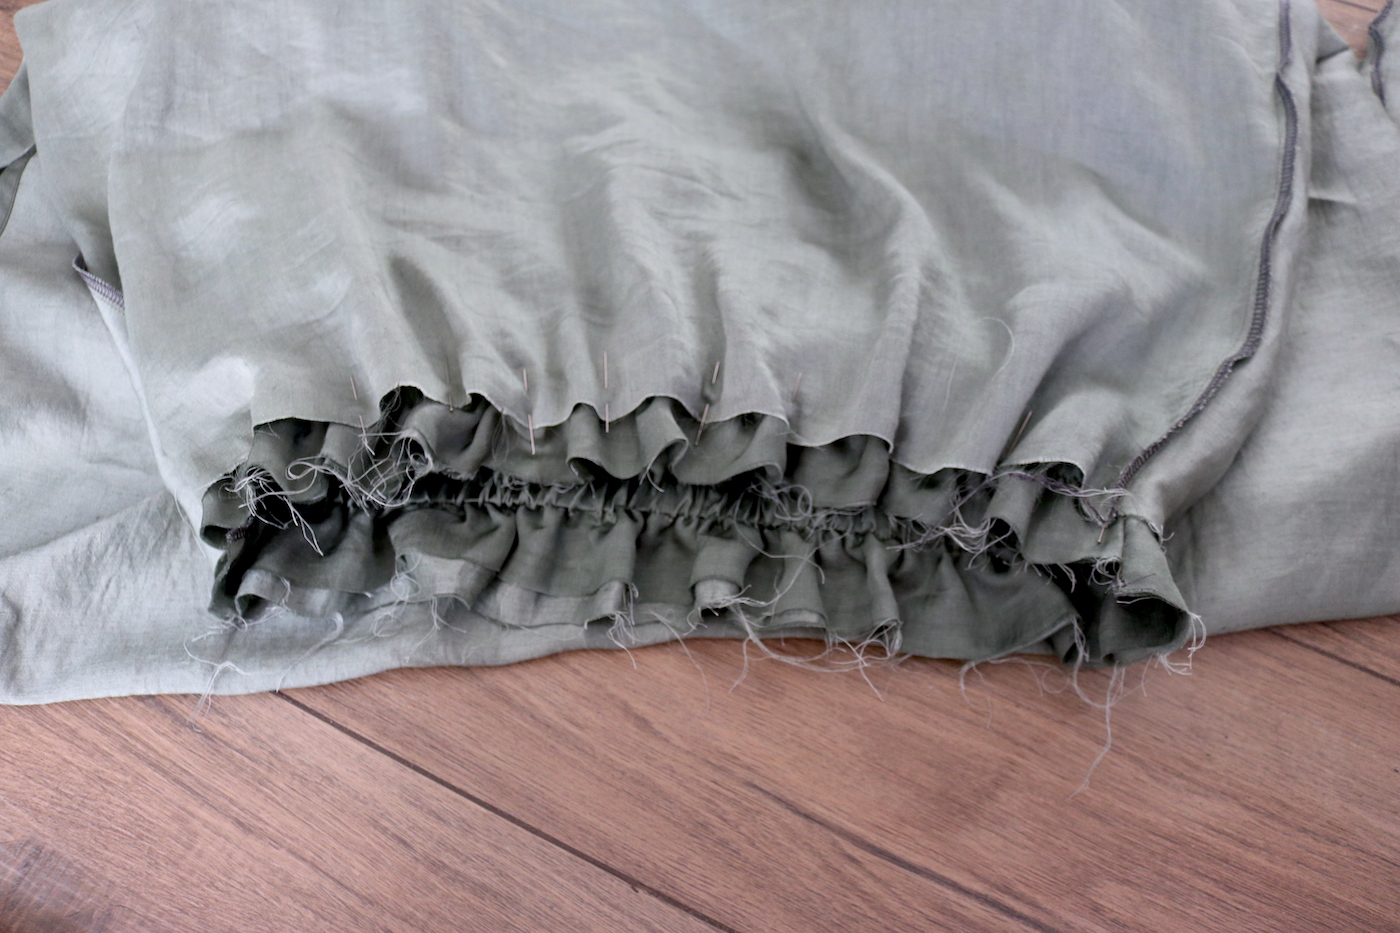
Then pinned the skirt to the bodice, right sides facing, just above the last casing stitch, where I would sew them to attach. I first pinned the sides of the skirt to the sides of the top, then stretched the bodice out to pin the front and back centers, and from there the quarters, etc. to distribute the skirt evenly along the bodice.
Then just sewed and finished the seam with my serger (or cut and zig-zag). Important to sew on the side of the bodice, so you see the last casing stitch and can sew directly over it.
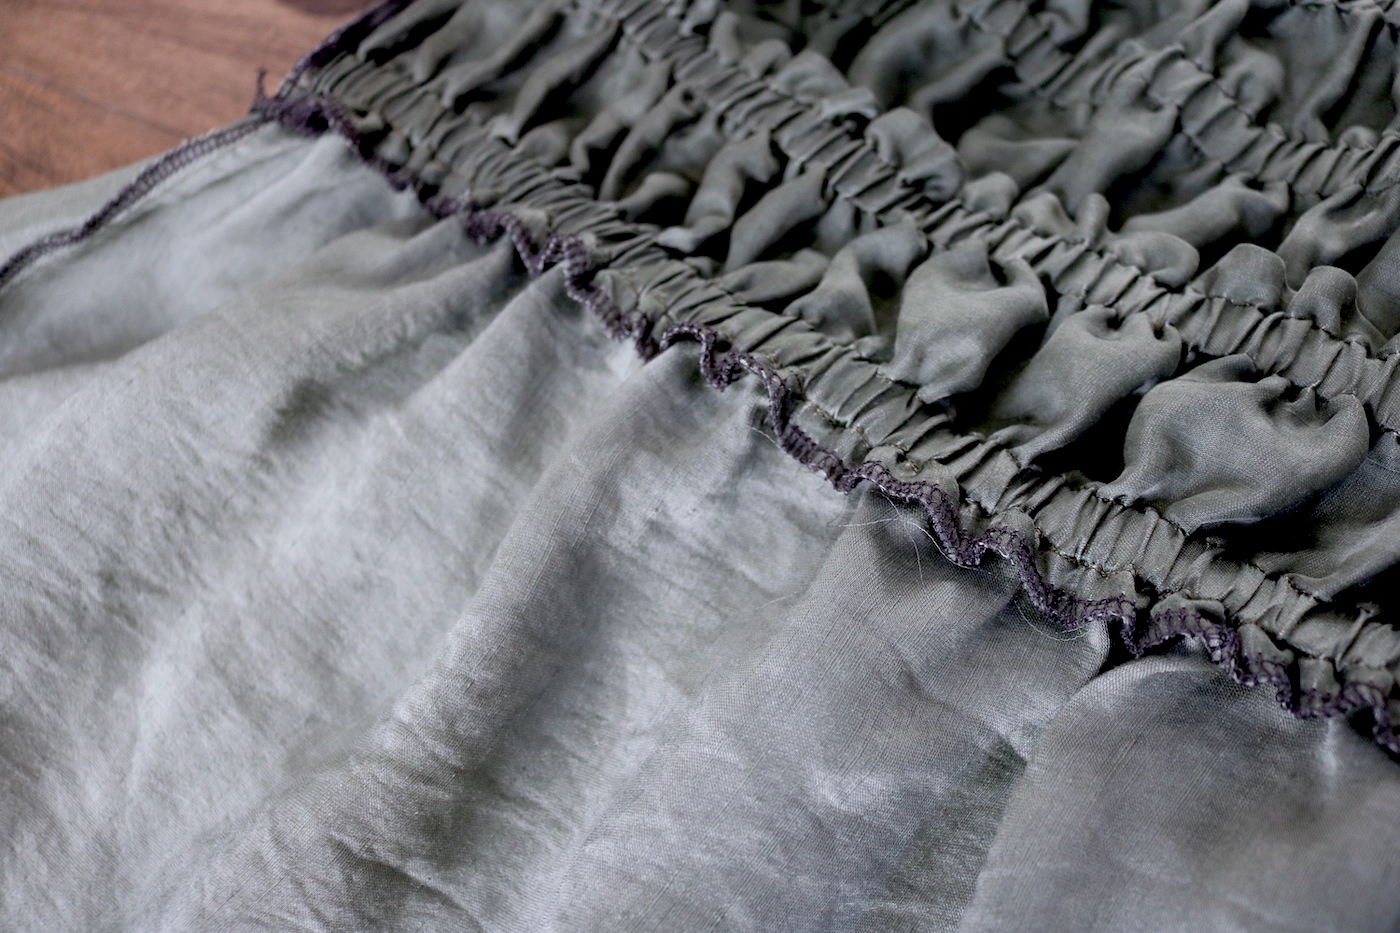
That way on the right side the skirt will continue seamlessly from the last elastic.
Into it.

xo,
Julia


you are very talented...love your creativity...your sewing skills are excellent...but above all, you excel in selecting appropriate fabrics to prevent the "homemade" look. i really enjoy and look forward to your posts. thank you! yvonne
ReplyDeleteThank you so much Yvonne!!
DeleteI love this dress so much! Going to attempt to make this one soon! I have one question: why did you choose to do the bodice with elastic rather than separated rows of shirring?
ReplyDeleteThank you! I just felt like doing something different, made so many shirred pieces I wanted to try out another technique.. but of course you could just do regular shirring!
DeleteThanks so much for your quick reply! Will definitely give this a go. I love your fabric too. Have been Googling cotton/linen fabrics the past hour haha, I'm so indecisive. Did you happen to get this online and have a link (fingers crossed)?
DeleteUnfortunately not for this one, got it locally here in Dubai.. I recommend checking out www.minerva.com - they have a very wide selection and lots of colours https://www.minerva.com/mp?type=Fabrics&substrate=Linen-Look
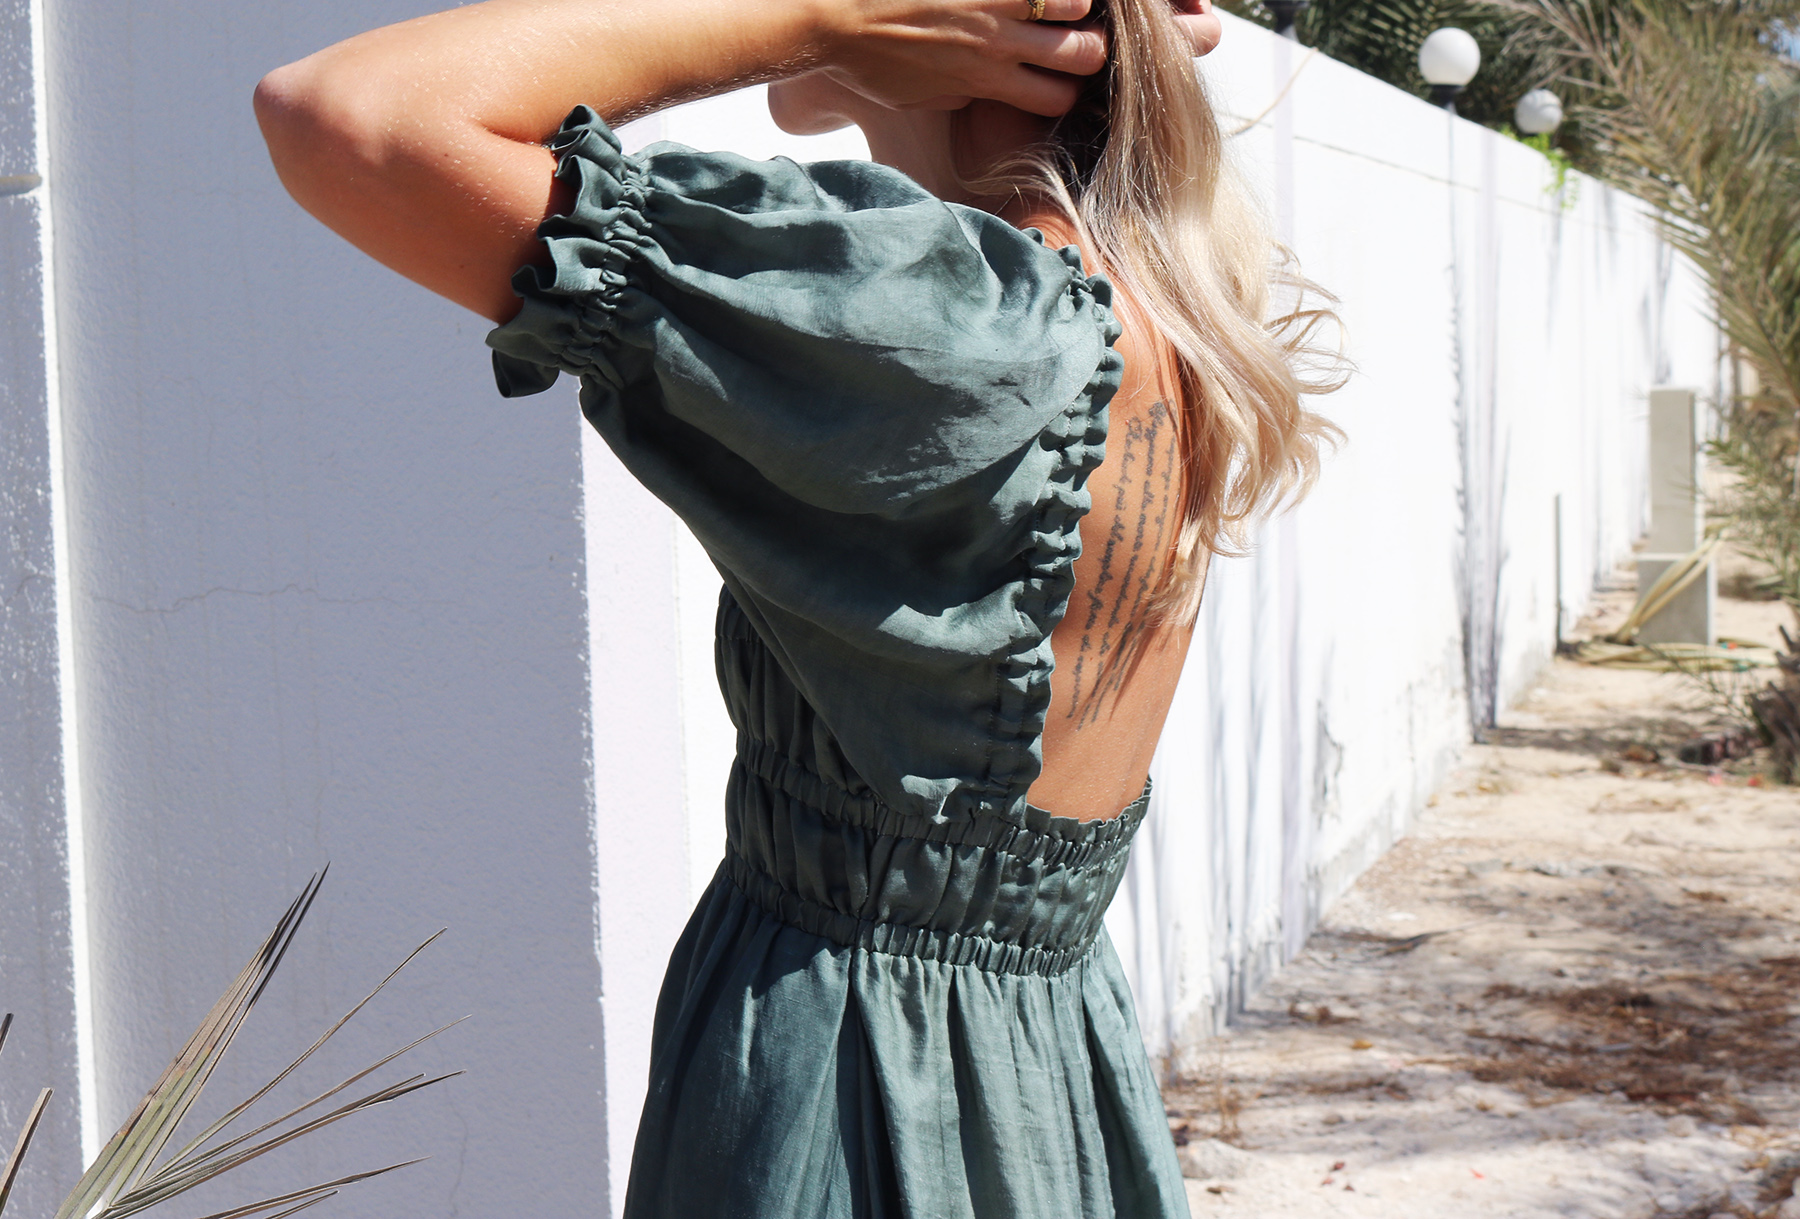
DeleteAw, I like yours better than the pattern. The lower back and the longer sleeves give it drama and make it look like an adult garment. <3
ReplyDeleteHi!! I Love Your makes!! But I was trying to turn this dress into a shirt and I’m having a very hard time Ataching the sleeves!! Can you please explain how to do It?
ReplyDeleteI've just noticed the tutorial is somehow missing that step entirely! I'm sorry about that, no idea what happened there.. I'm currently traveling and don't have access to the tutorial photos, I will need to fix this in August when I'm back home. But in short, you attach the sleeves by pinning them onto the top, right side to right side, the curved side of the sleeve goes in the front and the straight side in the back.
DeleteAny chance you have pics you add of attaching the sleeves?! Or a picture of the front of the dress where it's easier to see where it attaches?! Thank you - this is stunning!!
ReplyDeleteHey!! I had completely forgotten to fix this even though it was already flagged to me last year 😒 I've added a couple photos & an explanation in now, I hope they help!
DeleteOh this is amazing - thank you so much!!
Delete