

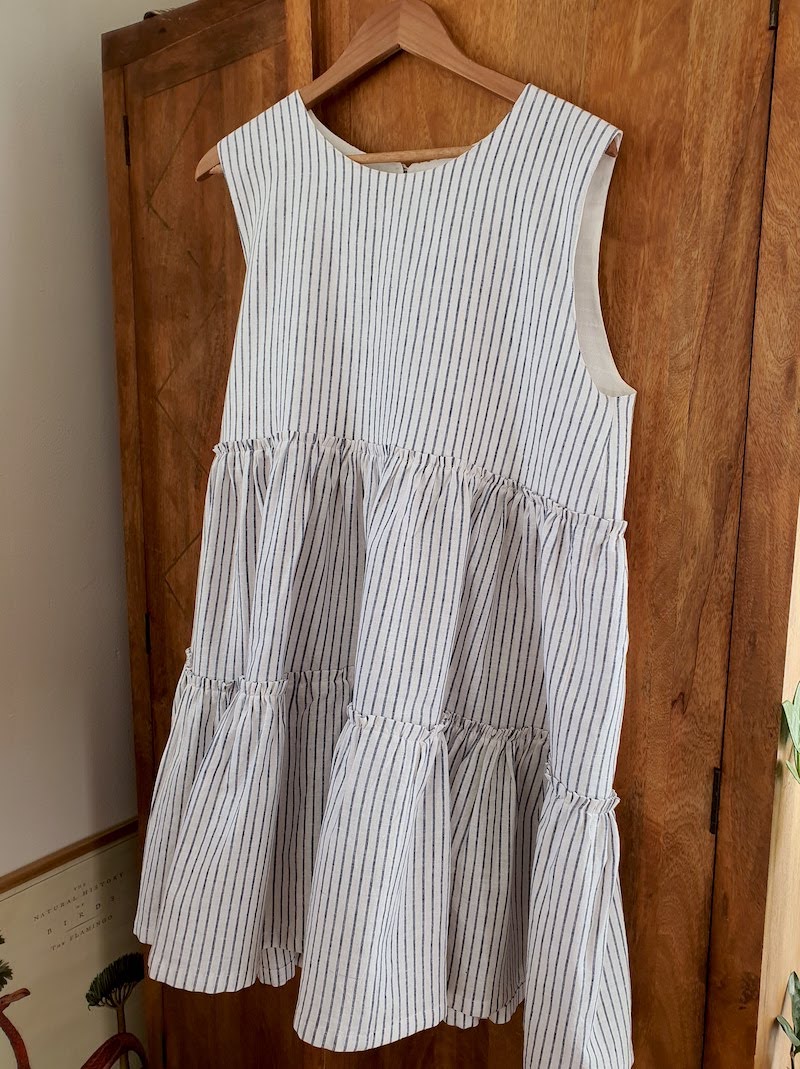
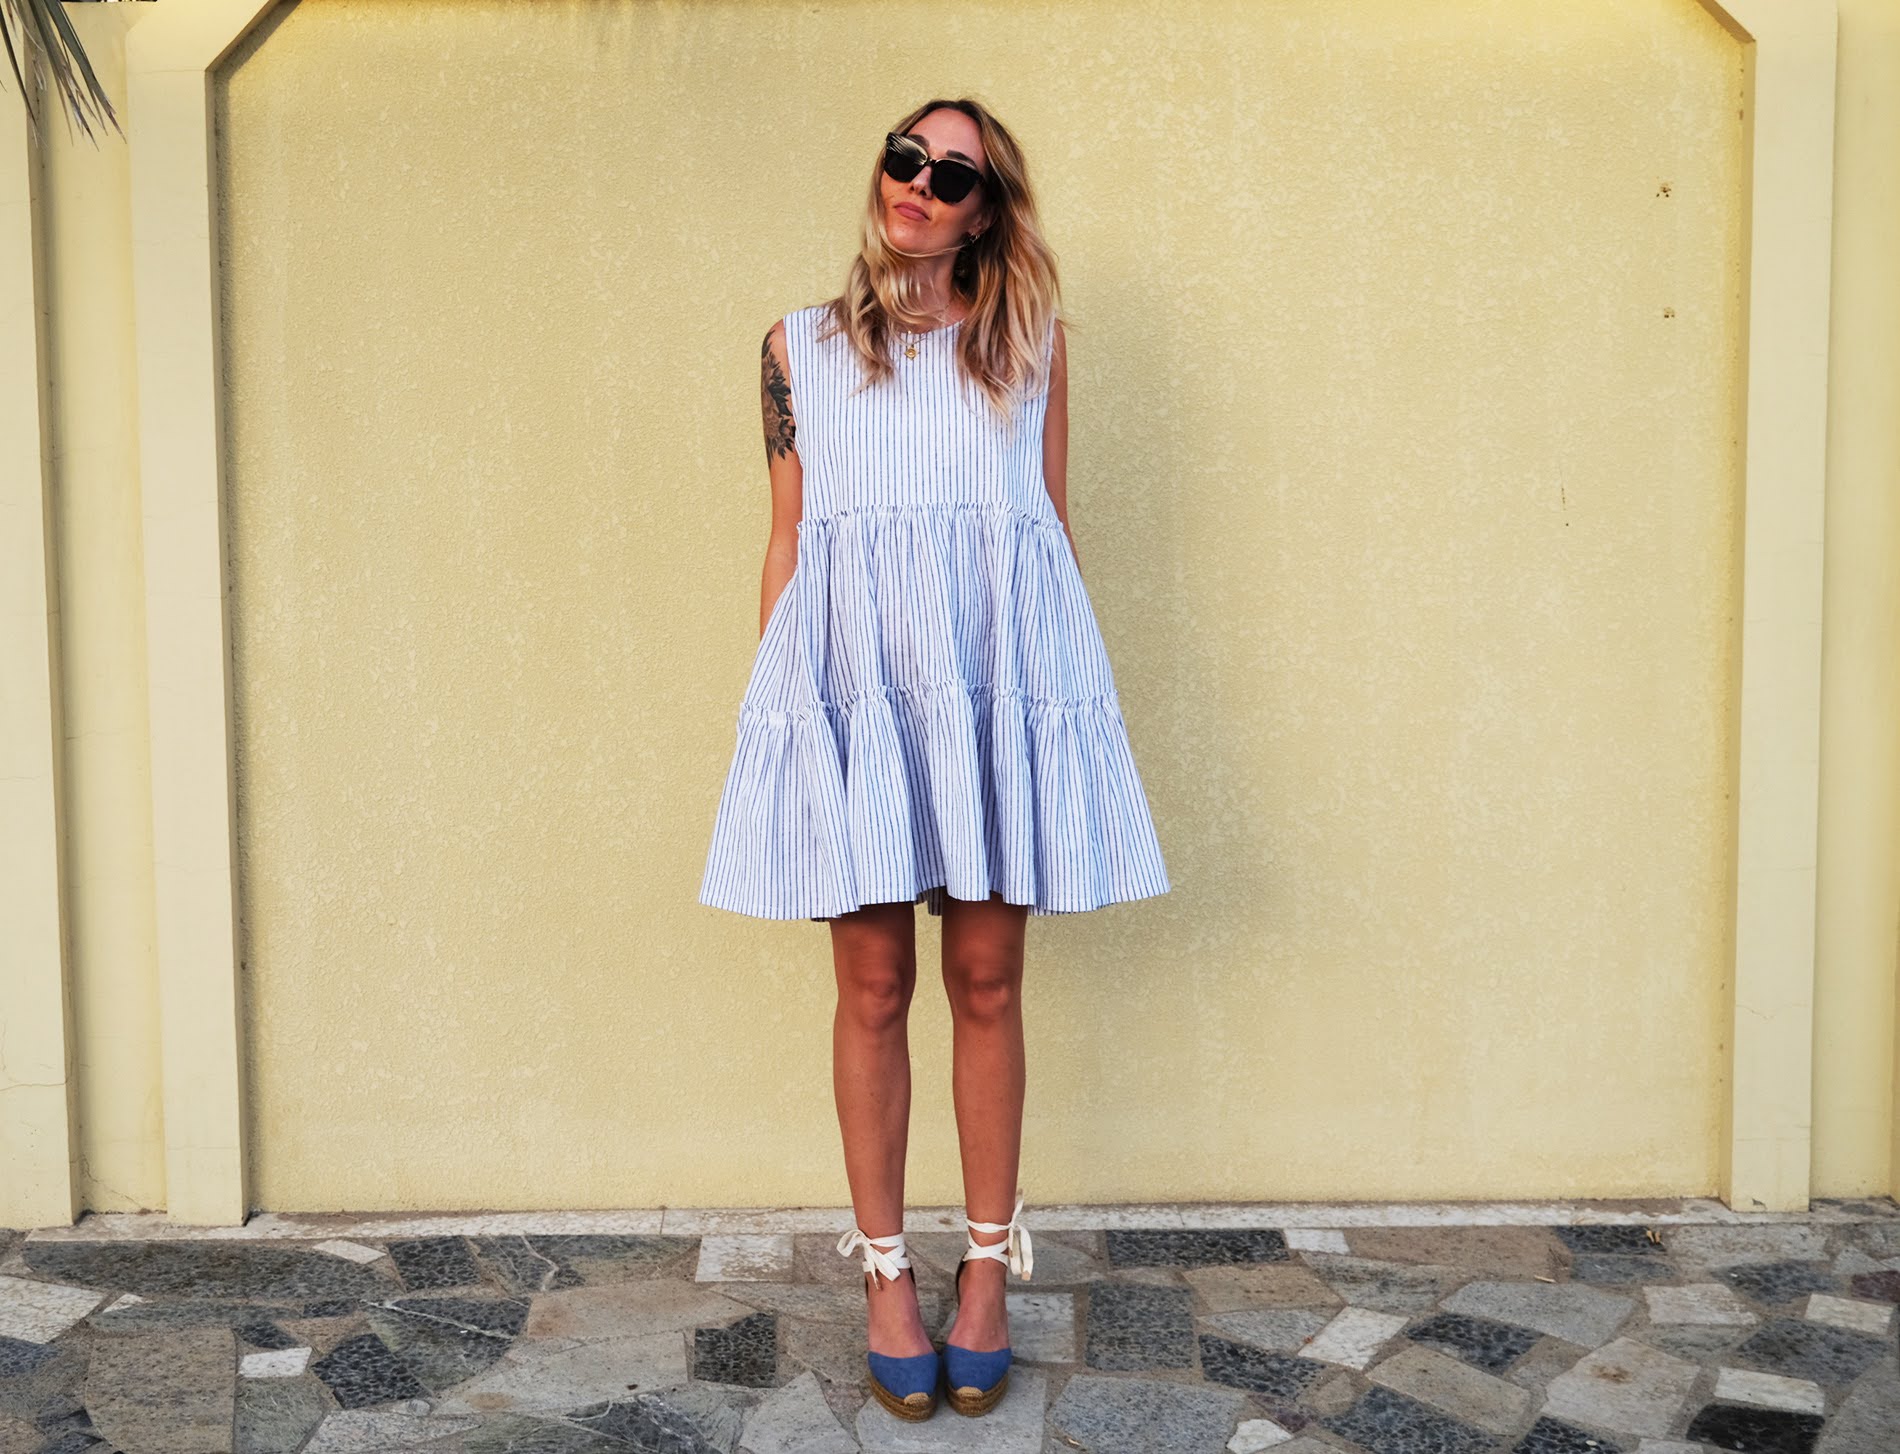
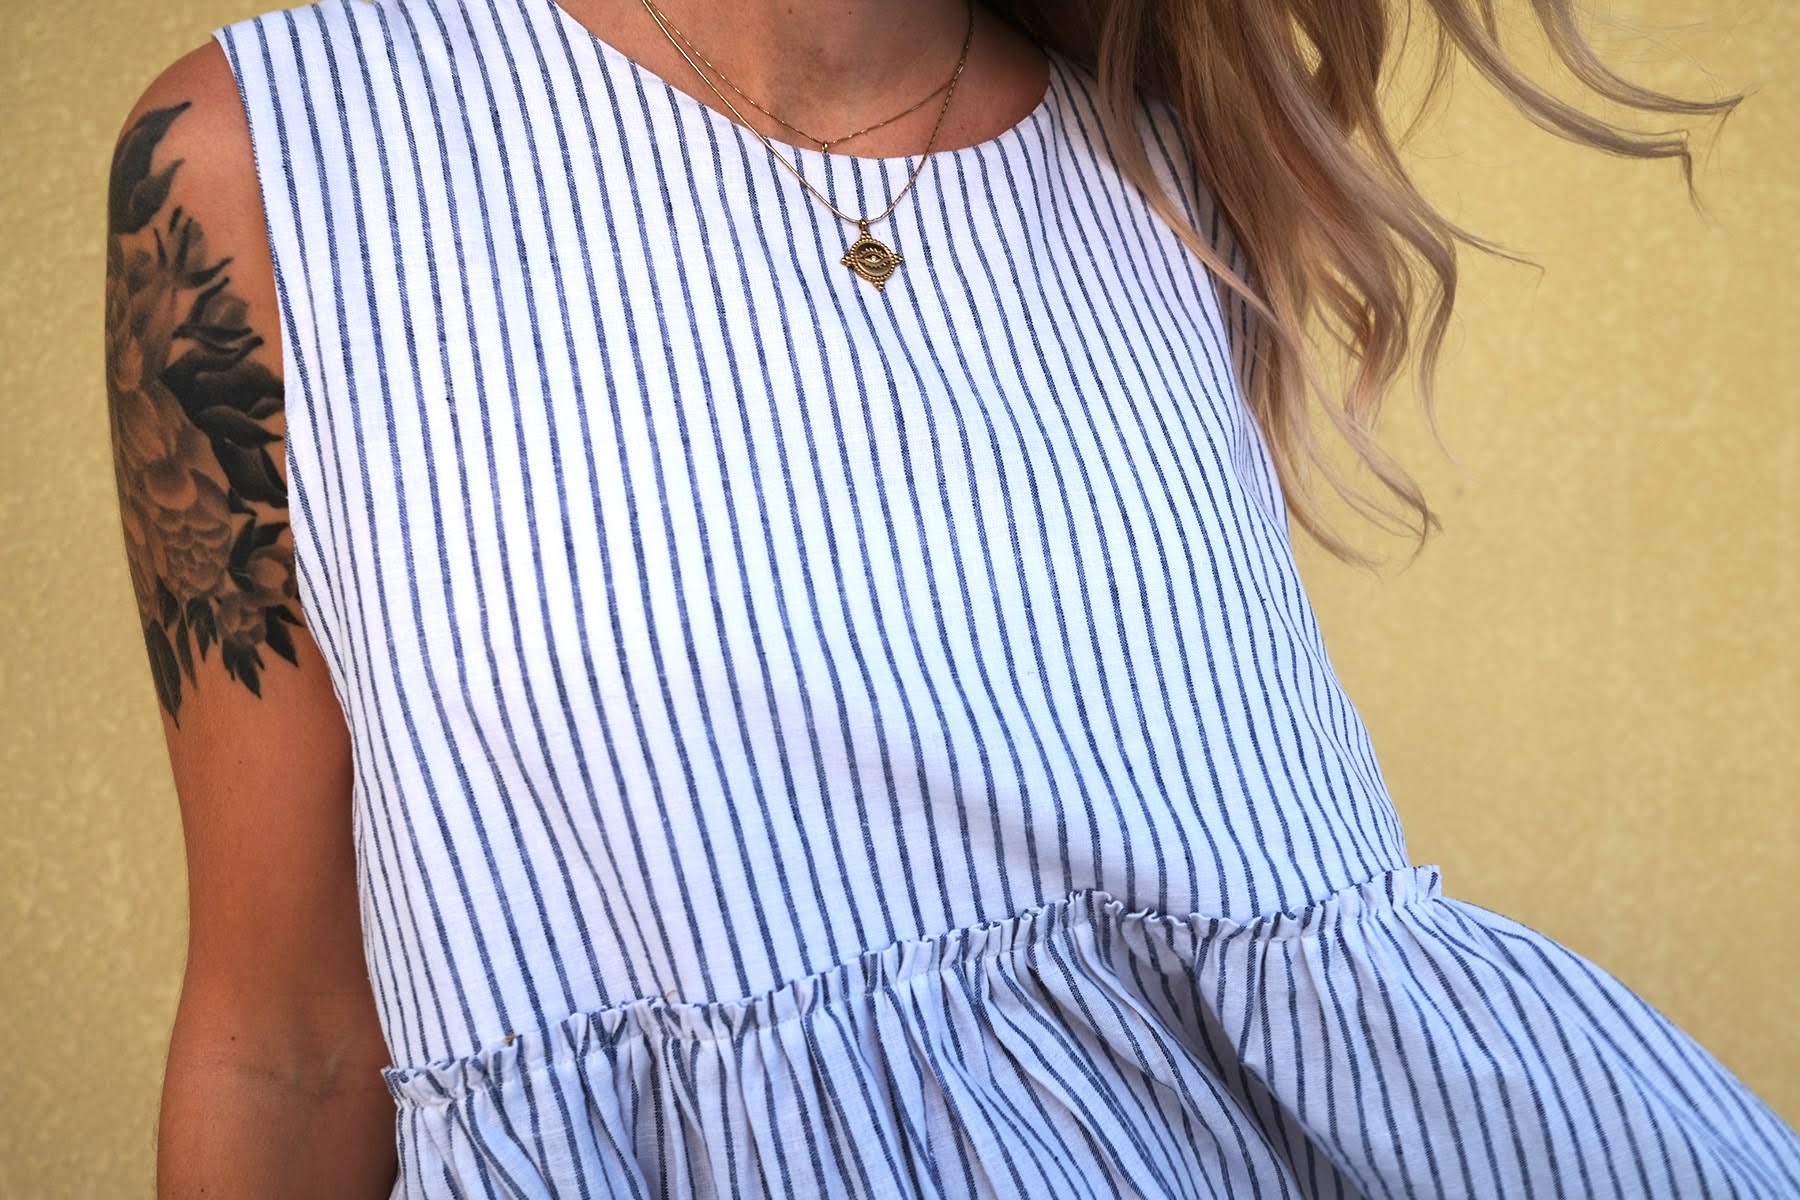
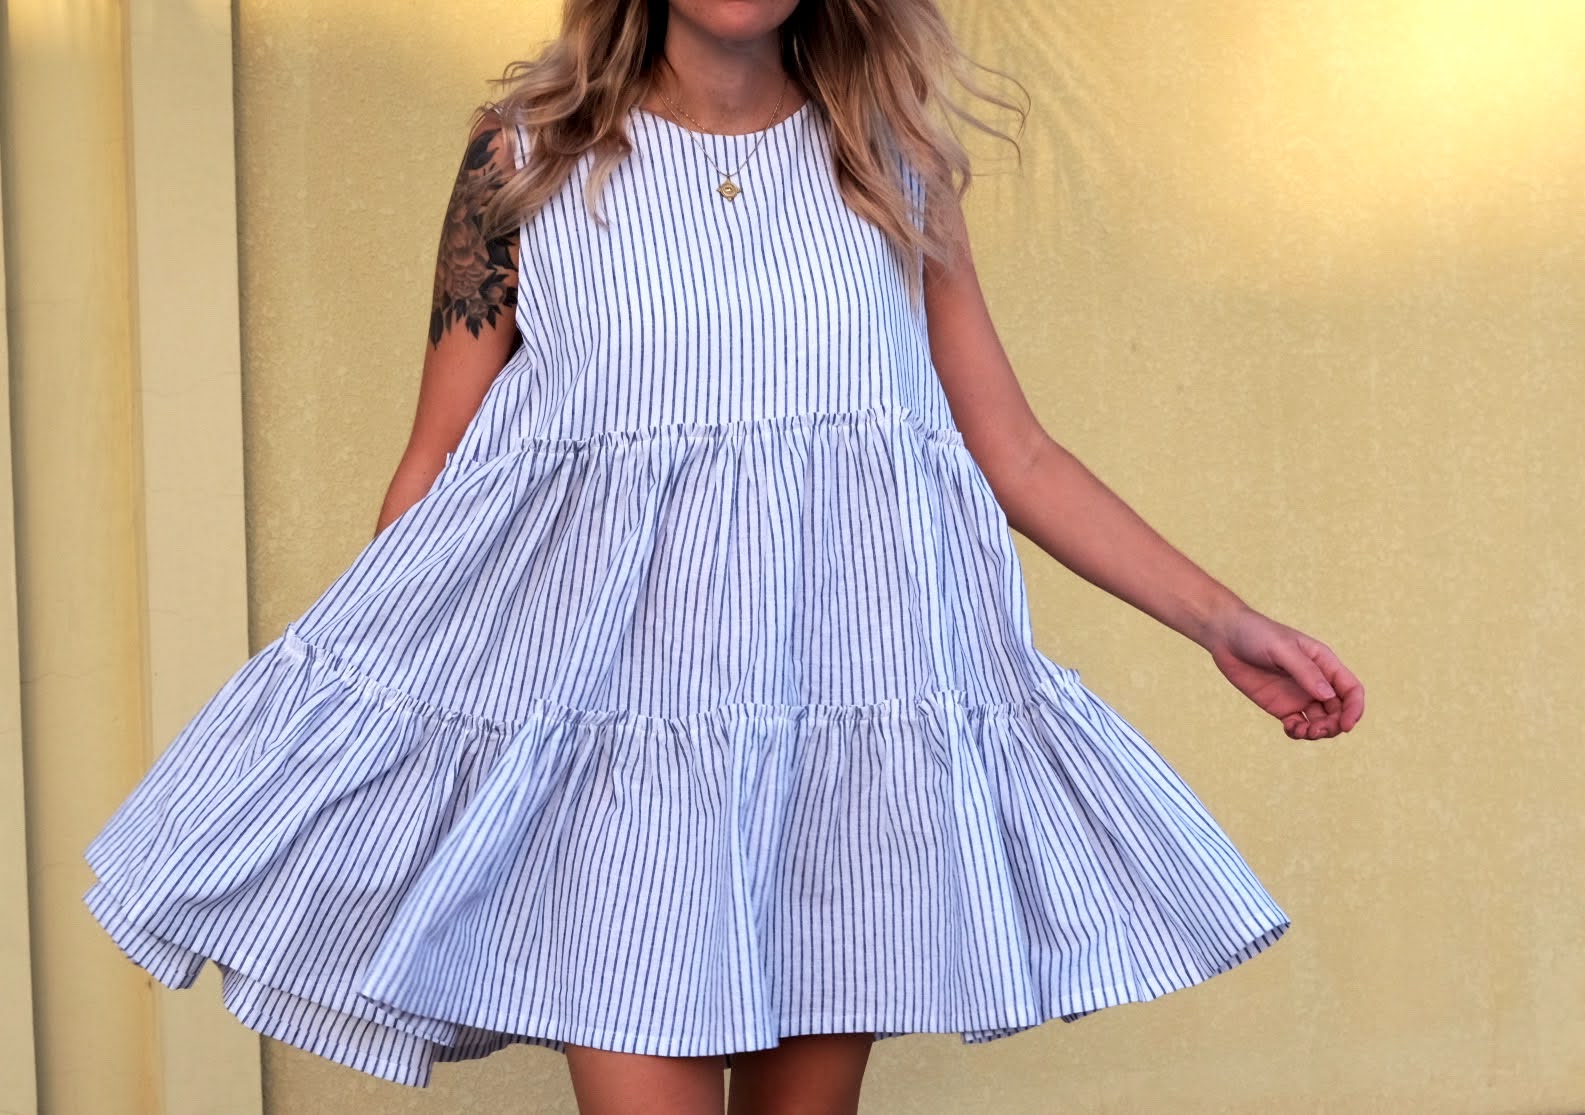
I've done many a tiered ruffle dress in my time. Many of them with exposed ruffles. But never a tutorial. So here it is. Enjoy.
Tutorials take a lot of time & effort to create, and I choose to make mine available for free. If you enjoy this guide, you can support me with a donation that feels right for you, here.
TOOLS:
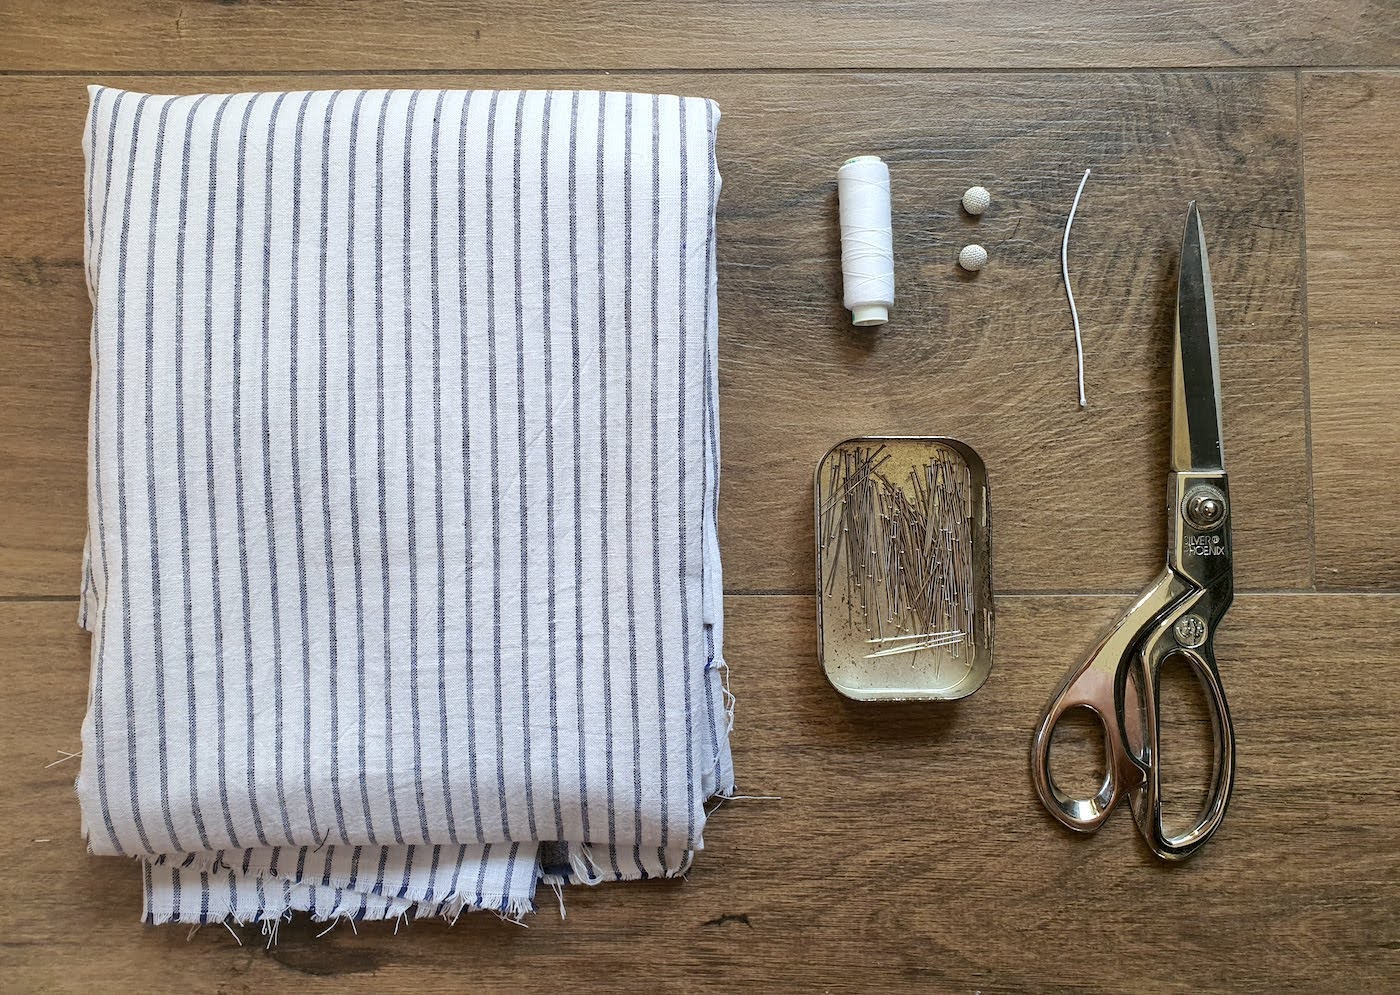
Fabric, 2 m full-width (I used linen) + 0.5 m of lining fabric (or same main fabric) | Scissors | A button or two | Small piece of thin round elastic | Thread & Sewing machine | Pins
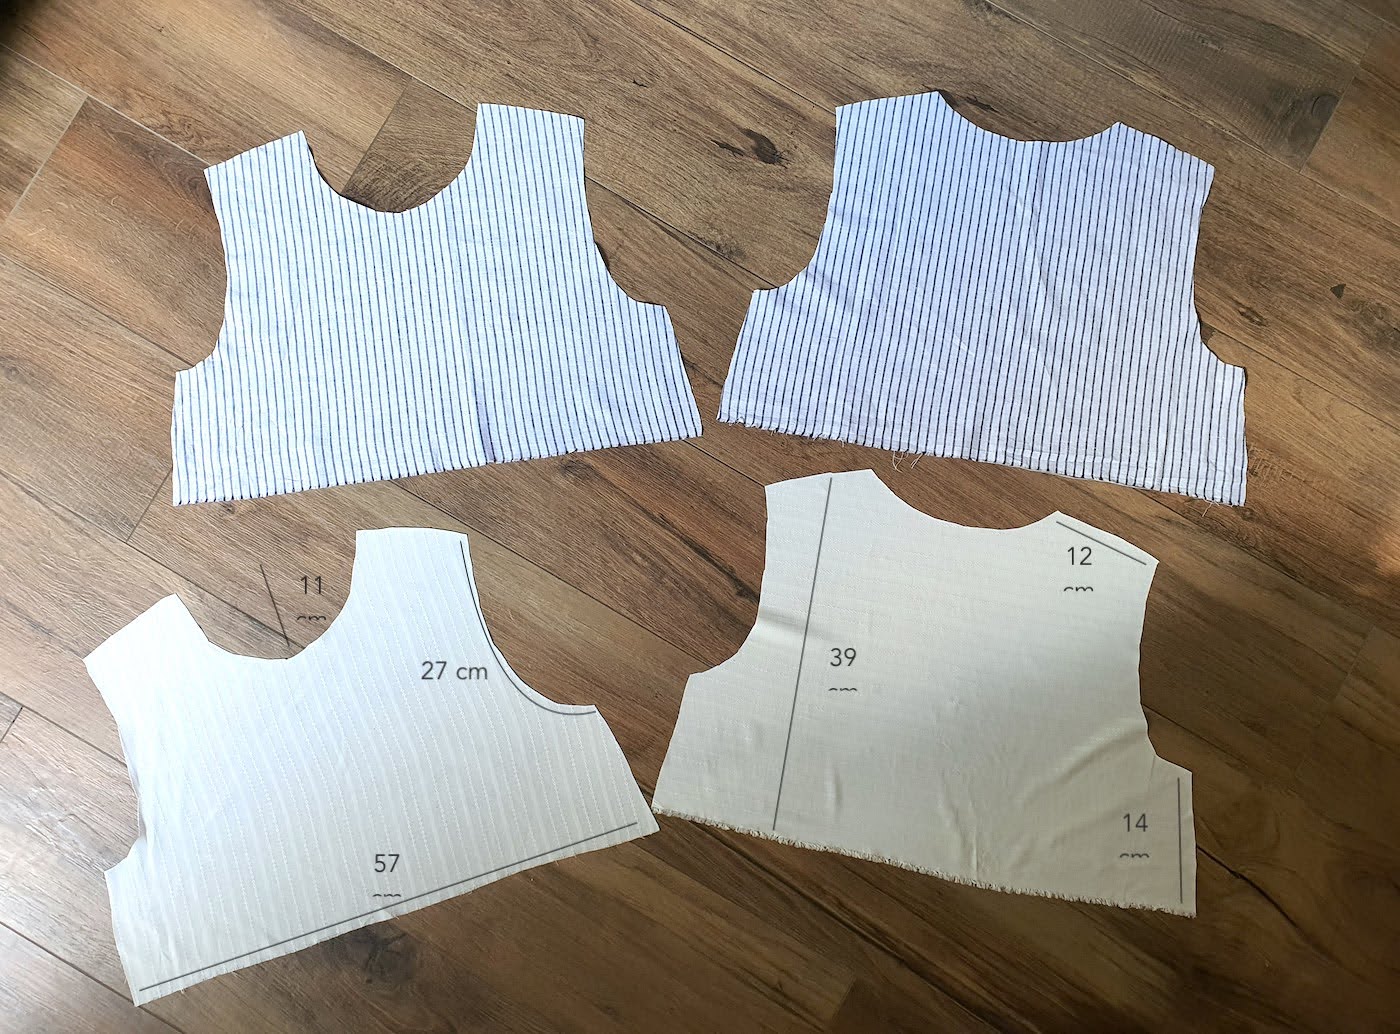
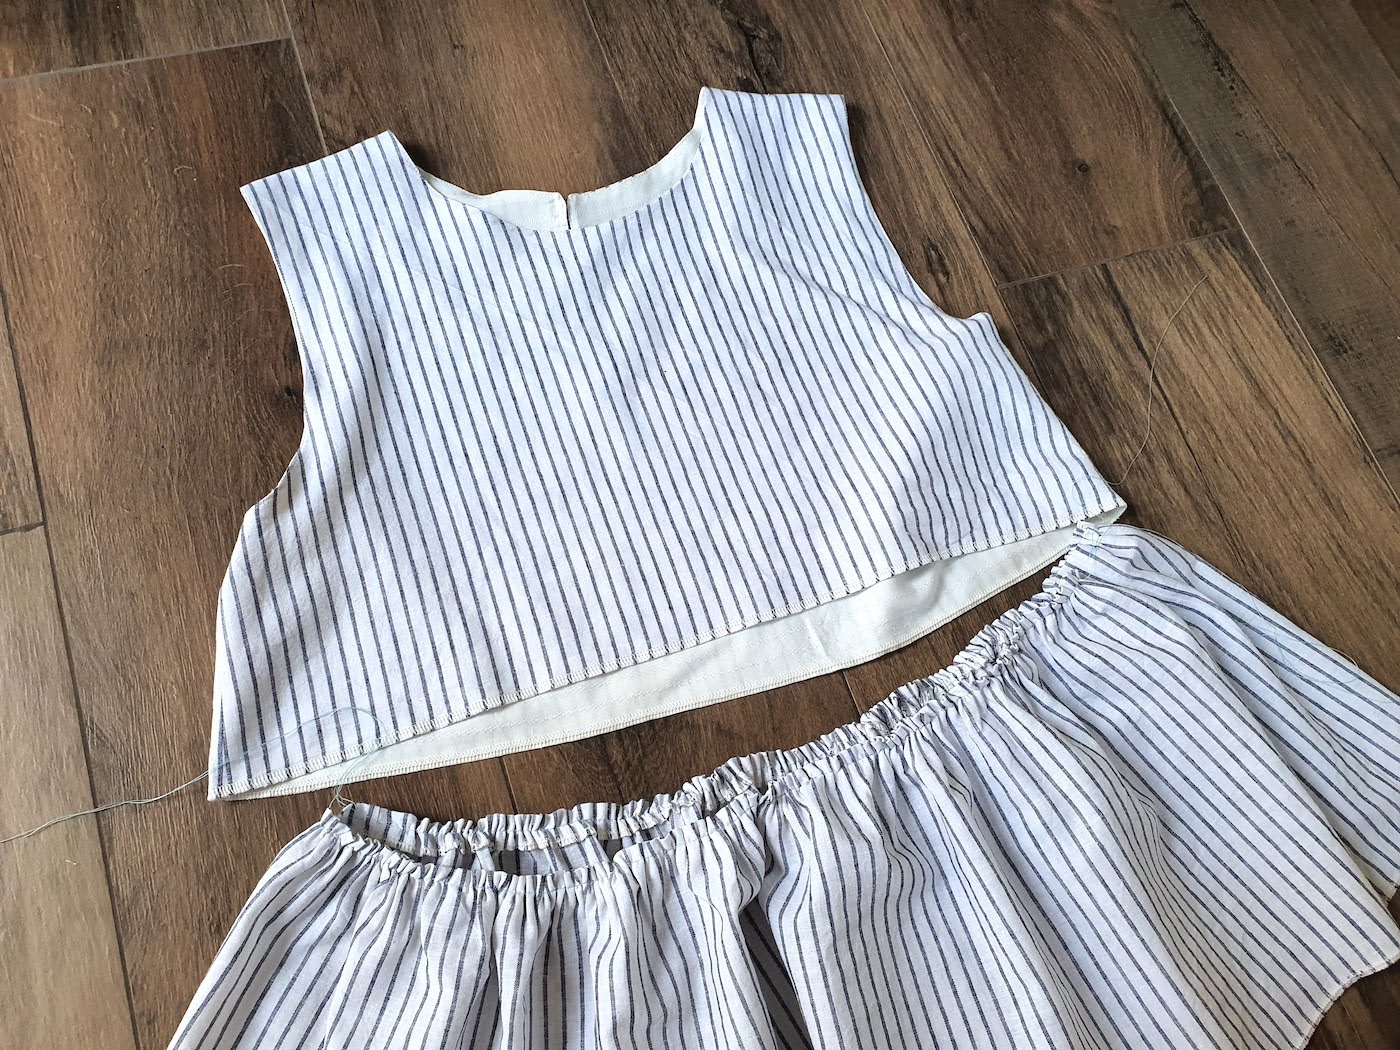
I. First I cut my top pieces + identical pieces for the top lining. These measurements get you a loose style dress that fits EU36/US4-EU40-US8. I don't know what my new FTP uploader did to this image, but it messed up the text somehow.. Anyway the numbers are cm.
II. Started by sewing and pressing the shoulder seams of both the main top and the lining.
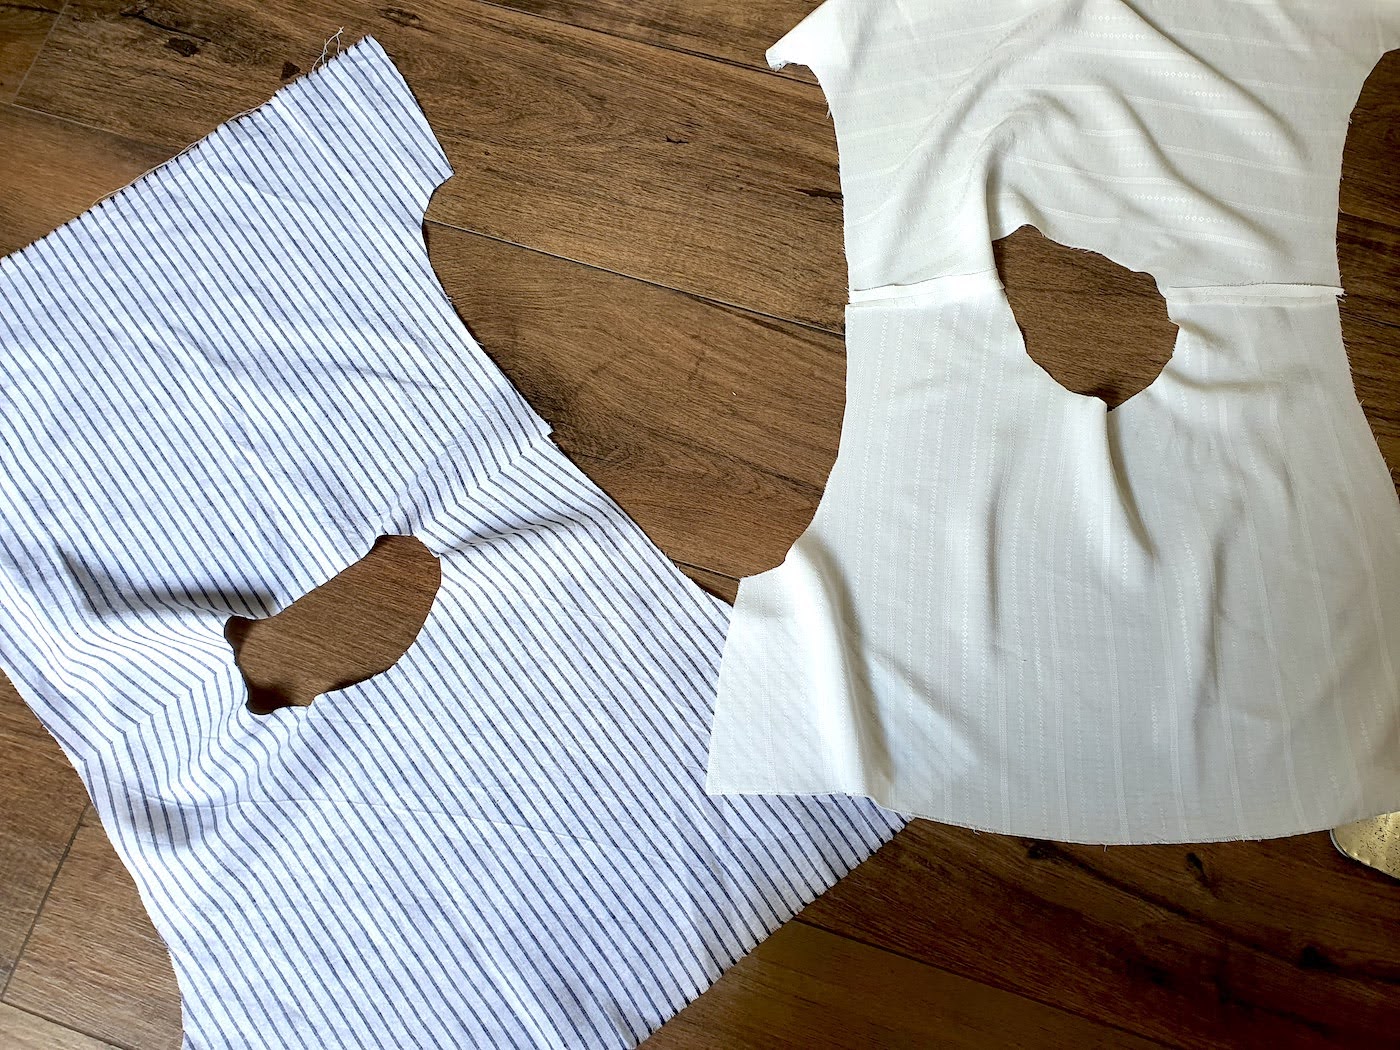
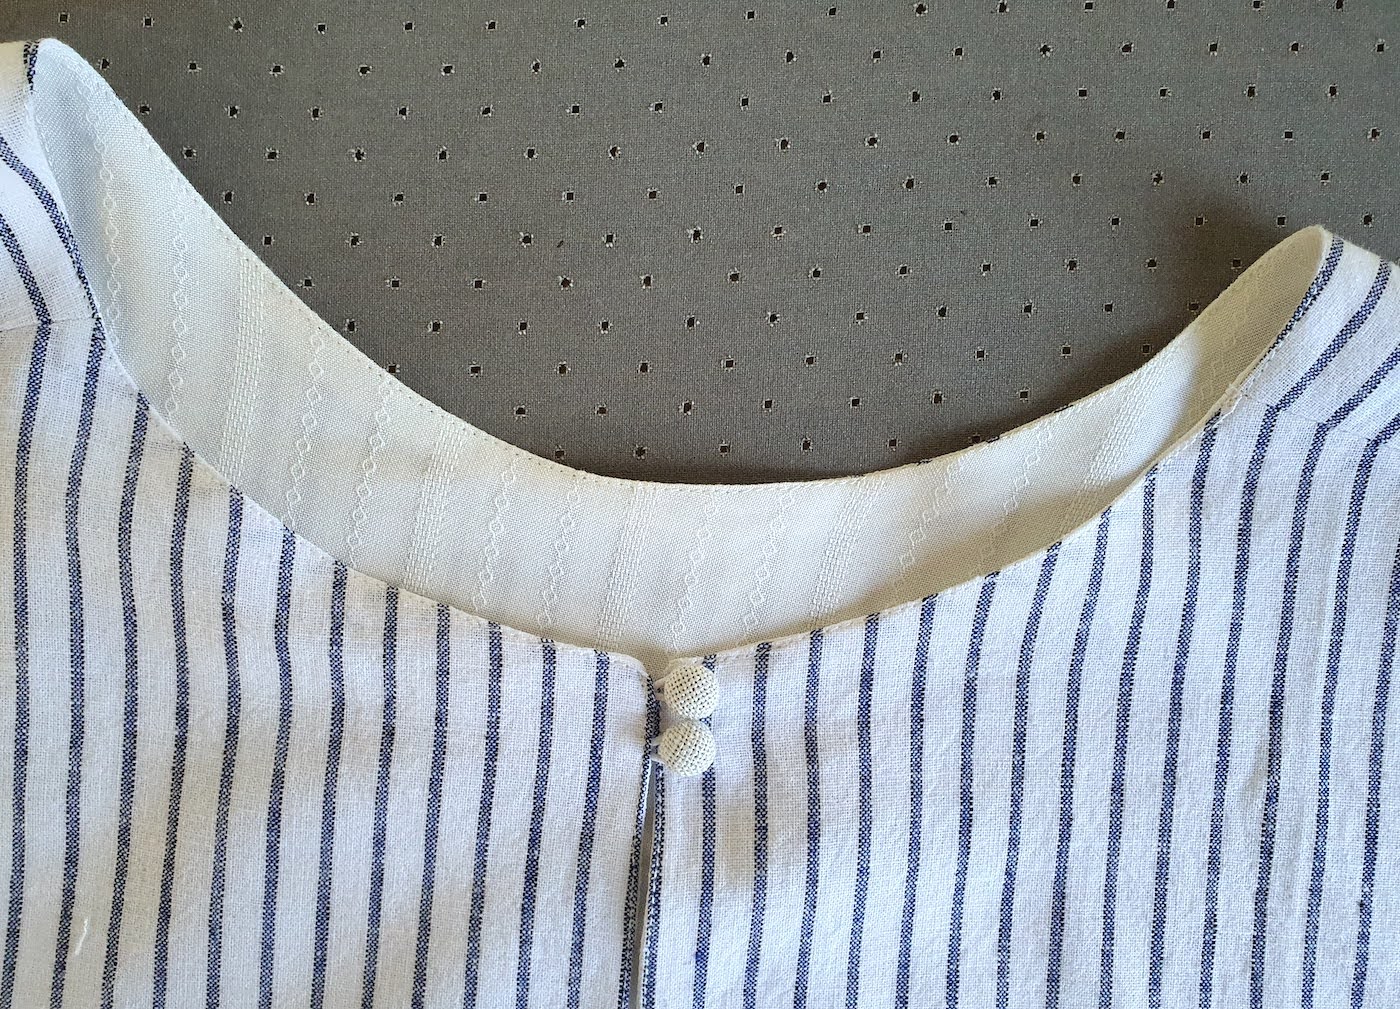
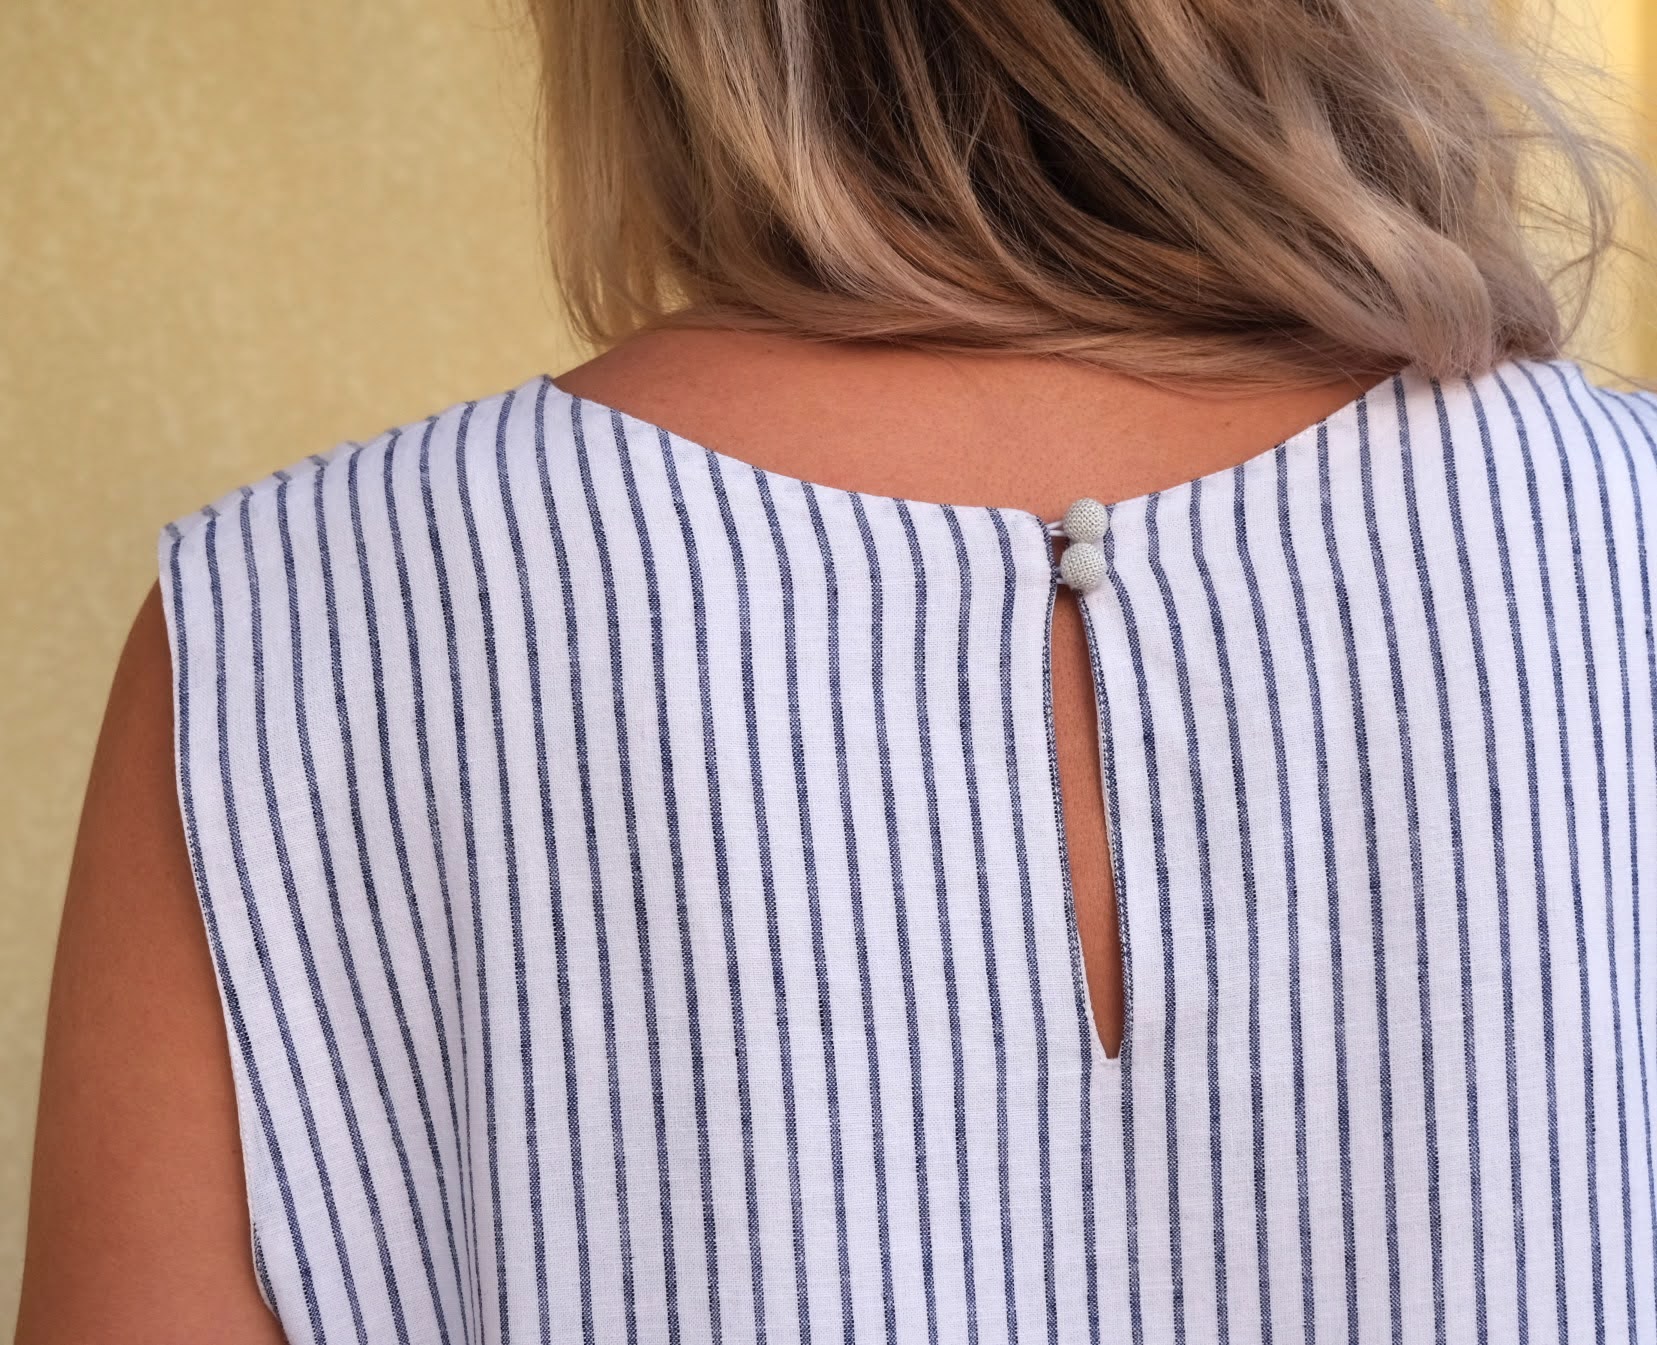
III. Then I hand-sewed the little piece of elastic onto the right side of the top back piece, to secure it in the right place.
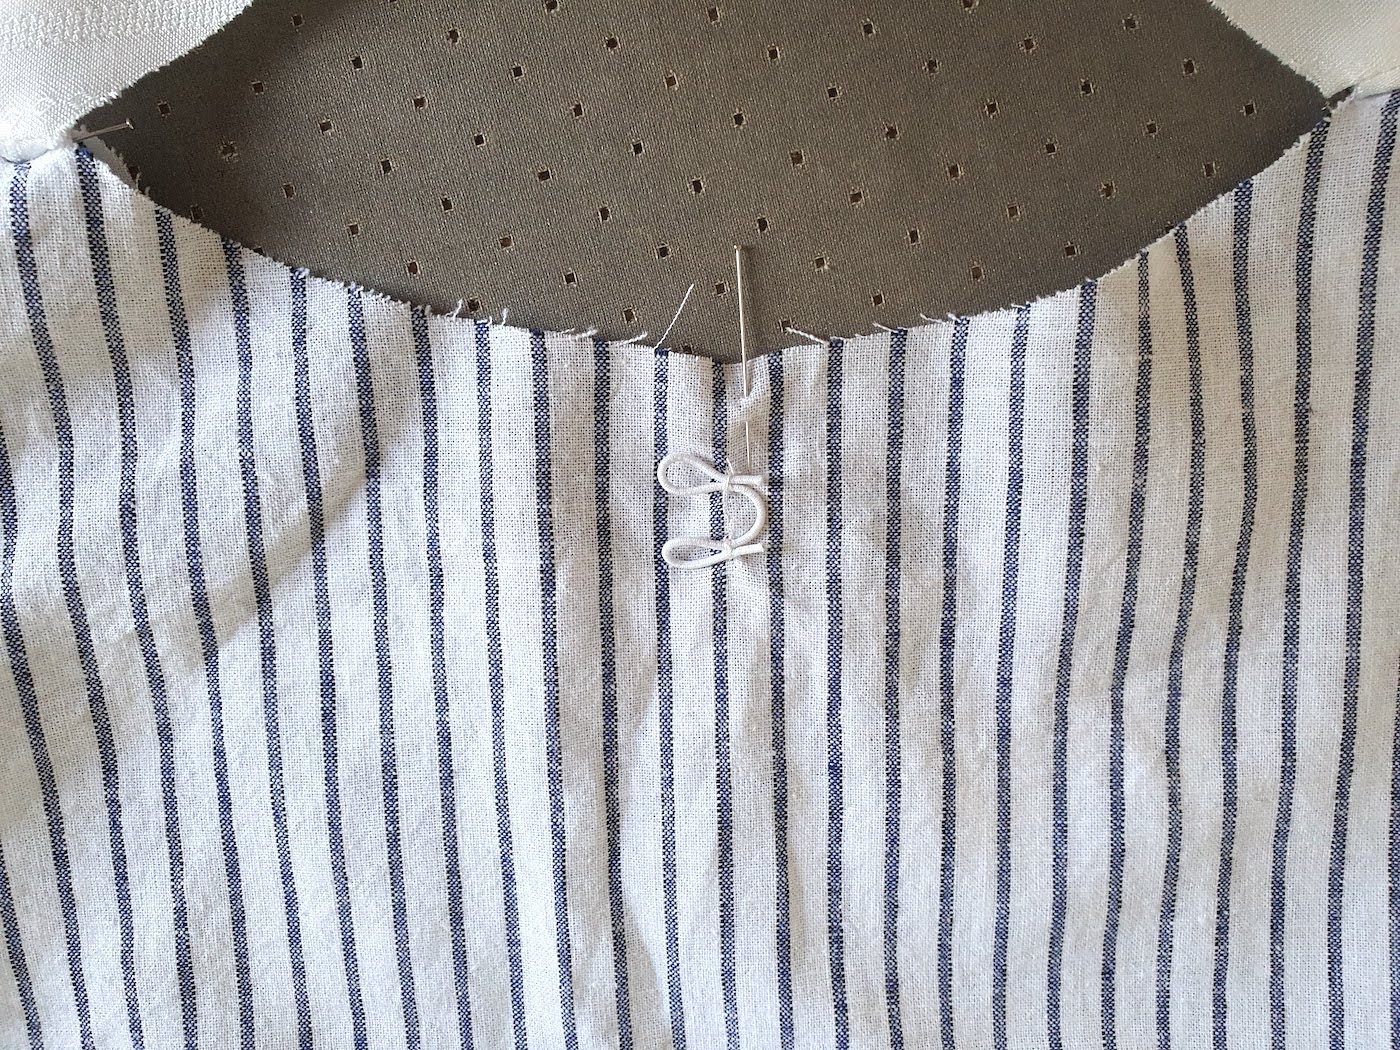
IV. Next I pinned the top pieces and the lining together at neckline, right sides facing..
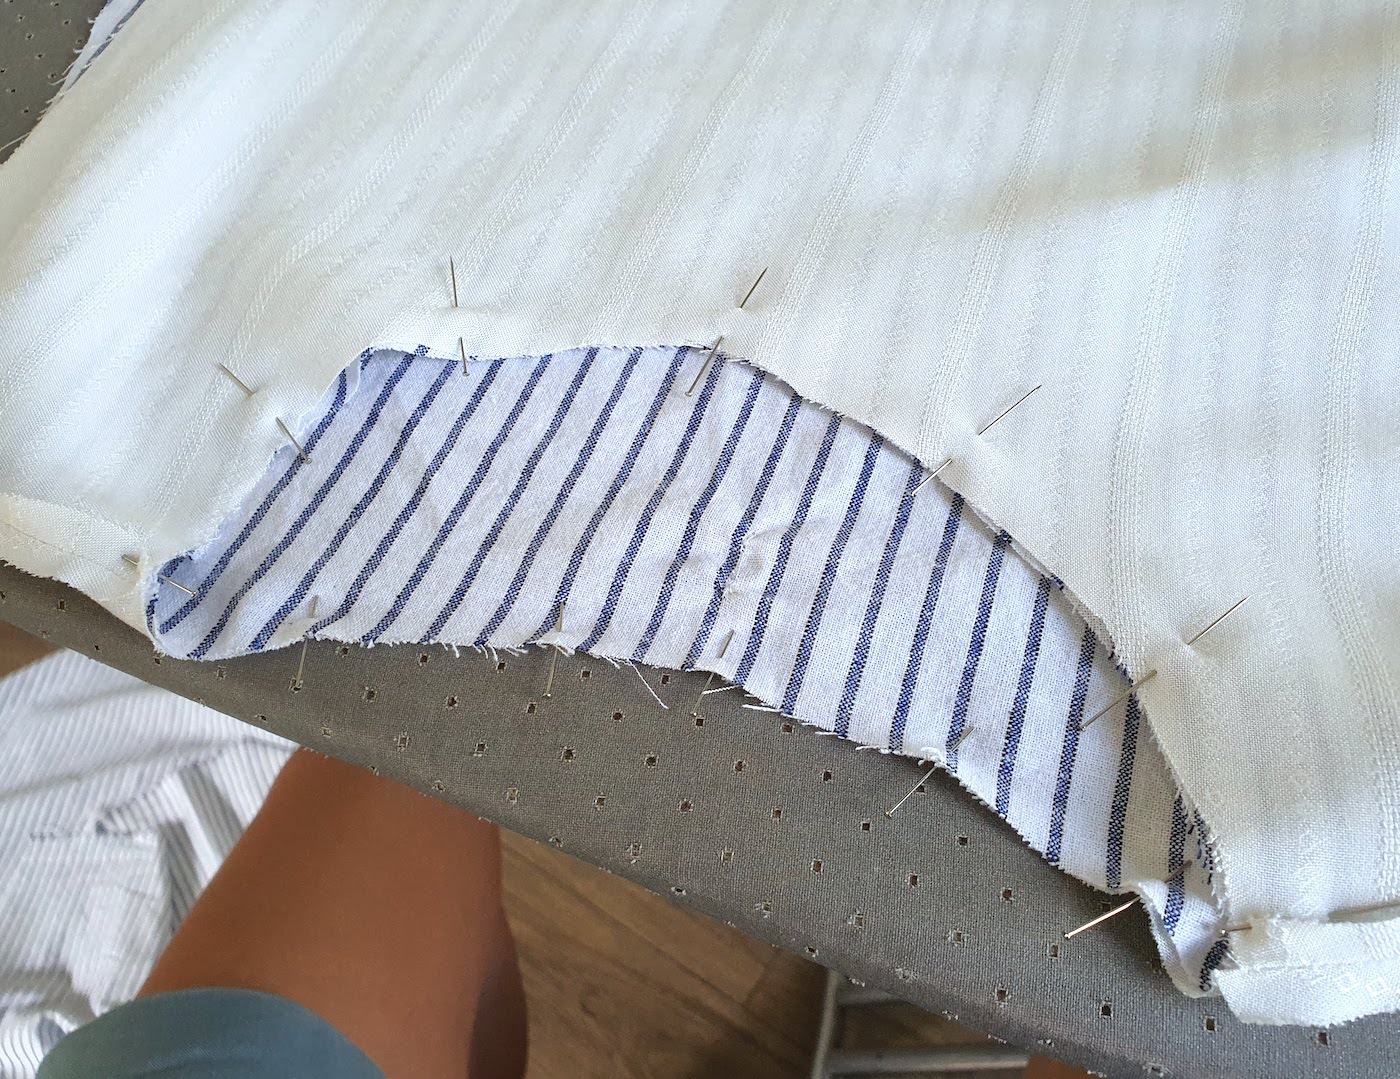
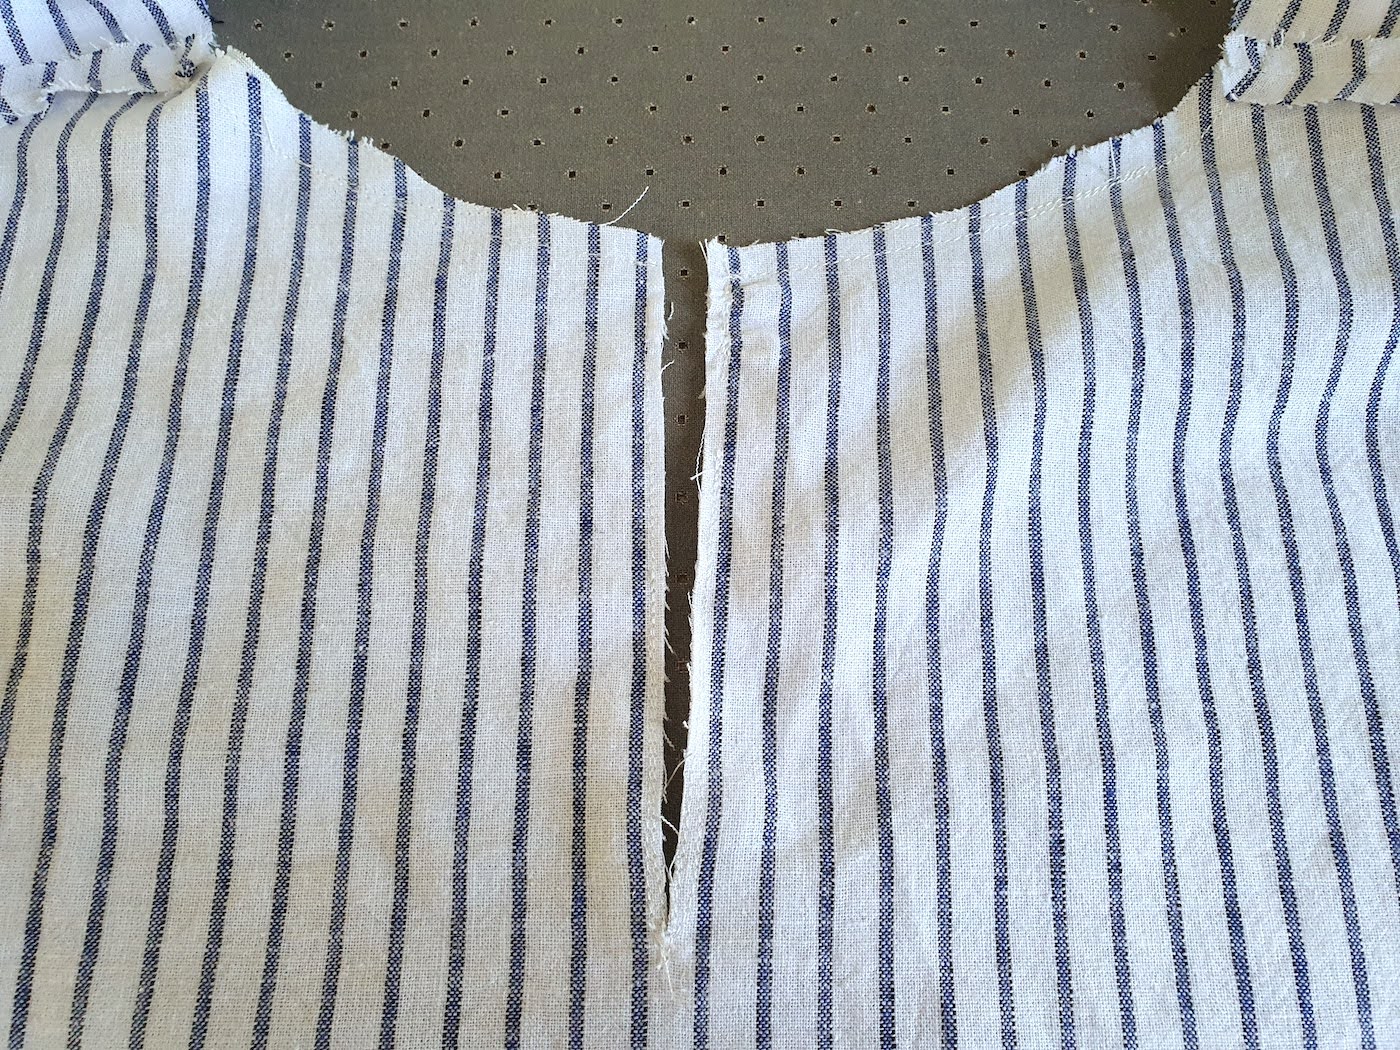
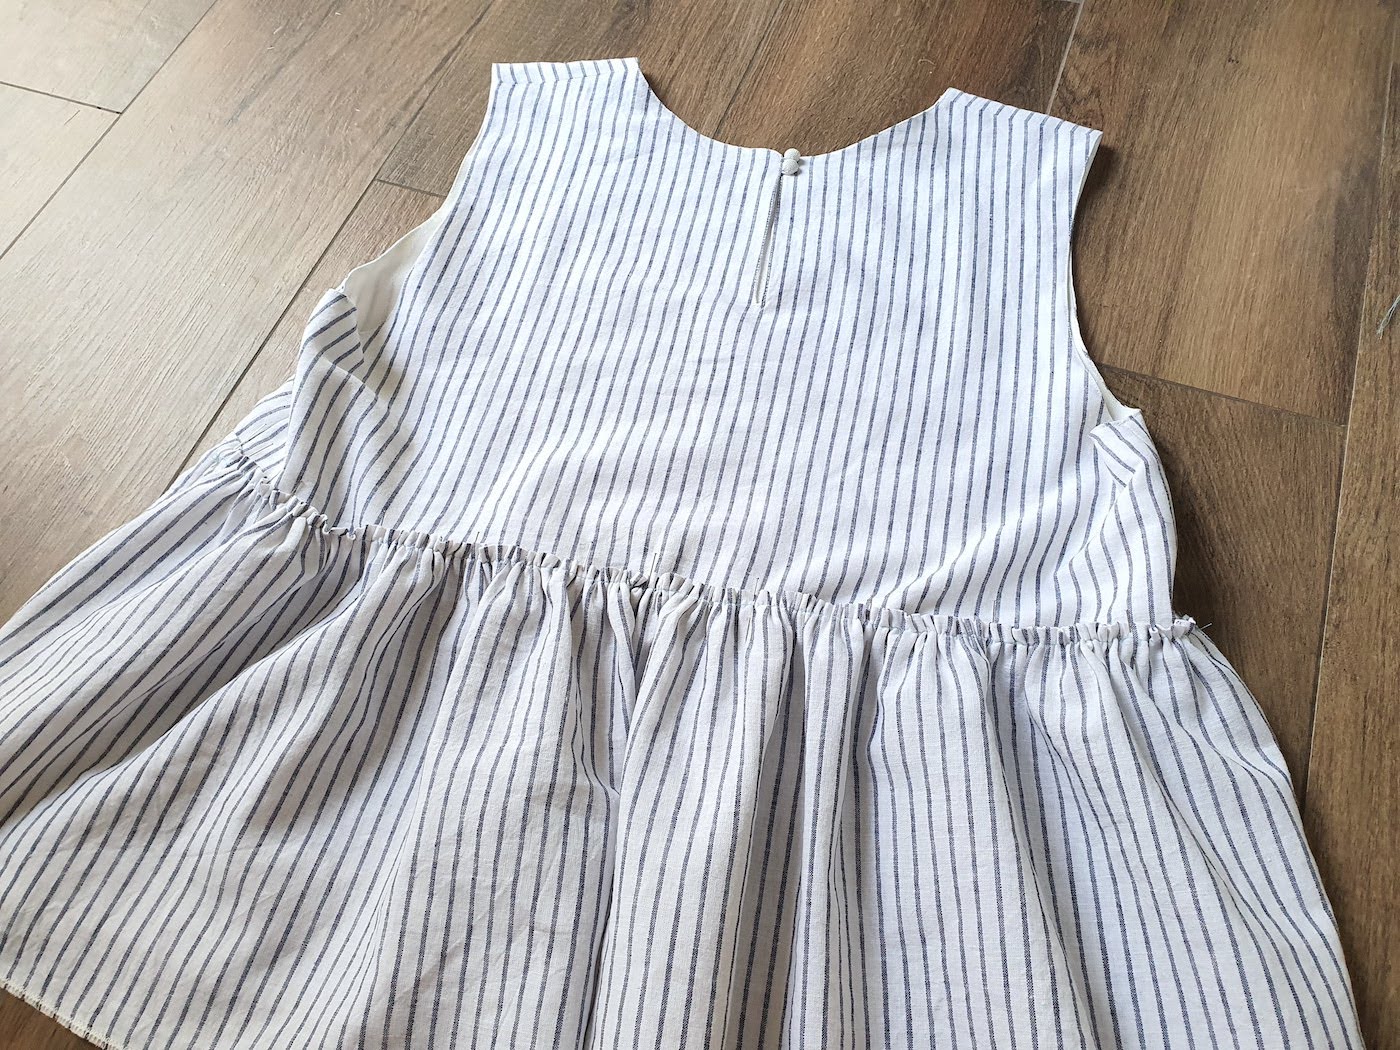
.. And then sewed all around, at the back creating the keyhole by sewing down in a narrow V at the middle, over the elastic sandwiched in between. If you look closely you see how the elastic hoops end up being just next to the stitch..

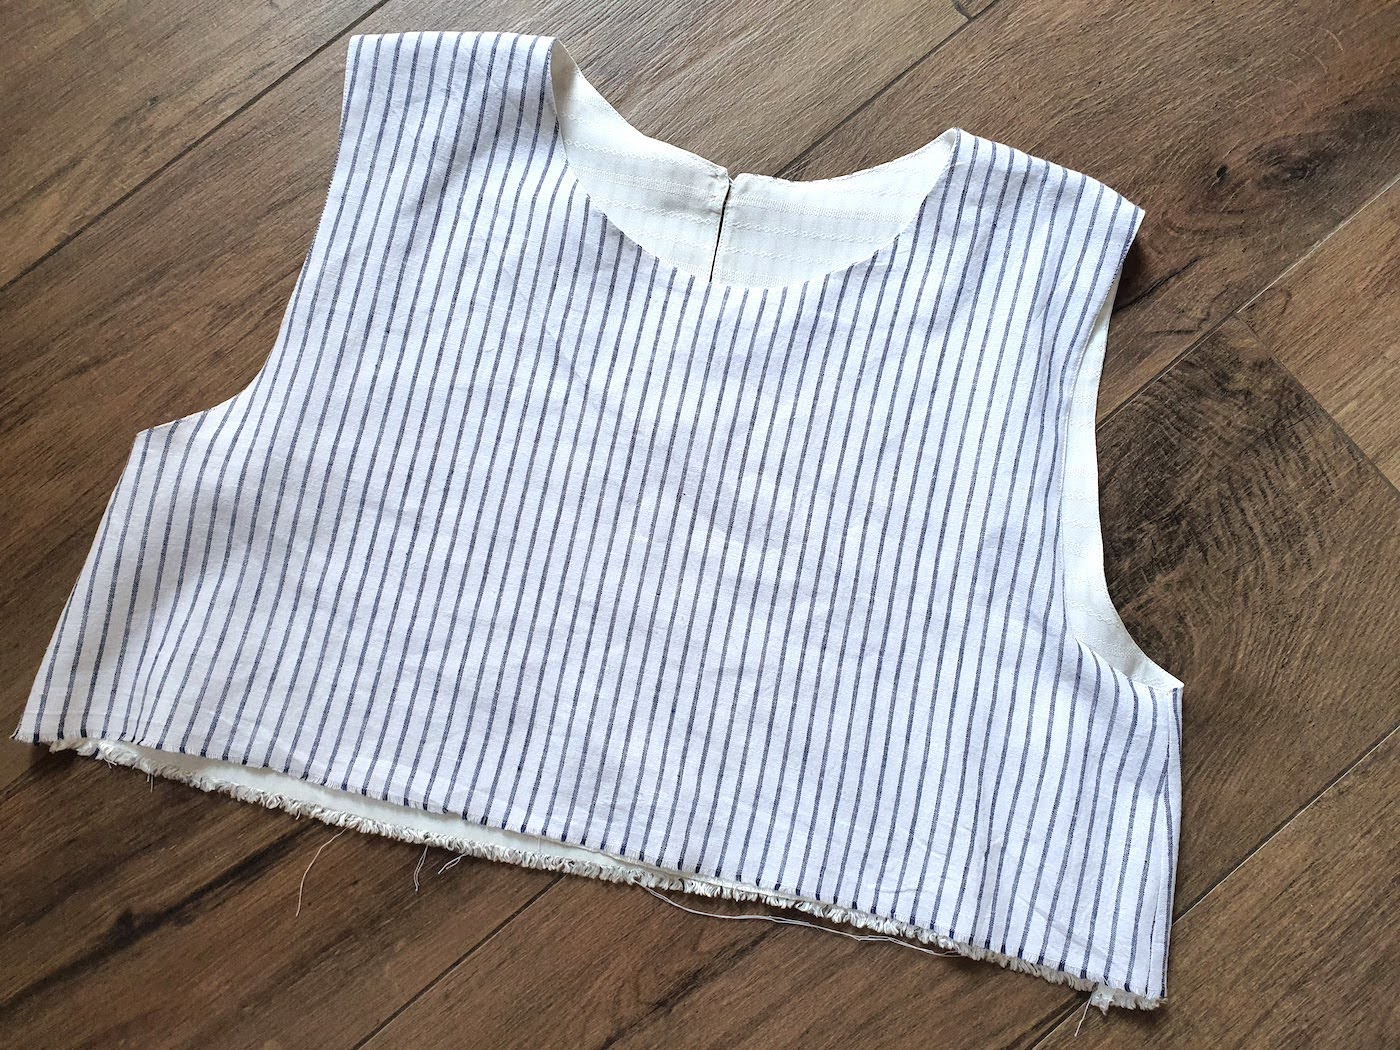
The next thing I did was to finish the arm holes using the burrito method. I explain that in more detail here, or if you prefer a video, this is a good one.
V. I was going for 2X ruffles, so the first piece I cut was a total of 220 cm long, and 26 cm wide. I cut it in two pieces, sewed the short edges to create a circle, finished the long raw edges with my serger (or you can use zig-zag), and pressed a 2 cm fold on one edge:

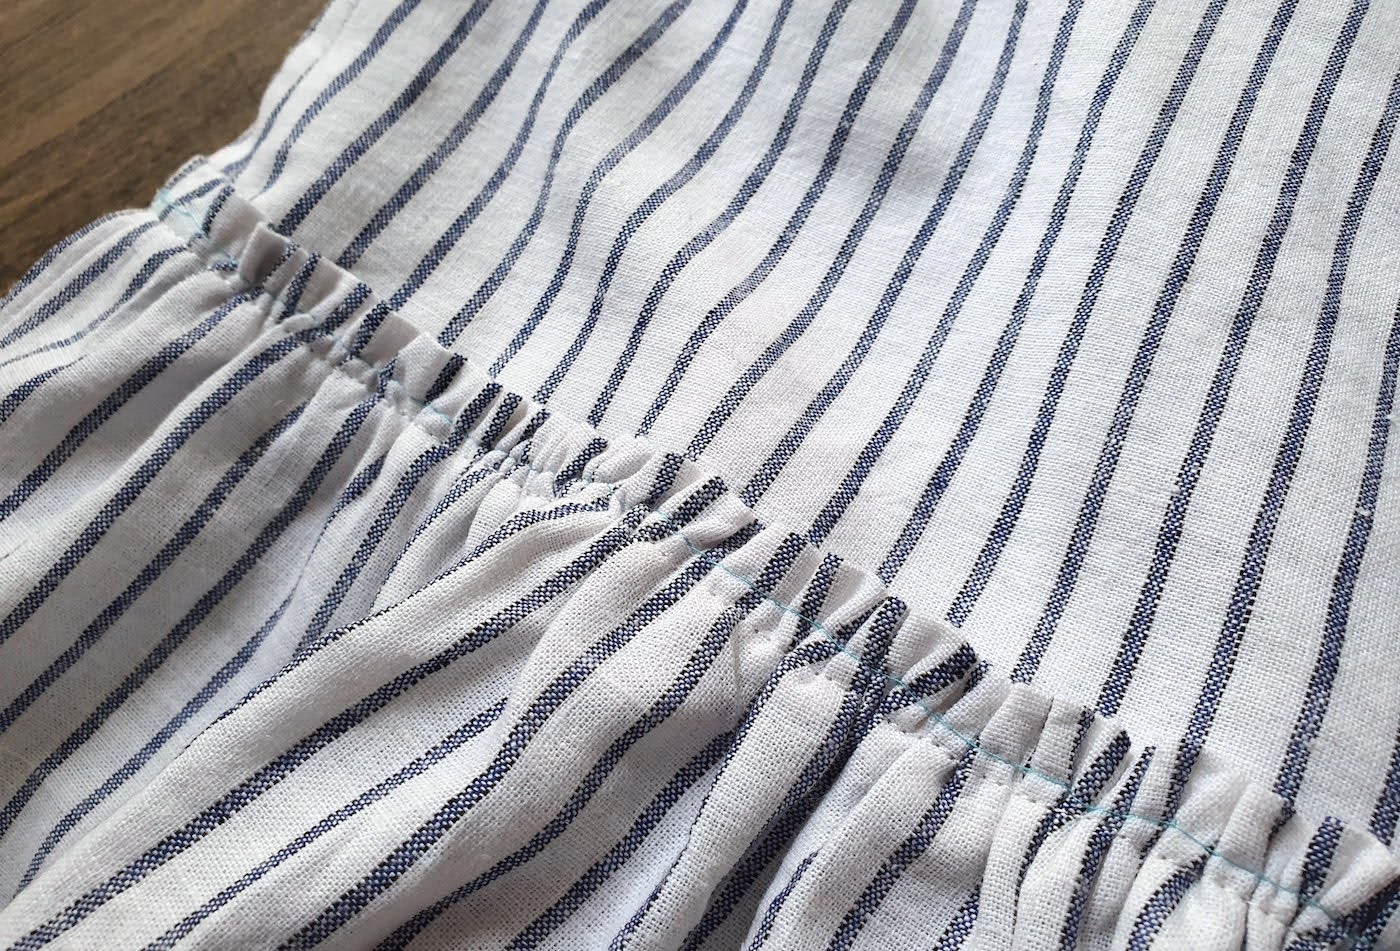
- I normally get lazy and use a matching thread with my fabric, and don't remove the basting stitch later.. But this time I figured I'd do it right for once, and used a contrasting thread.
- For when I need to gather a really long distance of fabric, I like to do the stitch in parts - in this case, I sewed 2 stitches, from side seam to side seam.
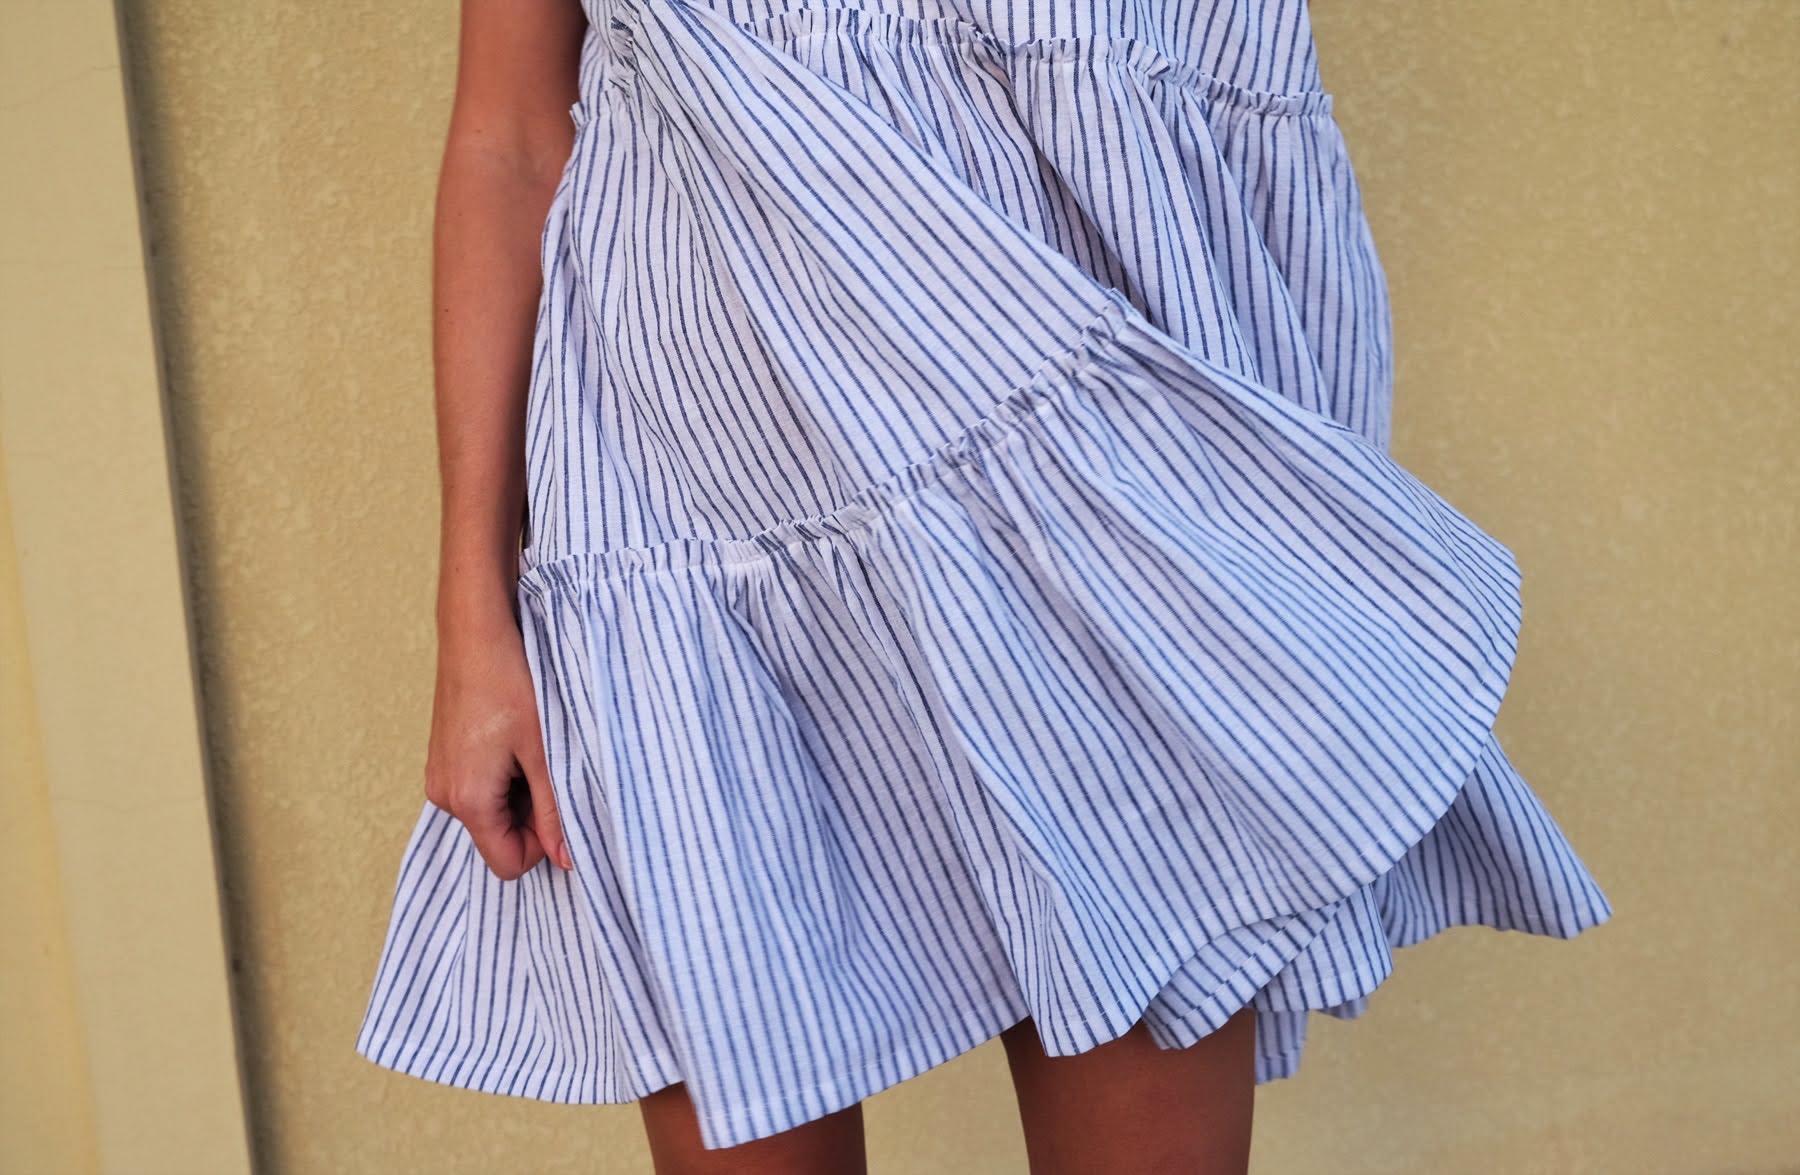
- To get a nice headstart on the gathering, when sewing your basting stitch put your machine tension as high as it will go. This way the fabric will already gather a good amount as you sew, and you just need to gather further by pulling the bobbin thread, to get the ruffle to match the width of the top as you see in the image below.
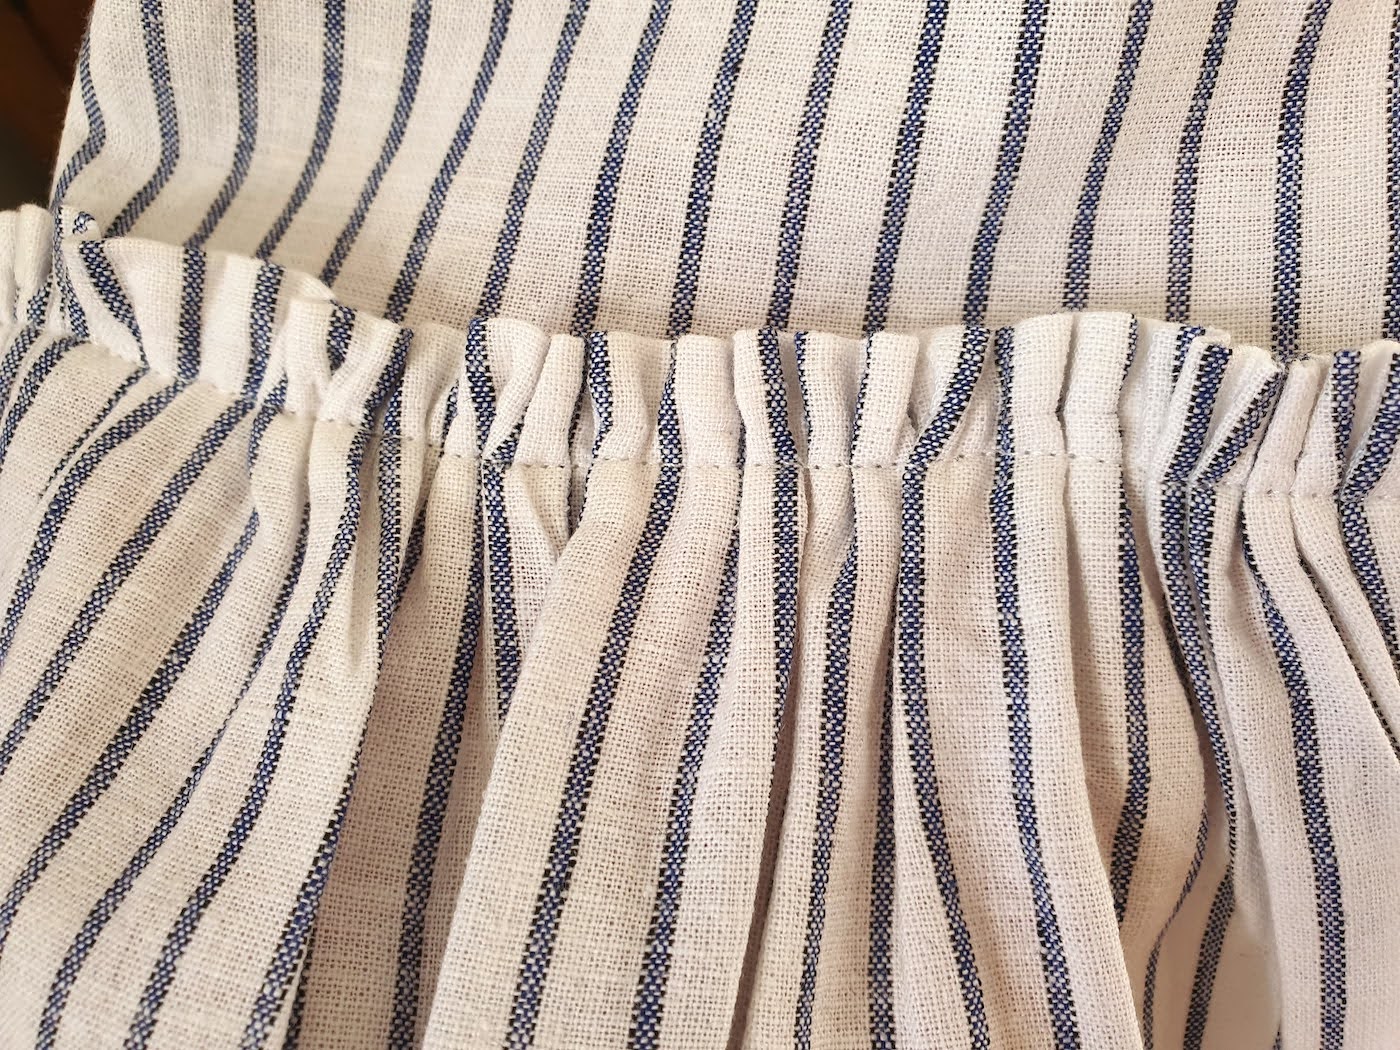
- Since in this technique the basting stitch goes through two layers of fabric, you'll feel more friction when pulling on the bobbin thread when gathering the fabric. To make this significantly easier, make sure you press the gathered area with a lot of steam after sewing, before starting to pull on the bobbin thread. This step makes the fabric slide on the thread way better.
.. Then I sewed all around, below the basting stitch.
So on the reverse you'll have this:

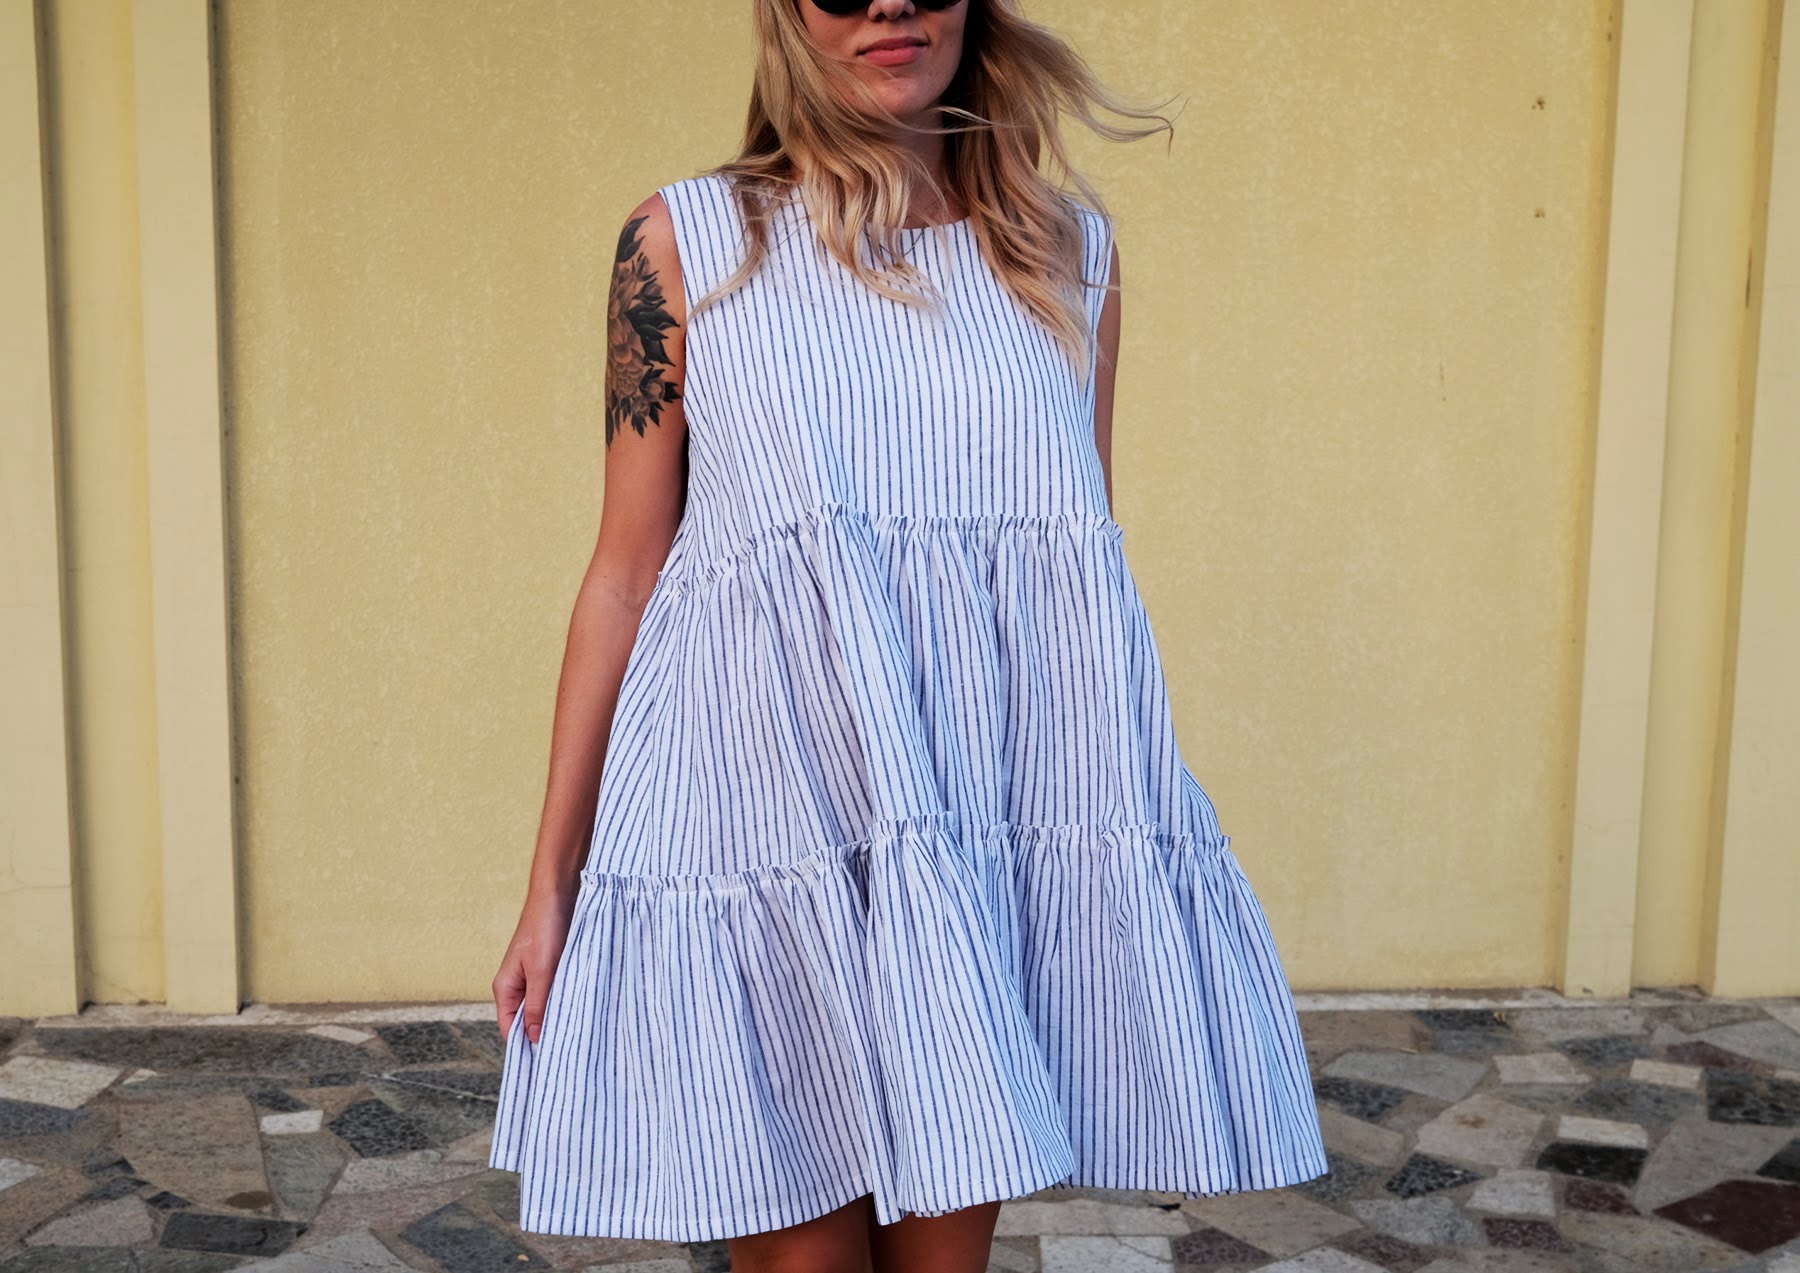
VIII. After that it was just a matter of repeating the same steps to add another tier. In my case this one needed to be pretty damn long - 2 x 220 cm = 440 cm (I sewed it from 3 parts), and I cut it 32 cm wide. Once both tiers were on, I removed the contrasting basting stitch. The little holes go away with a good press or in the first wash.
Last step was to hem the dress with a double fold.
xo,
Julia


This is impressive dress and designinng such unique ideas for elegant dressing for any special occasion. Well, to utilize the best MBA essay help for creating high quality work and boost academic grades.
ReplyDeleteWyspa ta jest samotna na środku spokojnego jeziora. Woda odbija niebo, a kamienie wydają się wyrastać z tafli wody jak małe wyspy w miniaturze. Cisza jest tu wszechobecna, a każdy dźwięk – plusk wody lub skrzypnięcie kamienia – jest wyjątkowo wyraźny.
ReplyDeleteThe puff is usually made from soft, synthetic fibers that mimic natural materials while being gentle on the skin. The fibers are lightweight yet dense enough to hold powders effectively. The texture provides a smooth application, making it ideal for cosmetics or skincare routines.
ReplyDeleteWhen it comes to essentials, quality outweighs quantity. A few well-made items can serve multiple purposes and last for years, reducing the need for constant shopping. Fabrics like cotton, linen, wool, and durable synthetics are preferred because they maintain their shape and appearance even after repeated wear and washing.
ReplyDeleteEach product offered by Seven Heavens Co. serves as more than just clothing; it's a statement of solidarity. By purchasing their items, customers contribute directly to meaningful change, making every piece a symbol of support and activism
ReplyDeleteLattafa Perfumes was founded with a vision to offer premium fragrances at accessible prices. Although it is relatively modern compared to some historic perfume houses, it quickly built a strong reputation. Its blends often combine traditional Middle Eastern ingredients with modern perfumery techniques.
ReplyDeleteThe brand operates on a philosophy of "less is more." By avoiding unnecessary additives, harsh chemicals, and artificial fragrances, Simple Essentials Canada focuses on creating products that are gentle on the skin and environmentally responsible.
ReplyDeleteTrap to podgatunek hip-hopu charakteryzujący się ciężkimi beatami, mocnym basem i szybkim hi-hatem. Teksty często opowiadają o trudnym życiu w biedniejszych dzielnicach, przestępczości, ale też ambicjach i marzeniach o lepszej przyszłości. Trapstar to artysta, który wyróżnia się autentycznością i zdolnością przyciągania fanów.
ReplyDeleteMr. Winston’s clothing is often described as conservative and meticulous, reflecting his personality and attention to detail. He tends to favor neutral colors such as grey, navy, and brown, which give him an air of understated professionalism. His garments are always neatly pressed, suggesting a careful routine and a respect for appearances. Even when he is not in a formal setting, his attire maintains a level of refinement, demonstrating that his clothing is an extension of his disciplined character.
ReplyDeleteDavrilsupply est une marque de mode streetwear émergente fondée en 2019 à Lille, dans le nord de la France. Elle s'est rapidement distinguée par son esthétique brute et contemporaine, inspirée du style urbain et des influences de la culture underground. La marque propose une gamme variée de vêtements, allant des jeans en denim brut aux vestes en cuir, en passant par des hoodies et des t-shirts à l'esprit rebelle. Chaque pièce reflète une recherche de qualité et d'authenticité, avec des finitions soignées et des coupes modernes.
ReplyDeleteDenim Tears is a fashion label founded in 2019 by Tremaine Emory, an American designer and creative consultant. Emory, who has previously worked with notable figures such as Kanye West and Virgil Abloh, established Denim Tears to explore the intersection of fashion and African American history. The brand is known for its deep cultural storytelling and socially conscious designs that reflect African American history and heritage.
ReplyDeleteChrome Hearts hoodies are more than just casual clothing—they are a statement piece in the realm of luxury streetwear. Known for their high-end craftsmanship and distinct aesthetic, these hoodies often feature the brand’s iconic gothic cross motifs, intricate embroidery, and signature silver accents. Unlike mass-produced hoodies, each Chrome Hearts piece is designed to convey exclusivity, appealing to fashion enthusiasts who appreciate both artistry and status. The combination of comfort and luxury makes them a standout choice for those seeking to merge casual style with designer appeal.
ReplyDeleteAkimbo Clothing is a fashion brand that has gained attention for its unique approach to streetwear and contemporary apparel. The brand blends urban culture with modern aesthetics, creating clothing that appeals to individuals who want to express their identity through style. From casual wear to more statement pieces, Akimbo has cultivated a design language that emphasizes comfort, versatility, and individuality. Its collections often showcase bold graphics, distinctive cuts, and thoughtful detailing, allowing wearers to stand out without sacrificing practicality.
ReplyDeleteSeekers, by nature, are driven by curiosity and a longing for meaning. They venture beyond the familiar, exploring ideas, cultures, and philosophies in search of understanding. A seeker’s journey is rarely linear; it is punctuated by questions, setbacks, and moments of revelation. When a sister herself is a seeker, she often inspires those around her, especially her siblings, to look beyond the surface of life. She becomes a guide, intentionally or not, showing that the pursuit of knowledge and truth is as much about the journey as the destination.
ReplyDeleteComme des Garçons, meaning “like boys” in French, is a Japanese fashion brand founded in 1969 by designer Rei Kawakubo. Kawakubo, born in Tokyo in 1942, initially studied literature before venturing into fashion, bringing a deeply intellectual and conceptual approach to design. The brand officially launched in Tokyo in 1969 and later expanded to Paris in 1981, marking its entry onto the international fashion stage. From the beginning, Comme des Garçons challenged conventional fashion norms, emphasizing avant-garde aesthetics over commercial appeal.
ReplyDeleteSp5der is a dynamic streetwear brand founded in 2019 by American rapper Young Thug (Jeffery Williams). Originally launched in Atlanta, Georgia, the brand has since expanded its operations to Los Angeles, California. Sp5der draws inspiration from the vibrant southern hip-hop culture, infusing elements of luxury fashion with bold, expressive designs. The brand's name, "Sp5der," is pronounced like "spider" and features a stylized spider-web motif, symbolizing the interconnectedness of culture, fashion, and music.
ReplyDeleteSp5der’s visual identity is very distinctive: heavy use of spider/cobweb motifs, bold and often puffed prints or raised textures, stylized typeface, and dramatic color combinations.
ReplyDeleteAmong these, the essential hoodie has secured its spot as a universal favorite. Whether you’re lounging at home, running errands, or heading out with friends, the hoodie provides a perfect blend of comfort, practicality, and style. More than just casual wear, essential hoodies have evolved into fashion statements, crossing boundaries of gender, age, and style preferences.
ReplyDeletefew brands have disrupted the streetwear scene quite like Corteiz. Emerging from the heart of London, Corteiz has grown from an underground cult favorite to a global streetwear phenomenon in just a few short years. Its unique marketing strategies, limited-edition drops, and strong cultural messaging have made it one of the most talked-about brands in the fashion world today.
ReplyDeleteKanye West is a name that commands attention — not only in the music industry but also in fashion, design, and cultural influence. Over the past decade, Kanye has transformed what it means to be an artist selling merchandise.
ReplyDeleteKnown for its edgy designs and celebrity associations, the brand has become a favorite among trendsetters and youth subcultures. One of its most iconic offerings is the Sp5der Blue line — a collection that fuses urban style with a distinct, vibrant color palette, making it both a fashion statement and a cultural symbol.
ReplyDeleteThe phrase “awful lot of cough syrup” gained traction largely due to its frequent use in hip-hop songs and social media. It’s often used to reference the recreational use of codeine-based cough syrups, commonly mixed with soda or candy (like Jolly Ranchers), creating a drink known as lean, purple drank, or sizzurp.
ReplyDeleteIn the dynamic world of streetwear, few brands have made as striking an impression as Sp5der. Known for its vivid colors, web-inspired designs, and connection to hip-hop culture, the Sp5der Store has quickly become a favorite among fashion-forward youth and celebrities alike.
ReplyDeleteTakashi Murakami, one of Japan’s most celebrated contemporary artists, has carved out a unique space where fine art meets pop culture. Known for his vibrant “Superflat” style that blends traditional Japanese aesthetics with modern cultural icons, Murakami's influence stretches far beyond galleries and museums.
ReplyDeleteSean John was launched in 1998 by Sean Combs, already a household name in the music industry with his label Bad Boy Records. Combs, known for his bold, trendsetting style, saw a gap in the market for high-quality urban menswear that reflected the swagger and ambition of the hip-hop generation.
ReplyDelete, society no longer seeks stimulation from physical substances. Alcohol, narcotics, and chemical enhancers are relics of the past. In their place, a revolutionary neuro-digital experience has taken over the social scene—a phenomenon known as Vrunk.
ReplyDeleteMatty Boy has always been the kind of person who can walk into a room and instantly change the energy. His laughter carries warmth, and his presence has a way of making people feel seen.
ReplyDeleteKroen is often described as a quiet refuge, a place where weary travelers gather after long journeys, sharing food and stories by the fire.
ReplyDeleteHMDD shorts are not just another addition to the modern wardrobe; they represent a refined balance between functionality and fashion. Crafted with premium fabrics and precision stitching, these shorts are designed for people who expect durability without compromising style. Unlike fast-fashion alternatives, HMDD shorts are built to last, with reinforced seams and a fit that molds naturally to the wearer’s body.
ReplyDeleteThe right joggers can enhance both home and outdoor winter routines. Kroen joggers balance softness and strength for daily use. Christmas discounts make them ideal for seasonal shopping.
ReplyDeleteFashion enthusiasts often search for brands that align with current trends during holiday sales. HMDD Clothing reflects modern styling without being overly flashy. Their Christmas sale could be ideal for building a smart winter wardrobe.
ReplyDeleteUnderstanding visual psychology during Christmas sales is crucial for conversions. ktwo studios applies these principles effectively in their creative work. This article shares useful insights on that topic.
ReplyDeleteThese jackets are timeless. I’ve always wanted a Denim Tears piece, and the winter sale finally made it possible. The details on each jacket are so impressive.
ReplyDeleteThese joggers are ideal for cold weather. Winter sale prices made it easier to stock up on multiple colors!
ReplyDelete“Broken Planet Market blends modern streetwear with deeper meaning, and that’s what makes it so appealing. It’s not just about clothing—it’s about creating a culture around the brand.”
ReplyDelete“A Cole Buxton hoodie is perfect for anyone who appreciates understated streetwear. It’s simple, durable, and holds its shape even after multiple wears.”
ReplyDeleteI like how the Chrome Hearts hat reflects individuality and bold choices. It’s stylish in a unique way. Perfect for modern fashion.
ReplyDeleteThe hoodies look super trendy.
ReplyDeleteAnd also very comfortable.
Perfect for daily wear.
Questo brand Hidden Hills è davvero creativo. Ogni prodotto mostra una forte personalità. Mi piace la sua semplicità elegante. È ideale per chi ama la moda street.
ReplyDeleteThis HMDD hoodie is really trending right now. Many people love its minimal design approach. It pairs well with jeans and joggers. I would recommend it for winter fashion.
ReplyDeleteOver5ize Farm ha uno stile urbano molto forte. I dettagli dei capi sono ben curati. Il brand è perfetto per i giovani. Amo la loro energia creativa.
ReplyDeleteWhat I like most about Fugazi hoodie is its comfort. It looks very easy to wear all day. The fabric appears warm and soft. It is ideal for colder seasons.
ReplyDeleteScuffers Australia has such a clean and appealing style. Their collection looks both comfortable and trendy. I like how versatile the pieces are. Perfect for casual everyday outfits.
ReplyDeleteBellissimo articolo sulle Trapstar tute. Mi piace come vengono spiegate le tendenze attuali. Le tute sono davvero alla moda. Grazie per queste informazioni utili.
ReplyDeleteHo provato la felpa Marcelo Burlon e sono rimasto colpito. La vestibilità è ottima e confortevole. I dettagli sono curati con precisione. È un capo che vale l’investimento.
ReplyDelete