I promised some Elepant hacks and here they come! This guide will go through using
#TheBabyElepant pattern to make shorts, bloomers, and dungarees (the latter can of course be made with either the bloomer, short, or full length pant!) So considering the 3 standard styles of the pant, we're now talking 10 different pants you can make with the same pattern!
As with the standard Elepant, these are very size-flexible, the shorts/bloomers version fitting from 4 mo to potentially even 18 mo depending on the size of your baby. The guide below walks through Shorts & Bloomers first, both of which you can make into dungarees. Whichever bottom style you are doing, you want to first construct the pant apart from the waistband - the dungaree flap will be integrated there.
What you need apart from the basic sewing supplies (sewing machine, thread, scissors):
Shorts
- Fabric - 0.3 m of 110 cm wide
- Elastic - 2 cm wide for waistband - measure your baby, likely 40-48 cm
Bloomers
- Fabric - 0.3 m of 110 cm wide
- Elastic - 2 cm wide for waistband (measure baby's waist, likely 40-48 cm piece); 0.7 cm wide for legs (measure your baby, likely 2 pieces 23-26 cm each)
Dungarees
- Fabric - Quantity depending on whether you are doing full length or shorts/bloomers bottom
- Elastic - See above for shorts/bloomers, and here for full length
- 2 buttons (recommend size approx. 1.5-2 cm in diameter)
Honestly I'd love to have inch conversions in this post but Naya is teething and mom's tired. If you work in inches: 1. I'm sorry that you have to suffer with this inferior measurement unit that lacks logic & precision; 2. You will be far less likely to make mistakes converting from cm to inch, compared to me in this state. (3. I recommend you join us civilised people and move over to the metric system at least in sewing. 😏 Yes you too Karen)
SHORTS / BLOOMERS
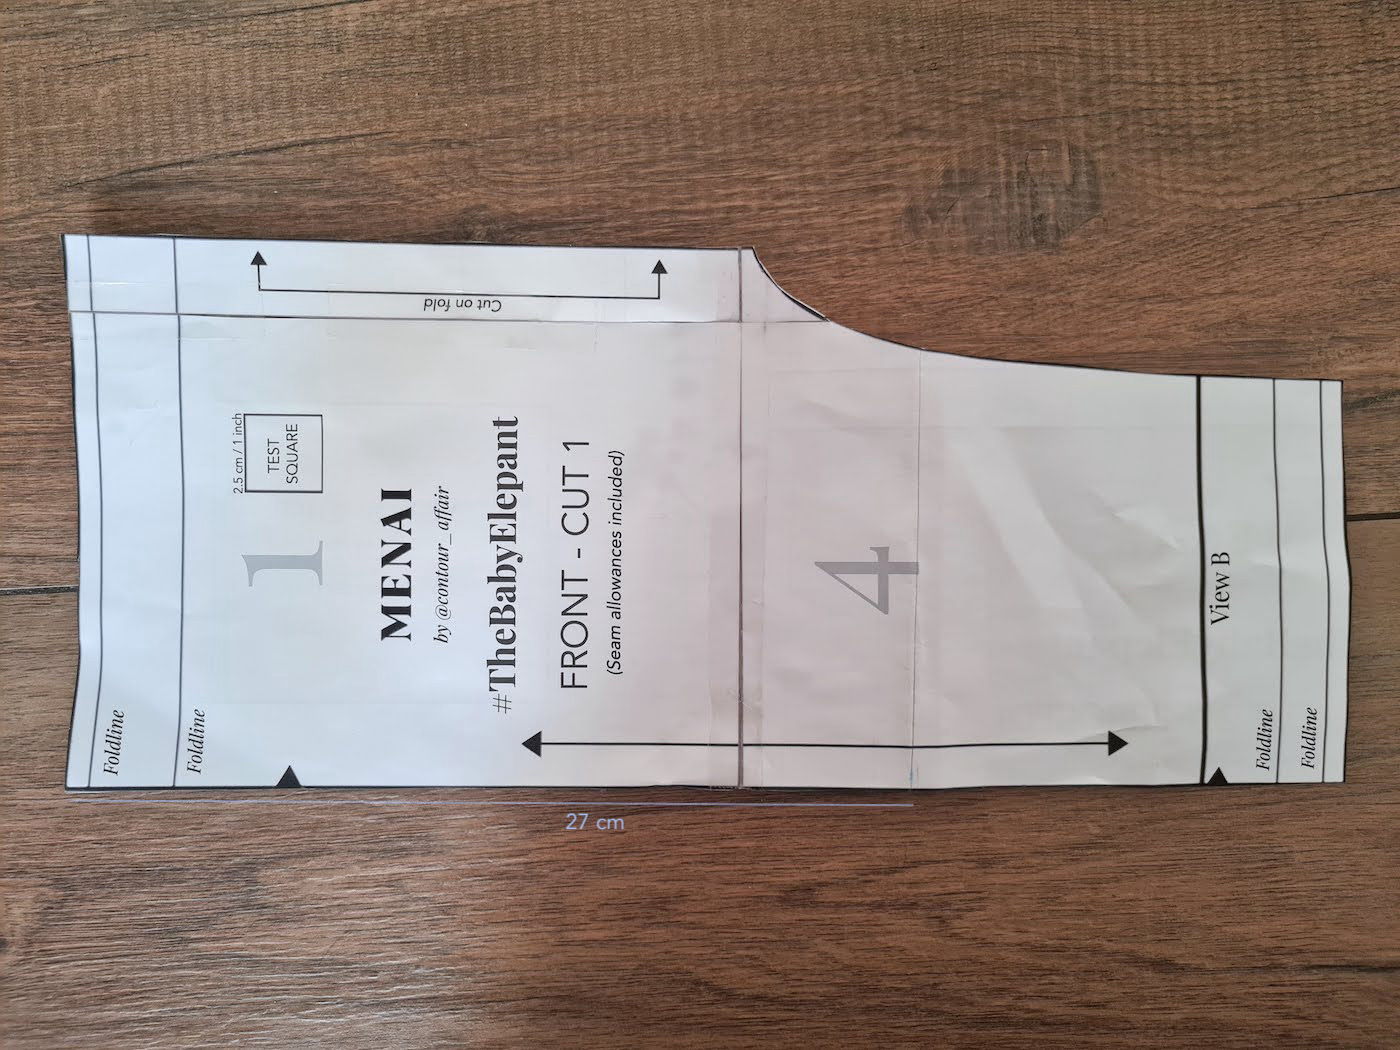
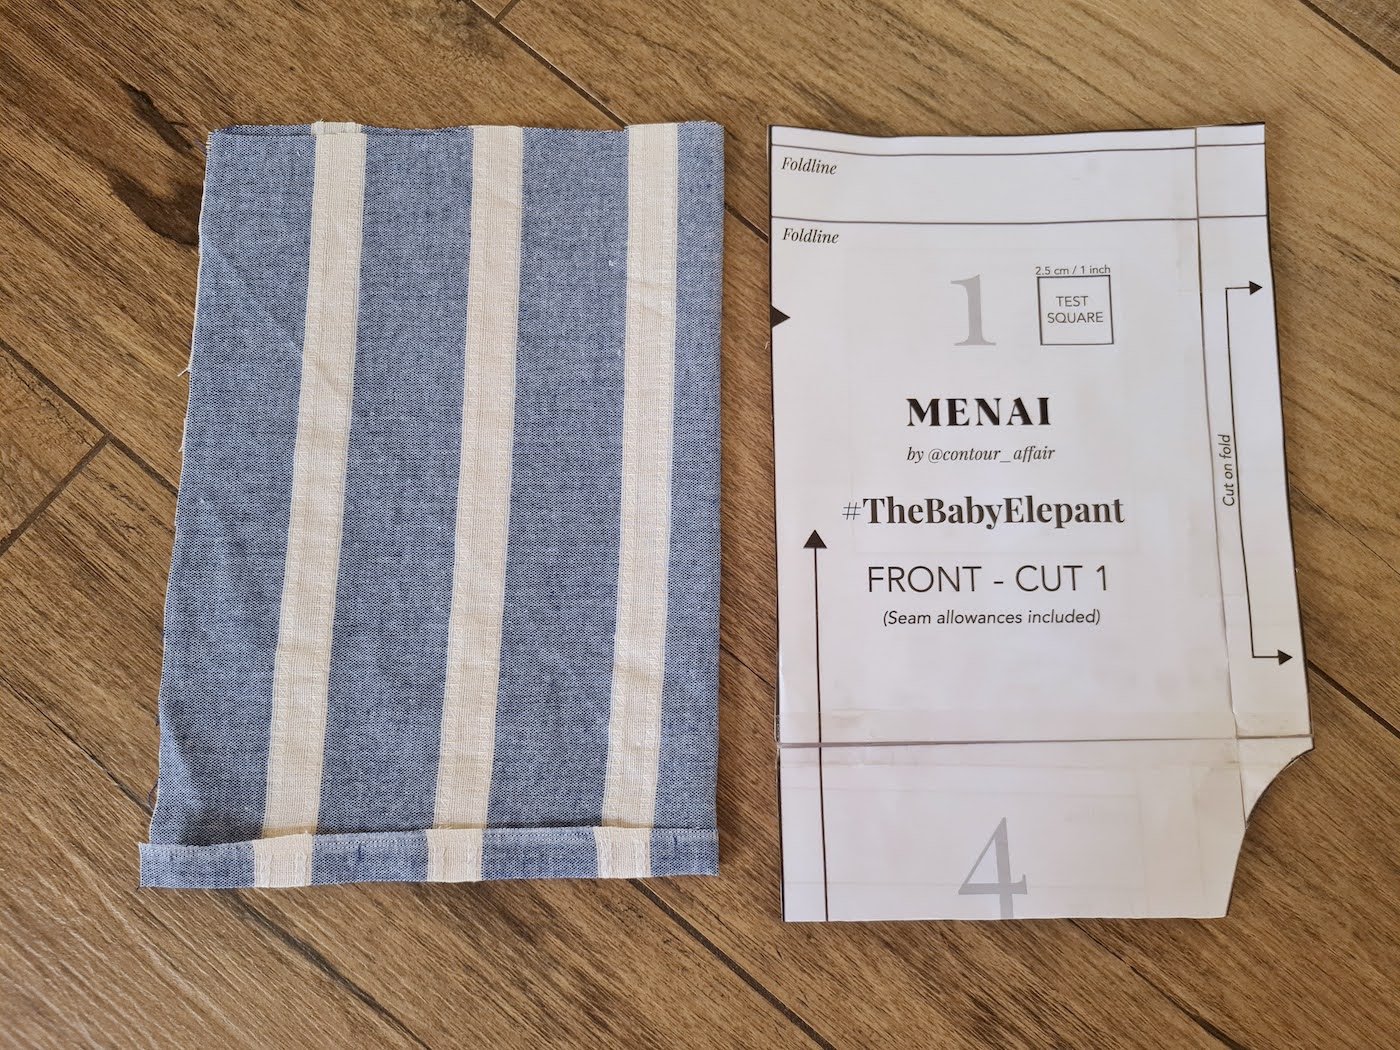
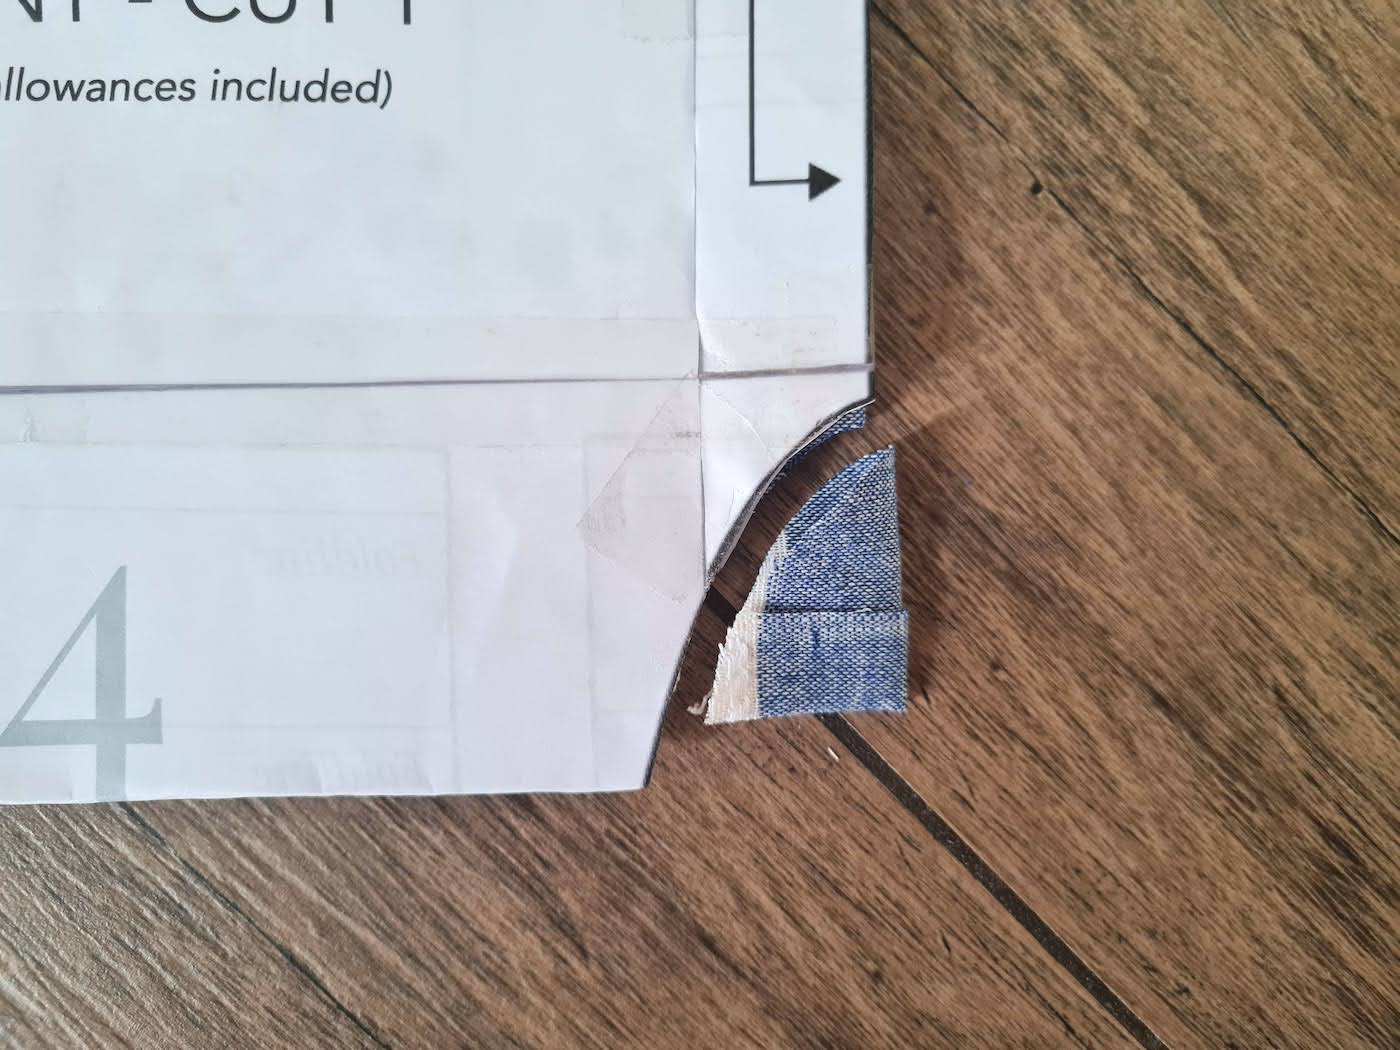
I. First we need to do a quick modification to the pattern pieces. On the front piece side seam, measure 27 cm down from the waistline and mark there. Draw a straight line across, at a 90 degree angle to the side.
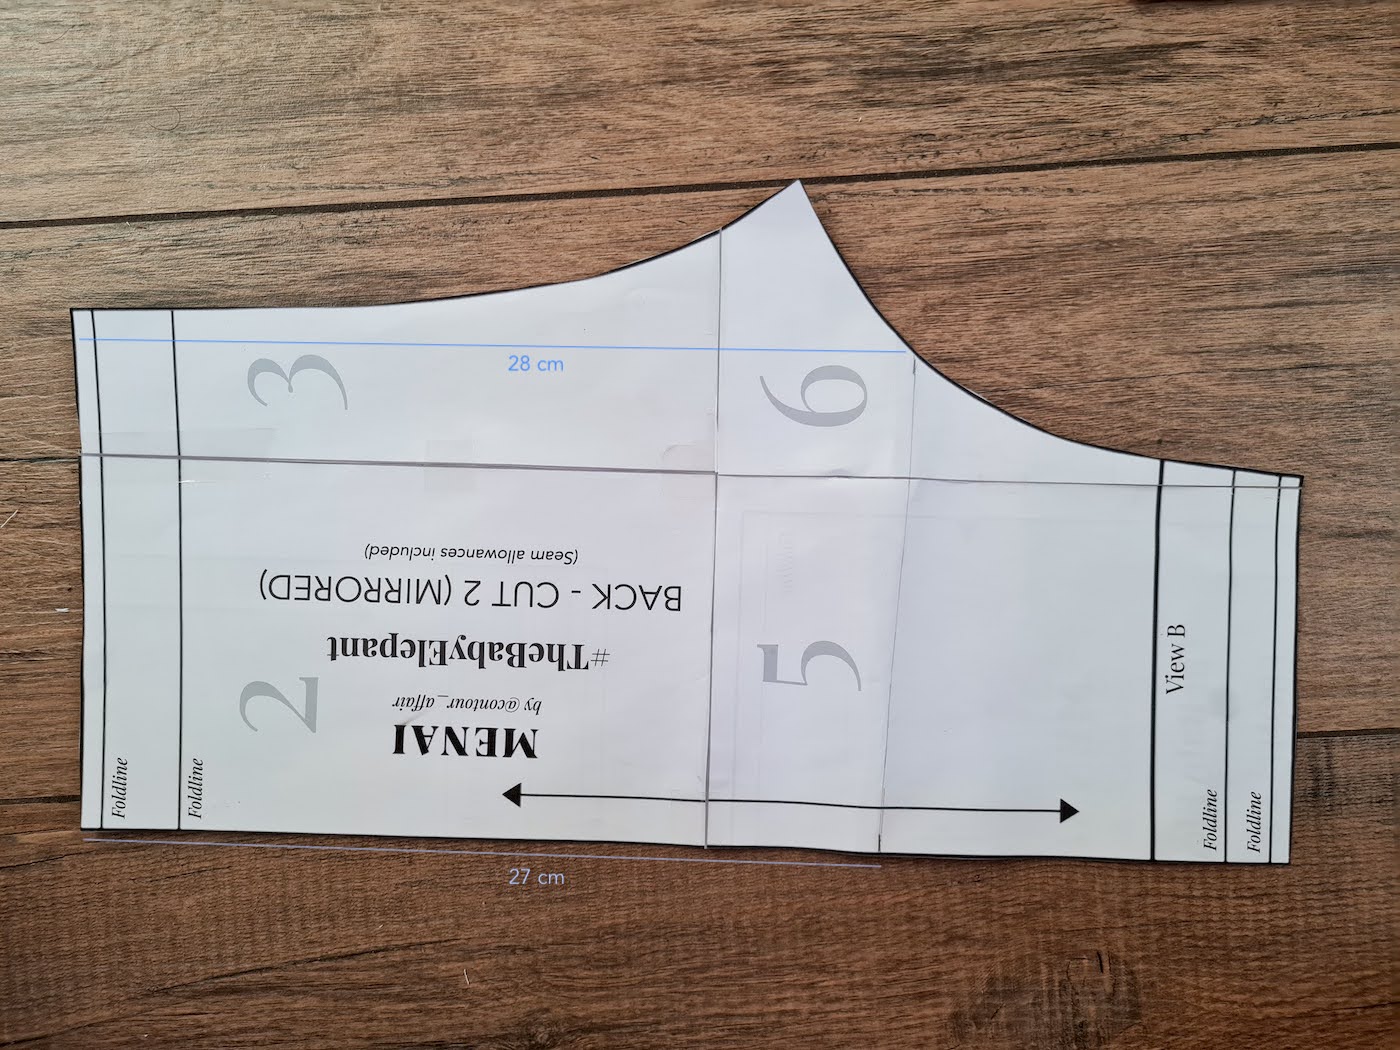
On the back piece, mark the same 27 cm on the side, but over on the crotch side mark 1 cm more - 28 cm. Connect these with a straight line.
To avoid cutting & reprinting the pattern, just fold the pant legs up, along the lines you just drew. Before cutting into your fabric, see the next step.
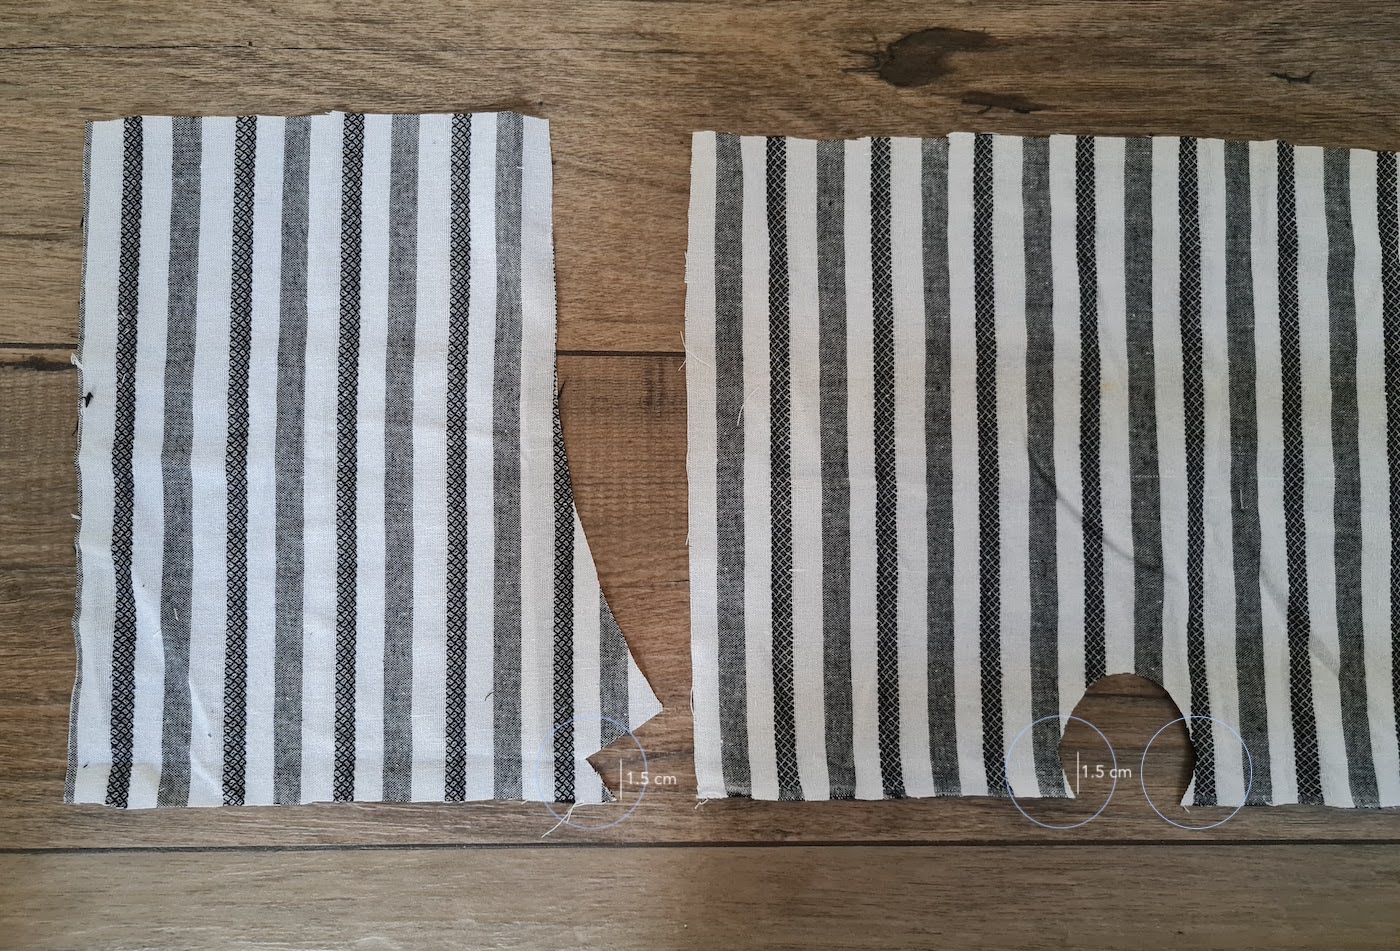
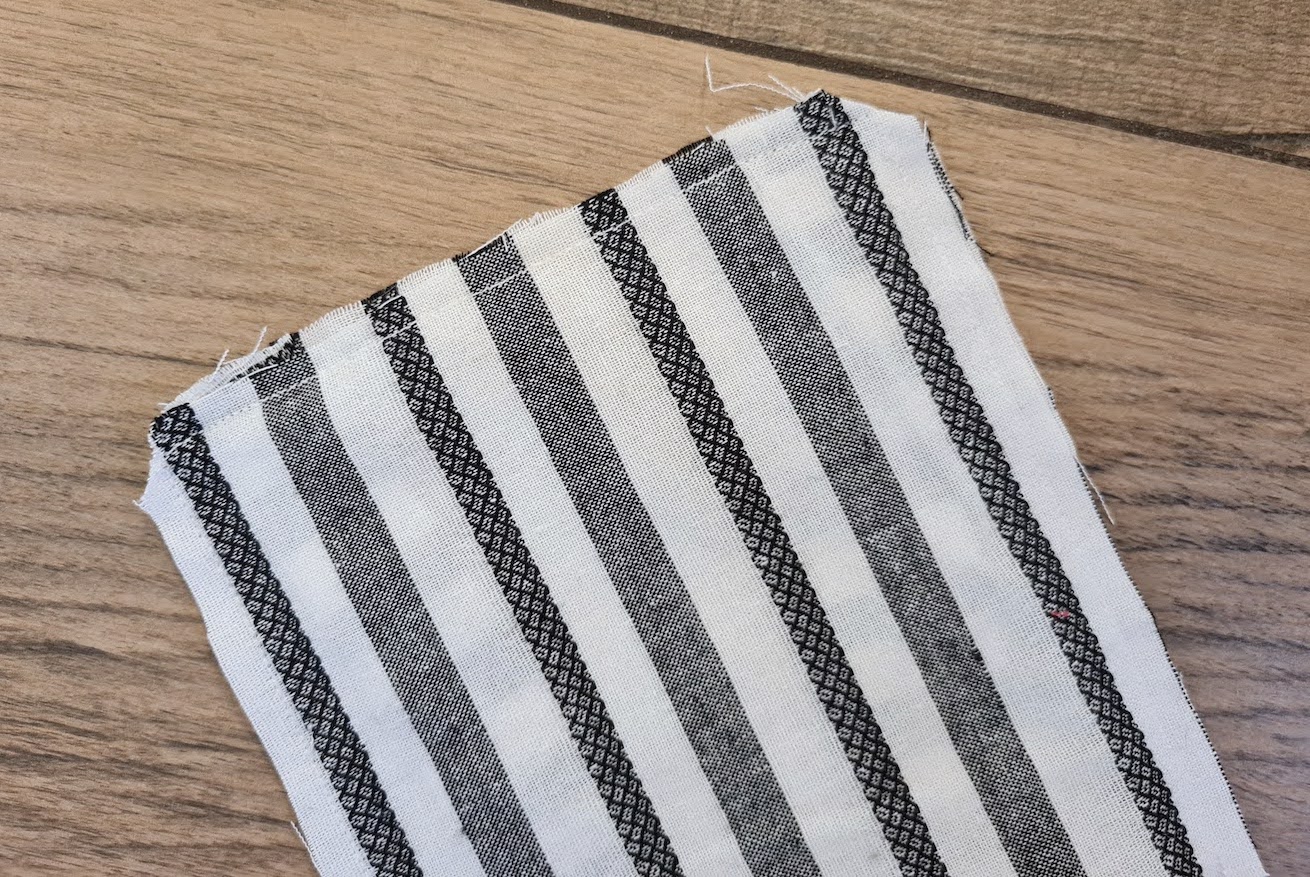
II. As you cut your 2 back pieces and 1 front piece for the shorts/bloomers, at the leg inseam you'll want to angle the cut out in the bottom 1.5 cm as shown below.
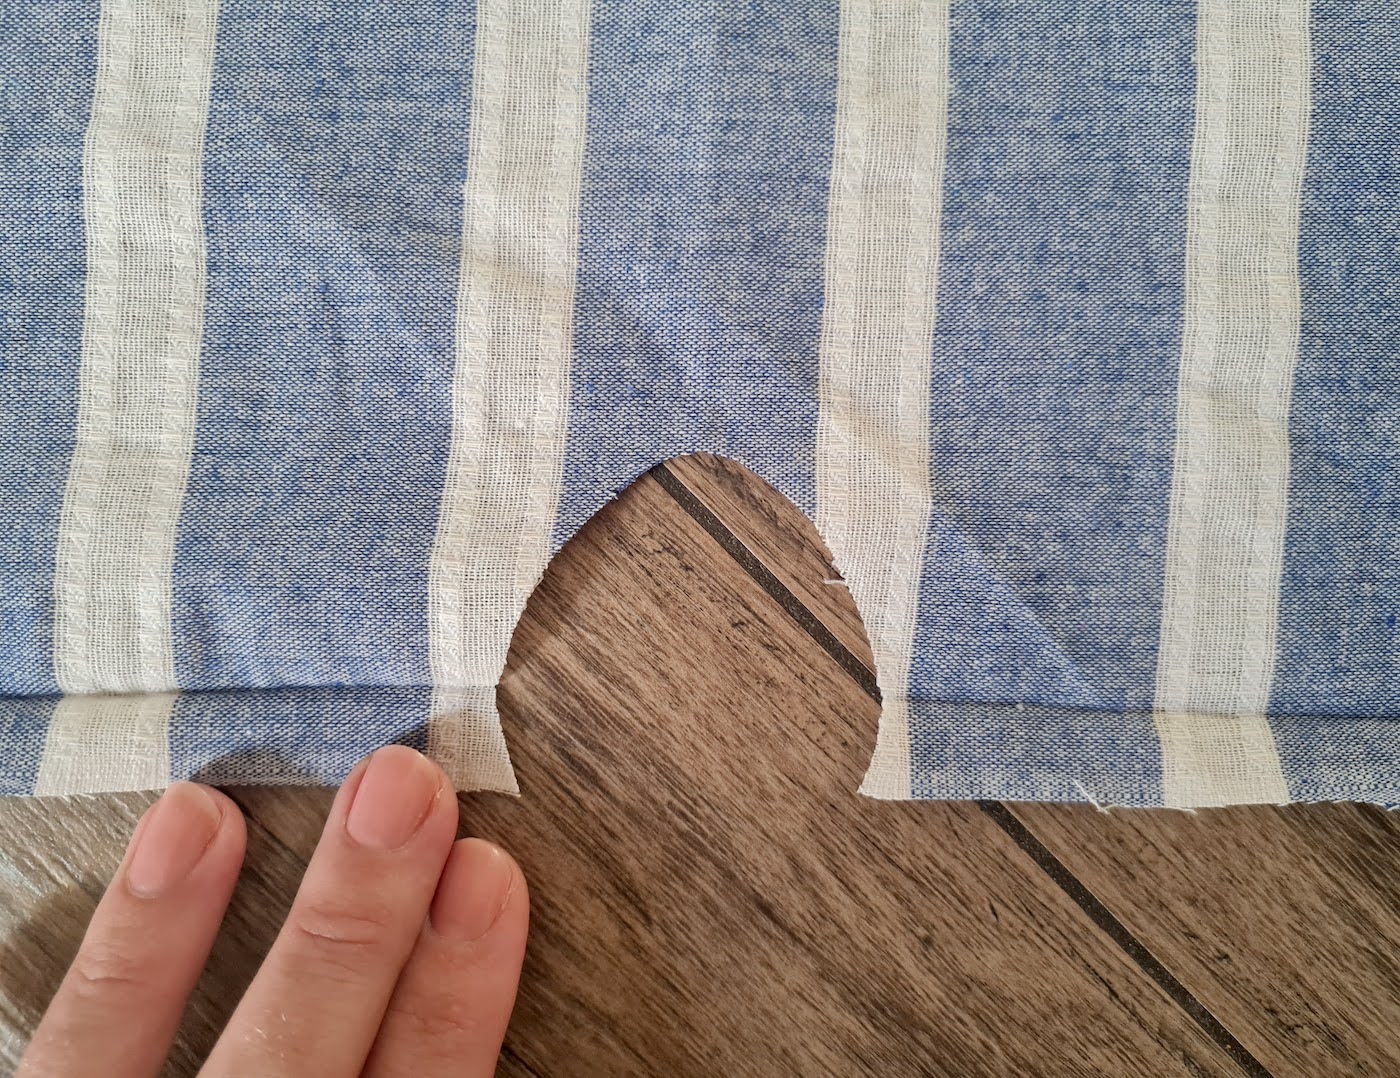
The easy way to do this is to first cut around the pattern in just a rectangle (don't yet cut the crotch curve), and fold the bottom edge up by 1.5 cm. Working with the front piece it will look like this (fabric folded in half in photo):
Then place the pattern at the fold and cut the crotch curve, over the fold:

And you'll have created a symmetrical angled cut.
This is to be able to hem the short with a fold:
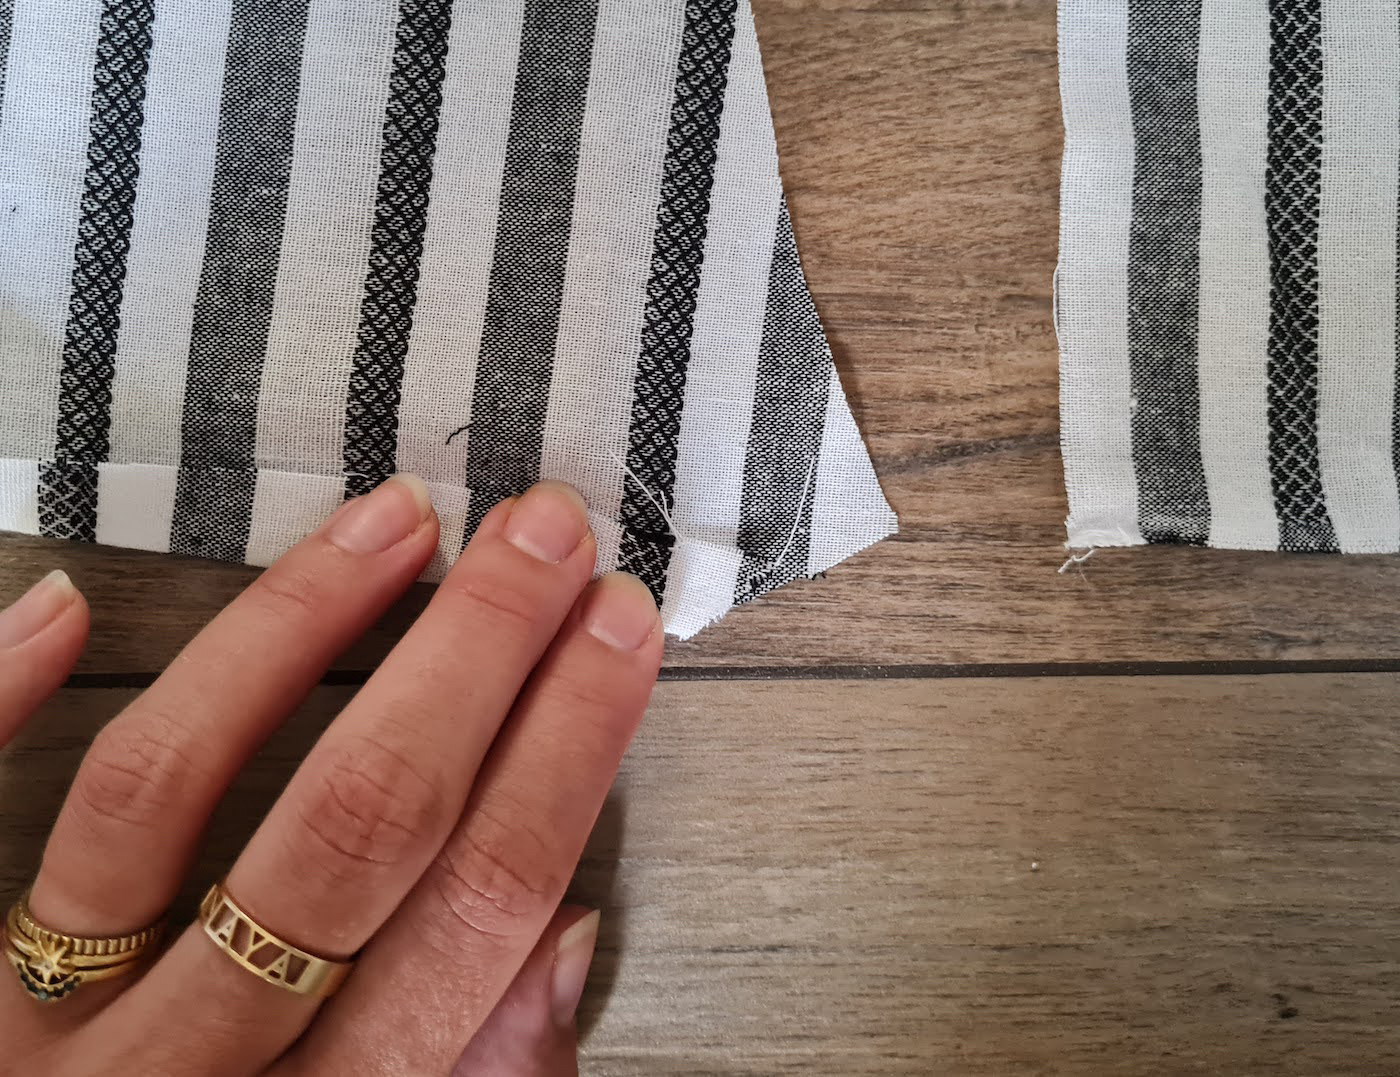
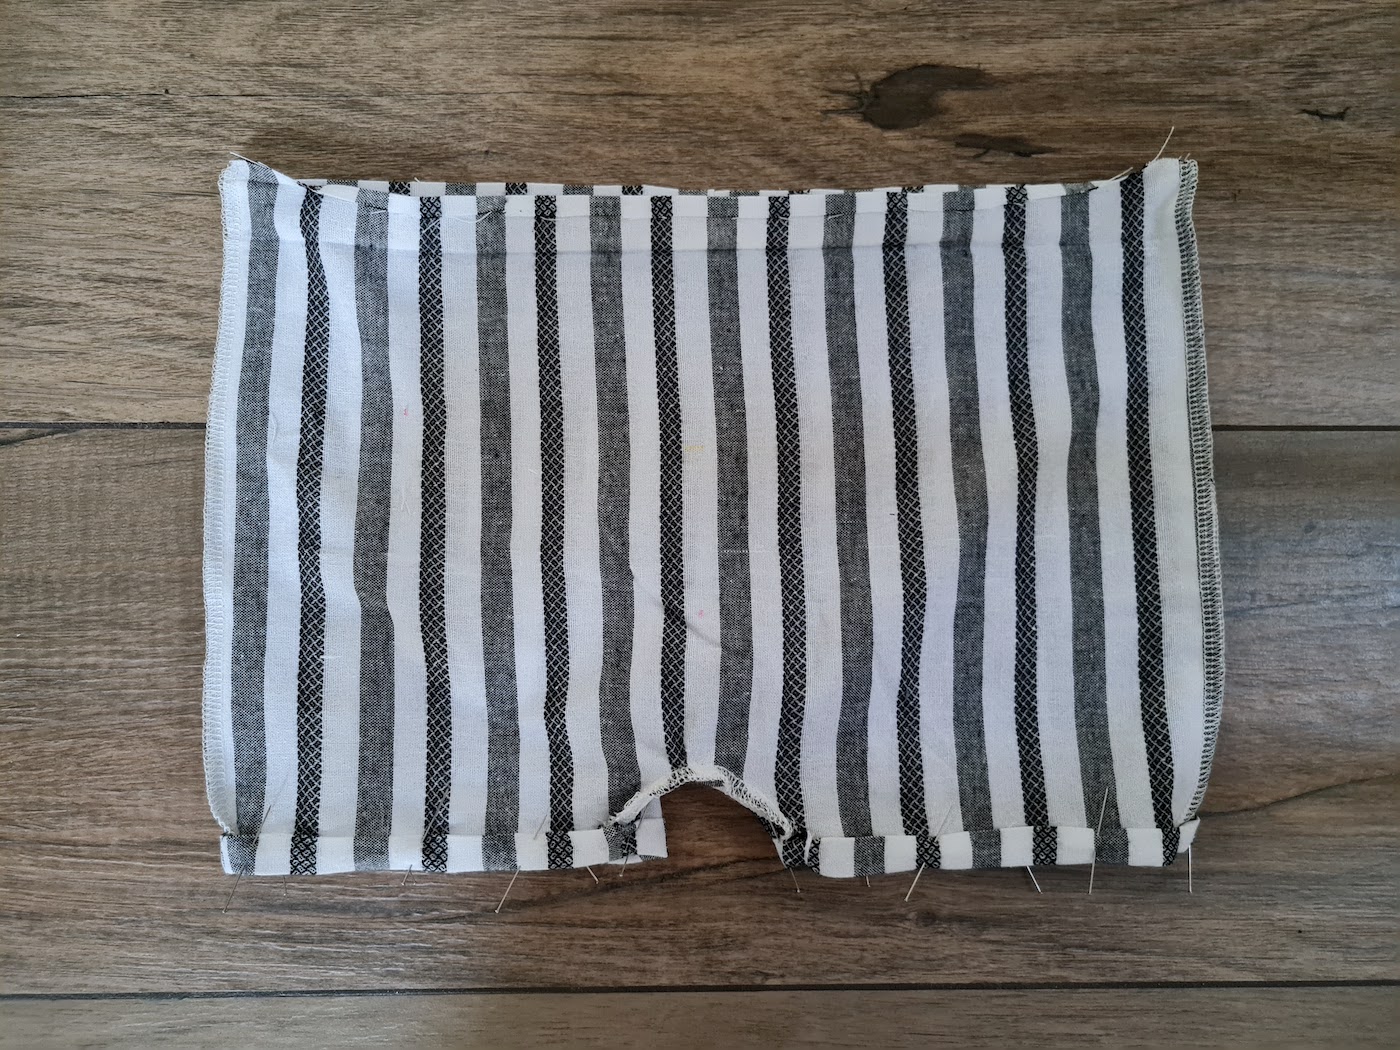
III. Assemble your shorts/bloomers similarly to when making the full length normal Elepant - only here we don't need any elasticated sides, making the process quicker! Pin the back pieces right sides facing and sew the back center seam, and press double folds on the waistline and legs. On waistline, first fold 0.5 cm, and then again 2 cm; on legs first fold 0.5 cm, then again 1 cm.
IV. Next pin the short/bloomer sides and crotch, right sides facing, and sew with 0.7 cm seam allowance. When sewing the scrotch, follow the angled cut.
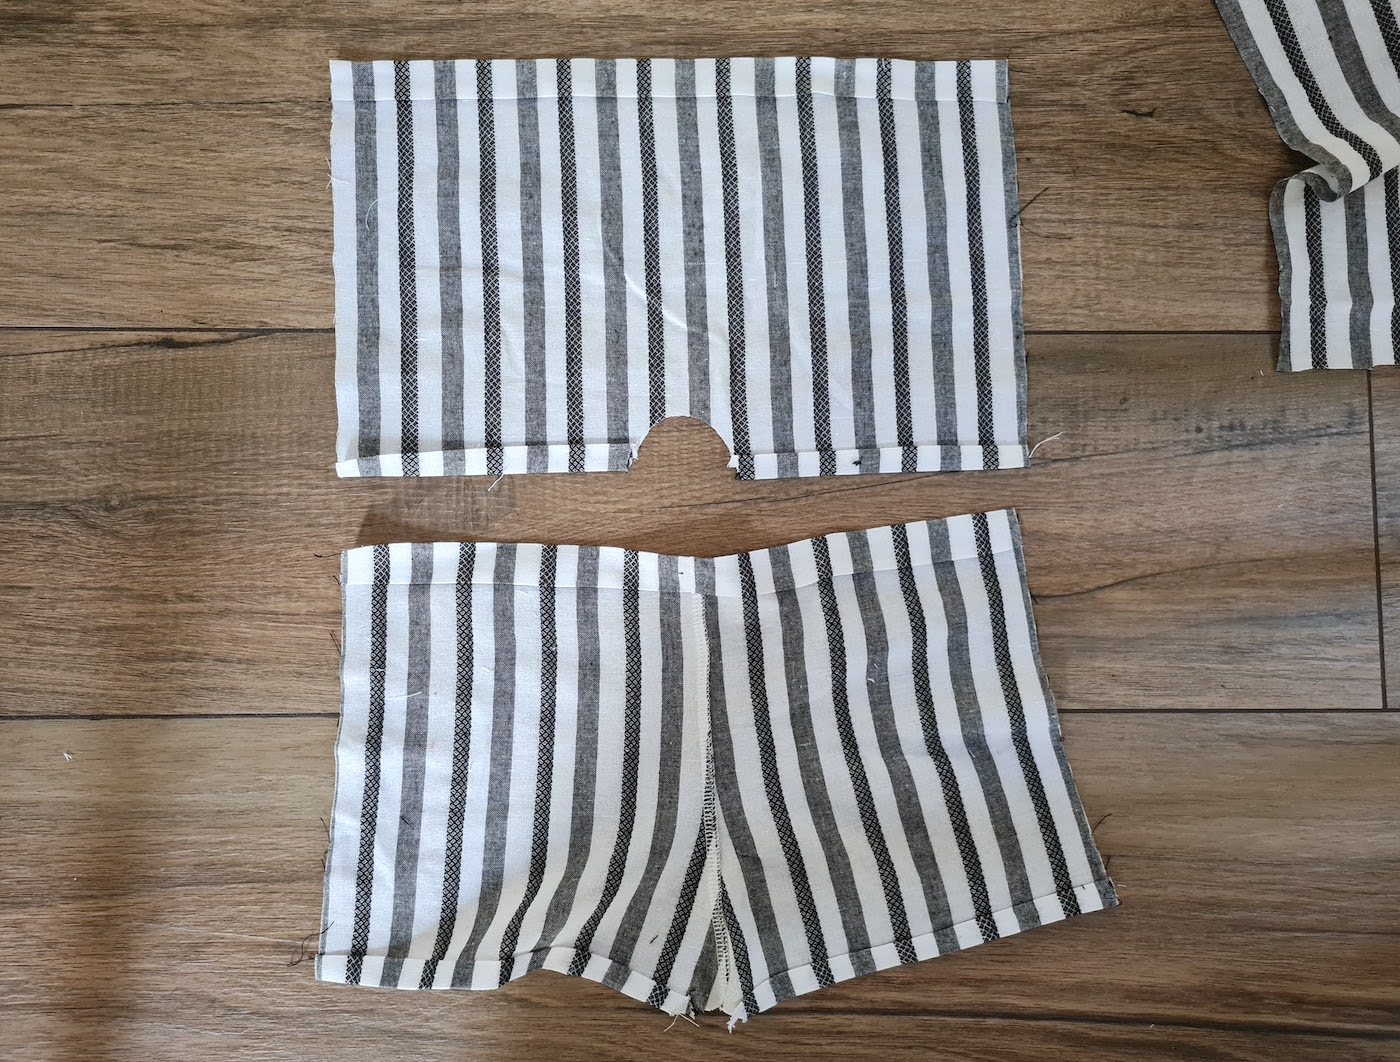
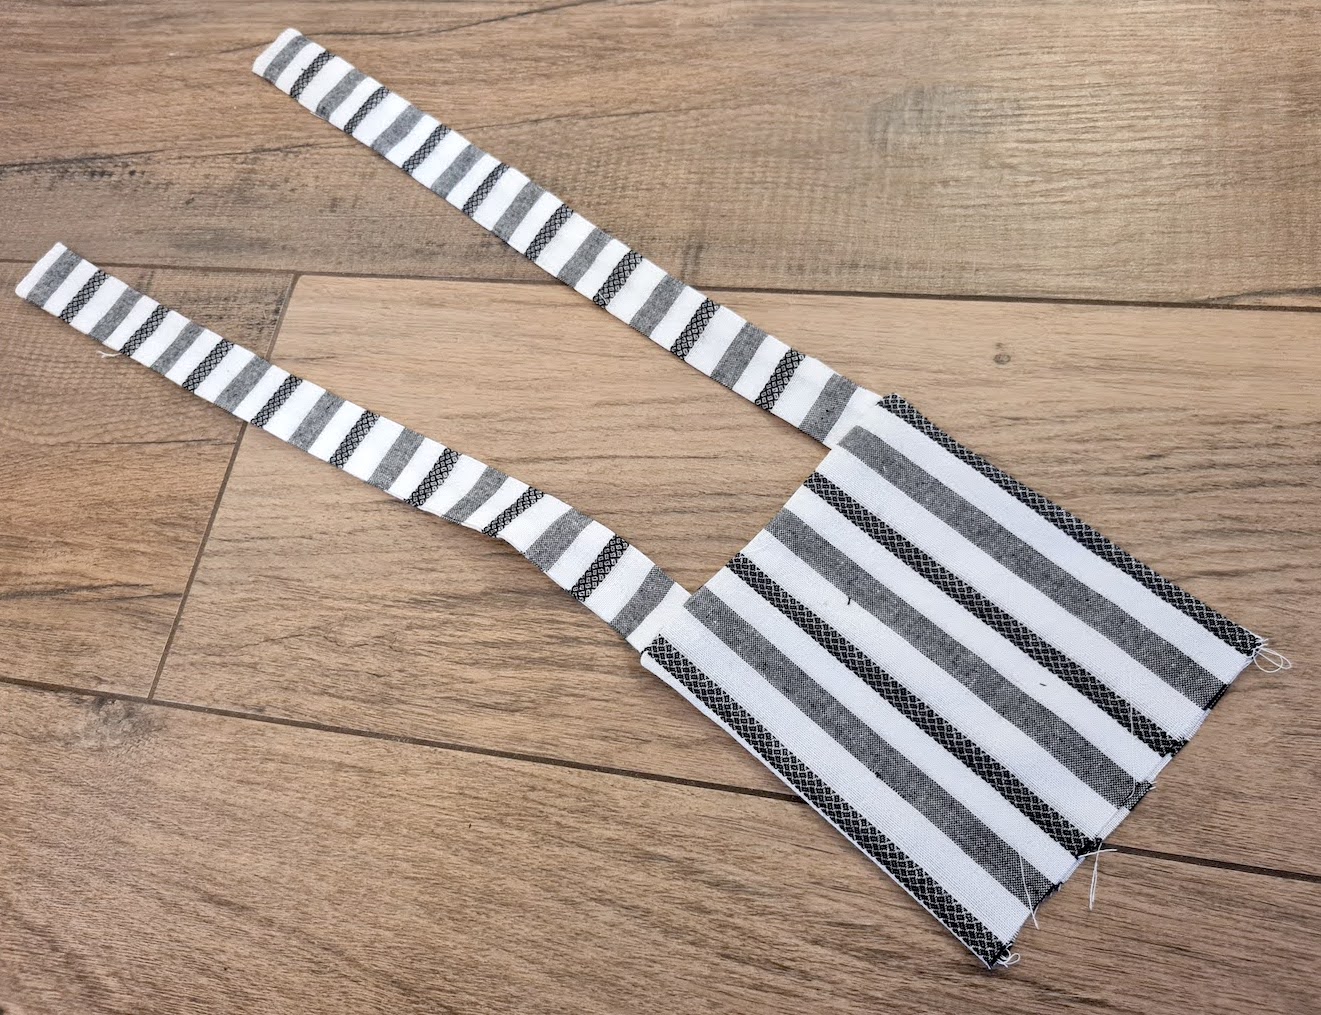
Then pin the leg hems you had pre-pressed, and edgestitch at the bottom of the fold - either all around if doing shorts & not adding elastic to the hems, or leaving a gap for elastic if doing bloomers. Here are my shorts version which I used to make the dungarees (no elasticated legs). If you are sewing dungarees, from here jump to the start of the DUNGAREES guide, a couple steps below.
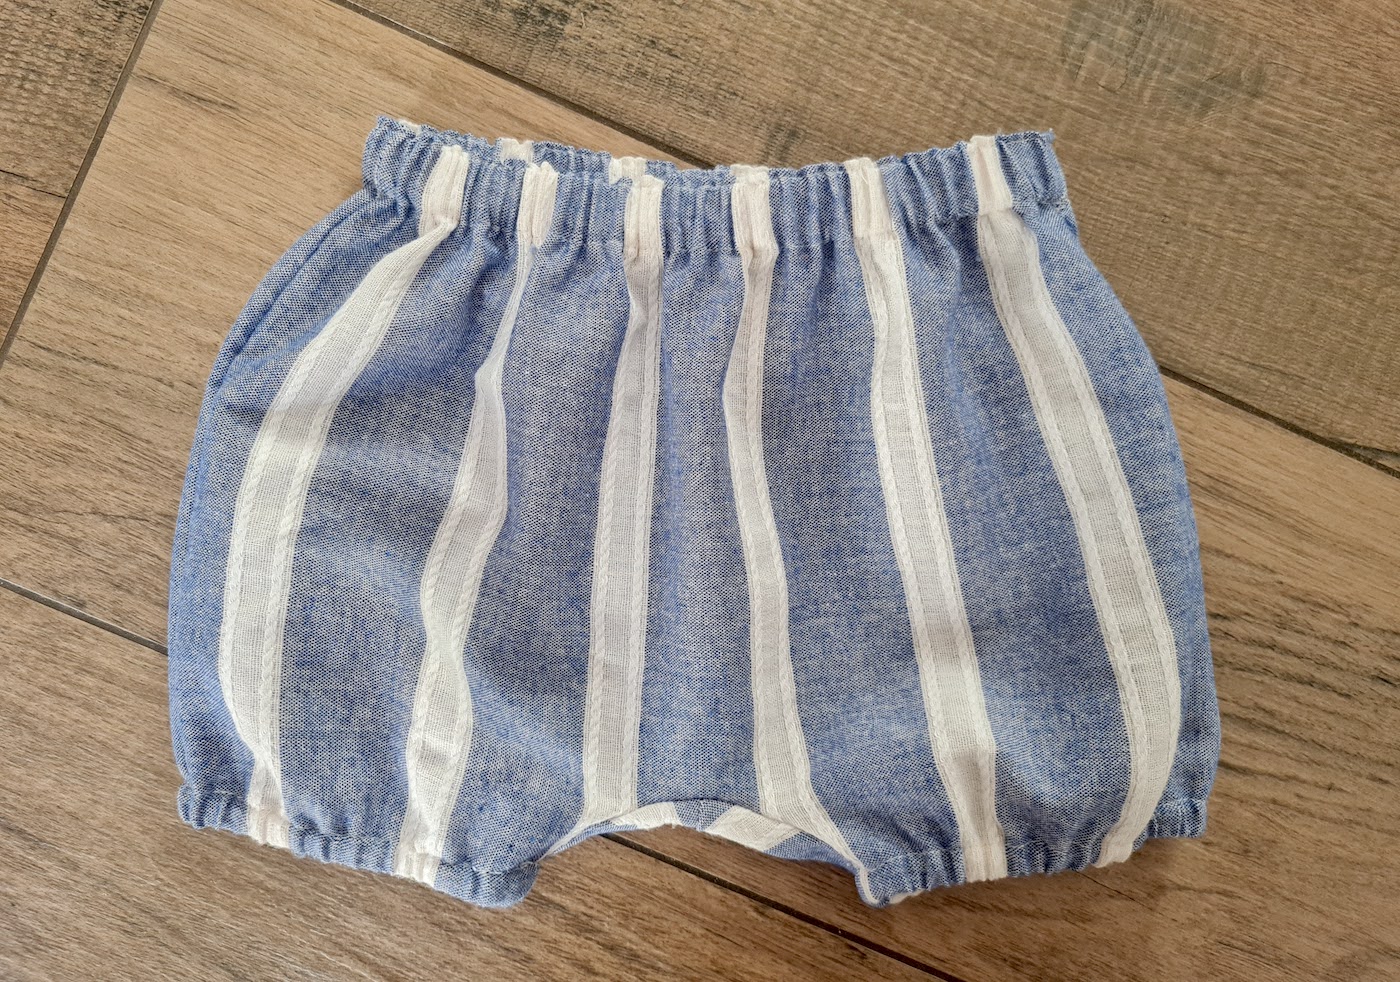
.. But if doing bloomers or just shorts, you're almost there. For my bloomers version, I did a tiniest little ruffle along the waistline by adding a stitch about 3 mm from the top of the fold:
And added my elastic to the waistline and legs. If doing shorts, you'll only elasticate the waist. I did loose legs for Naya's little thighs and used a 24 cm long piece of elastic for both - but measure your baby's thigh to make sure it's comfy for him/her.

DUNGAREES
Start with either the shorts/bloomers from above - or the
full-length Elepant - all done except for waistband.
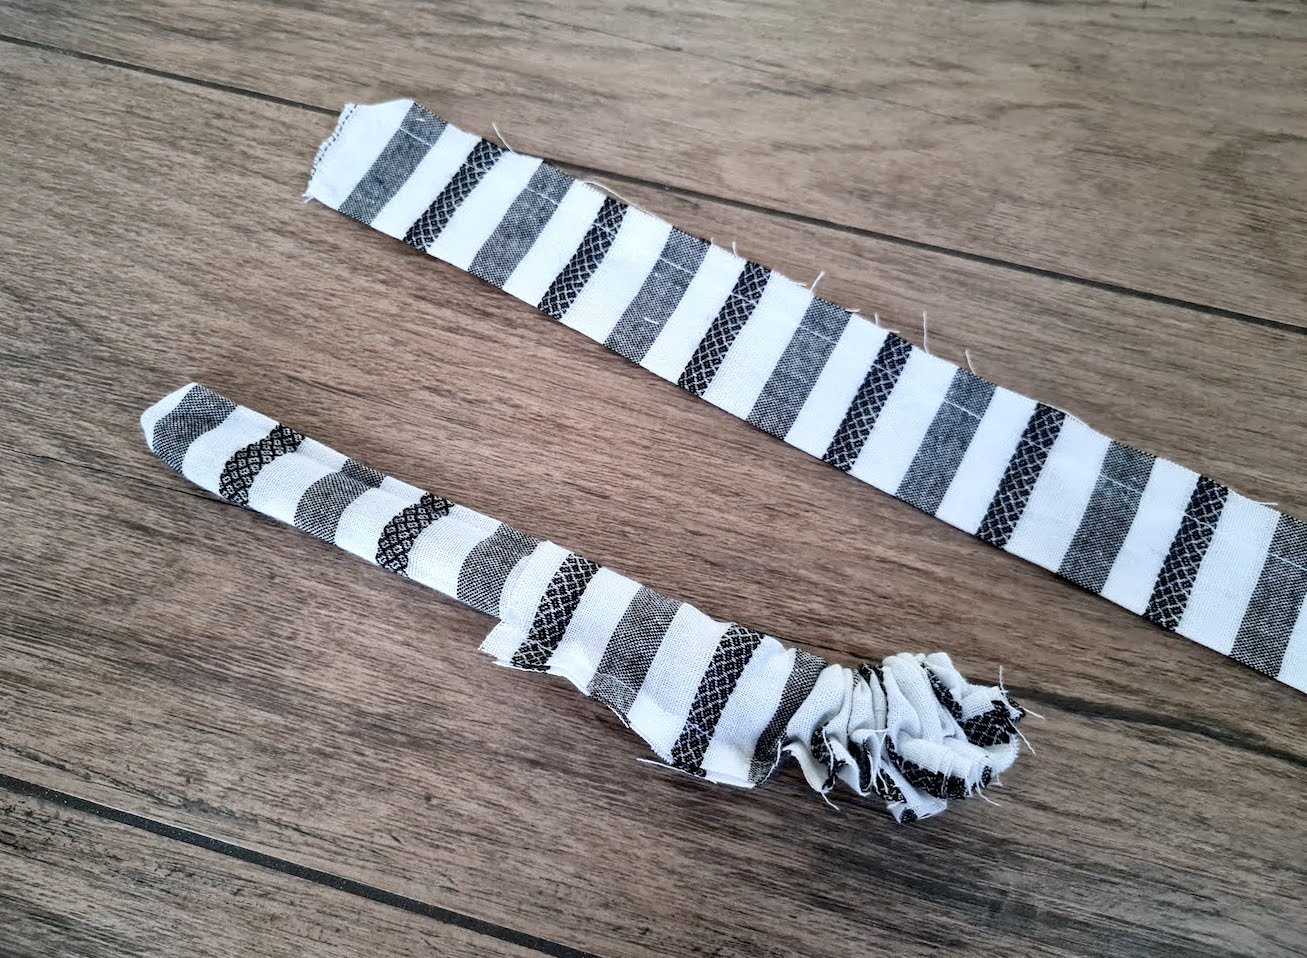
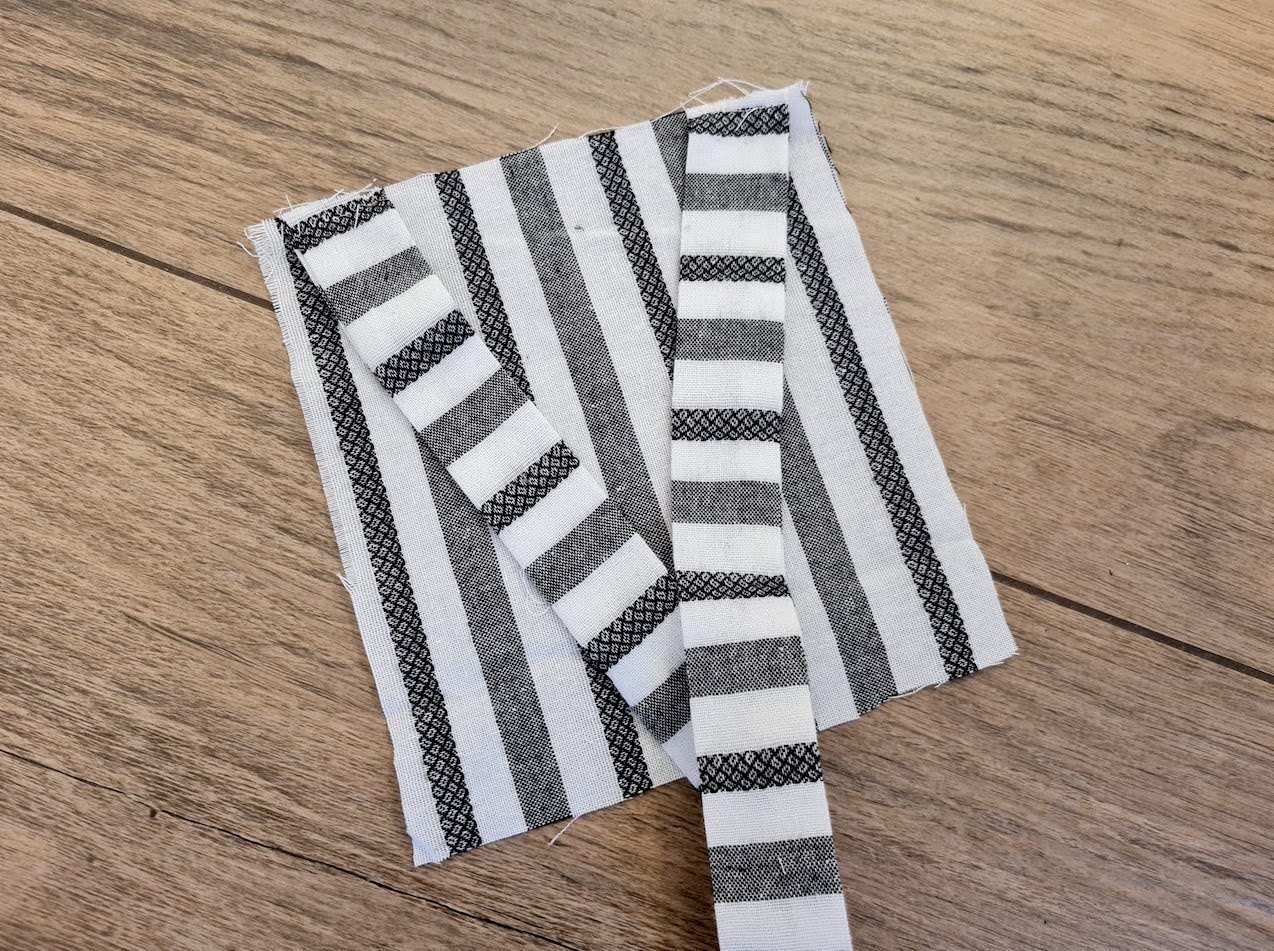
I. The other 4 pieces you need for dungarees are for the front flap and shoulder straps - Cut 2 of each of the below rectangles. II. To make the shoulder straps, take your 2 long rectangles, fold in half width-wise with your iron (right sides facing), and sew from the fold at one end (0.7 cm seam allowance), pivot at the corner, and sew along the long edge, leaving the other short end unsewn. Trim the corners.
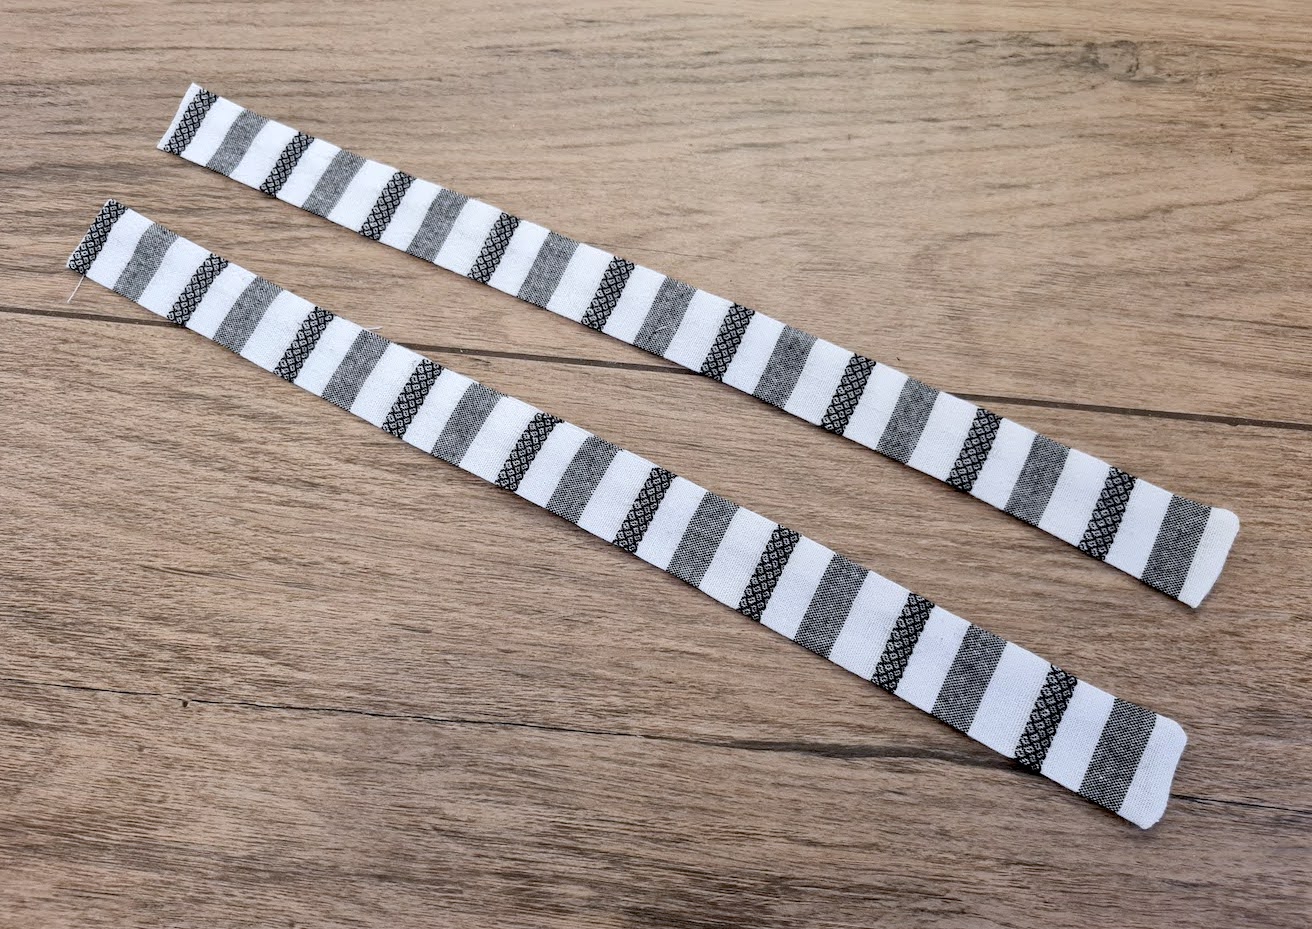
Push the strap through itself, turning it right side out and pushing out the corners (I like to use a paintbrush handle for this, the rounded head makes sure I don't puncture the fabric).
Press your straps.
III. Take one of your dungaree flap rectangles and pin the two straps on the right side of the fabric, at both corners of a short edge, 0.7 cm from the edges. Sew the straps in place just a few mm from the edge.
Pivot the straps towards the center so they are out of the way and you don't sew over them in the next step.
Take the other dungaree flap piece, place on top, right sides facing, and pin around.
Sew around from one long edge to the other, and clip the corners.
Use the straps to pull right side out and press.
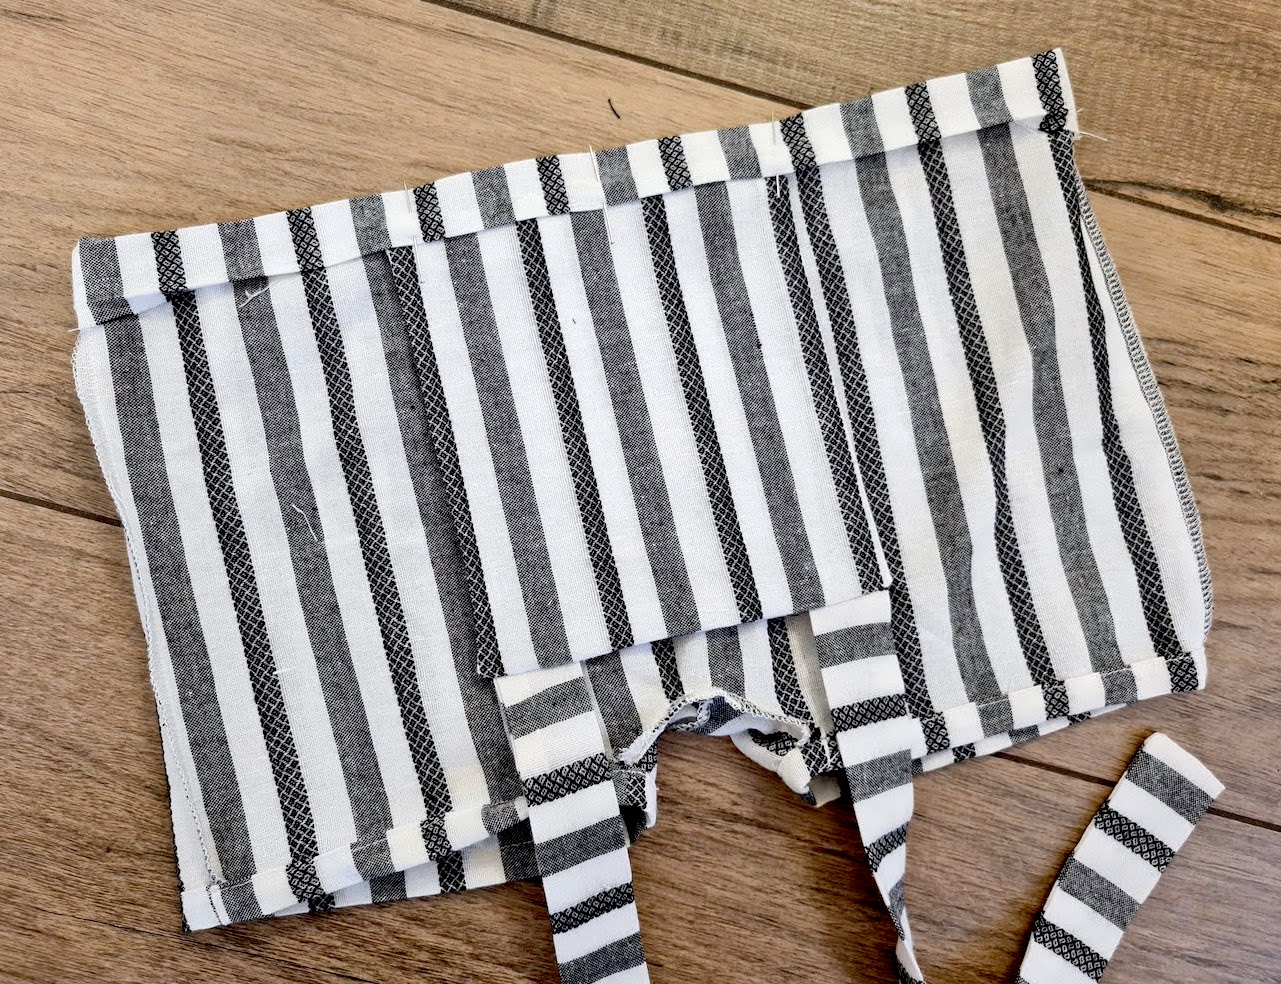
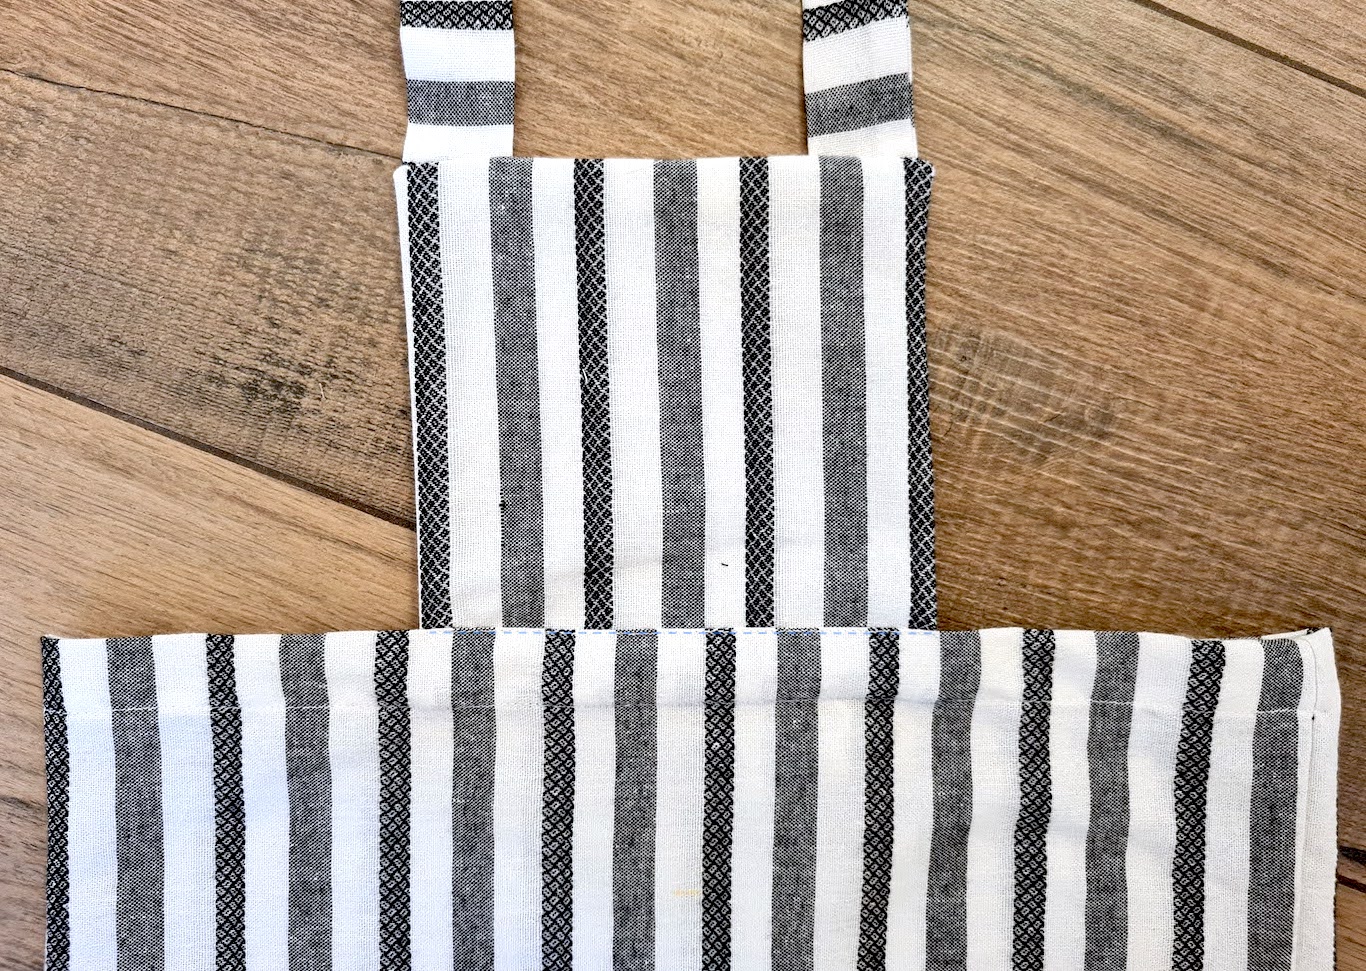
IV. To attach the flap to the shorts (or pants), mark the center front on the pant and the flap, slide the flap 0.5 cm under the waistline fold you have pressed on the pant, aligning the center markings. Reverse of flap should face reverse of pant. Pin in place.
V. First edgestitch at the bottom of the waistband fold, leaving a gap to insert your elastic. Then fold the flap up, and edgestitch at the top of the waistband fold (marked in blue), securing the flap in place.
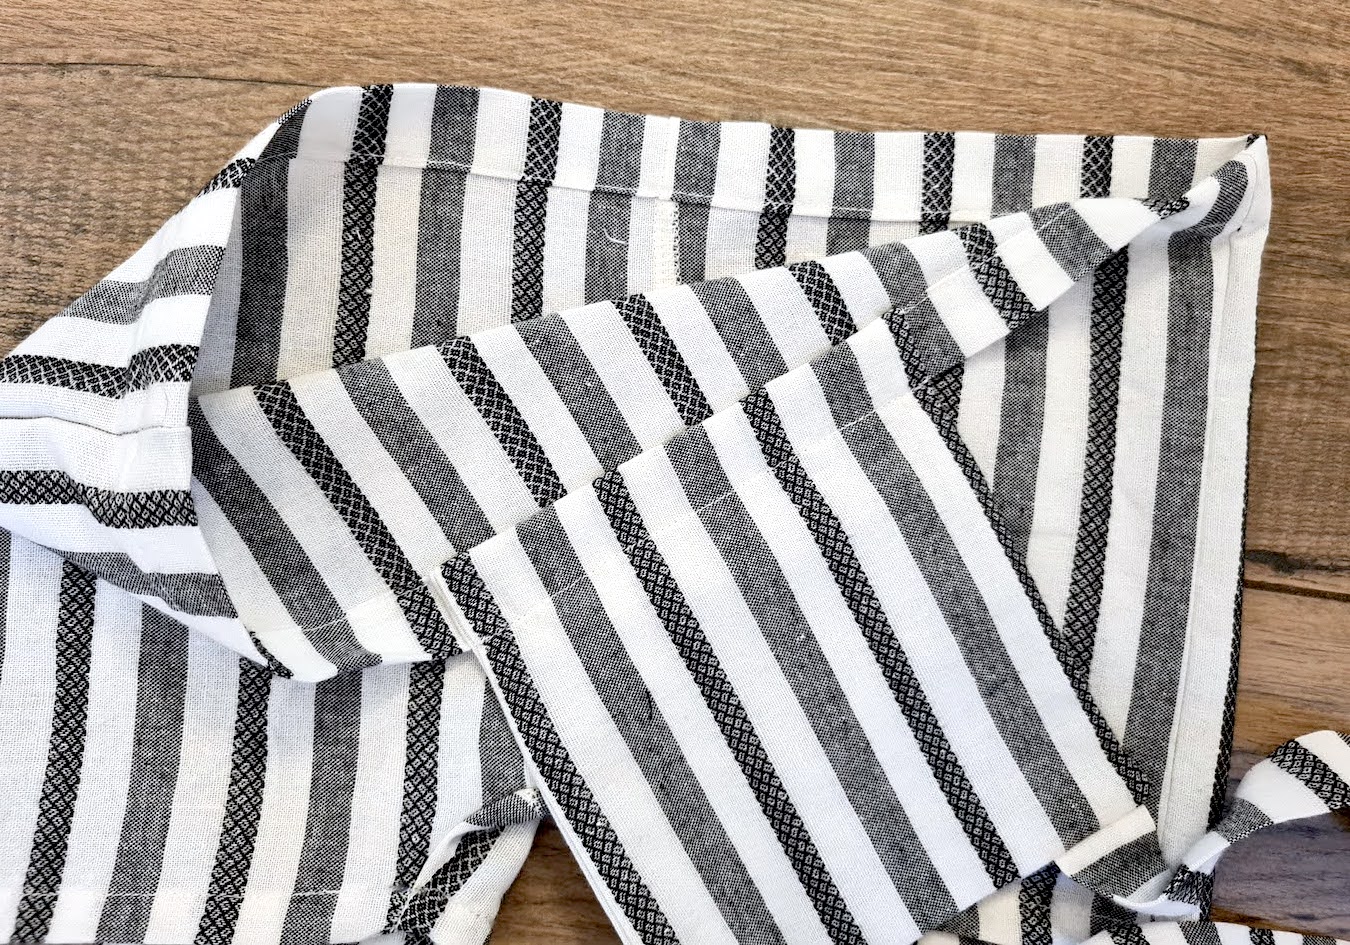
On the reverse it will be nice and clean:
VI. Insert your elastic from the gap you left, sew elastic ends together, and close the gap in the stitch. I like to also distribute the gathers on the waistband so that the front has less gathering (we don't really want to gather the flap area that much)...
... And the back has more as you can see below. To secure the gathers like this, stitch in the ditch over over the waistband at both side seams.
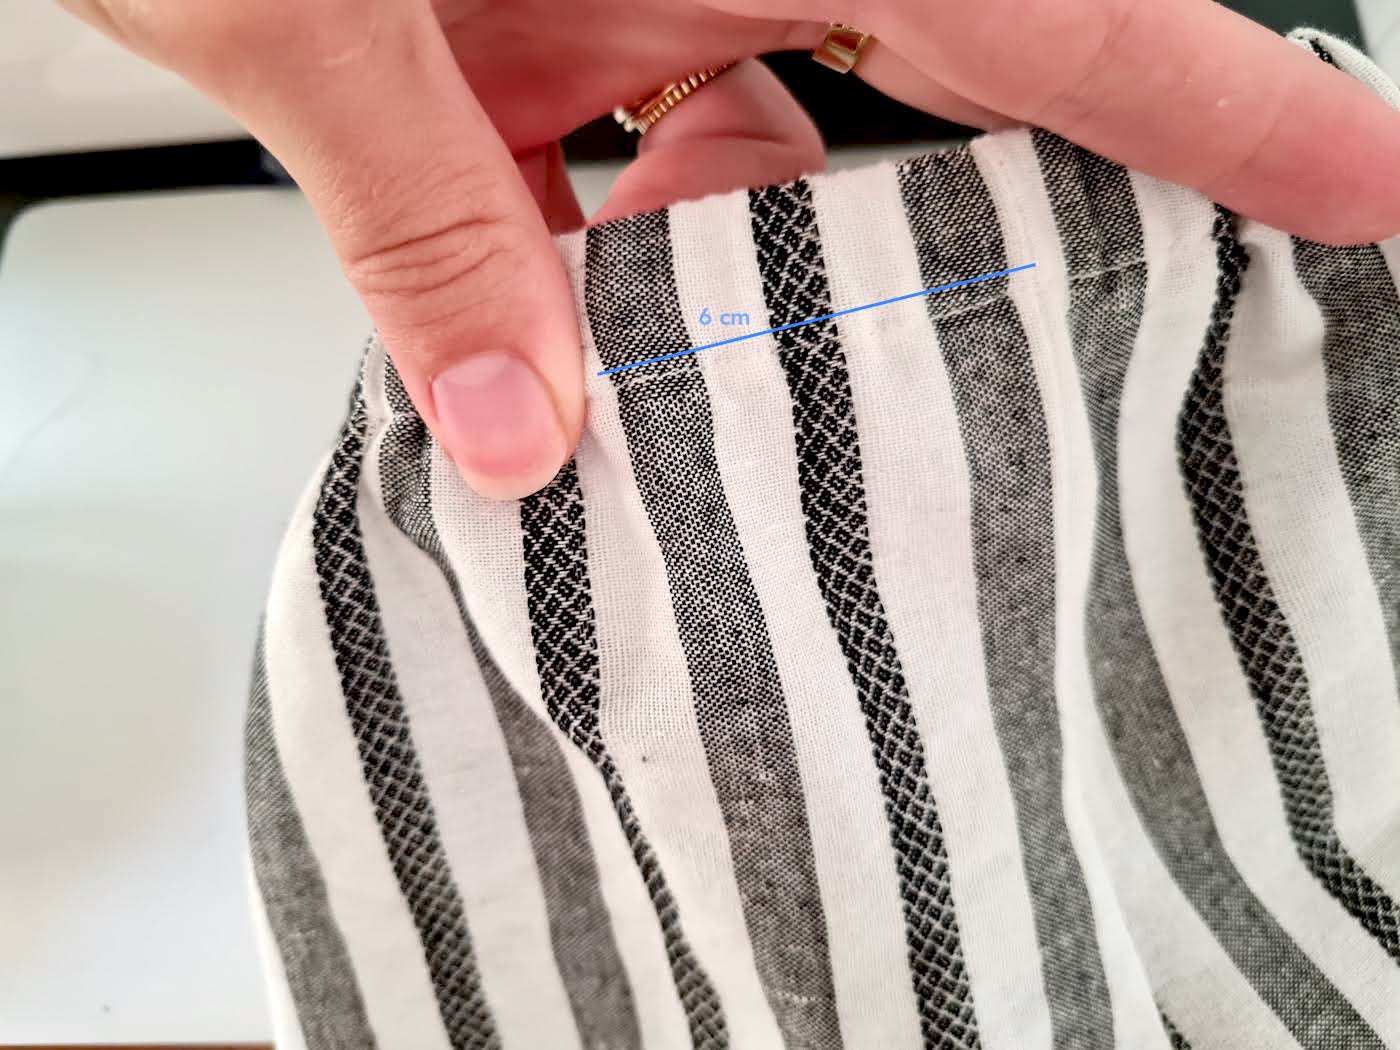
VII. Almost there! At the back, mark 6 cm out from the center back seam on both sides for the buttons..

.. And sew them in place at the seam of the waistband.
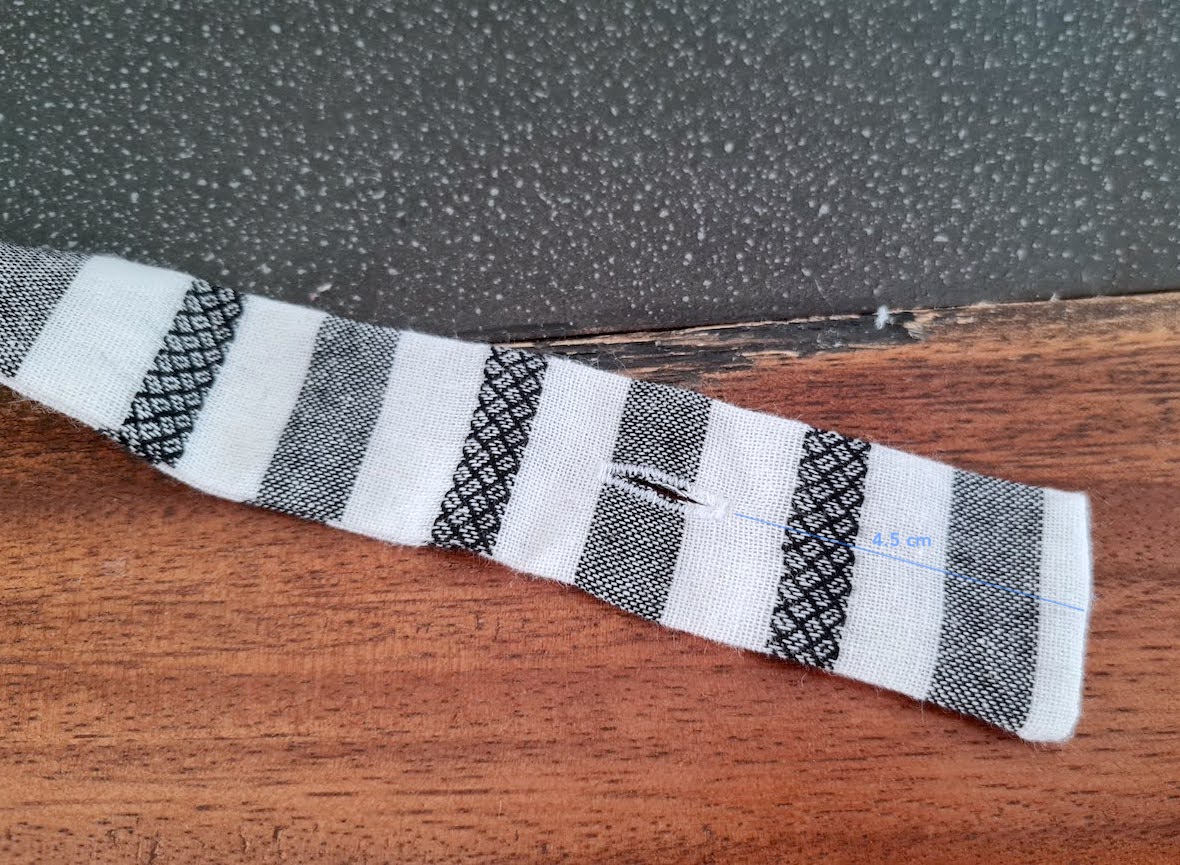
The straps have some room for growth - I recommend trying on your baby to get the buttonhole placement right. For my 9 month old the perfect spot for the buttonhole right now was 4.5 cm from the end of the strap. As she grows, I'll add another hole to the end of the strap.
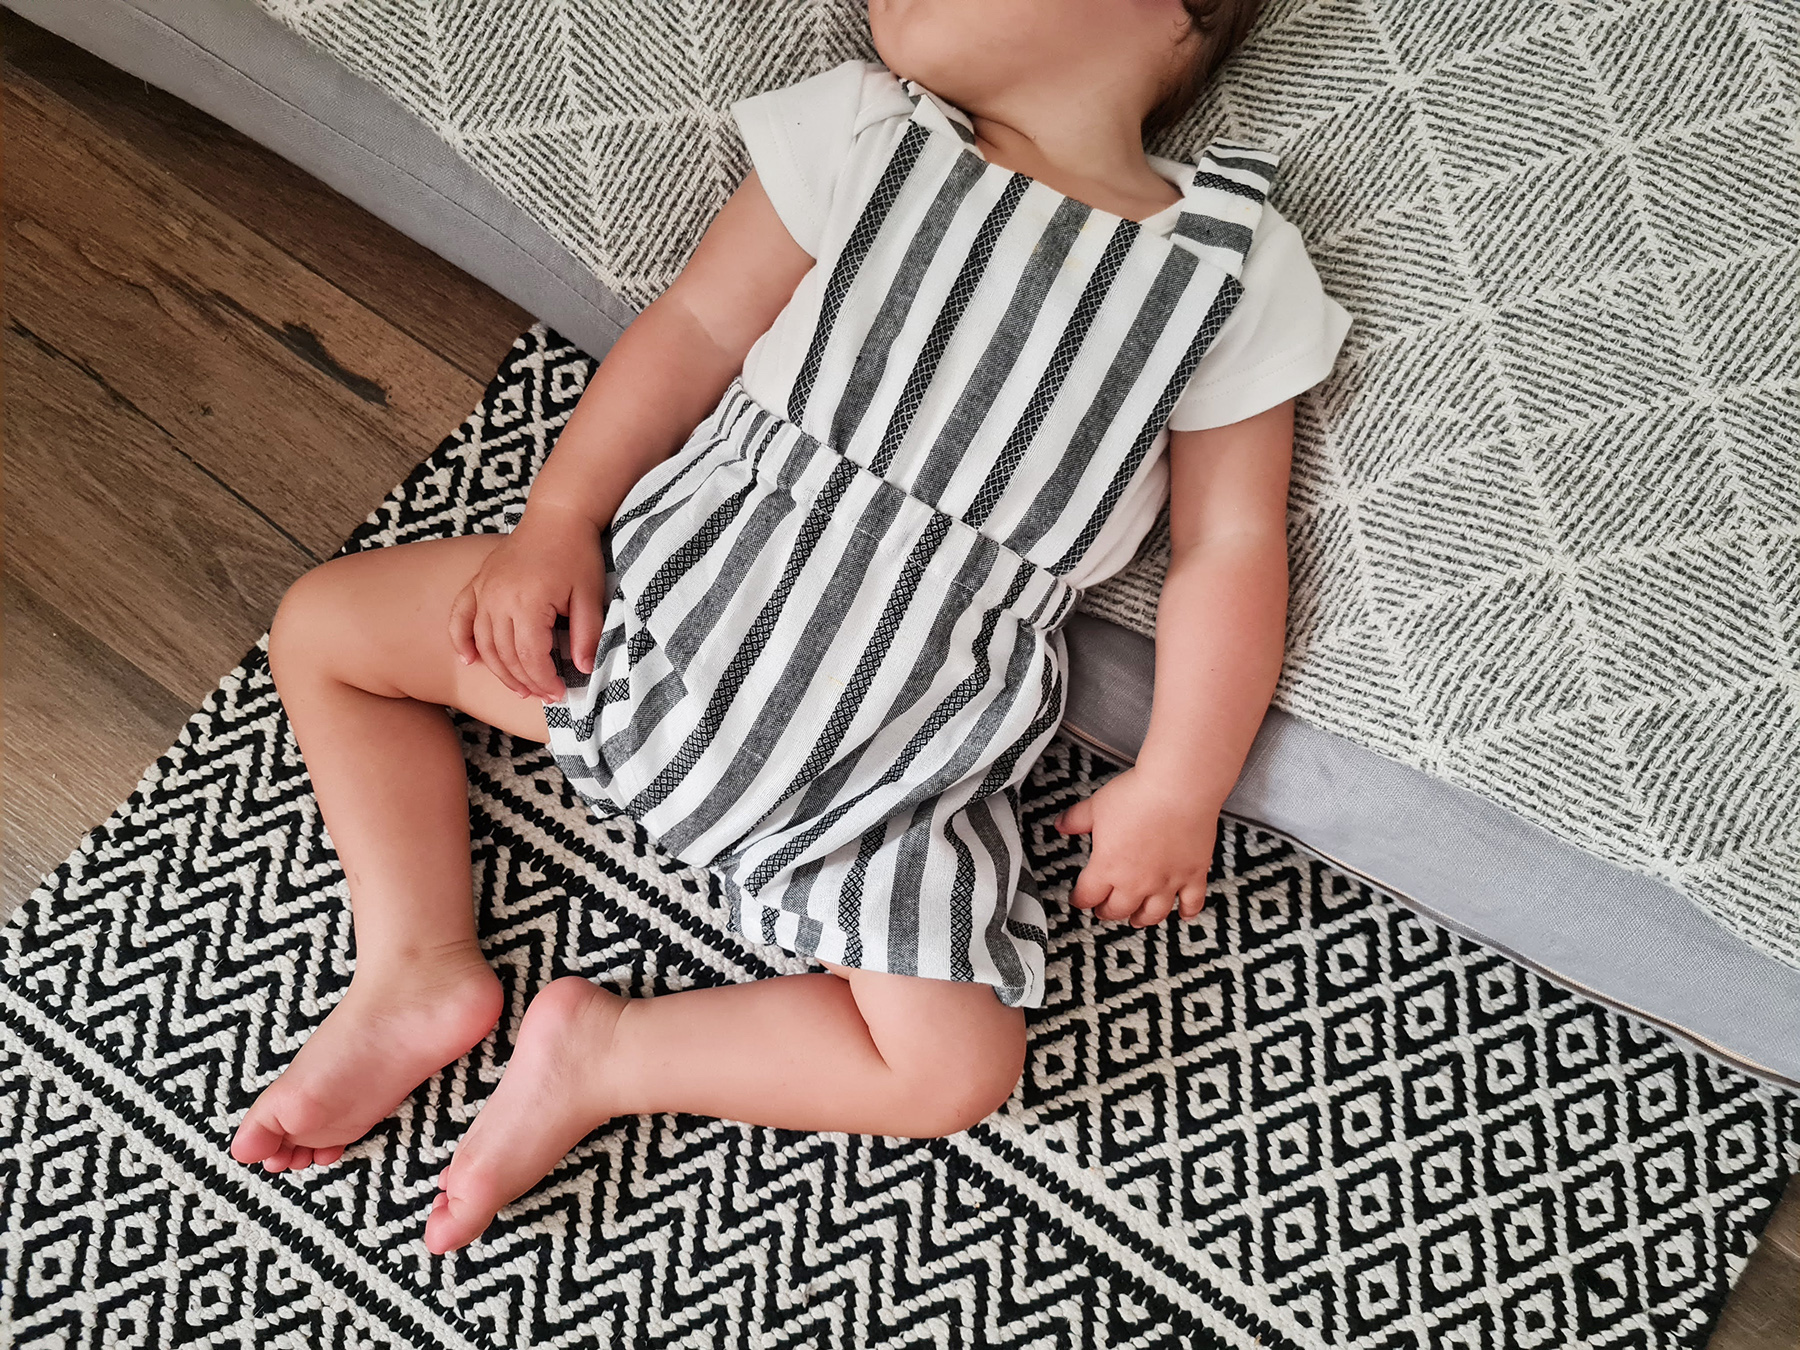
All done!
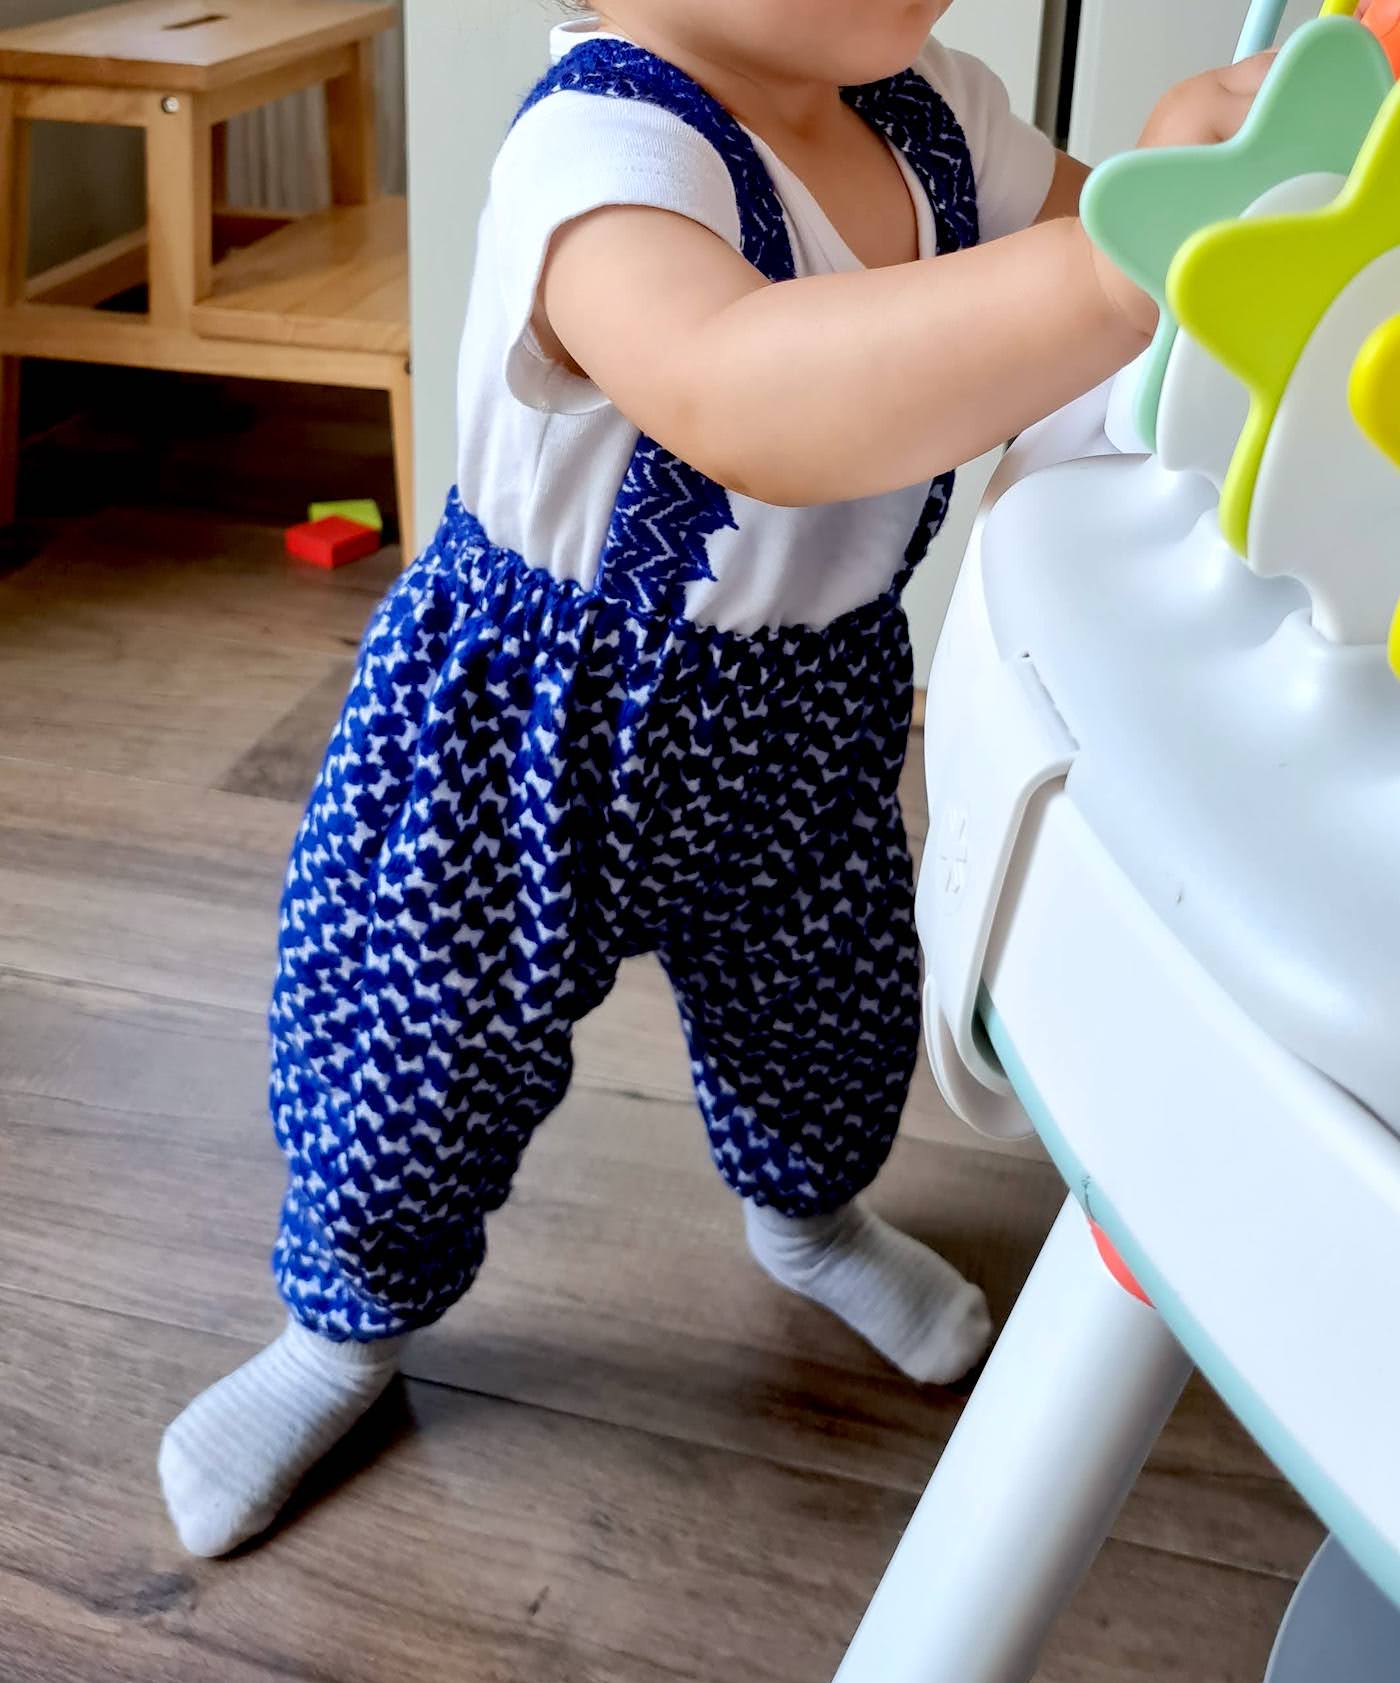
Naya approves:)
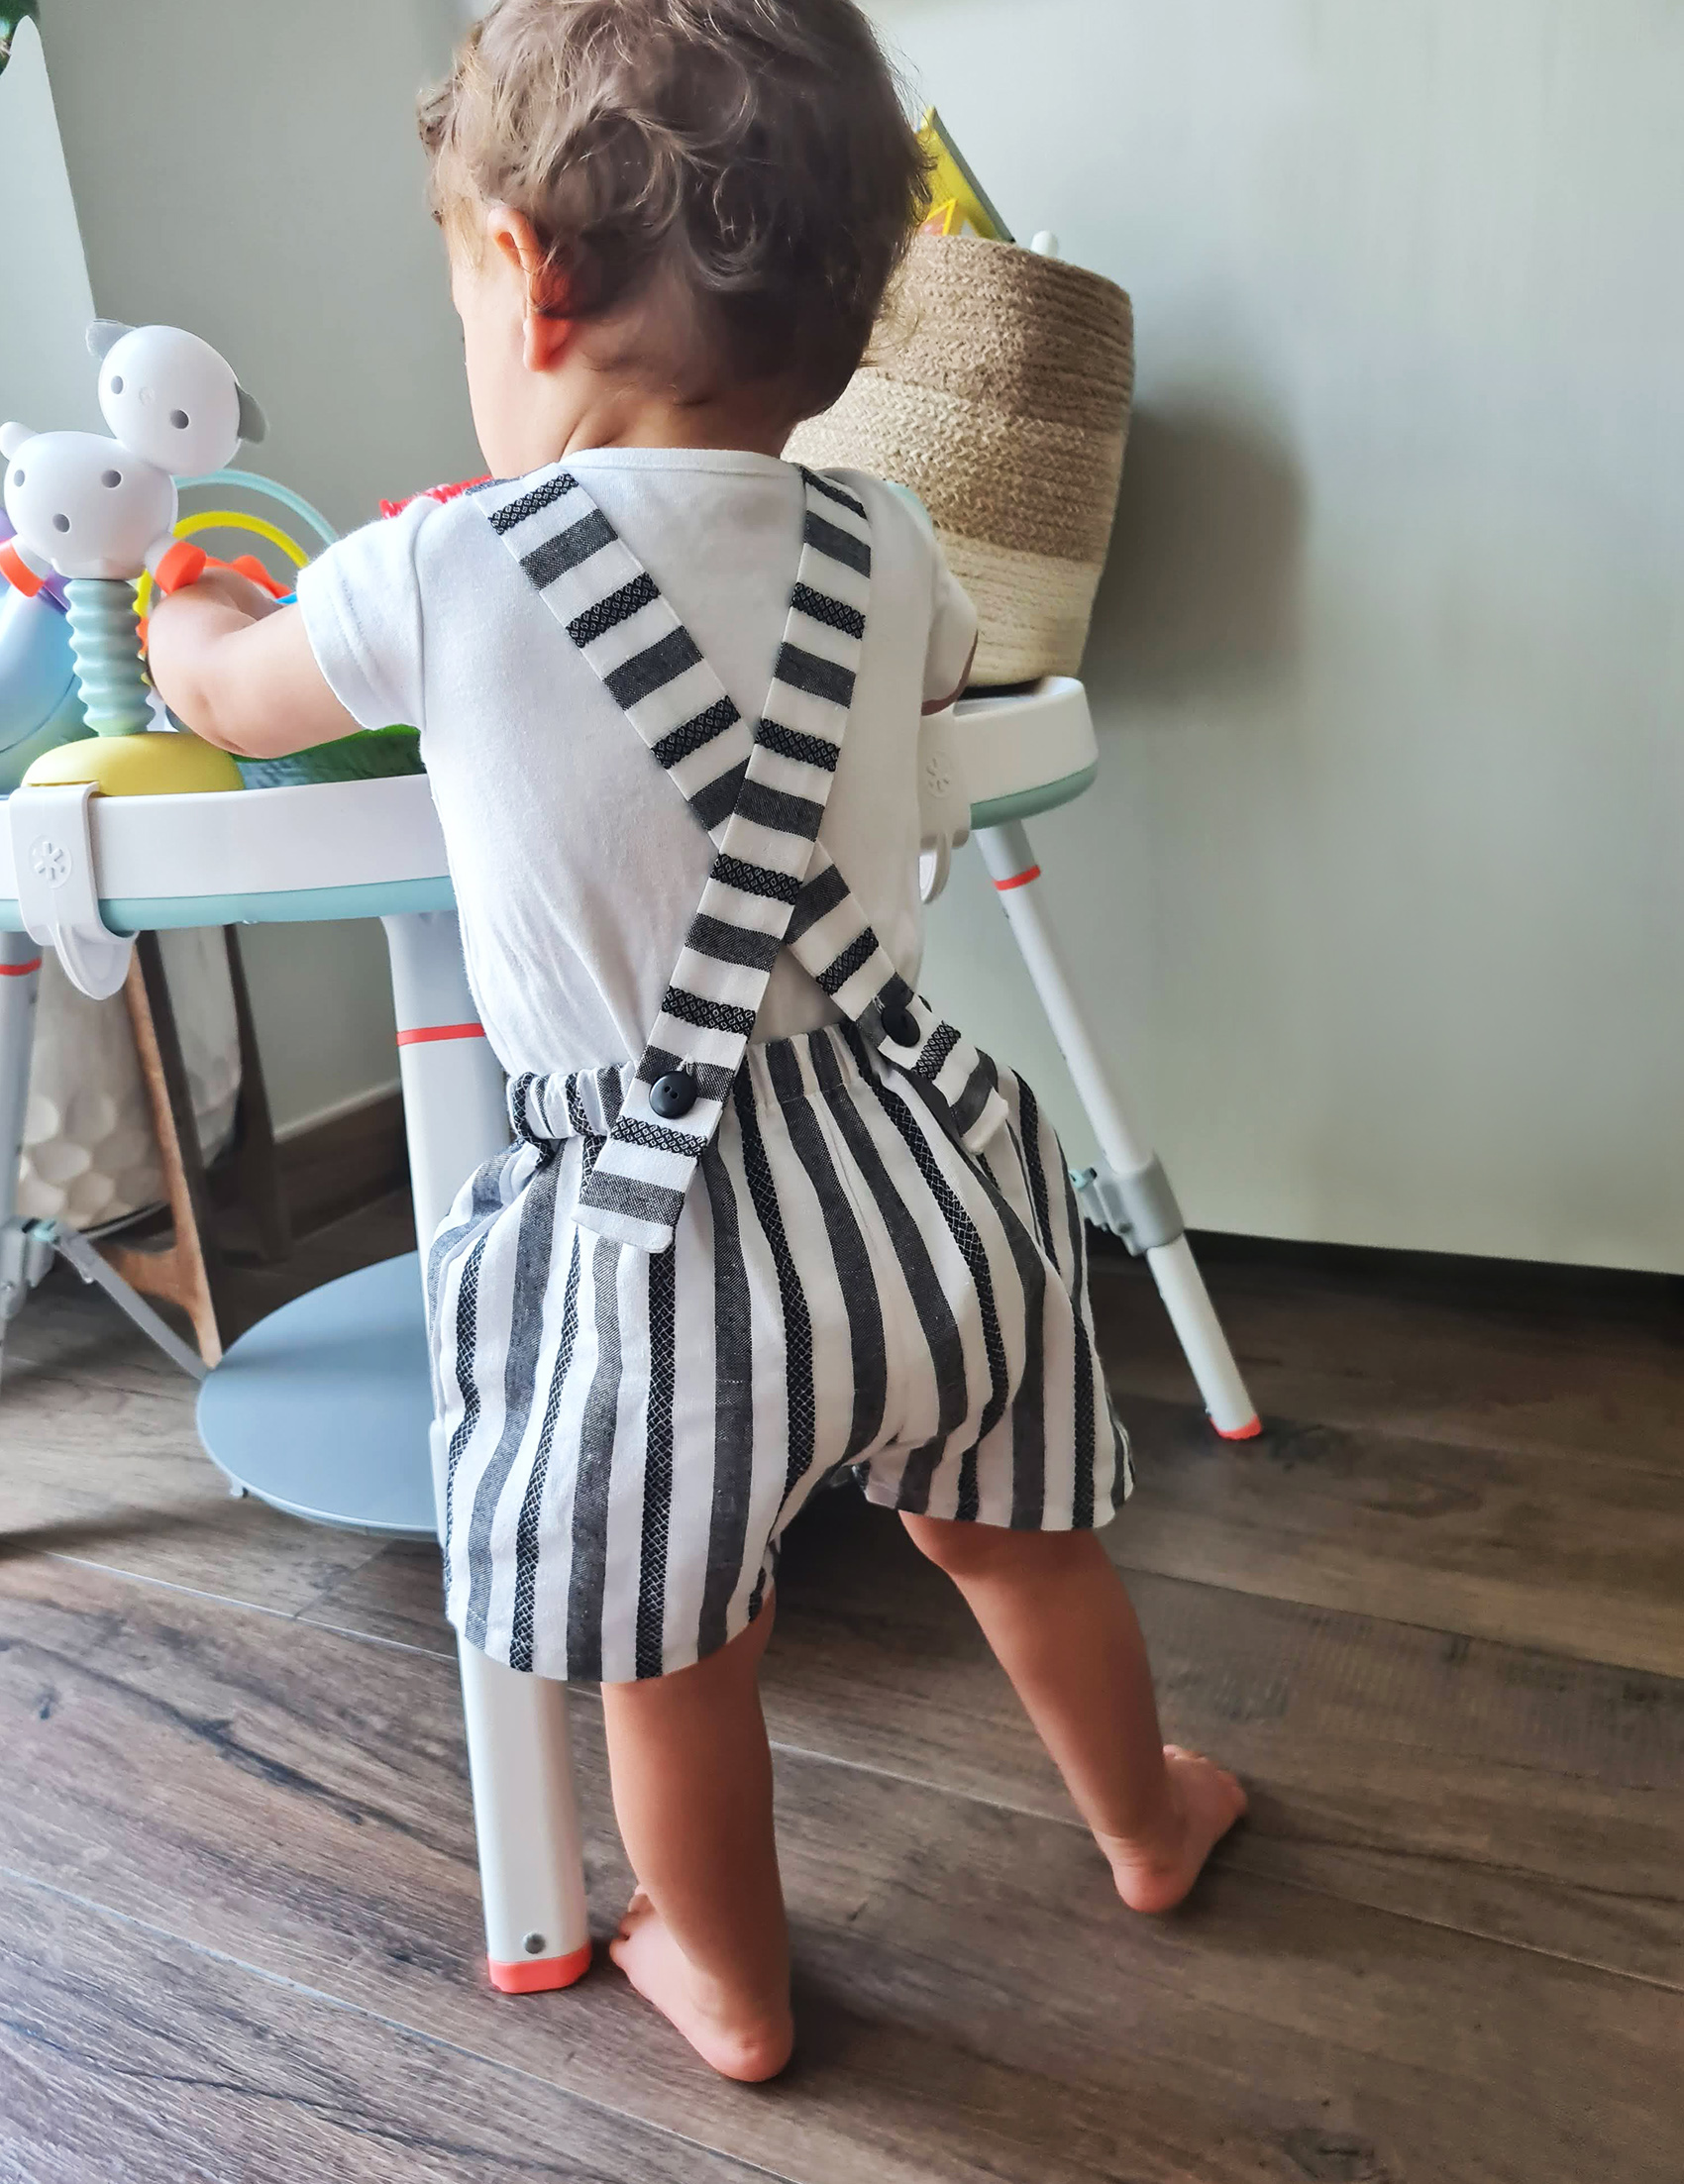
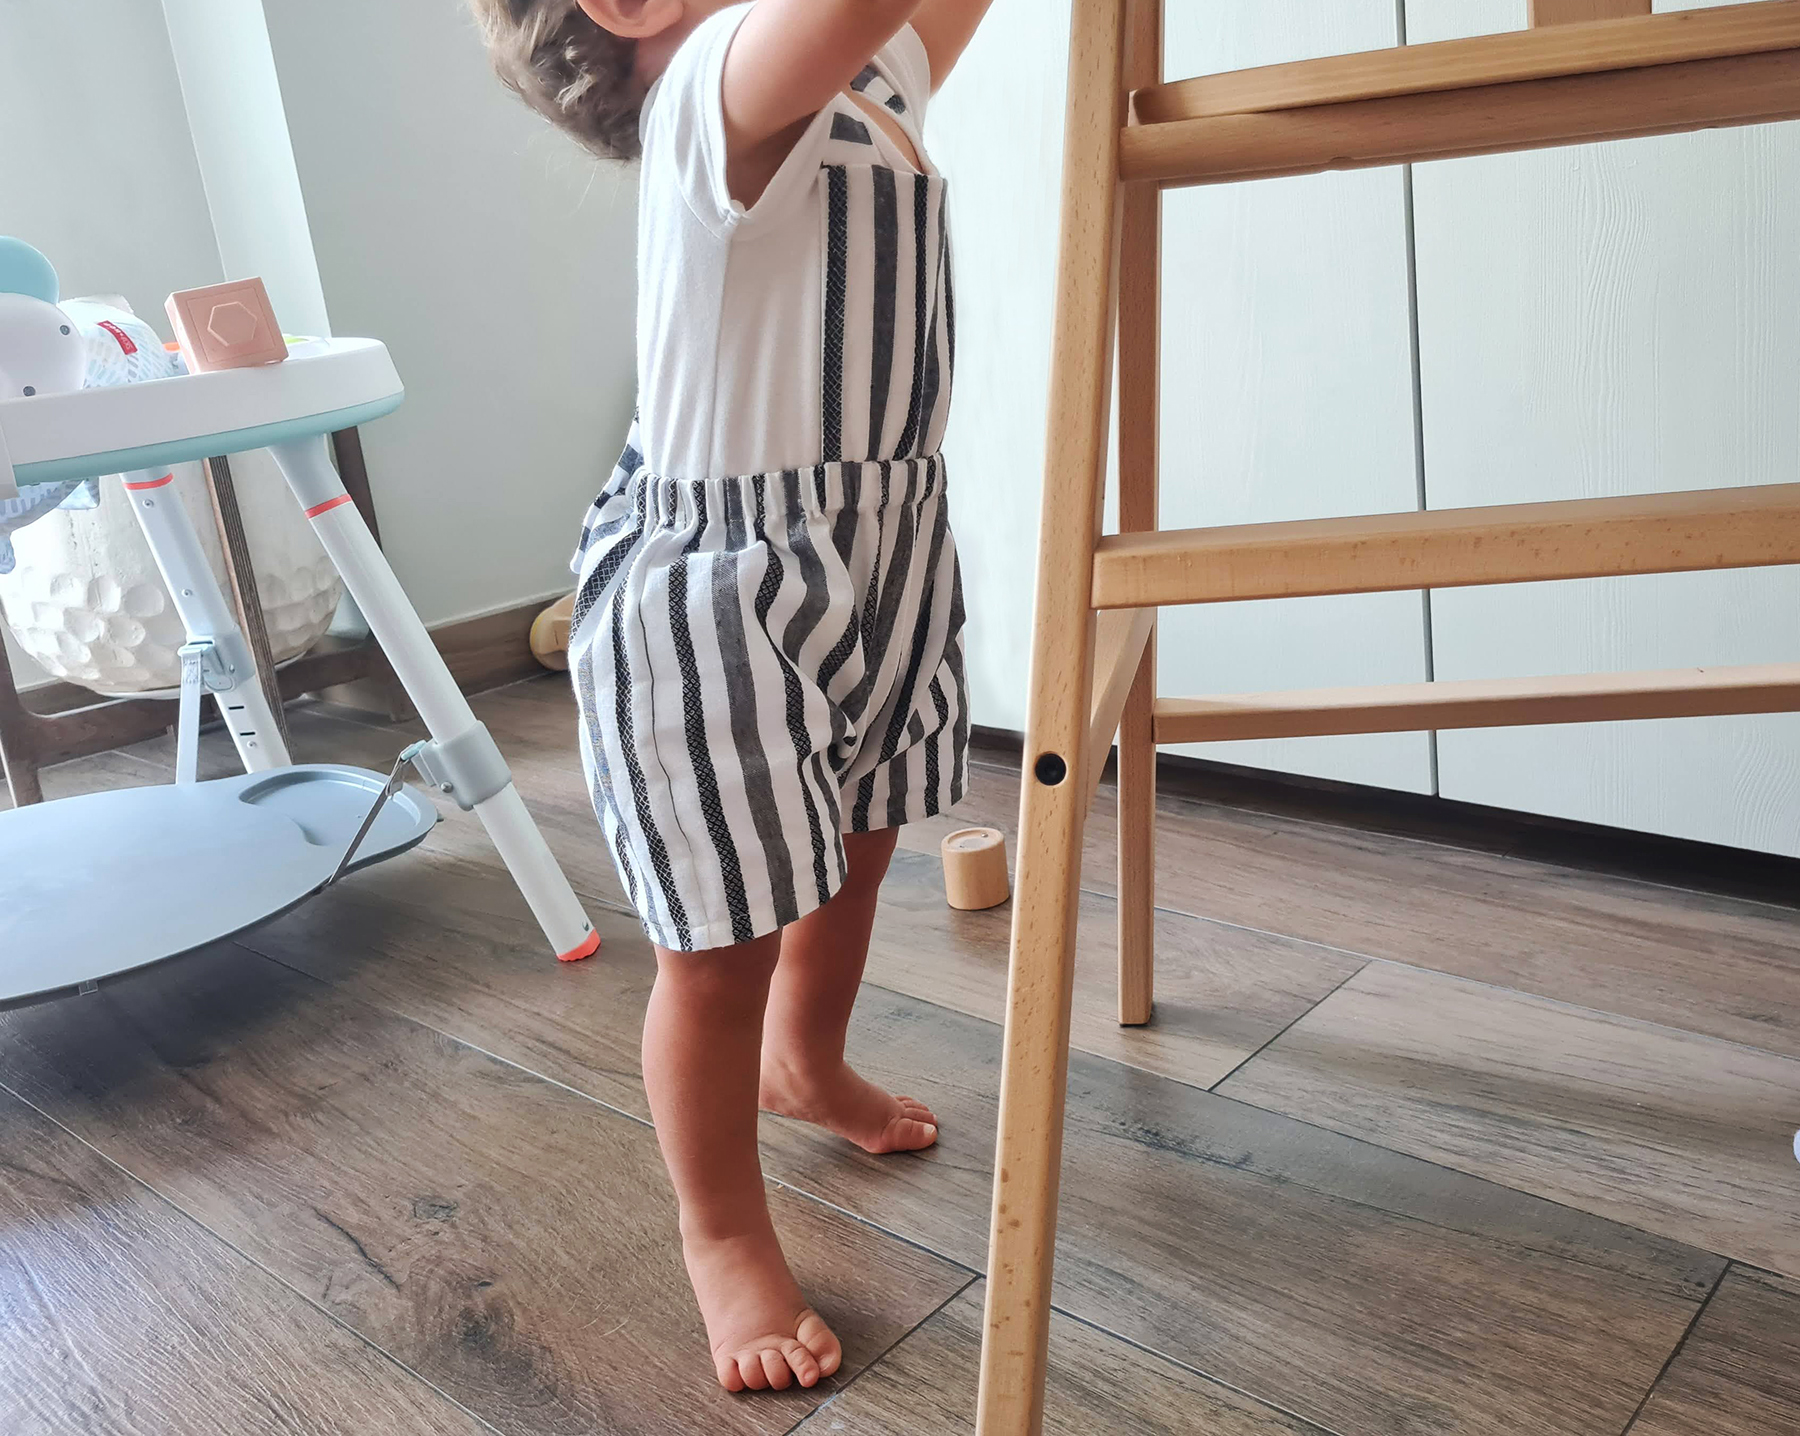
Here's how they look in full length dungaree version:
xo,
Julia


 .. And sew them in place at the seam of the waistband.
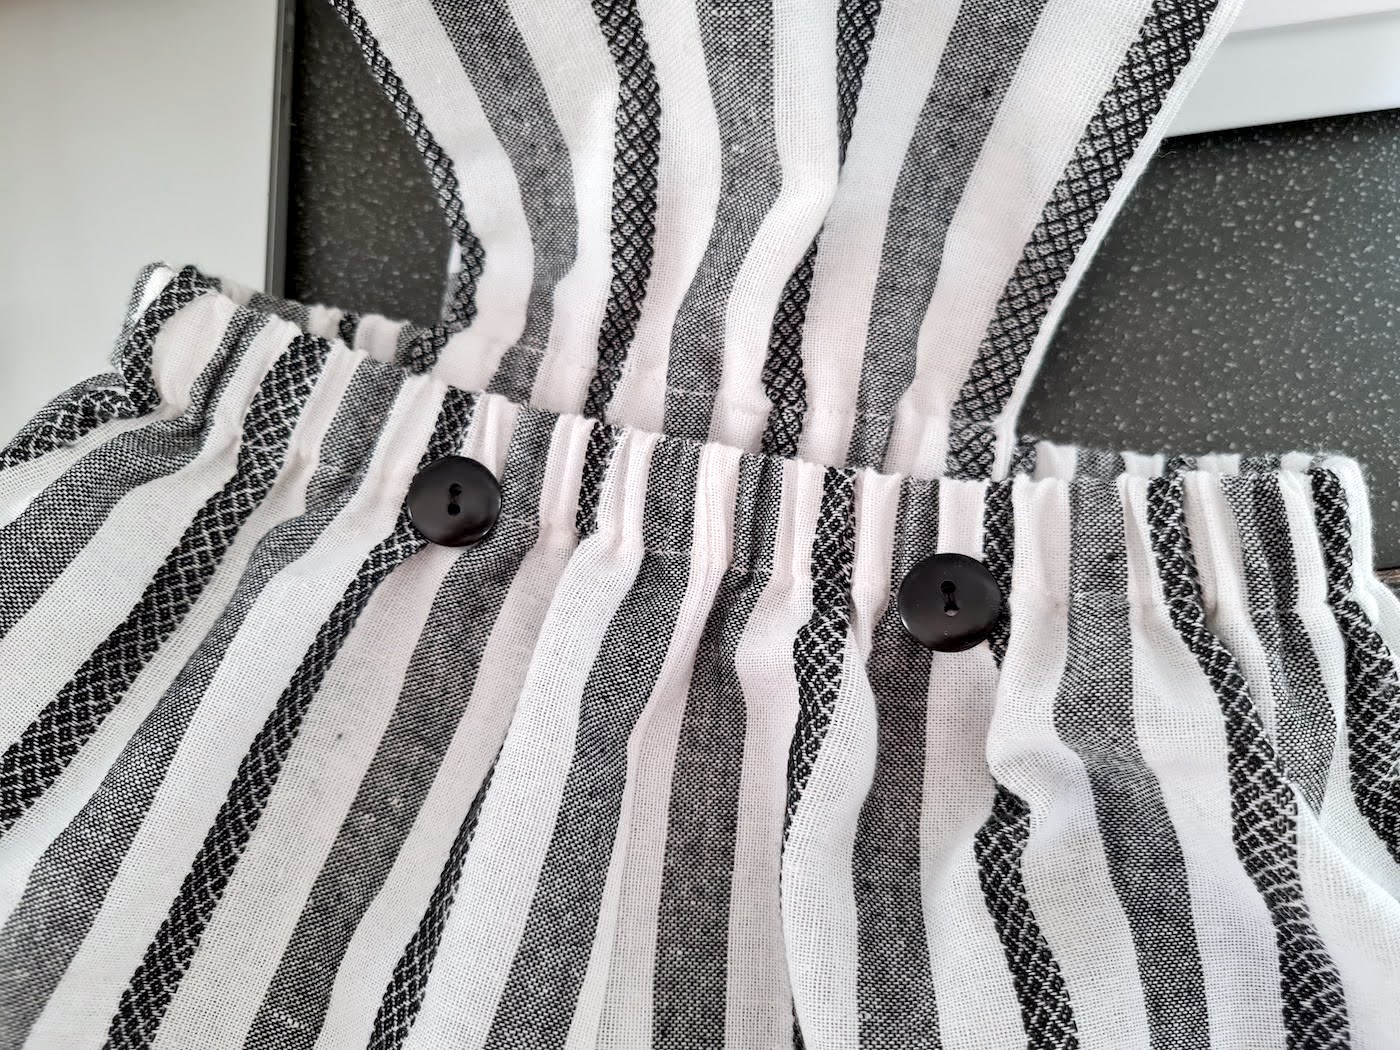


Fantastic innovation showcased! AppImageLauncher offers a highly efficient solution for Linux users managing AppImages. Its simplicity, reliability, and thoughtful integration make installing and launching portable apps effortless, highlighting the developer’s deep understanding of user experience and workflow optimization.
ReplyDeleteI enjoy how OldTweetDeck makes managing multiple Twitter accounts effortless. Its intuitive design, flexible layout, and fast performance allow users to schedule and monitor tweets efficiently, providing a dependable and user-friendly platform for individuals who rely heavily on social media engagement.
ReplyDeleteThe efficiency UniRx brings to Unity programming is remarkable. Its reactive extensions, intuitive operators, and reliable performance allow developers to manage asynchronous events effectively, improving code readability and reducing complexity while fostering scalable, maintainable, and high-quality application development.
ReplyDeleteGet a free 15-minute business audit with Price Venture Capital. Discover growth strategies, increase revenue, and scale your business fast.
ReplyDelete