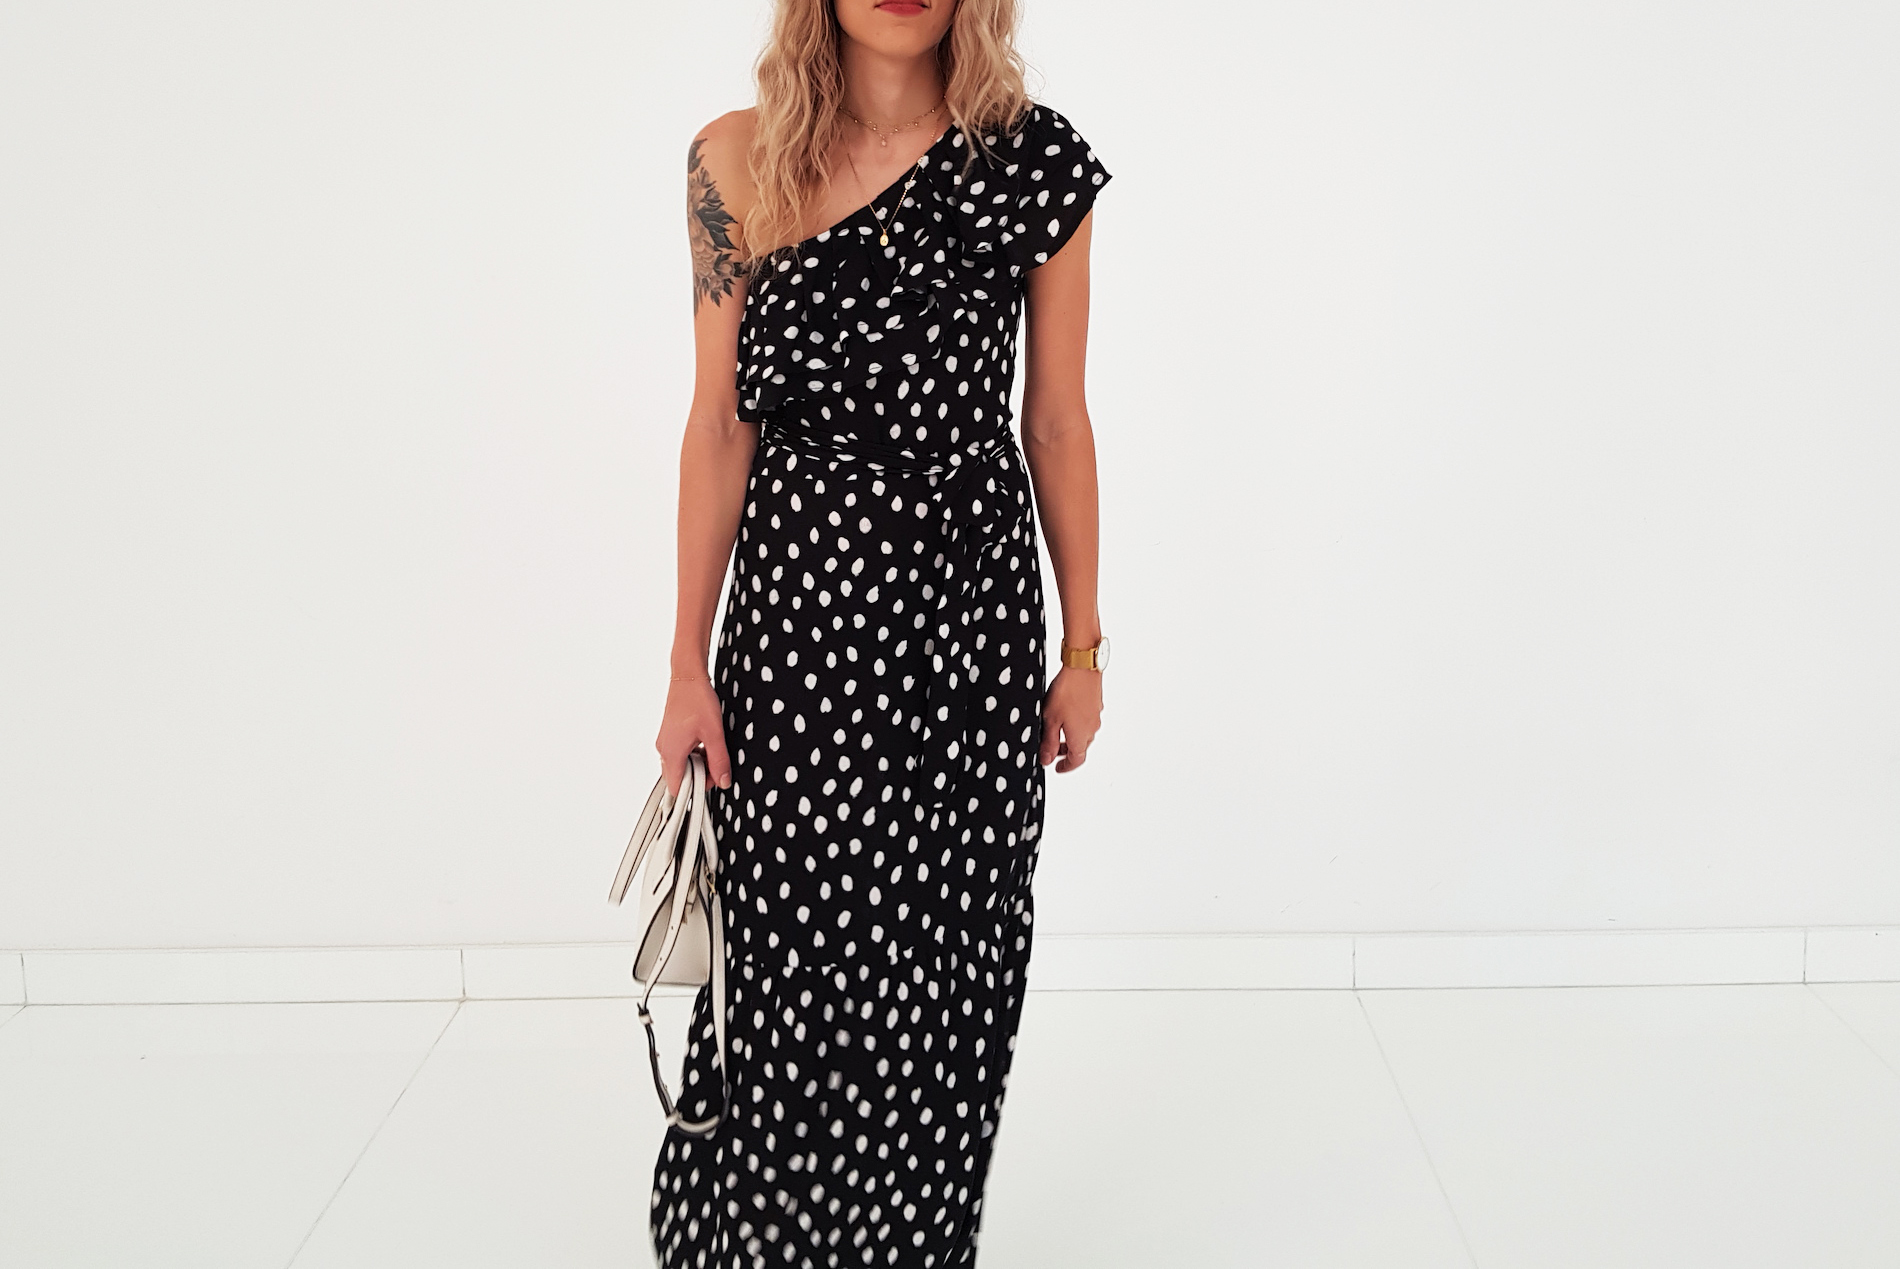
Lisa Marie Fernandez can do no wrong. Lately I've been having daydreams of the
Arden dress but I feel like I can spend those $340-ish dollars better (read: on fabric) on a couple upcoming trips🙏 Also, since it's currently incinerator weather in Dubai, I could really do without the puffy sleeve, and let as much skin breathe as possible. I've made a
top in a similar style here.
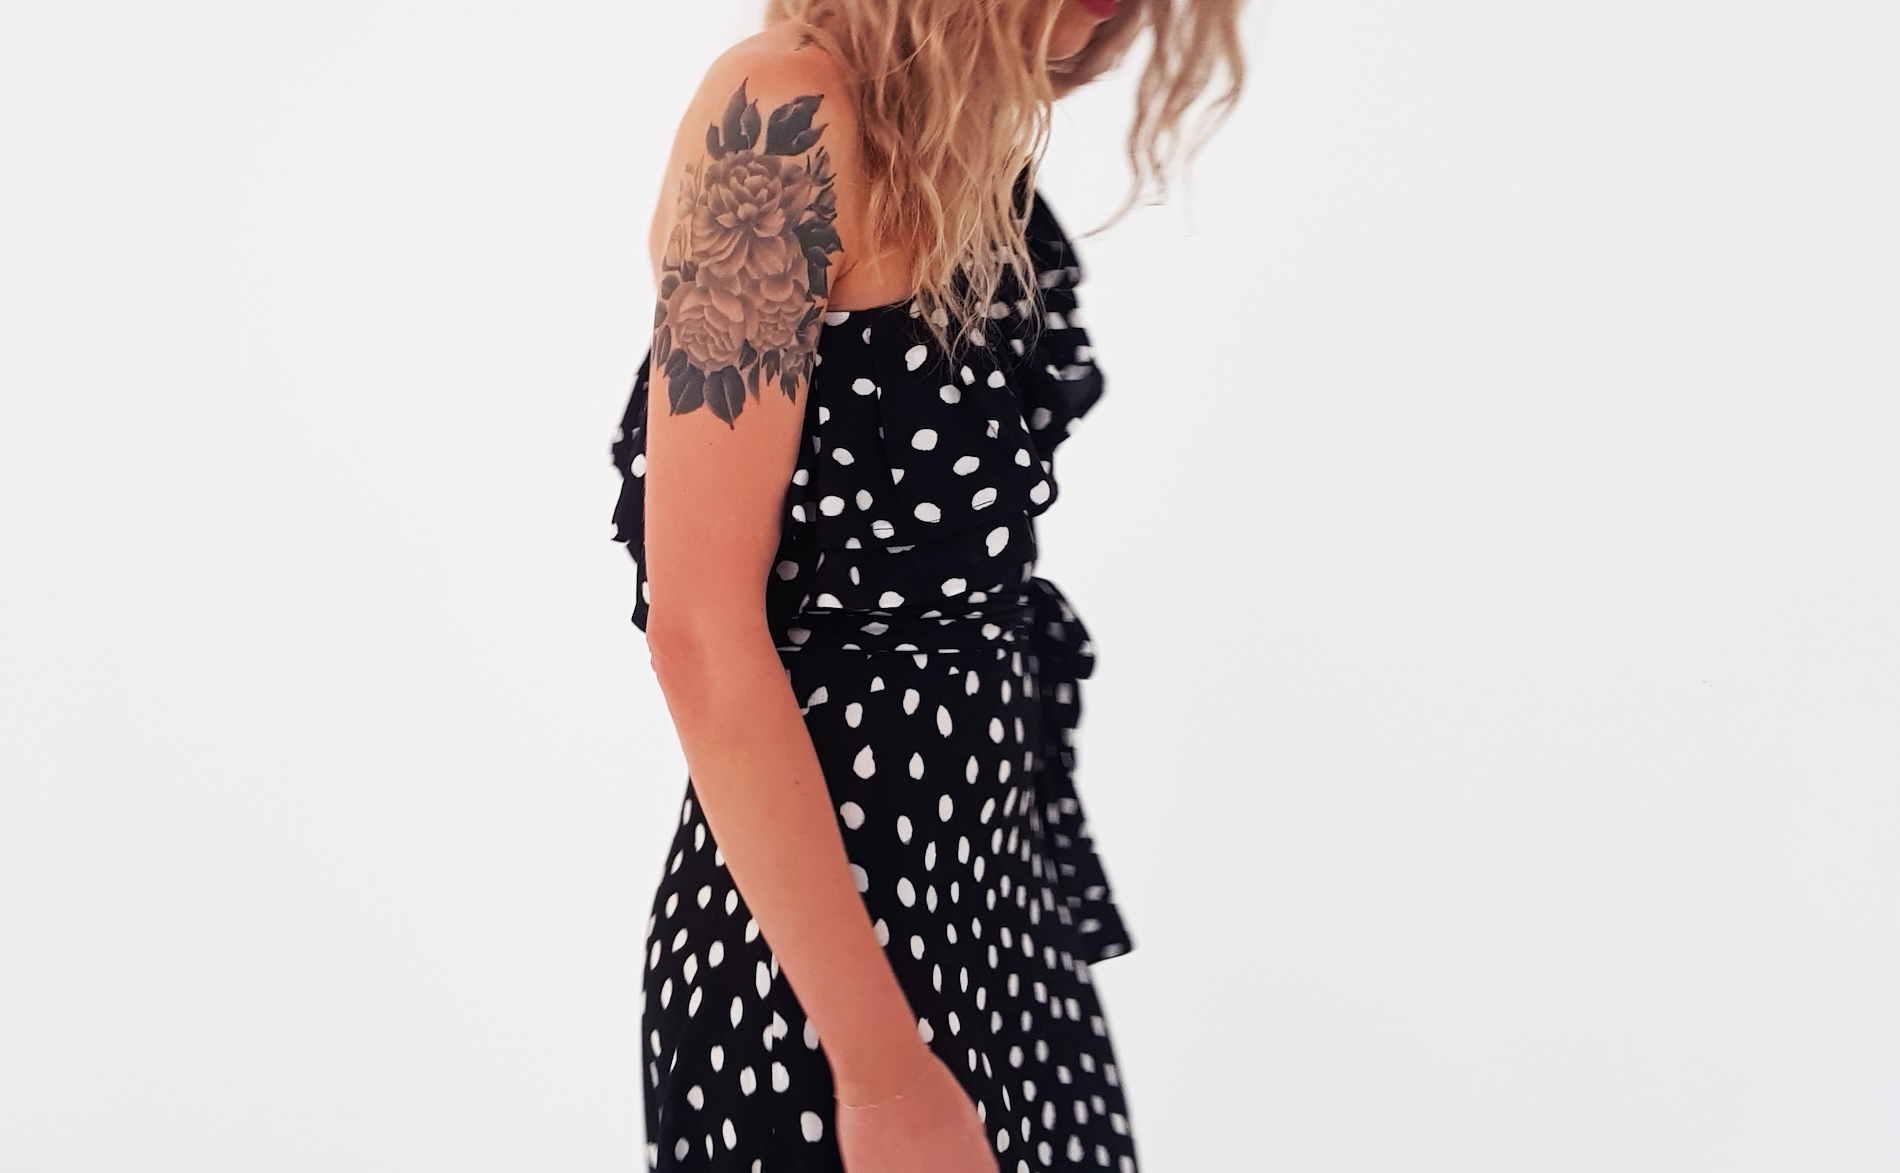
I got this beautiful irregular polkadot viscose from Montmartre
♥ You could use lots of different types of fabric for this dress - a flowy viscose or crepe will get you this drapey style, but if you went with a slightly more stiff cotton, you'd get a bouncier ruffle and fuller hem.
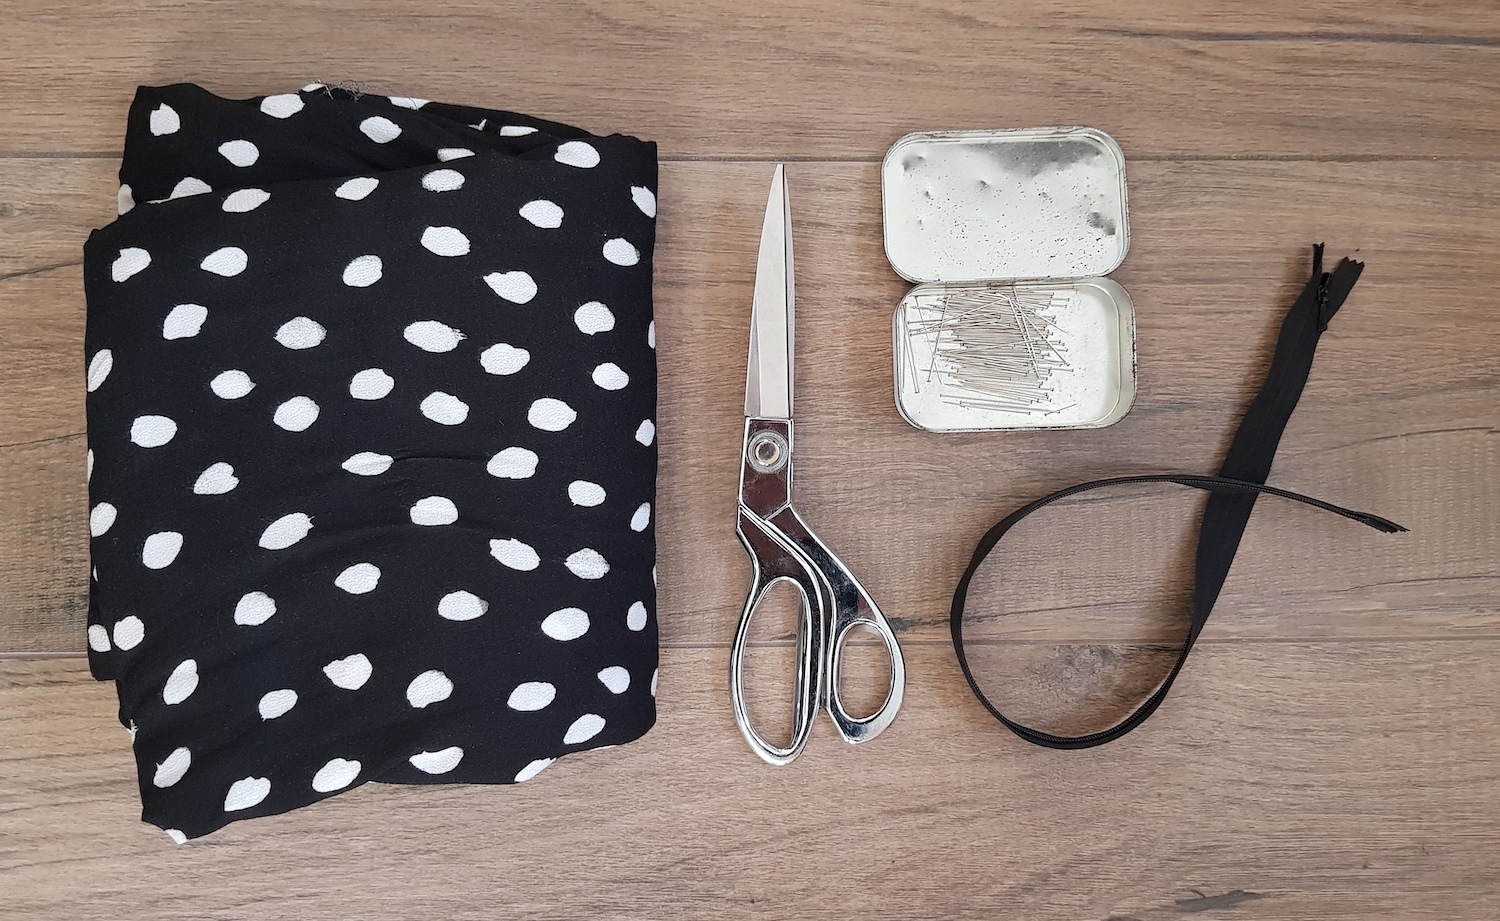
TOOLS:
Fabric - 3-3.5 m (I used 3 m but am remarkably stingy when cutting) | Scissors | Long invisible zipper | Pins | Thread, sewing machine + also used my serger
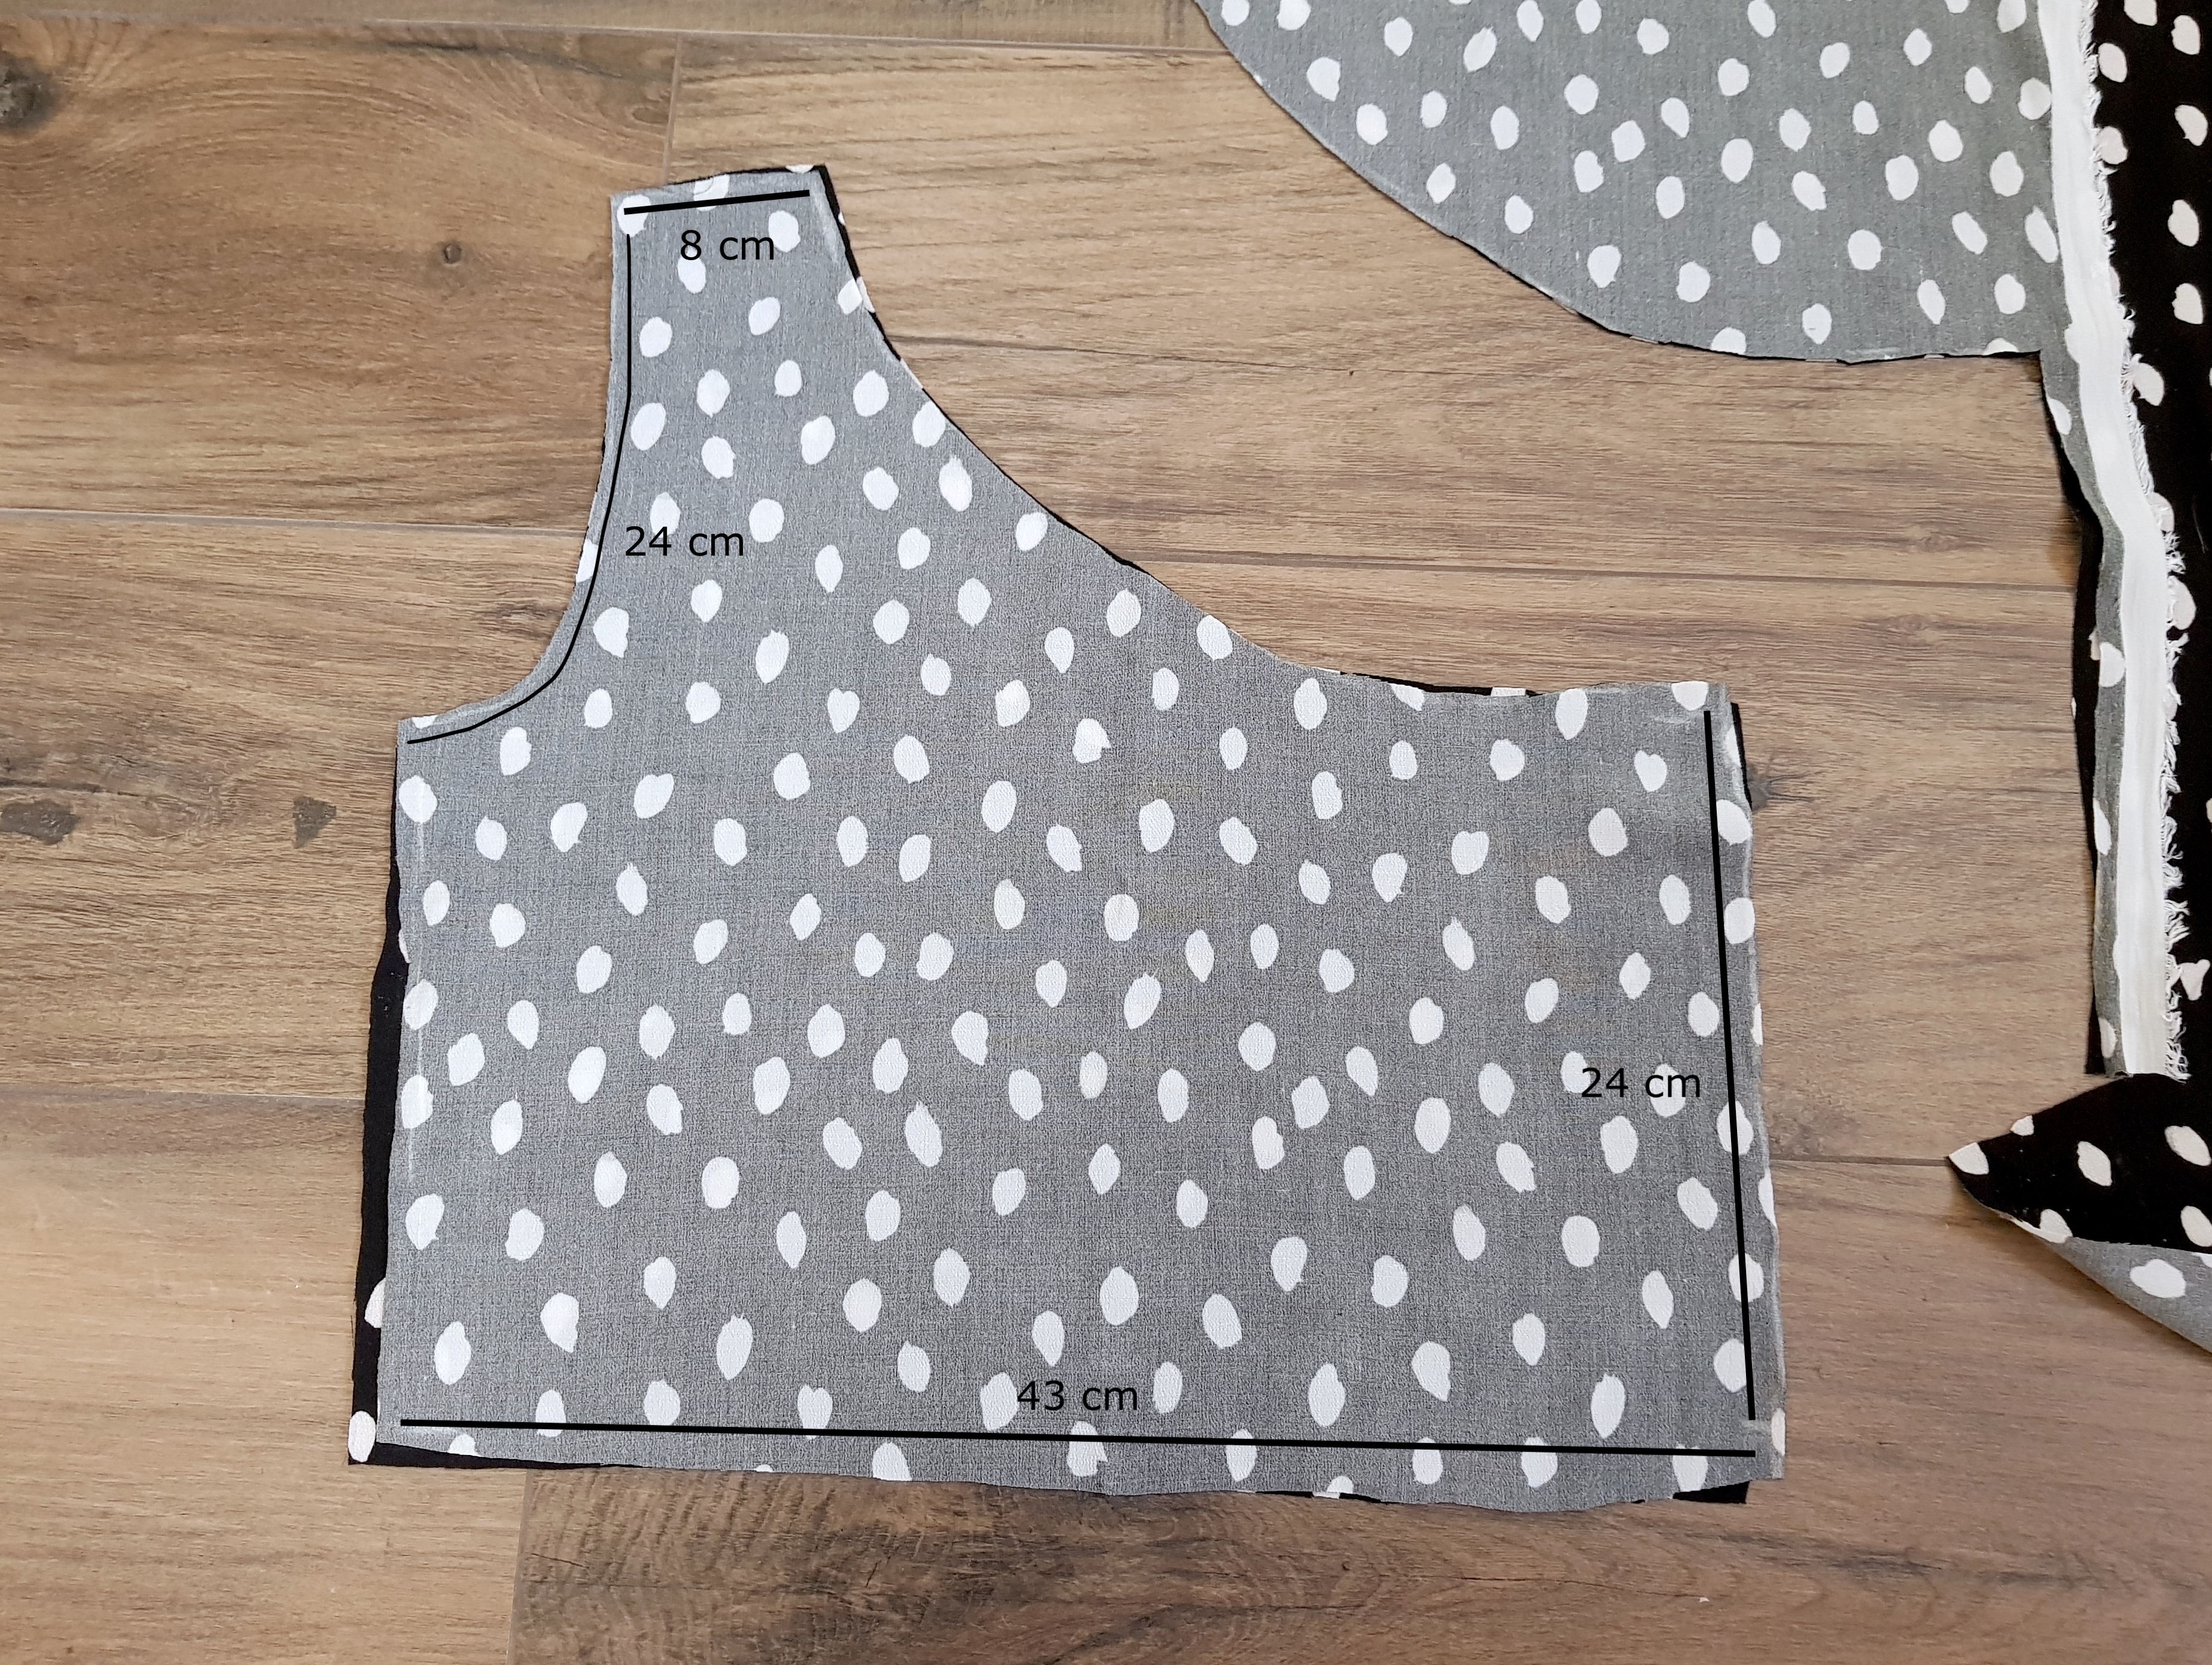
I. I started by cutting out my pieces, first the top. I was first planning on making the whole fit looser, but later on I went for a more form-fitting torso, so the measurements here ended up being a bit wide for me. I'm a EU36/US4 (check the About tab for my full measurements).
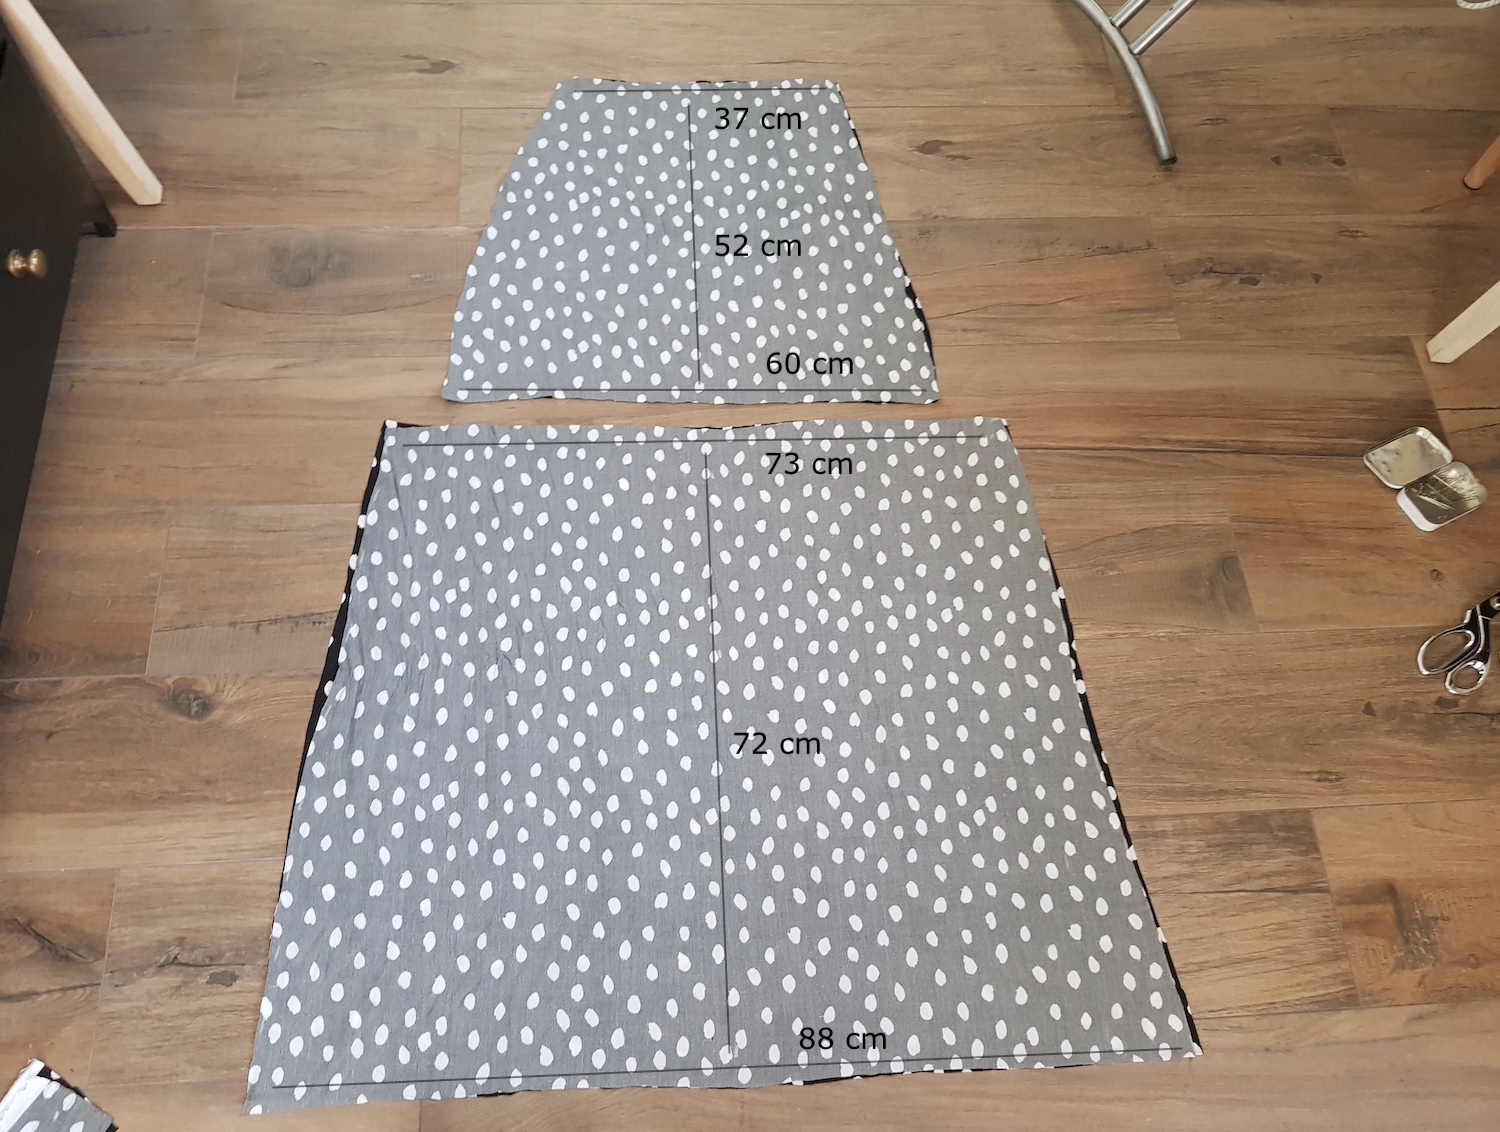
Then the skirt.
II. To put together the top I sewed the shoulder seam, the side seam on that same side, just to check the fit. Thanks to this awesome viscose, I needed zero darts. At this point I also decided I would make the top fitting instead of loose, I would need to take the side in by about 4 cm.
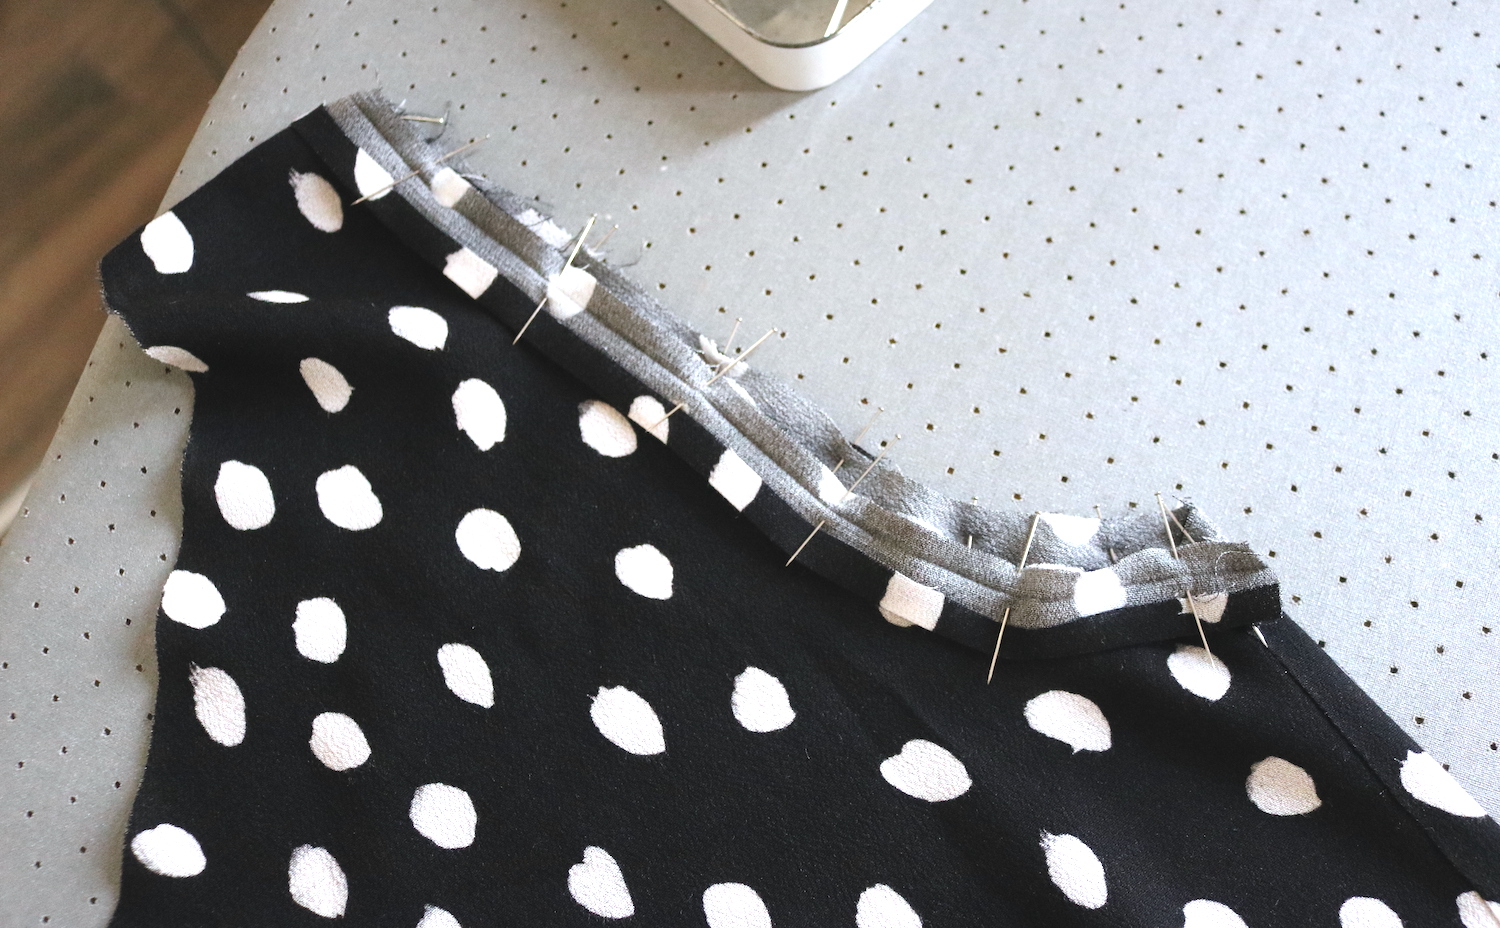
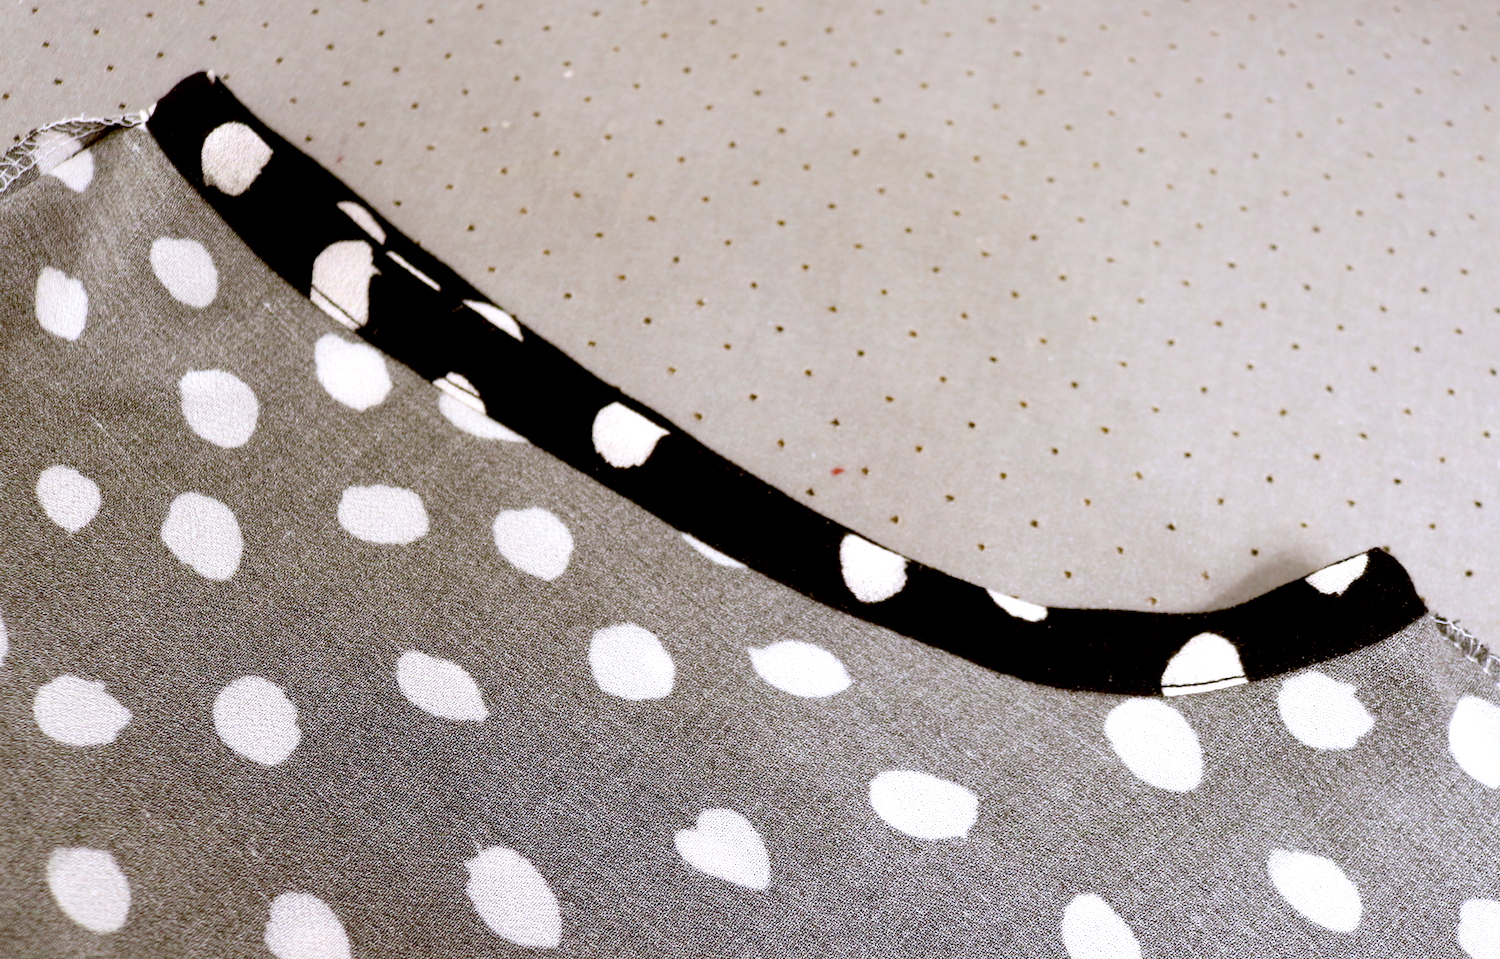
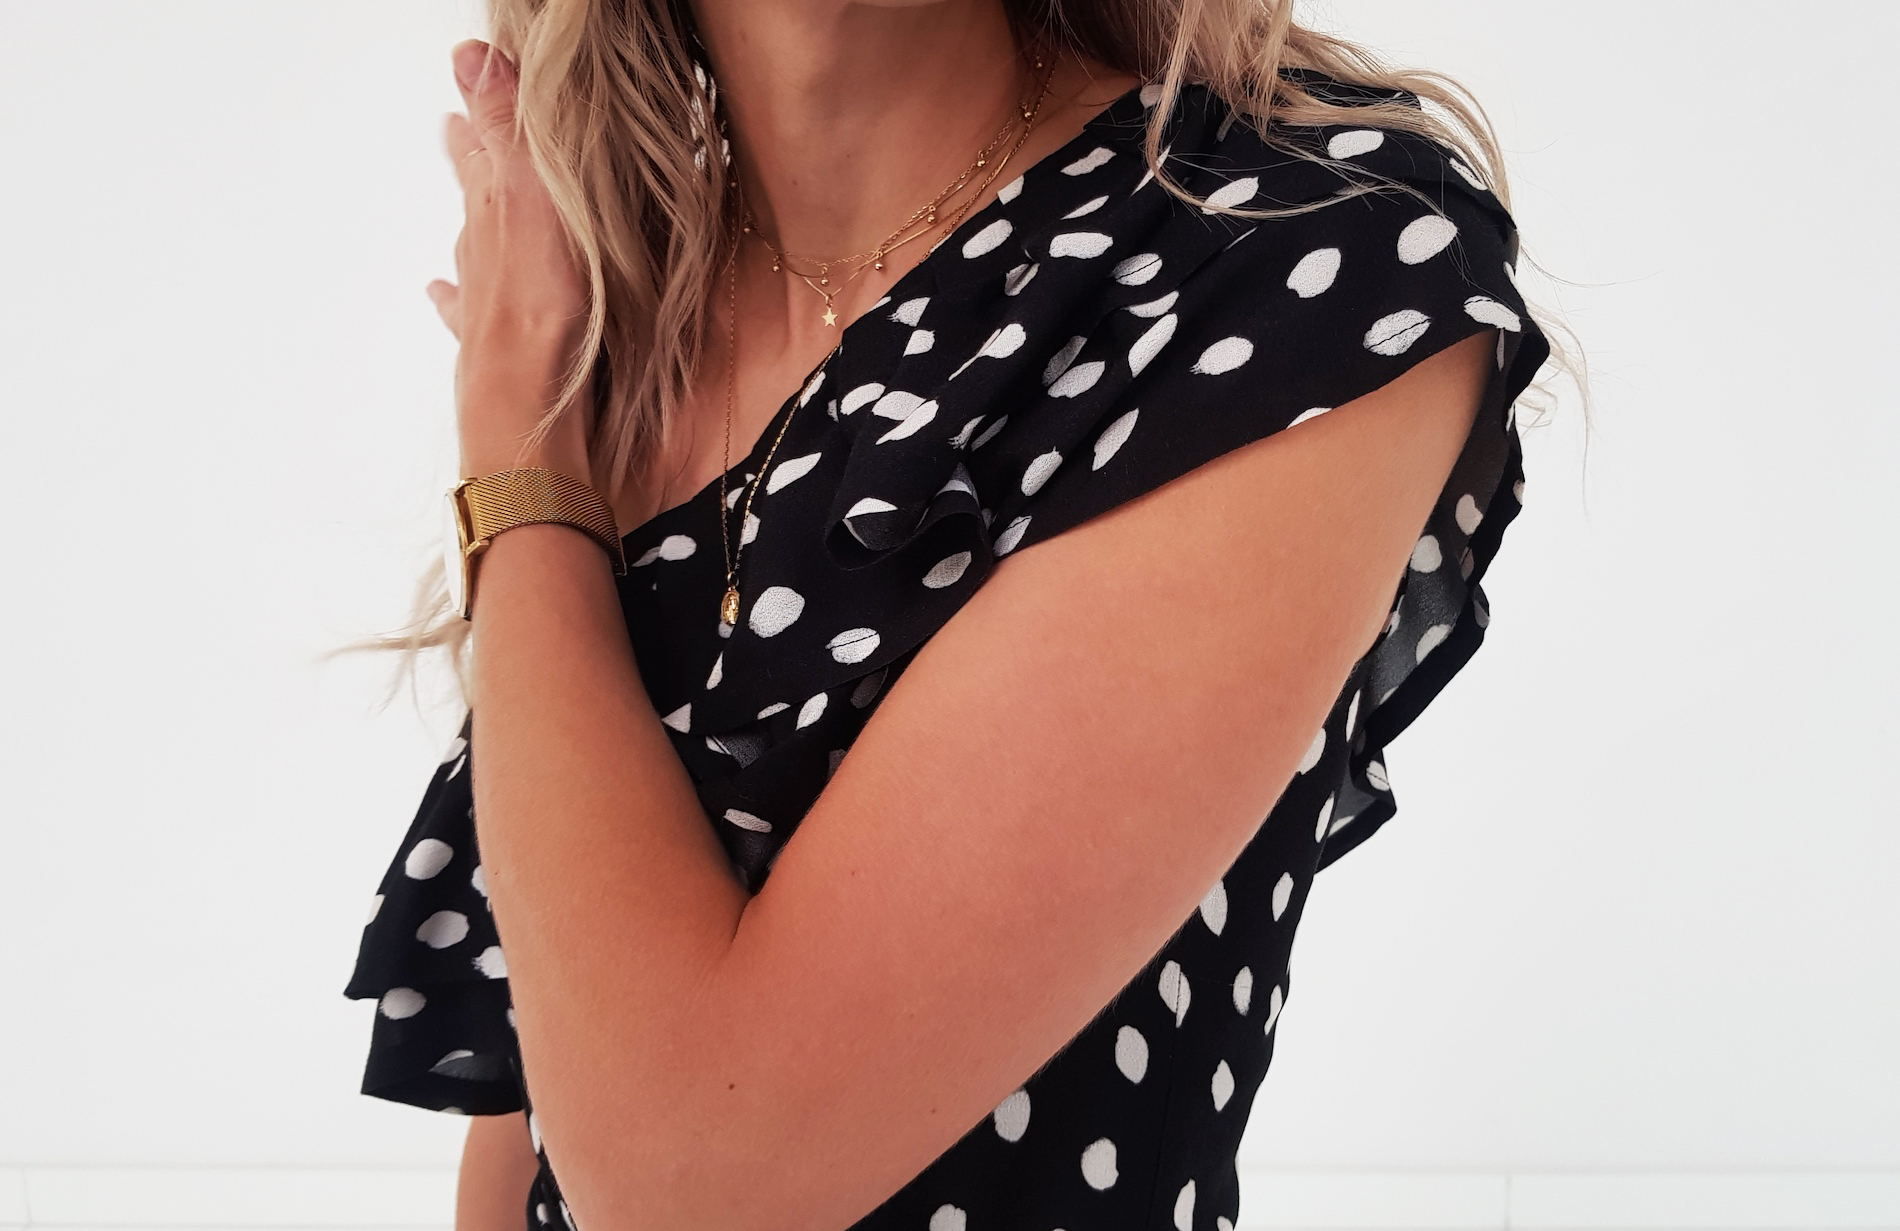
III. To finish the arm hole, I used bias tape I cut & pressed from the same fabric. If you need more detail on how to do this,
I've got that here.
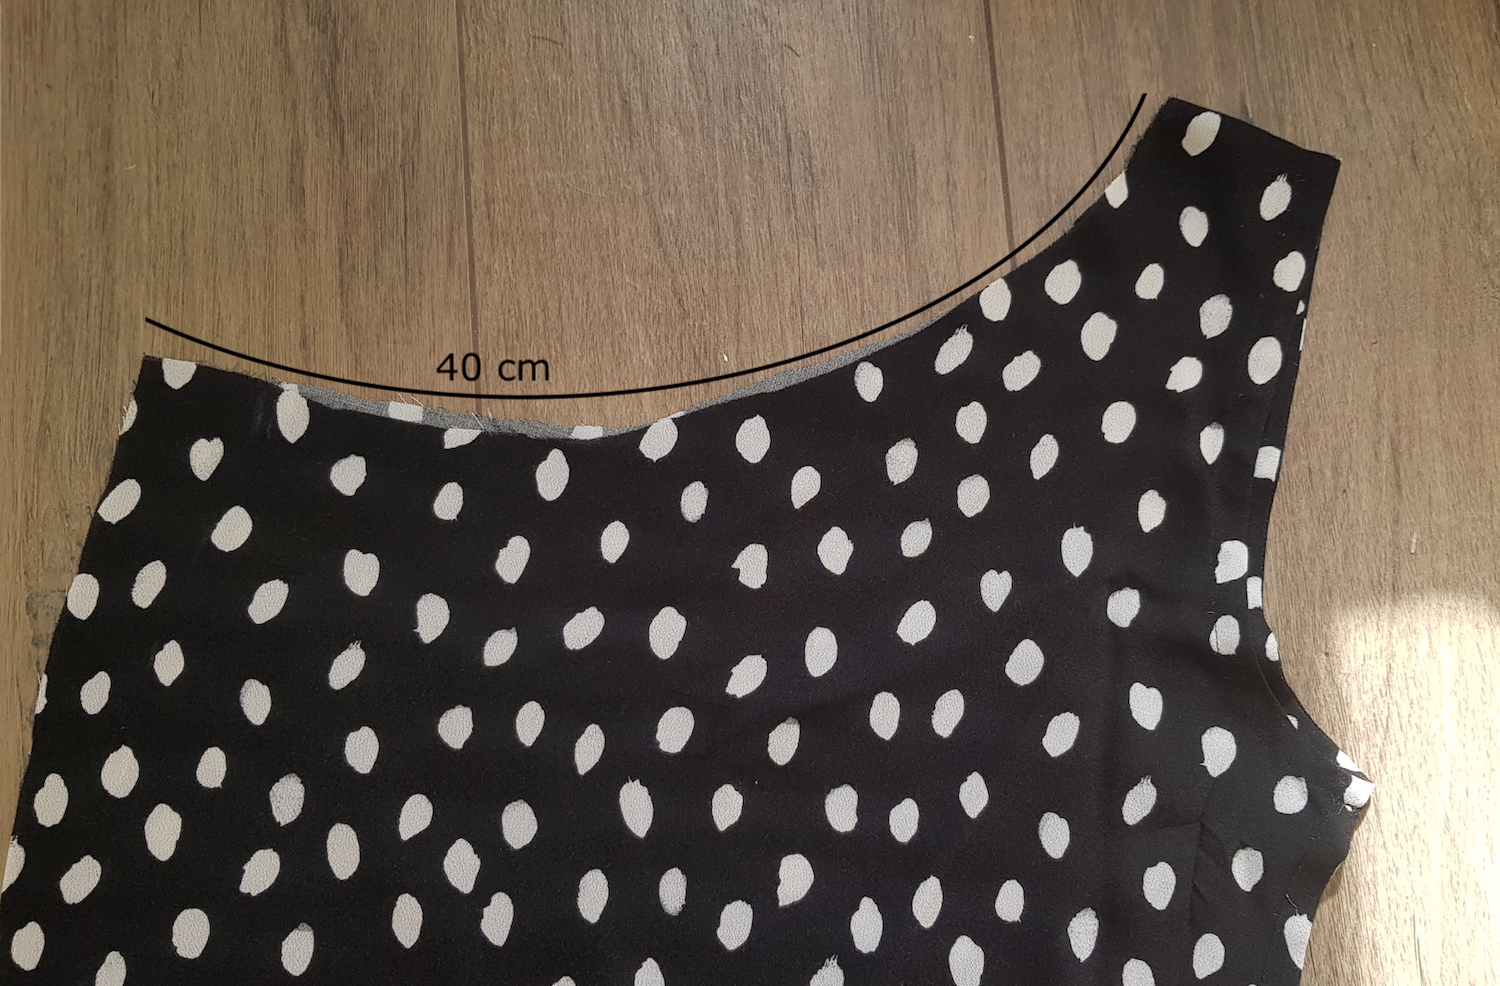
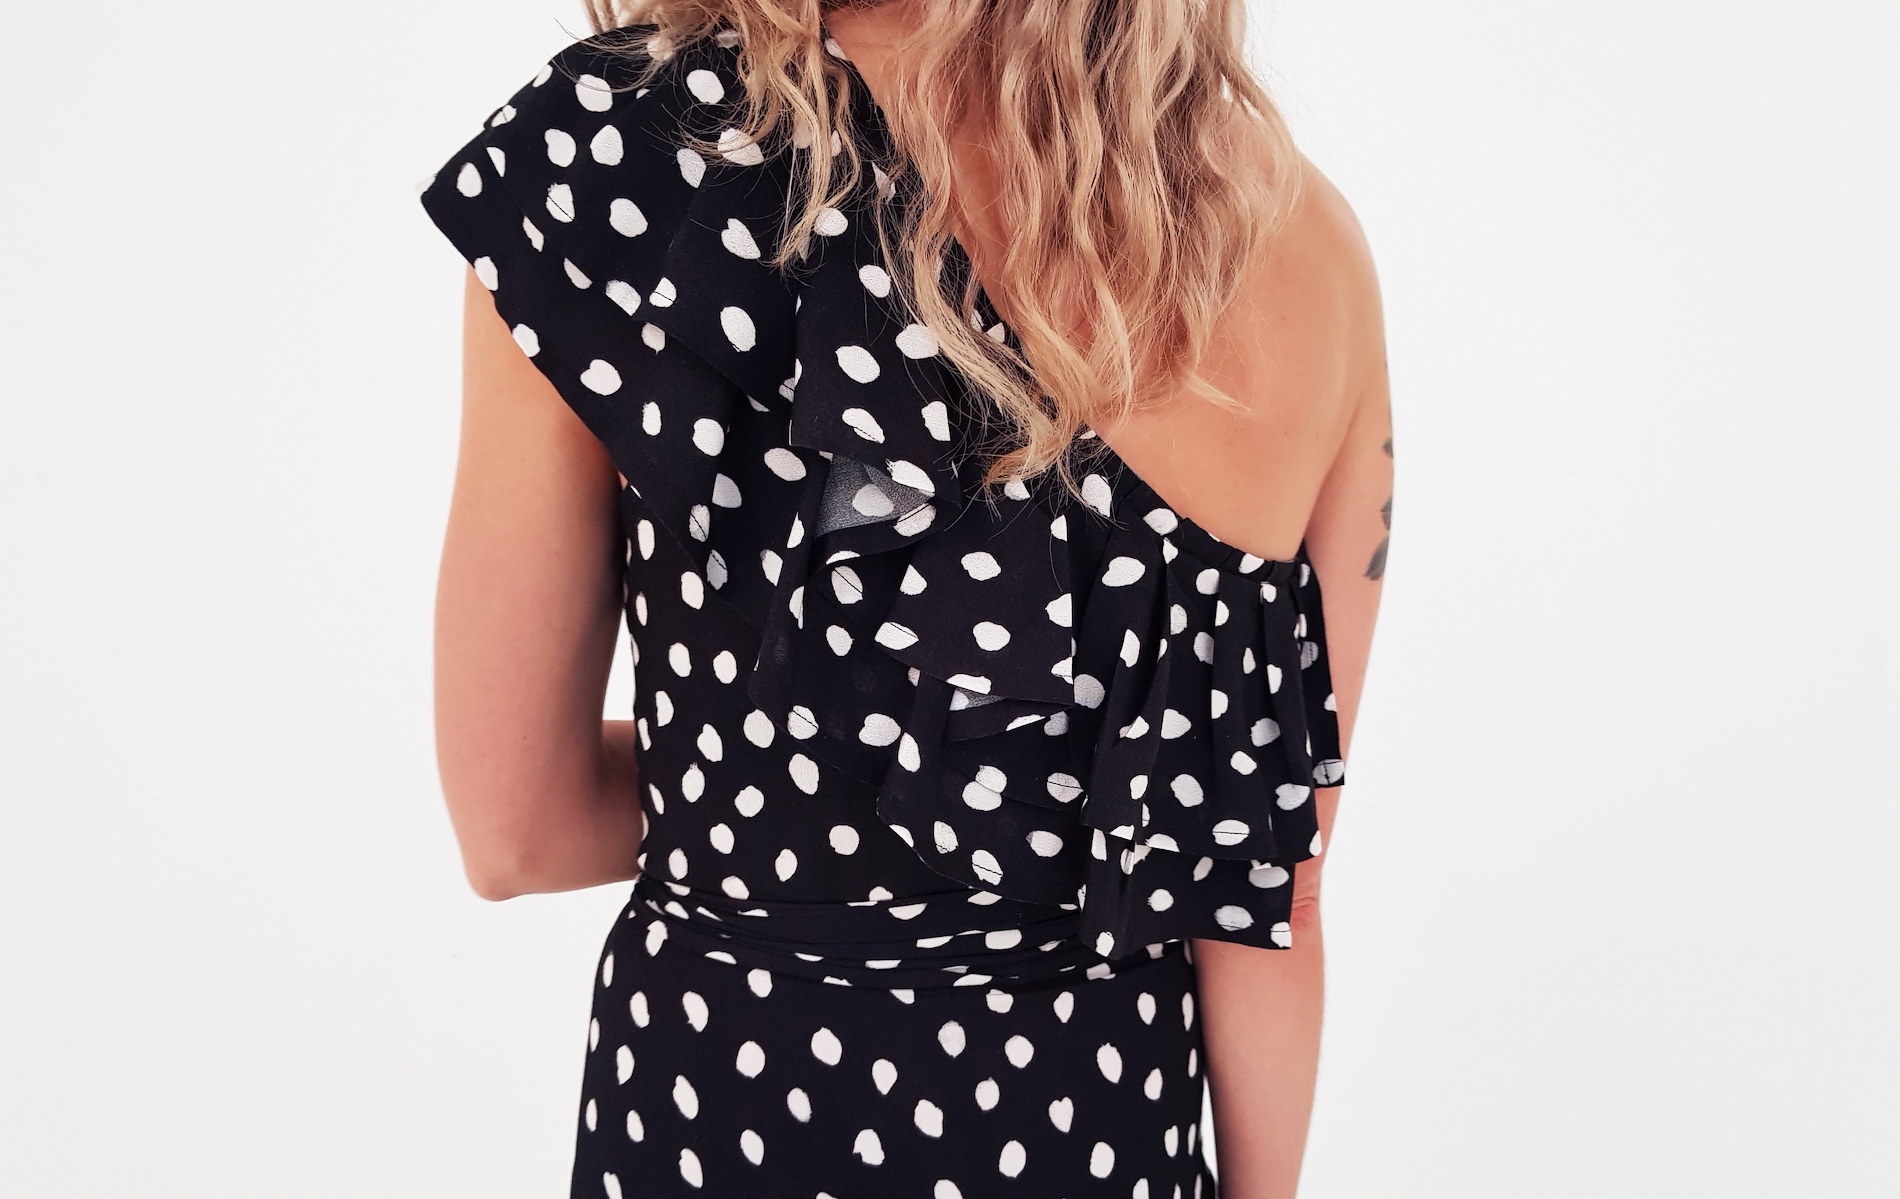
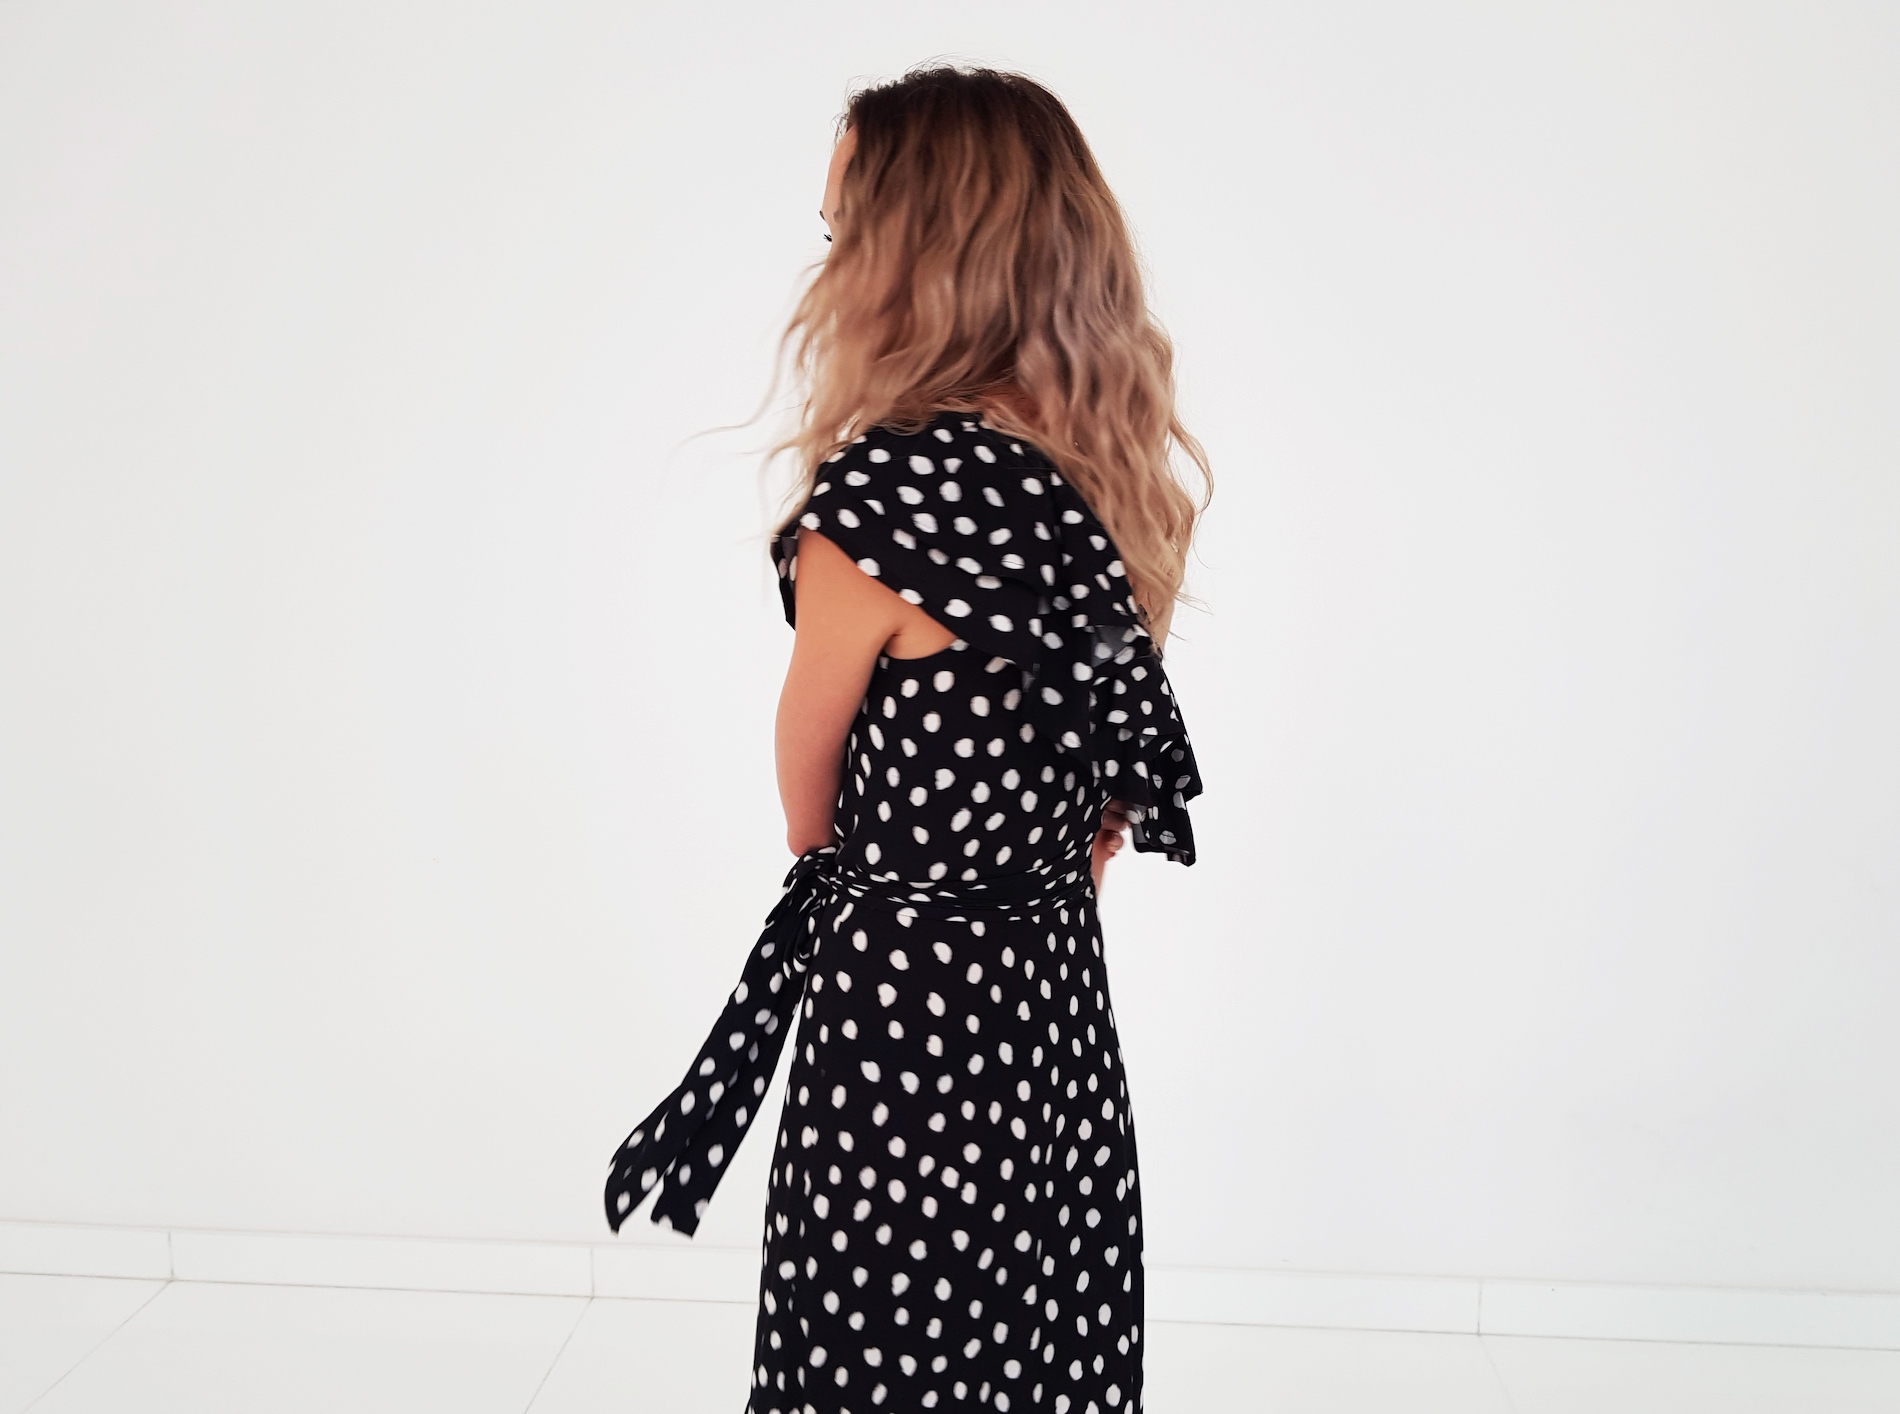
IV. Onto the ruffles. I first measured the curved neckline distance, for me it was about 40 cm after I cut some excess off from the top width. So a total distance of 80 cm to cover with the ruffle.
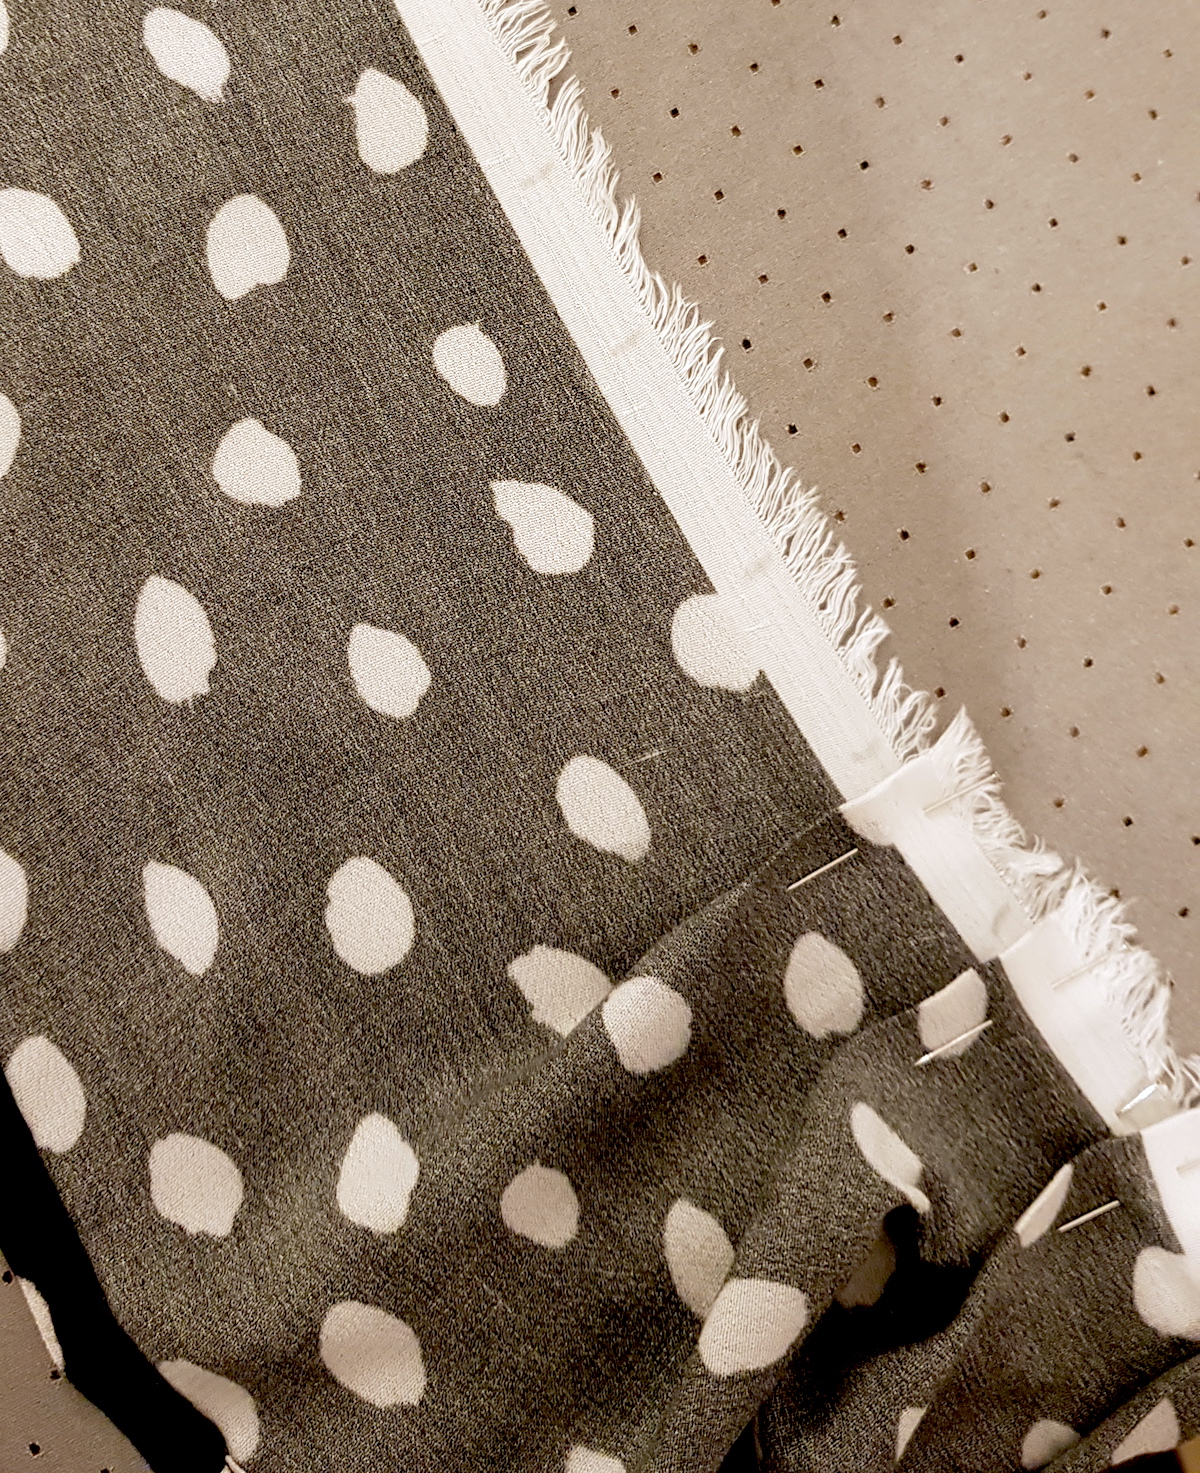
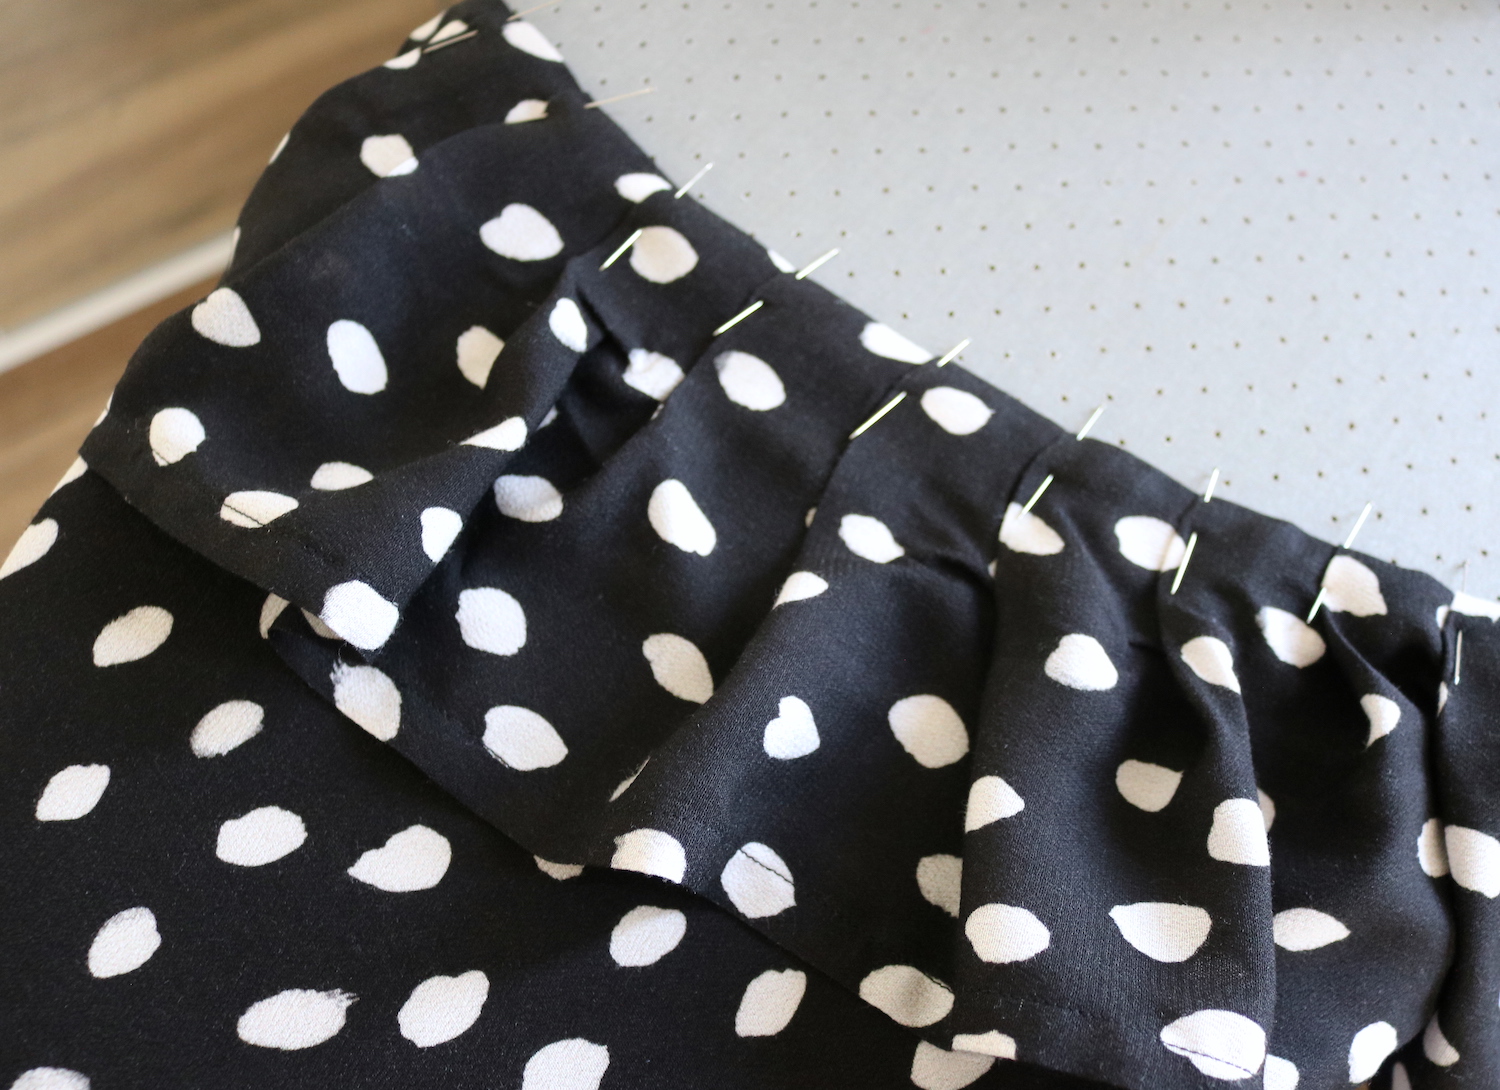
This next part made my head hurt a bit. I first cut a long rectangular piece of fabric, about 180 cm long and 14 cm wide. I used the side of the fabric to make it easy to mark the white factory edge. I pressed a double-fold at one end, and then went through the piece length-wise, marking 3 cm, 4 cm, 3 cm (4 cm was my pleat depth, 3 cm the distance between the pleat folds).
Then I started to gather the pleats, pulling the fabric under itself so the pleat depth marks (4 cm in between them) would meet. I pinned the pleats down and pressed them with my iron.
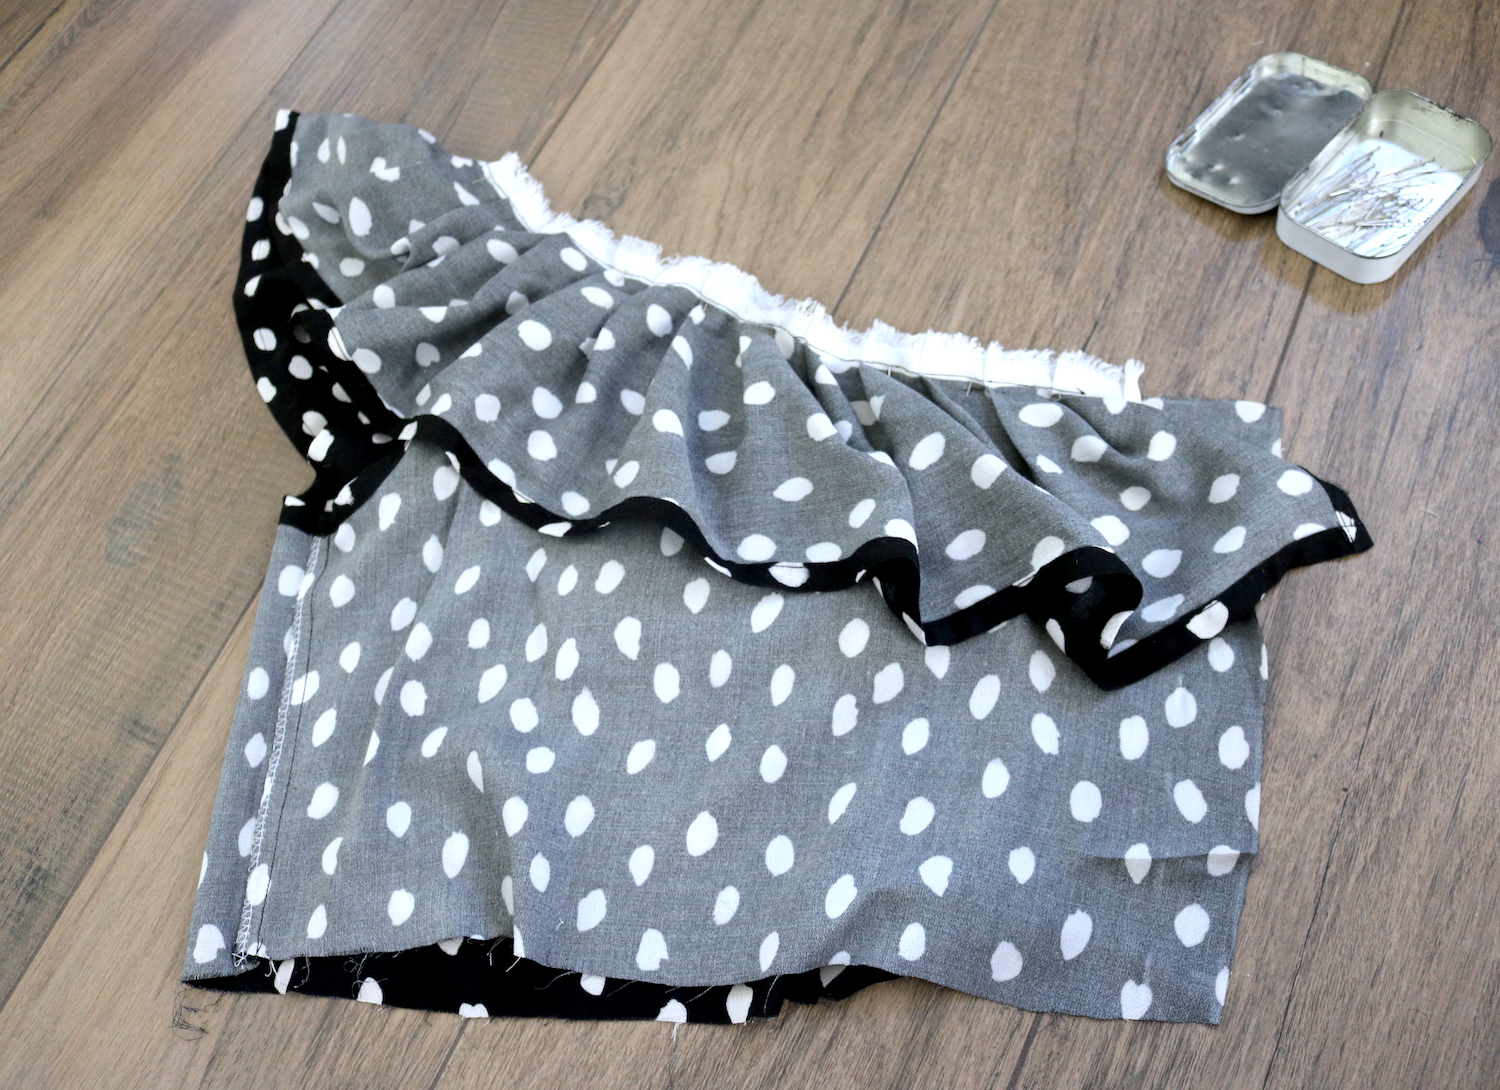
At the end, my 180 cm piece was slightly too long, but I just pleated on until I had a total length of 80 cm. While I still had the piece not attached to the top, I hemmed the ruffle. Then pinned it onto the reverse of the top along the neckline, wrong sides of fabric facing, and sewed in place.
Then I flipped the ruffle onto the right side, pinned the pleats down again there (just to make sure they lay flat nice and symmetrical), and pressed. Finally did a top-stitch over them, about 1 cm from the edge.
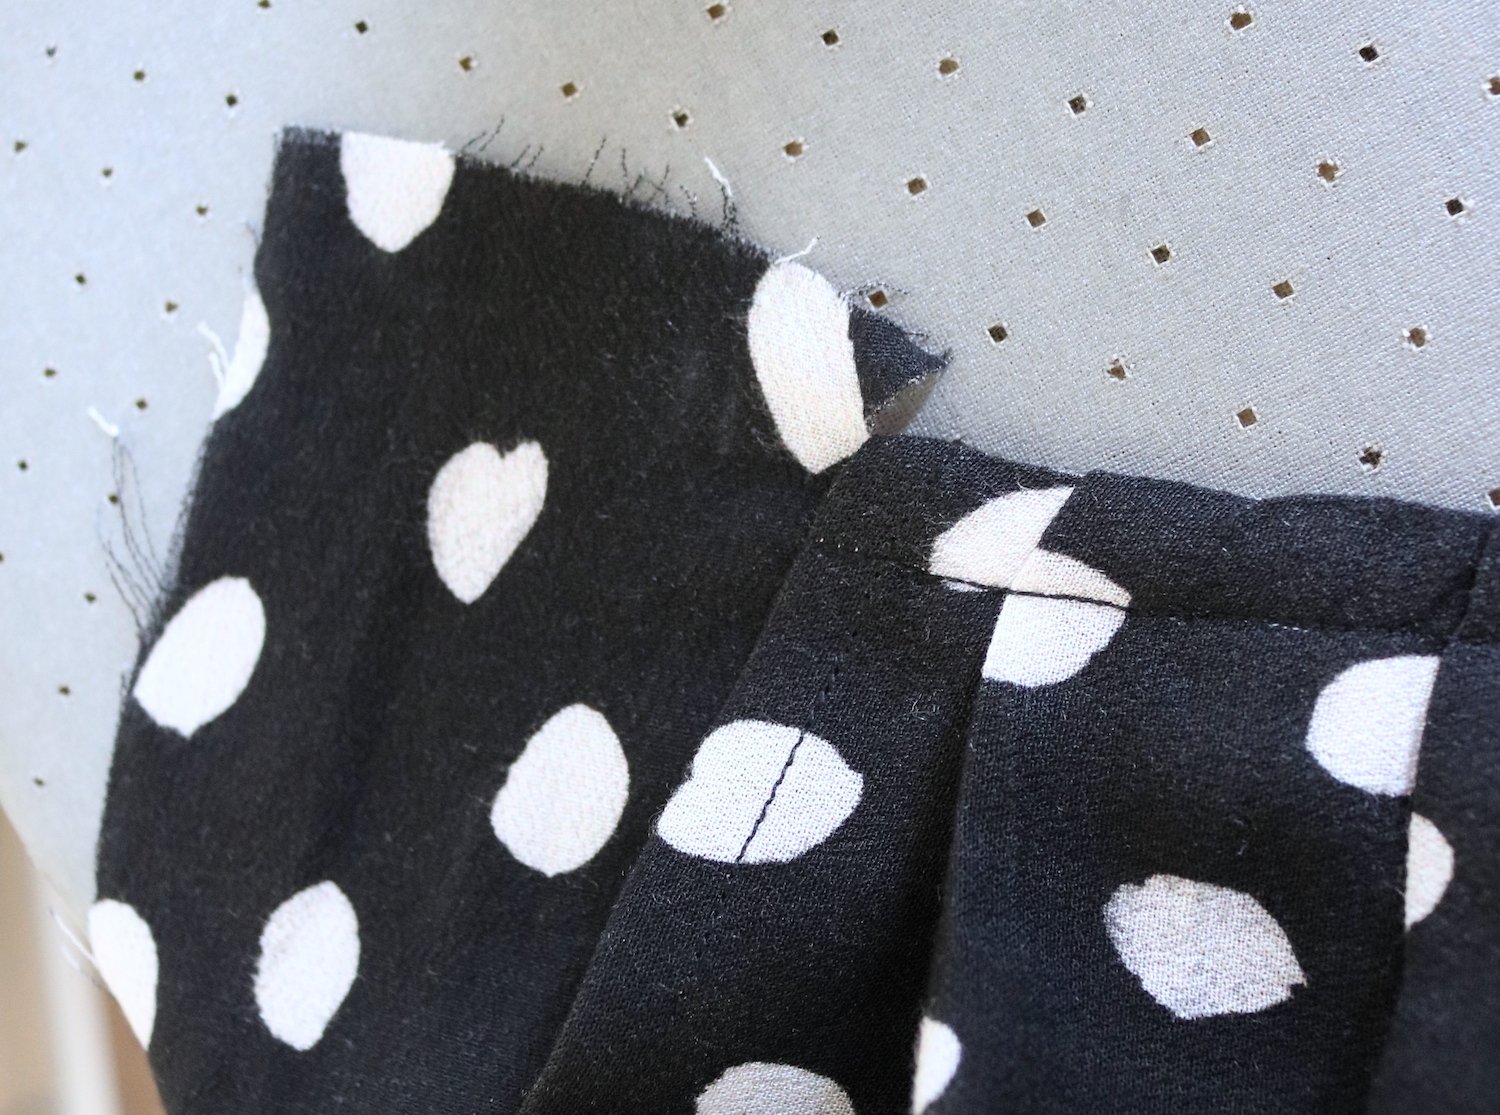
At the end of the ruffle, where the zipper was going to go, I clipped the fabric like so, and did a small double-fold on the remaining bit.
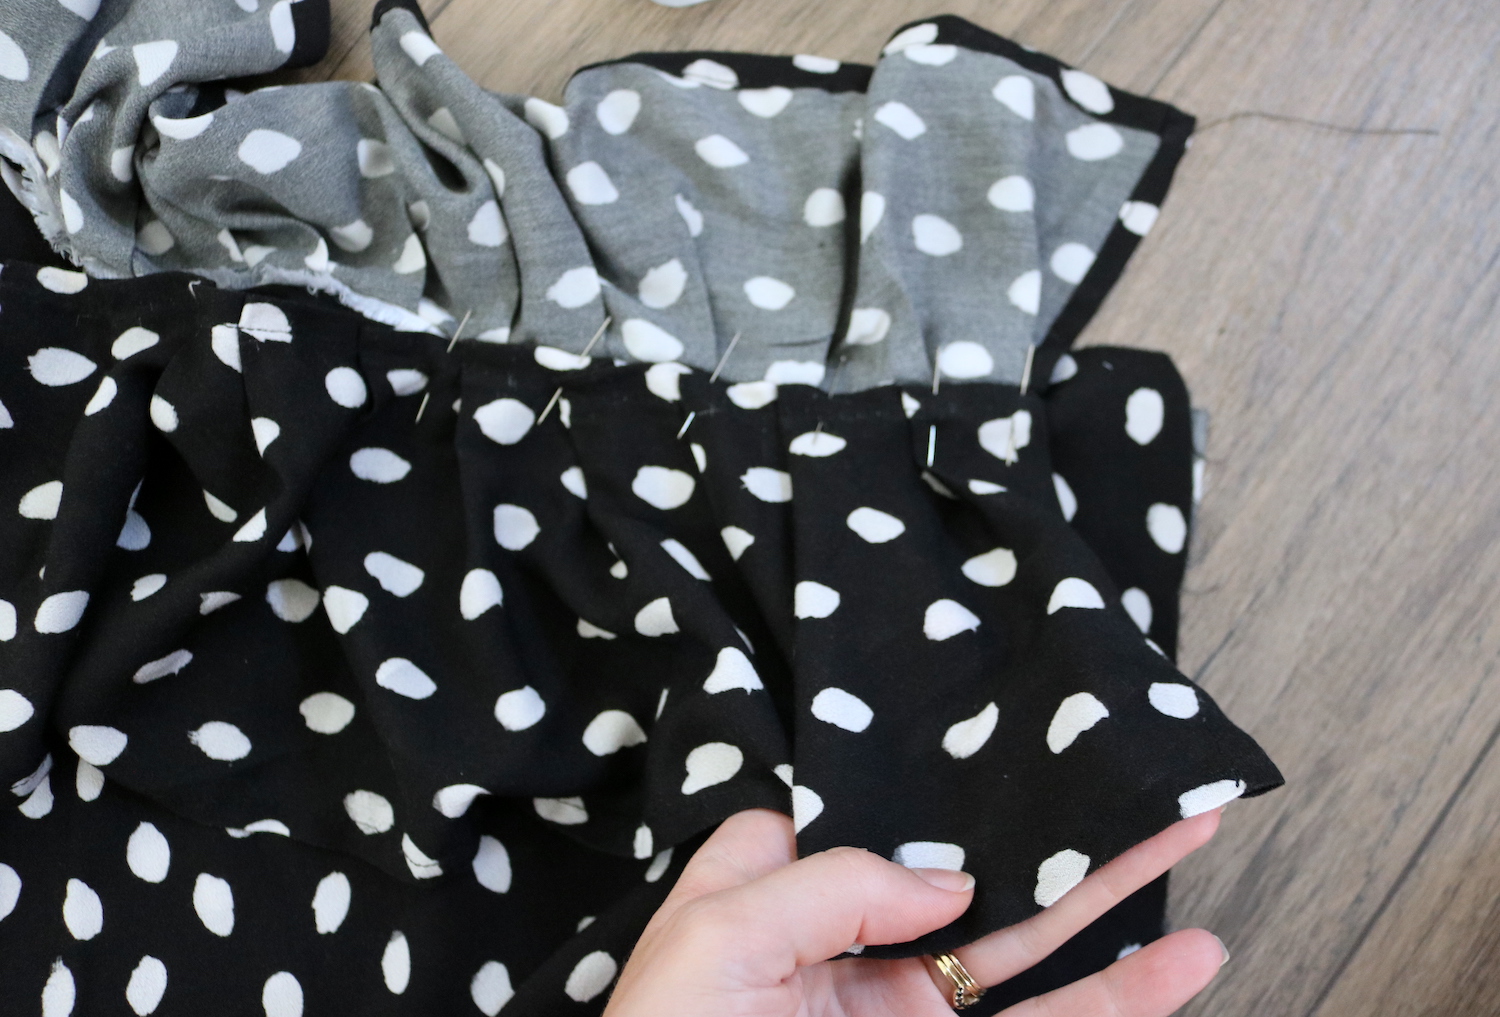
V. Time for ruffle numero due. This one needed to be just a bit wider than the first one to show from underneath. Yes, I could have sewn both ruffles at once with the neckline, but I didn't want the neckline to end up too bulky. This worked out much better. Ok so I cut my ruffle piece, same size as the previous one in length, but this time about 19 cm wide (which came down to 16 cm after I finished one long edge with my serger + a fold, and the other with a double fold). I gathered this ruffle with pleats just like the first one.
.. And then pinned it right underneath the first ruffle, and top-stitched in place.
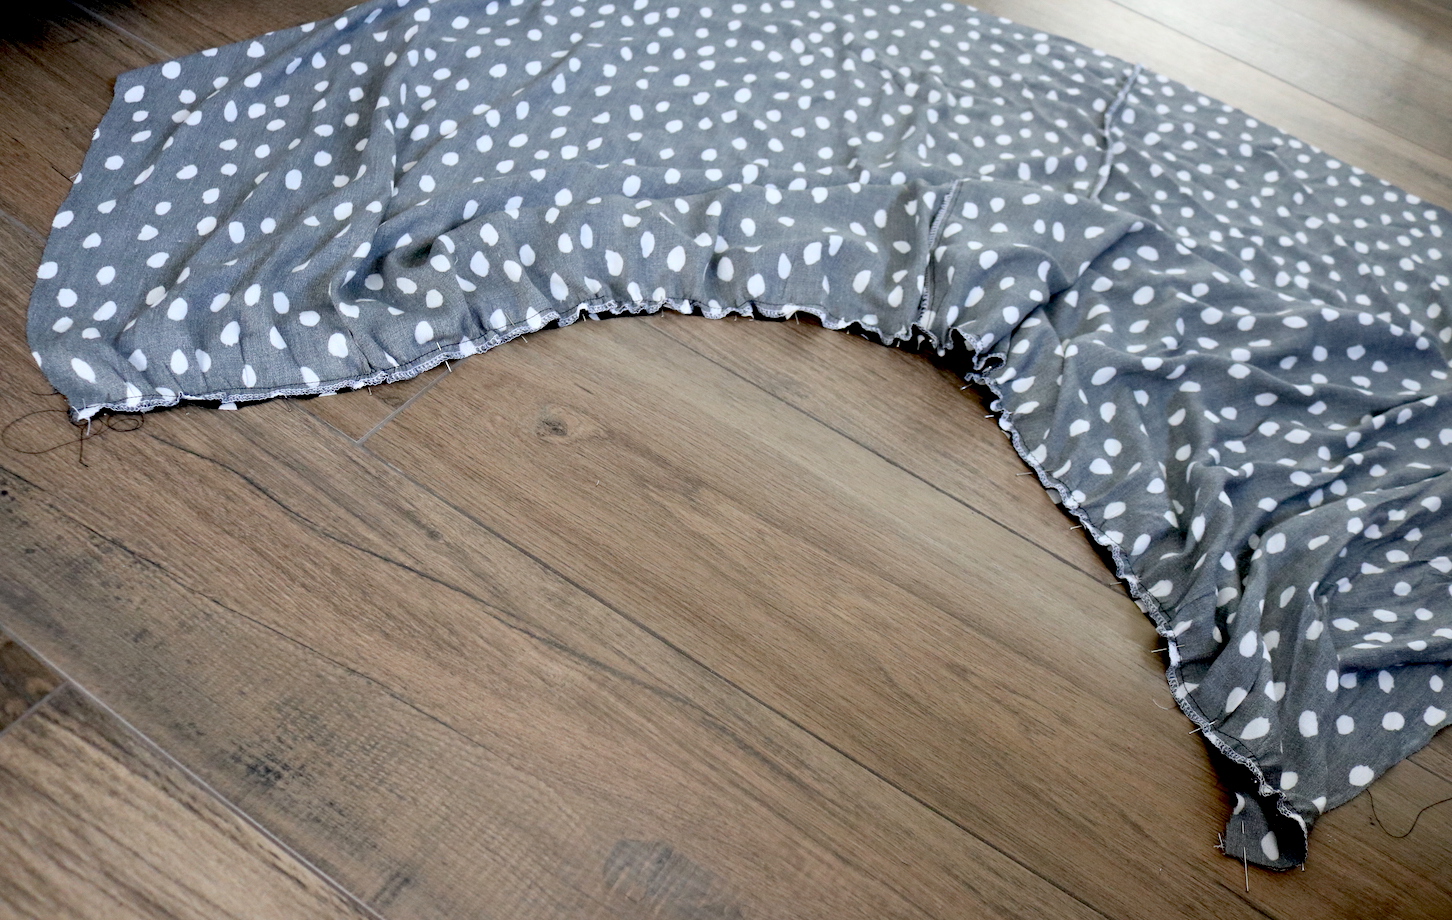
VII. Then for the skirt. I sewed 1 side seam of both the upper and lower skirt pieces (make sure to sew the same side). Then I gathered the upper edge of the lower skirt piece until the length matched the hem of the upper skirt piece, pinned in place, and sewed the two together.
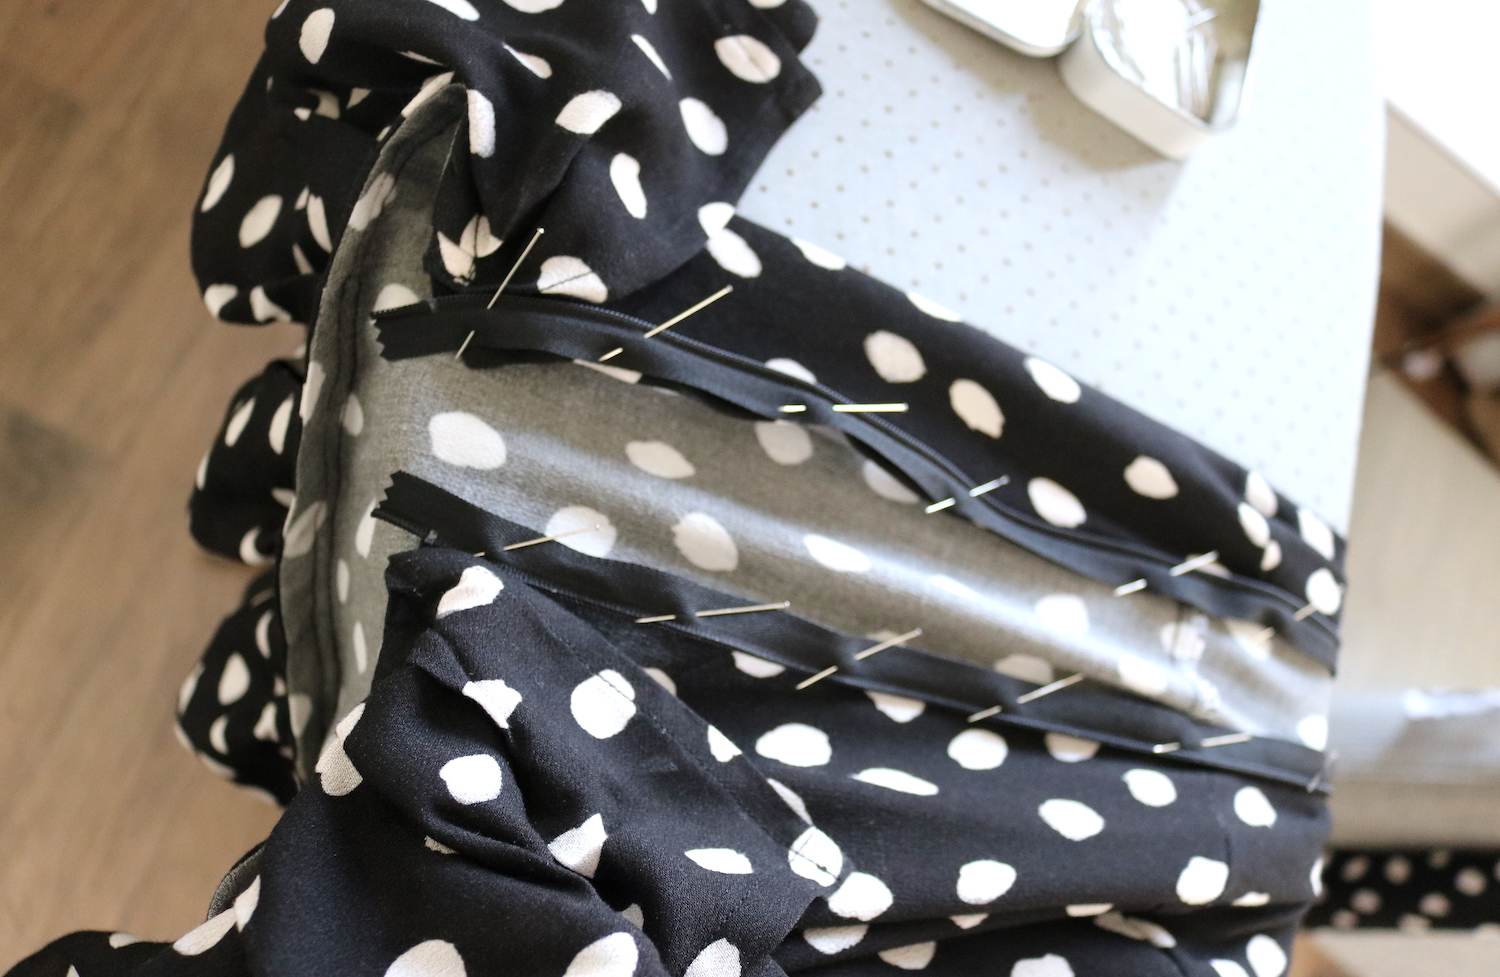
VIII. Getting there.. After sewing the skirt piece onto the top, I finished the sides with my serger, and added my invisible zipper and finished the side seam all the way down to the hem. Folded the zipper ends on the reverse and hand-sewed in place.
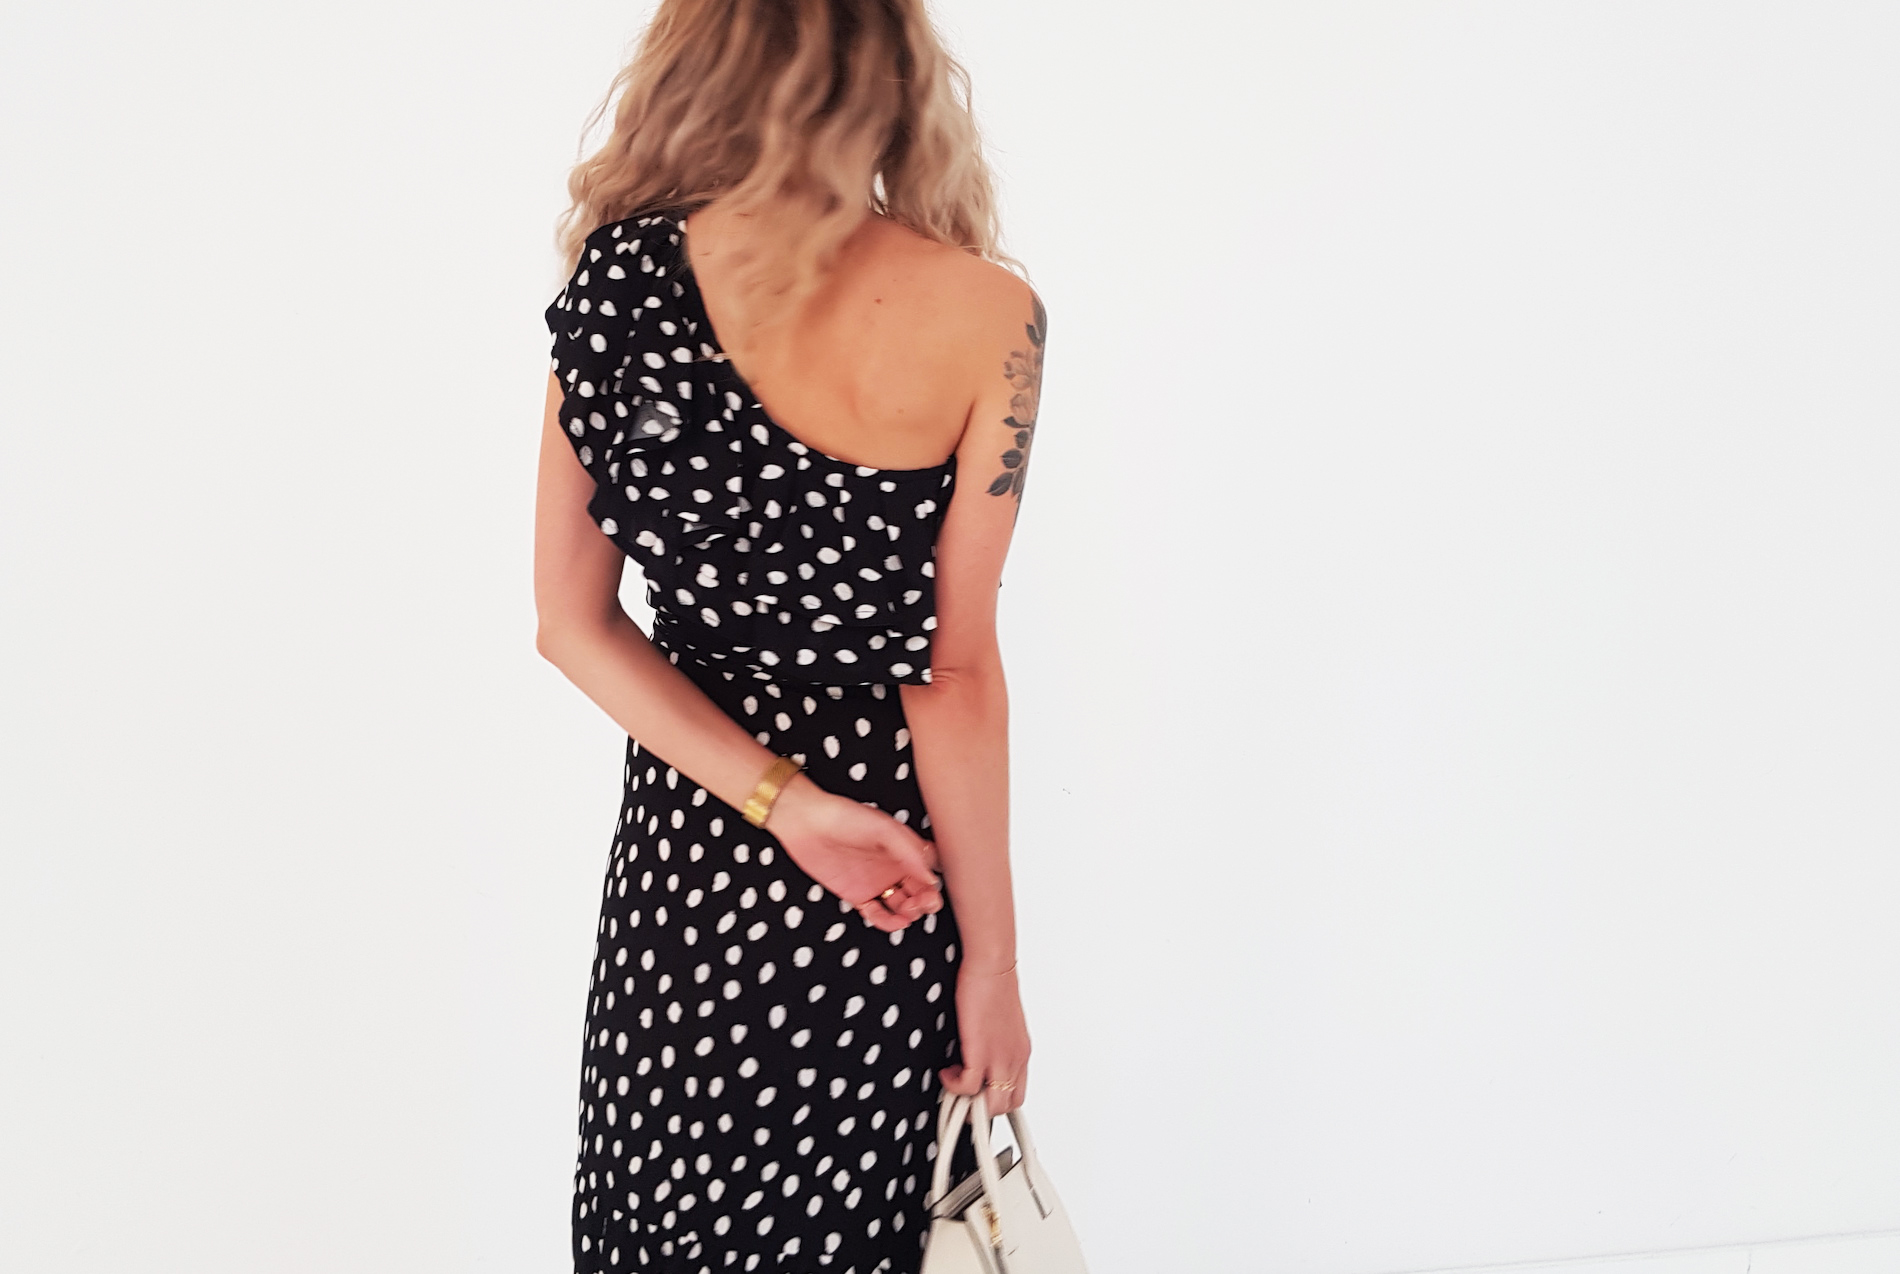
IX. The last 2 things I did was to hem the dress (I had enough to do a nice wide double-fold), and out of the final scraps of fabric I had left, there was just enough to make a matching belt.
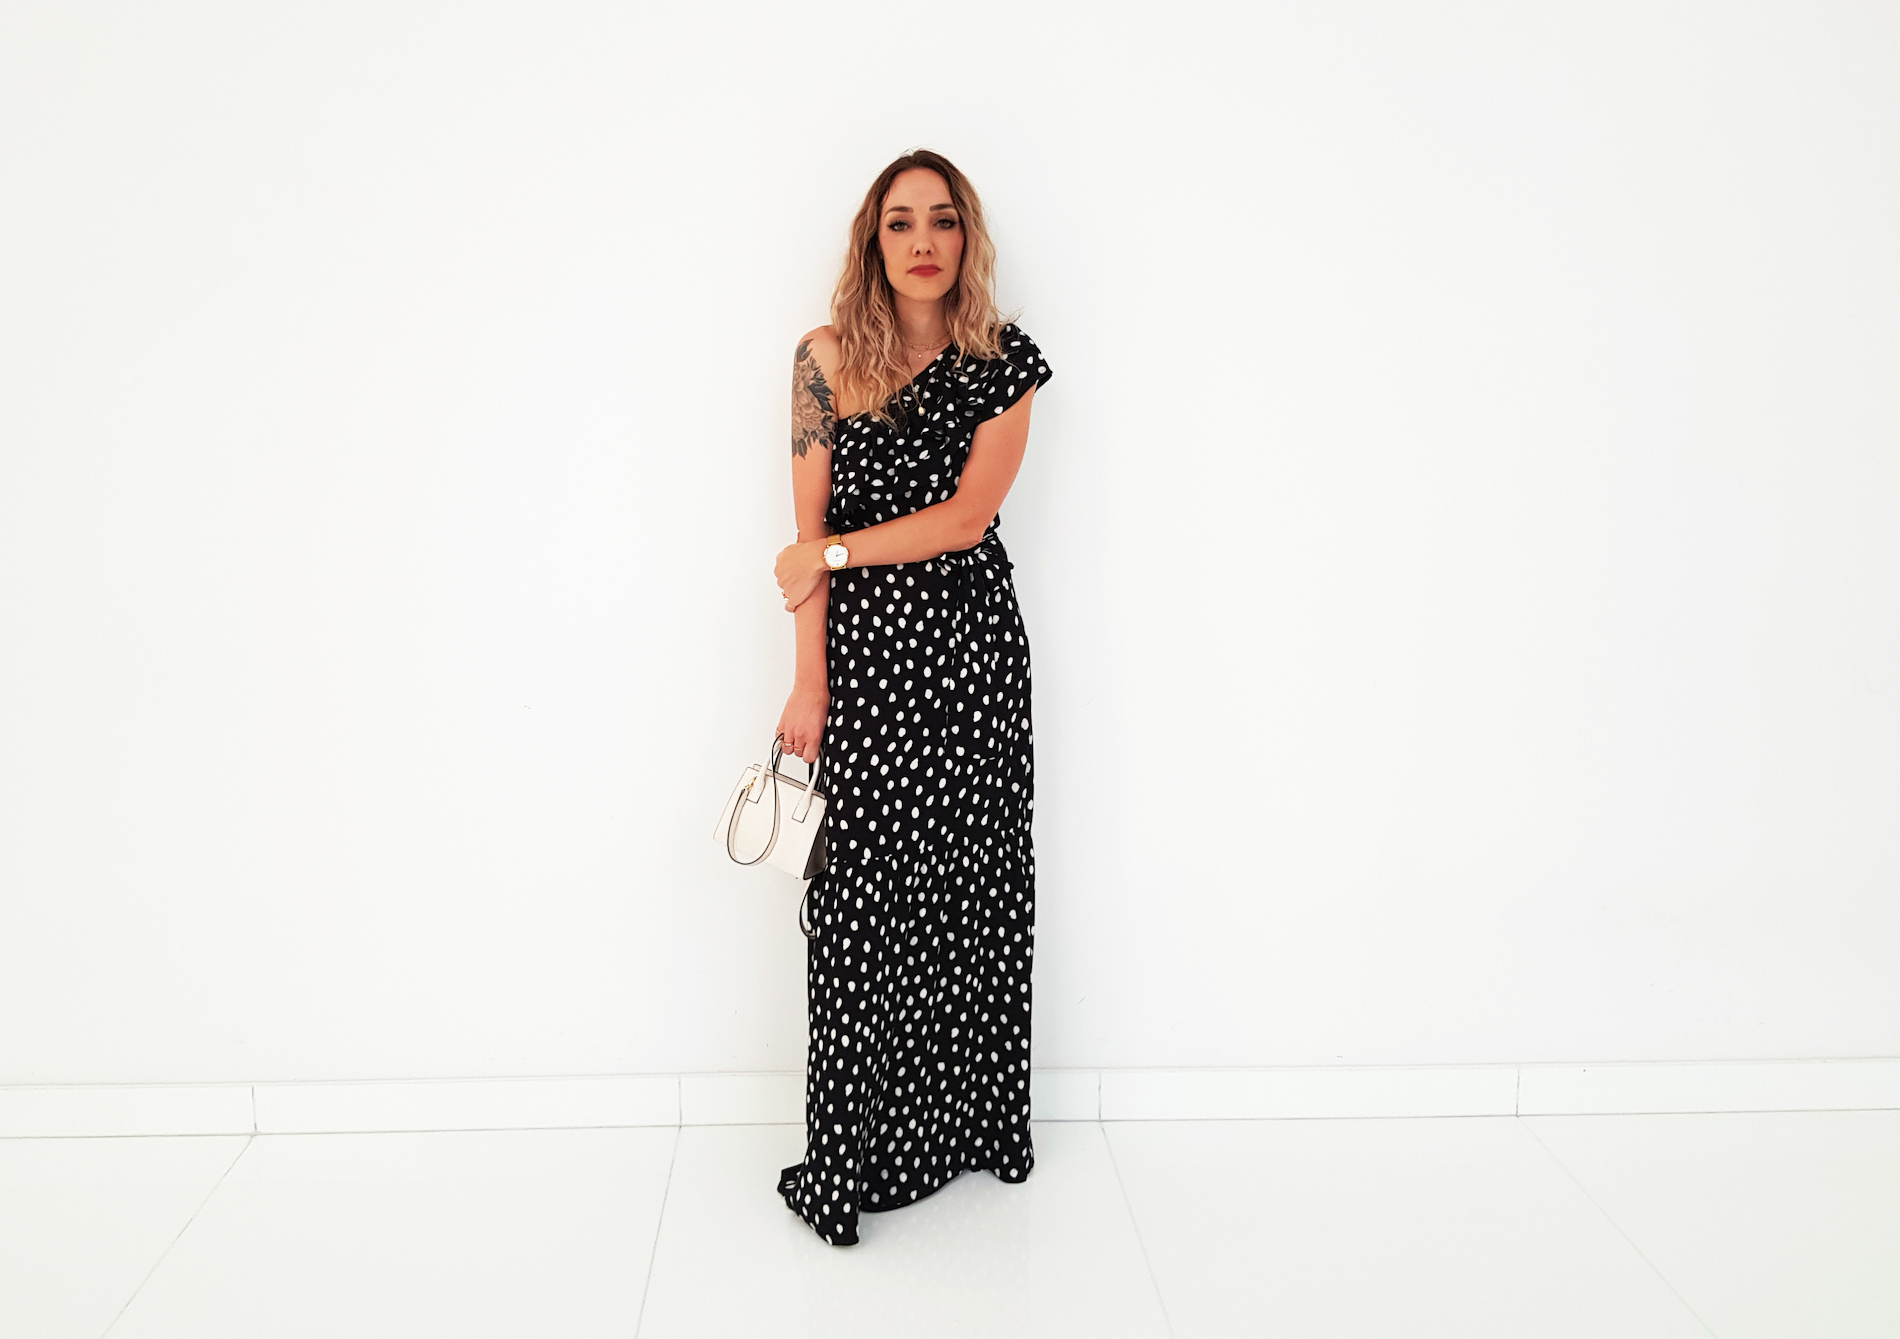
Found the whitest lobby in the World waiting for our friends the other day.
xo,
Julia


0 comments:
Post a Comment
I would love to hear what you think and learn about your DIY adventures! If you use one of my tutorials, tag me on social @contour_affair, I'd love to see!