

For the most part of the Northern Hemisphere the timing of this project may seem a bit off, but in Dubai the oven we call summer is finally losing its power and it's the perfect weather to venture outdoors! This is for all my Aussies out there getting ready for beach days. Part II - Beach bag DIY coming soon..
TOOLS:
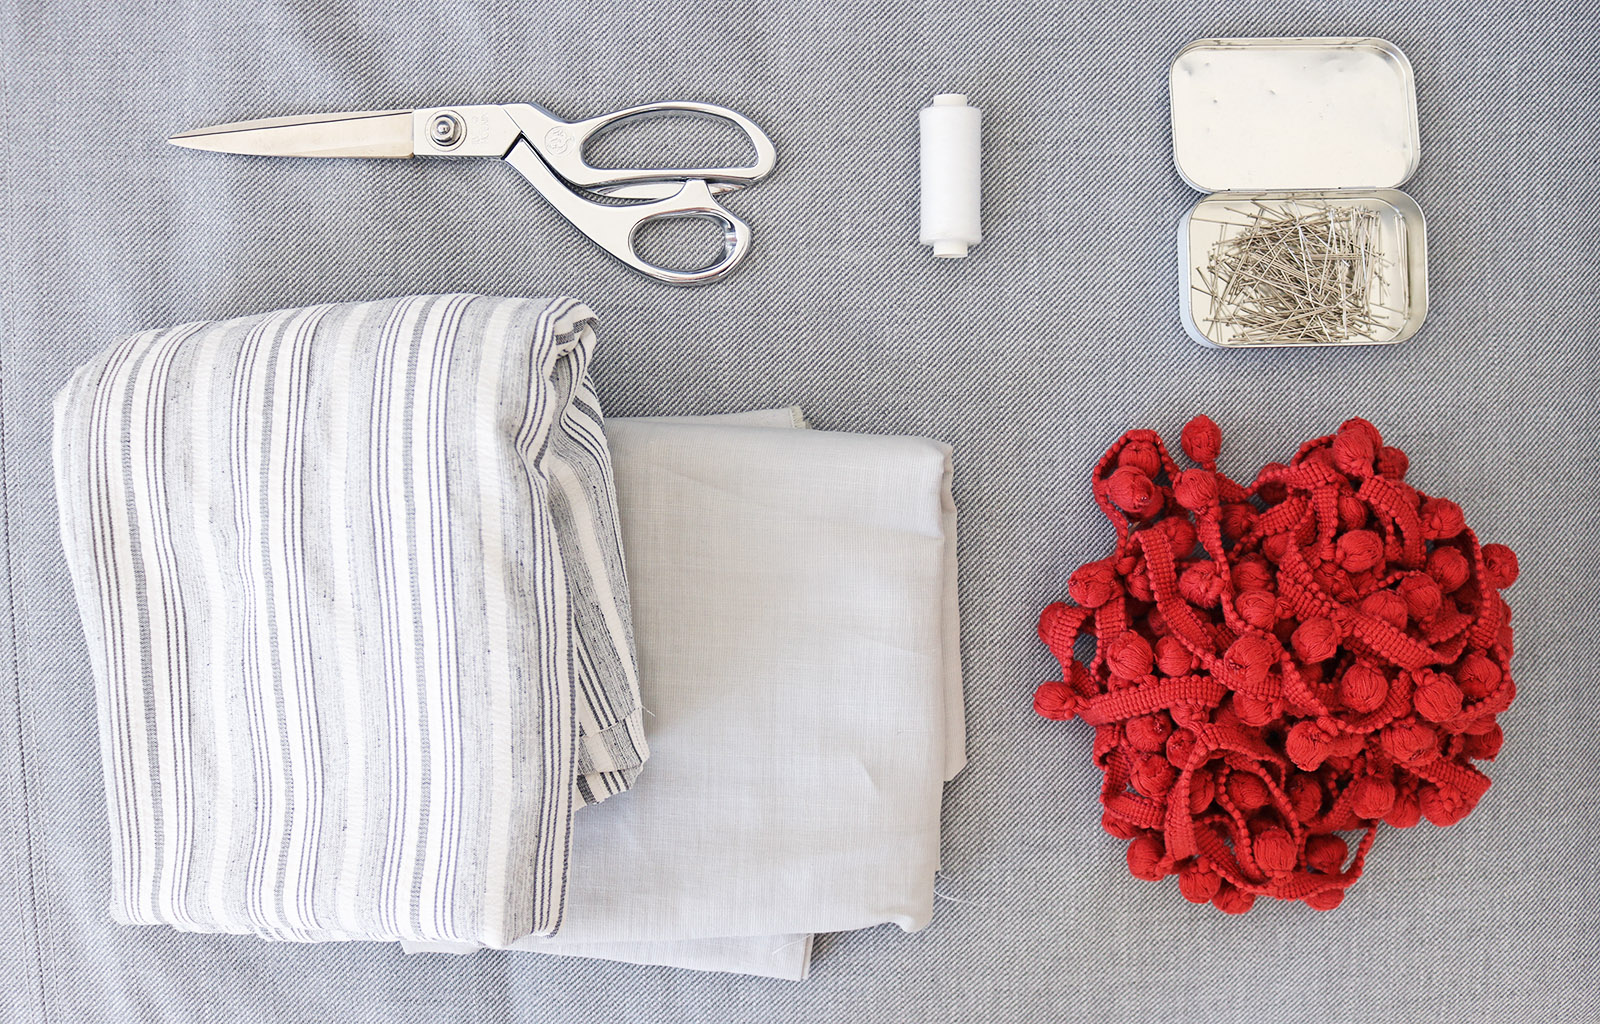
2 Pieces of fabric, durable kind (I used a thick cotton) - could be the same colour or a stripe and monotone one like mine | Pom pom ribbon | Thread, sewing machine | Scissors | Measuring tape | Pins
To determine how much fabric you need first decide how big a towel you want to make. I used a standard fabric where the width was a little less than 150 cm, so I got 150 cm in length of my two fabrics (so I had a square piece of each, with the side measuring 150 cm).
To figure out the required length of pom-pom ribbon, first get the radius of the circle you're planning on making. Round up if unsure. Then plug that number into the field here, and you'll get your circumference. My radius was about 73 cm, which gave me a circumference of about 460 cm. Get some extra pom-pom just to be sure, especially if your fabric is at all stretchy.
I. To start I folded my stripy fabric in half, and then in half again. Then measured the maximum size of my circle (starting from the folded corner, the shorter edge of the folded square, if your edges aren't the same length). For me that was 73 cm. Marked the 73 cm all along the quarter circle, and cut out.
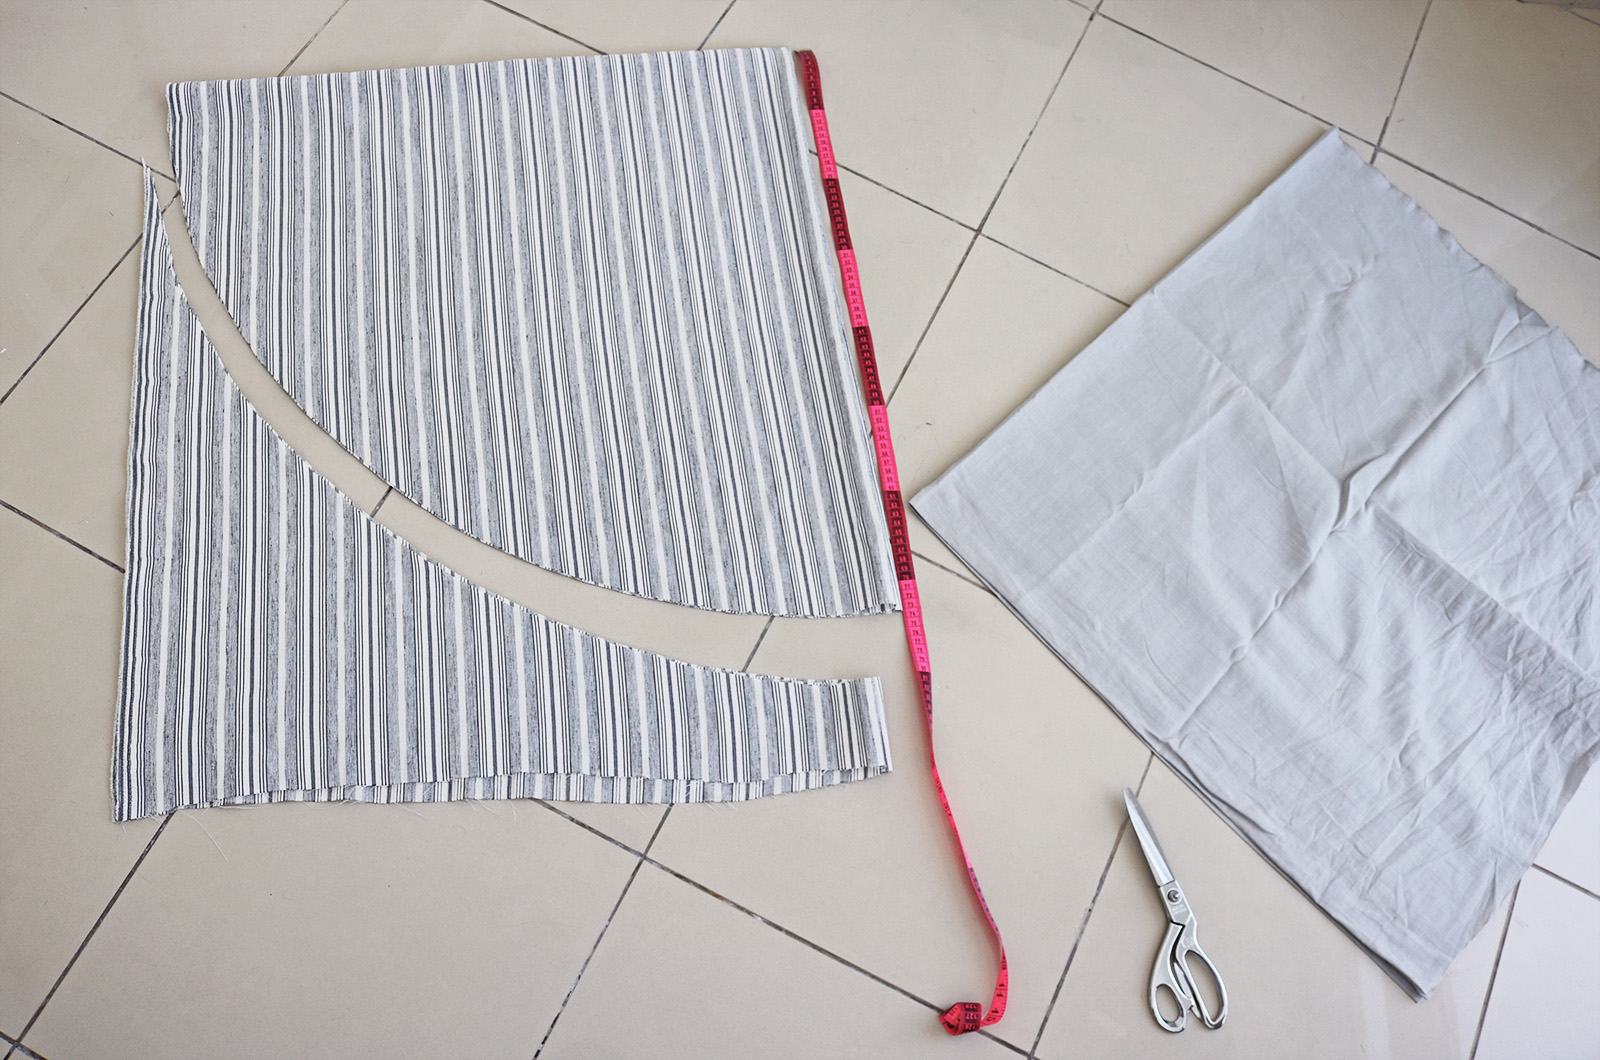
II. Then used that first circle I cut out as the stencil for the second piece of fabric, which I had also folded once in half and then in half again. Who wants to measure more than once if you don't have to? Cut out my second circle.
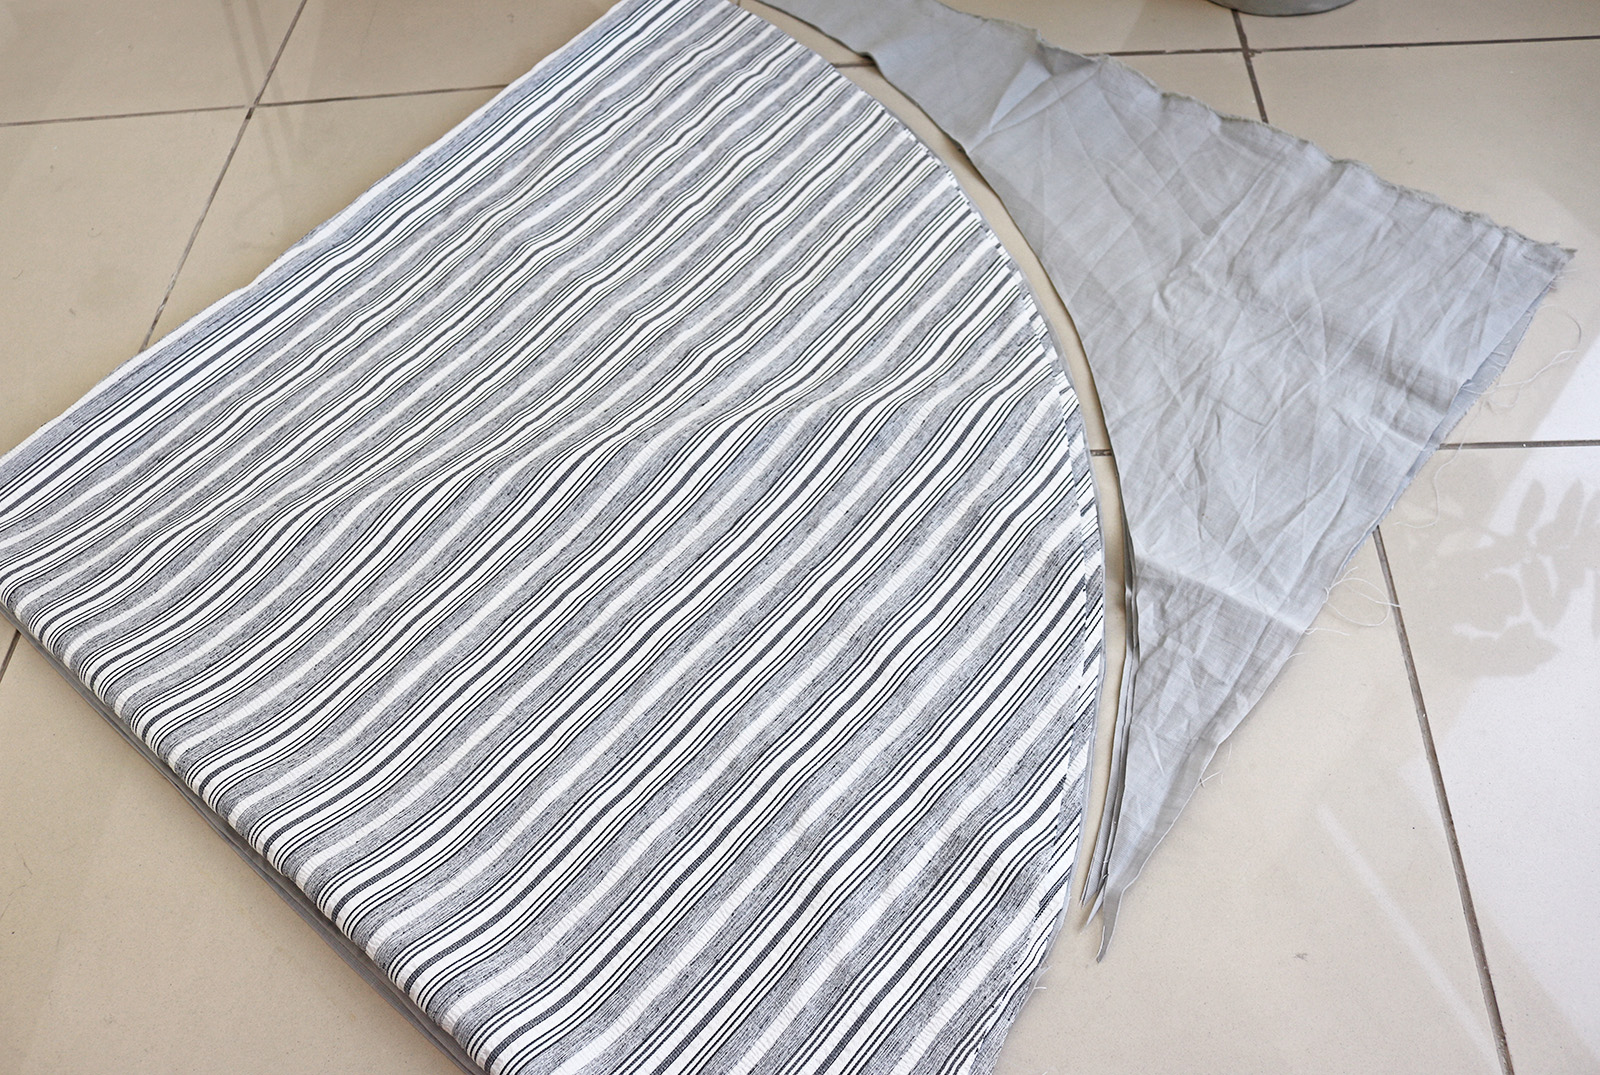
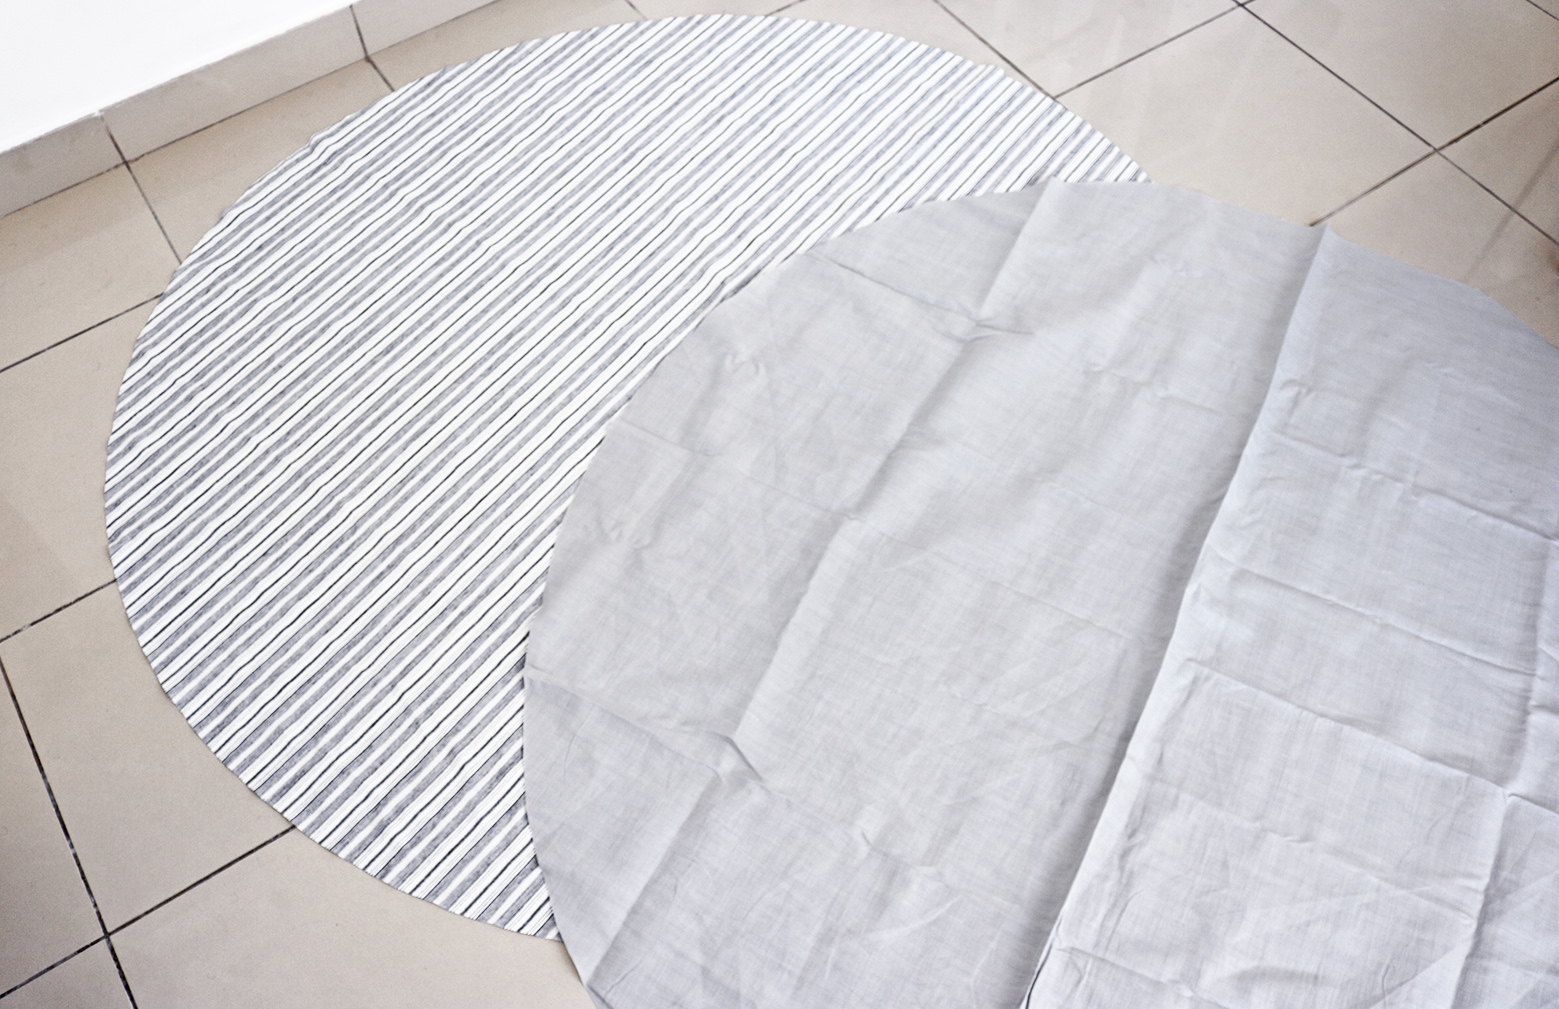
.. Which left me with two identical circles of fabric.
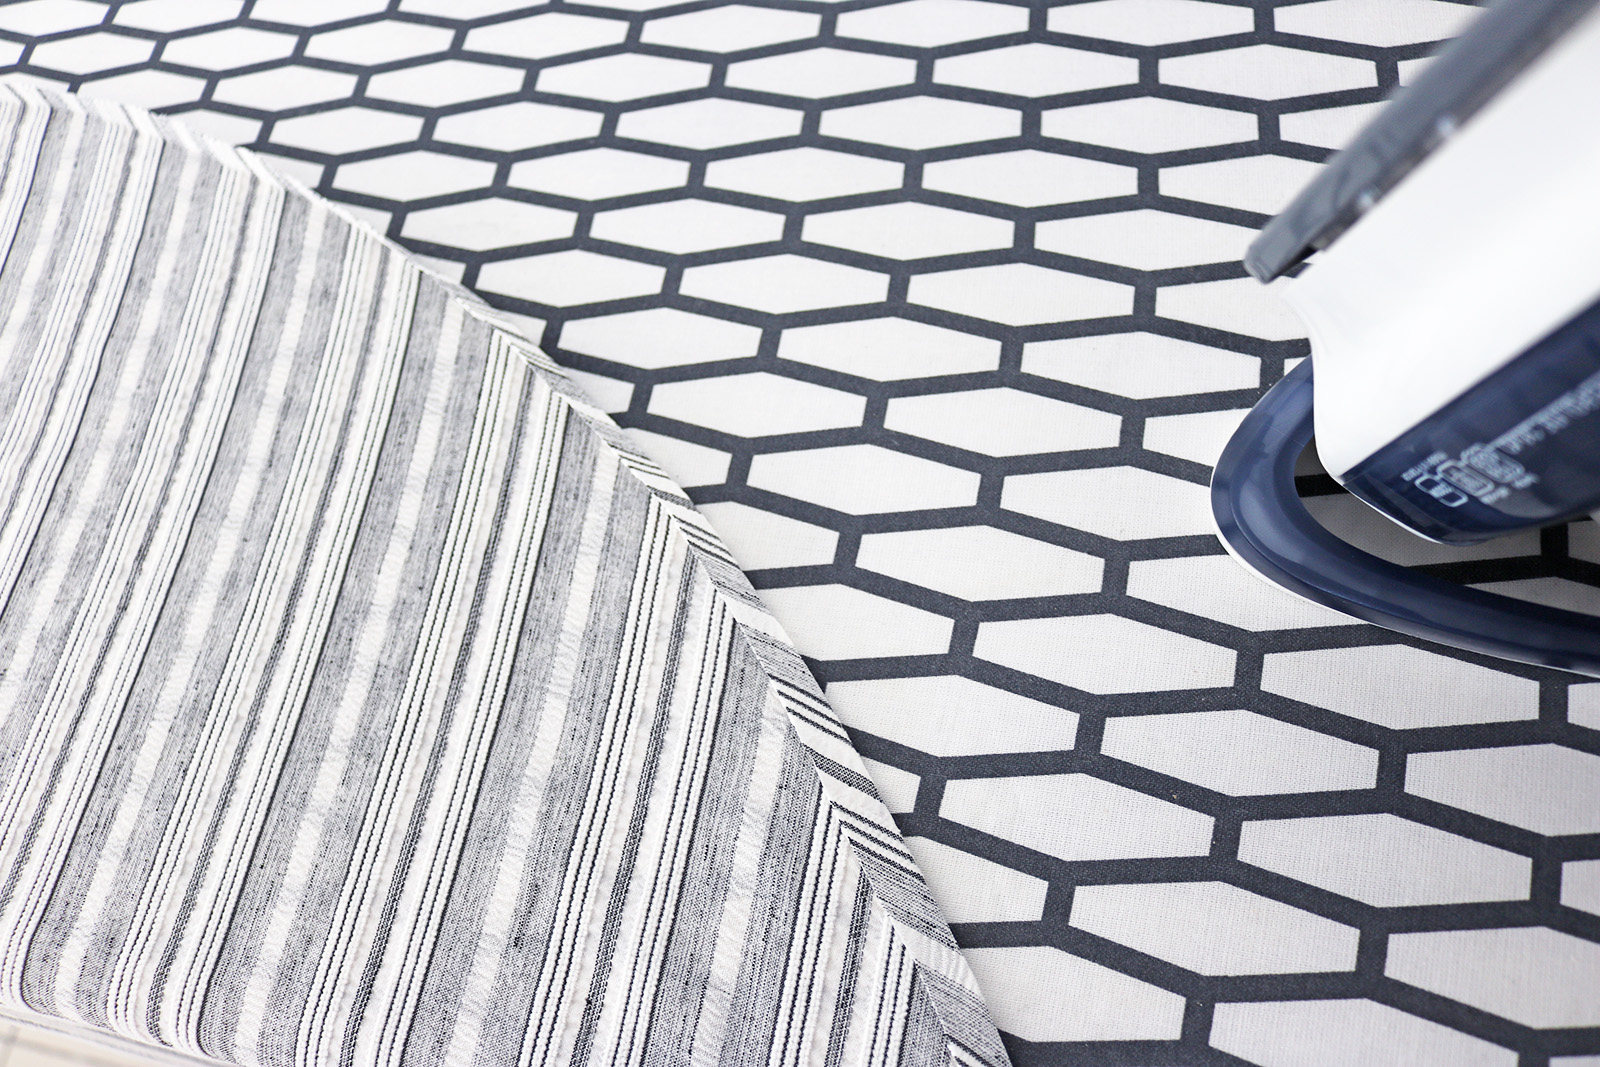
III. I then took my iron and pressed an approx. 0.7 cm fold along the edges of both circles as shown below, onto the reverse side.
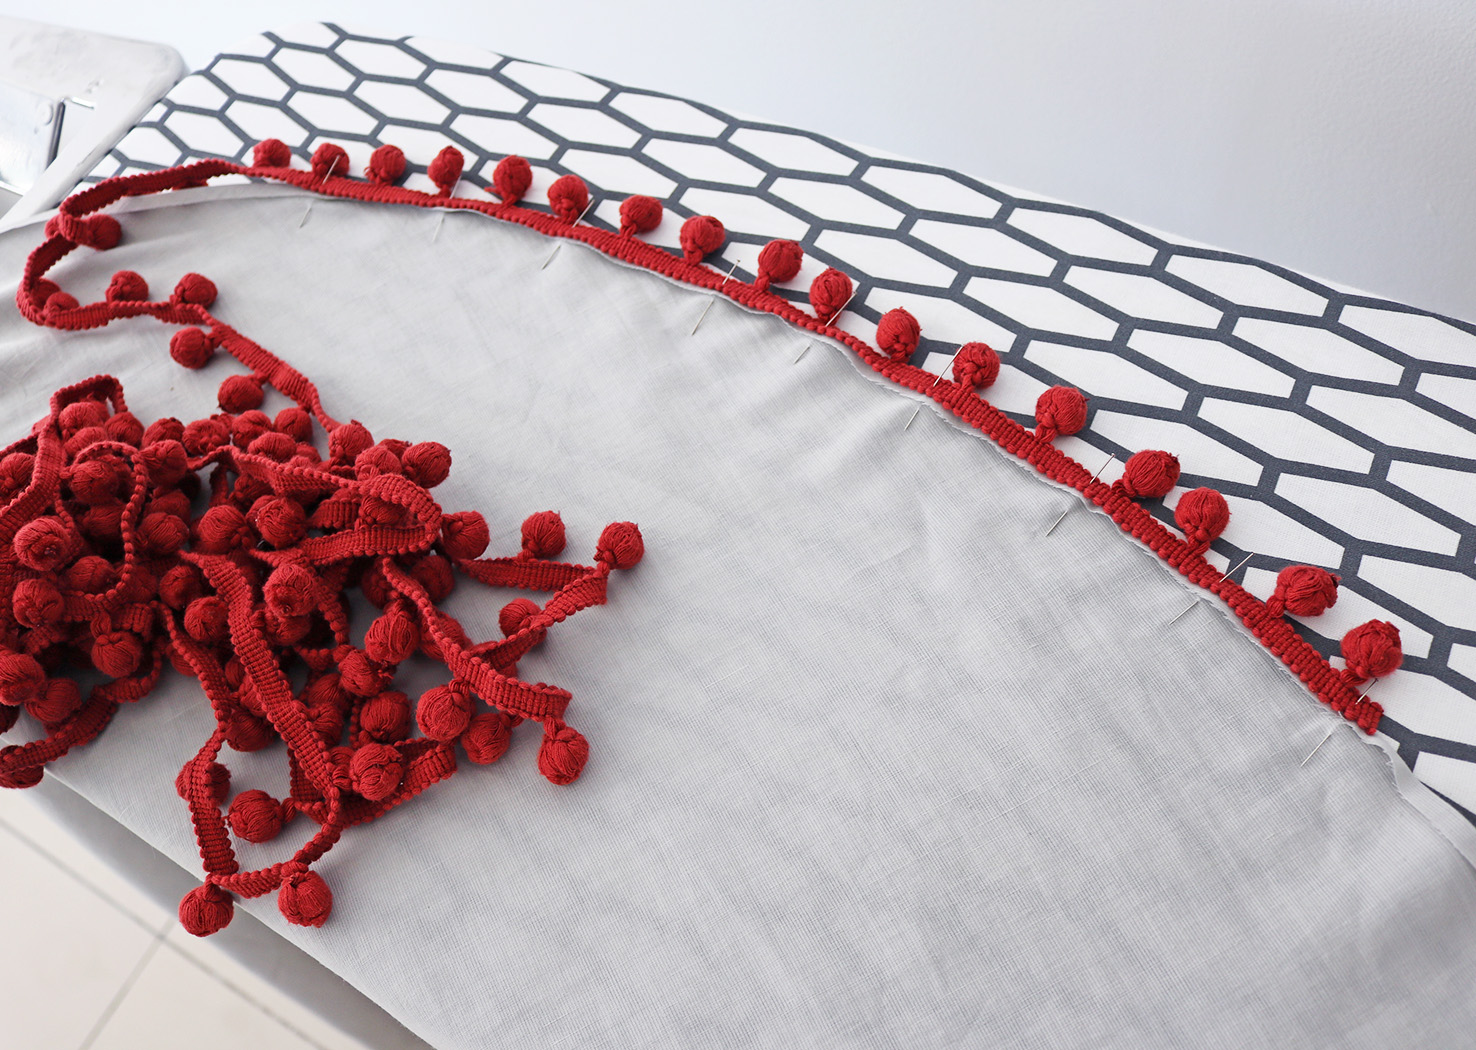
IV. Then took my pom-pom ribbon and pinned it along the edge like this. Note that I left some of the actual ribbon visible at the edge along with the pom-poms themselves. Once I got all the way around I sewed the pom-poms onto the edge with a straight stitch.
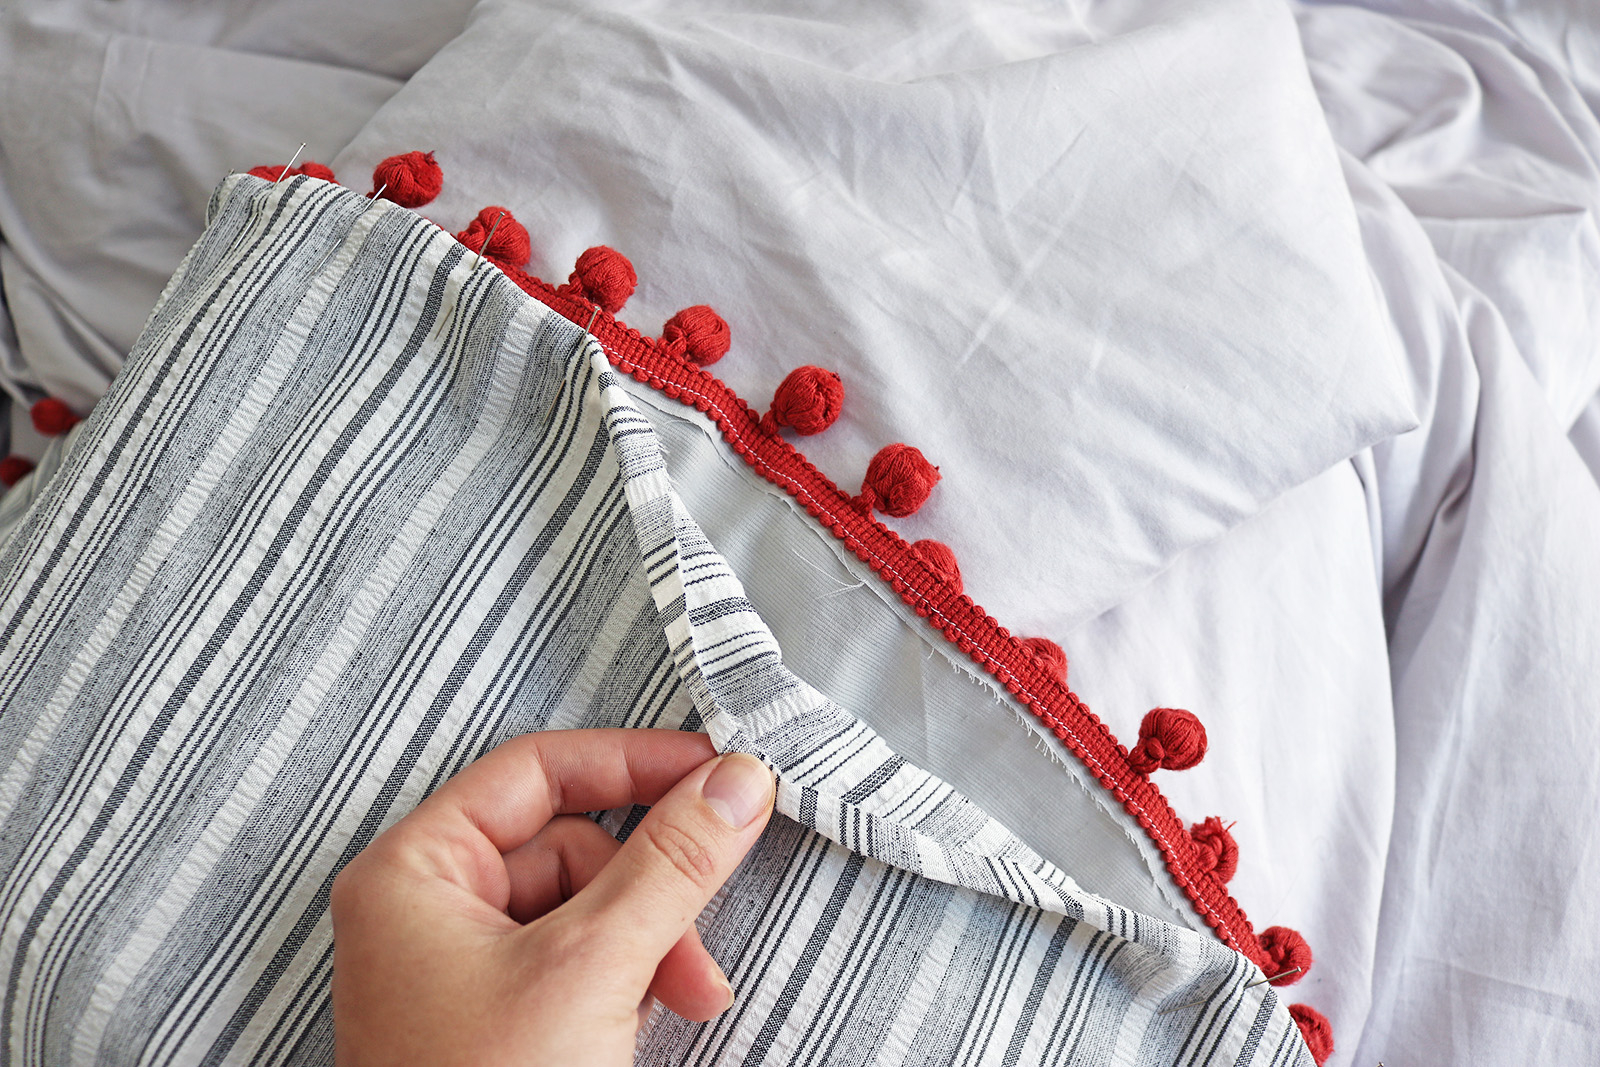
V. Finally, I repeated the process by pinning the main fabric (the one that will face upwards) the same way as above, so the pom-poms were sandwiched in between. Sewed in place all around. And yes, you could do these two steps in one by pinning the pom-pom in between the two fabrics and sewing a single stitch, but I found it much easier with two separate steps.
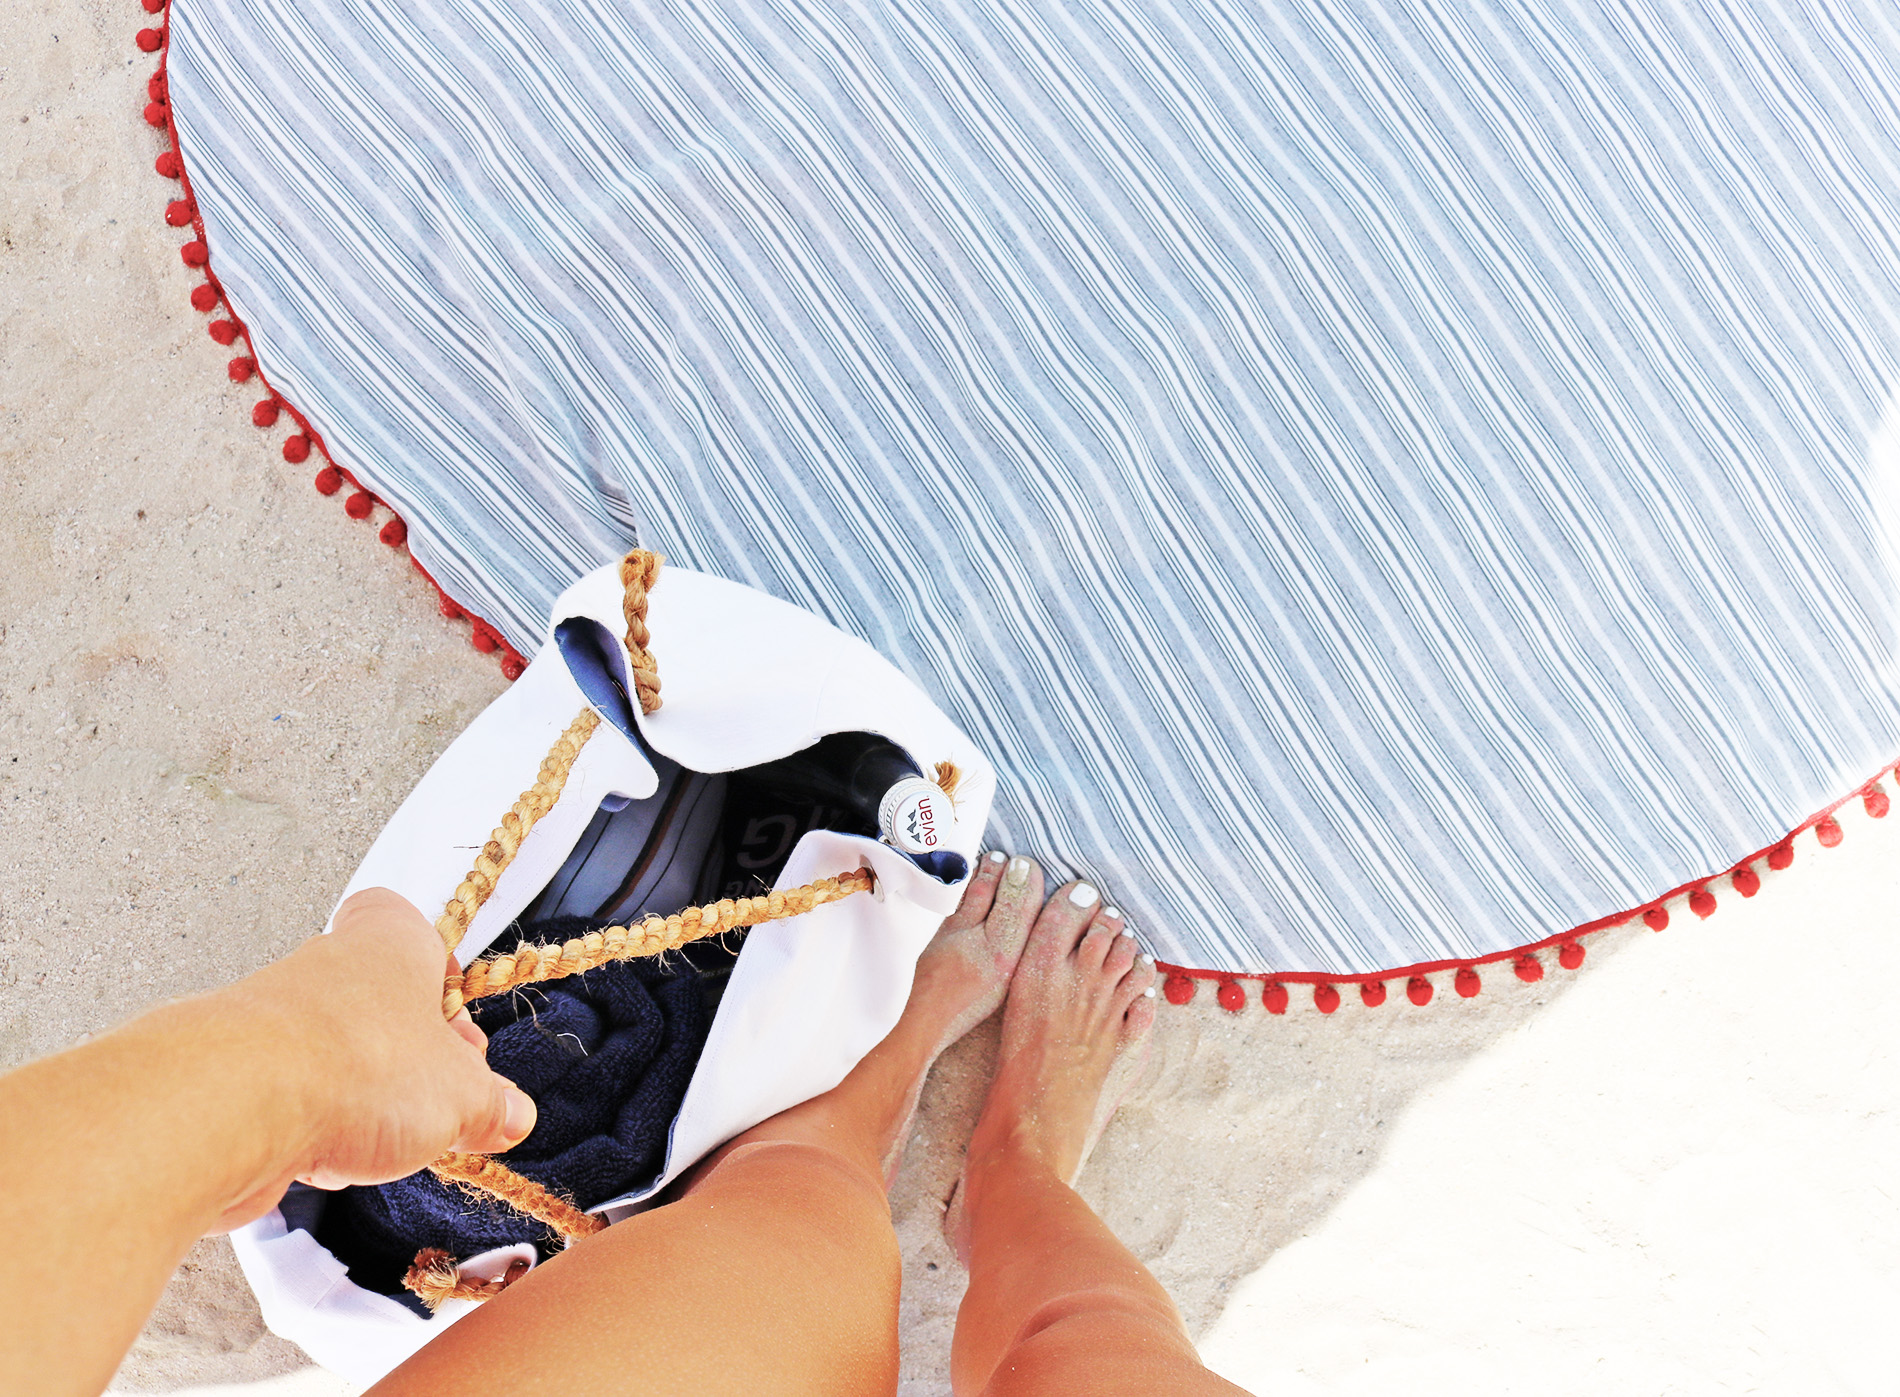
That's all there is to it!
xo,
Julia


Swimsuit backless
ReplyDeletehttps://princessbiquinishop.com/collections/swimsuit
Buy latest one piece Swimsuit Ushuaia Regular price €64.90 EUR? Best shop for one piece swimsuit backless online at princessbiquinishop.com