

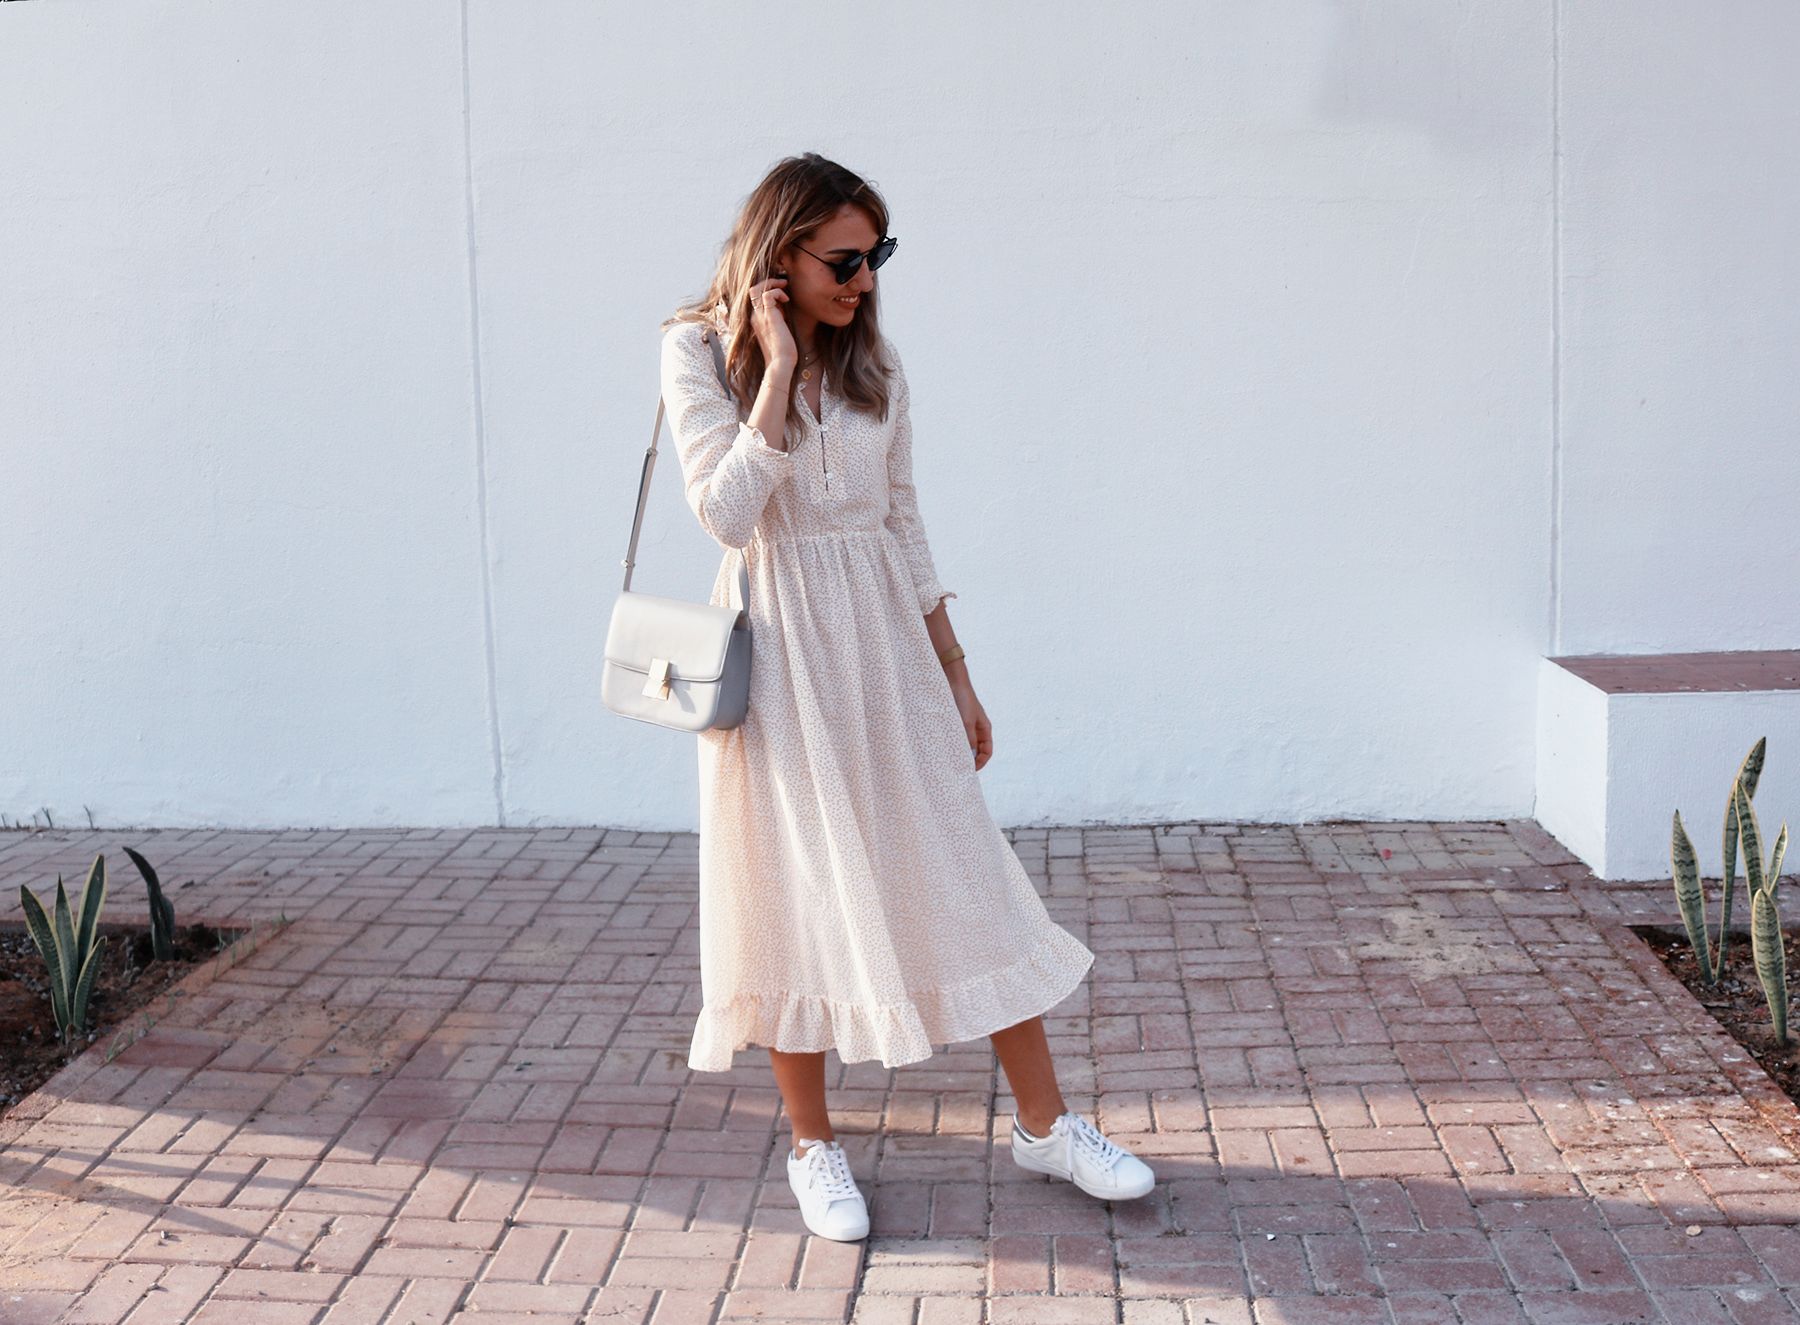
I can't believe the transformation that's happened in my attitude towards ruffles. A few years ago I saw them as too girly & preppy, and here I am now adding them to every other thing I make. The neckline I made on this dress was a bit of an experiment, so I'm super happy it ended well vs. in me collecting the remains of my sewing machine from the ground 11 floors down. The risk of meltdown is something any experimental seamstress has to accept going into most projects.
Tutorials take a lot of time & effort to create, and I choose to make mine available for free. If you enjoy this guide, you can support me with a donation that feels right for you, here.
TOOLS:

Fabric, around 3.5 m (I used 100% soft cotton) + small piece of interfacing | Scissors | 4 buttons | Elastic to go around the waist | Pins | Thread, needle, sewing machine
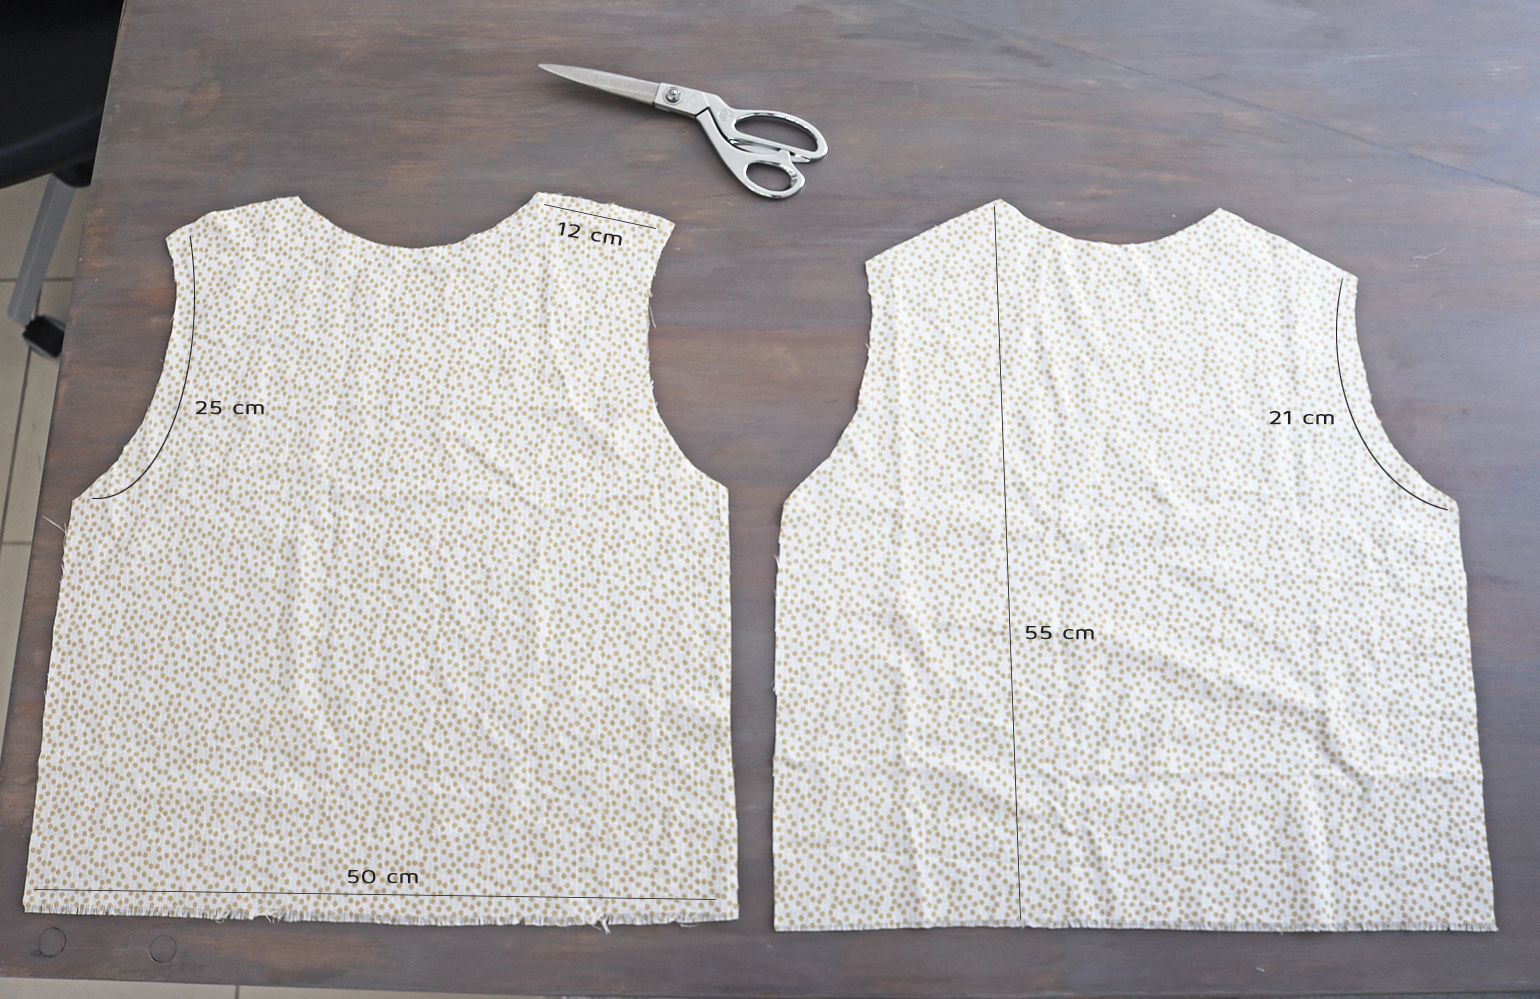
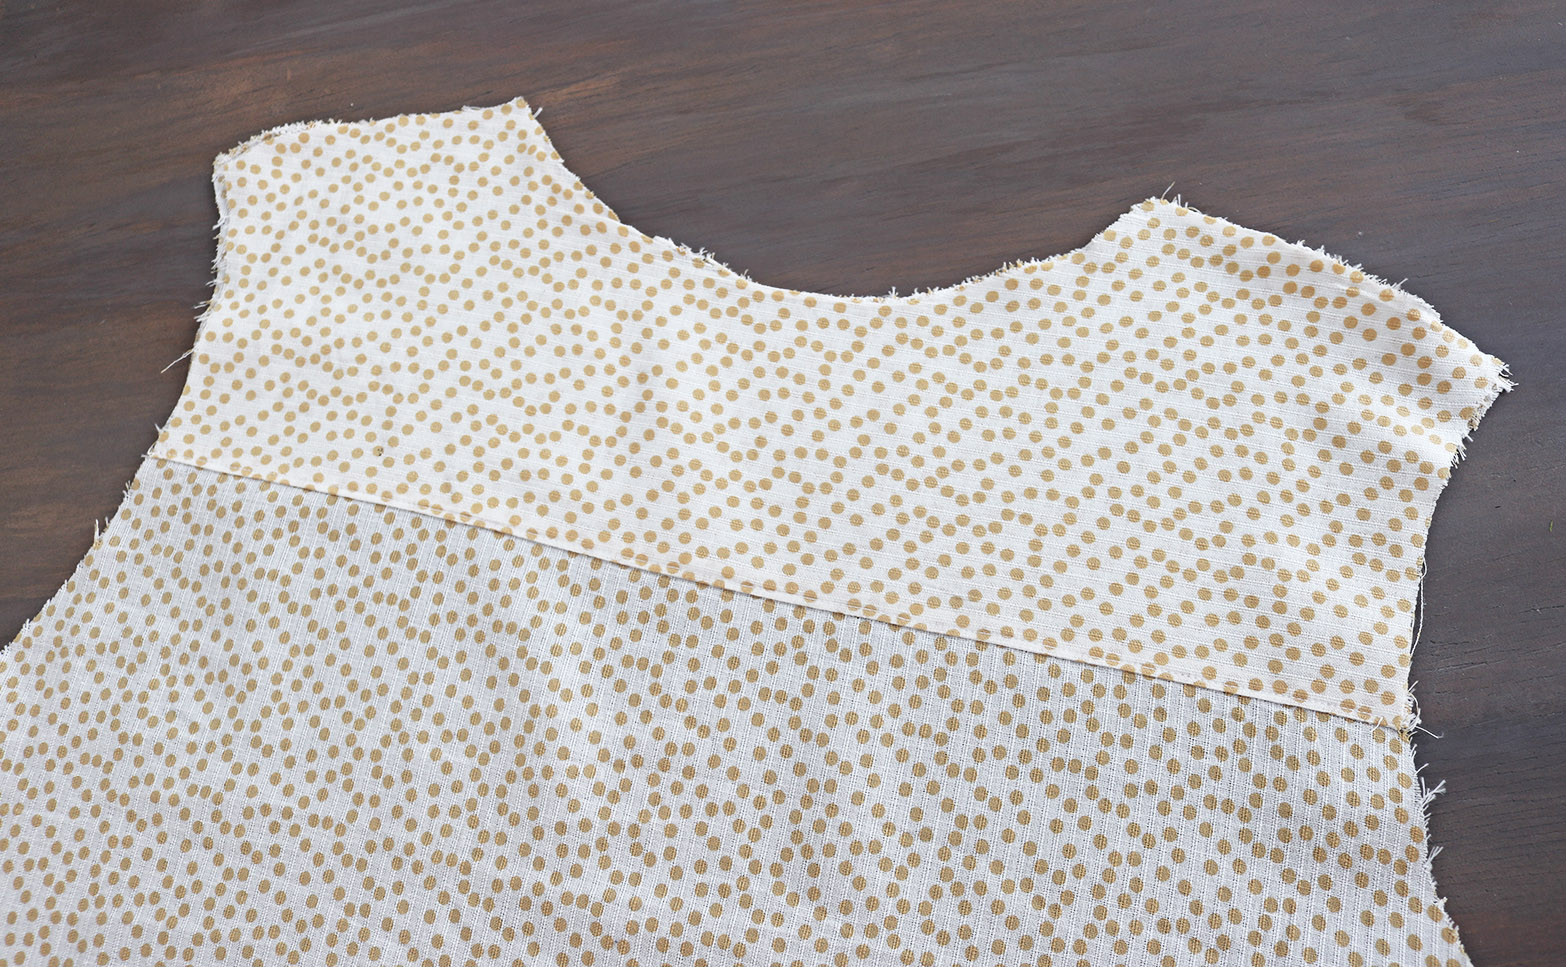
I. Starting from the top of the dress, here's what my cut pieces looked like with approximate EU36/US4 size measurement guides. The front and back pieces were identical with the exception of the shoulder lines being a bit steeper on the front piece, and the arm holes a few cm longer on the back piece.
II. First I folded the back piece down 15 cm from the top..
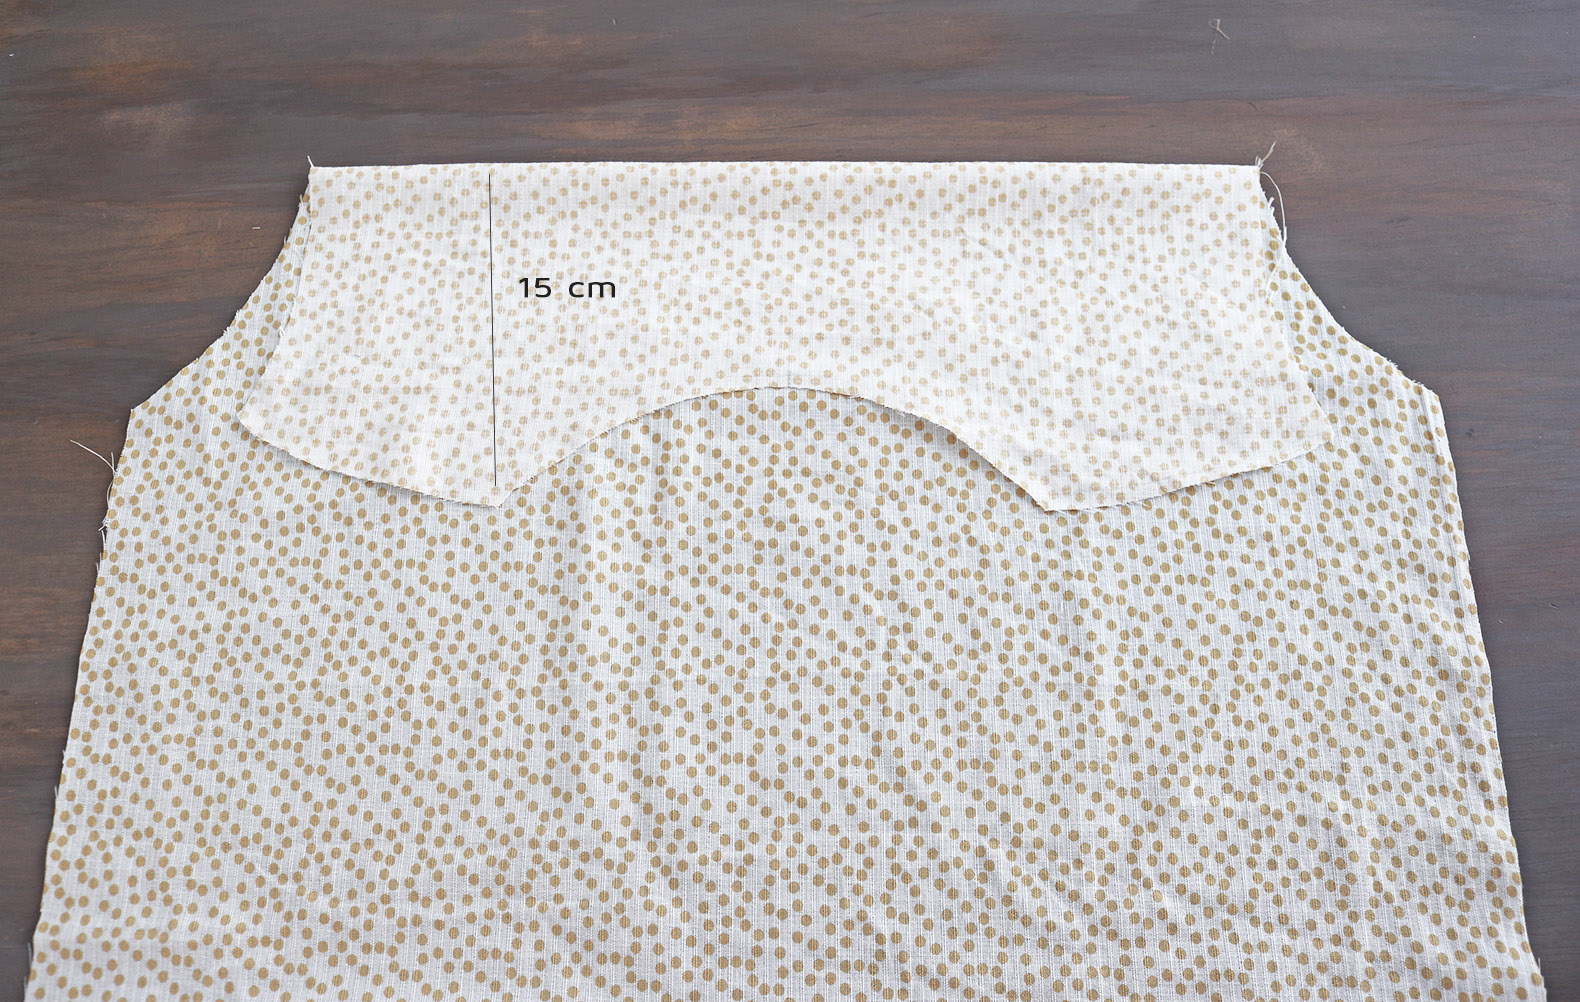
.. And cut across to create my yoke.
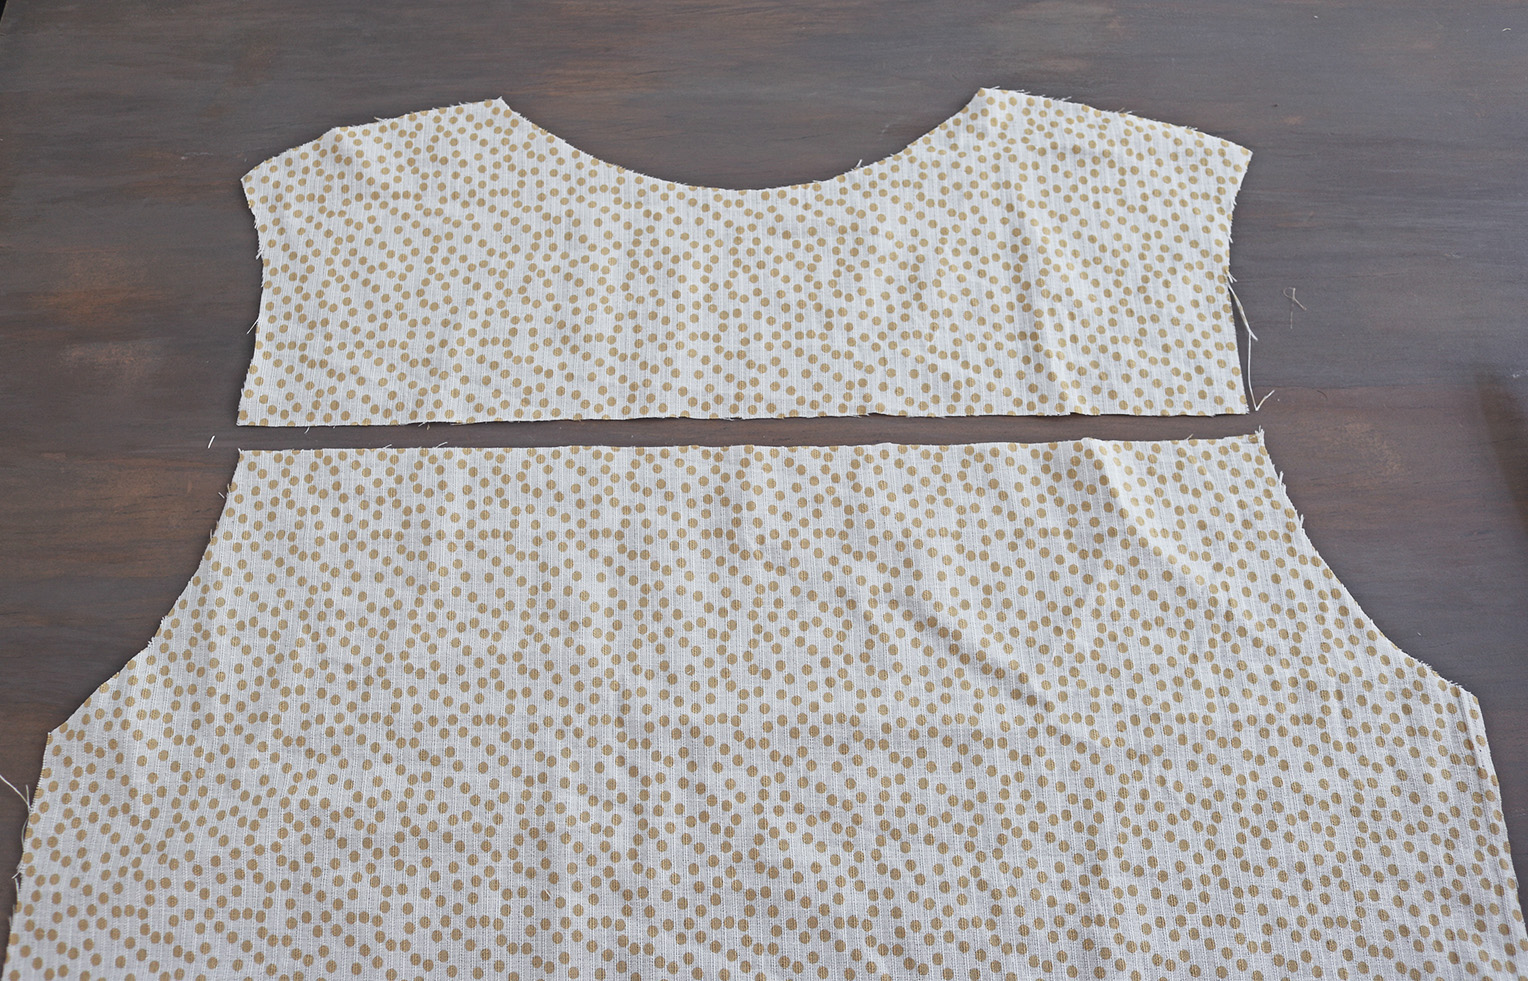
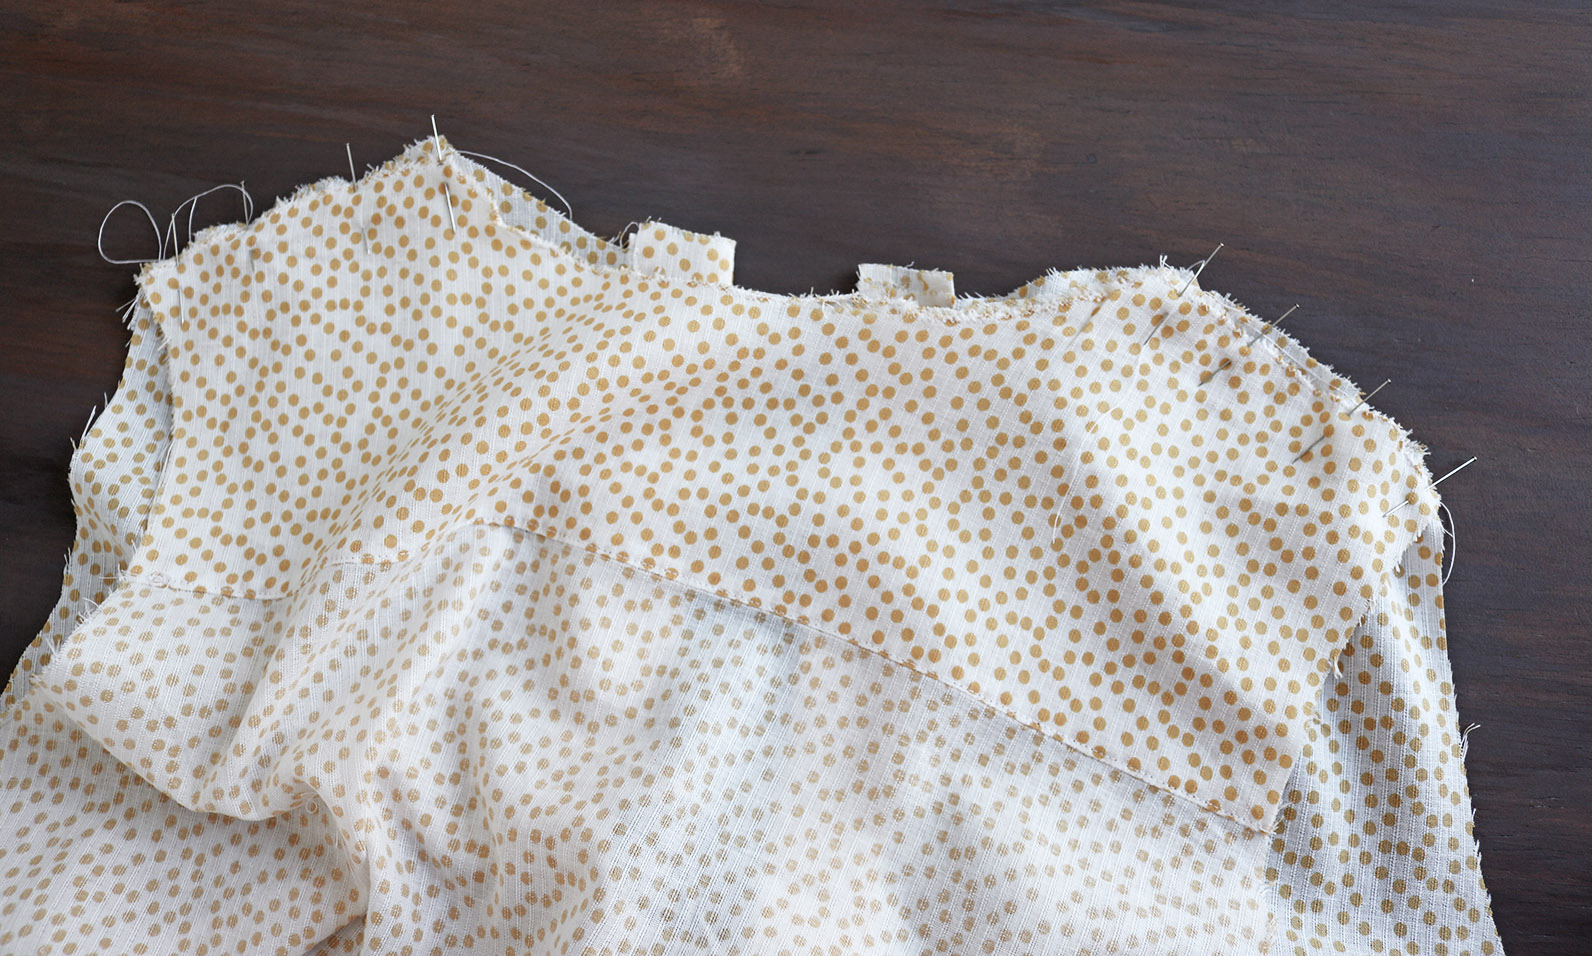
I then used that cut piece as a stencil to cut the yoke lining. From there I just pinned these 3 pieces together..
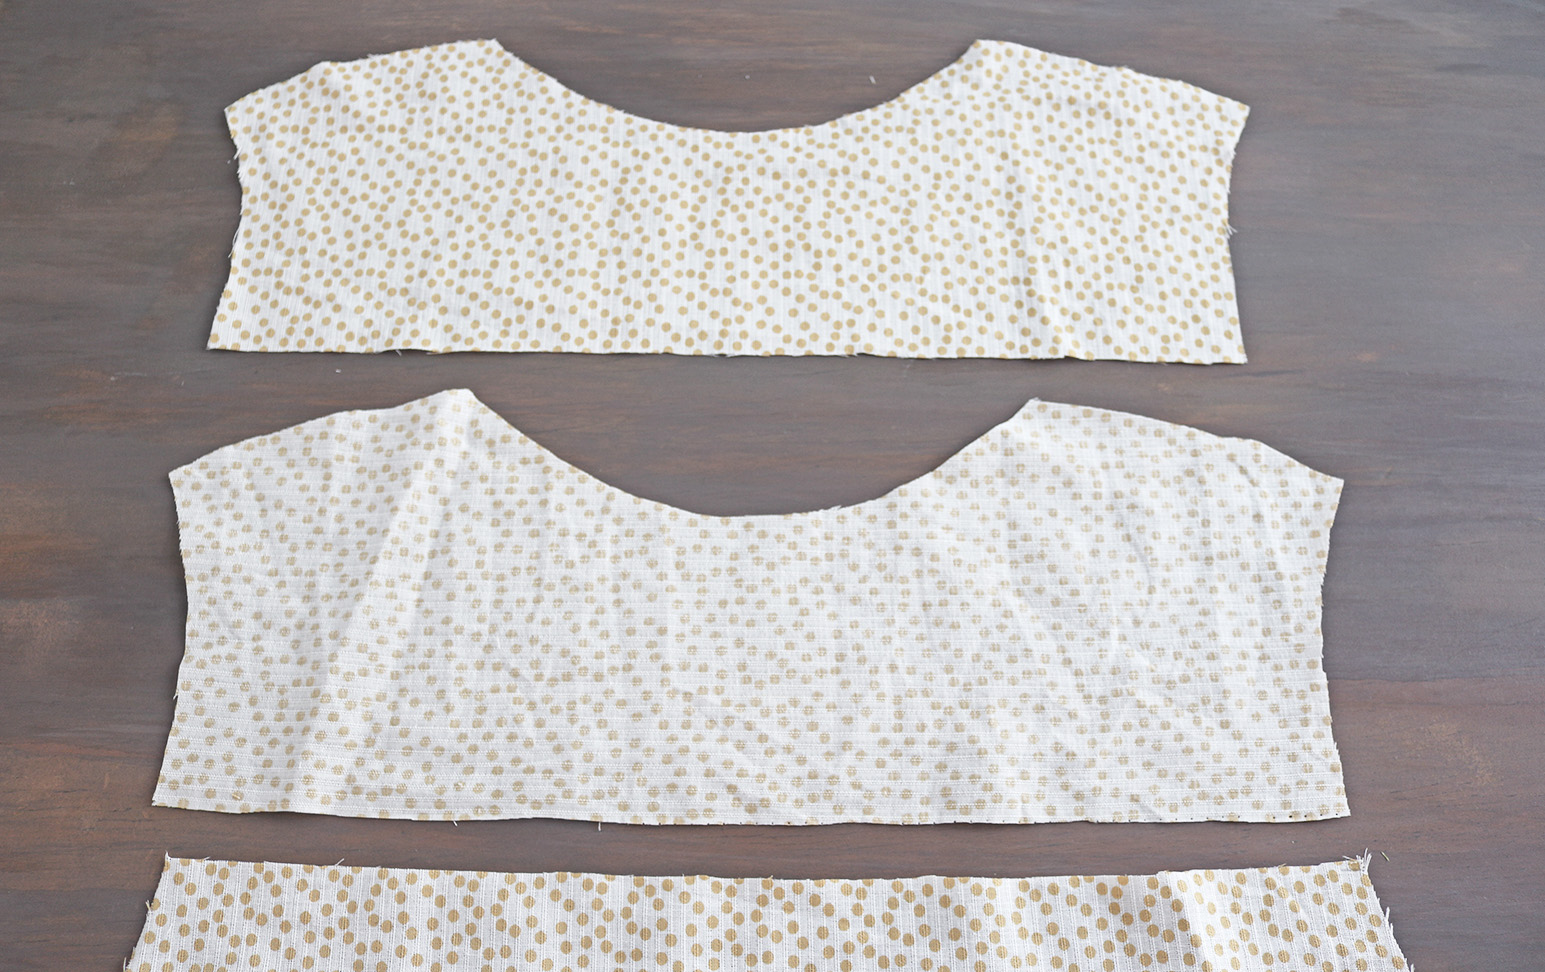
.. And sewed the yoke in place. For more detailed steps on the yoke process, see this post.
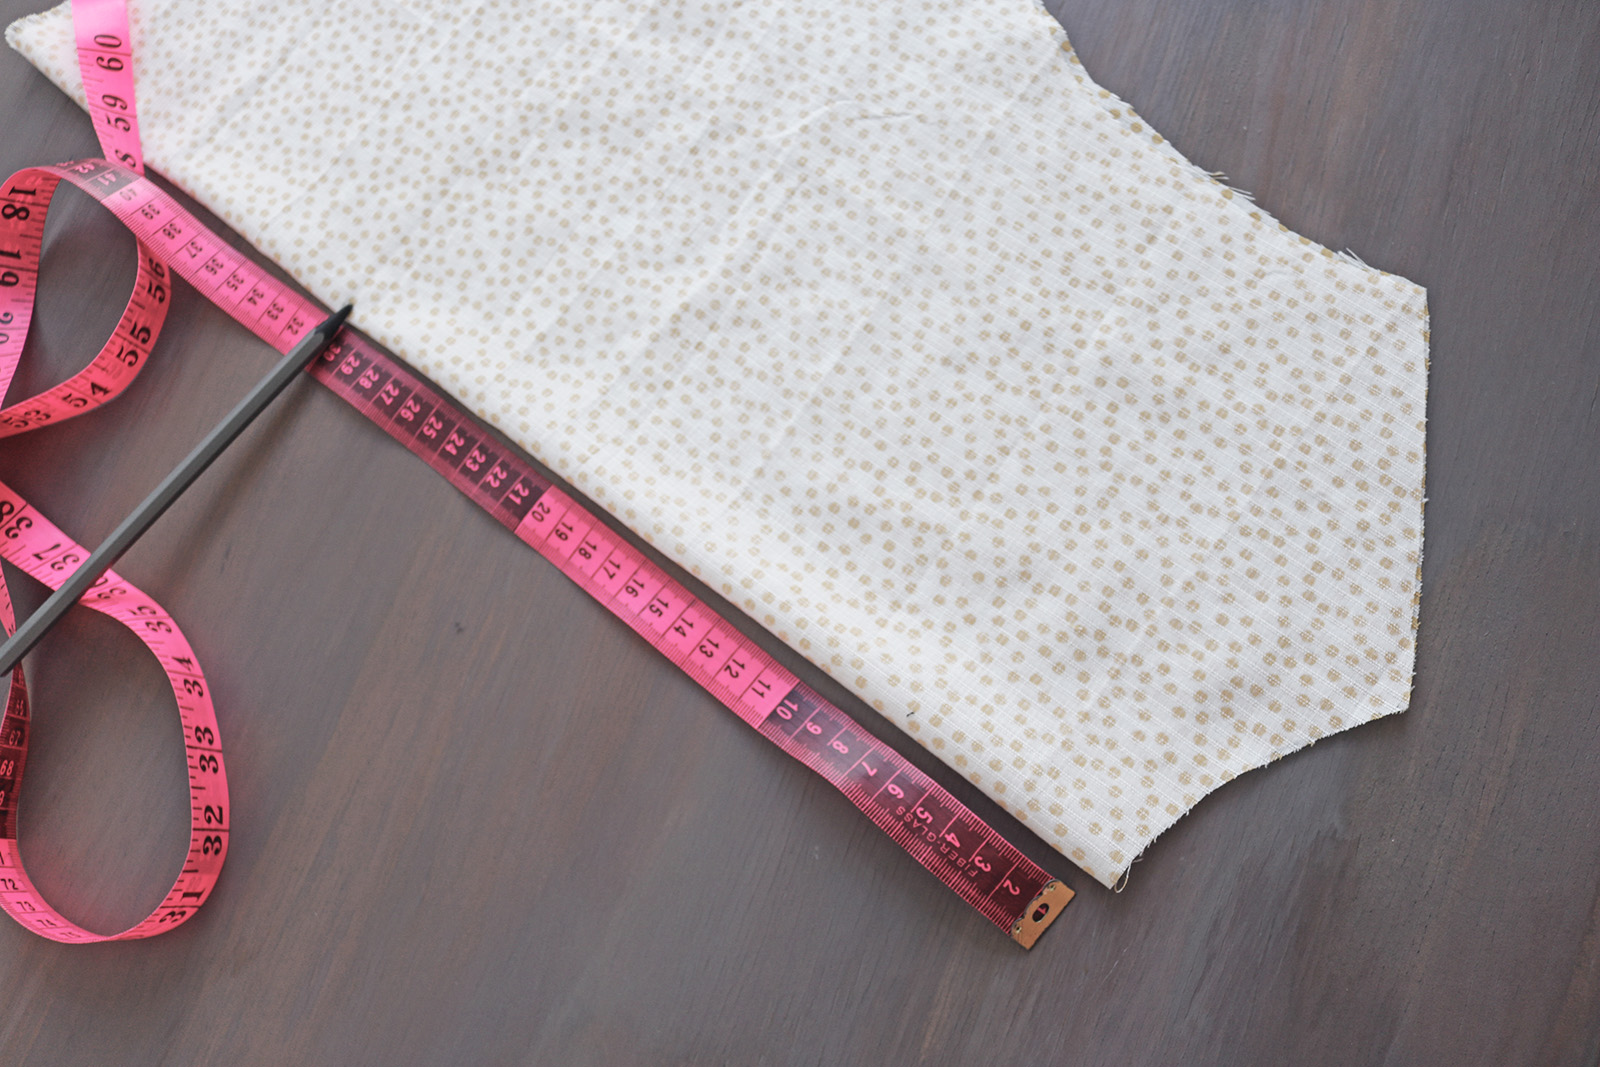
III. I then took the top front piece, folded it in half, and marked where I wanted the neckline/placket to end. for me that was around 33 cm. Cut down the center of the top until my mark.
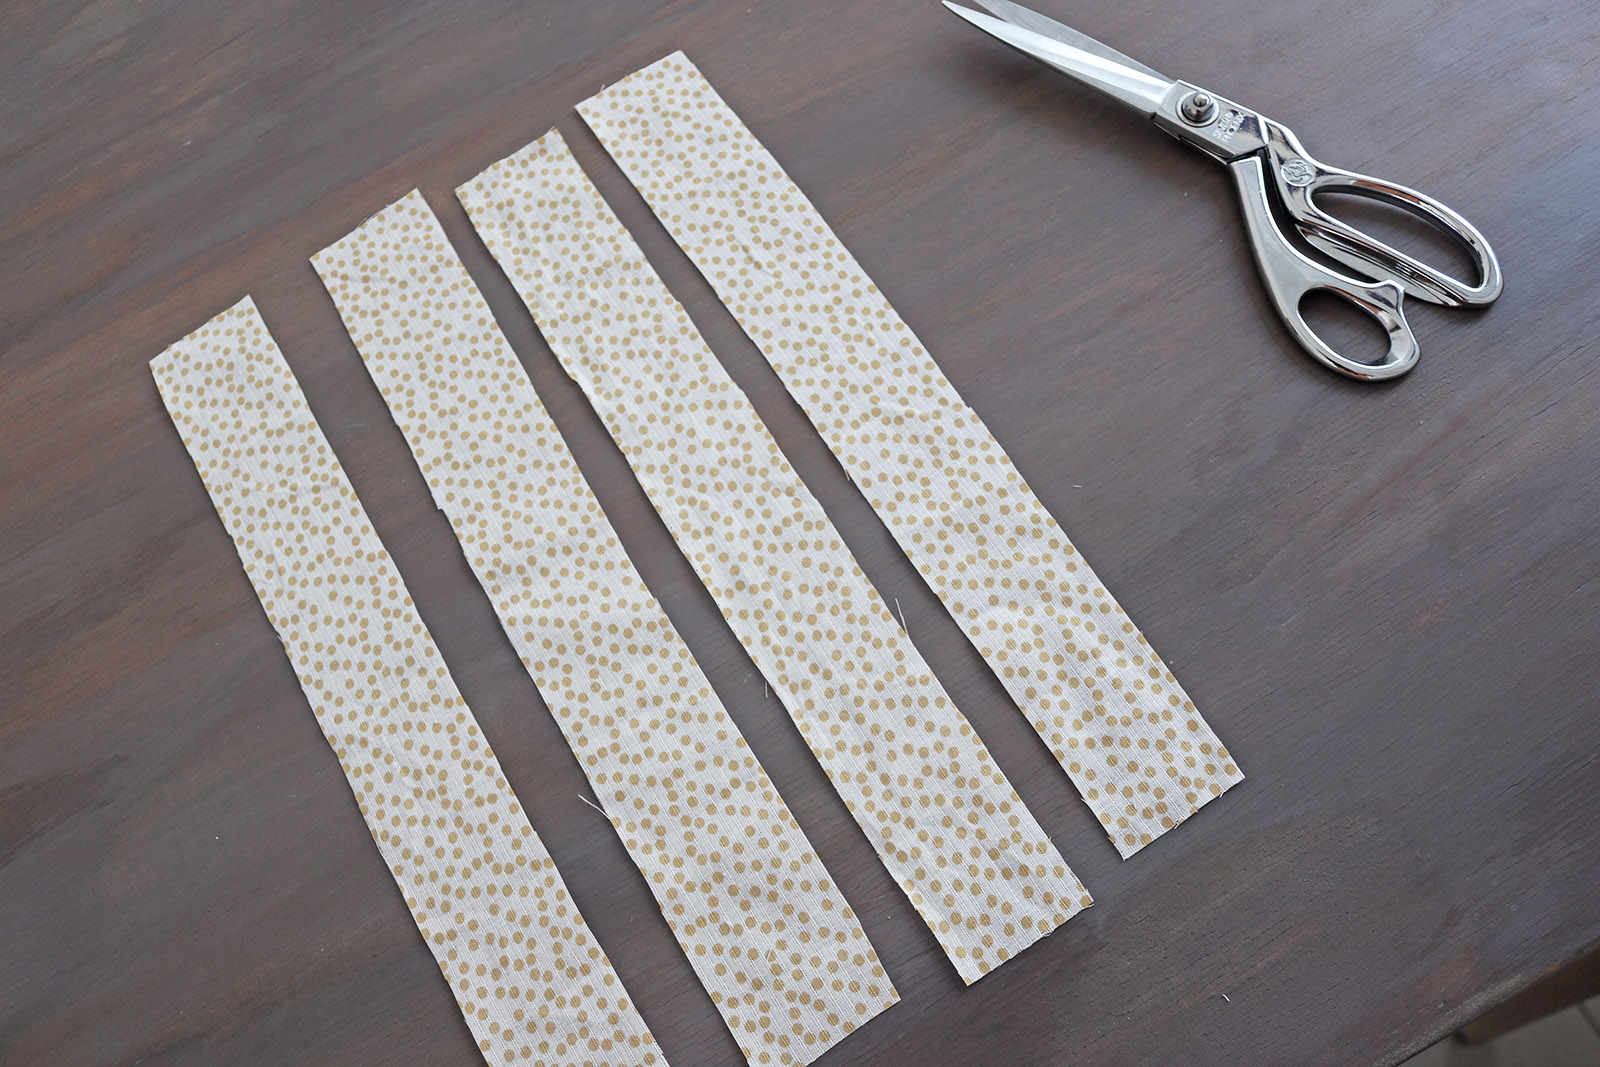
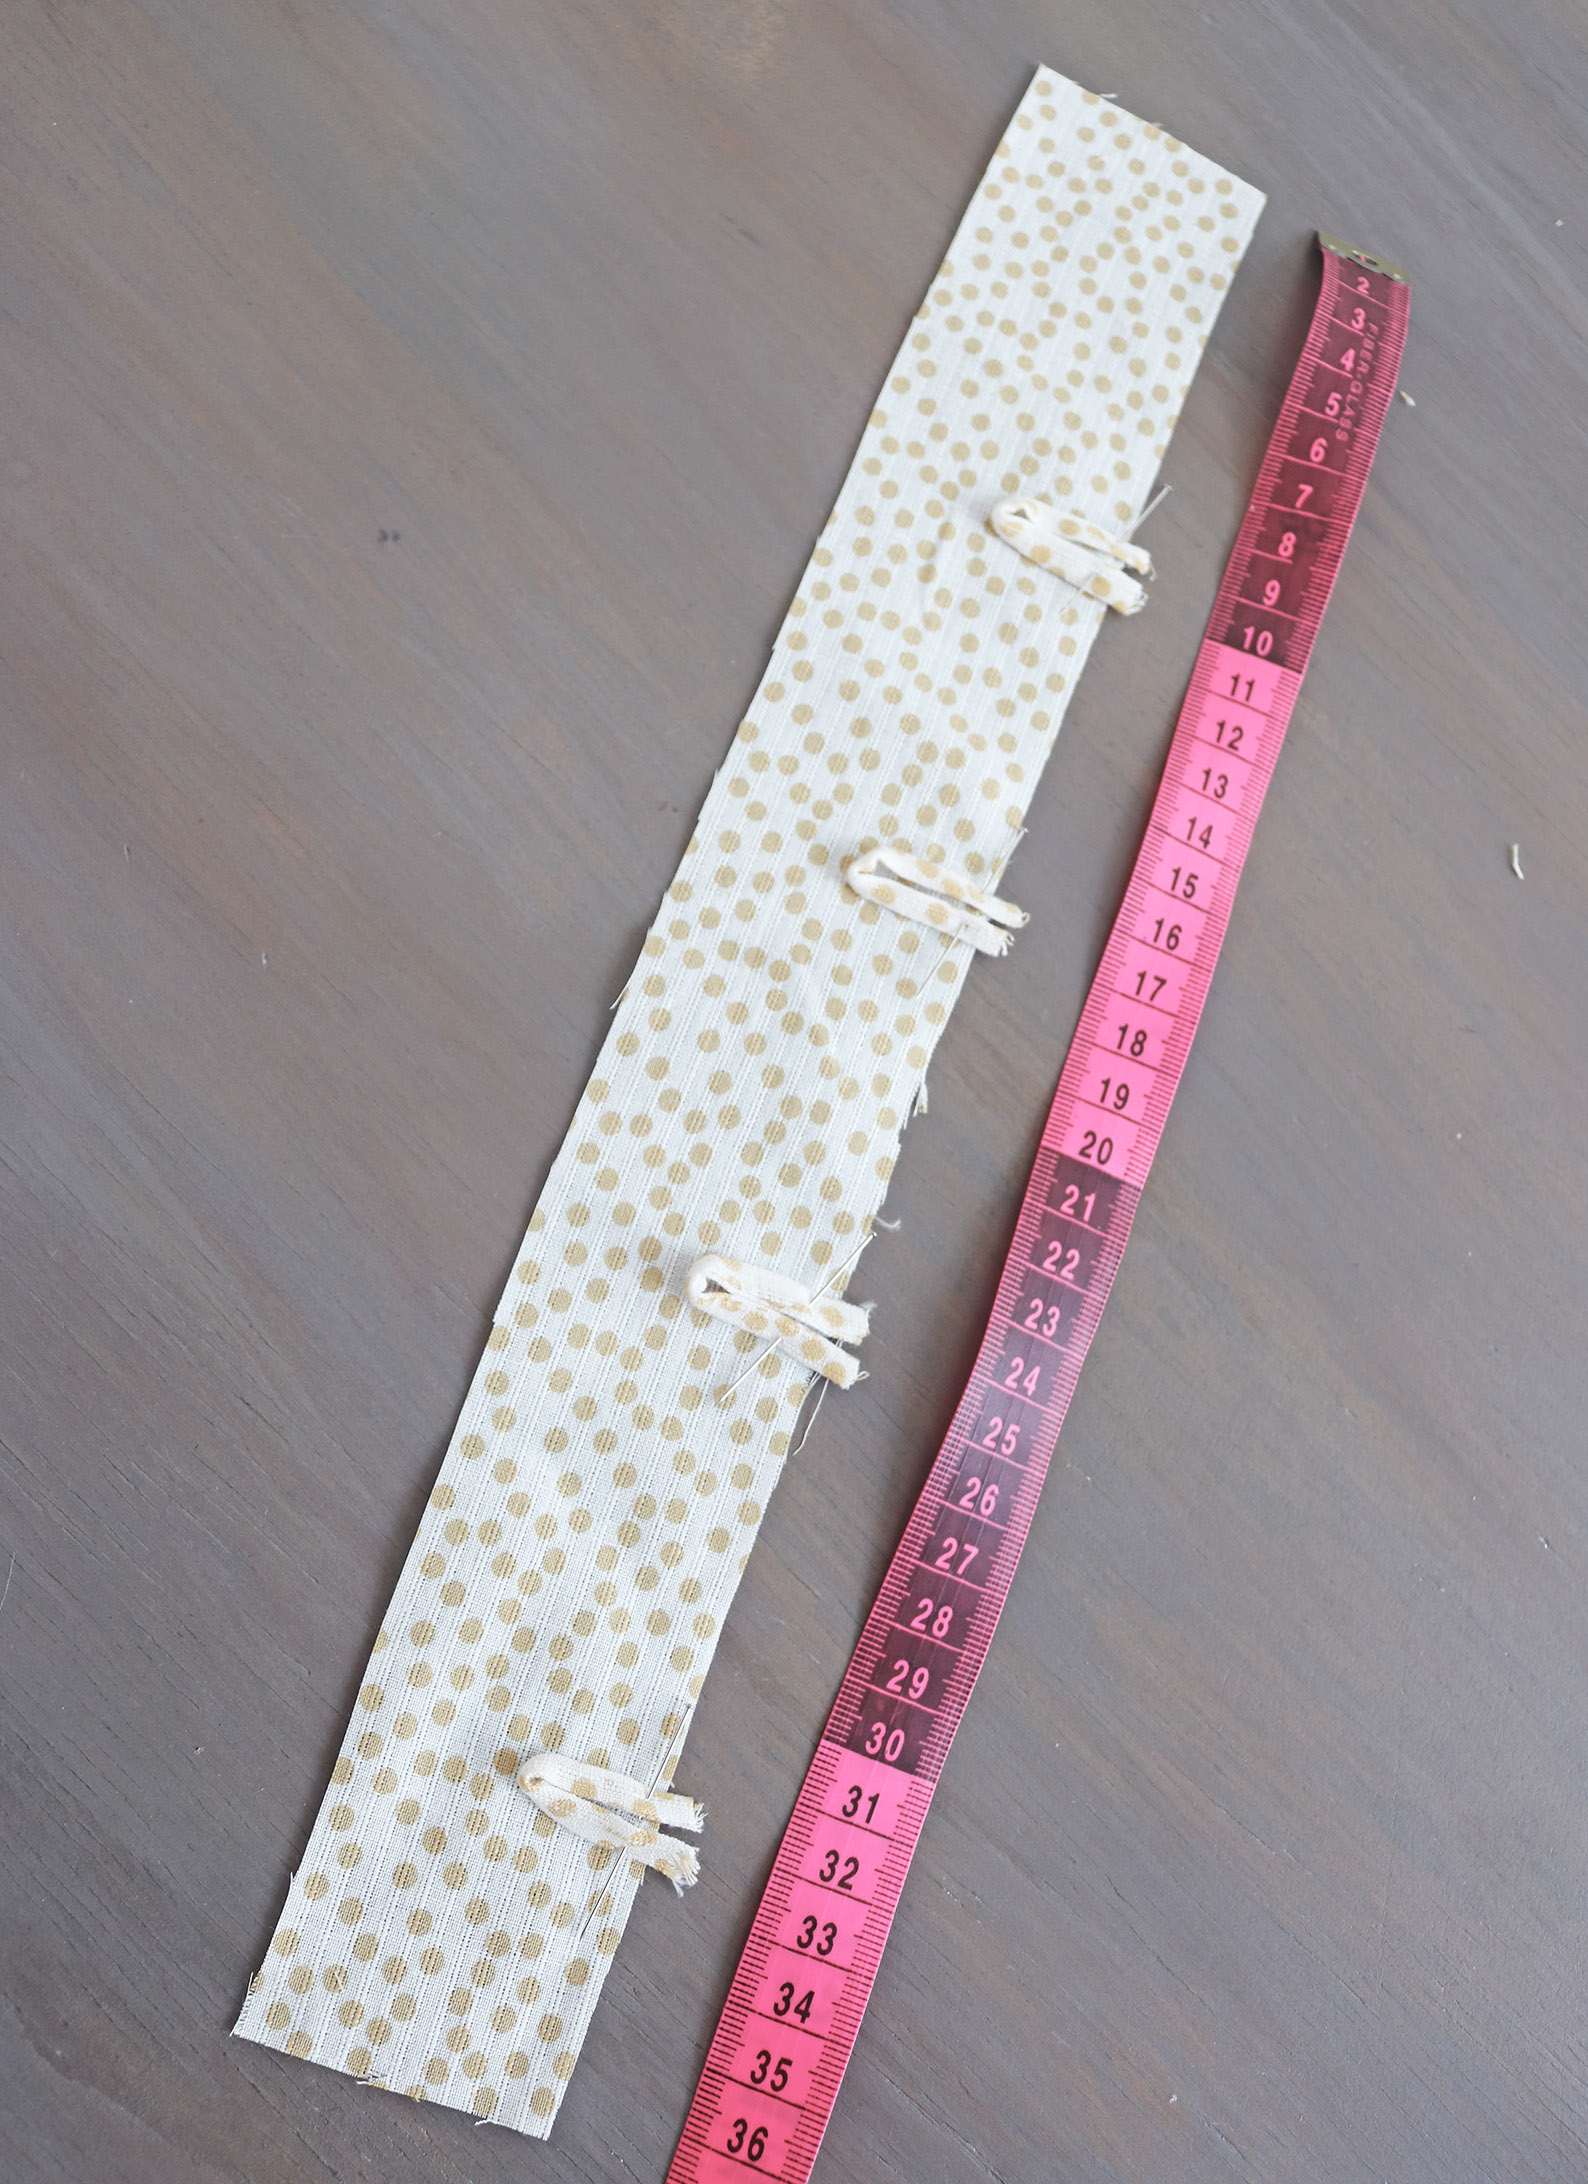
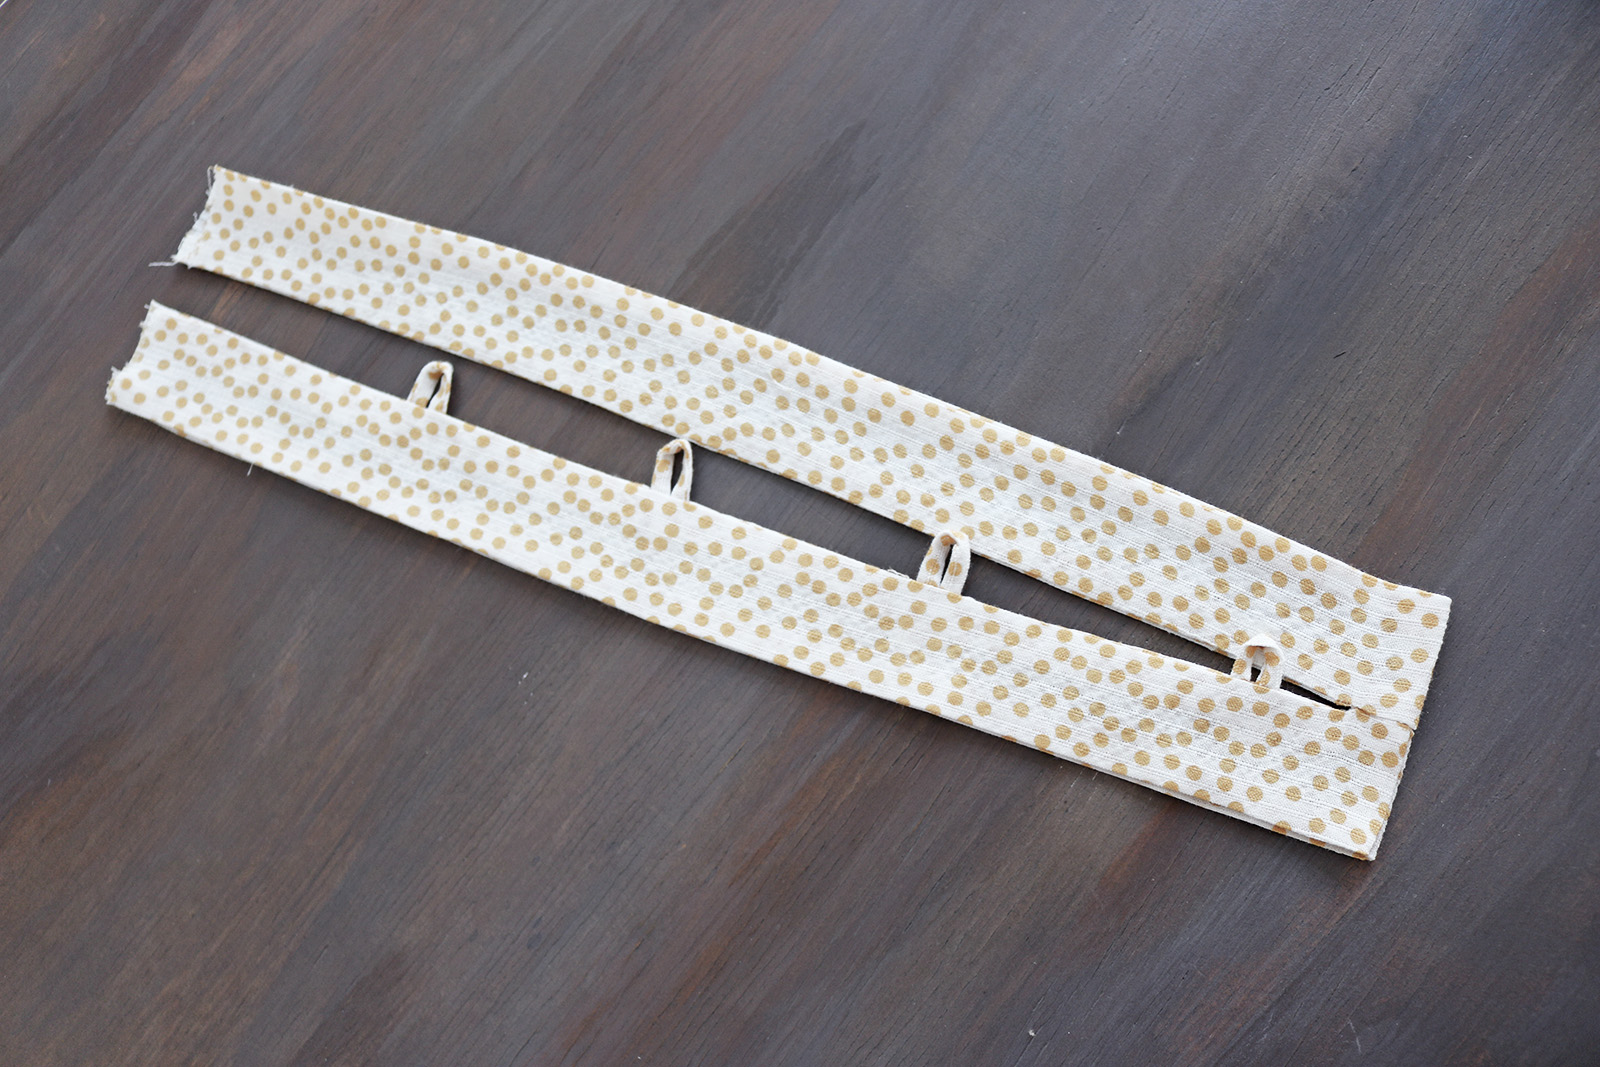
I then cut four long rectangular pieces of fabric, about 3 cm wide and in length 3.5 cm longer than the depth of the neckline I measured in the previous step.
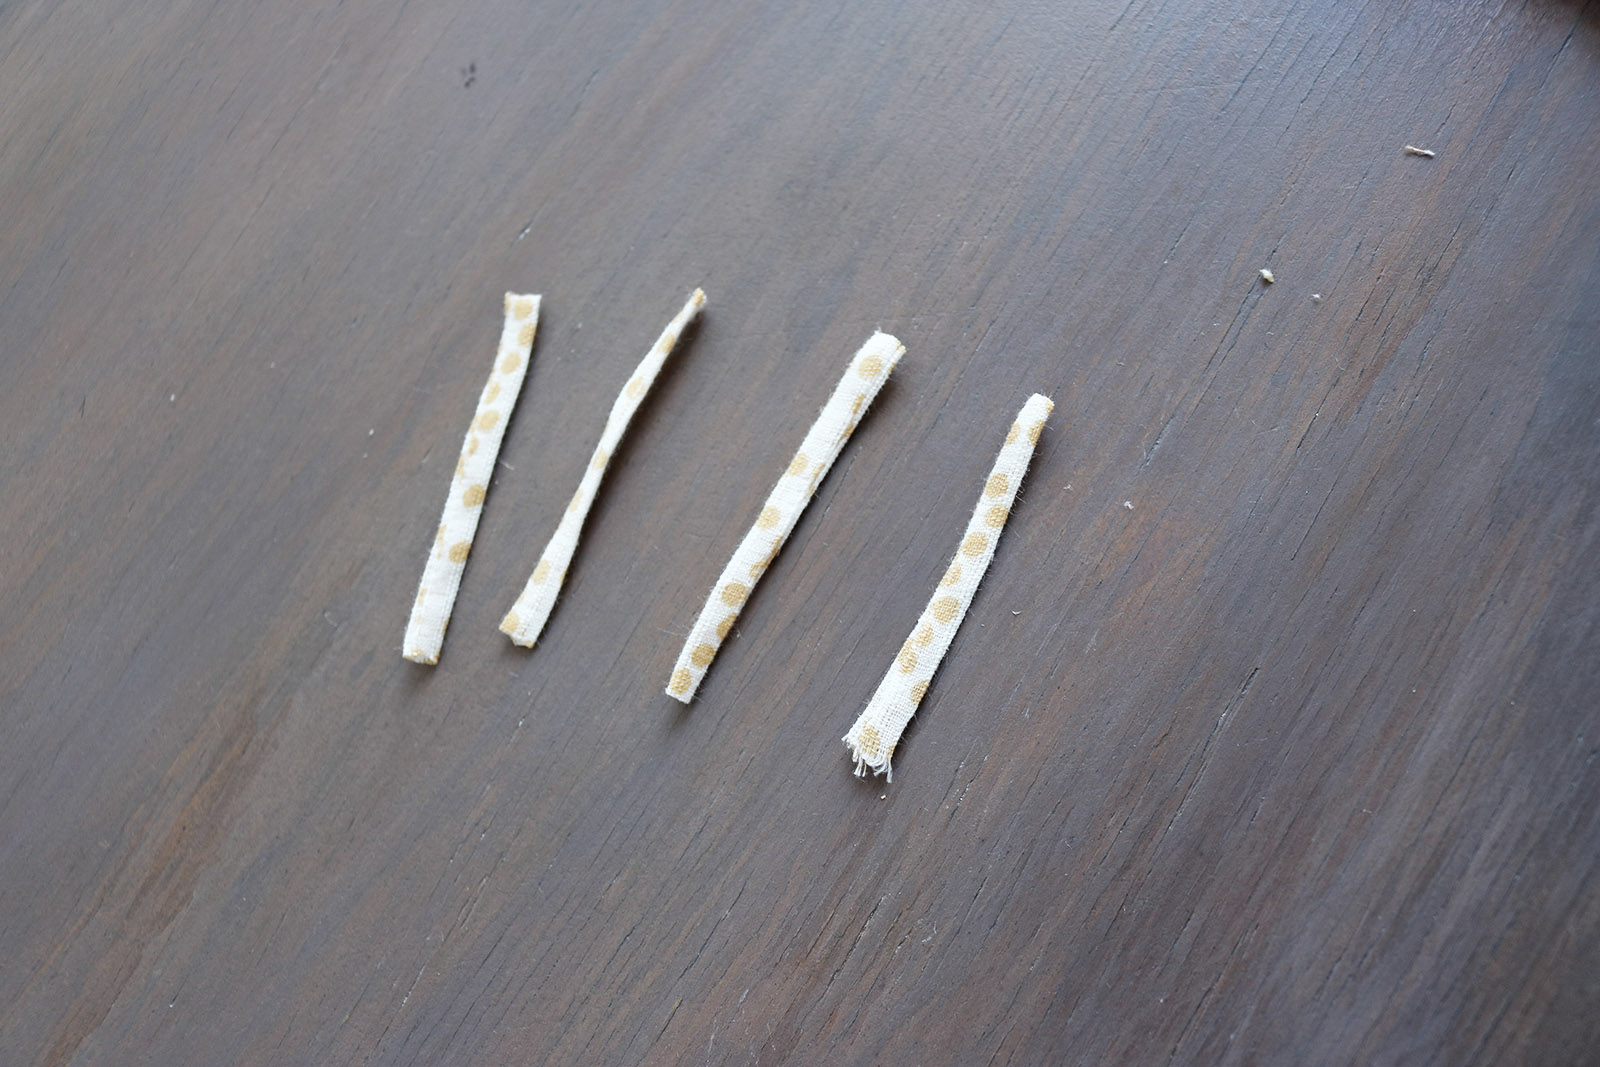
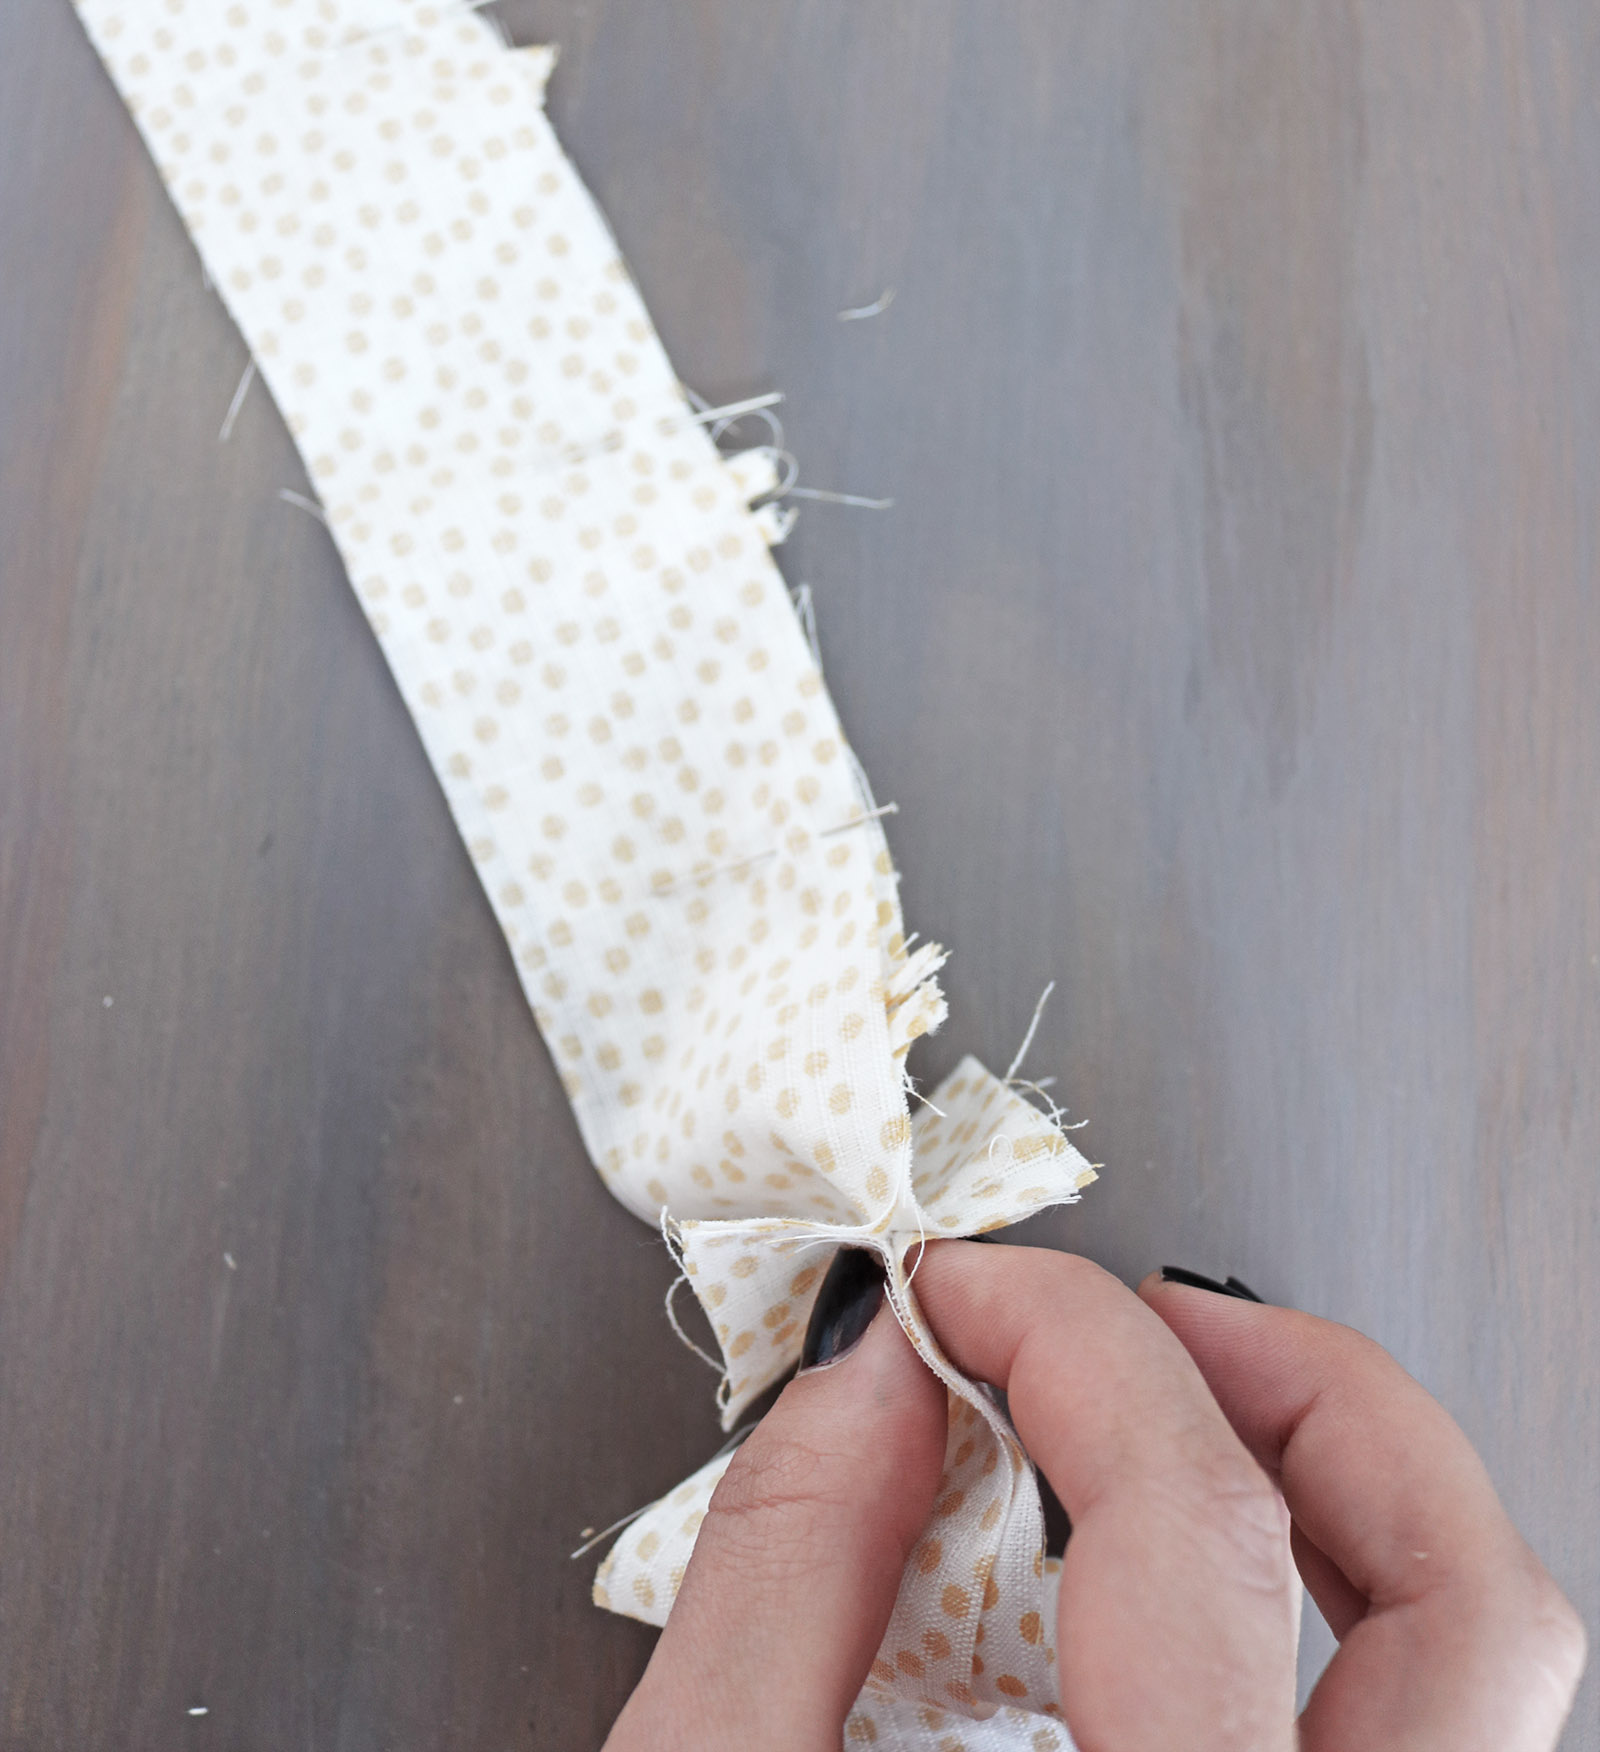
I then followed the method from this post to make string from my fabric. Just enough to have 4 little pieces, 3-4 cm long each.
IV. I then took one of the rectangular pieces and folded the little string pieces in half, pinning them at equal distances along the long edge of the rectangle, on the right side. As you see below I put the first one about 10 cm down from the top, and folded the hoops so the folds were sort of pointed downwards. I then sewed the hoops in place.
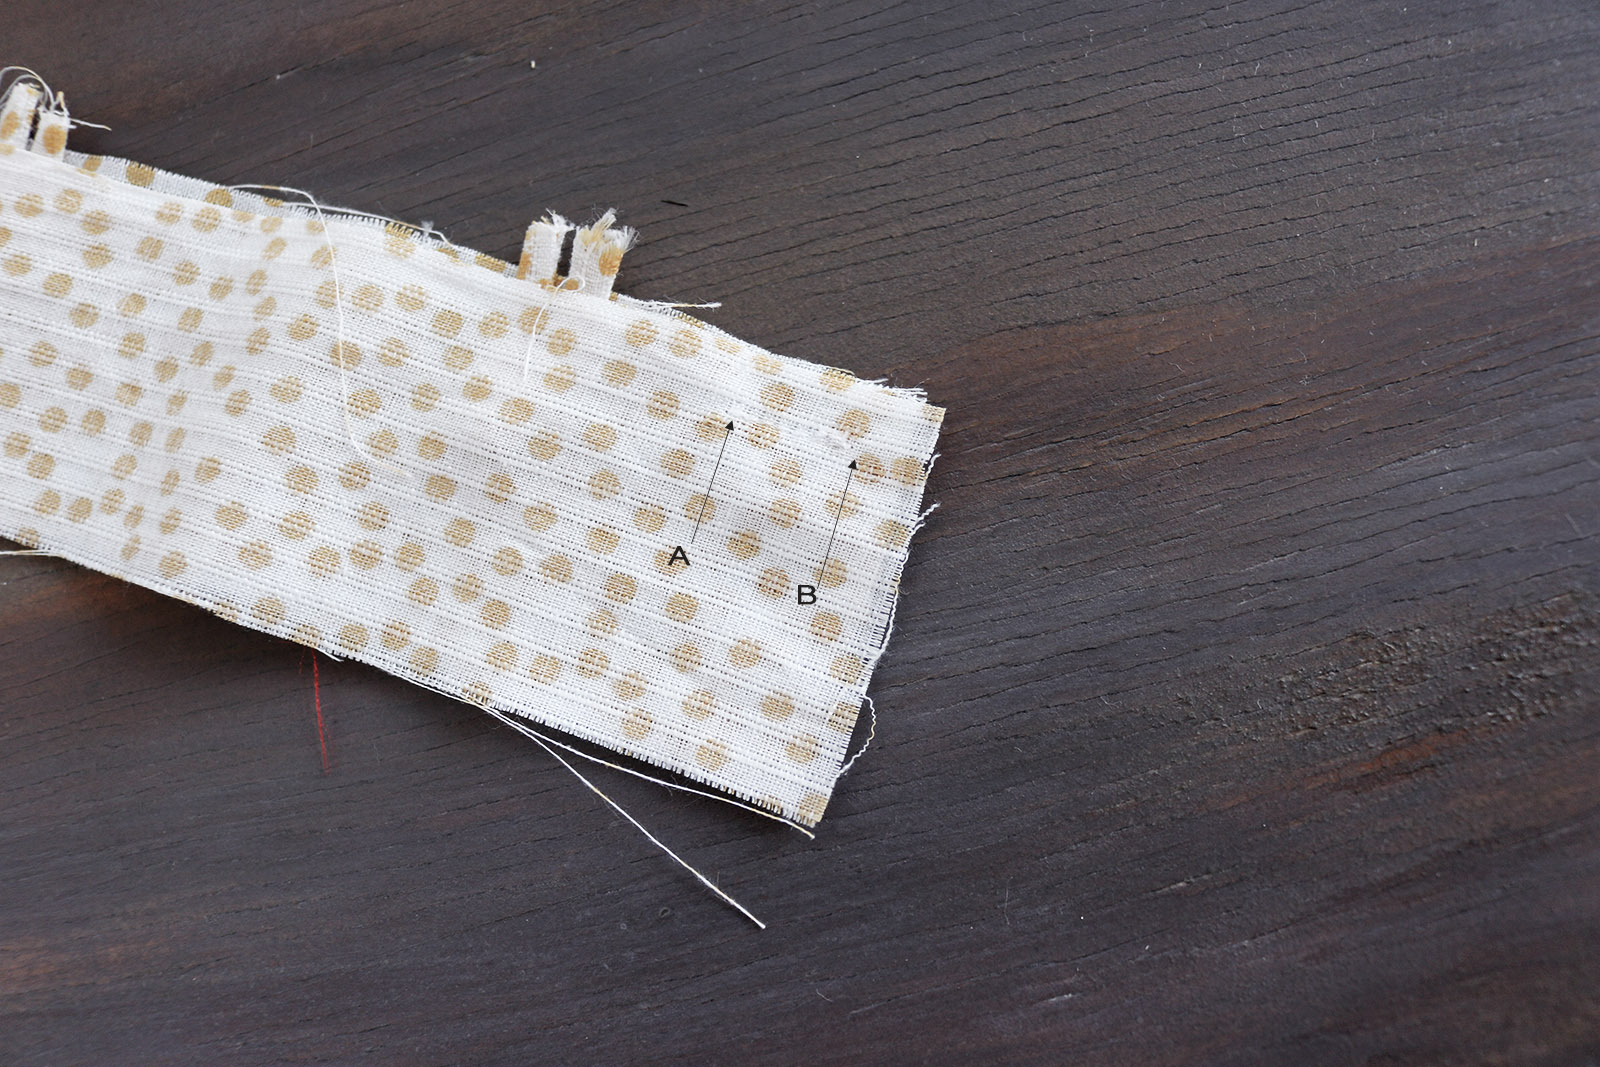
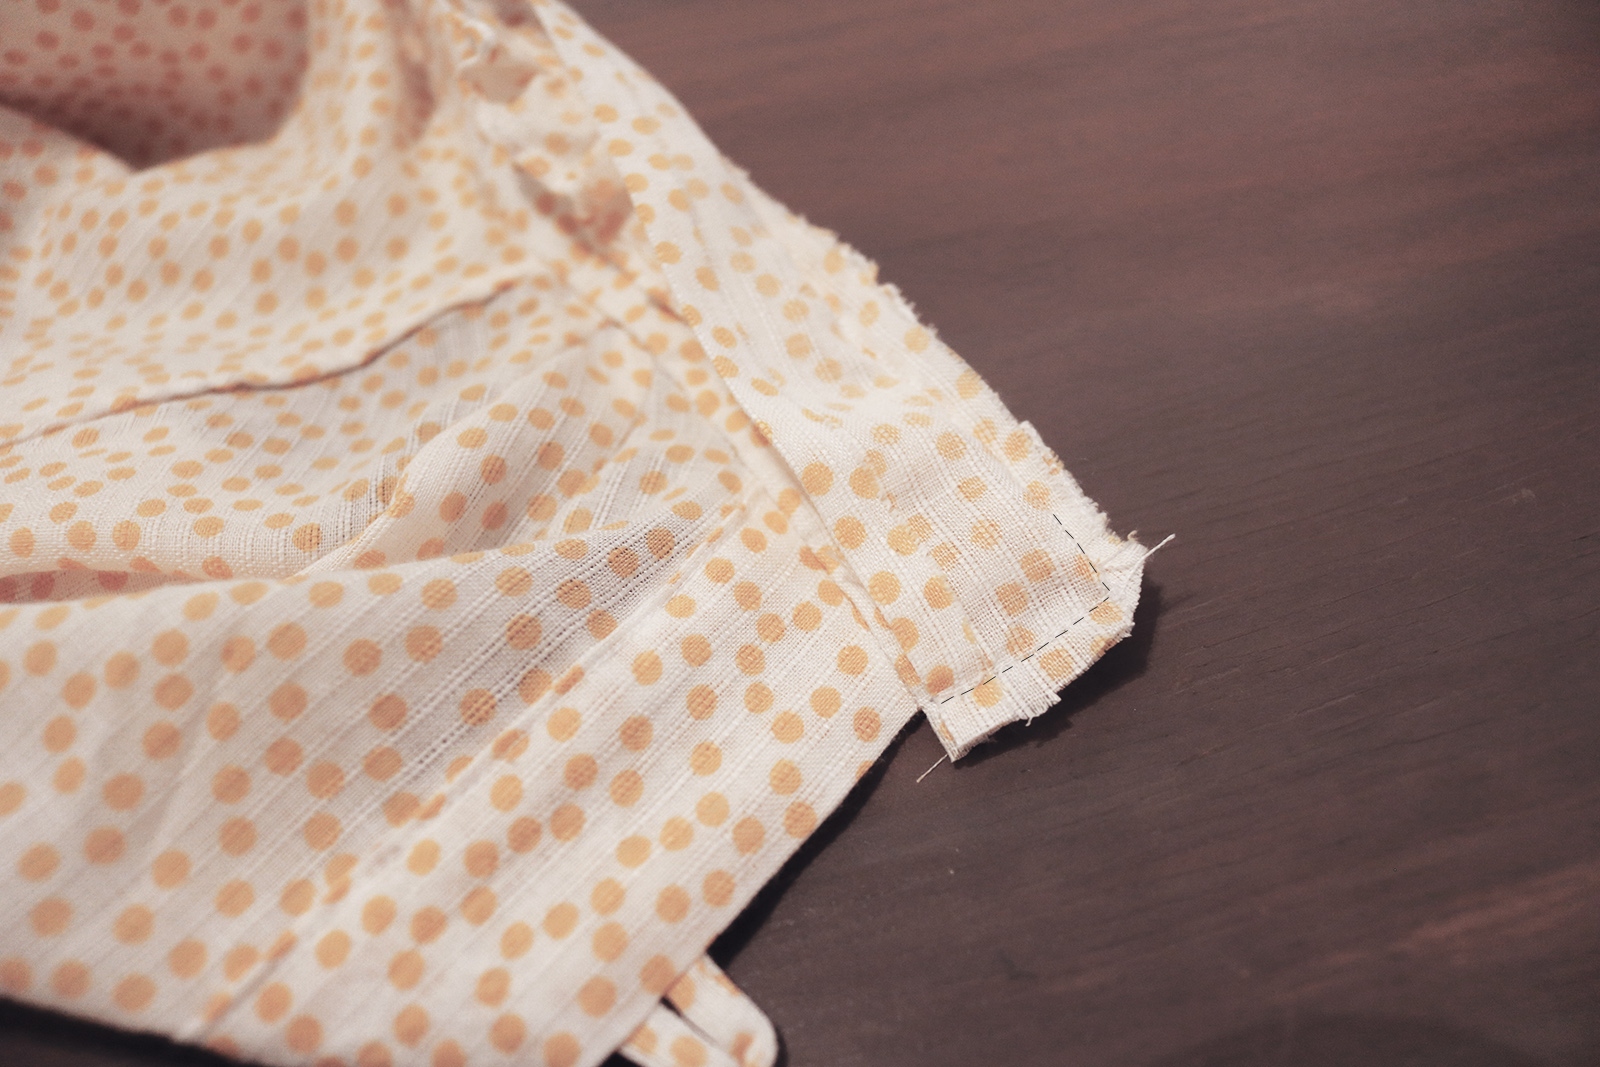
Next I took the pice, layered it with another one of the rectangles right sides facing, and placed along the slit I had cut on the top so the top matched the neckline of the top. Then I marked the end of the slit with a pin (point A). Point B is where the seam allowance starts.
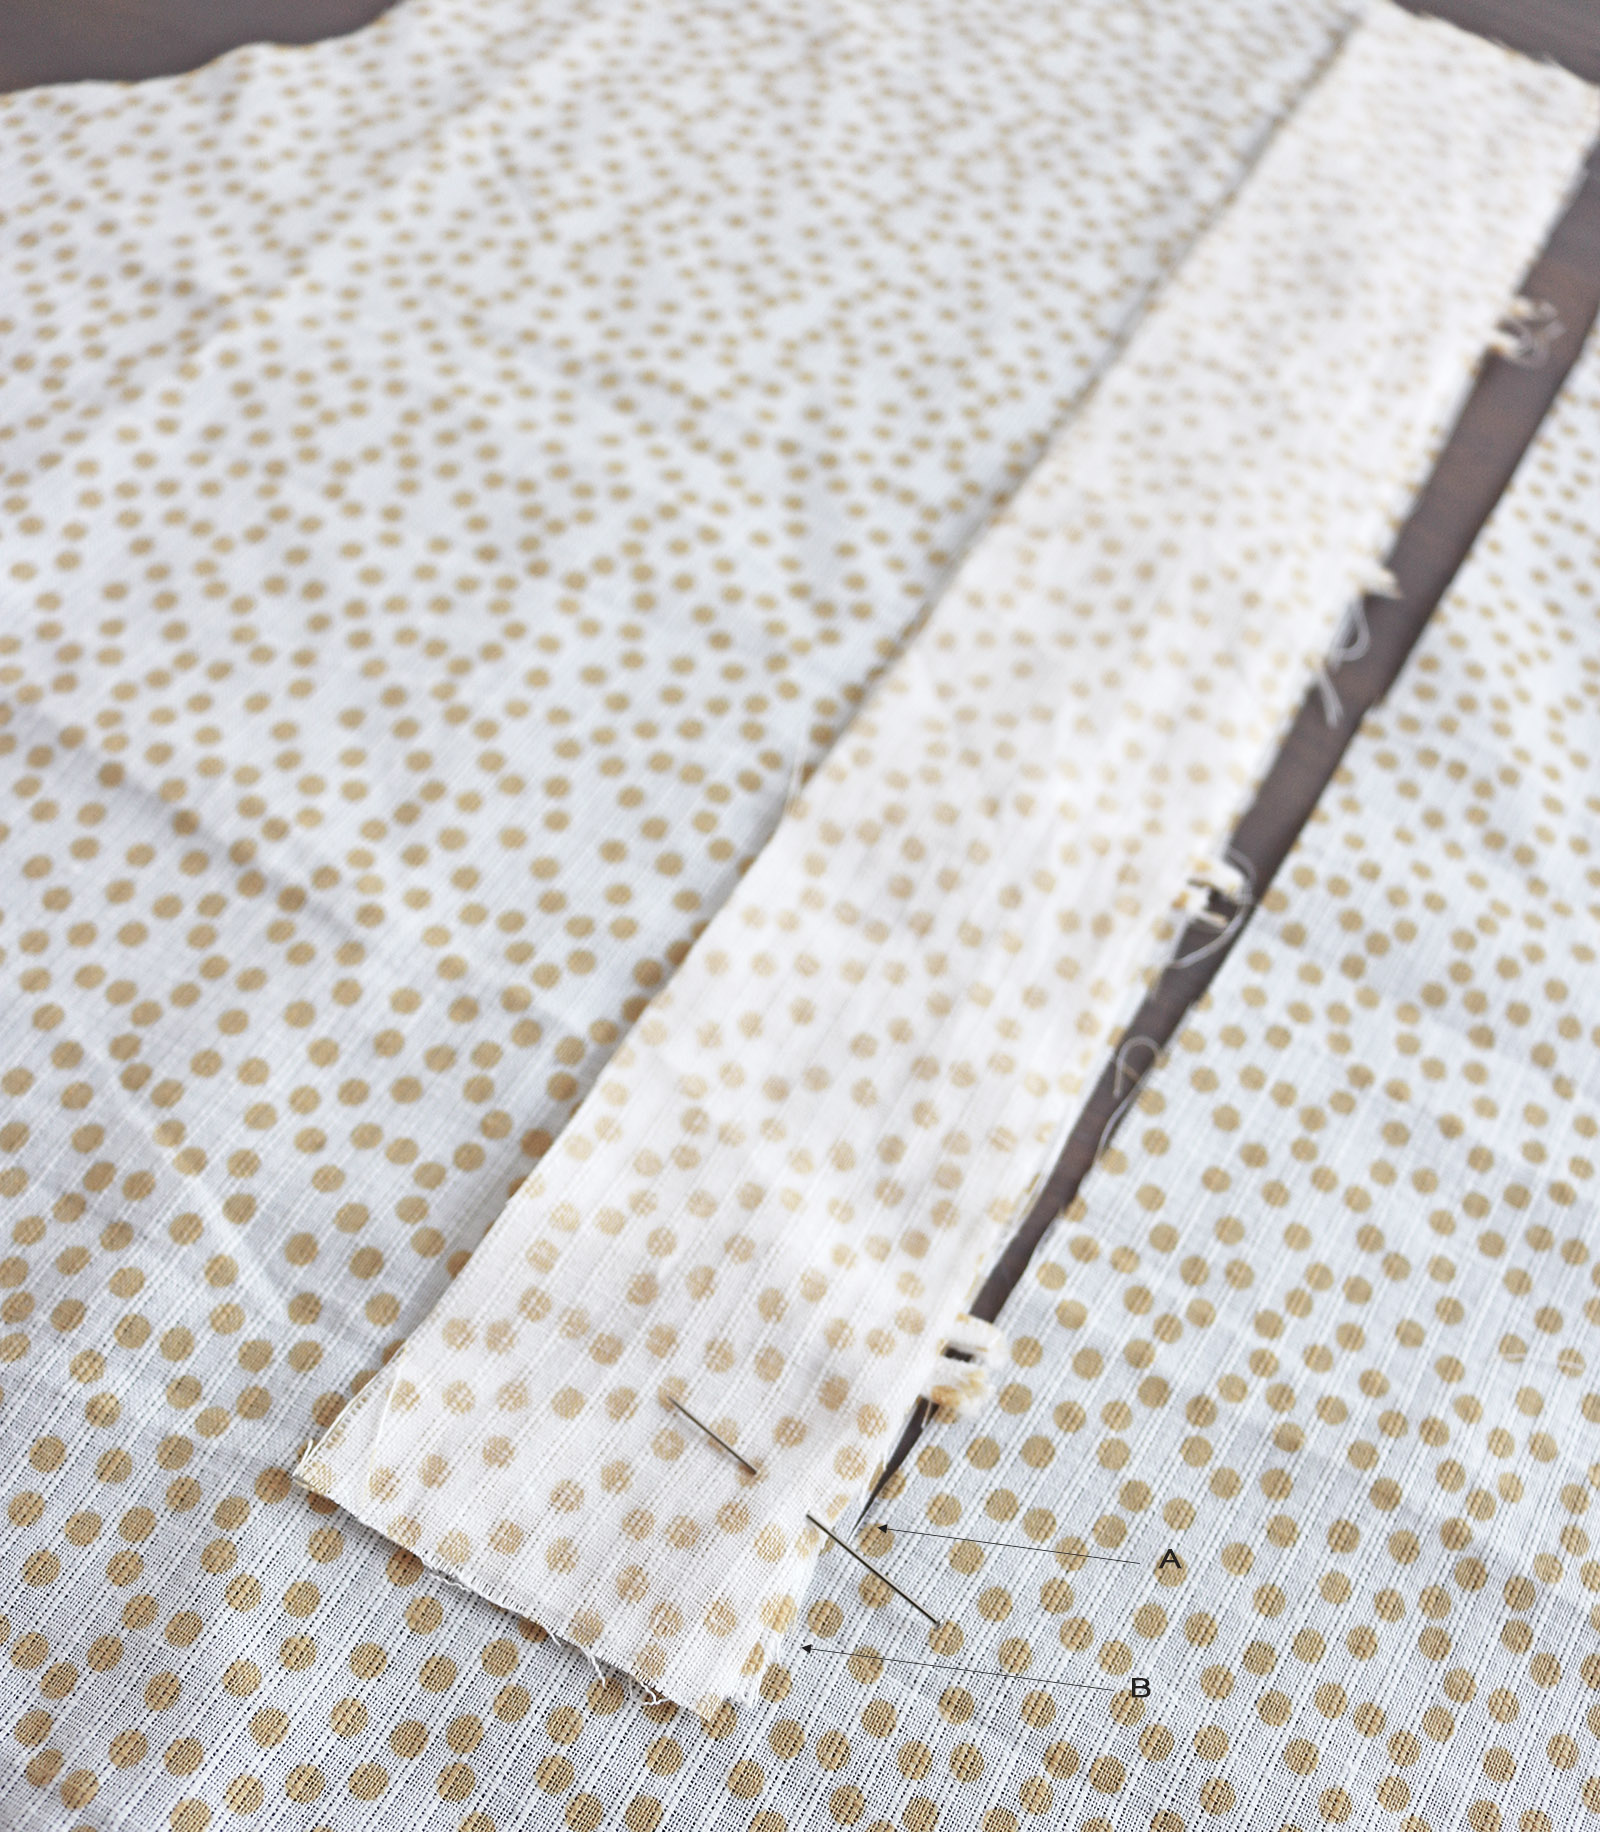
I then sewed a straight stitch between points A and B.
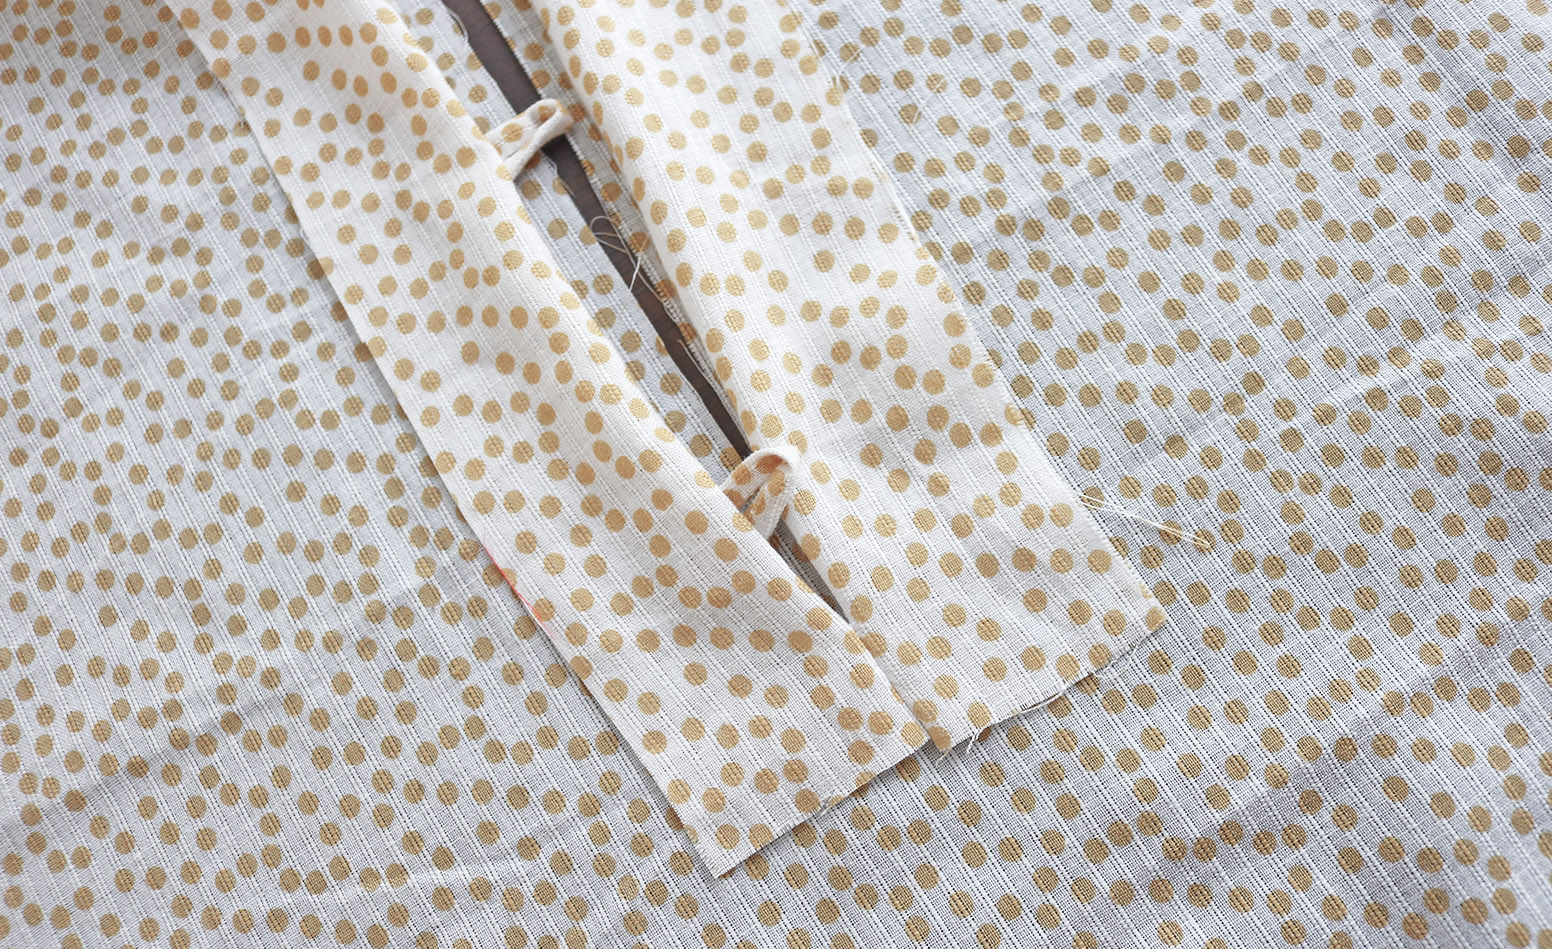
Now, when opening the pieces up and placing over the slit, we can see the placket starting to form.
V. To continue constructing the placket, I repeated the above step of adding the short stitch to the end of the other pair of rectangles, placed right sides facing. Then I took both pieces, aligned the little stitched parts, and pinned the long edges on the side of the hoops together. Then sewed first the side with the hoops, stopping right at the short A-B stitch, and continued on the other side.
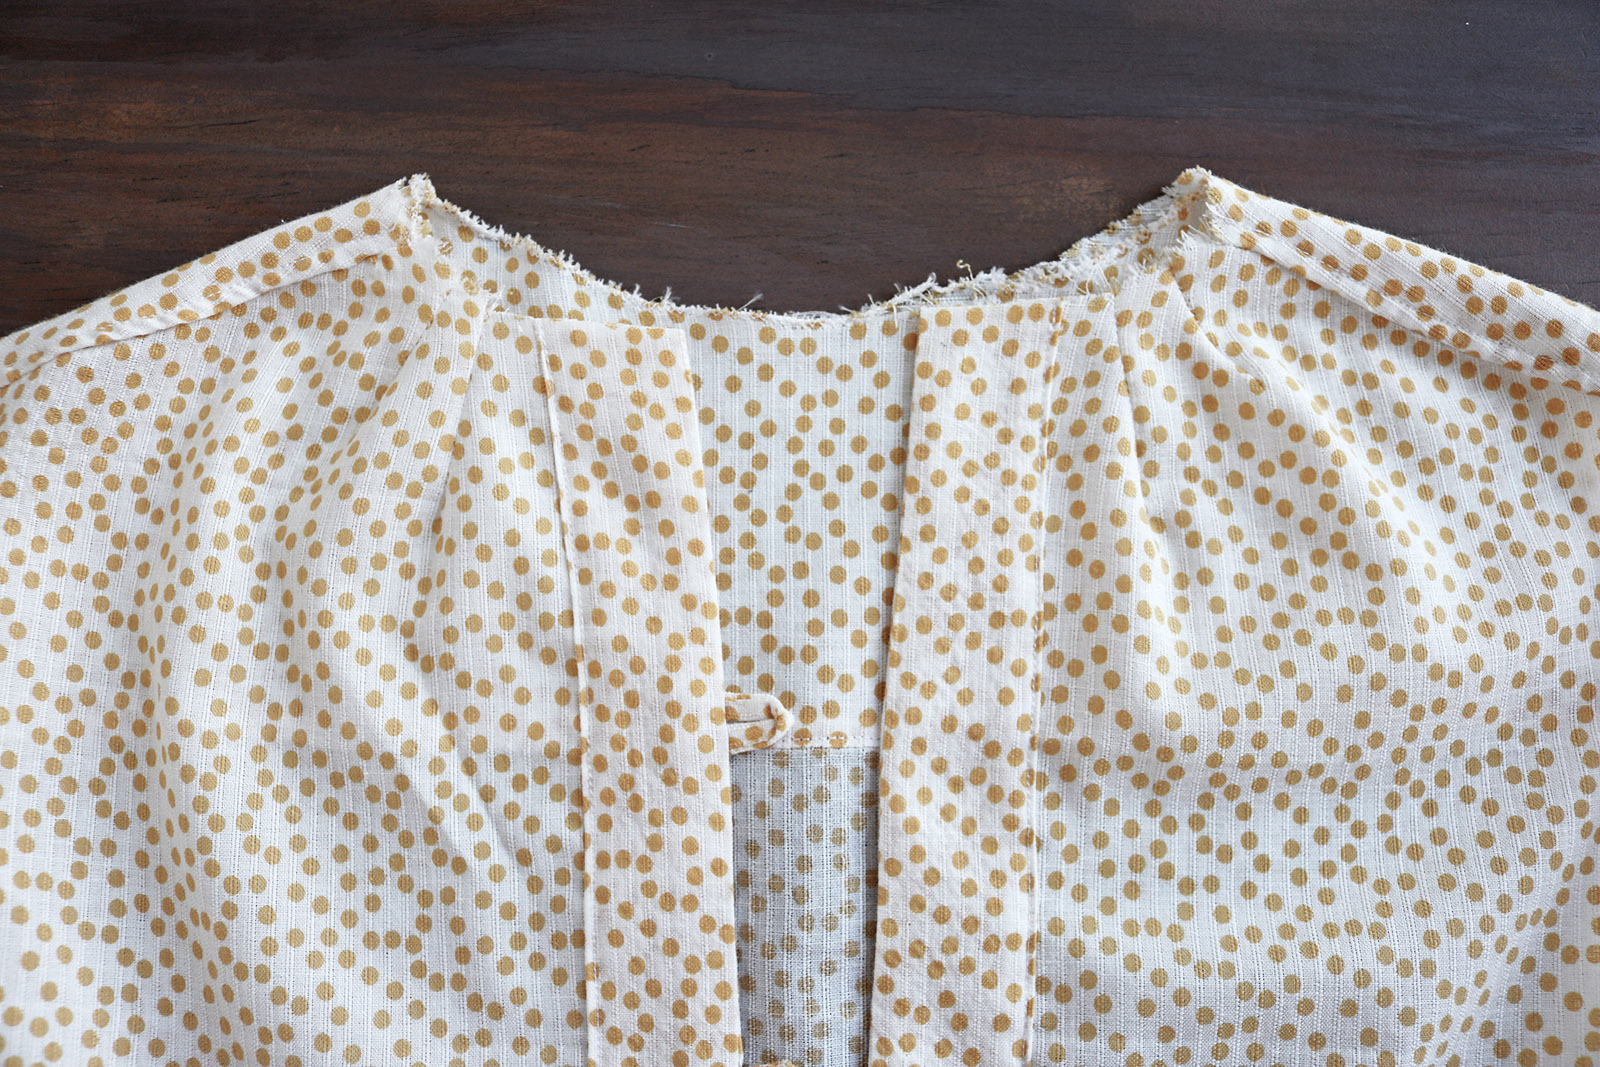
VI. After that step, when turning the placket right side out and pressing to fold a 0.7 cm seam allowance all around, I had this.
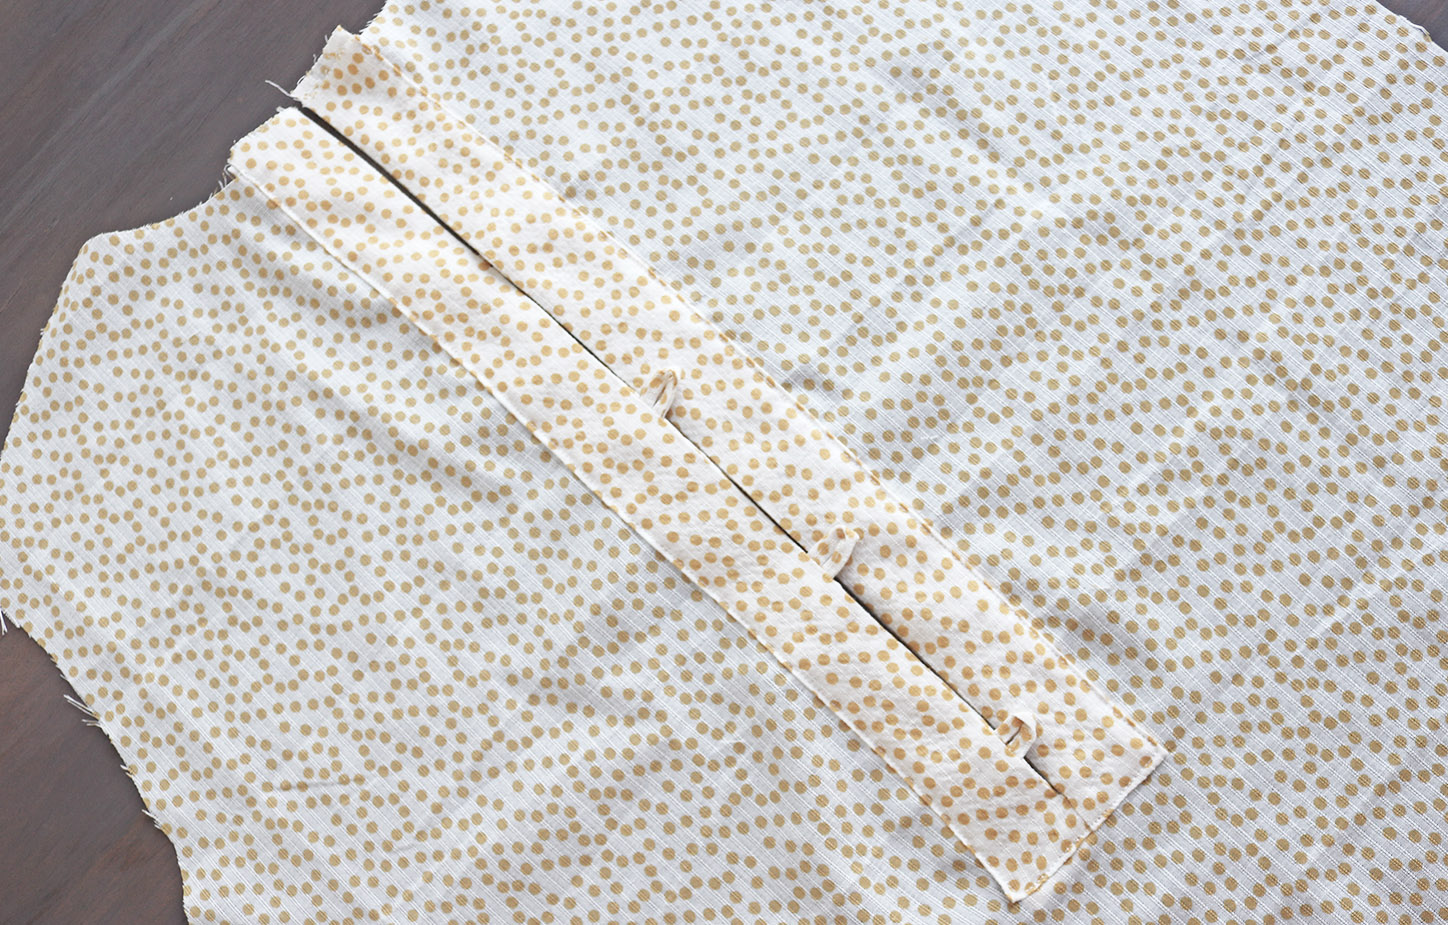
VII. Next I inserted the placket into its place, so the starting point of the short A-B stitch aligned with the bottom of the slit I had cut, and the placket sandwiched the top.
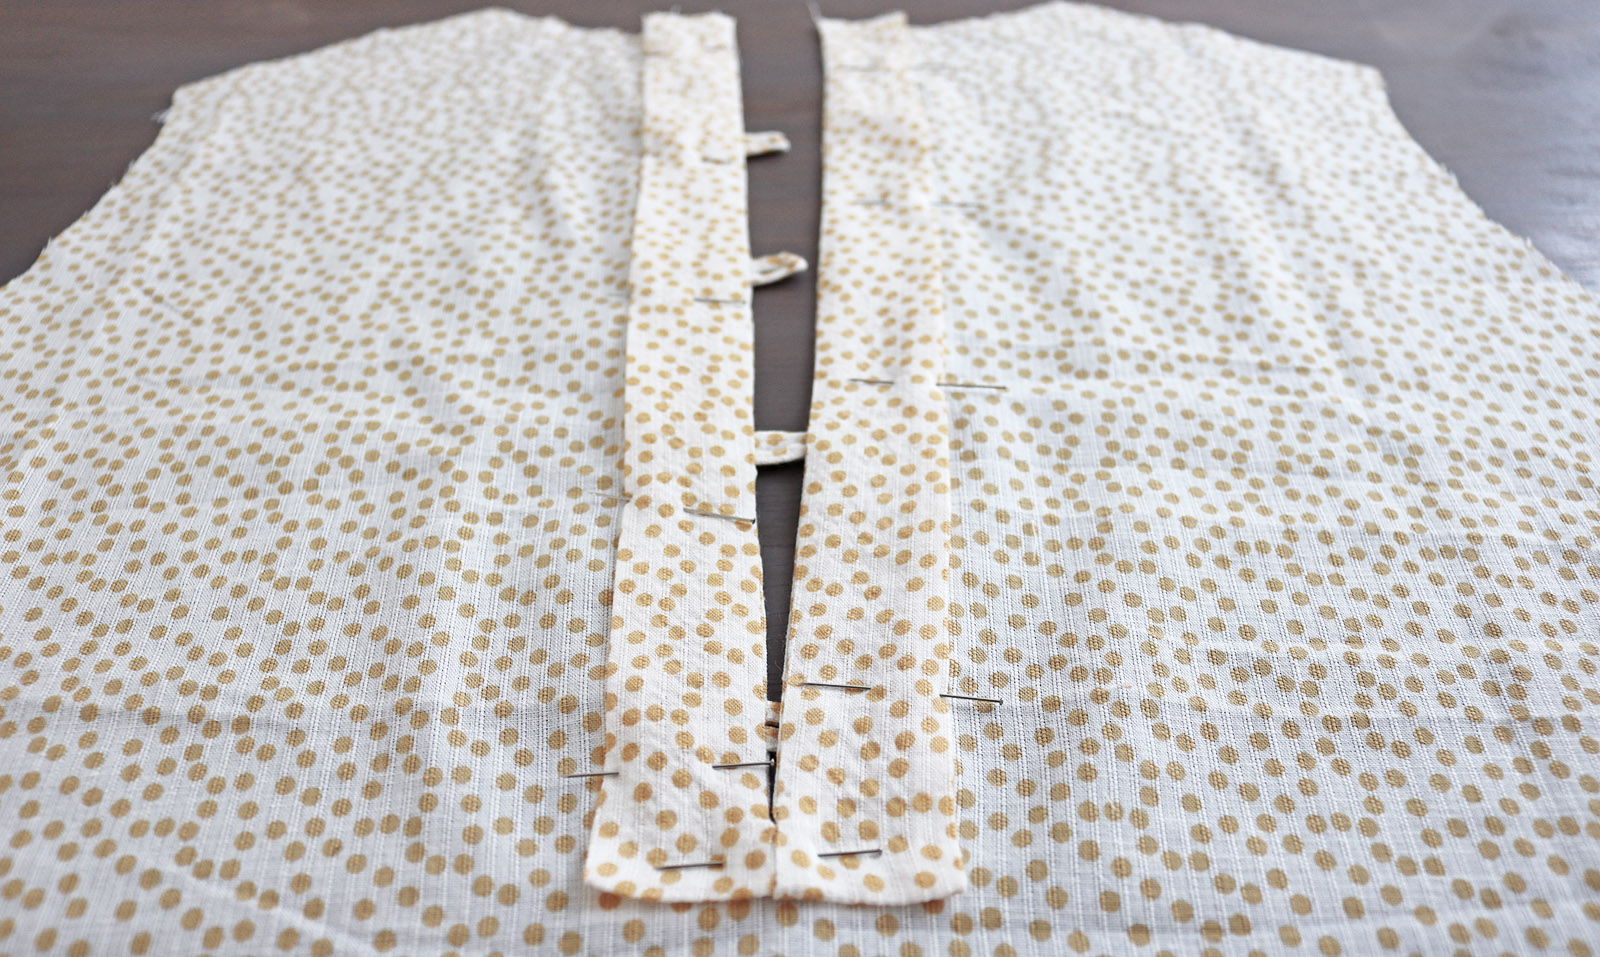
After sewing all around at the edges, I had this.
VIII. Next up where the shoulders, where I did a simple flat-felled seams.
IX. And the sleeves, which are explained in a separate post here.

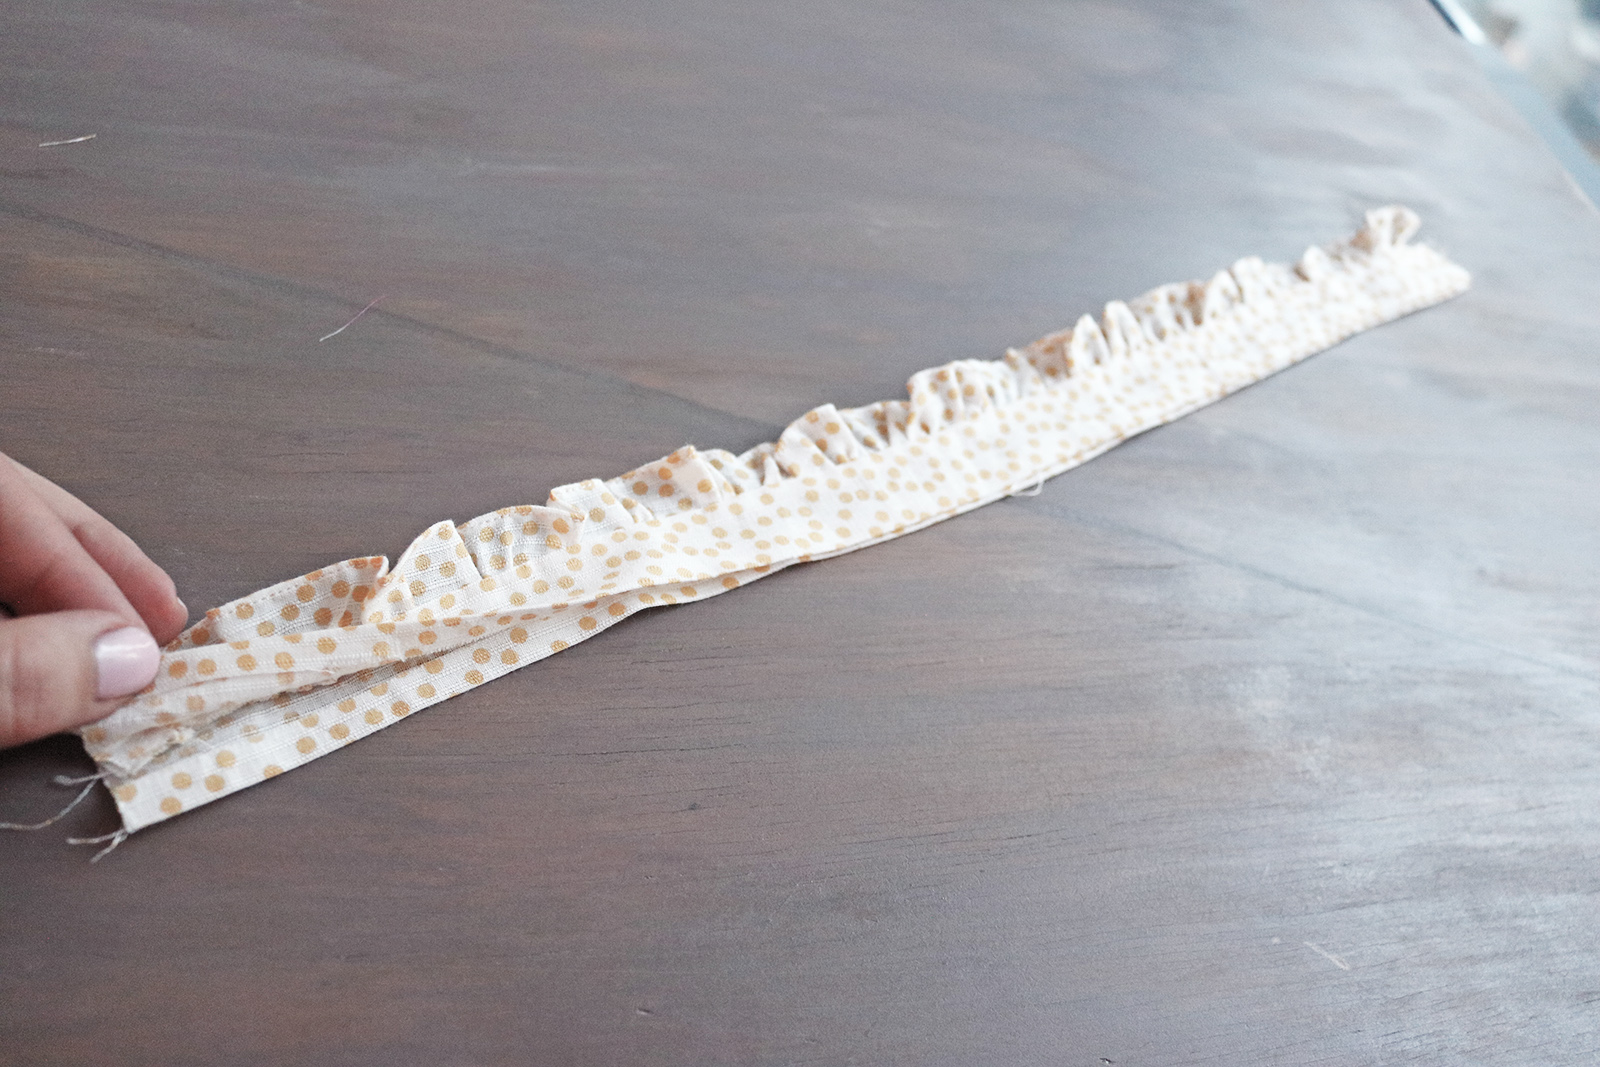
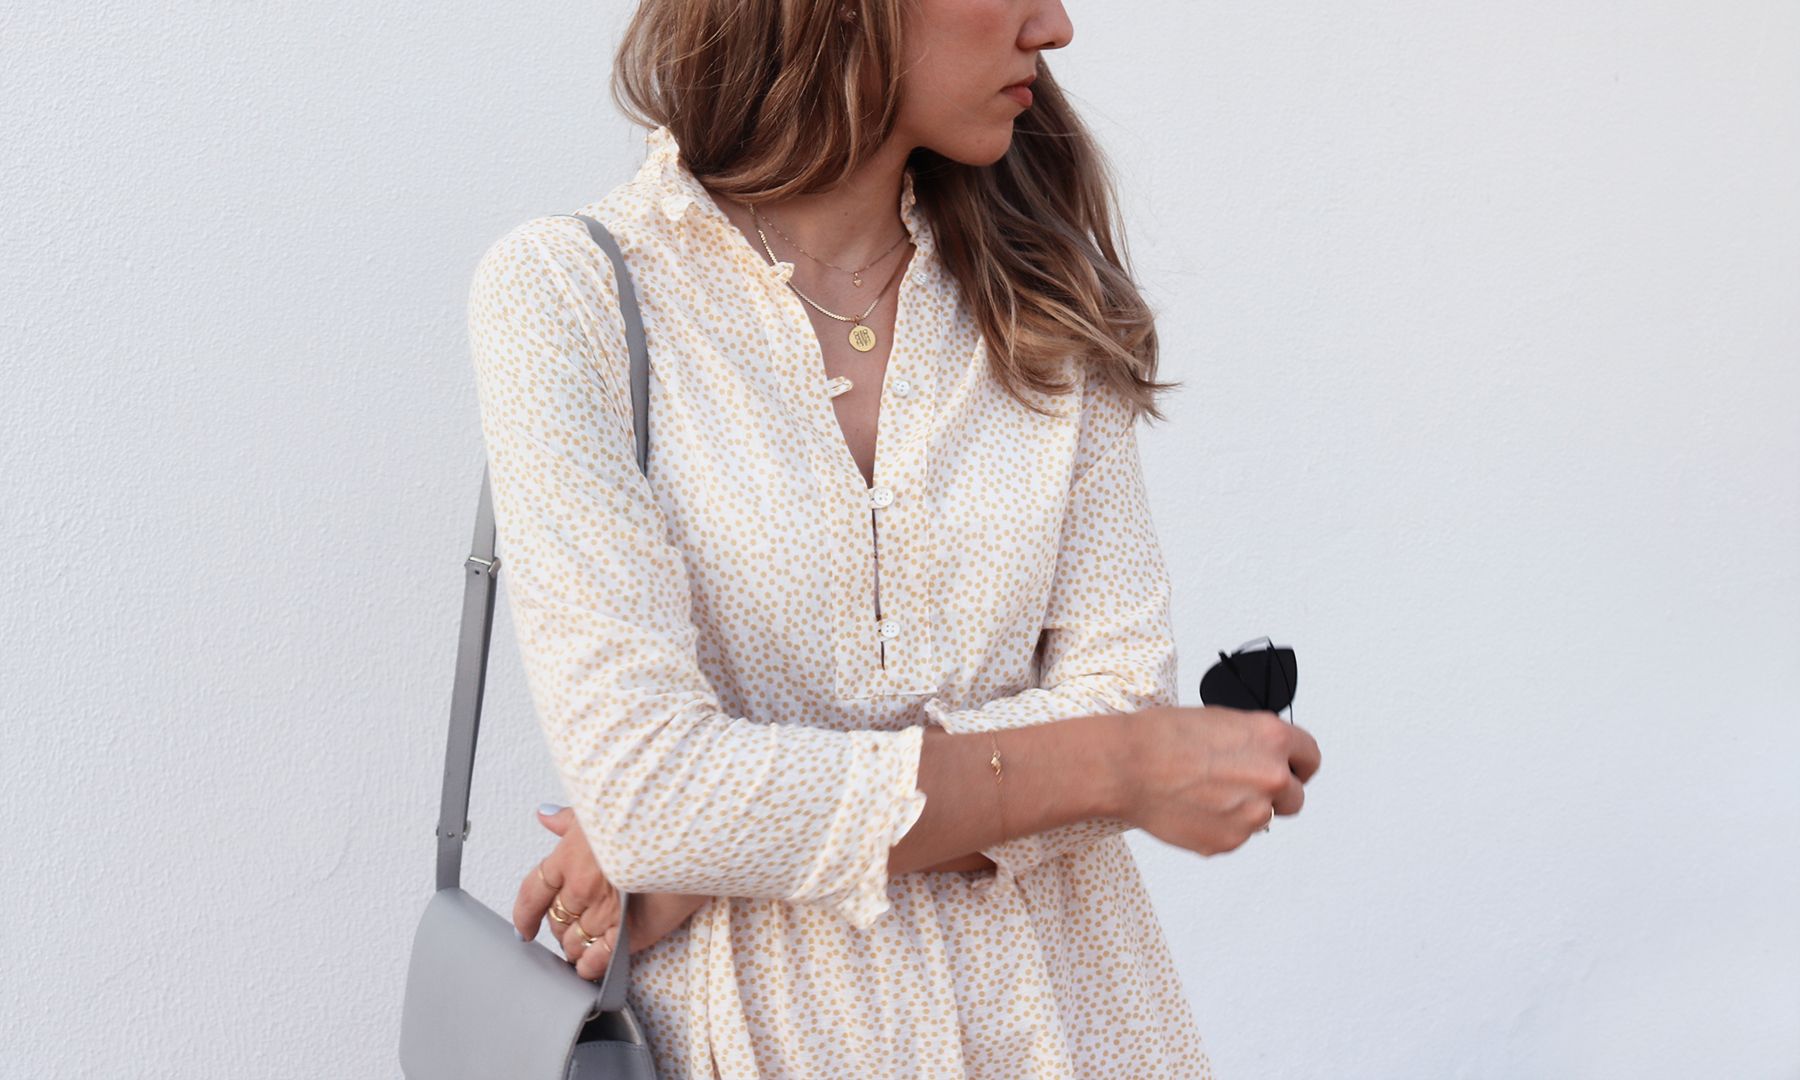
X. The last bit of the top was the collar. I first tried the top on and decided I wanted the neckline to open a bit more than it was doing, so I added a couple of subtle darts on both sides (yeah, they aren't exaaactly symmetrically placed, but I was hungry). I then measured around the neckline..
.. And used the same philosophy I did with the cuffs to create a long ruffle. The pieces I cut were 3 cm wide for the collar itself, and 3 cm for the ruffle. The total length of the collar should be the length of the neckline, plus 2 cm in seam allowances (for me, 45 cm). To get this fullness of ruffle, I used a 1.8 multiplier on the collar length (83 cm long ruffle piece). I also cut out a rectangular piece of interfacing and added that to one side of the collar, and pressed a 0.5 cm fold along the long edge.
XI. Then I pinned the collar to the neckline, right side of the collar facing right side of the dress, with the fold opened, and sewed along the fold line.
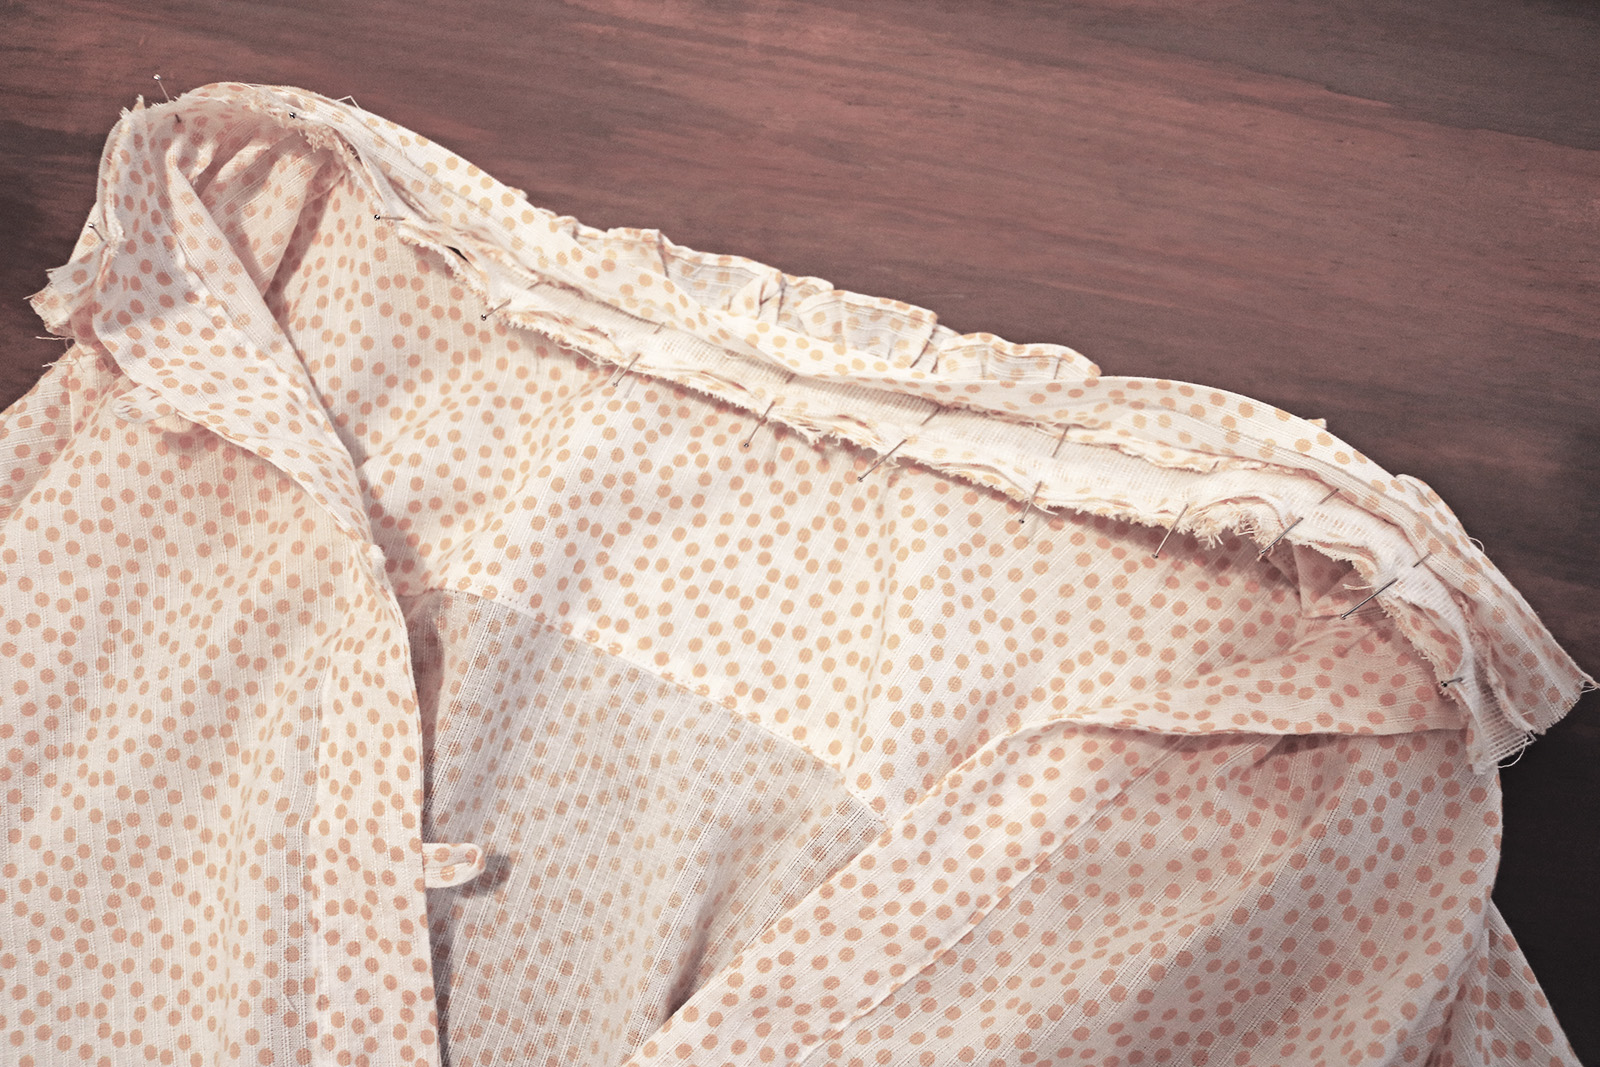
Next I folded the collar onto itself so the ruffle was in between, and at the ends I pivoted my stitch 90 degrees and continued it down. Then clipped excess around the corner.
Lastly I folded the collar right side out again hand-stiched the collar edge to the reverse.
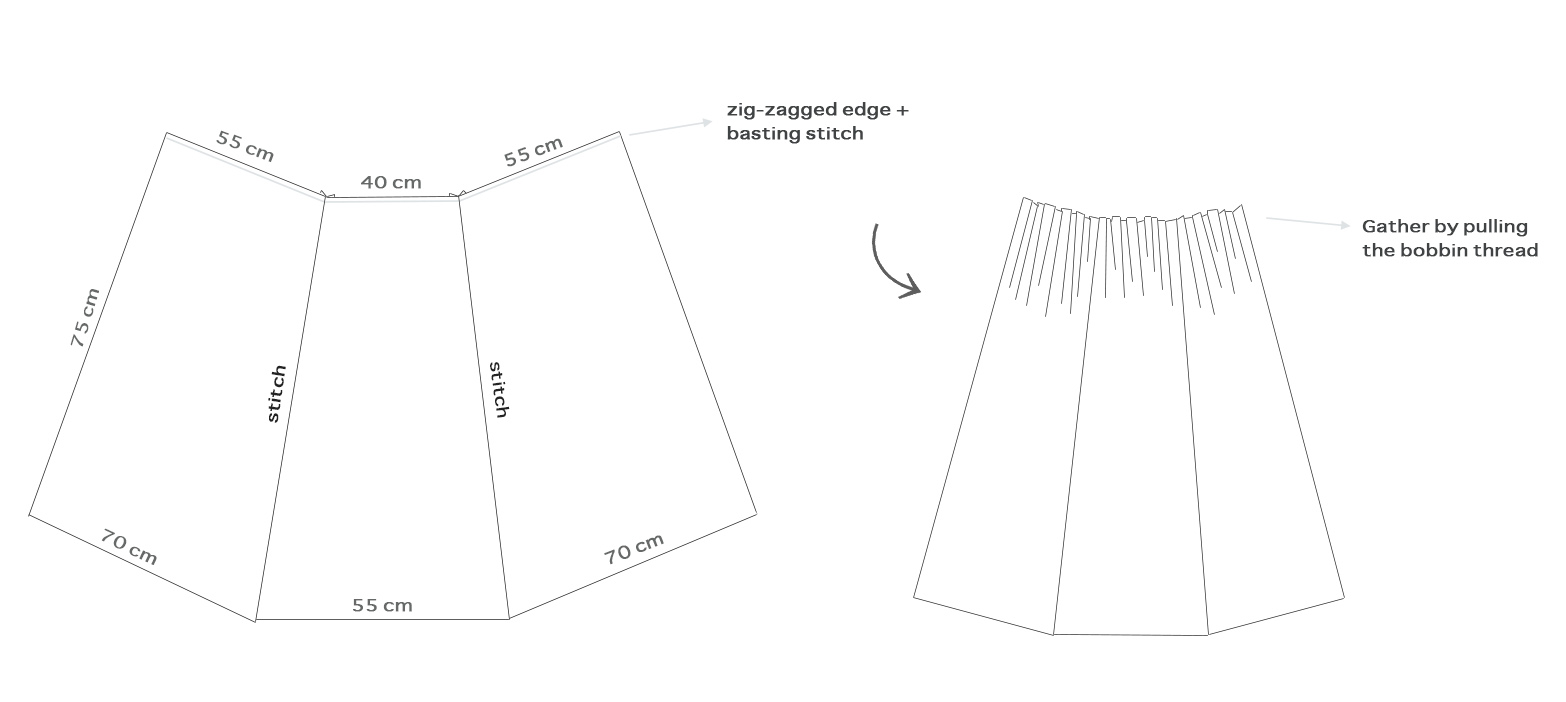
XII. Before I added the skirt part, I trimmed the length of the top to about 42 cm from the shoulder down. Then I made my skirt. I didn't document this part because it was pitch dark, but it was super simple. I cut 3 pieces in a trapezoid-ish (yes this is a word) shape - illustrated below in very crappy fashion, and sewed them together.
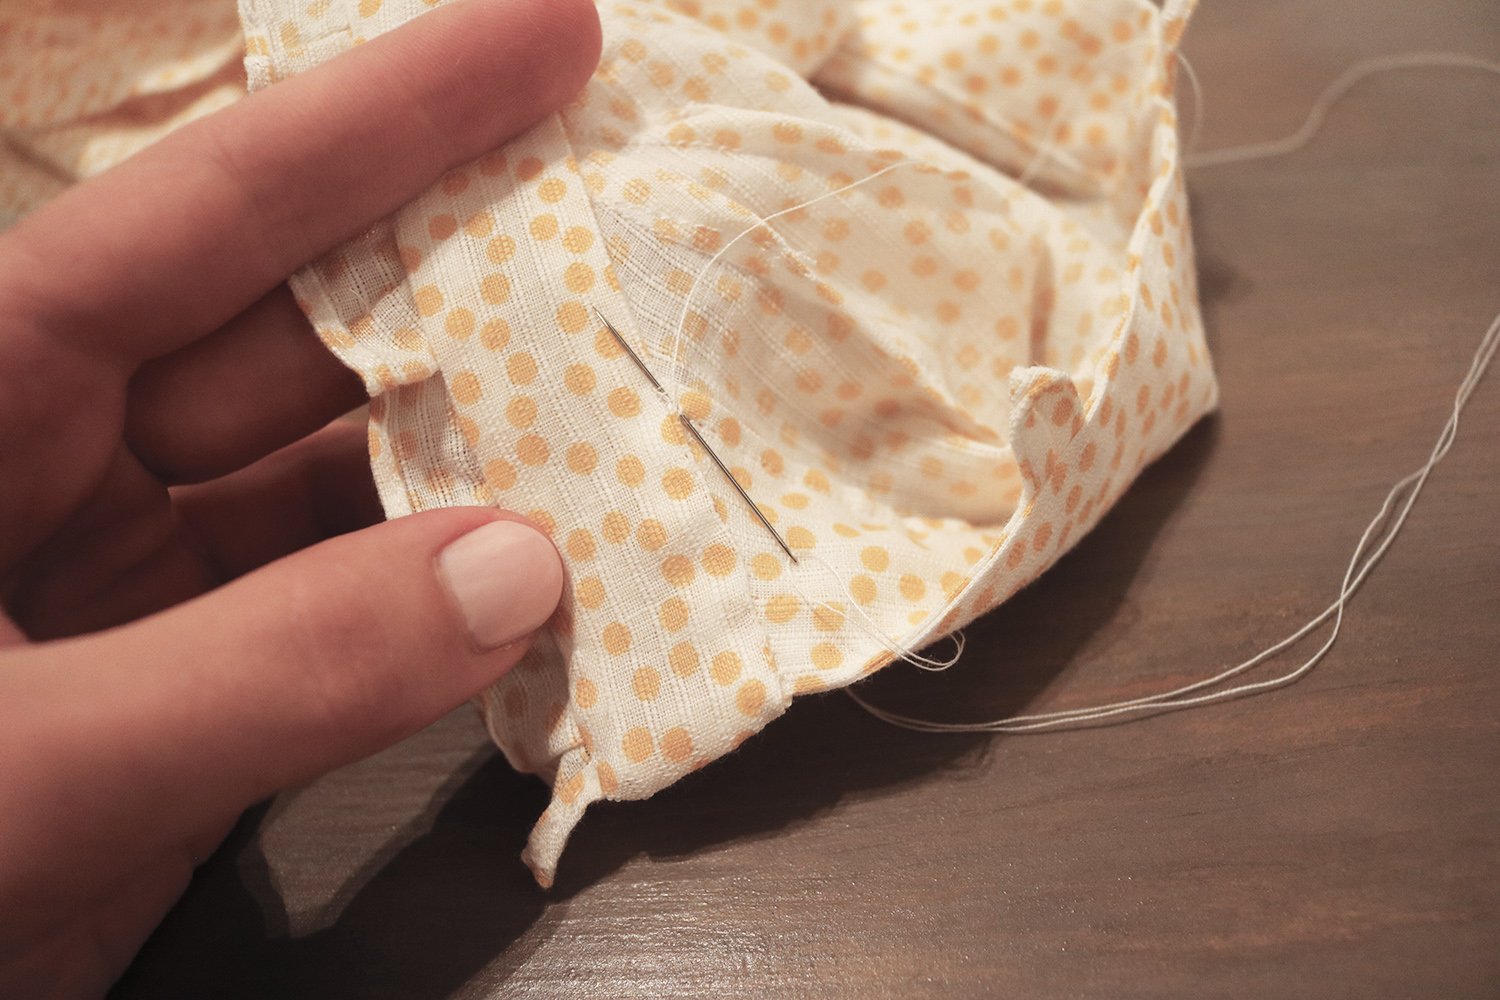
 Then I added a basting stitch along the waistline and gathered it enough to match the circumference of the waistline of the top. Then just attached the skirt to the top, aligning so the ends were centered at the back.
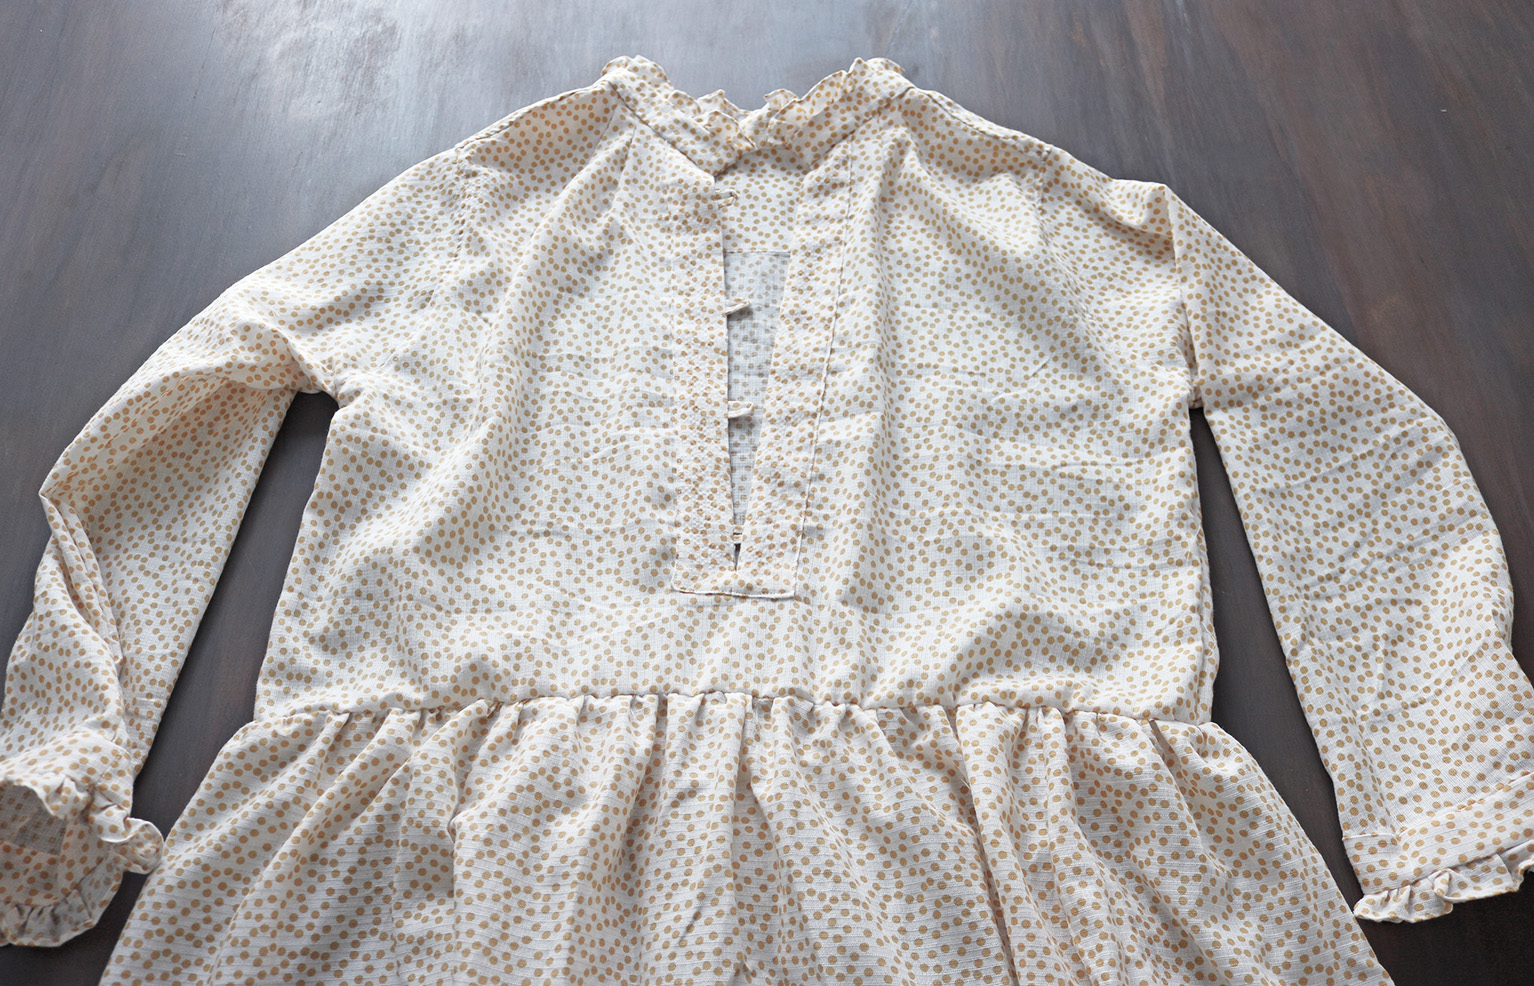
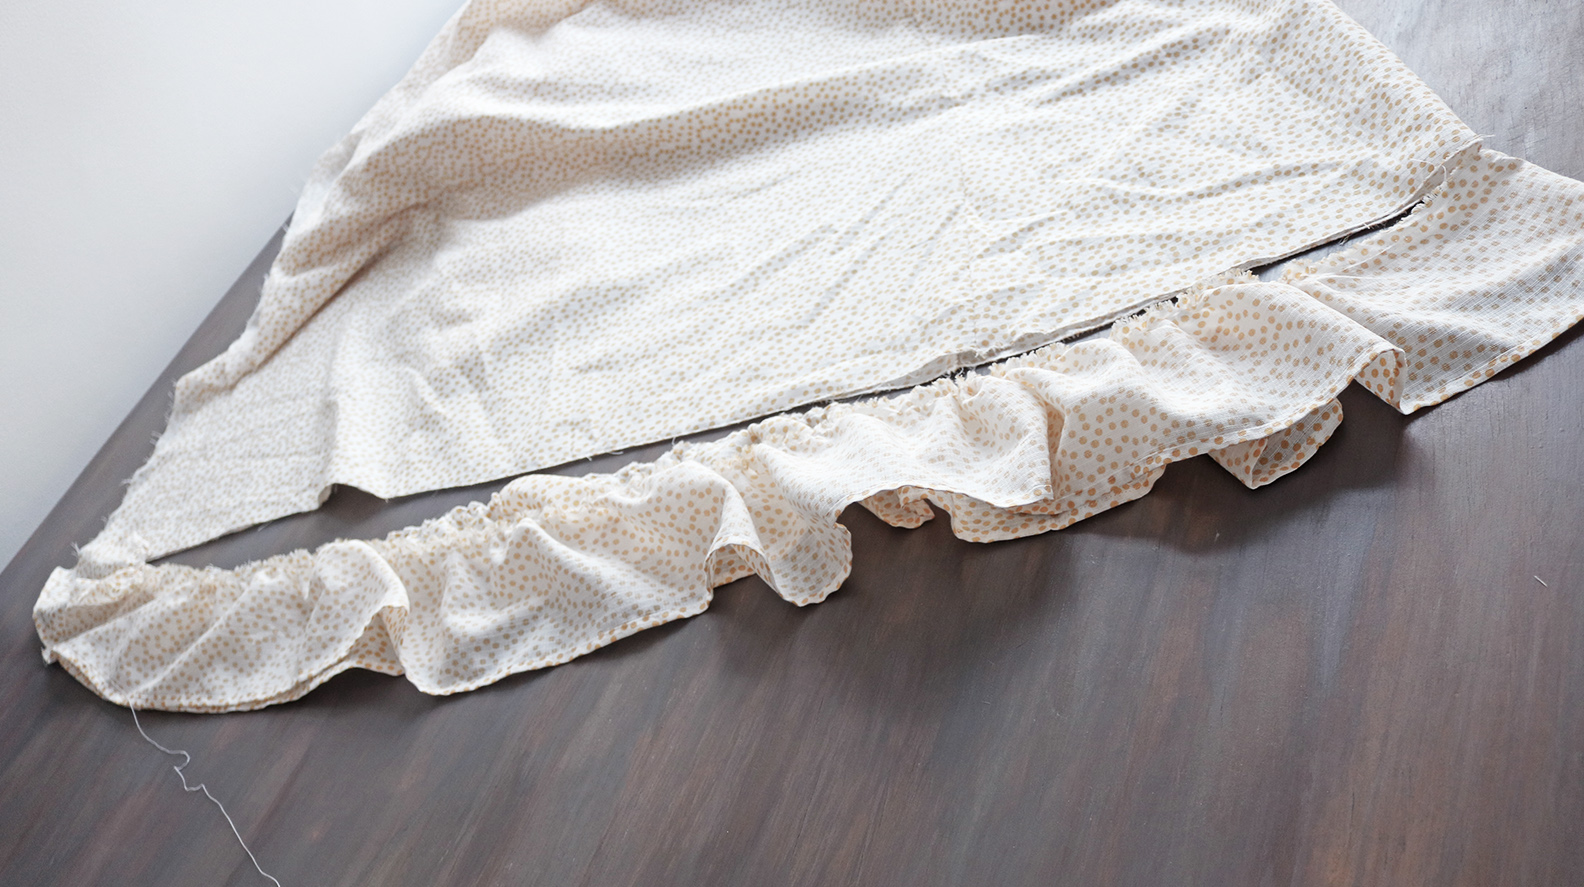
XIII. I also added a ruffle detail to the hem of the dress, and as the full length of my hem was 195 cm, and I did a 1.5 multiplier for my ruffle, the ruffle length was just under 300 cm. After hemming the ruffle on one long edge and zig-zagging the other, I added a basting stitch to the zig-zagged edge, and gathered it to match the length of the hem. Then attached the ruffle to the hem, and sewed the vertical back seam of the skirt.
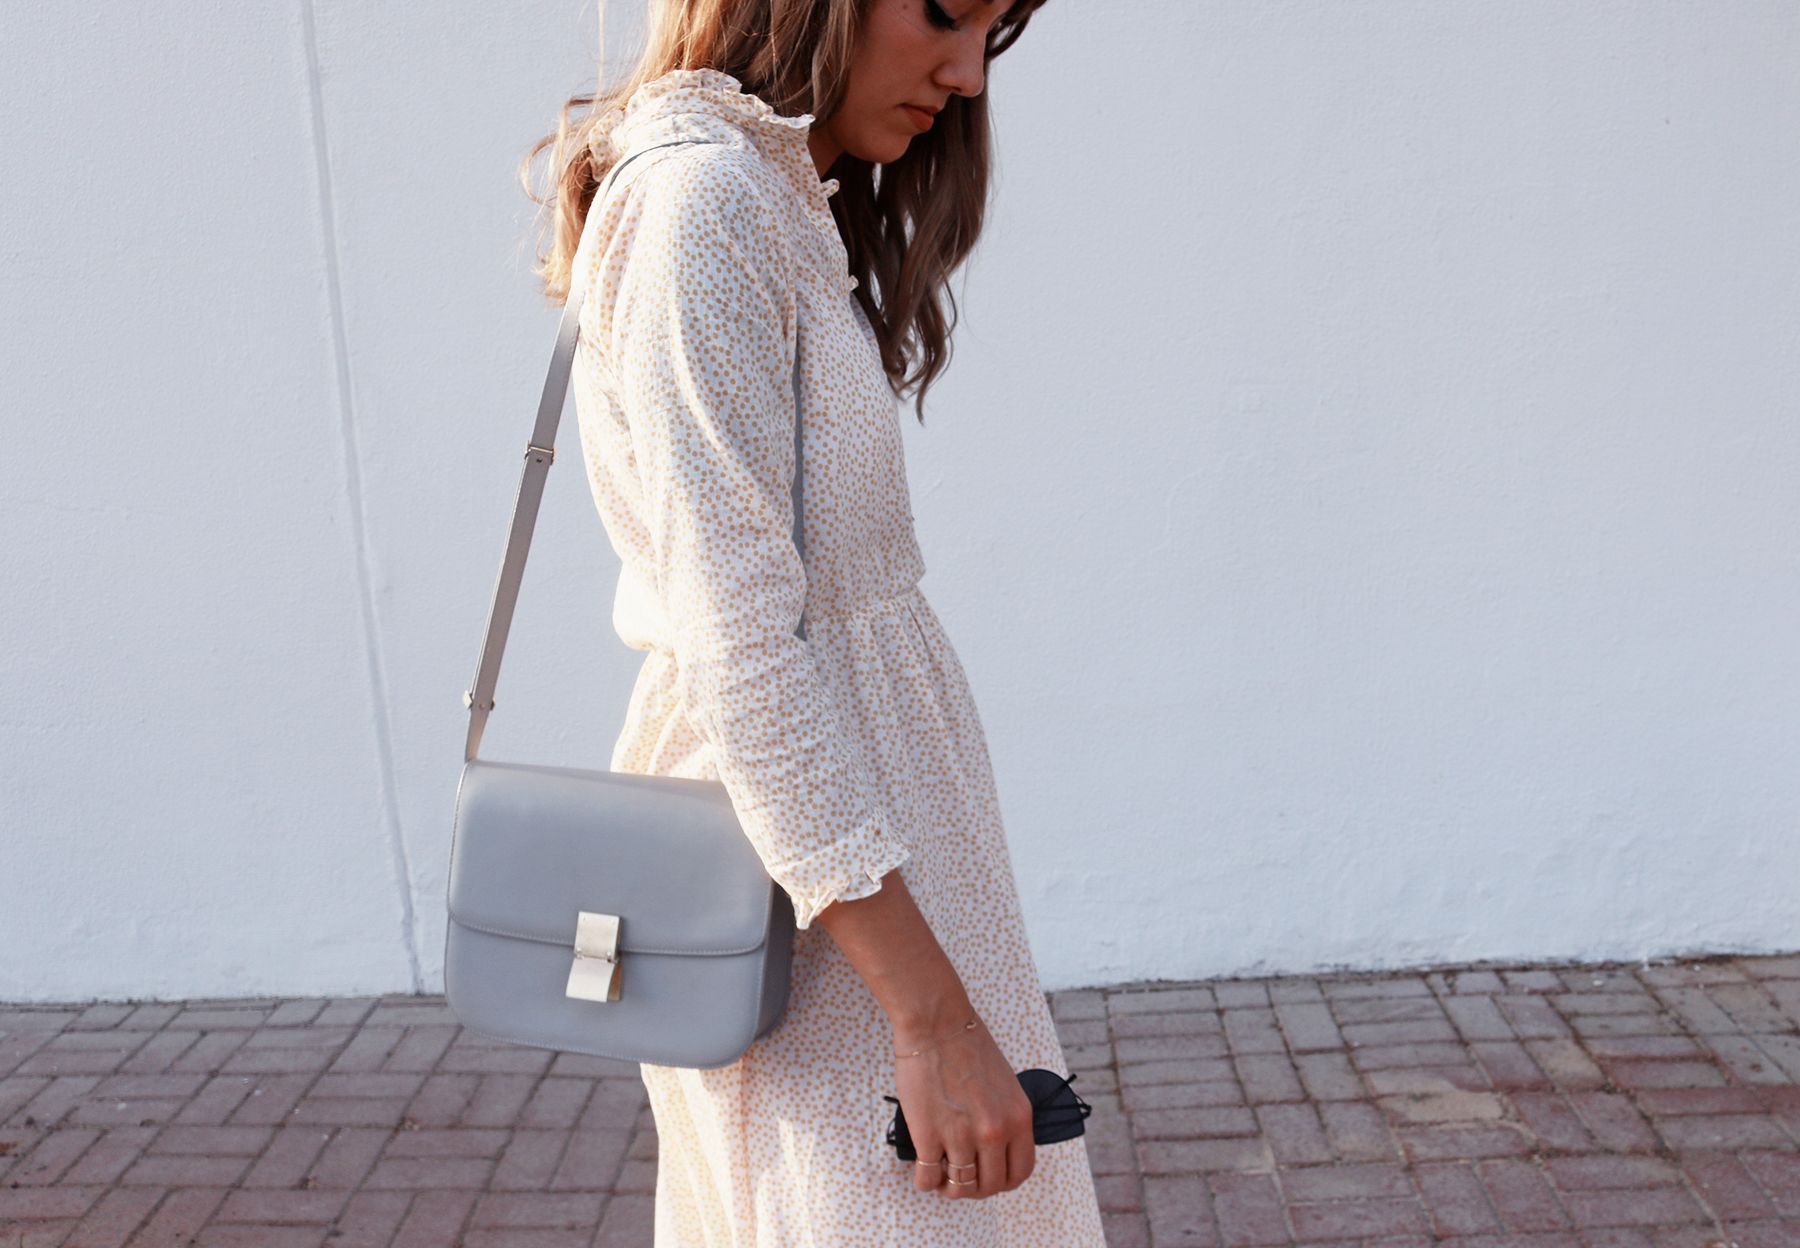
XIV. The final final step was to add the elastic to the waistline. I did this by stretching the elastic to pin it onto the seam allowance of the waistline seam, and zig-zagged that in place. The actually final step was adding the buttons to the neckline.
That's all folks.
xo,
Julia


sooooooo pretty!!
ReplyDeleteGood pictures and thanks for sharing! i show you a good site for you to see more chiffon short dresses
ReplyDelete,i know it has good quality with low price.and for free shipping.
www.gearbest.com/chiffon-short-dresses-_gear/