

Tutorials take a lot of time & effort to create, and I choose to make mine available for free. If you enjoy this guide, you can support me with a donation that feels right for you, here.
TOOLS:
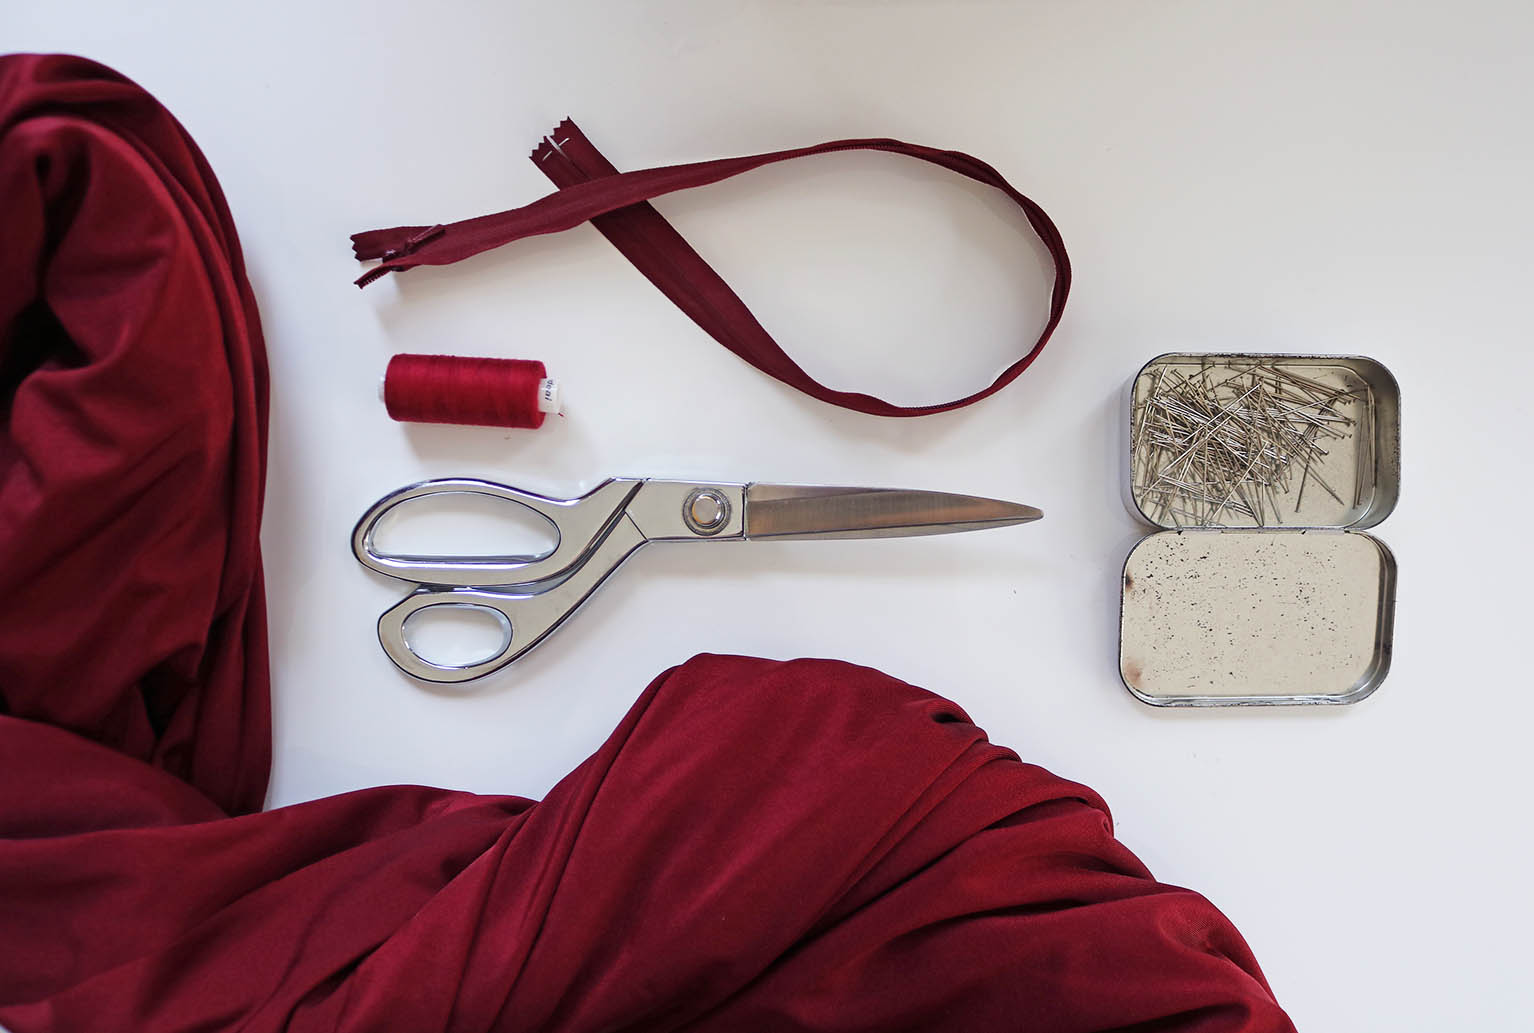
I used a thick, high quality lycra with a slight shine, 4 m | Invisible zipper | Pins | Scissors | Thread & sewing machine | not pictured: I reinforced the shoulder straps with some thin firm elastic
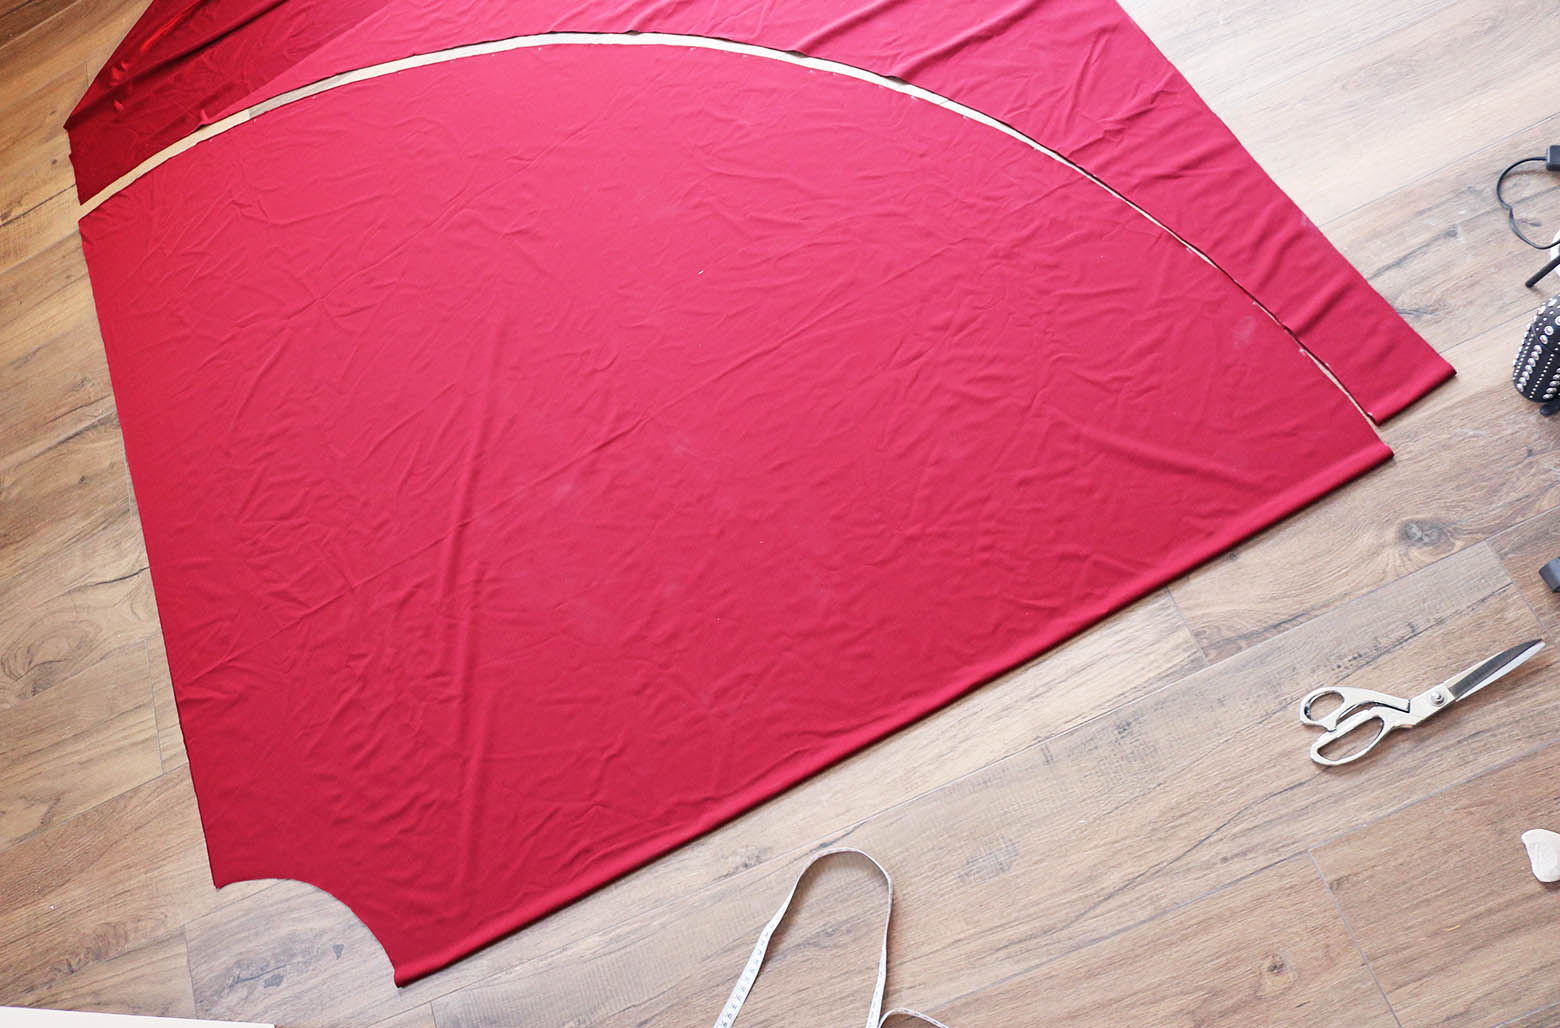
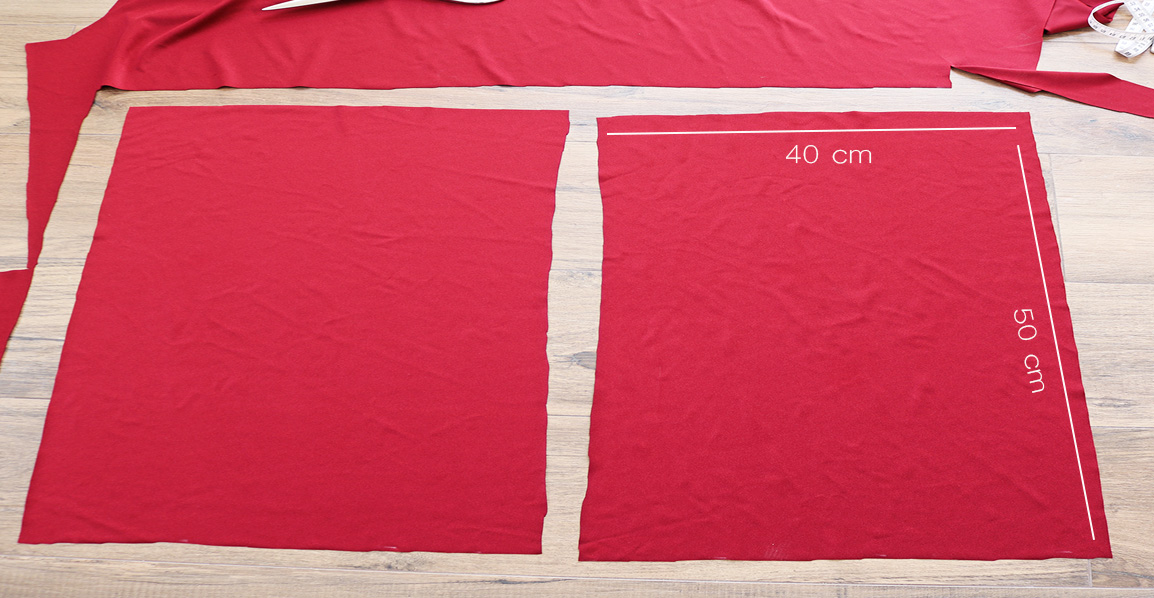
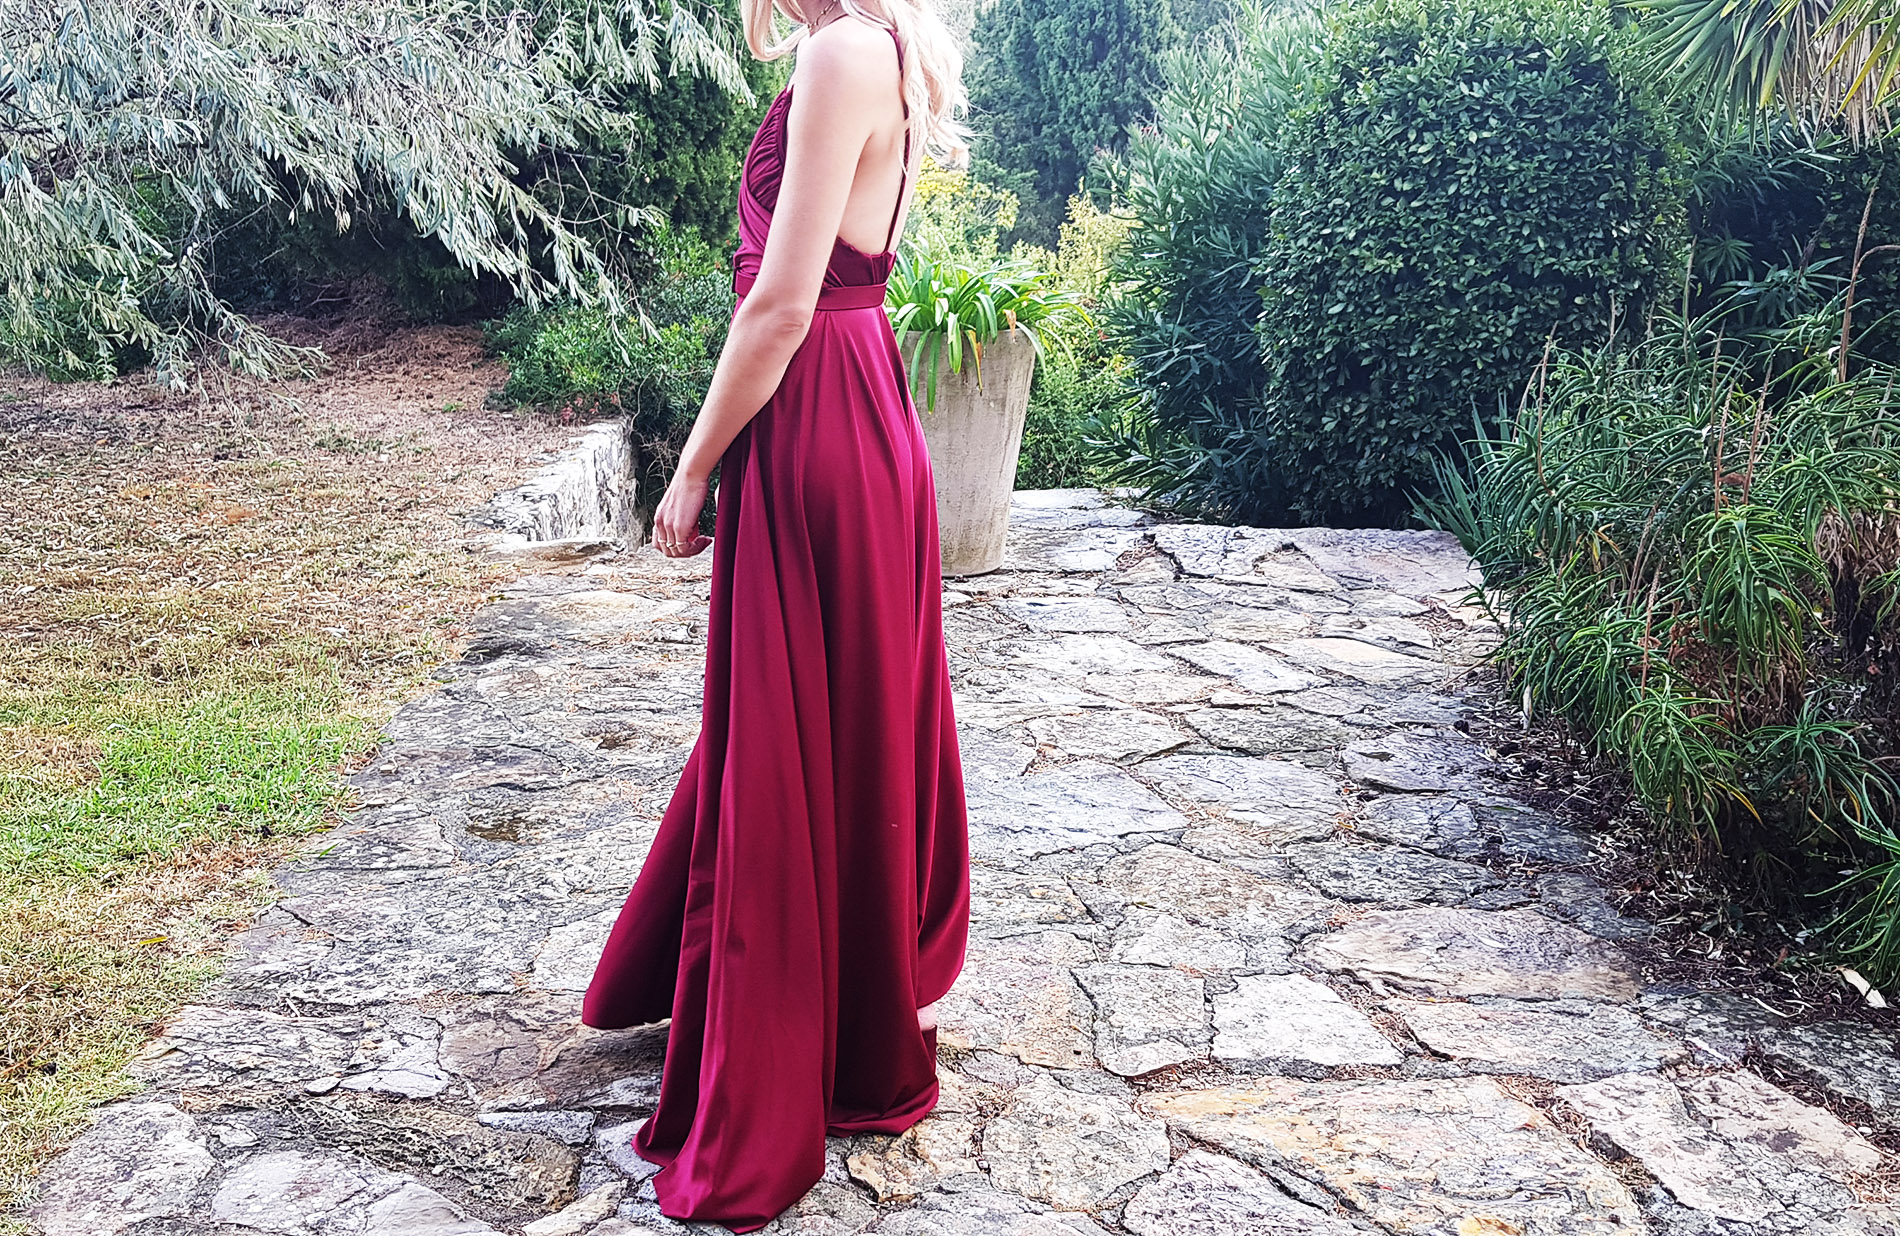
I. The bottom piece was really basic, just a half-circle skirt.
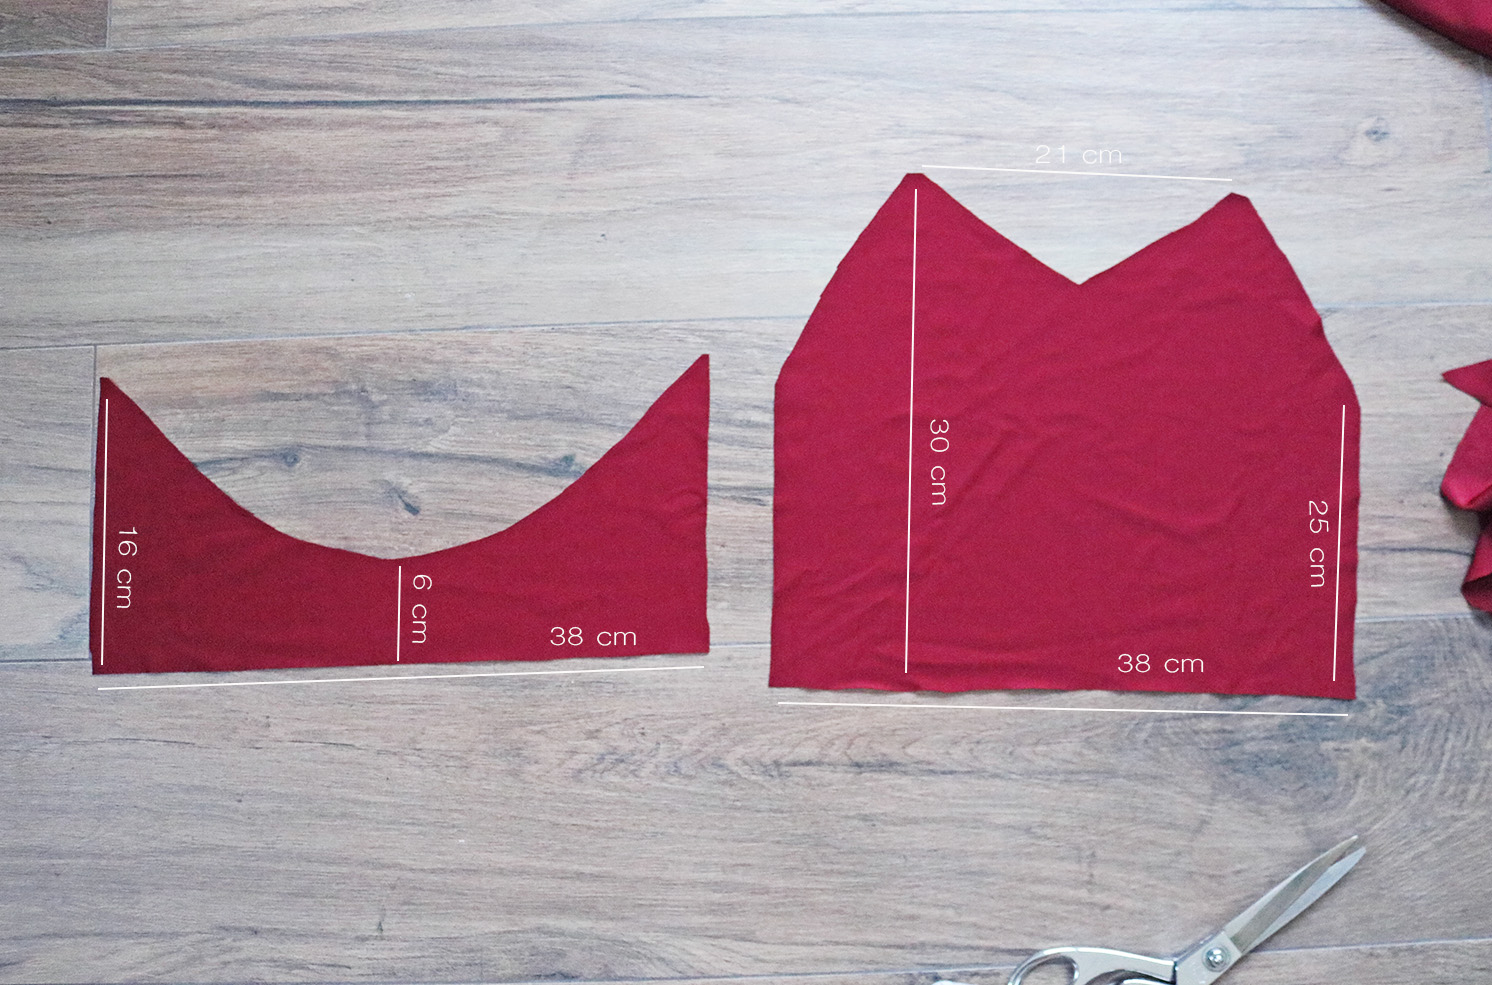
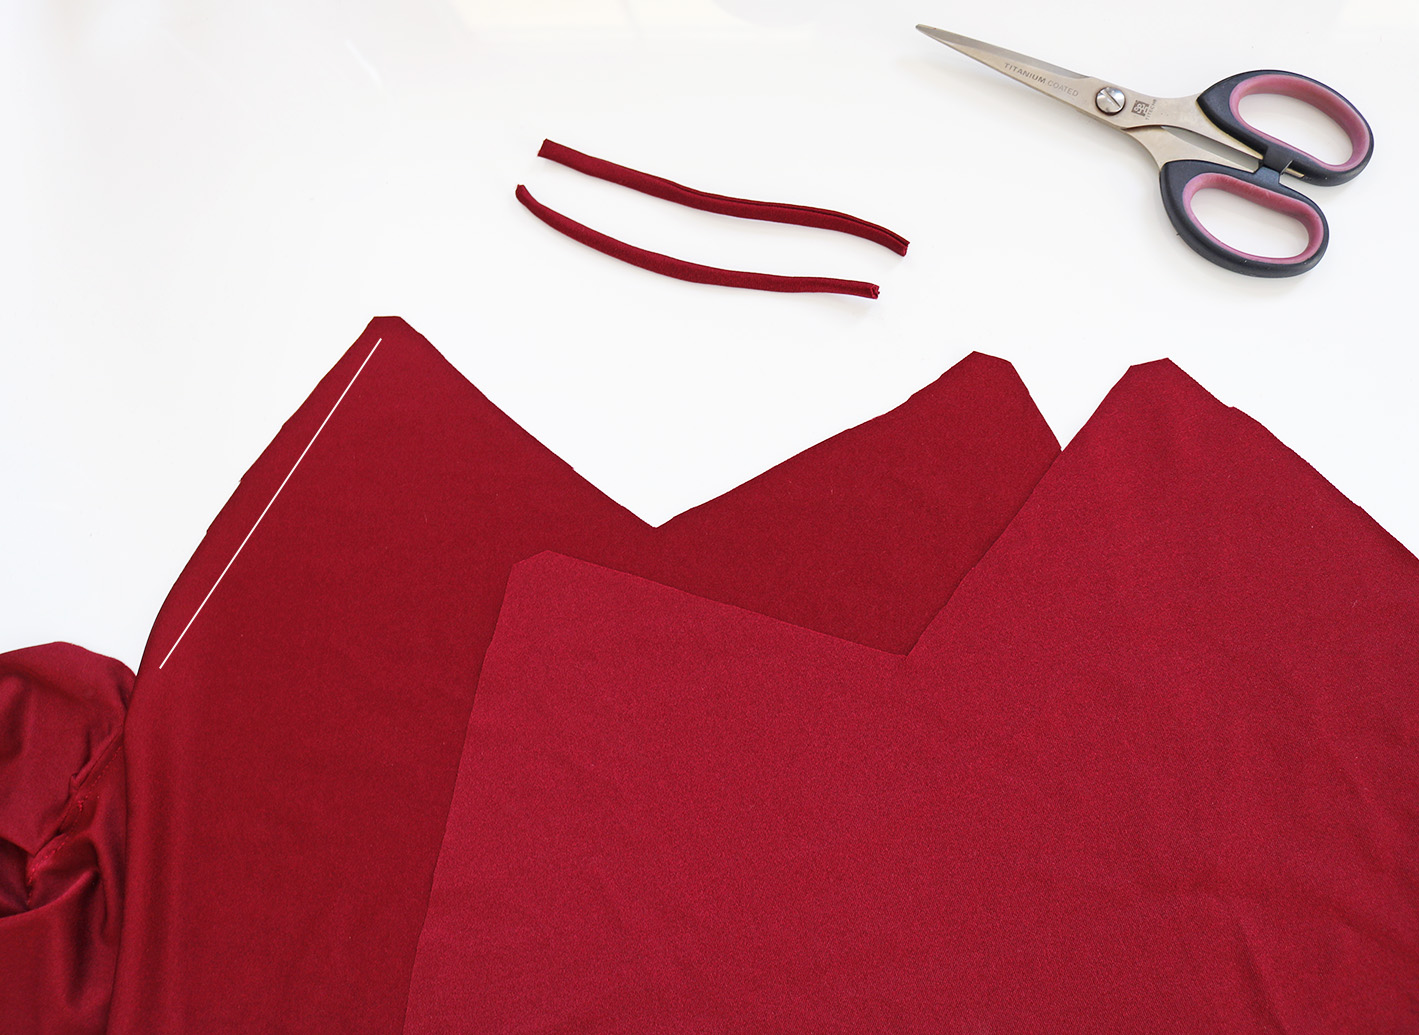
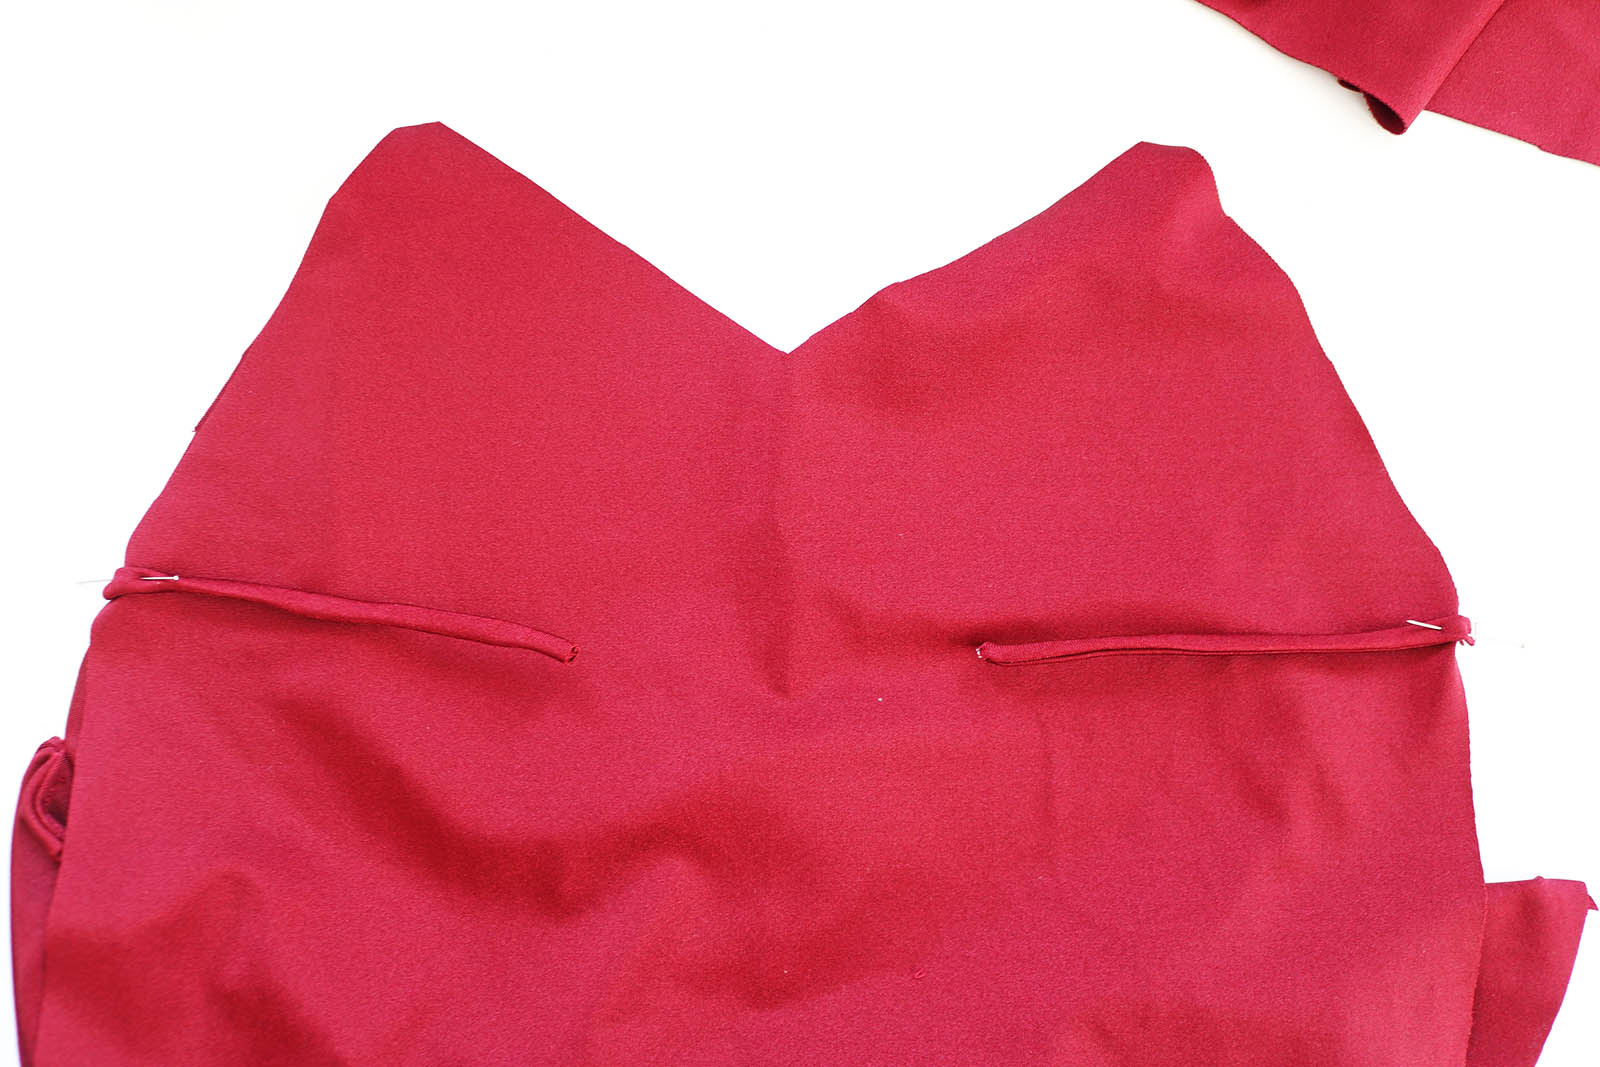
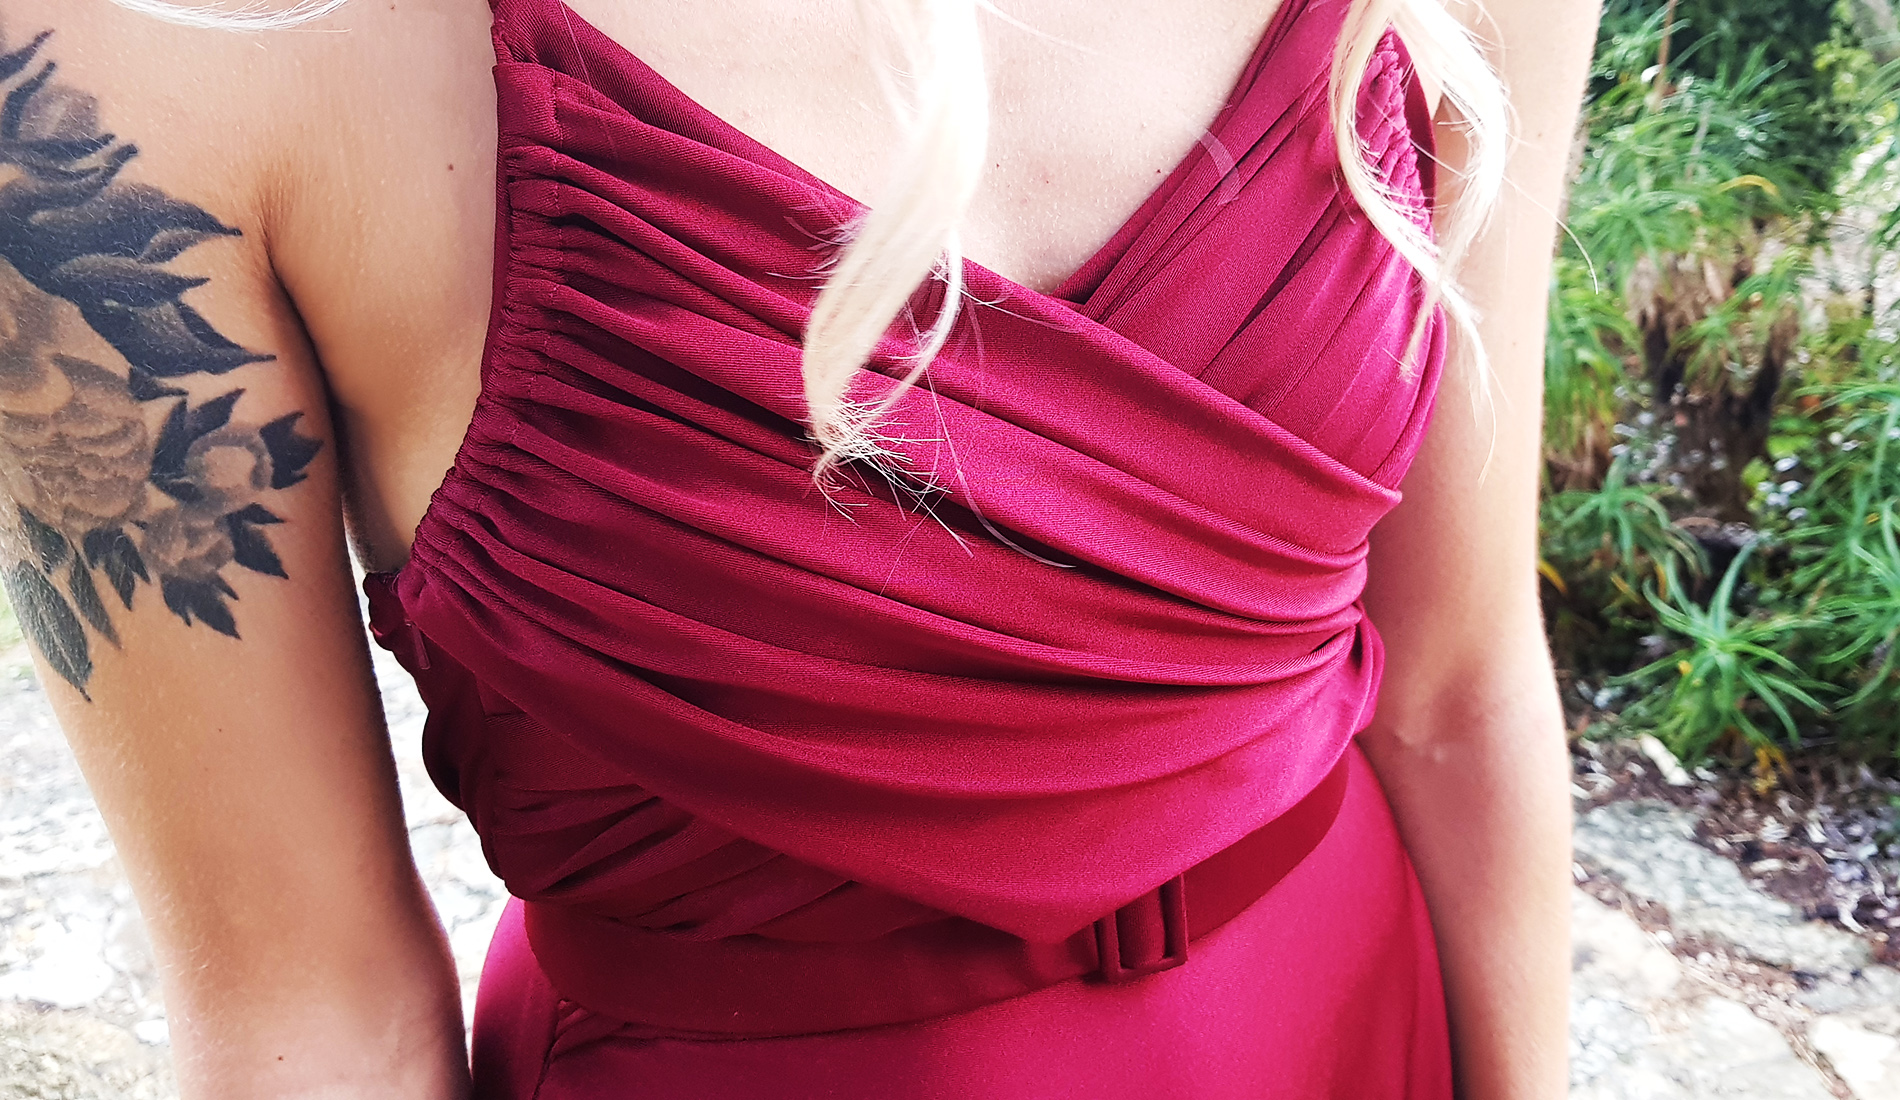
II. For the top I first cut like so - one back piece and 2 of the front pieces.
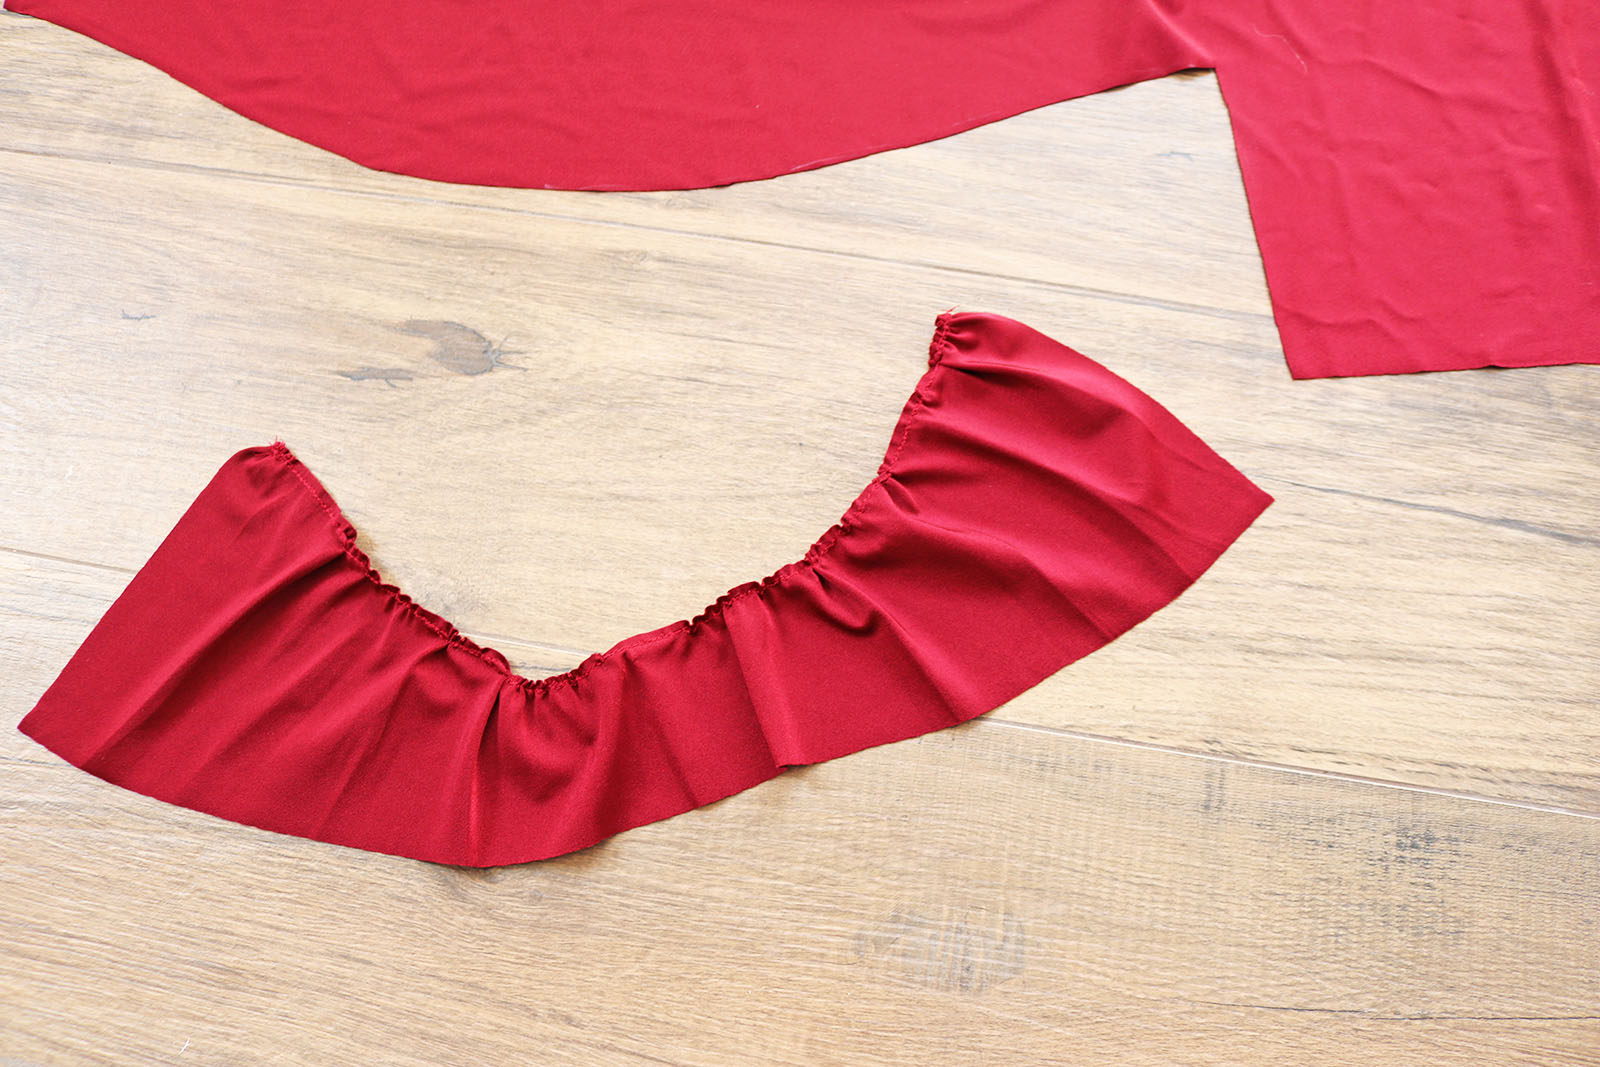
Then I cut another back piece, but this one I made 20+ cm longer than the first one, so I could gather it a bit.
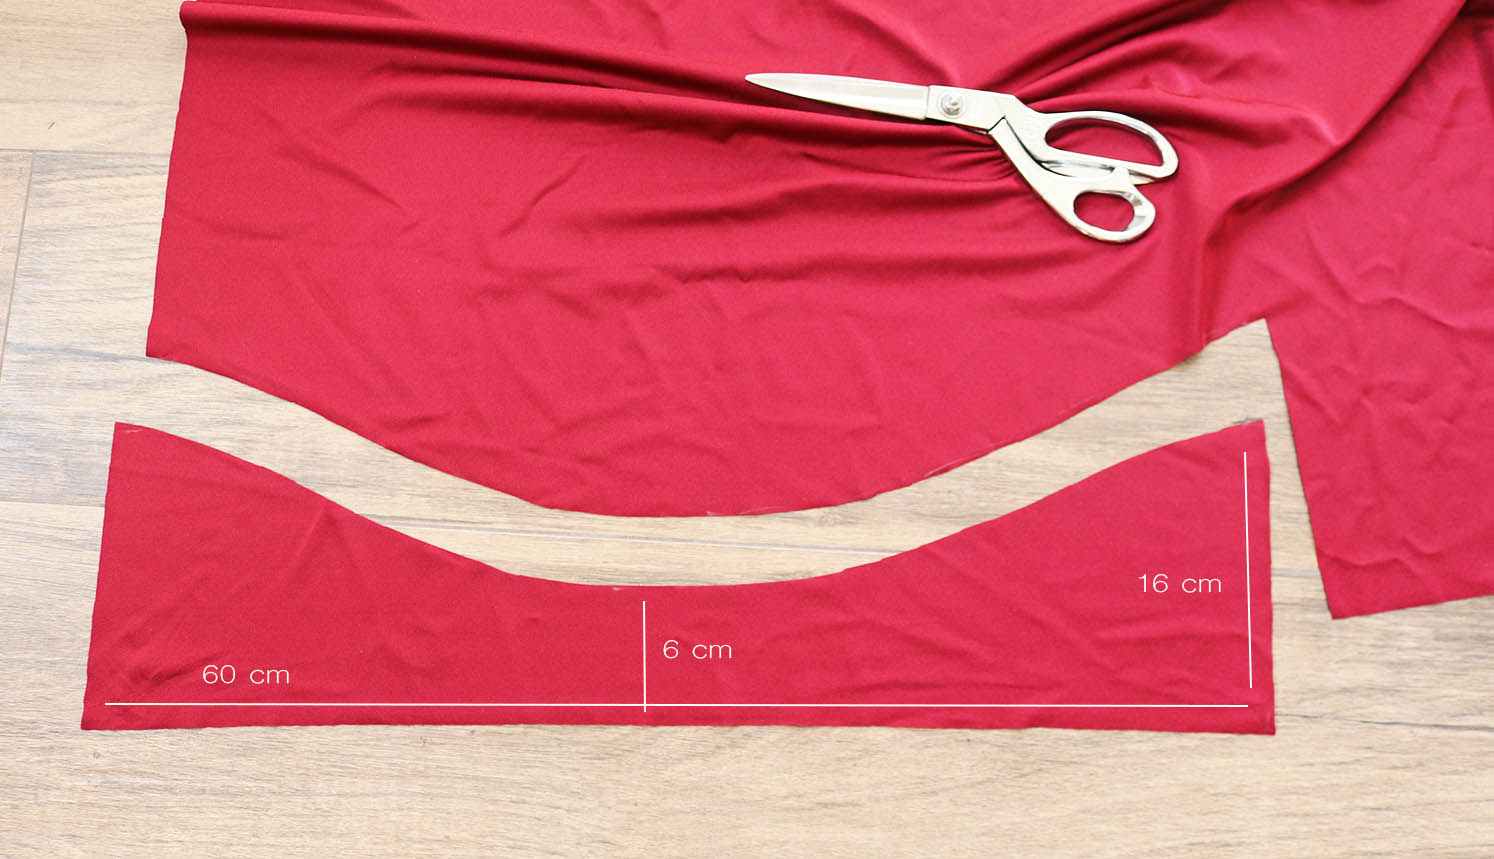
Added a basting stitch on the curved edge and gathered so I was at the same width as the first back piece I cut.
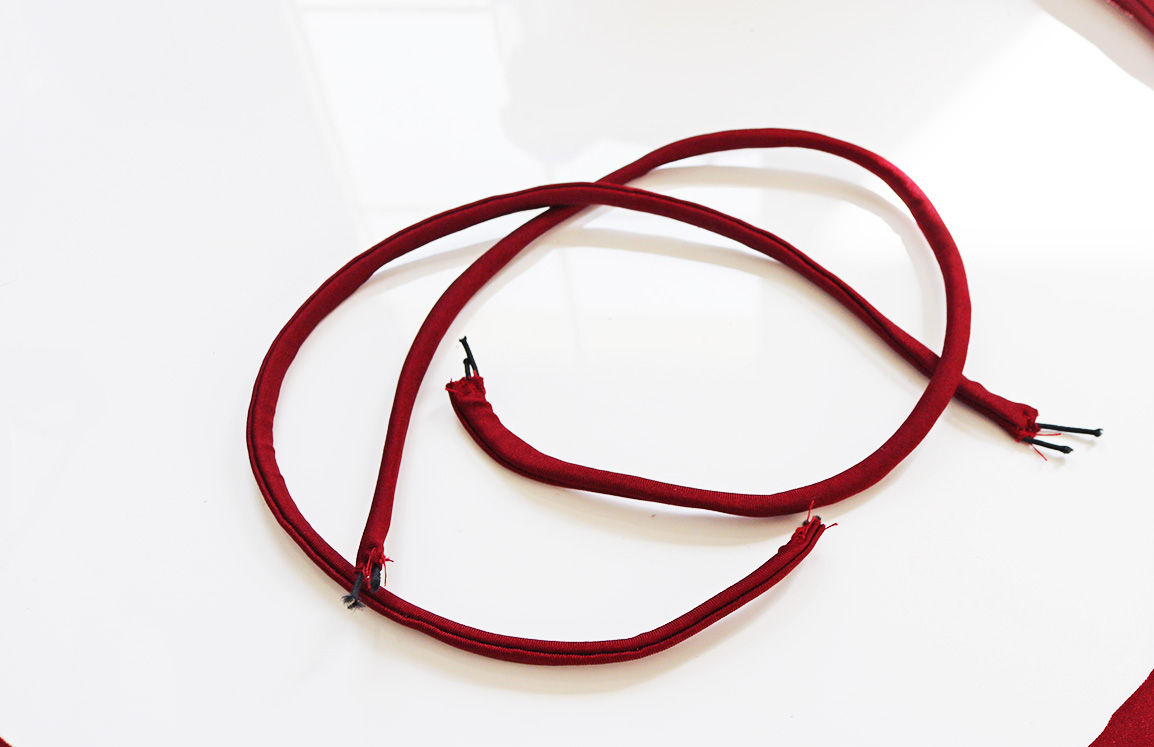
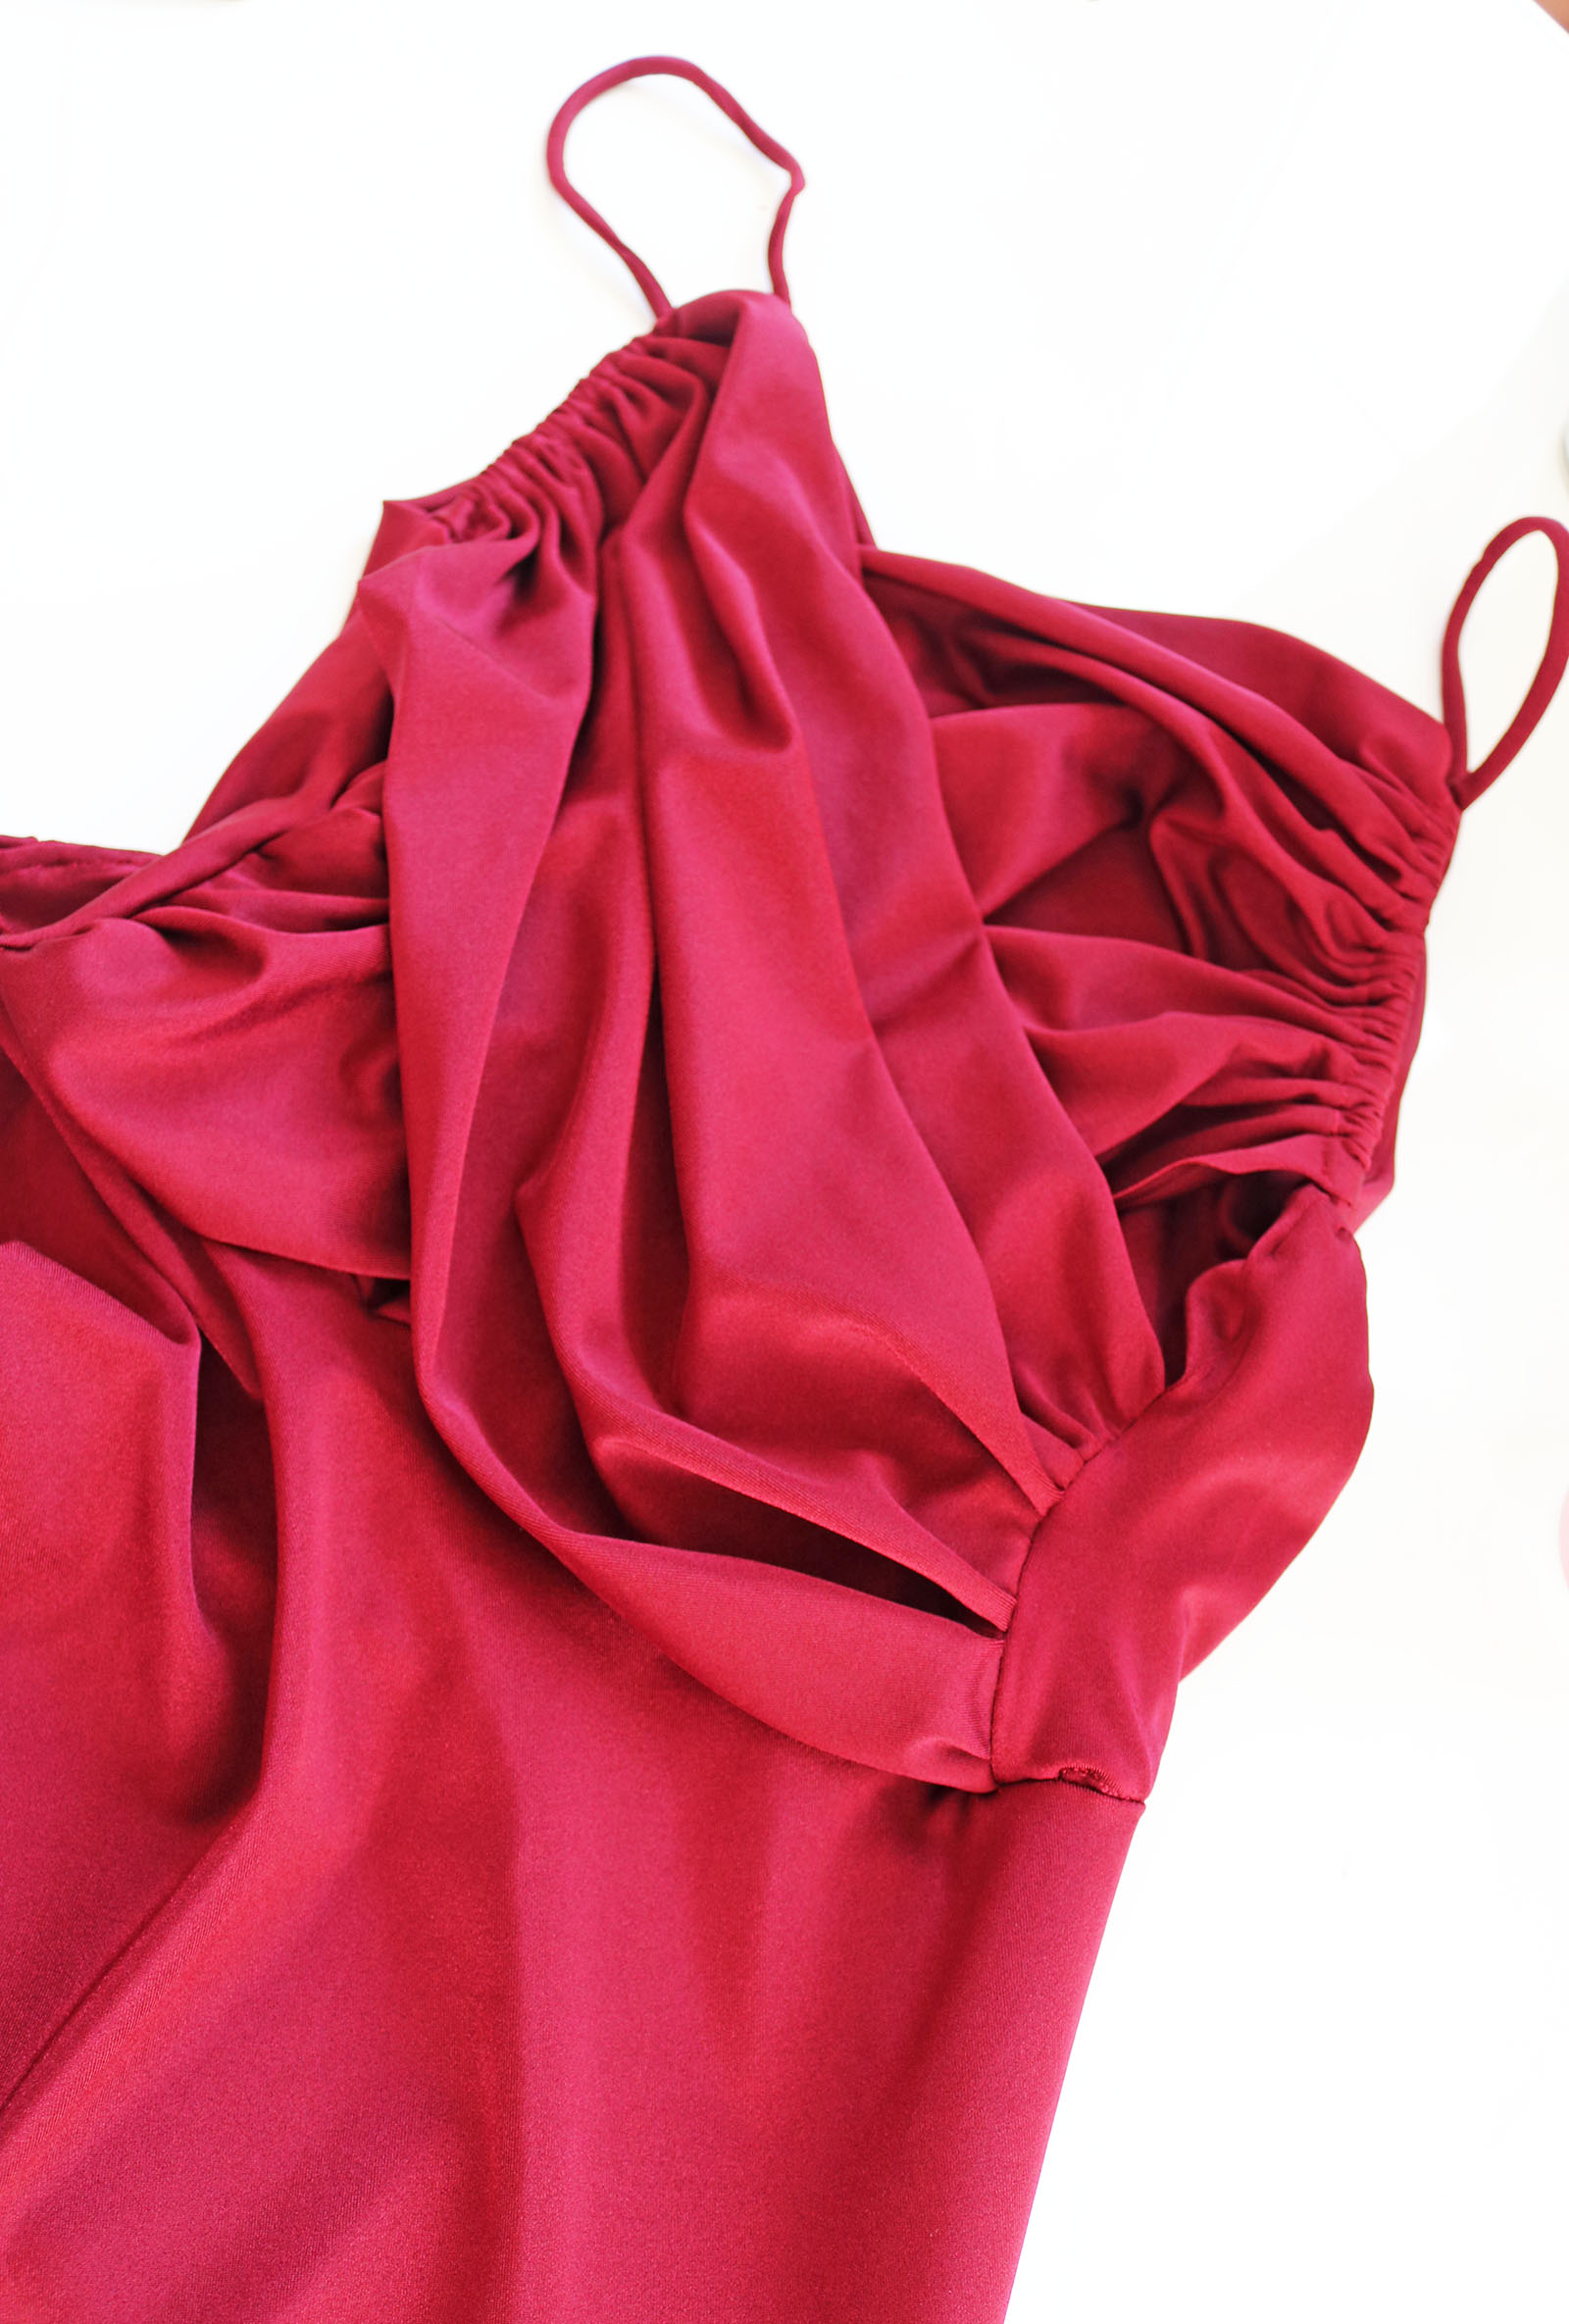
III. Then I made my shoulder straps using this method, and added a double thin elastic in both to make them extra firm (my fabric was pretty heavy and I hate a flimsy shoulder strap). I made each strap about 20 cm longer than I needed (see in step IV what for).
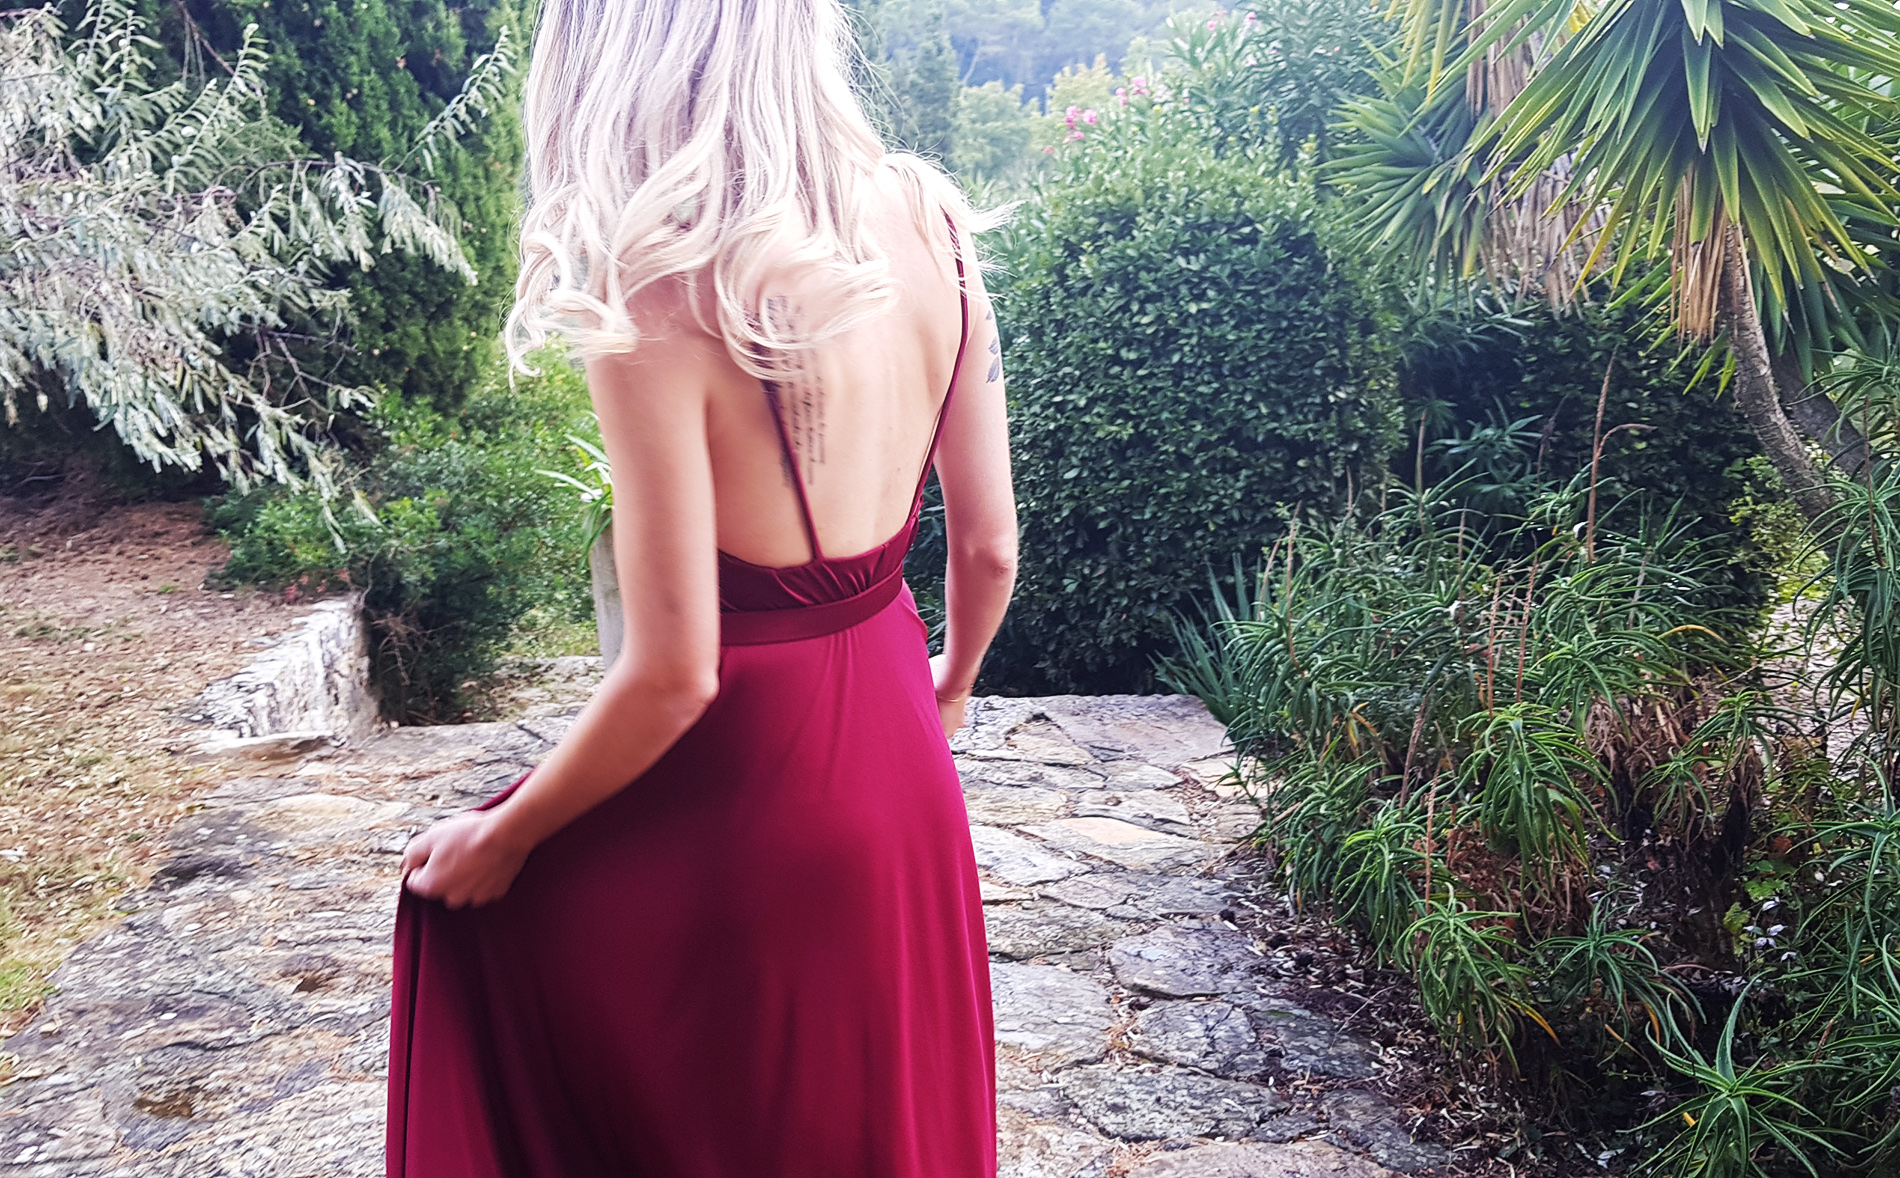
I attached the shoulder straps a few cm off the center of the back piece on either side and secured them there with a few stitches. (I had gotten a bit over-excited and sewed the back piece to the front piece at the side - I later picked that open as it was easier to assemble right at the end).
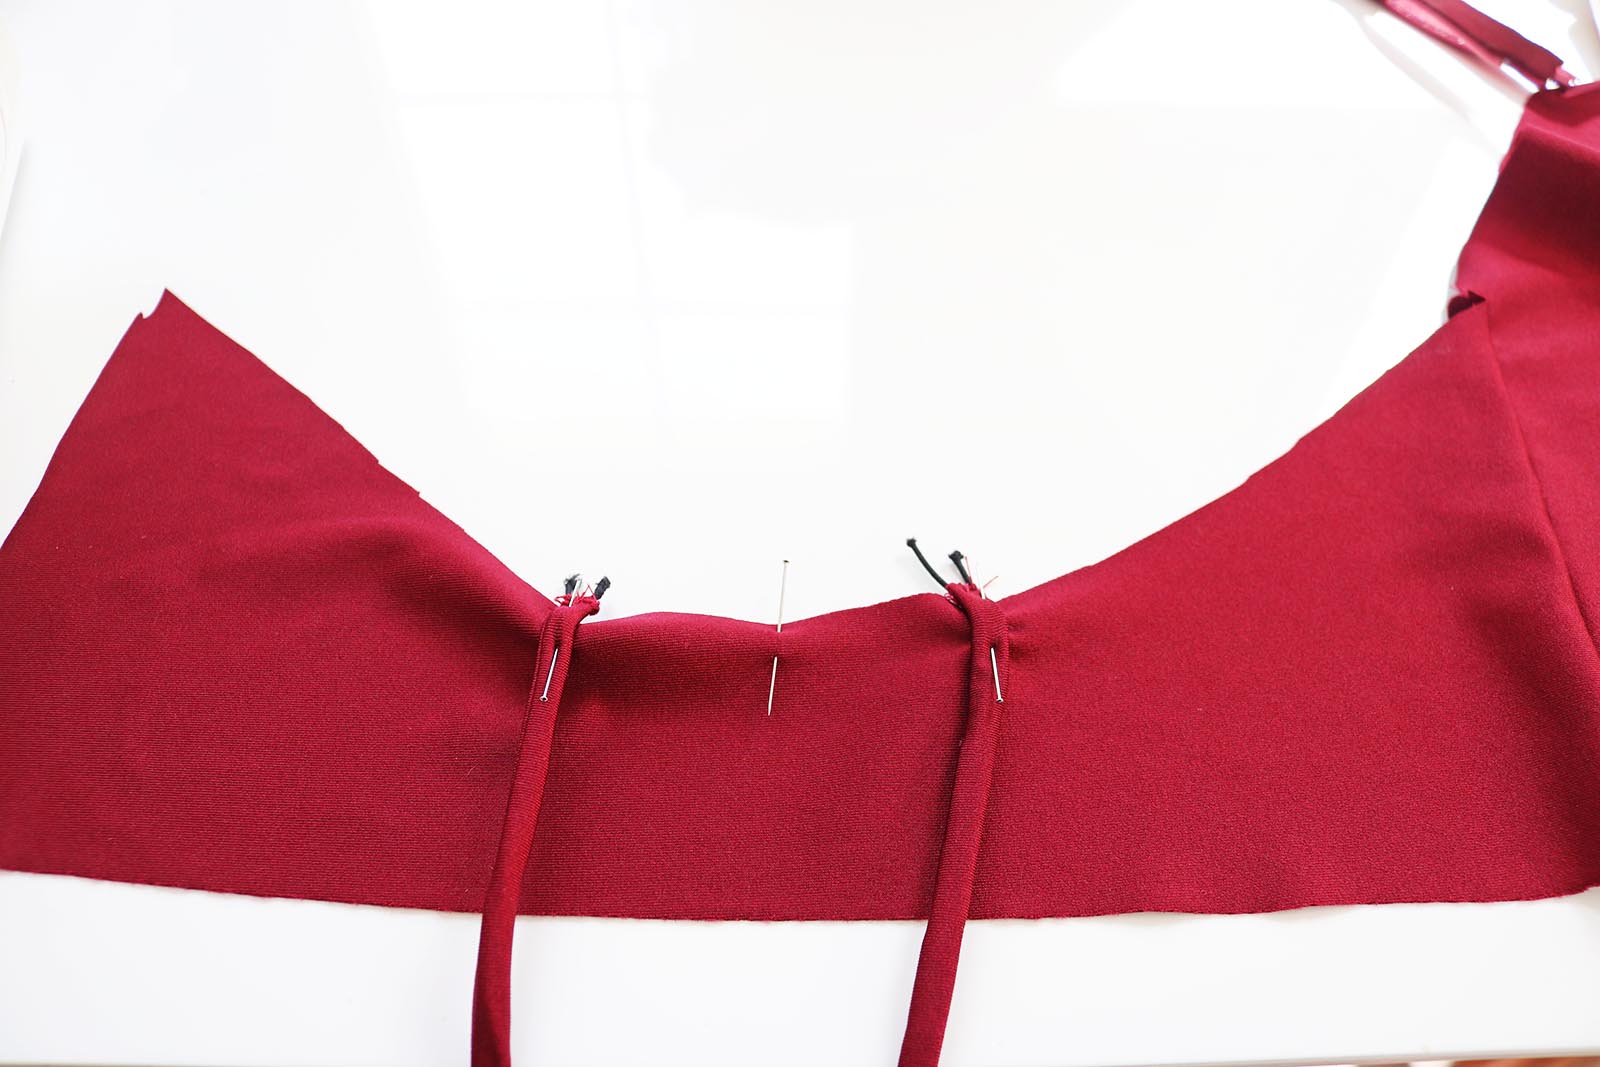
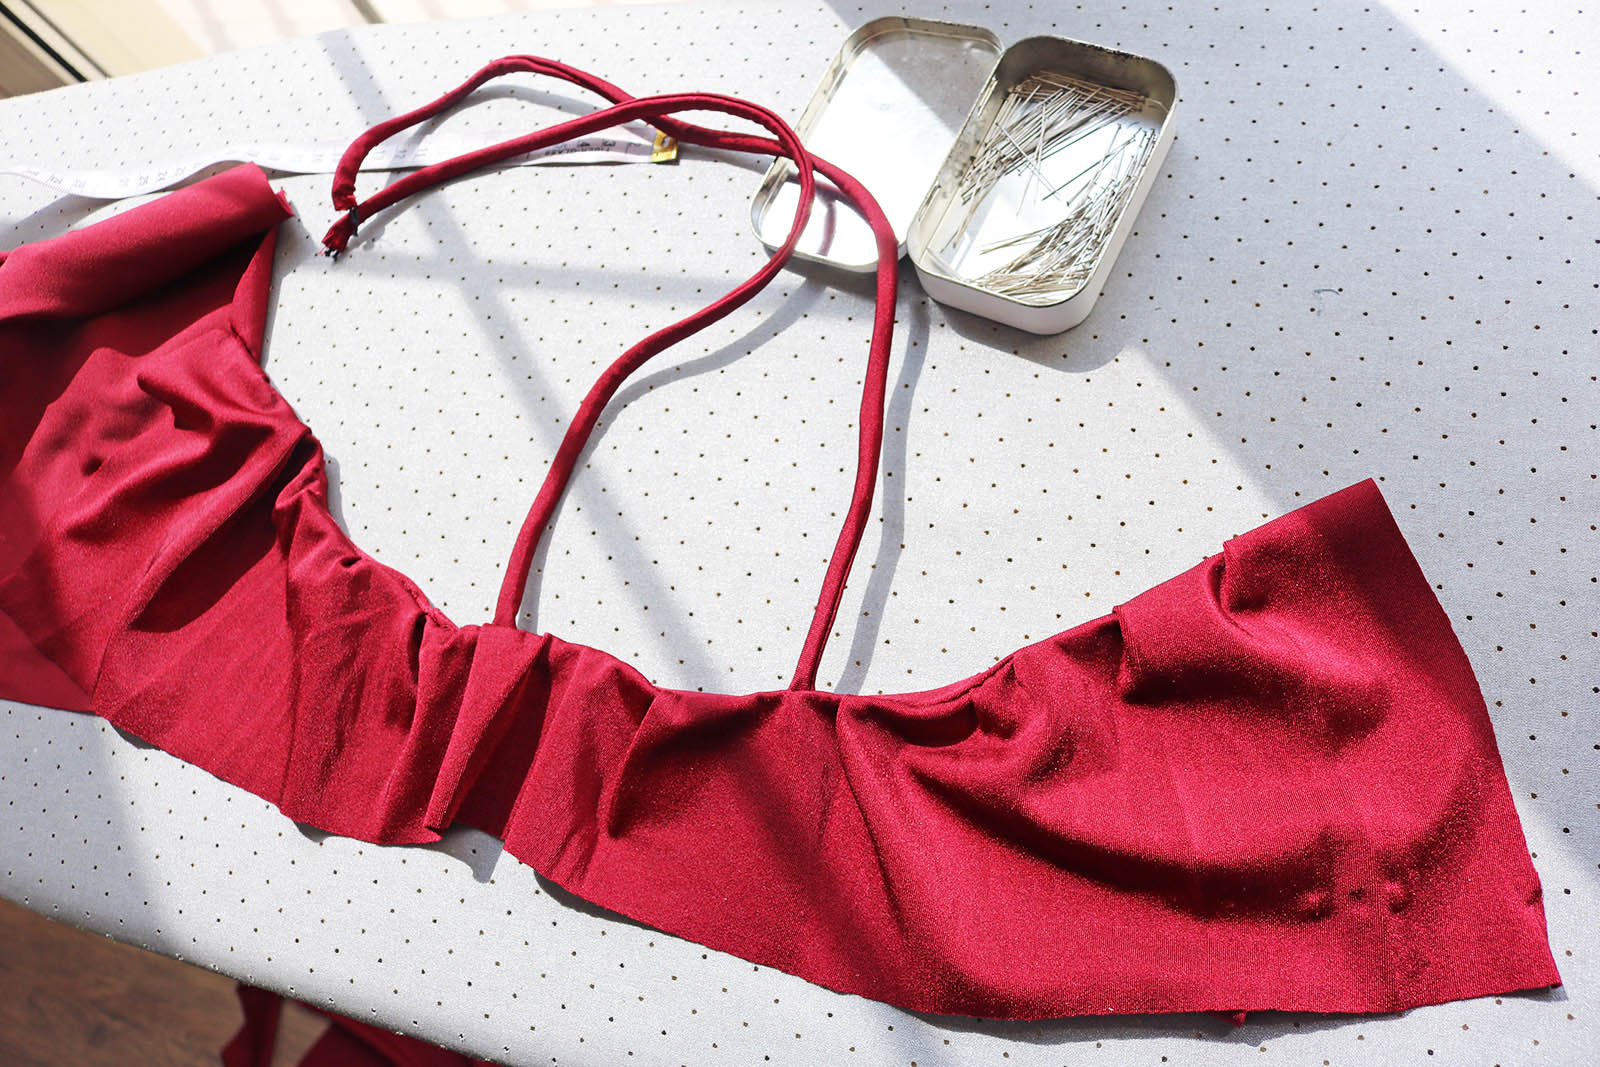
And then inserted the mini strap into the casing using safety pin, attaching the loose end of the mini strap where the shoulder strap also goes.

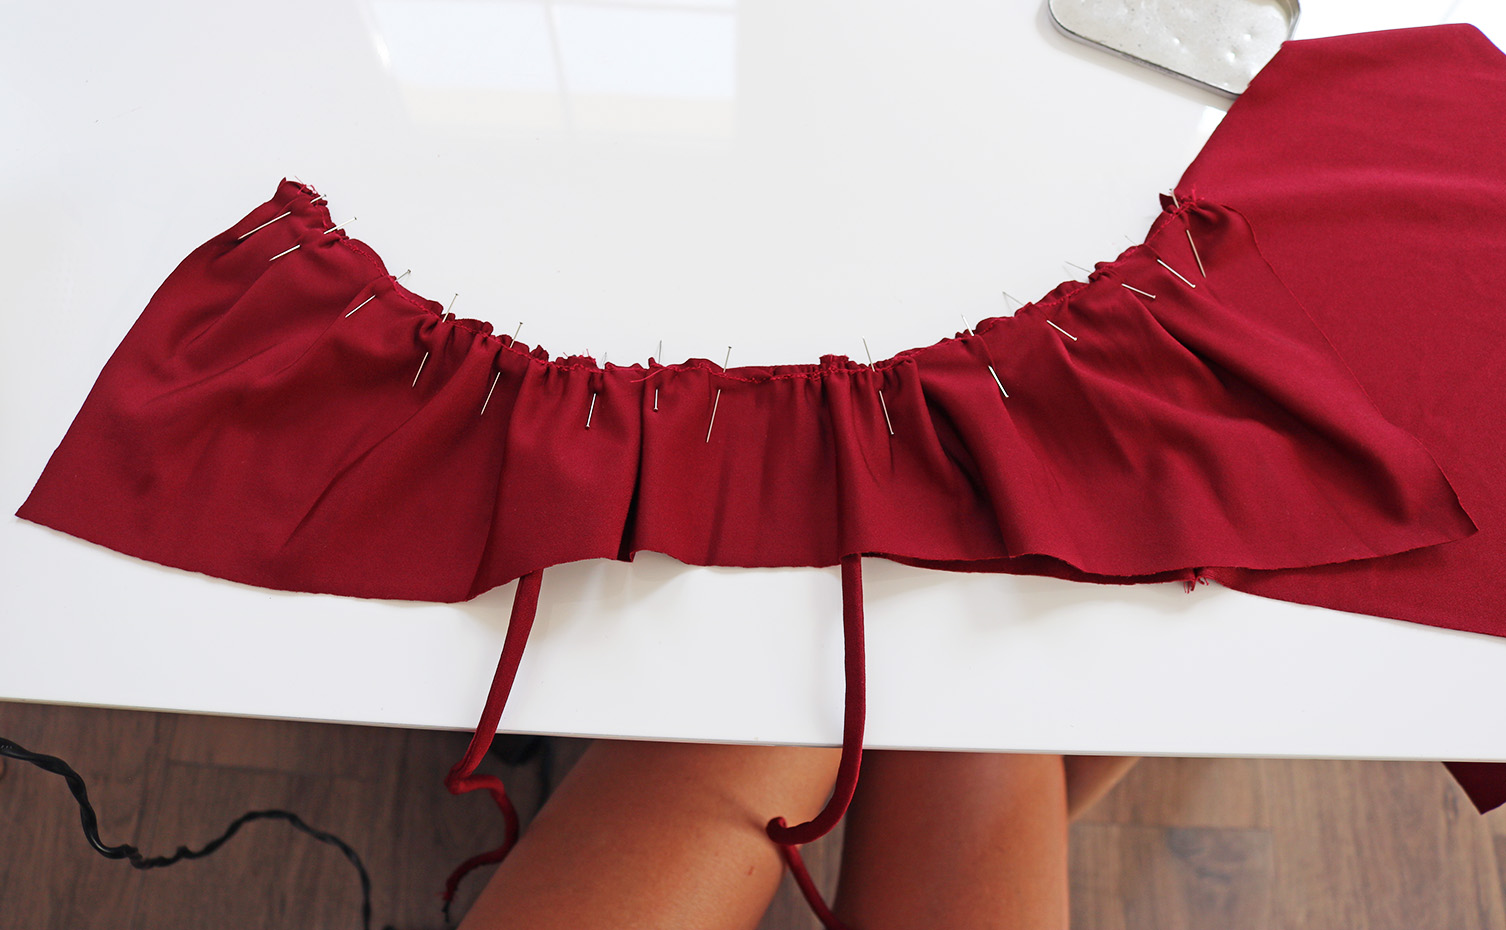
I took the other front piece and attached the loose ends of the shoulder straps to their spots, making sure the straps were not twisted, and then placed the lining right sides facing over the draped layer, pinning edges and sewing in place (also making sure I only sewed over the two ends of the mini straps, not getting the gathered pieces themselves stitched over.
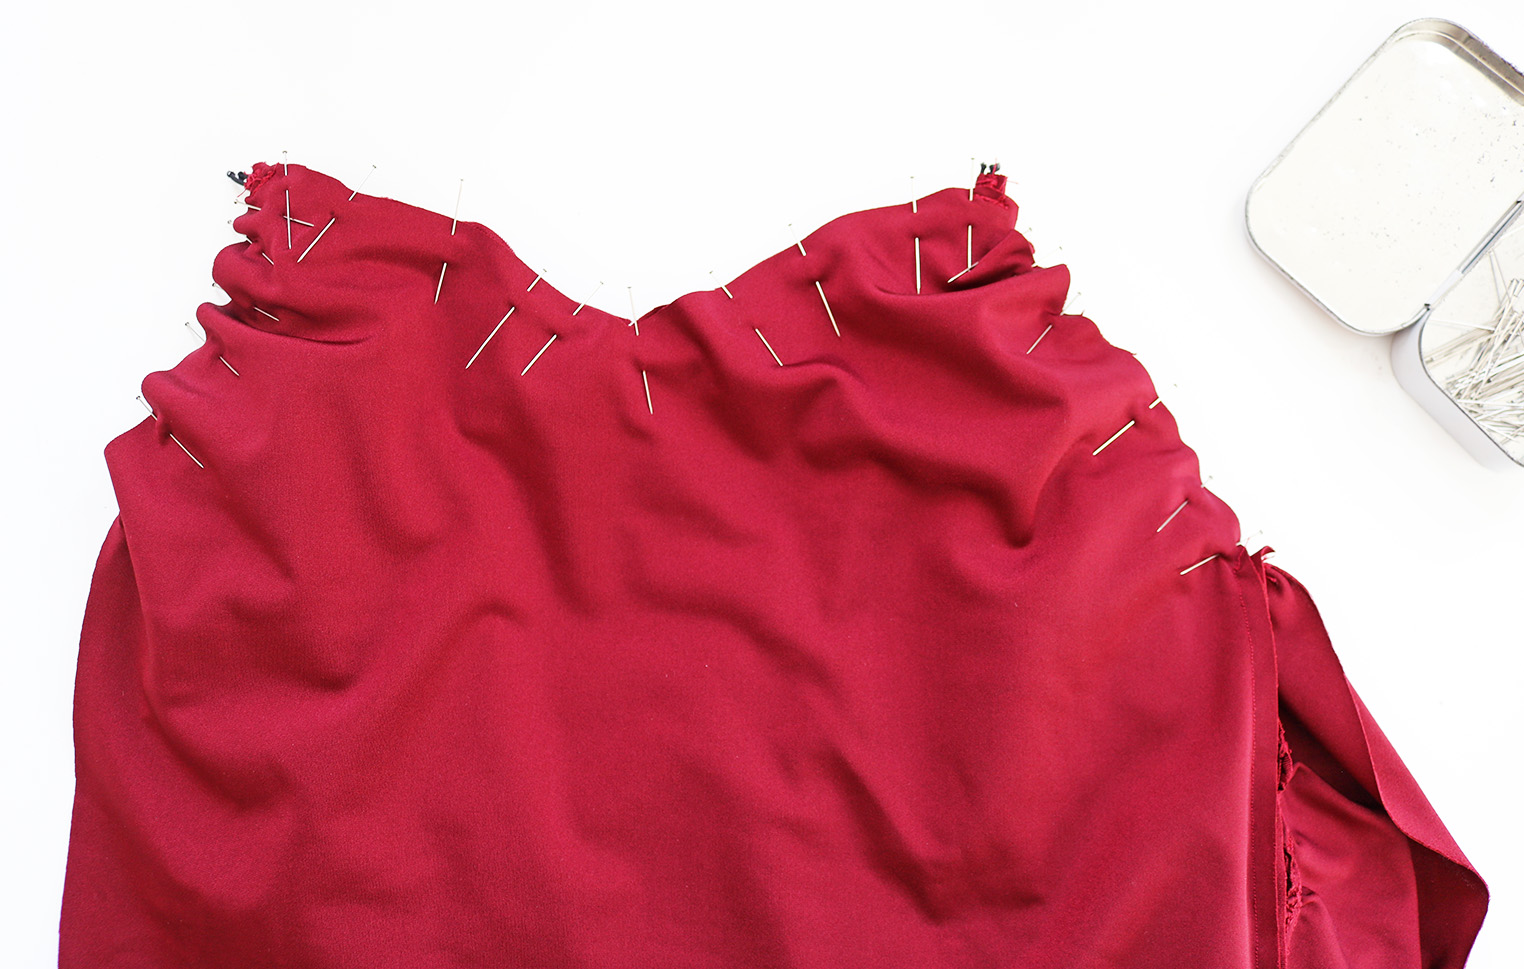
Turning the top pieces right side out, I then had this. I took the loose ends of the draped pieces and pinned them to the sides. I also pinned the back piece and the front piece together at the sides..
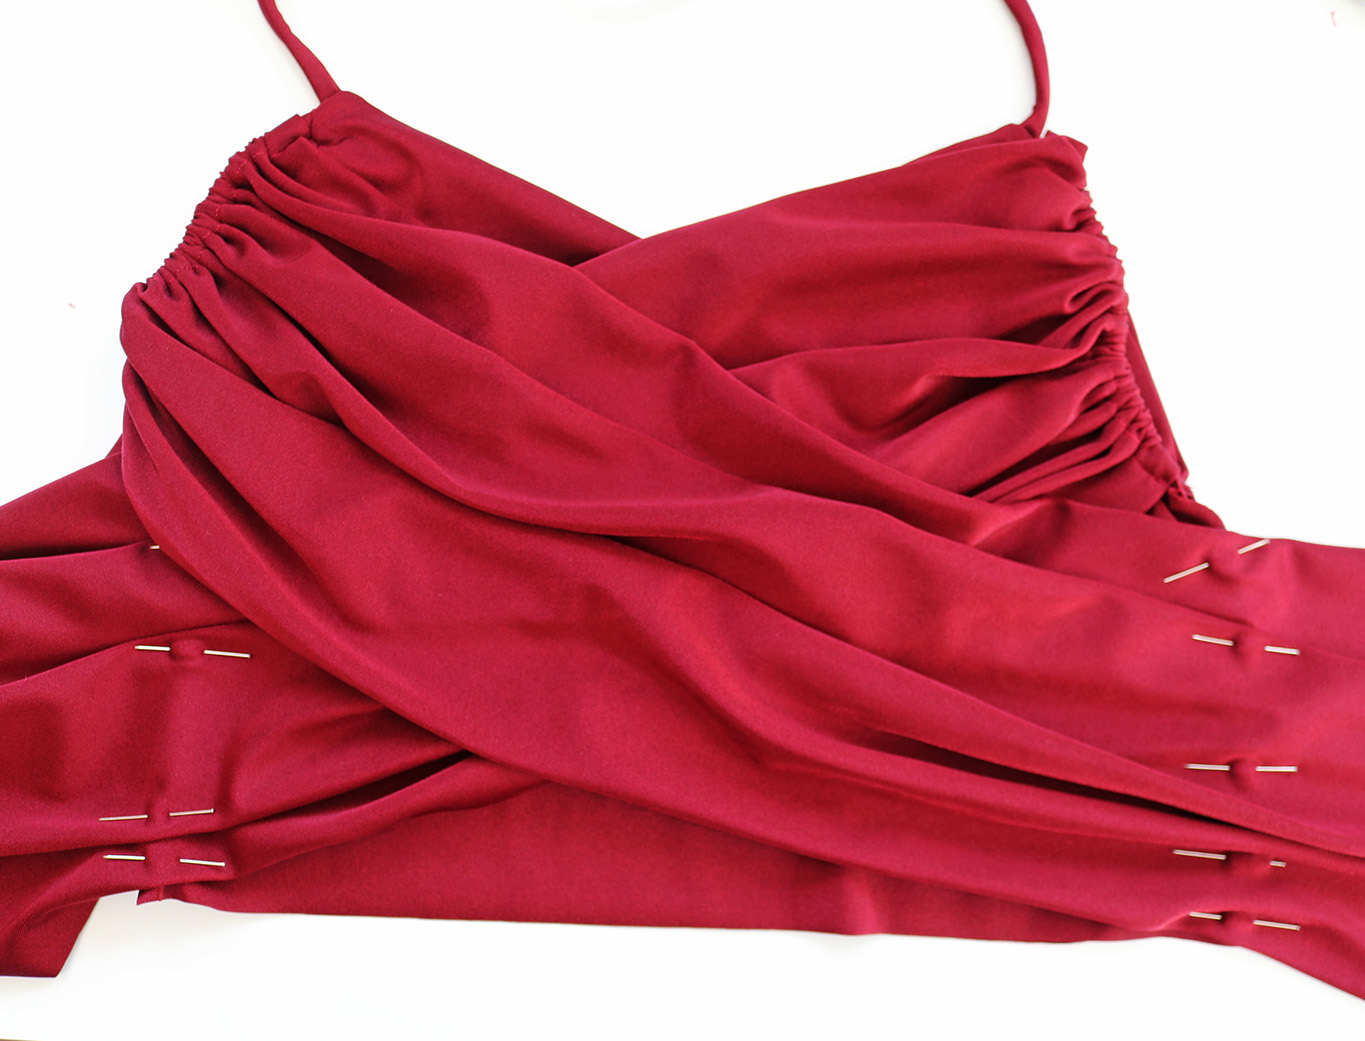
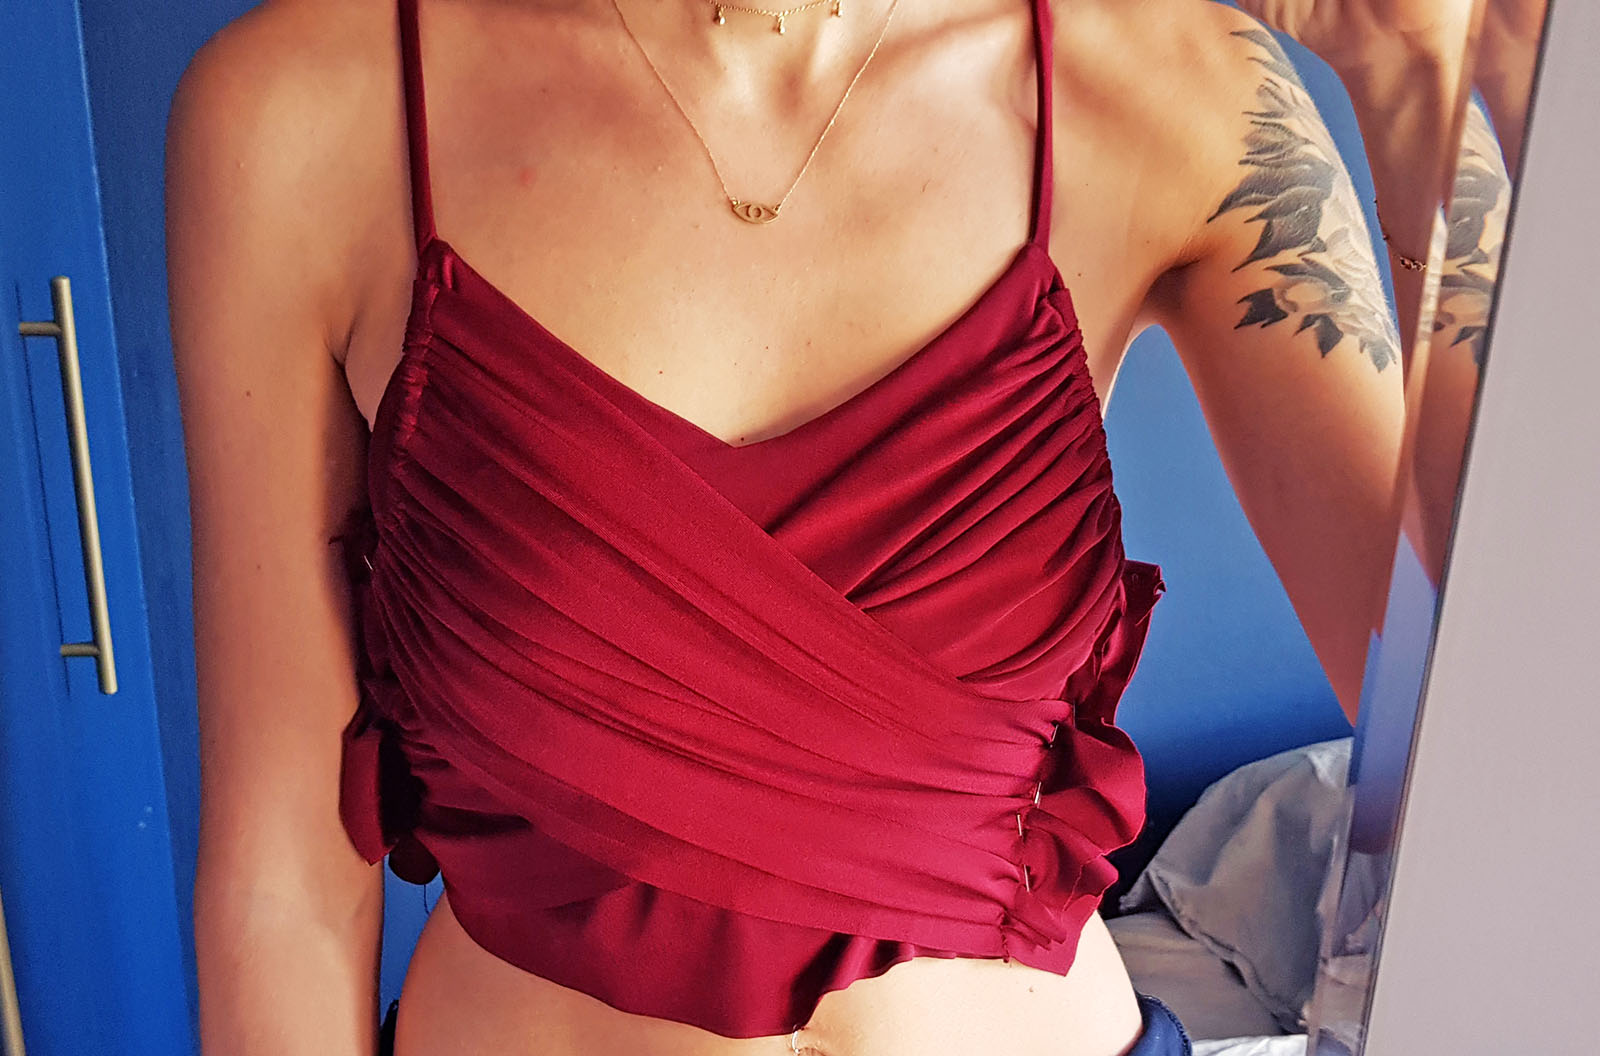
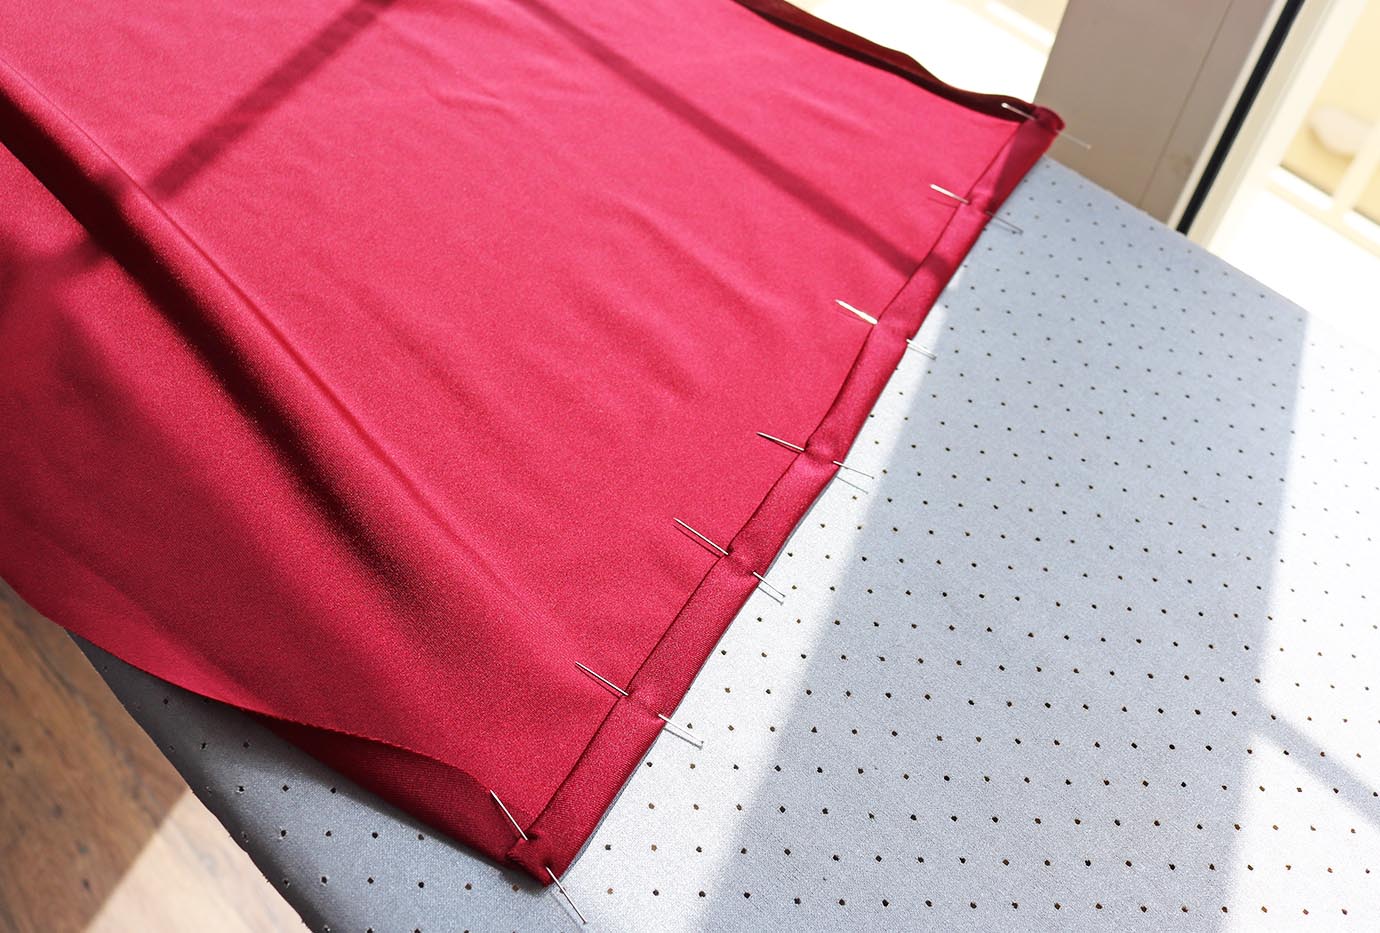
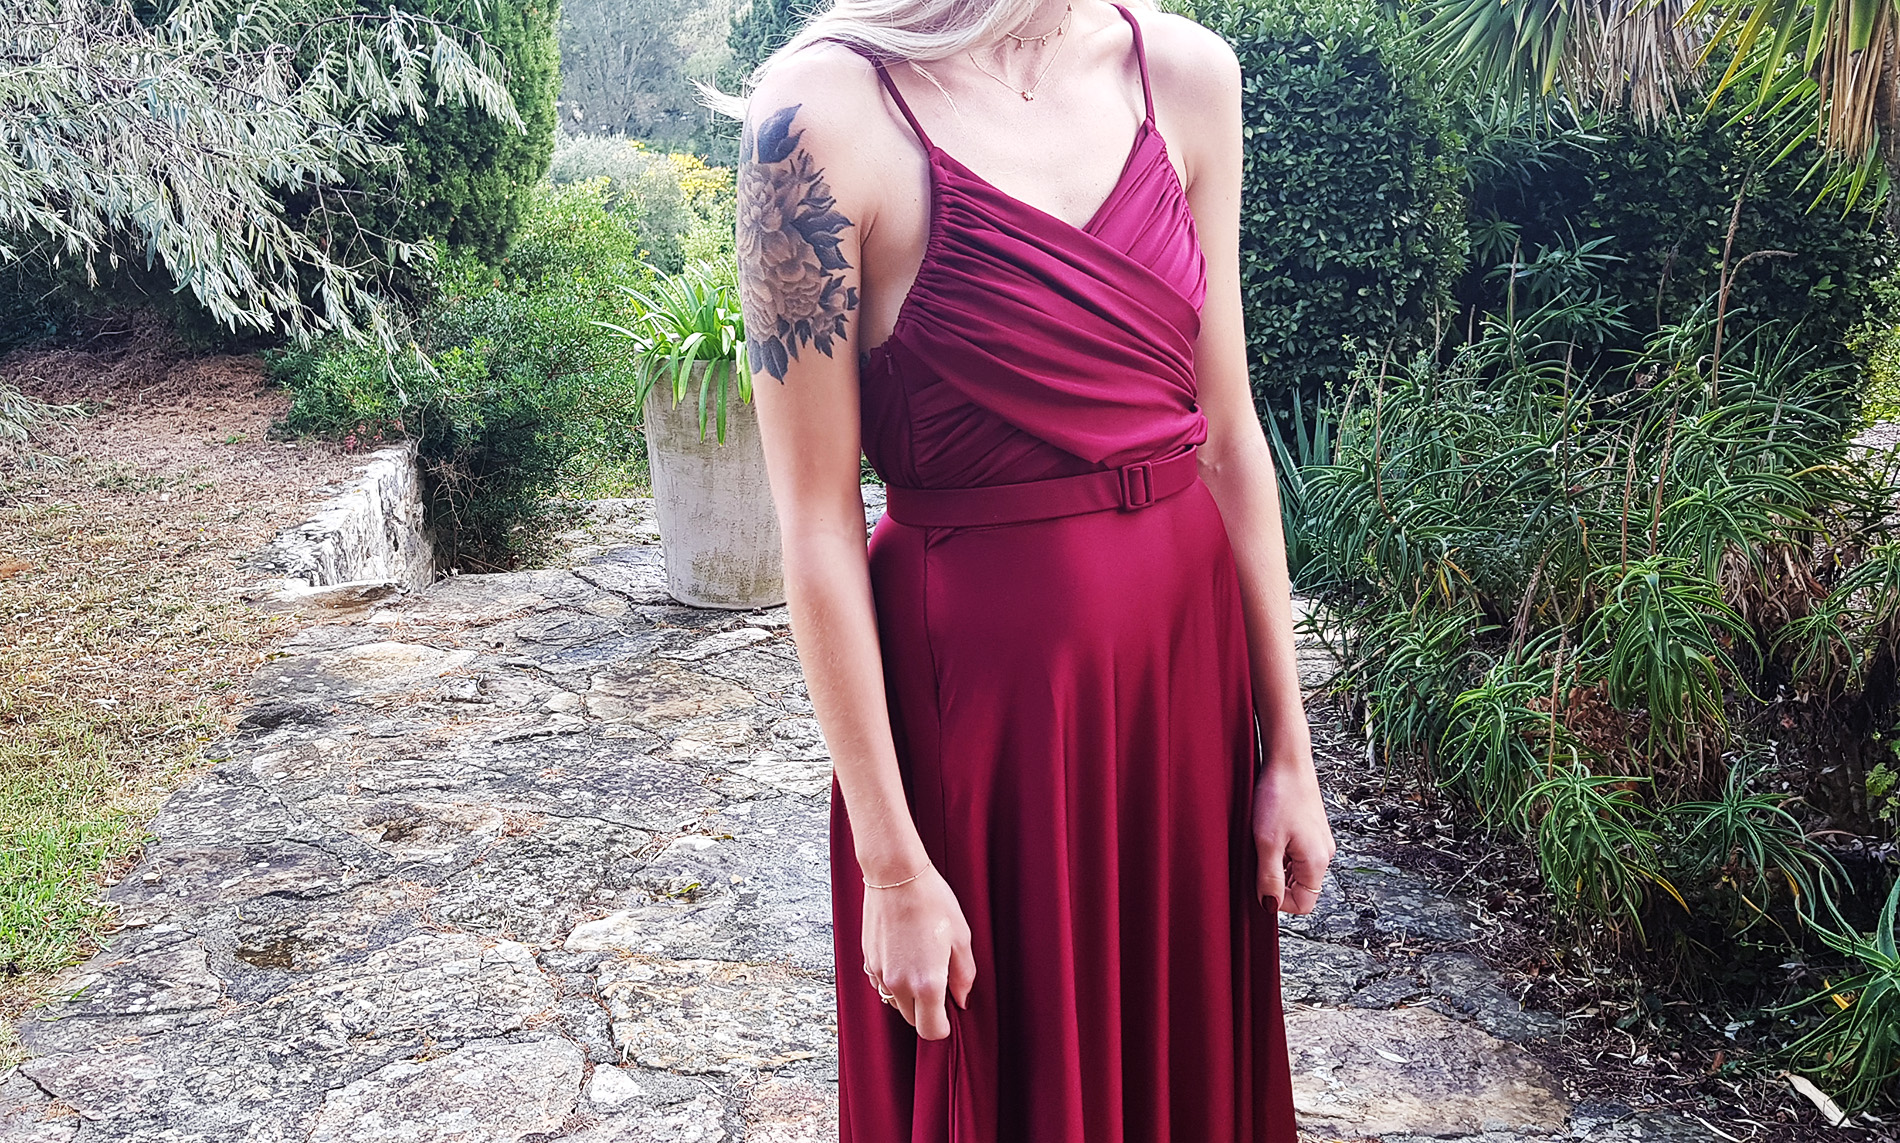
That was pretty much it for the top detail! After that, I just sewed back and front pieces together at one side. The other side needed the zipper, so I first sewed the front layers together, as well as the two layers of the back piece at the side, which made it easier to work with. Then sewed my skirt piece to the top, and finally added the invisible zipper to the side and about 15 cm down the skirt. You can see it in the last image below.
The last step was to make my matching belt, which I didn't document.. But honestly I got so into the concept of integrated belts... Might be more coming on that topic:)
Wedding ready!

xo,
Julia


0 comments:
Post a Comment
I would love to hear what you think and learn about your DIY adventures! If you use one of my tutorials, tag me on social @contour_affair, I'd love to see!