

You could do this using just glue, but I preferred to sew on the pearls & gems just cause I felt they would be more secure. I only used glue for a couple of gemstones that didn't have anything for the thread to loop through. Instead of buying all the pearls separately, I also used a trim with tiny pearls and teardrop shaped ones (I just took it apart).
Tutorials take a lot of time & effort to create, and I choose to make mine available for free. If you enjoy this guide, you can support me with a donation that feels right for you, here.
TOOLS:
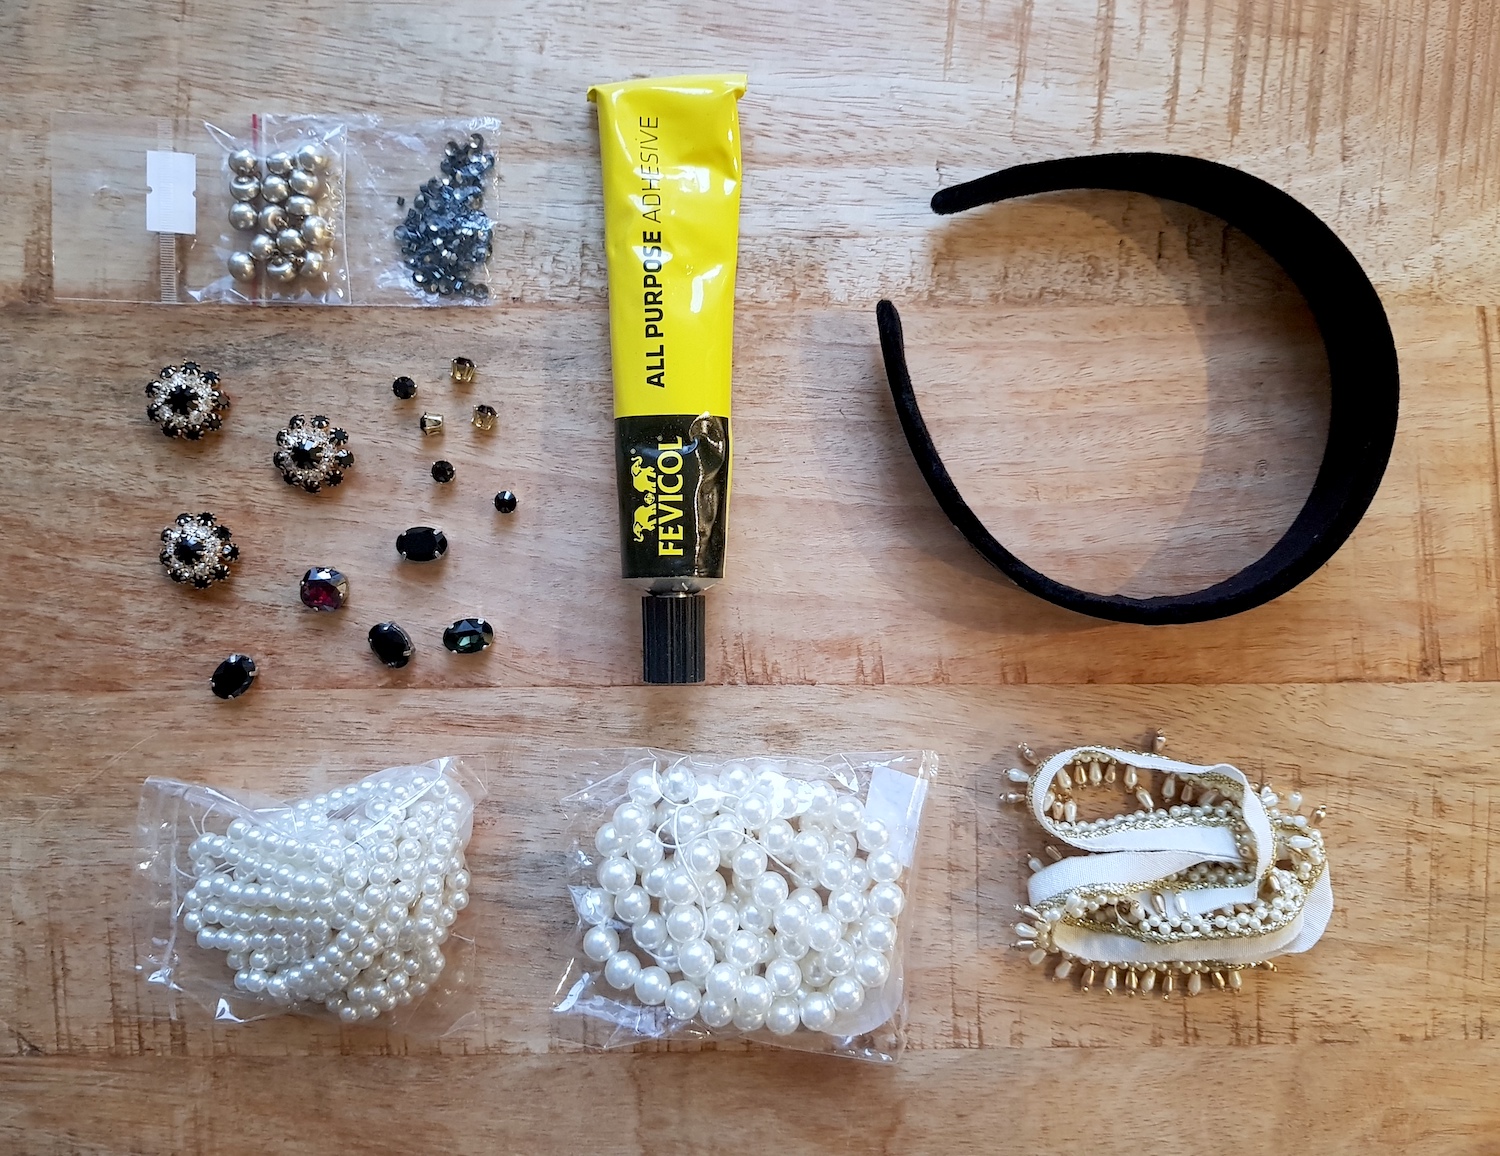
Velvet-covered, wide headband | All-purpose glue | Selection of gemstones, different size pearls, and sequins/filler bits | Not pictured but needle, thread & pliers to help pull the needle through
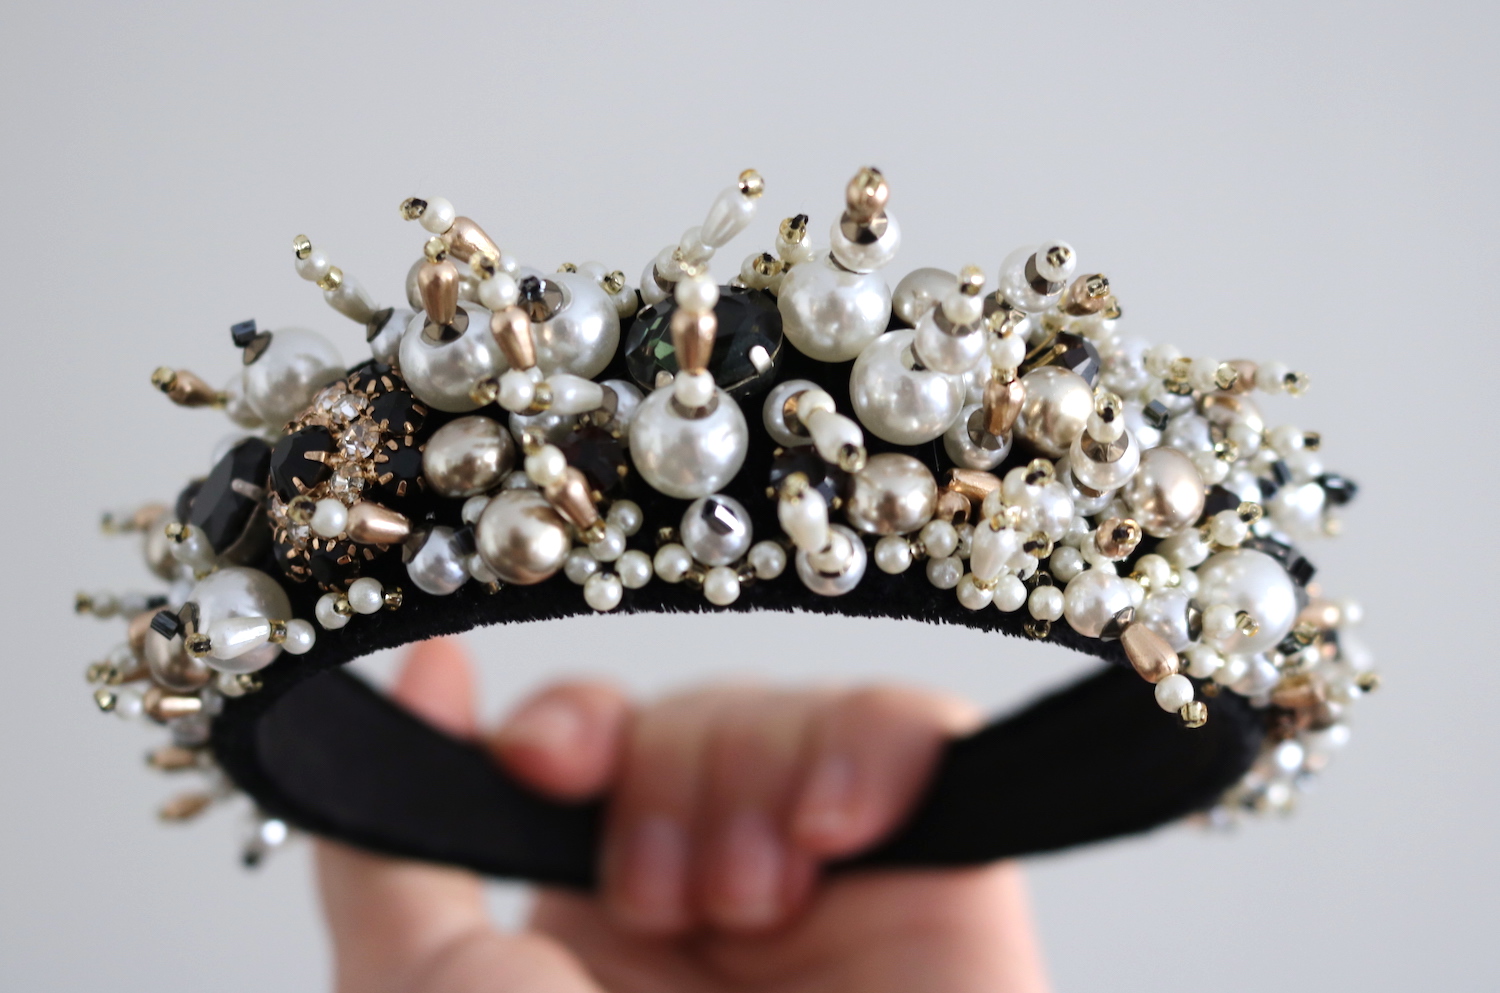
I. I started with my biggest gemstones and attached them irregularly along the band, then continued adding the rest of the stones:
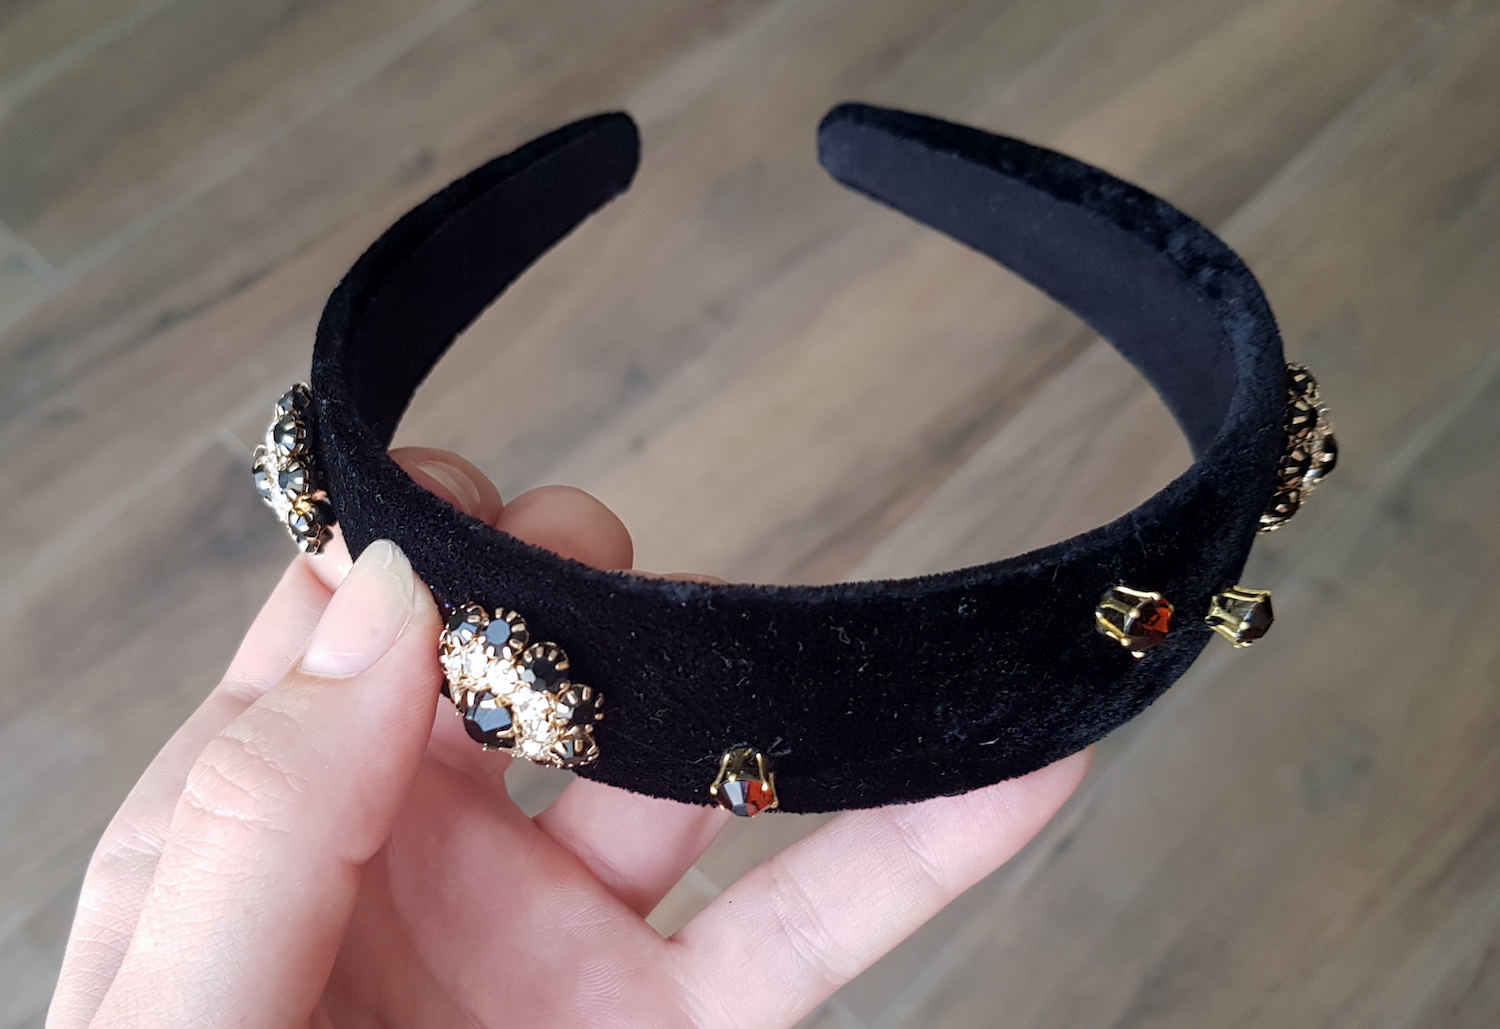
II. After the stones I started adding the golden pearls...
.. Making sure that from the front I wasn't leaving any gaps with no big elements.

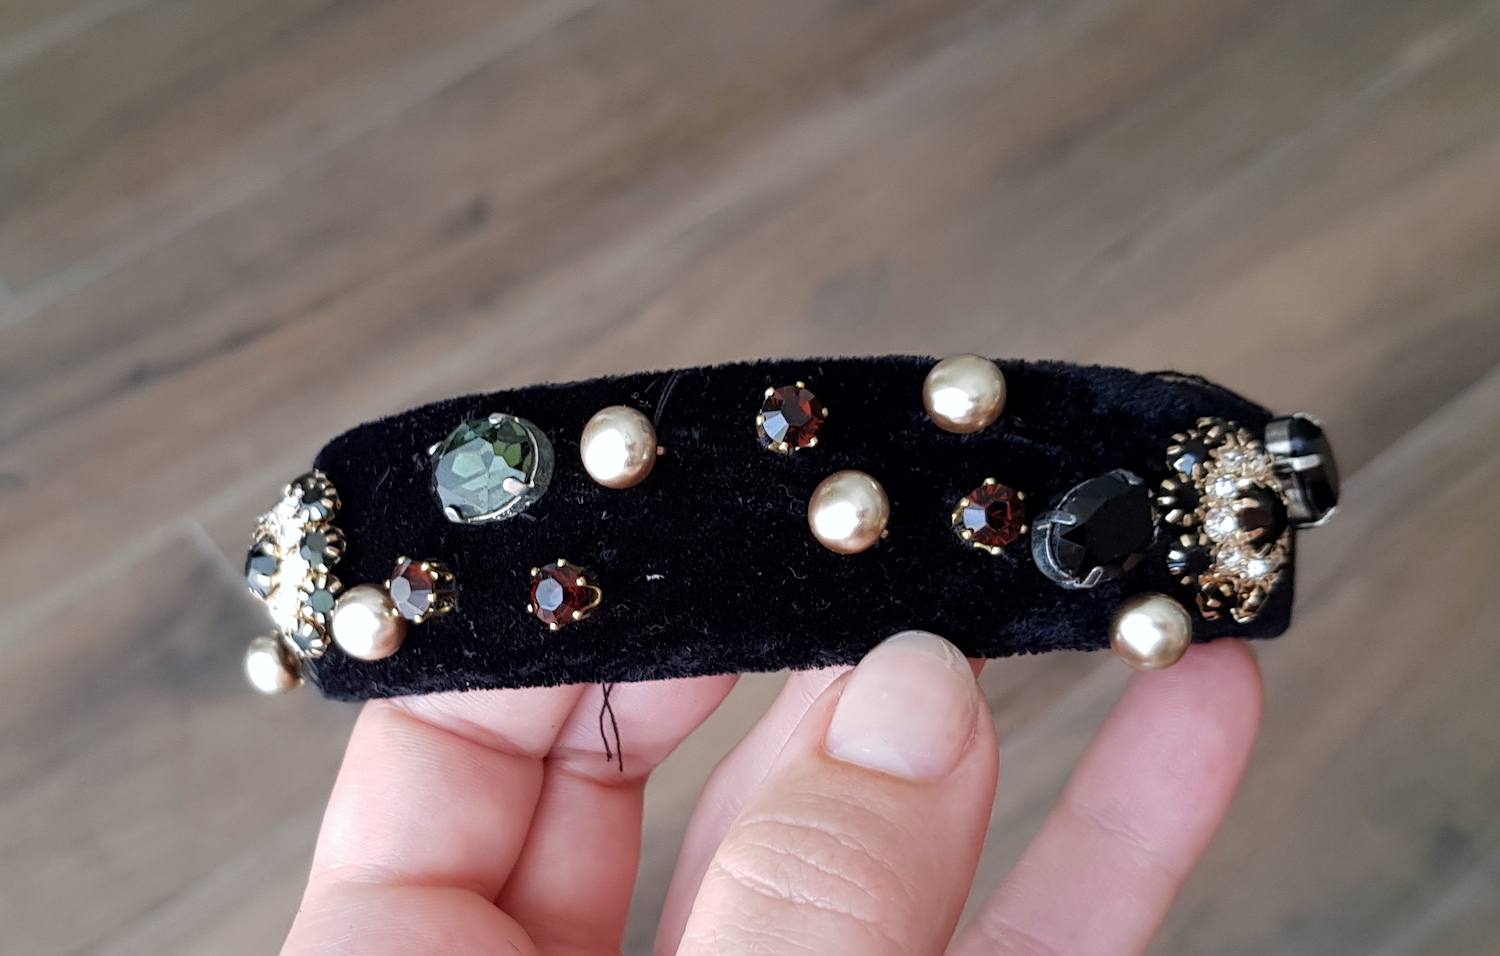
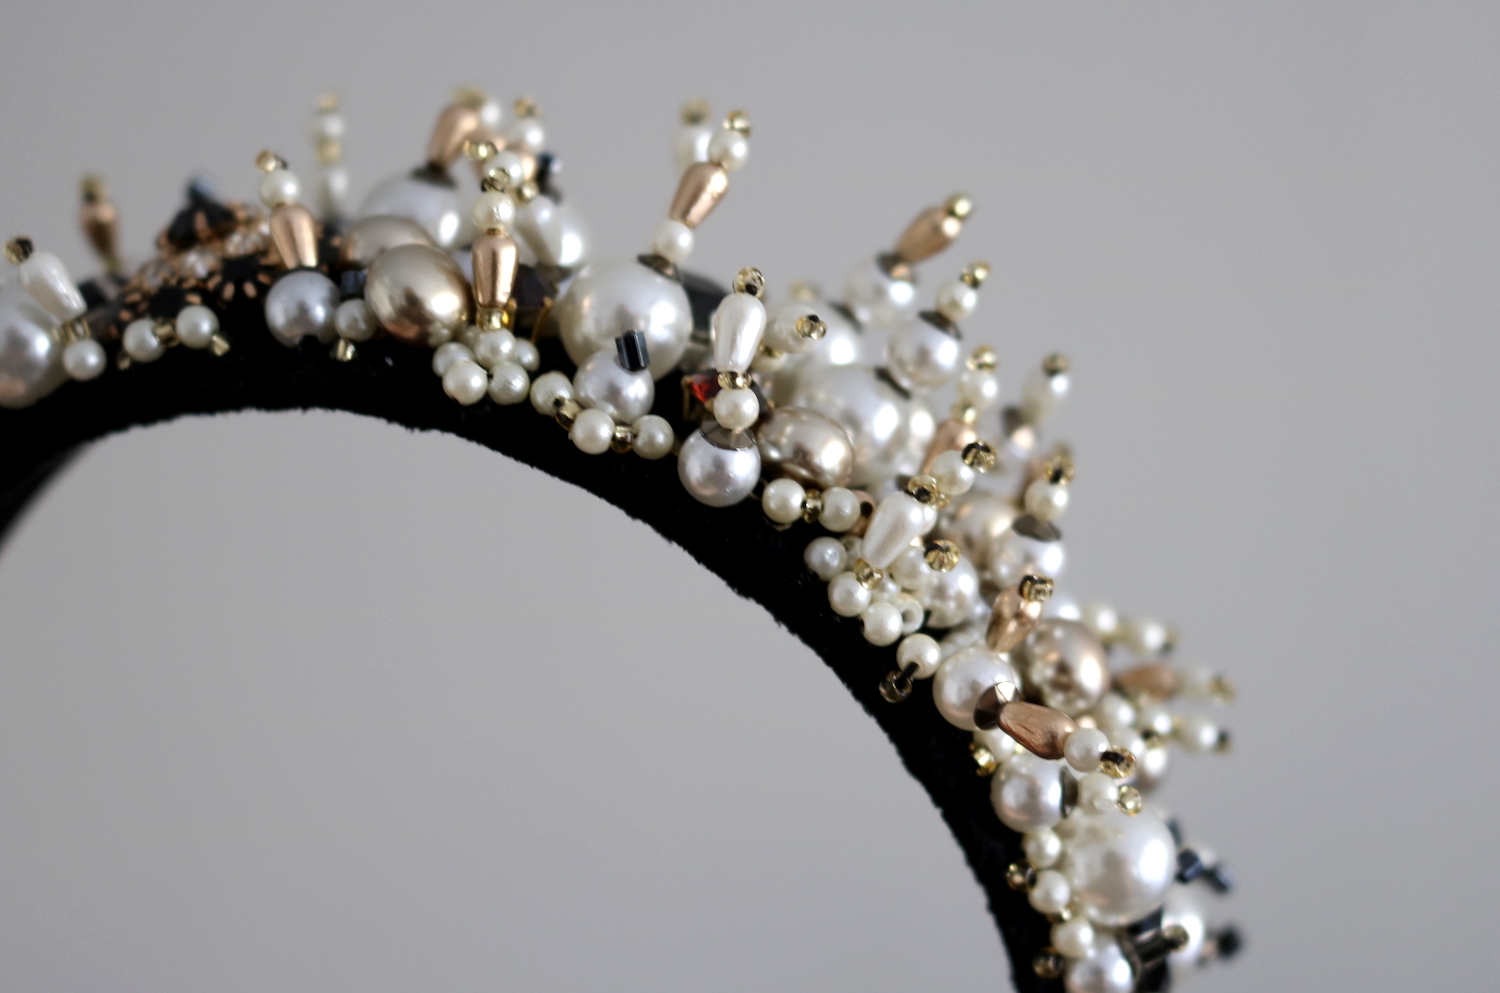
III. Then I went in with my biggest pearls, which I attached by looping the thread through the pearl, then a sequin piece, and finally through a tiny stopper bead, and back in through the sequin and the big pearl. I wanted the finished crown to be chunky, so I loved the look of the cylinder-shaped mini bead on top of the round pearl. But this was still me being conservative.

IV. BOOM! As I continued working on I went all out. I came up with all kinds of combos to create a 3D situation. If you wondered what Bruno Mars meant with dripping in finesse, this is it.
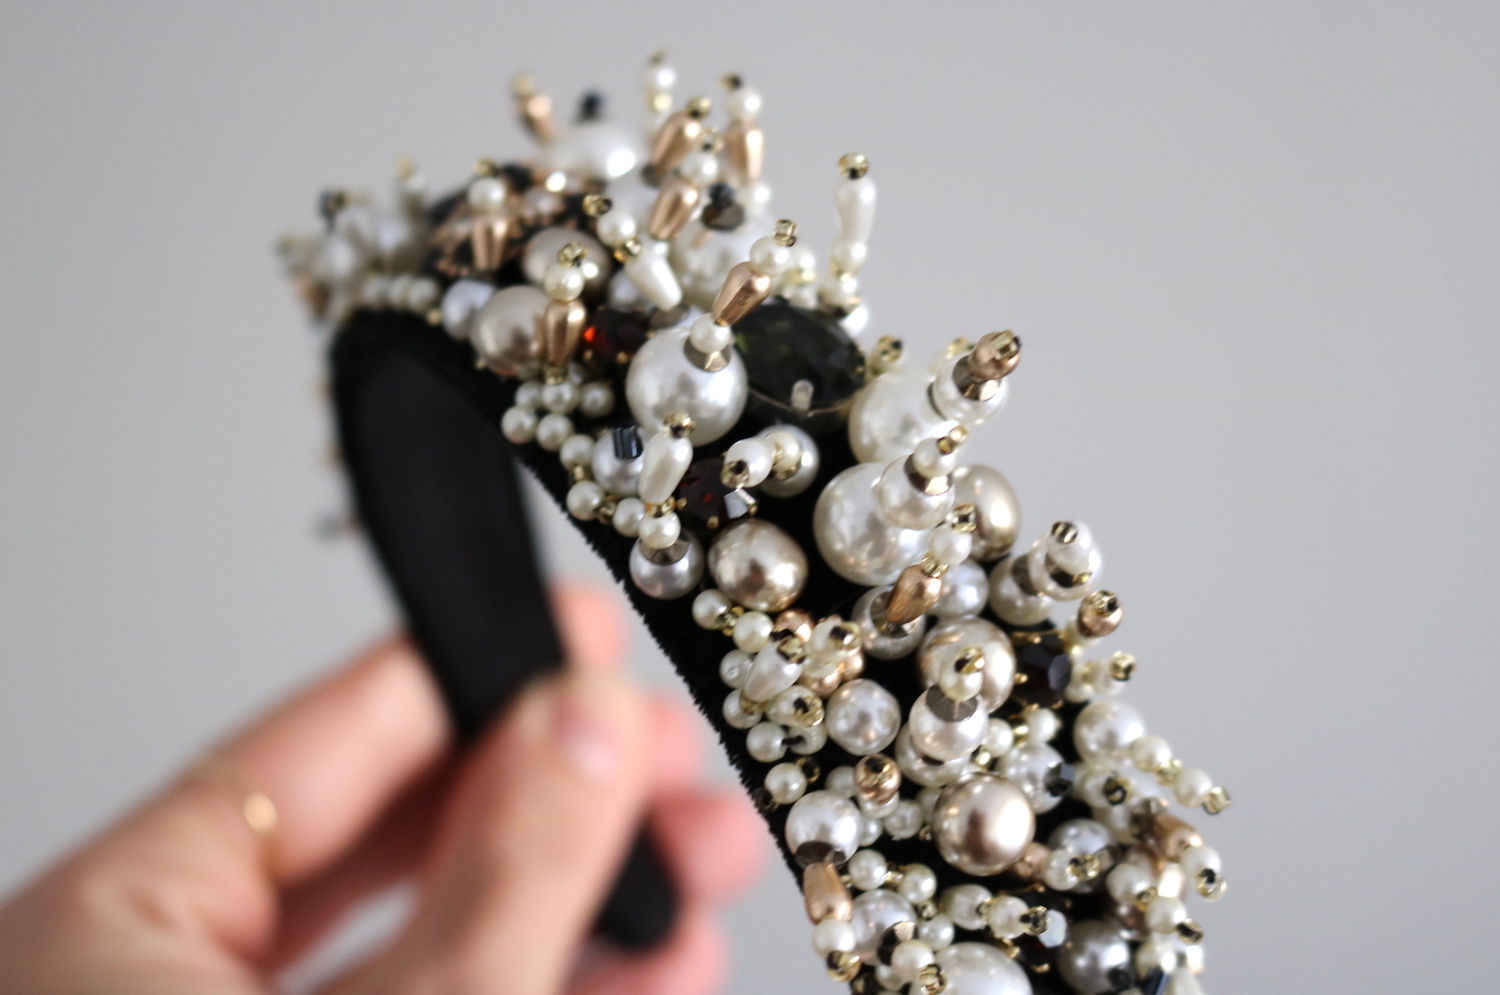
Here's a couple of close-up where you see how I layered the bigger pearls, the teardrop ones, and the mini pearls to create irregular towers that give the band a crown-y feel.
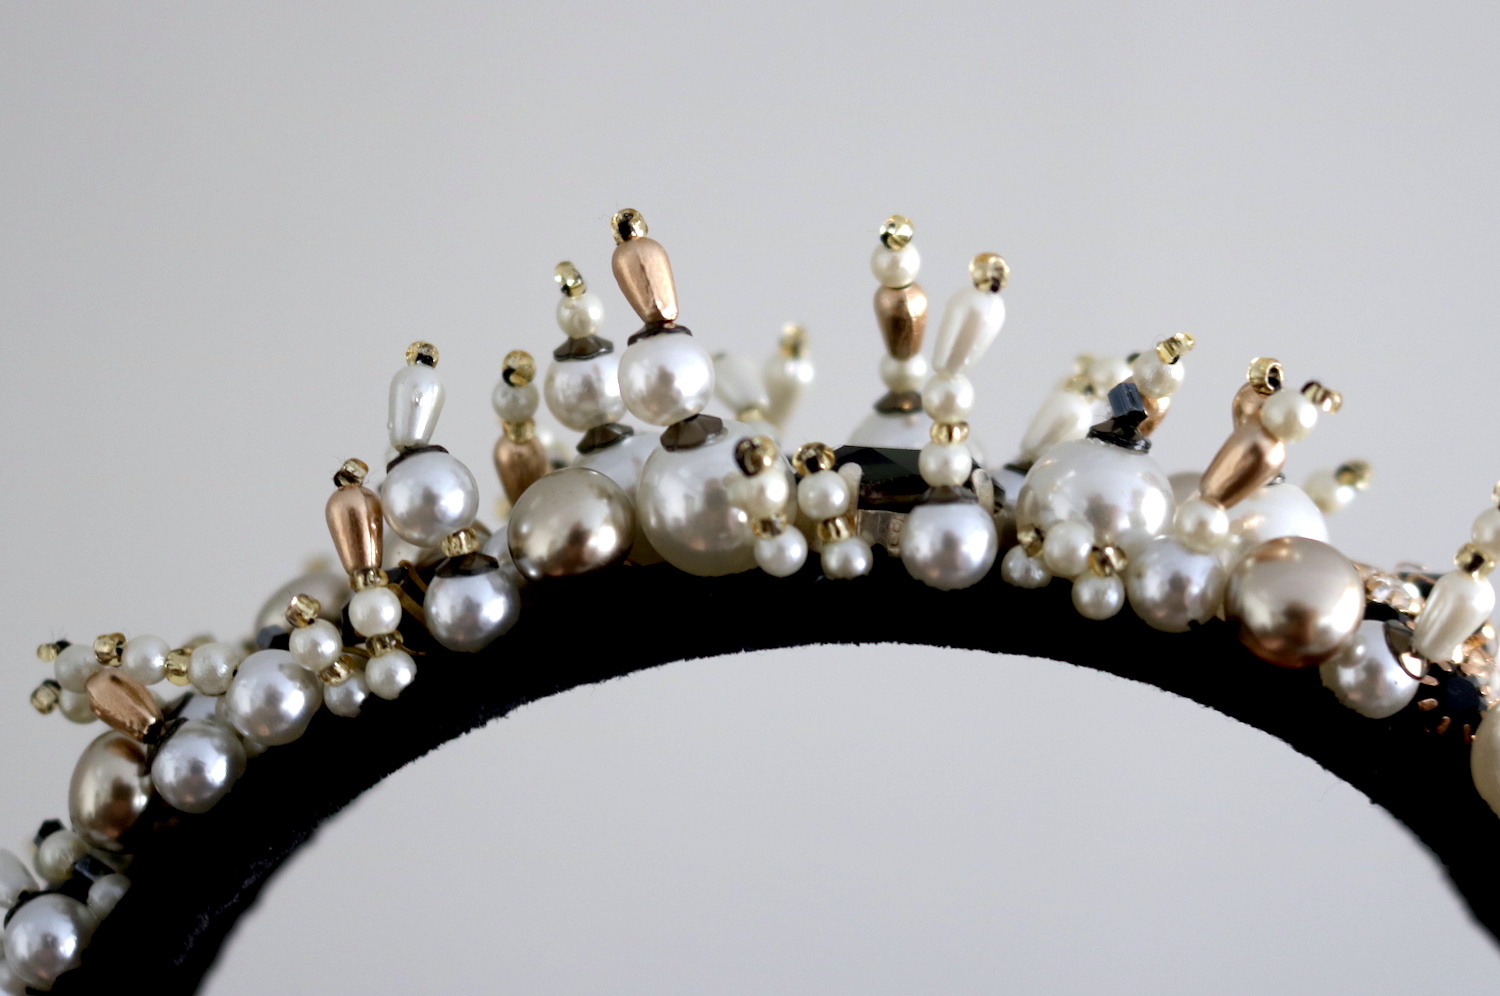
From the top you see how I alternated with the pearl combos.
And from the front, how I built the 'towers' slightly taller towards the center.

Yes. Yes yes yes.
xo,
Julia


Contour Affair is a thoughtfully curated blog by Julia, a self-taught seamstress on a mission to build a self-drafted, handmade wardrobe. Her platform offers a wealth of free sewing tutorials, emphasizing slow fashion and creative self-expression. Jewelry
ReplyDelete