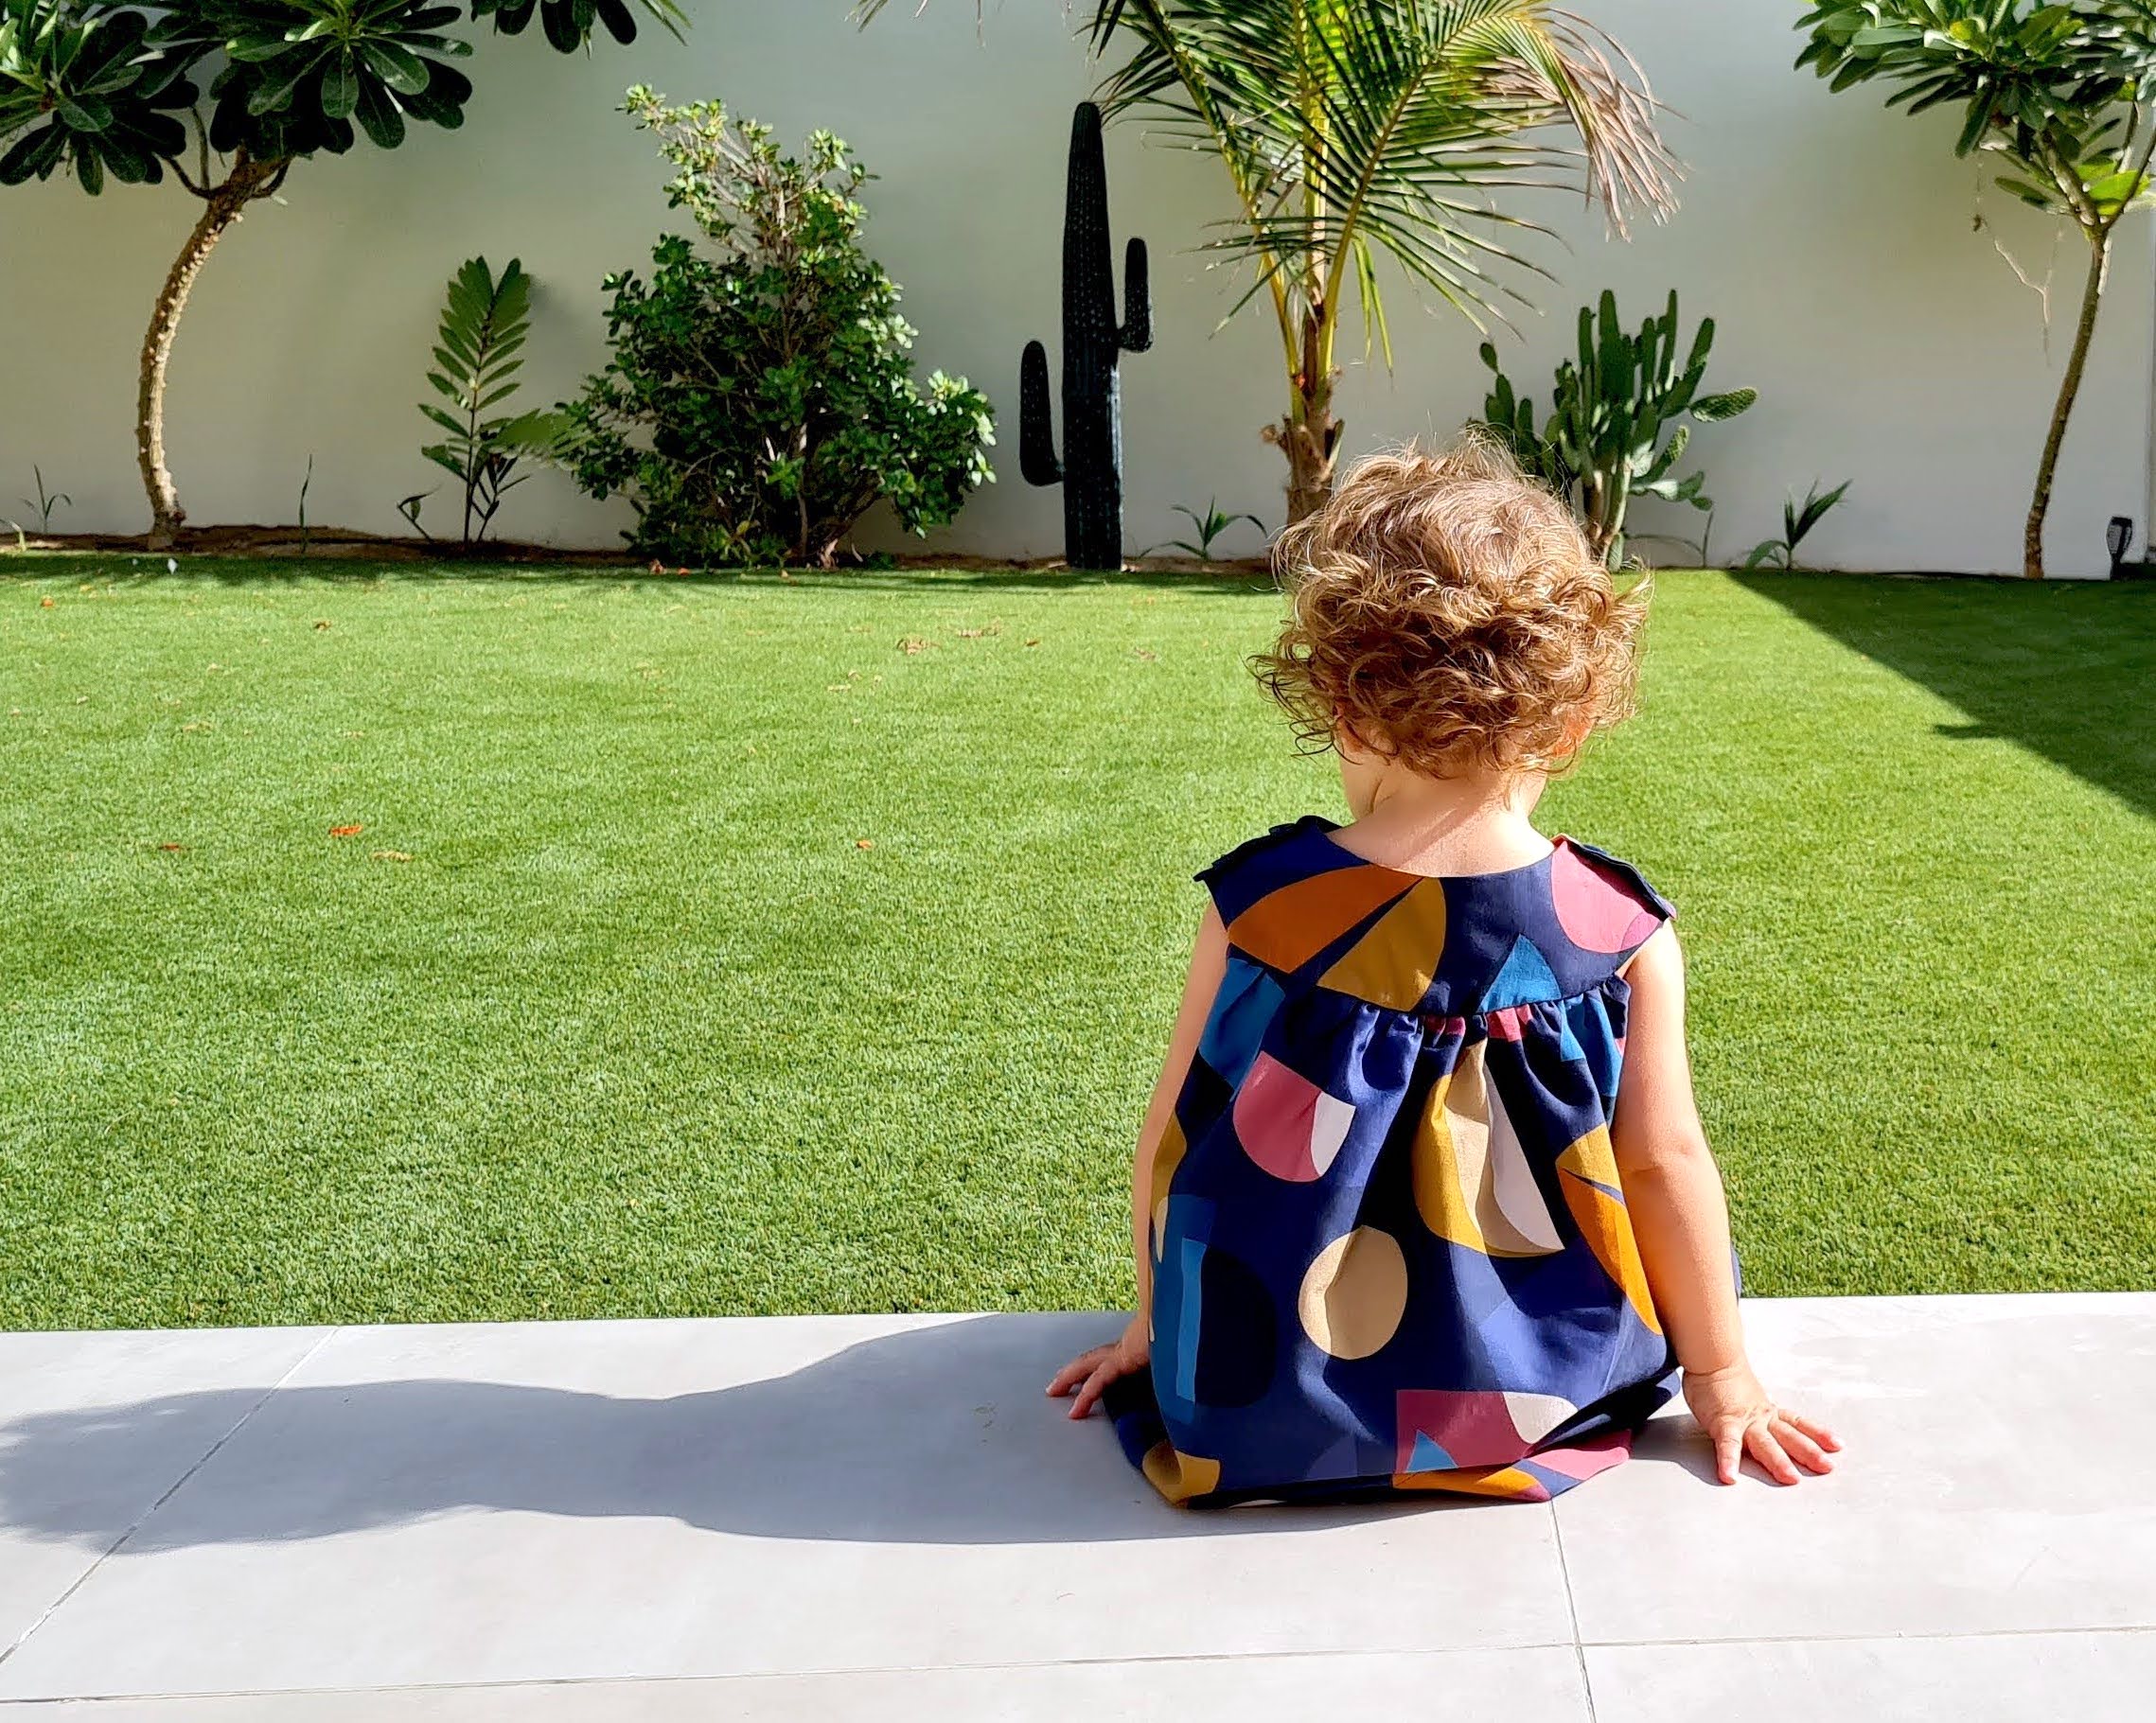
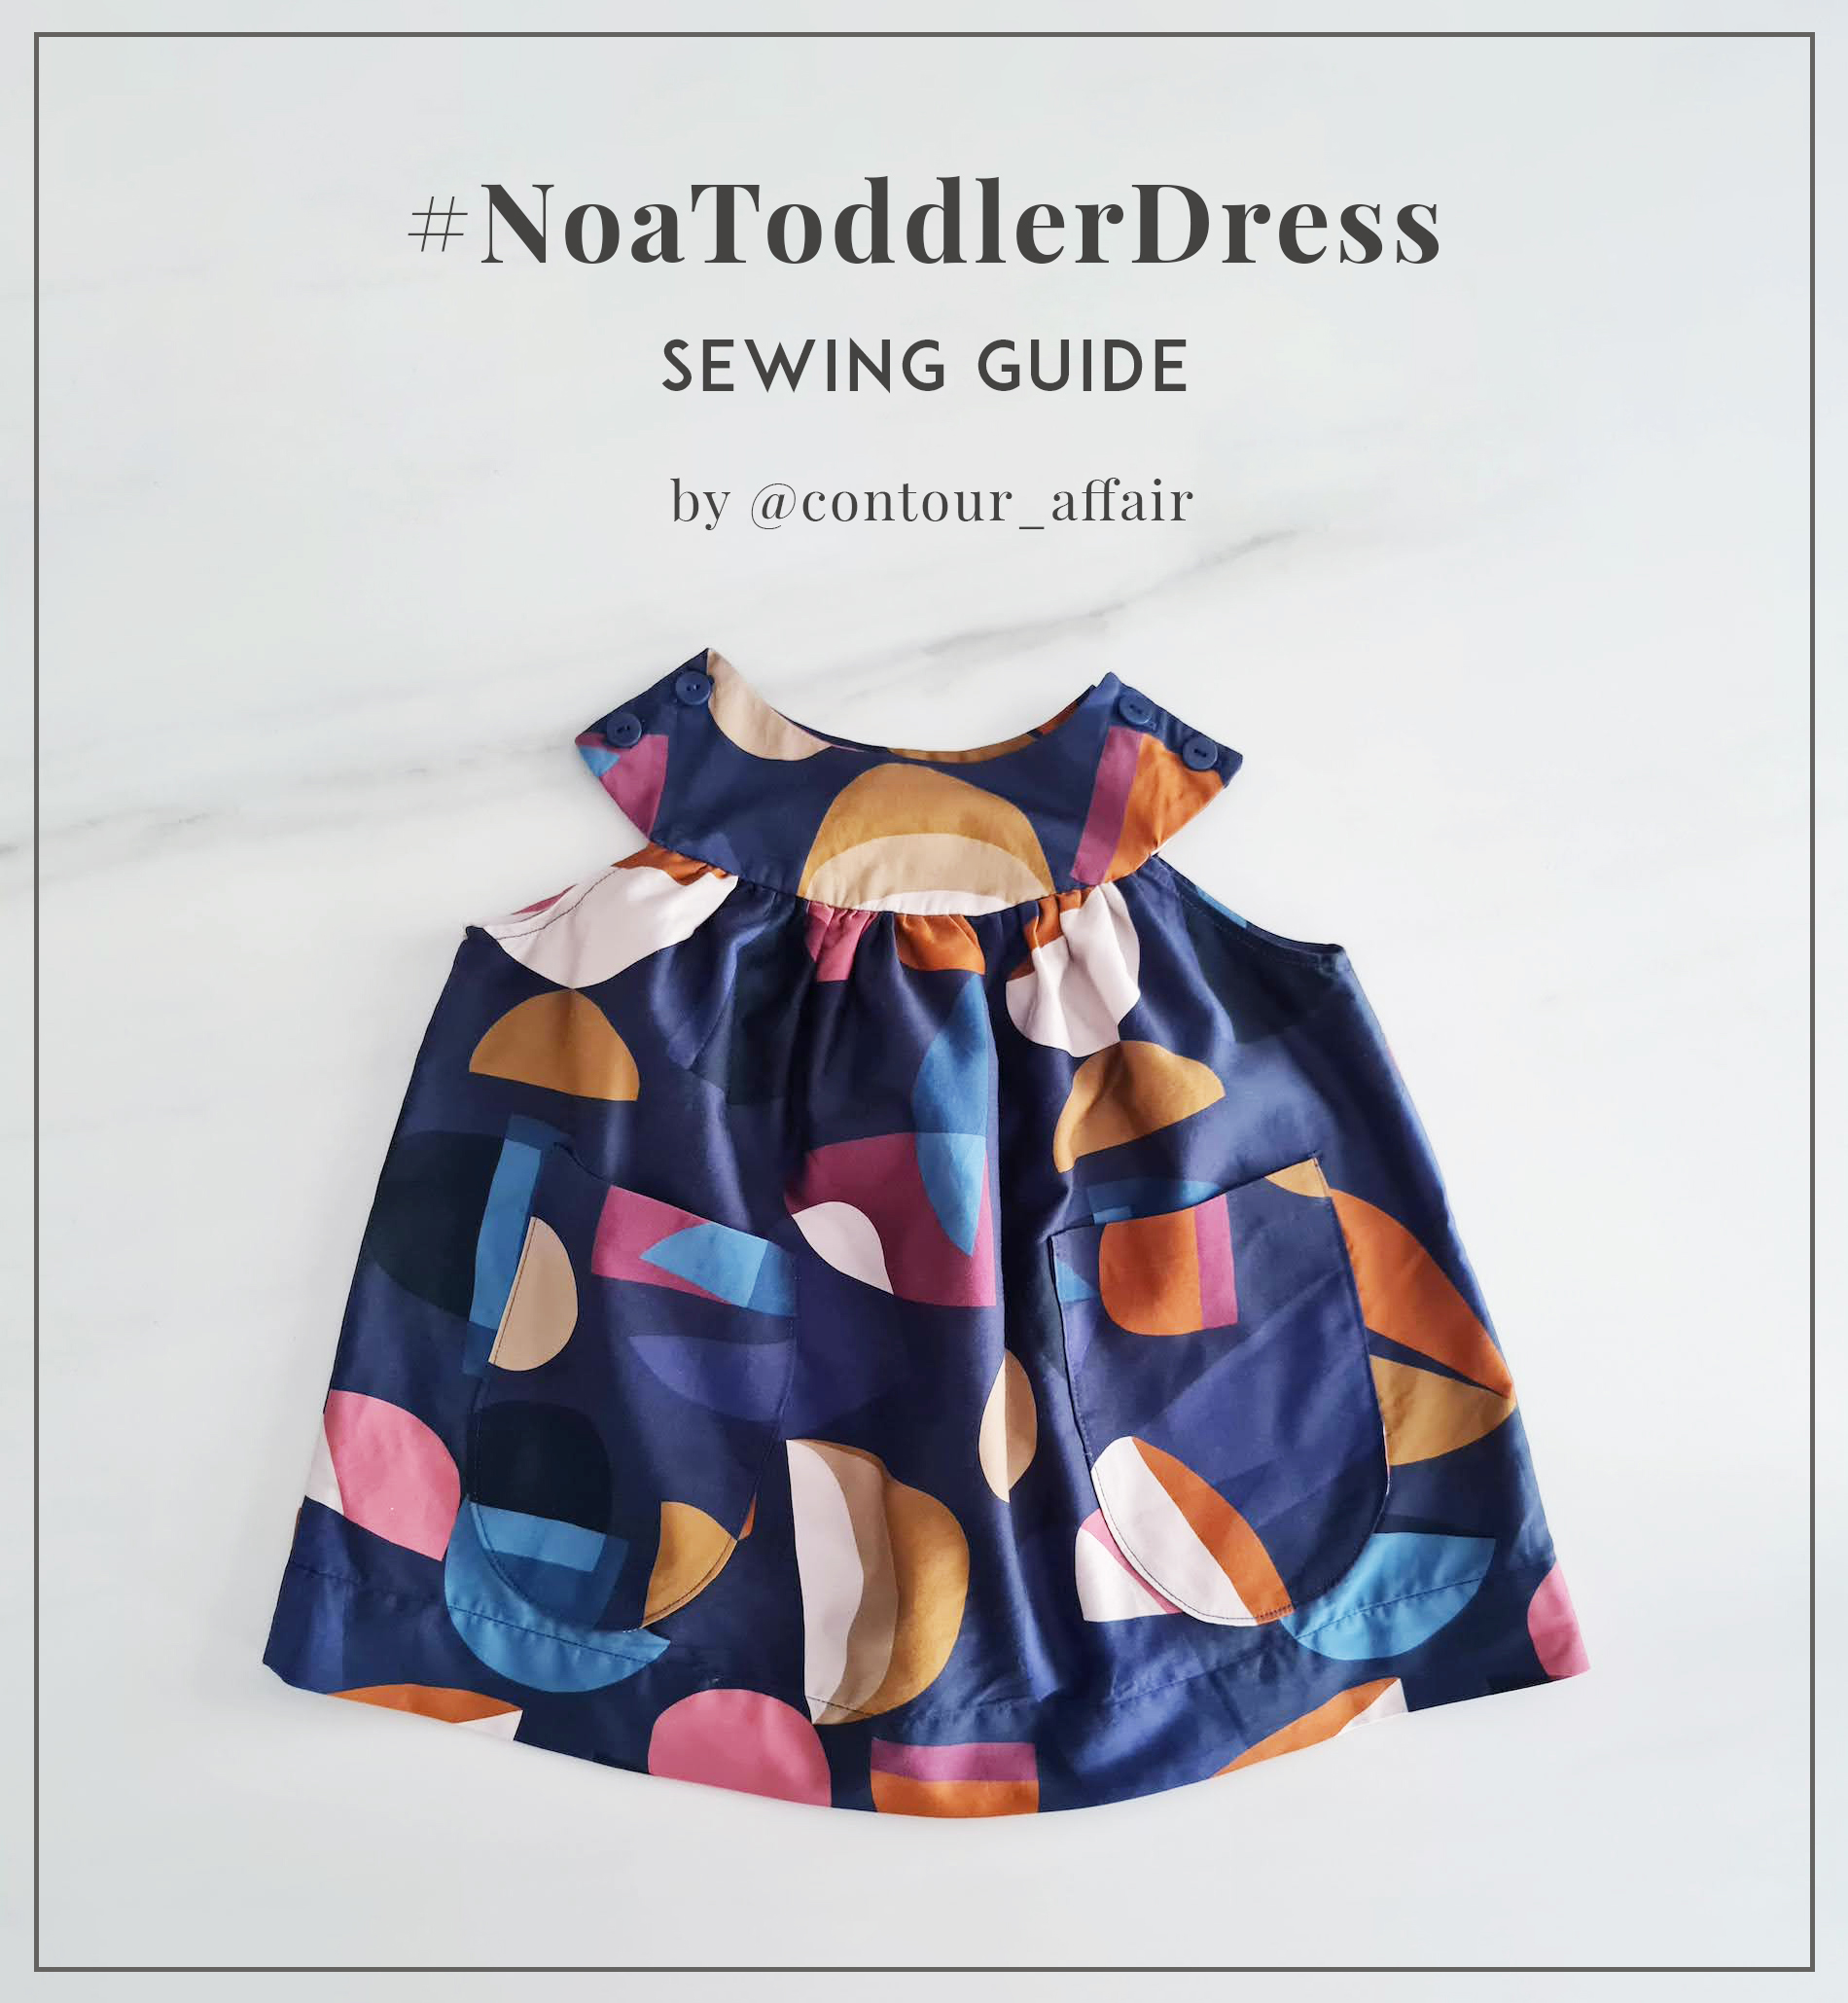
Just like that, about six months ticked by since I last posted a tutorial.. Life with a toddler flies. I've been talking for ages about doing guides for kids pieces, and here we go, finally. I'm also starting to give my designs names, so it's easier for you to discover other sewists' versions on social. Meet the #NoaToddlerDress ! This is a size-flexible dress of course, fitting over a long time, first looser, then closer, and finally as a top as your kid grows.
The 9-24 mo is an approximate range - babies/toddlers come in such different sizes.. I recommend you measure an existing dress your child has, and compare the measurements to see if you need to adjust. My kid is 15 mo in the photos, 78 cm tall, and her build is a bit smaller than average (she still fits into most 12-mo commercial clothing).
.. And before you ask, yes, I absolutely plan on trying this style out in adult size.
Tutorials take a lot of time & effort to create, and I choose to make mine available for free. If you enjoy this guide, you can support my work with a donation that feels right for you, here.
TOOLS:
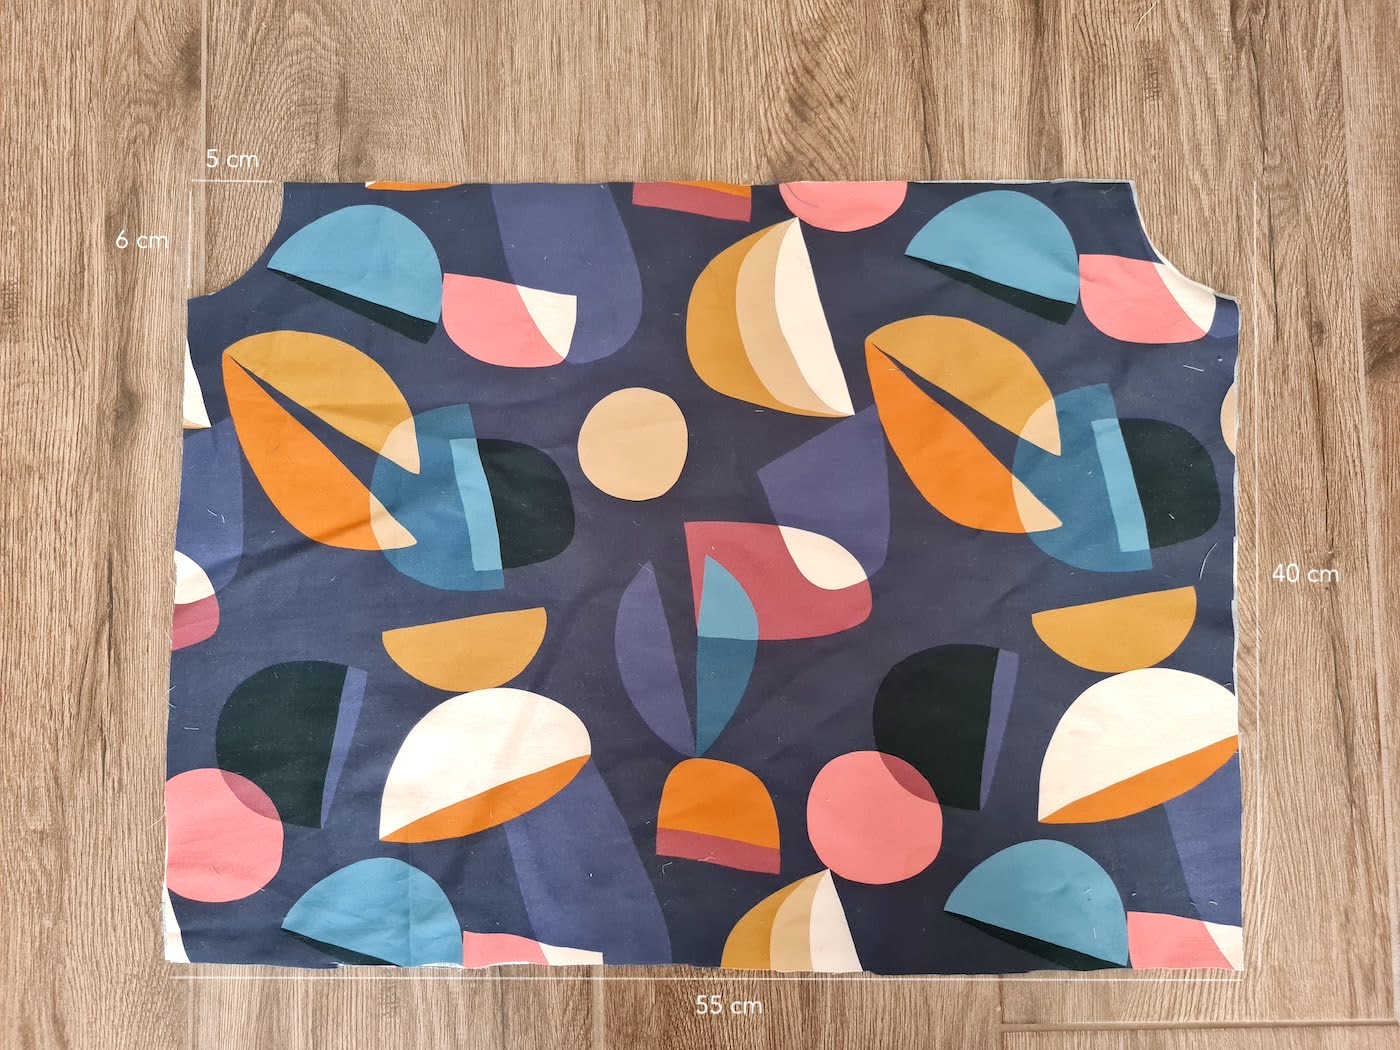
I. To cut the body of the dress, start with a 40 cm by 55 cm rectangle, then mark 5 cm in and 6 cm down from the top corners, and draw + cut a curve. You need 2 of these pieces.
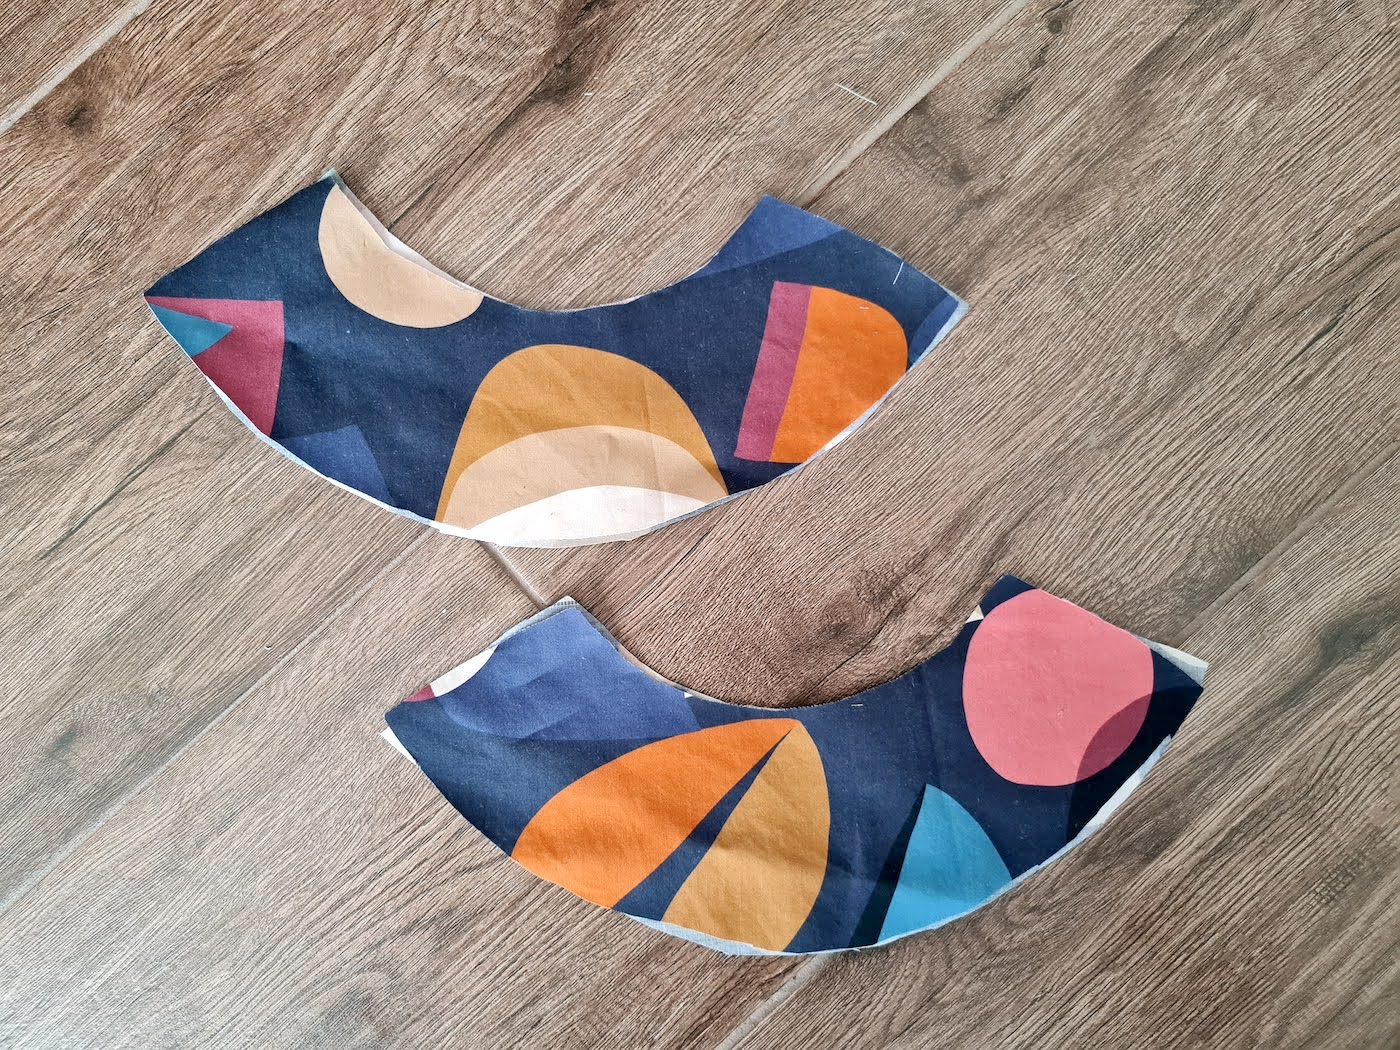
II. Next we'll cut the yoke pieces. You may want to start by making yourself a pattern on an A4 piece of paper; Draw a rectangle sized 30 cm by 12 cm, and then mark 7 cm in and 3 cm down from the top corners. connect these dots. Then mark the top center, and 4 cm down from that point, and draw the curved top line. Mark 8 cm down from it to draw the bottom curved line, to create the below donut slice shape.
Cut 4 of these - 2 for front and back, and 2 for the linings.
Mark one piece of each yoke pair as below - 6 cm in from both bottom corners.
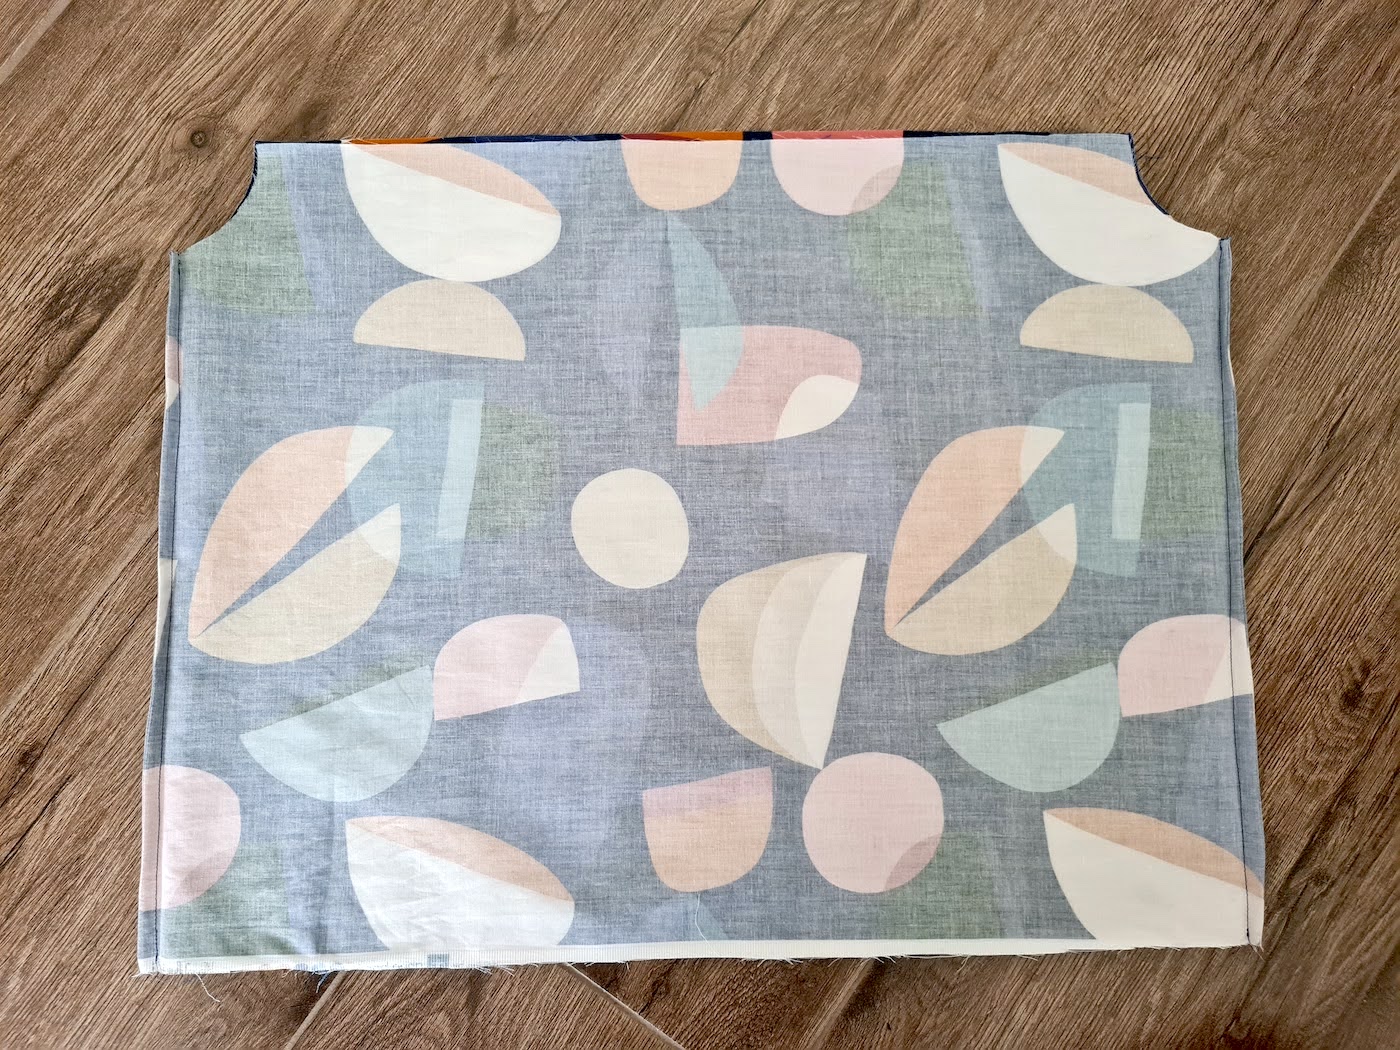
III. Let's start constructing the dress. Sew the sides of the dress body pieces - I did french seams but you could also just pin right sides facing, and sew the sides normally, finishing with serger or zig-zag. About 1 cm seam allowance.
IV. Next finish the arm holes. Using your iron, make a narrow fold (5 mm or so) onto the reverse:
.. Then fold again..
.. And secure with a stitch right along the edge of the fold.
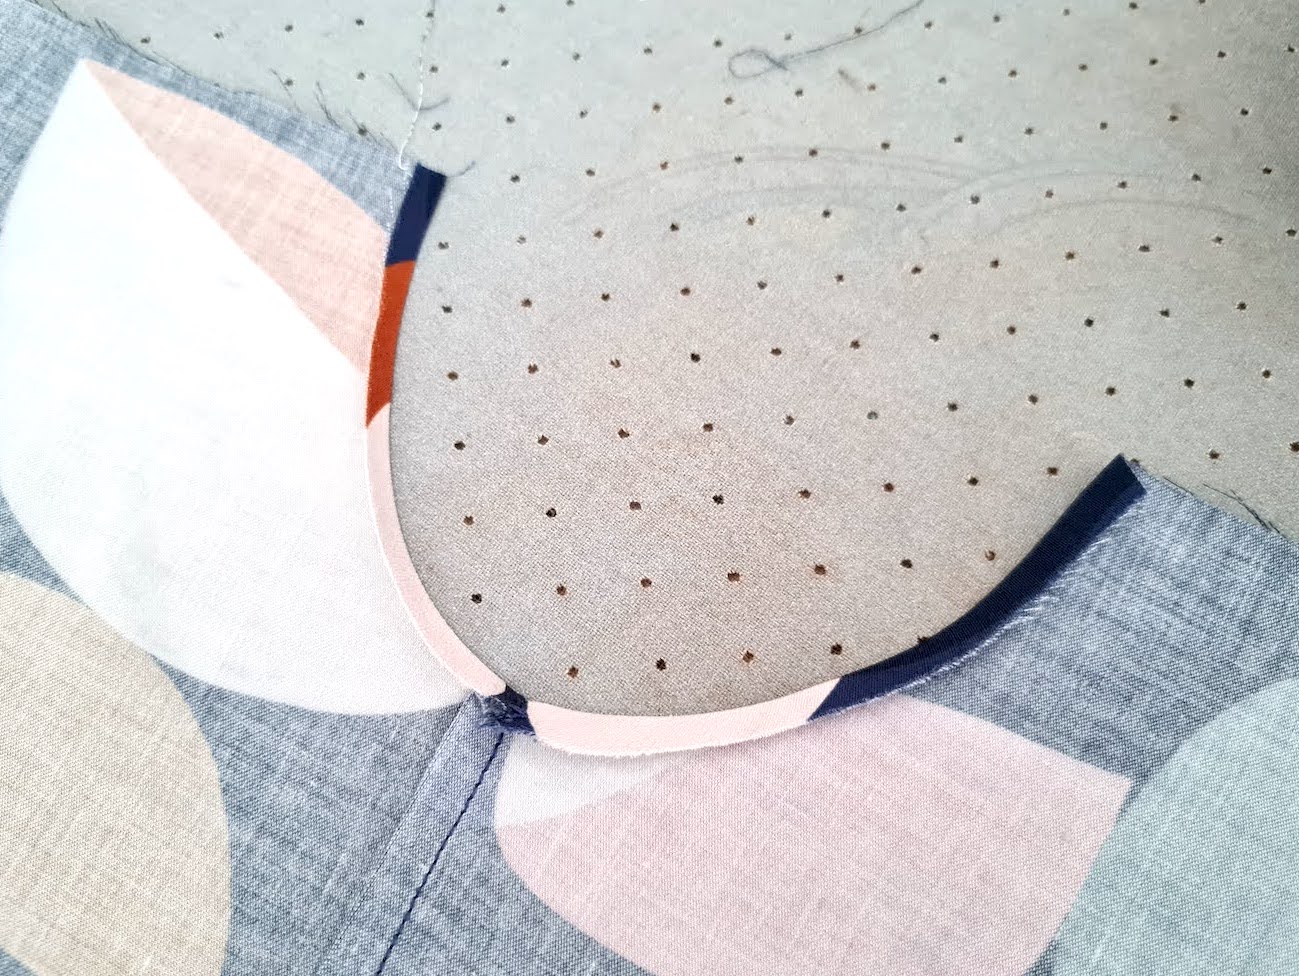
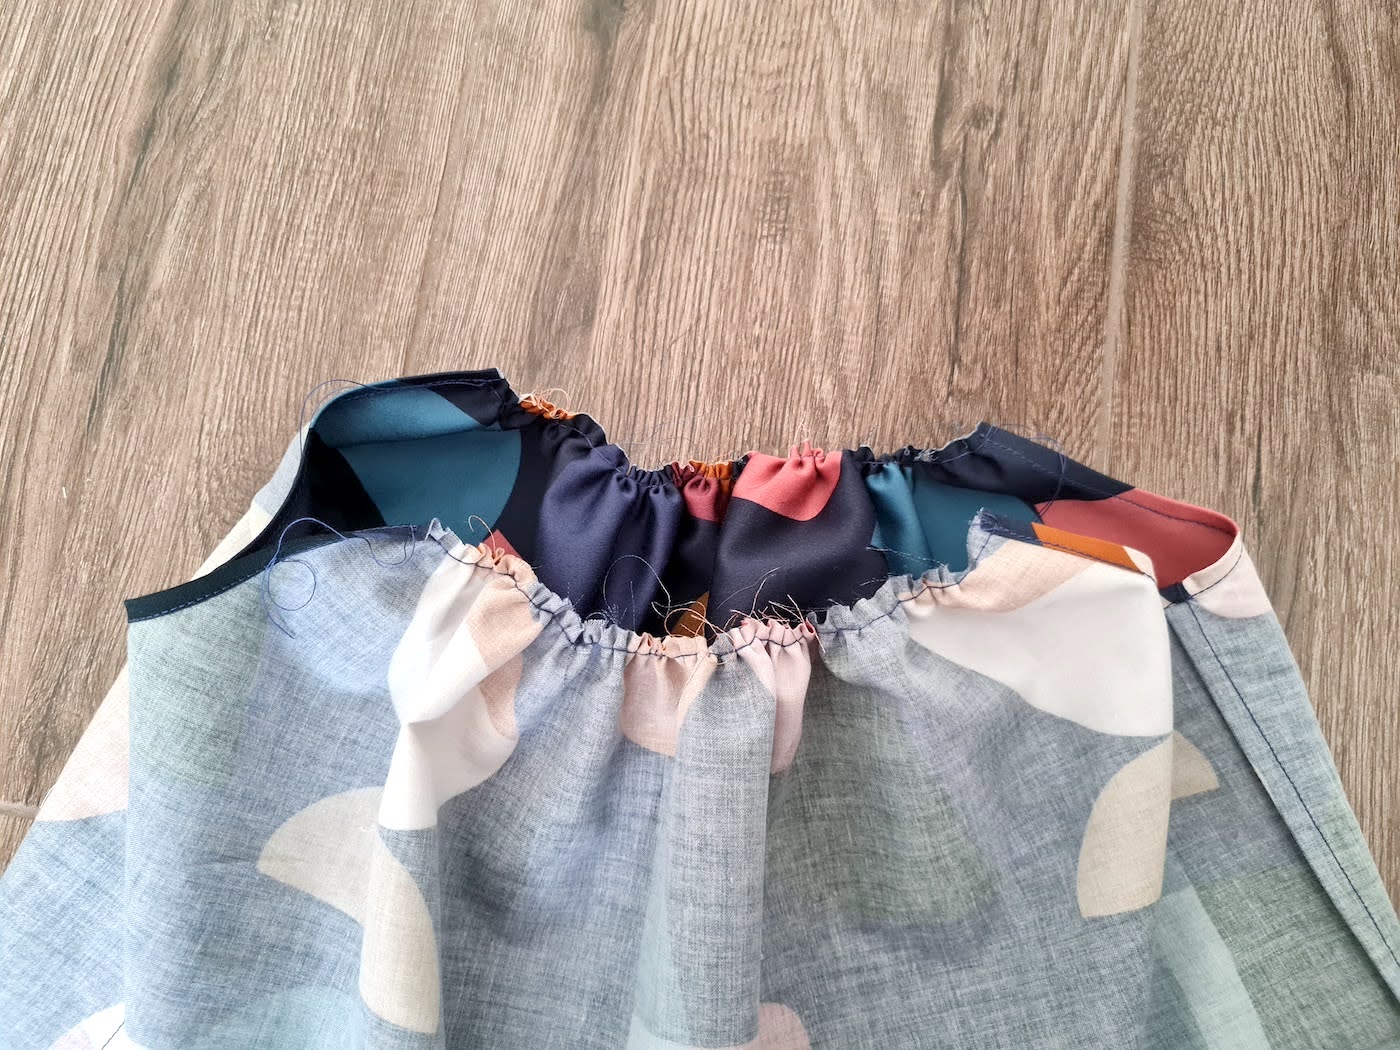
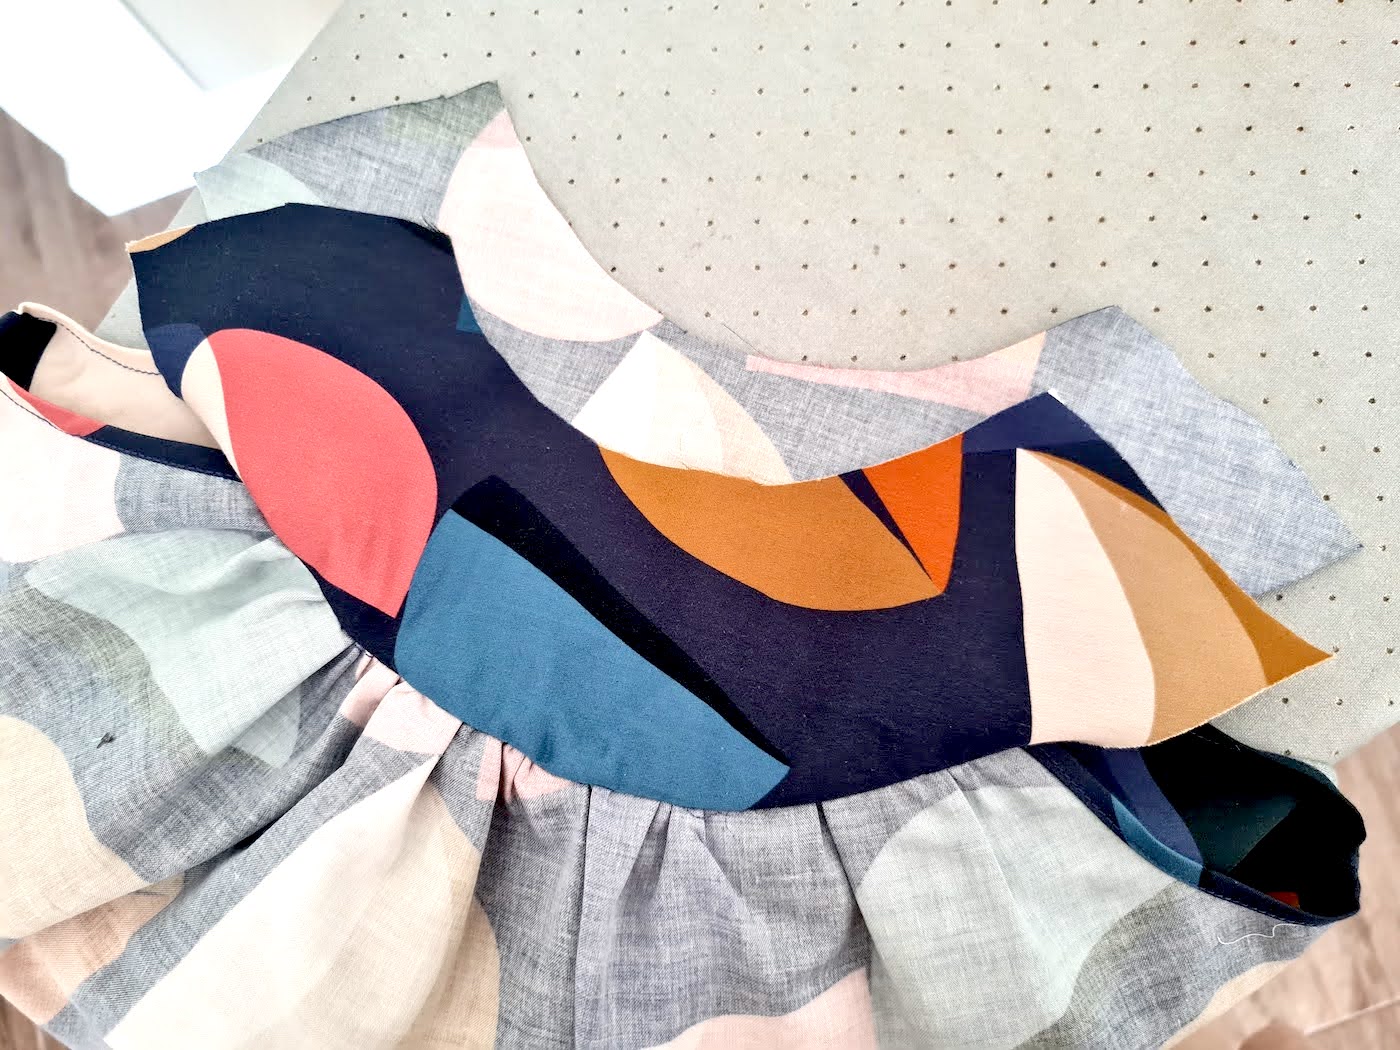
V. Now we'll gather the dress neckline to match the area of the yoke it needs to cover - 20 cm. Sew a gathering stitch (longest stitch on your machine, with high tension - I crank mine all the way up to 9). Depending on your fabric and your machine, you will probably get very close to the 20 cm by just sewing with high tension, but if you need to, adjust the gathers by pulling on the bobbin thread, until you have a 20 cm width. To have better control of manipulating the gathers, sew 2 gathering stitches right next to each other - I was lazy here and just did one.
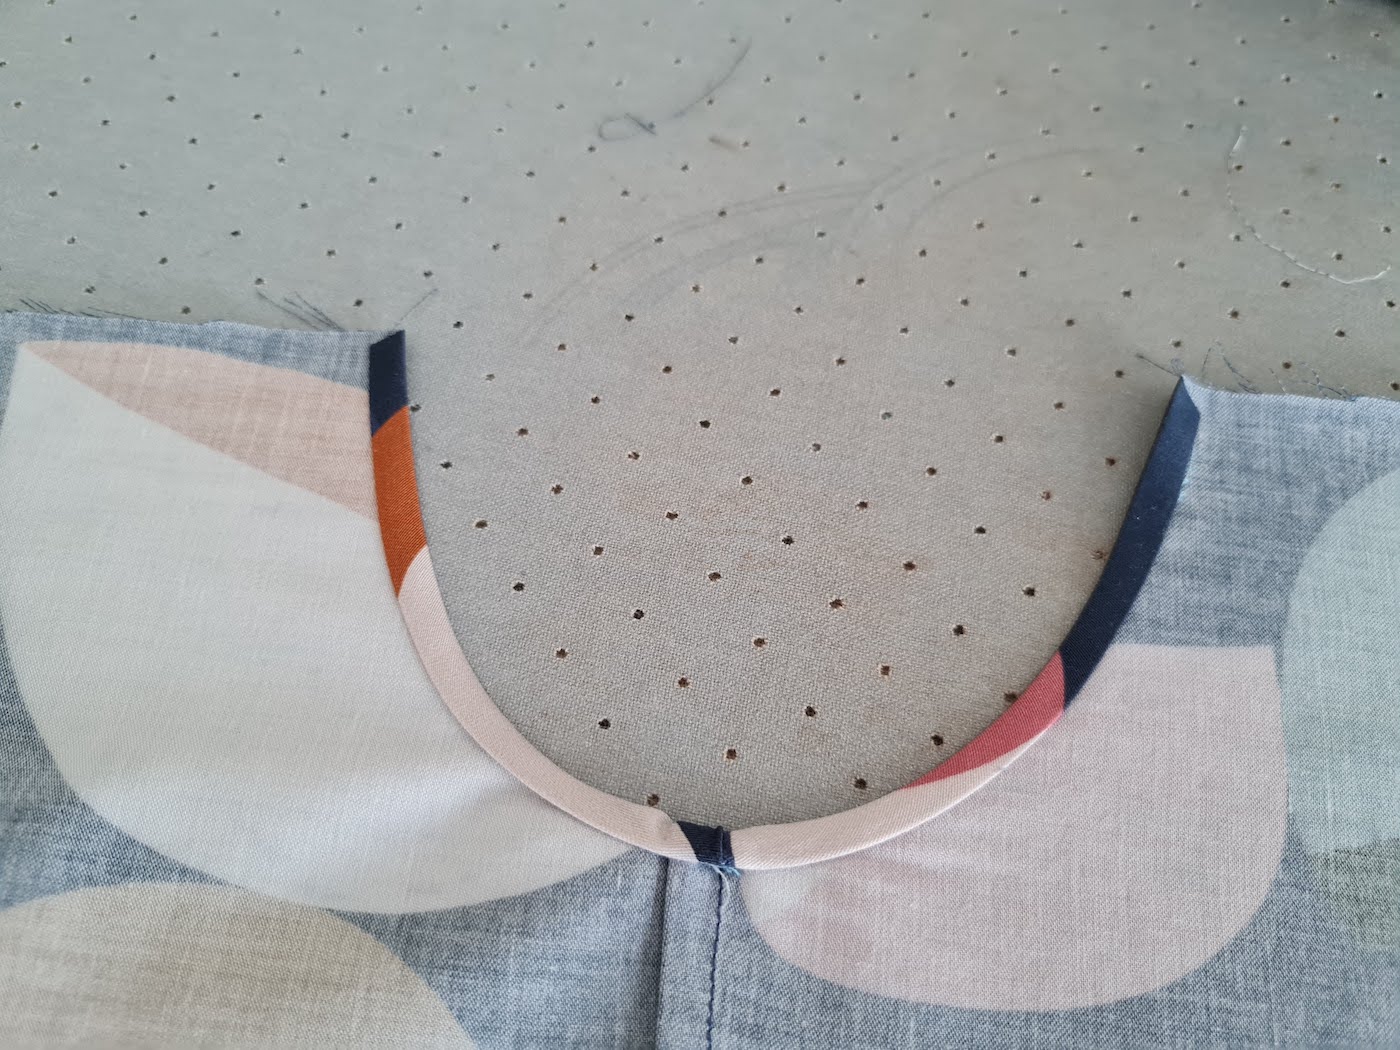
VI. How you pin in this next step is a matter of preference. When attaching linings at gathers, I prefer to first sew the piece on the reverse with my machine, and then
hand-sew the right side. This means I first pin the lining piece to the reverse of the dress, right side of lining facing reverse of dress. Align the ends of the gathered neckline with the markings on your yoke.
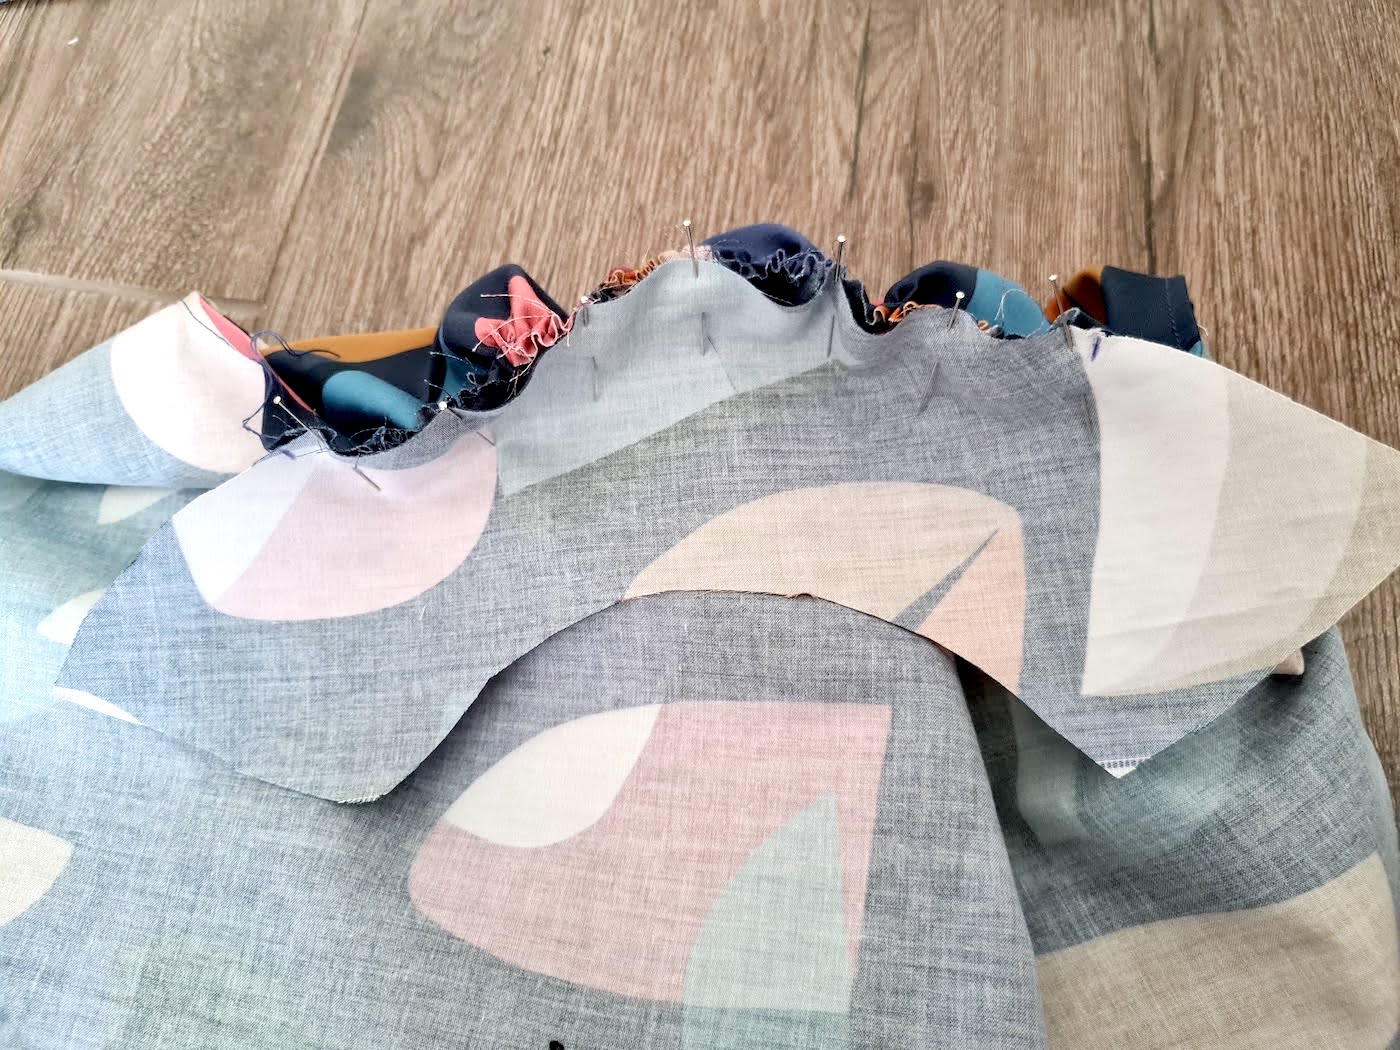
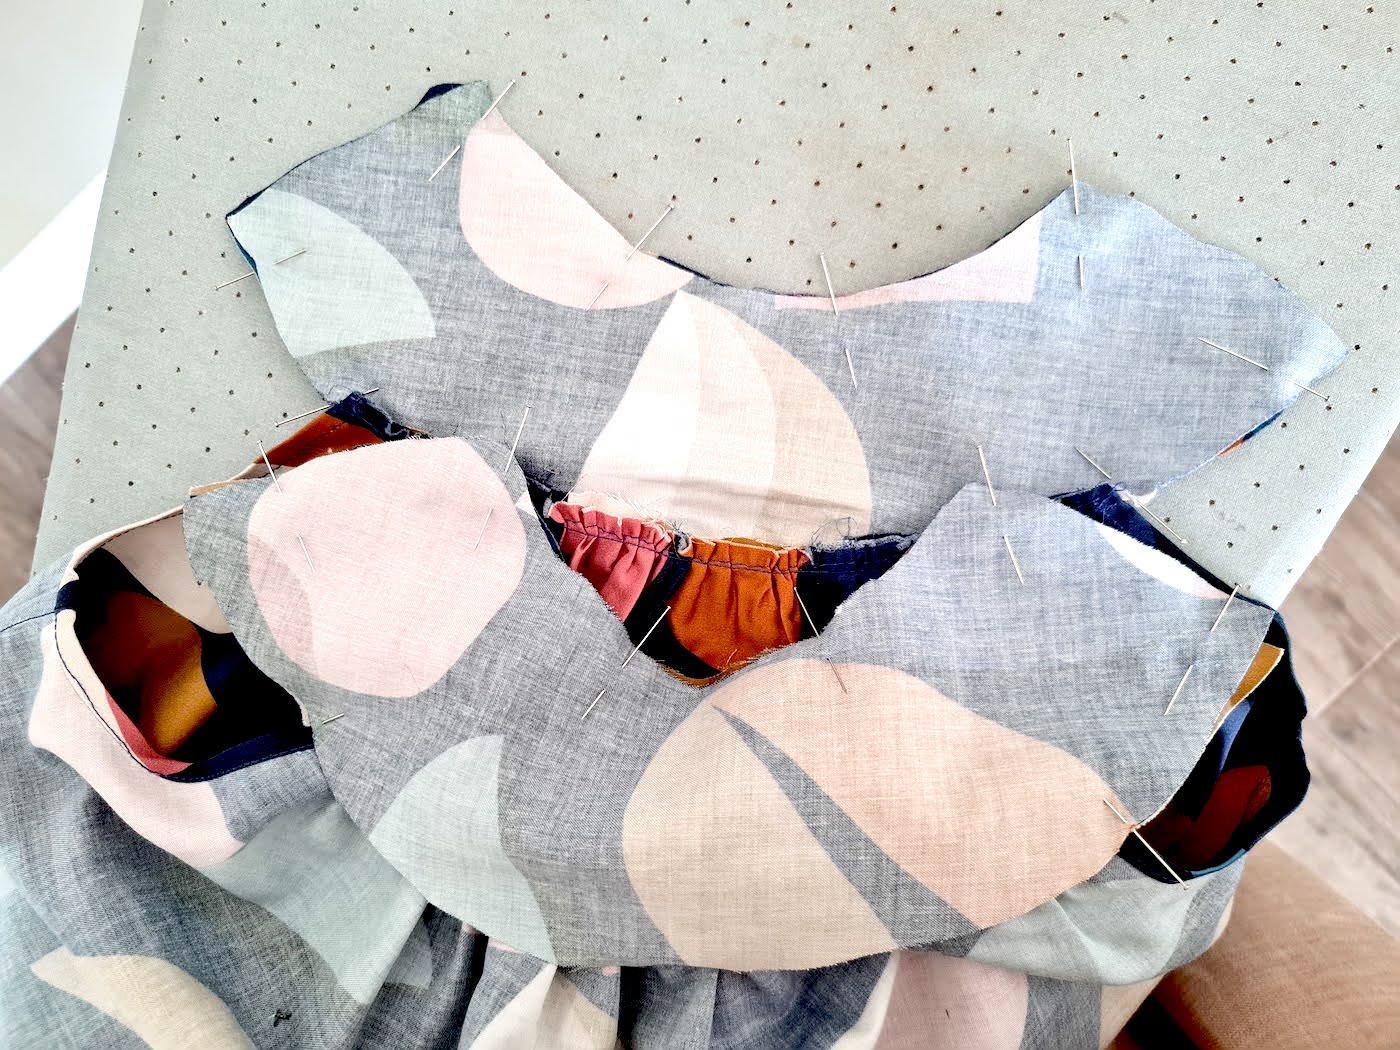
If you prefer to hand sew the lining on the reverse, then you need to start by pinning the yoke piece to the right side of the dress, right sides facing.
If you go with my order, here's what you'll have after sewing both lining pieces onto the dress along the gathered neckline.
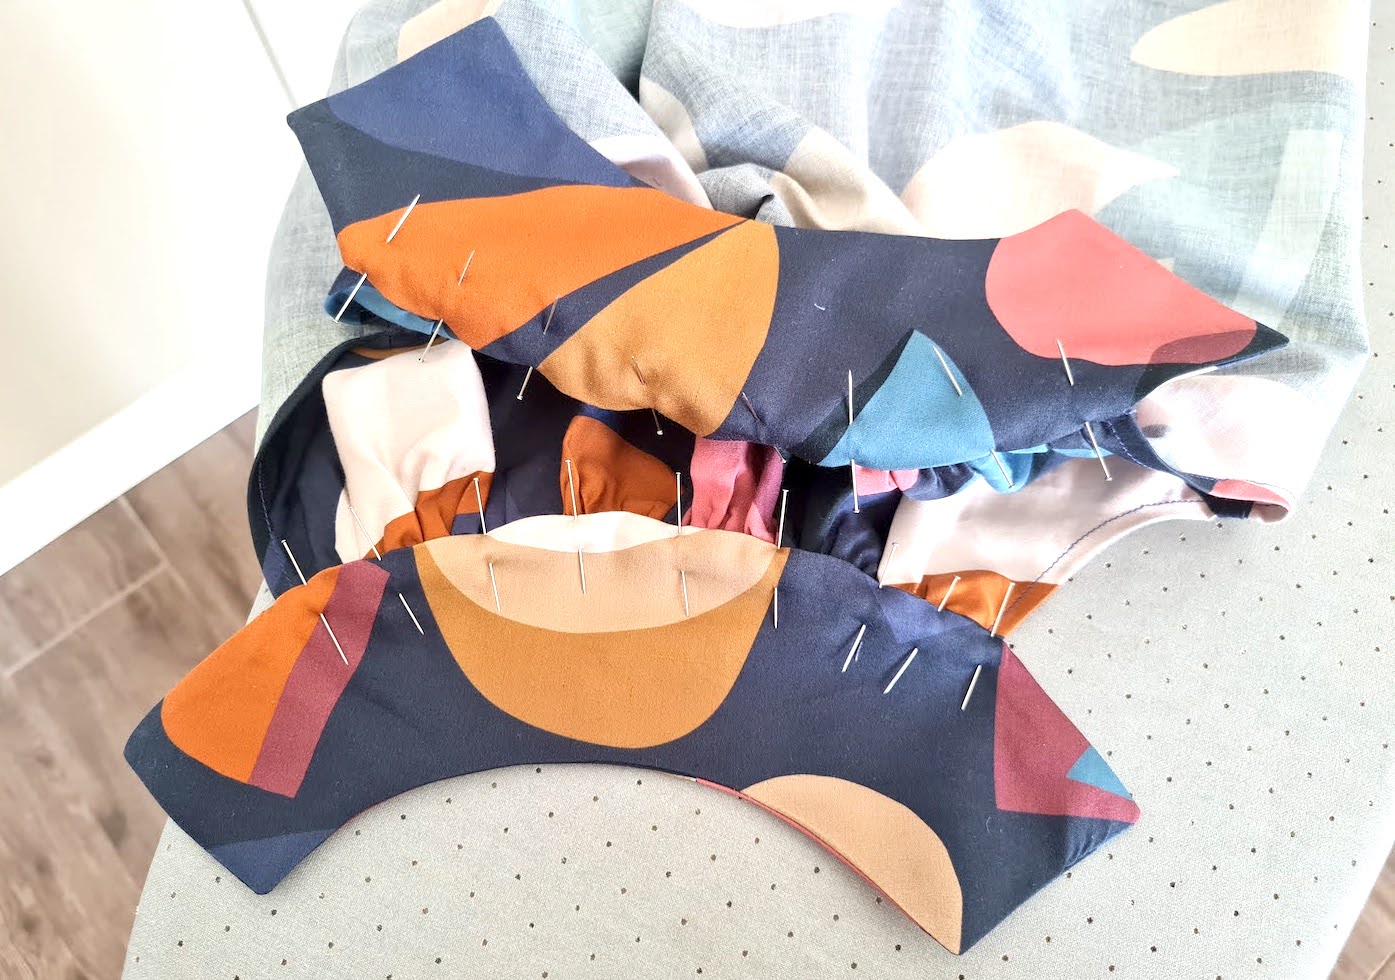
Next we'll add on the right sides of the yokes (or if you started the opposite way, the lining pieces). Pin them right sides facing, and sew all around, pivoting at the corners.
Once sewn, clip the corners and also clip into the curved edge to remove tension, before turning right side out.
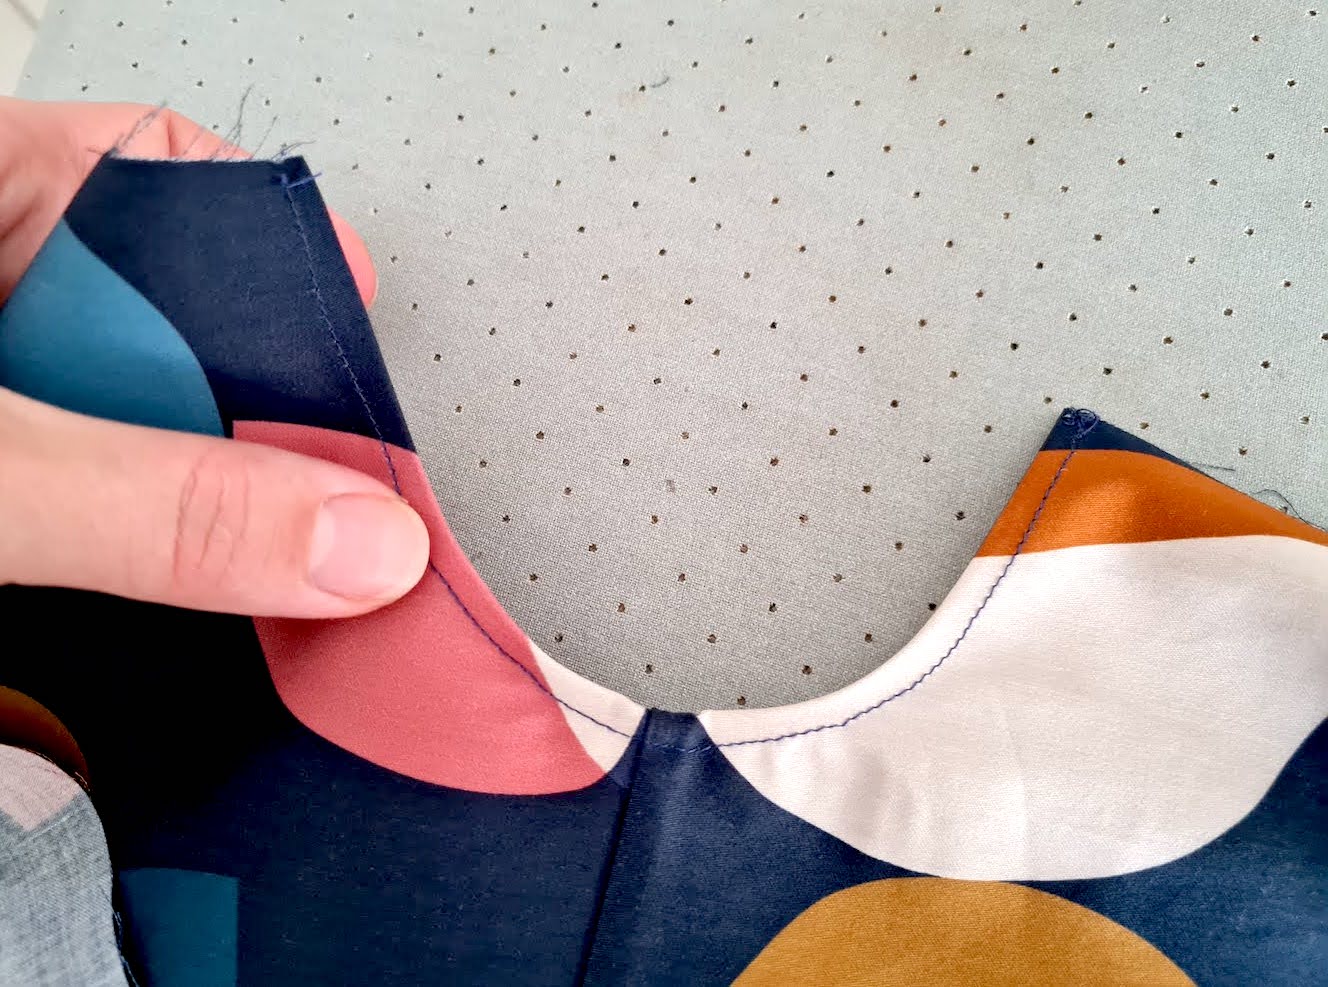
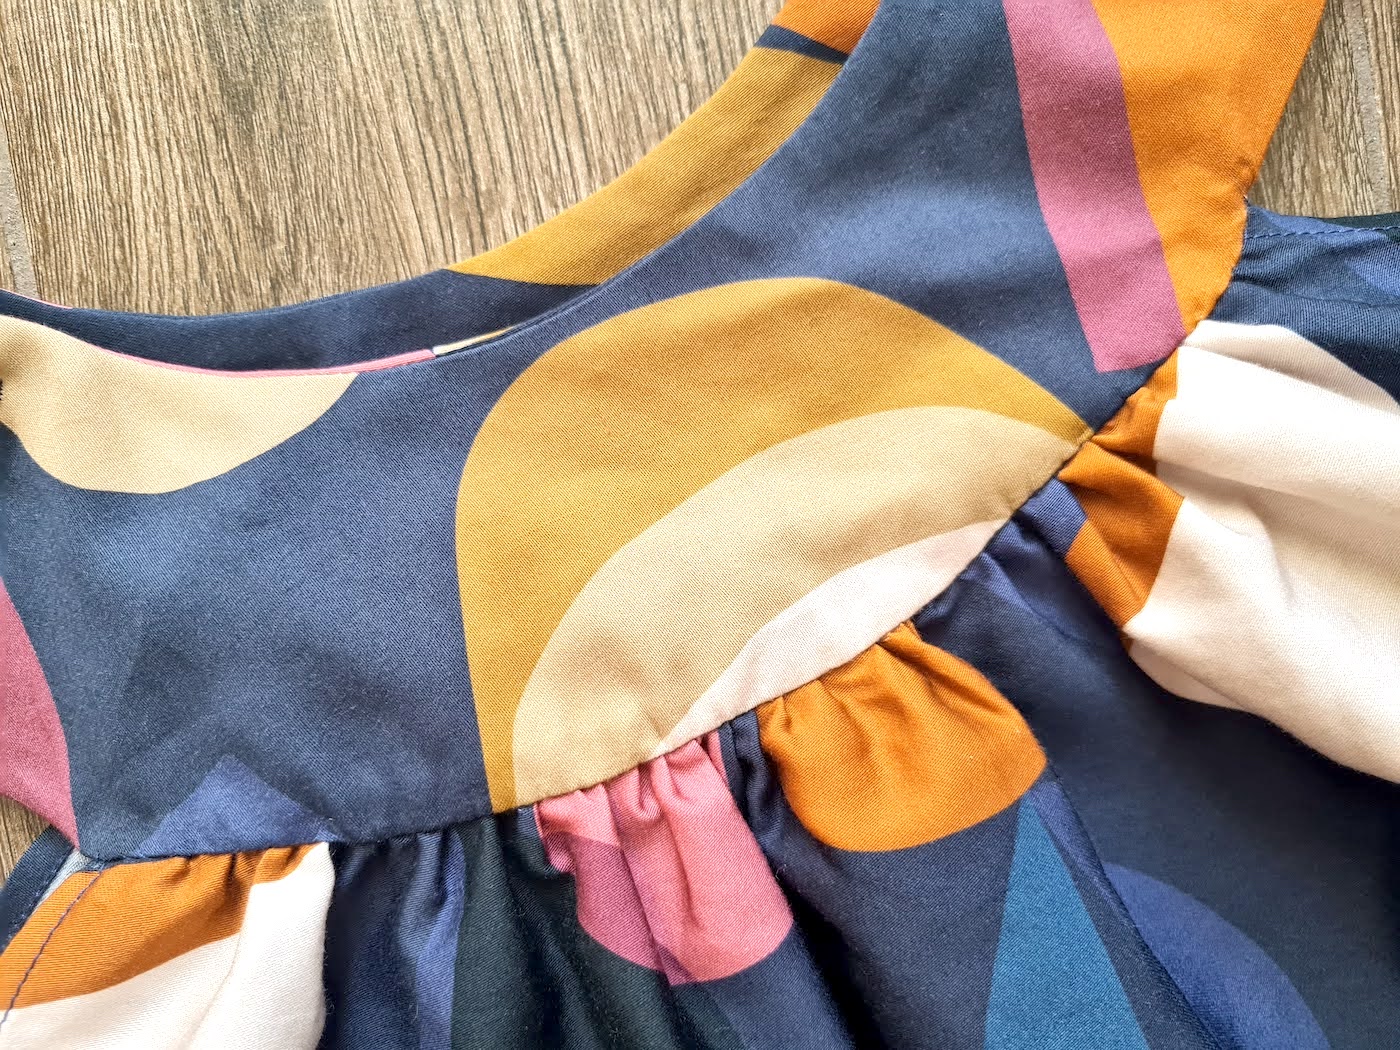
Turn the yoke right side out, gently push out the corners with something not too sharp. Press. Then fold the un-sewn part of the yoke under, and pin in place. Hand-sew to secure. You can of course do a topstitch here with your machine - I prefer the stitchless look. If you started the other way around, you'll just be handstitching on the reverse at this point.
Your neckline is now done!
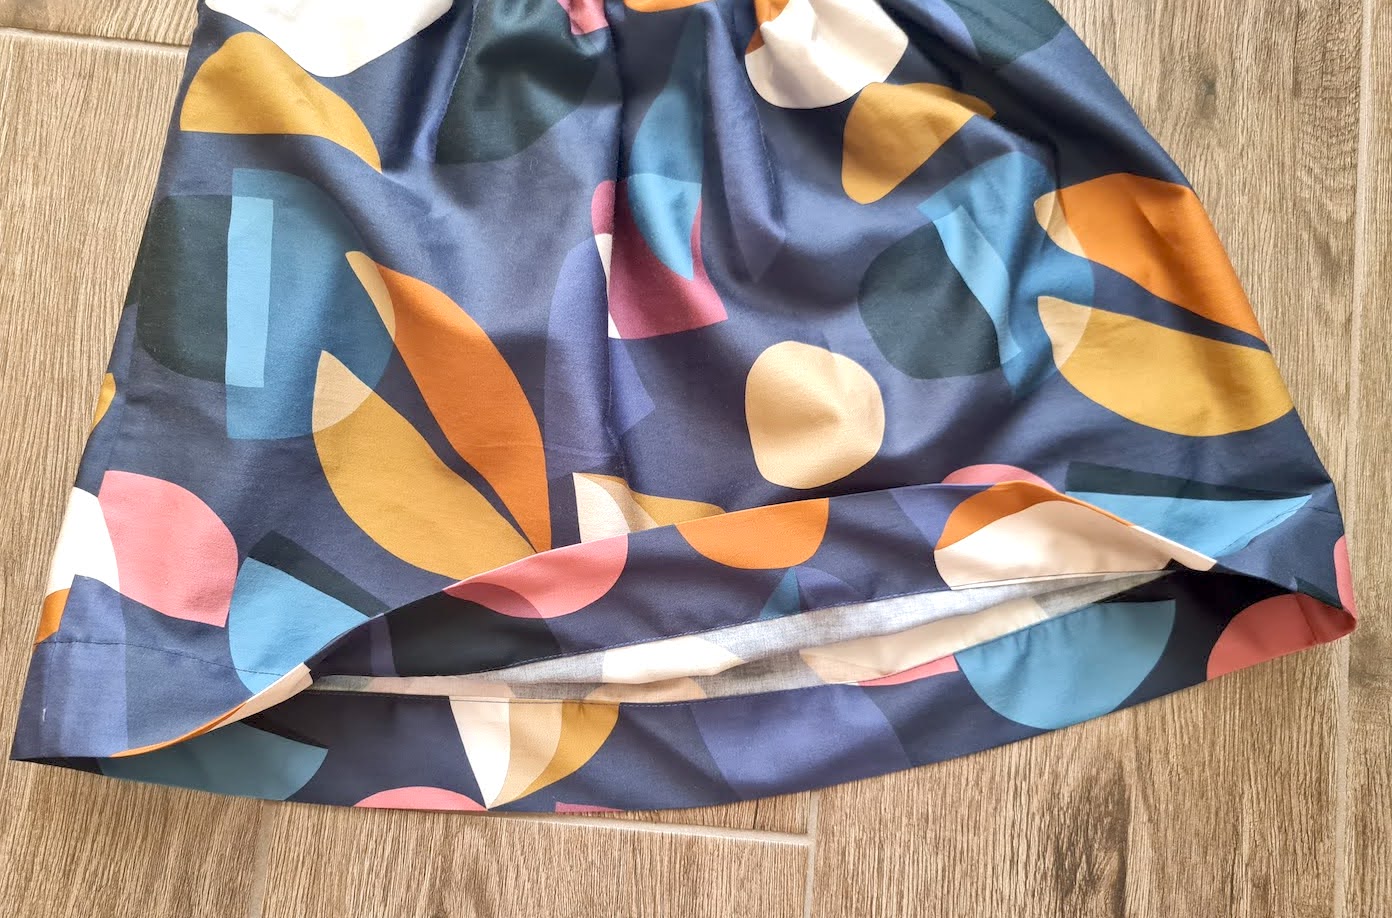
VII. Next hem the dress with a double fold - I went a bit wider, about 3.5 cm, and I can later lengthen the dress from here as Naya grows.
VIII. Last step is adding your buttons. Mark two button holes on each end of one yoke, sew with your machine's buttonhole setting, and then add 2 buttons on each end of the other yoke.
That's it! Dress done! I had some fabric left at this point so used the scraps to add 2 patch pockets in the front (lots of tutorials for that to be found,
e.g. this one).
xo,
Julia


0 comments:
Post a Comment
I would love to hear what you think and learn about your DIY adventures! If you use one of my tutorials, tag me on social @contour_affair, I'd love to see!