
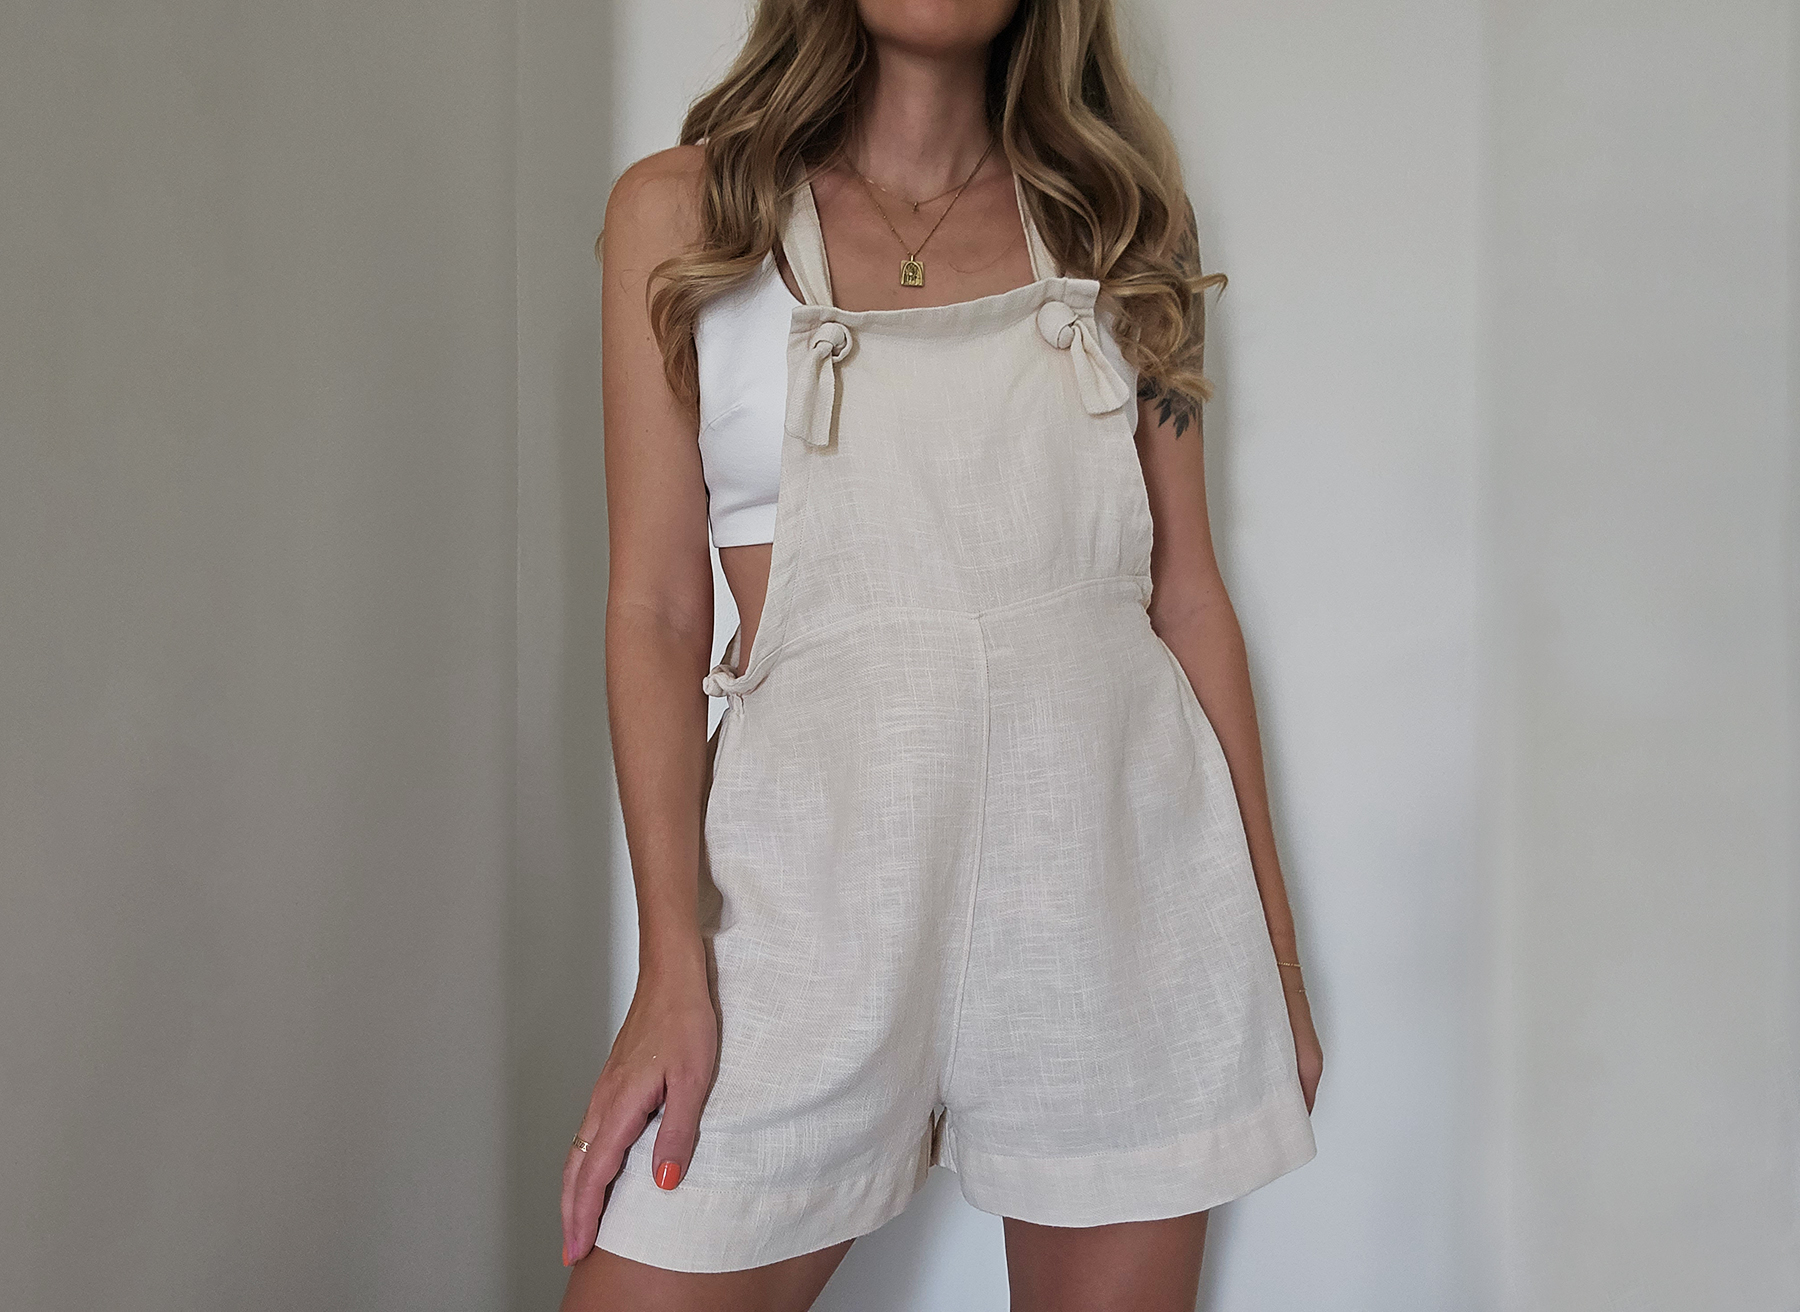
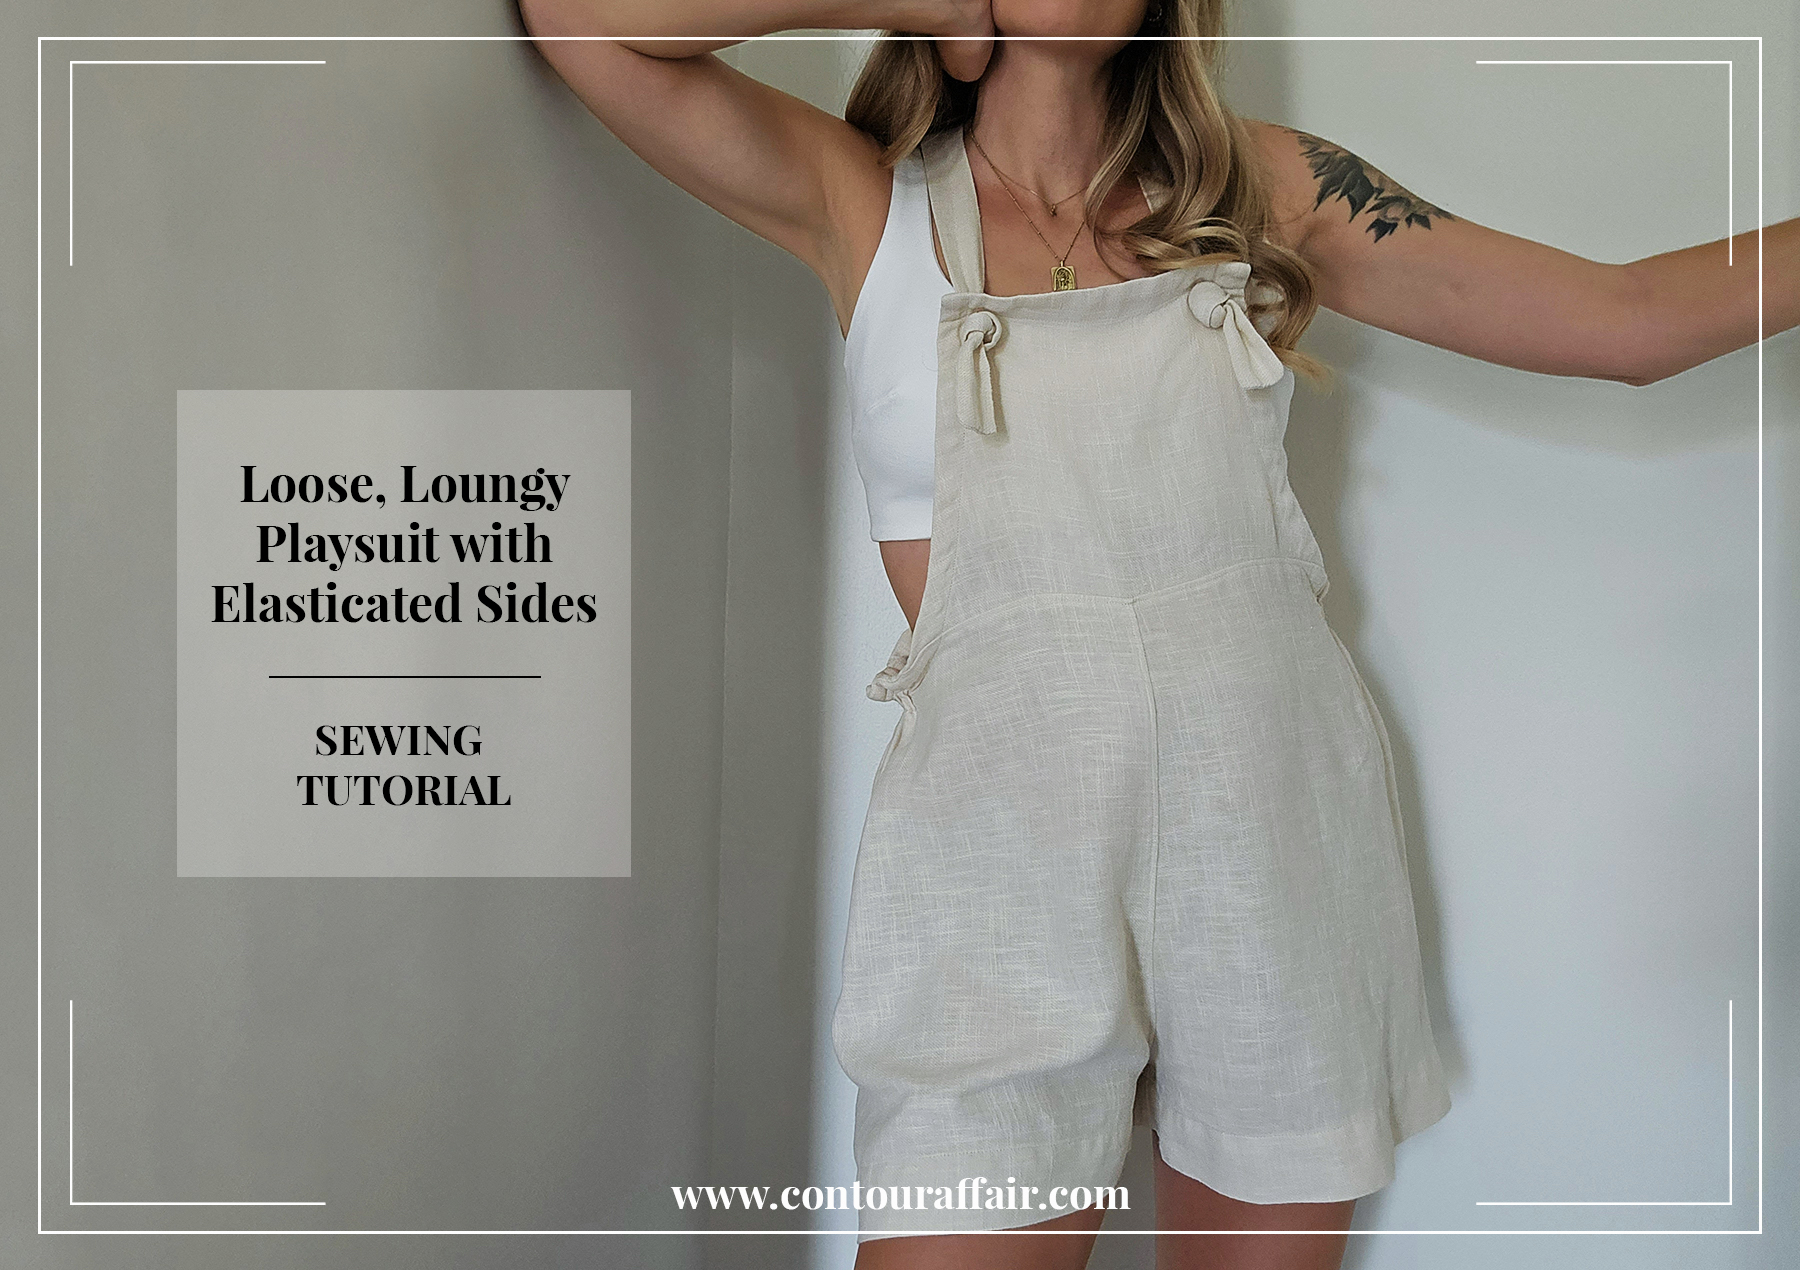
It's been a while! I haven't been in the mood for making tutorials for long time, I'm pretty sure this blog has never seen such a long hiatus.. But I'm back - not sure if consistently - with a guide for this playsuit, which has been one of my most worn garments this past summer. There are so many layering options apart from the obvious crop tops/swim.. This is also another size-flexible style - These measurements would work for EU36/US4-EU42/US10, you'll just play with the distance you gather with the elastic on the sides.
Tutorials take a lot of time & effort to create, and I choose to make mine available for free. If you enjoy this guide, you can support my work with a donation that feels right for you, here.
TOOLS:
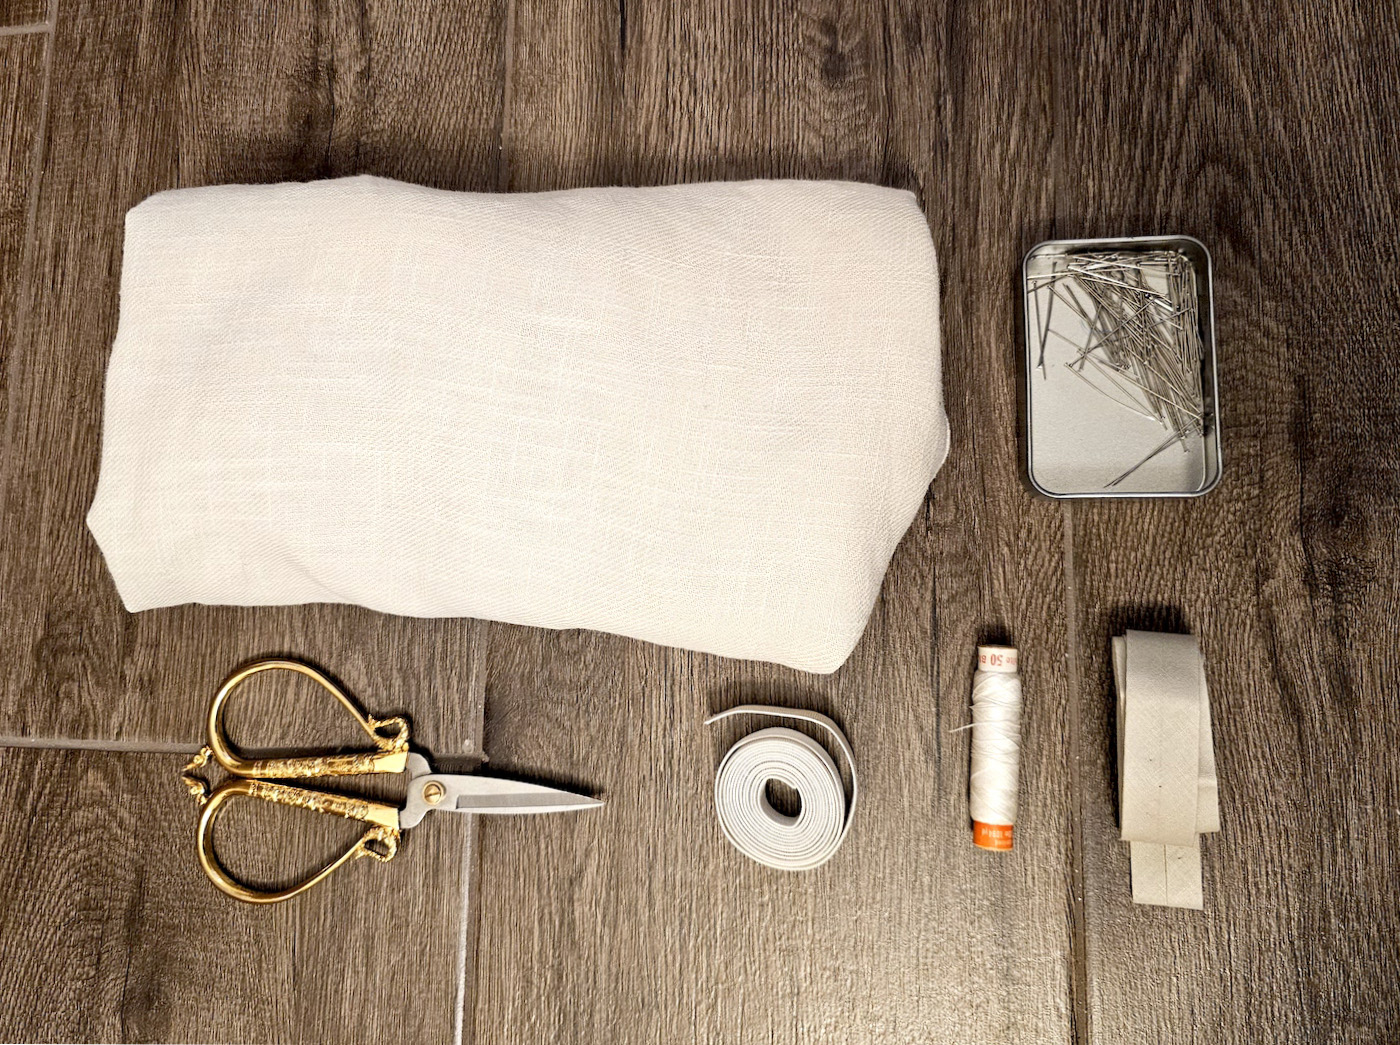
Fabric, 1.6 m half-width (110 cm wide), I used medium-heavy linen | Scissors | Pins | Thread | Bias binding (or make matching binding from the fabric) | Elastic (I used 1.5 cm wide), 20 cm | Sewing machine (serger optional)
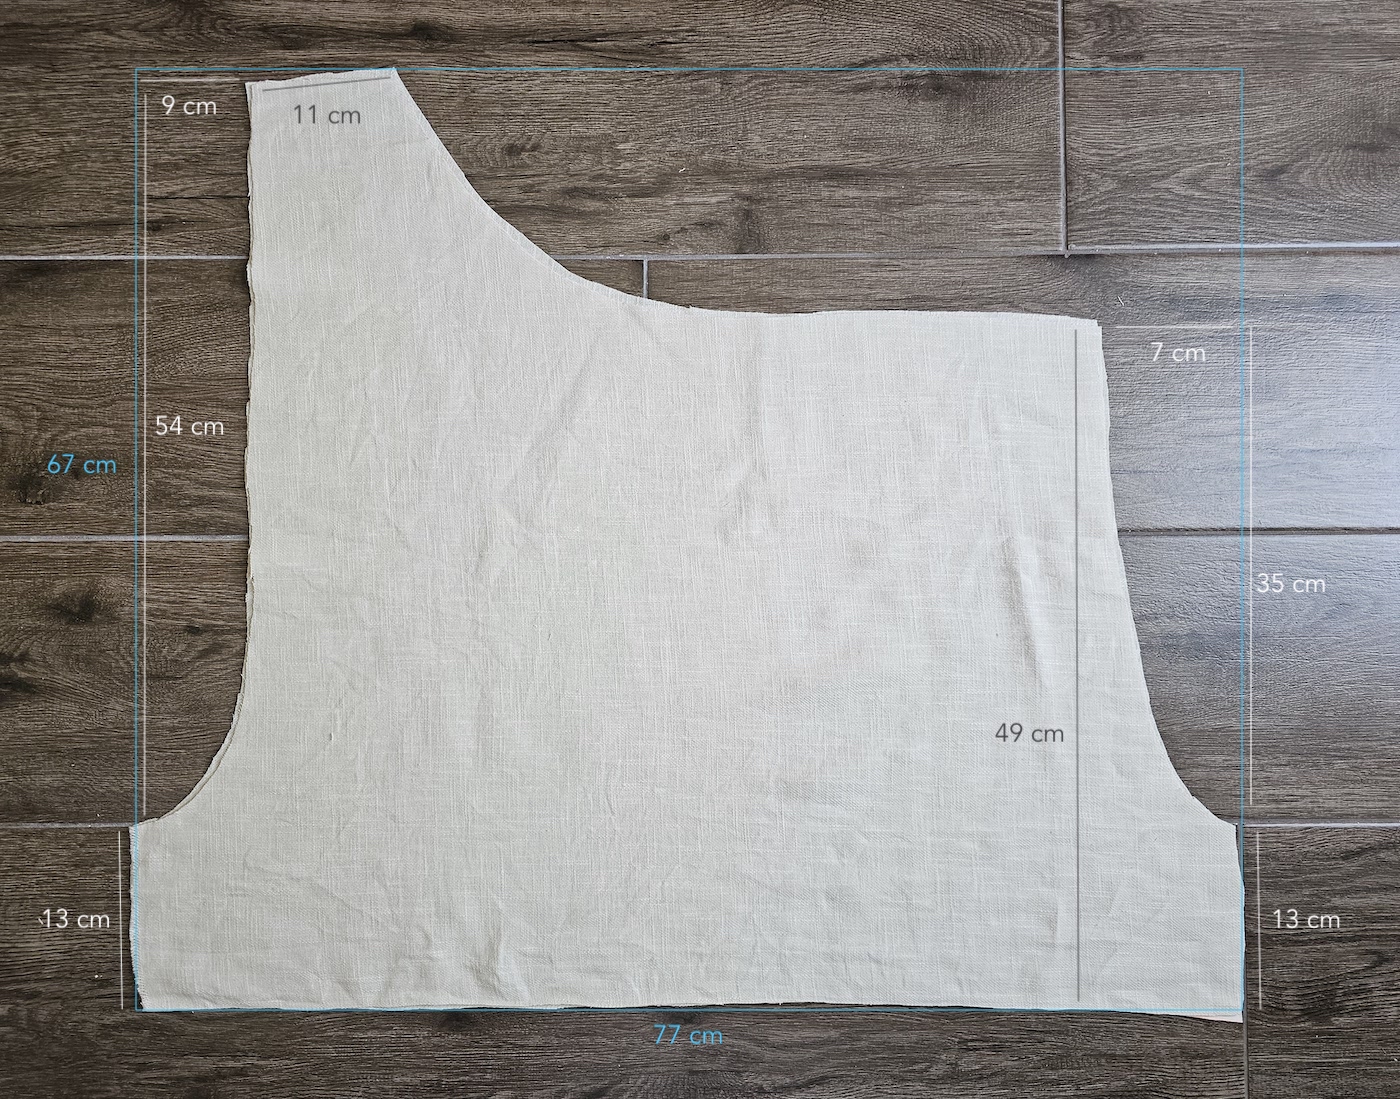
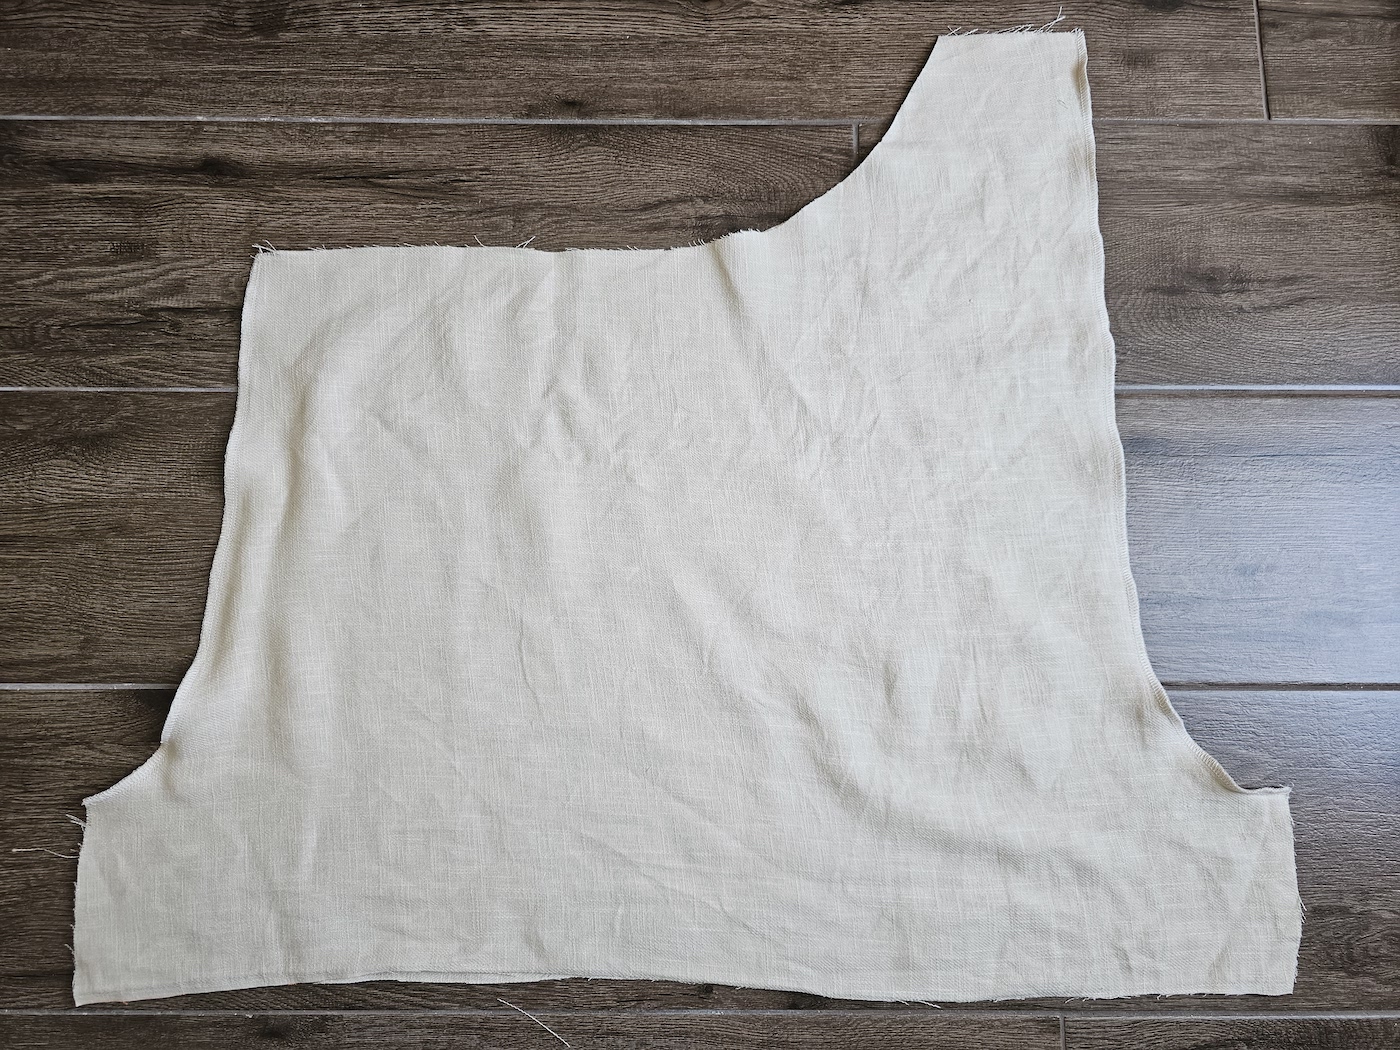
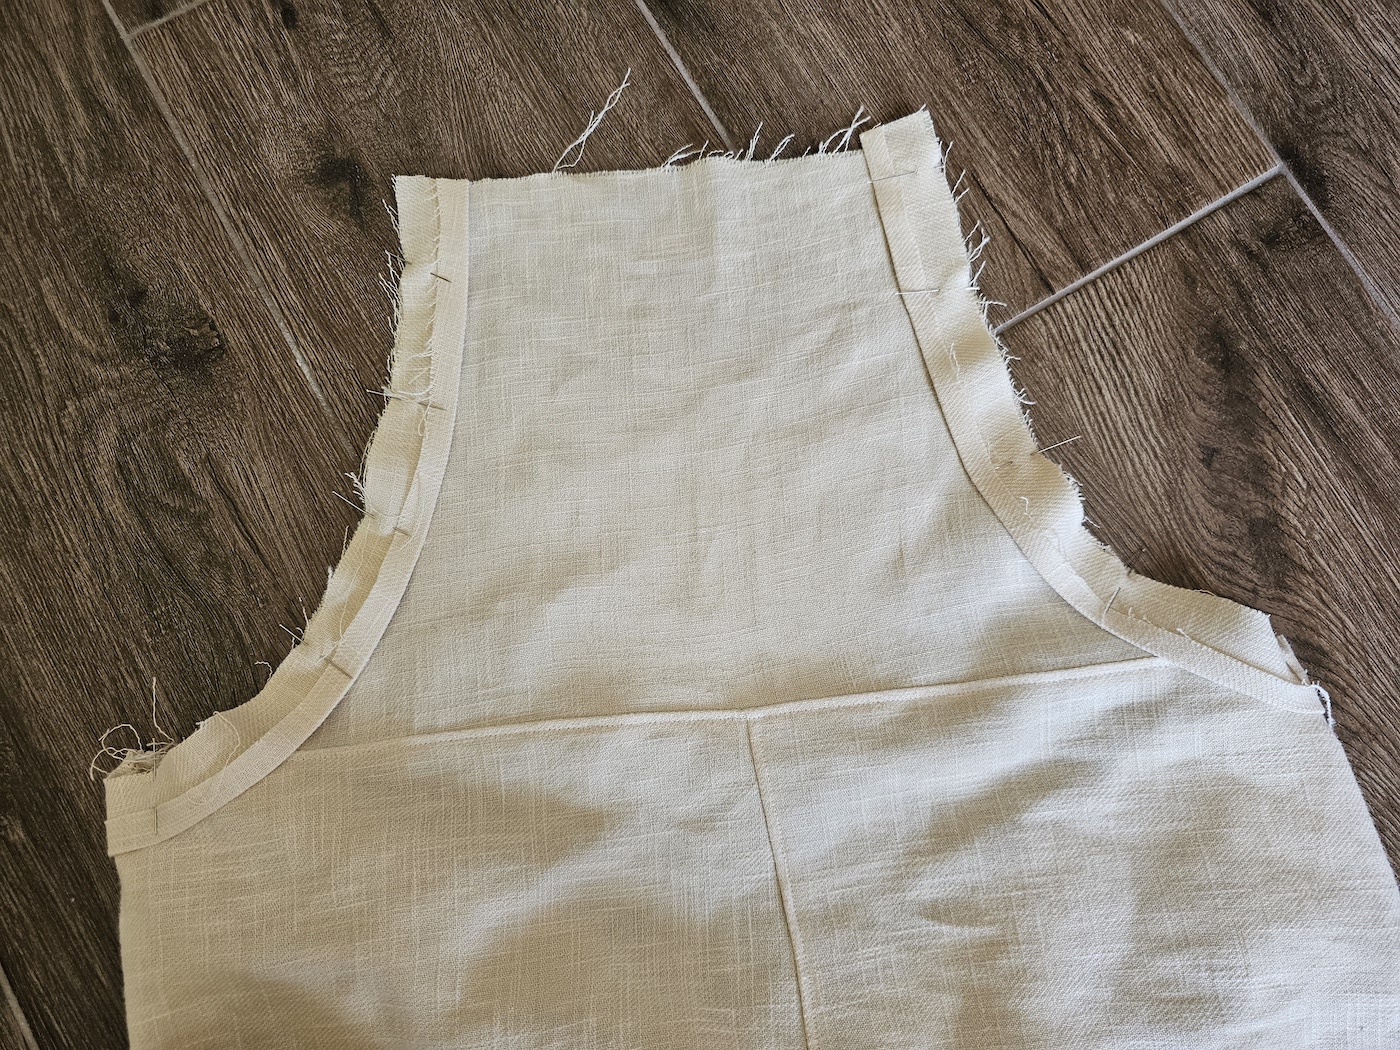
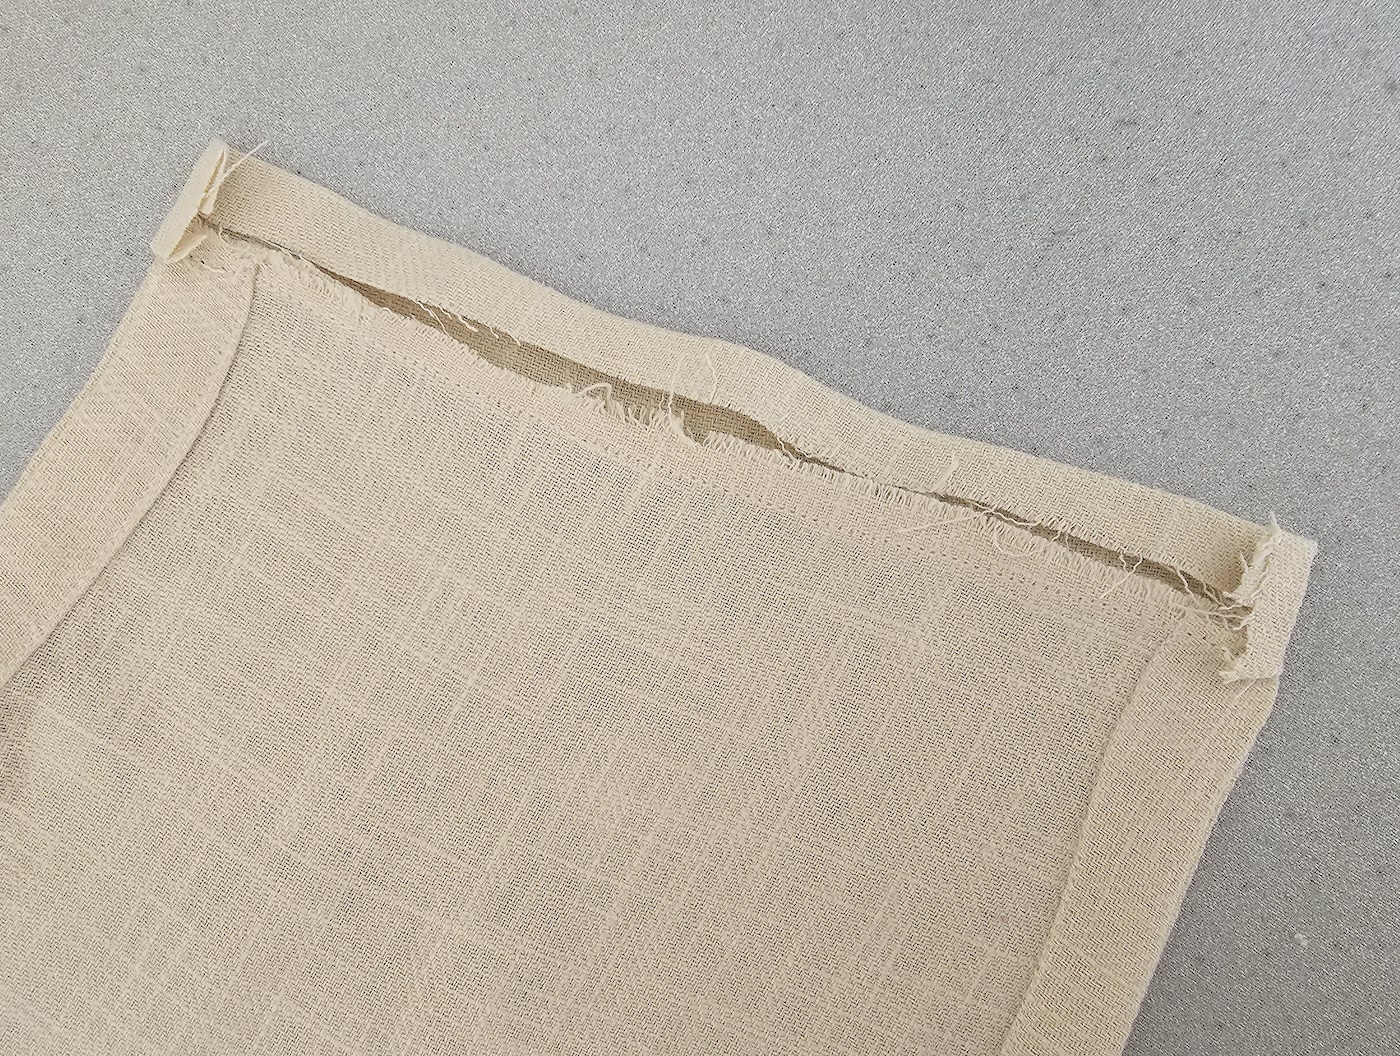
I. I started by cutting out my main playsuit pieces, 2 identical for the right and left side of the suit (this is a side-seamless design). On the right you have the front crotch curve, and on the left the back.
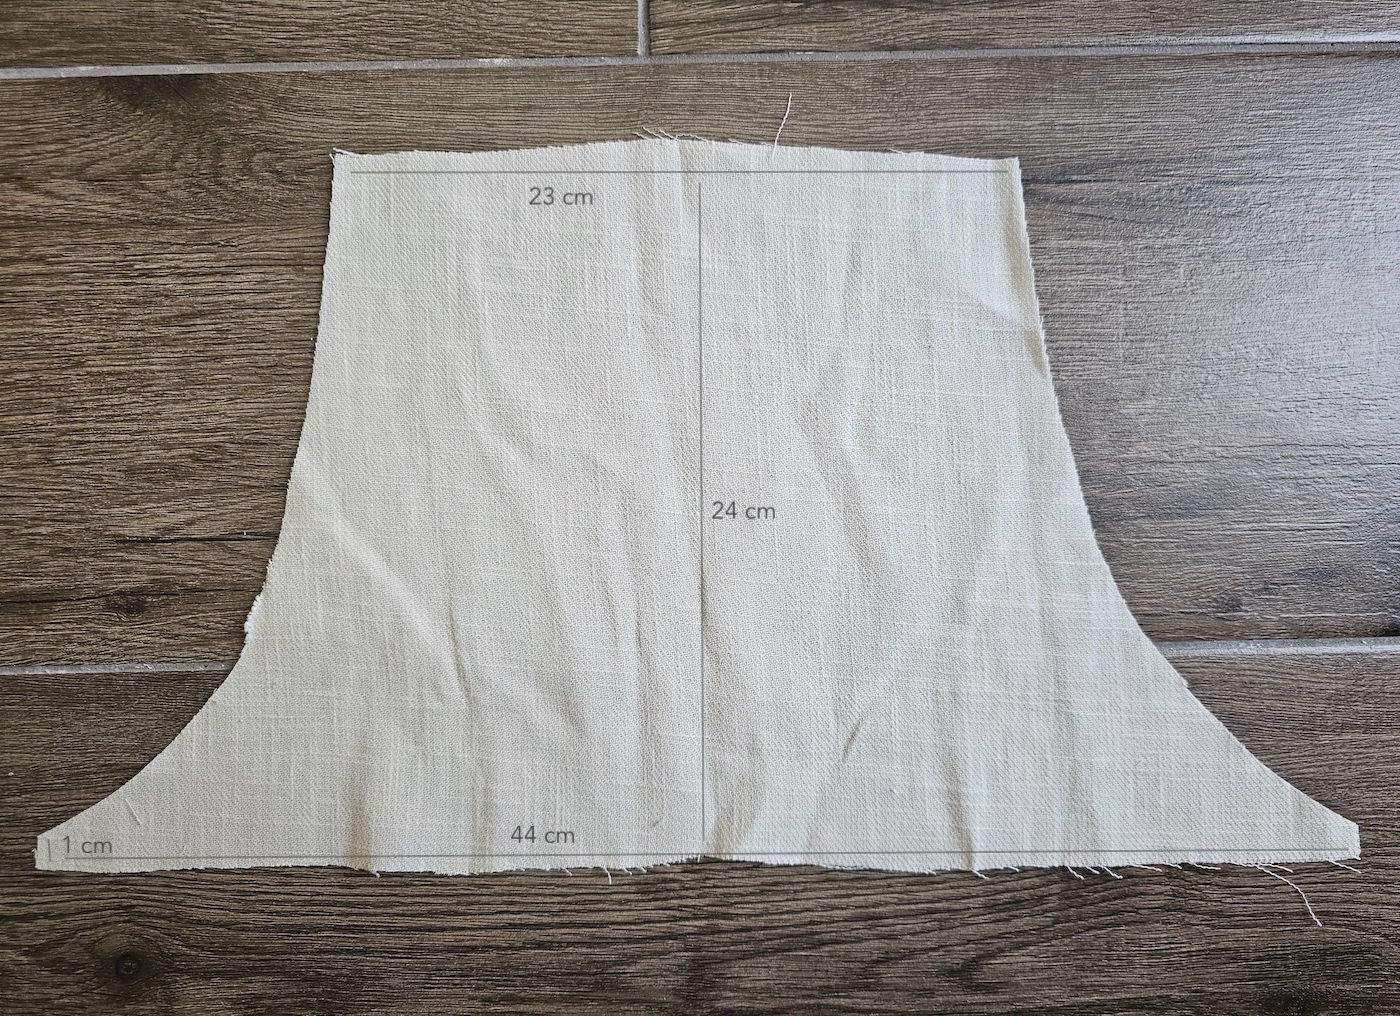
II. I also cut one front panel where I sloped the sides:
III. Then I was ready to start constructing. I pinned the right and left sides together, along the center back and center front, right sides of fabric facing, and sewed together. I finished the seam allowances with my serger, but you can also zig-zag or use the faux serger stitch on your machine, if it has it.
To finish and reinforce the seams, I pressed the seam allowances in opposite directions, and topstitched them down, I like to do this whenever working with linen, it strengthens the seams and gives your garment a much longer life.
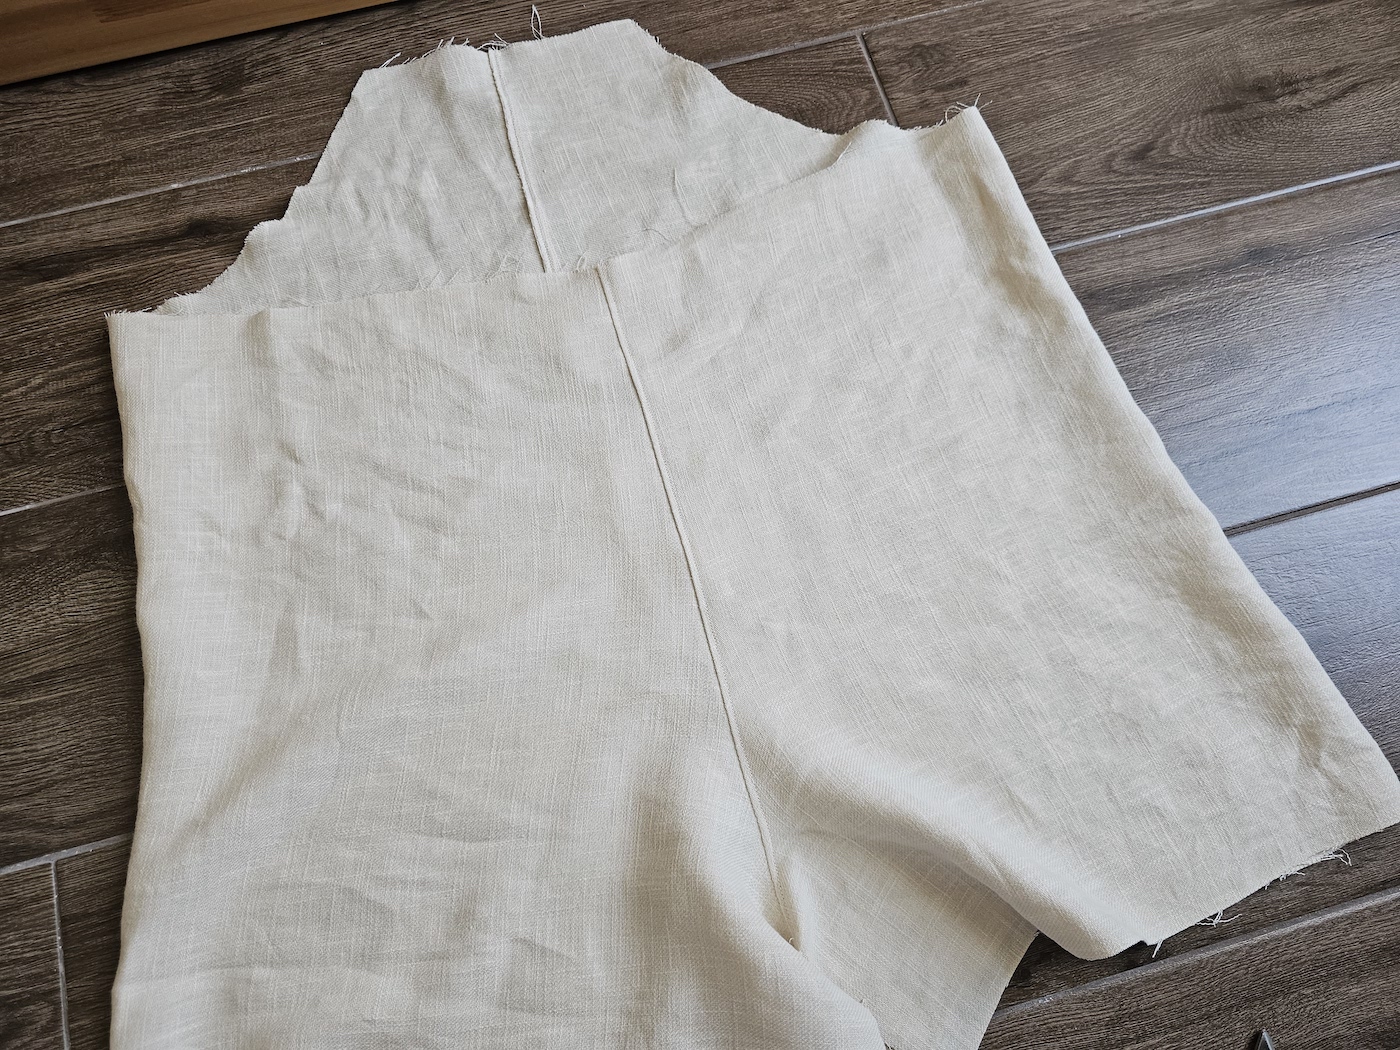
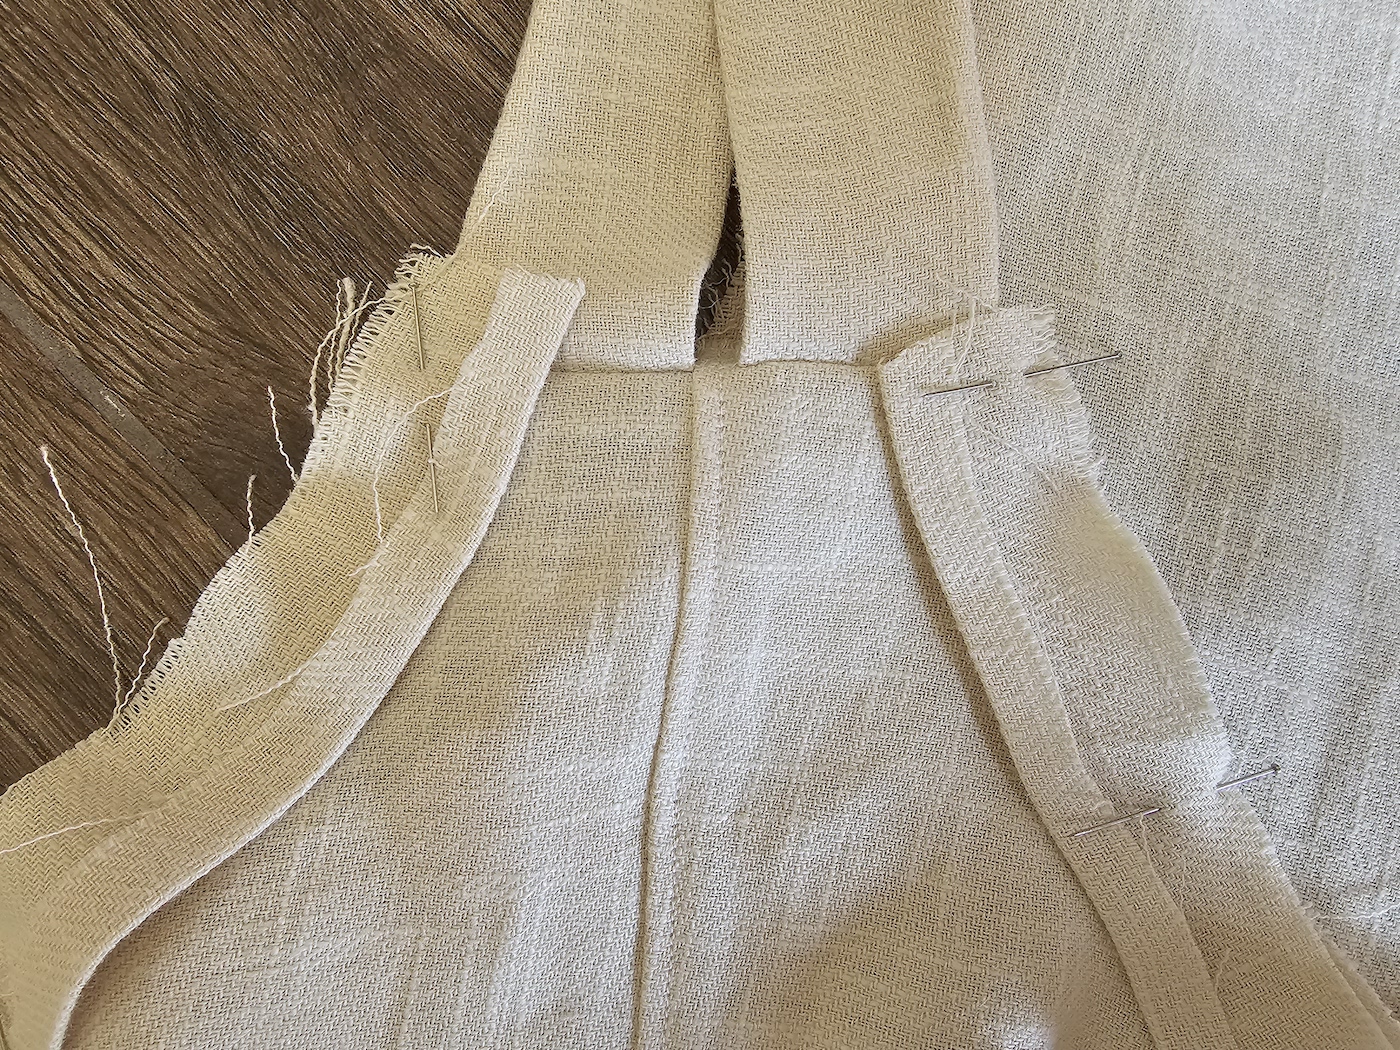
IV. Then I pinned the crotch together, right sides facing, and repeated the above there.

V. I took my front panel and pinned to the suit waistline, with its center aligned with my front center seam, and sewed in place. Finished that in the same way, seam allowance pressed down and topstitched.

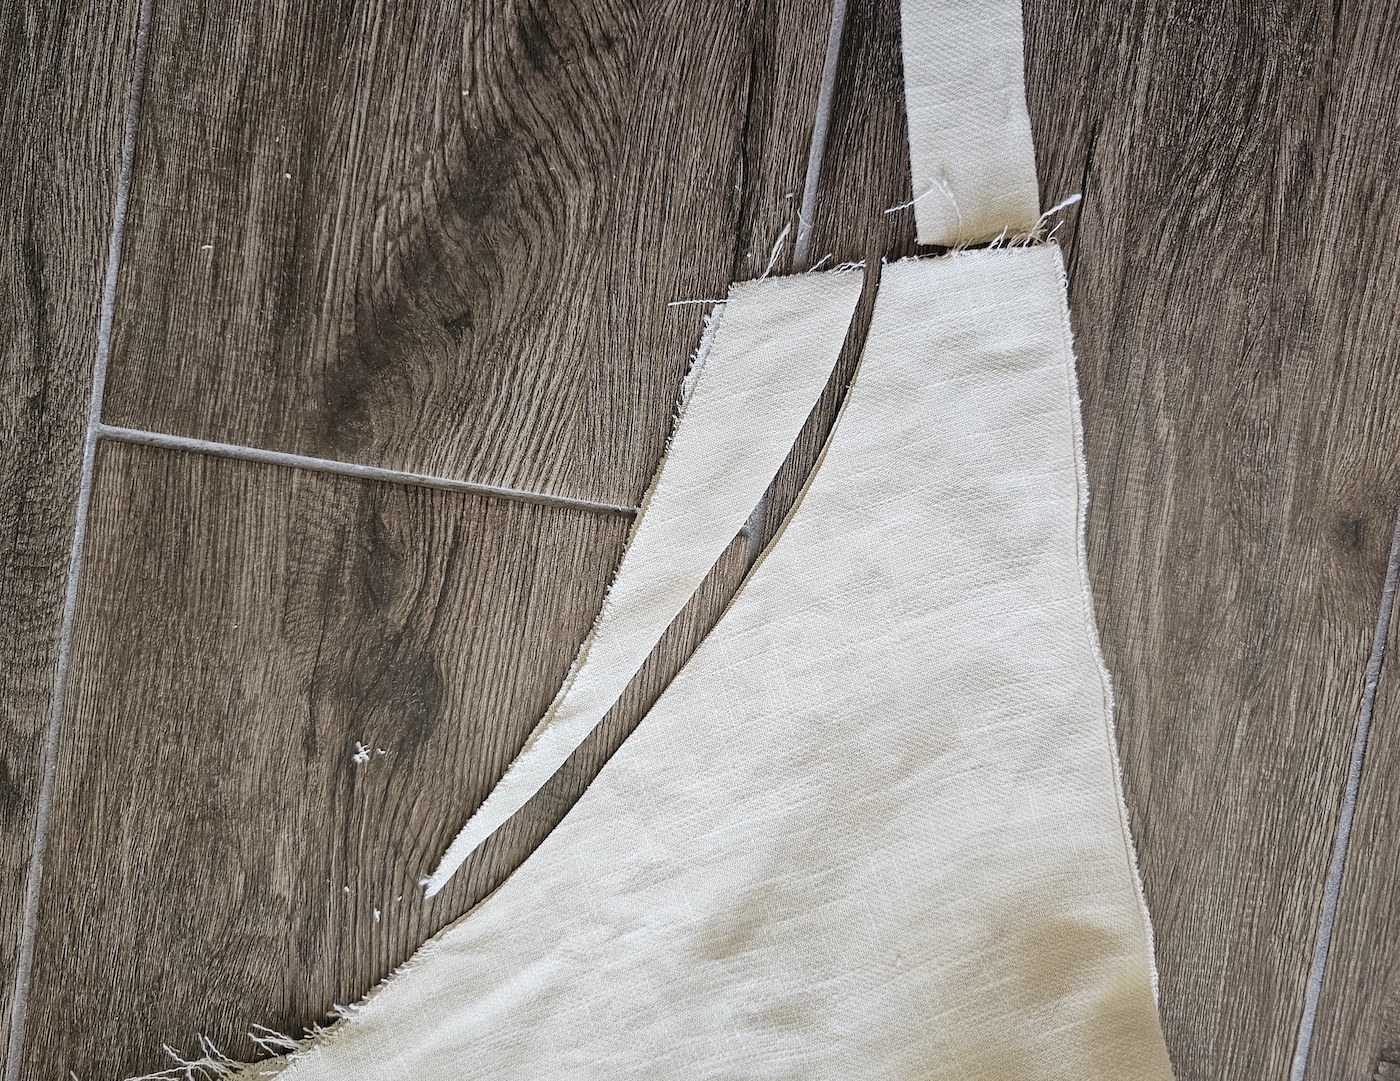
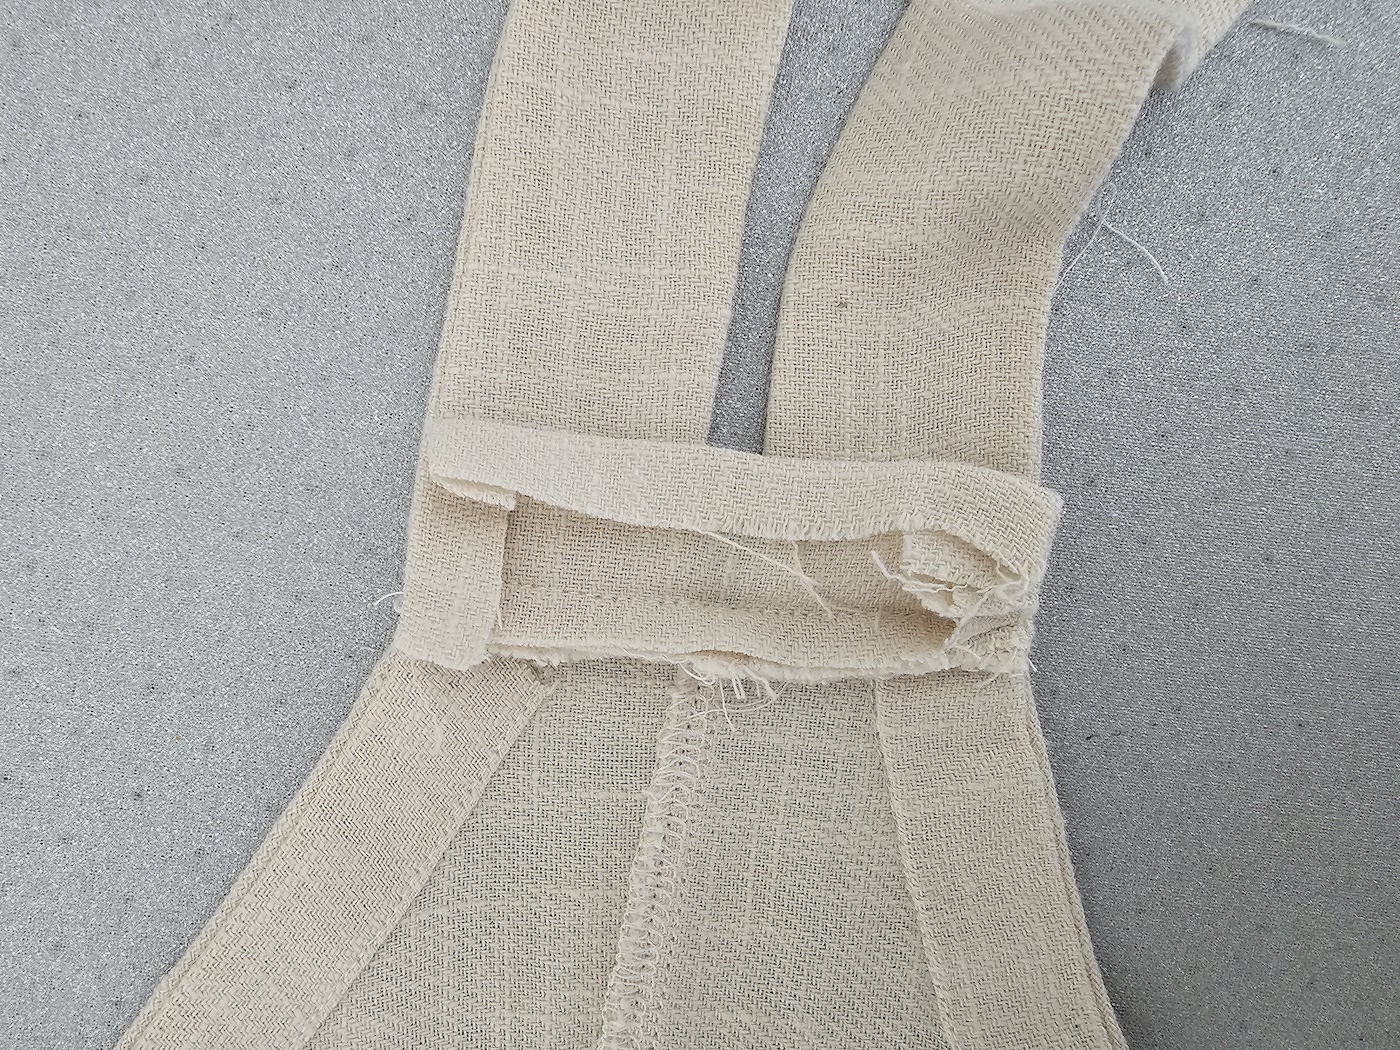
VI. Next up was the back - I originally thought I wanted a wider back, but then decided to go for more of a racerback. I first made my straps: two identical. My finished straps measured 75 cm by 3.5 cm wide, so I started with strips of fabric 75 cm long and 9 cm wide.

.. I then used the strap width as my guide to adjust the width of the top of the racerback - adding 0.7 cm or so for the seam allowance.
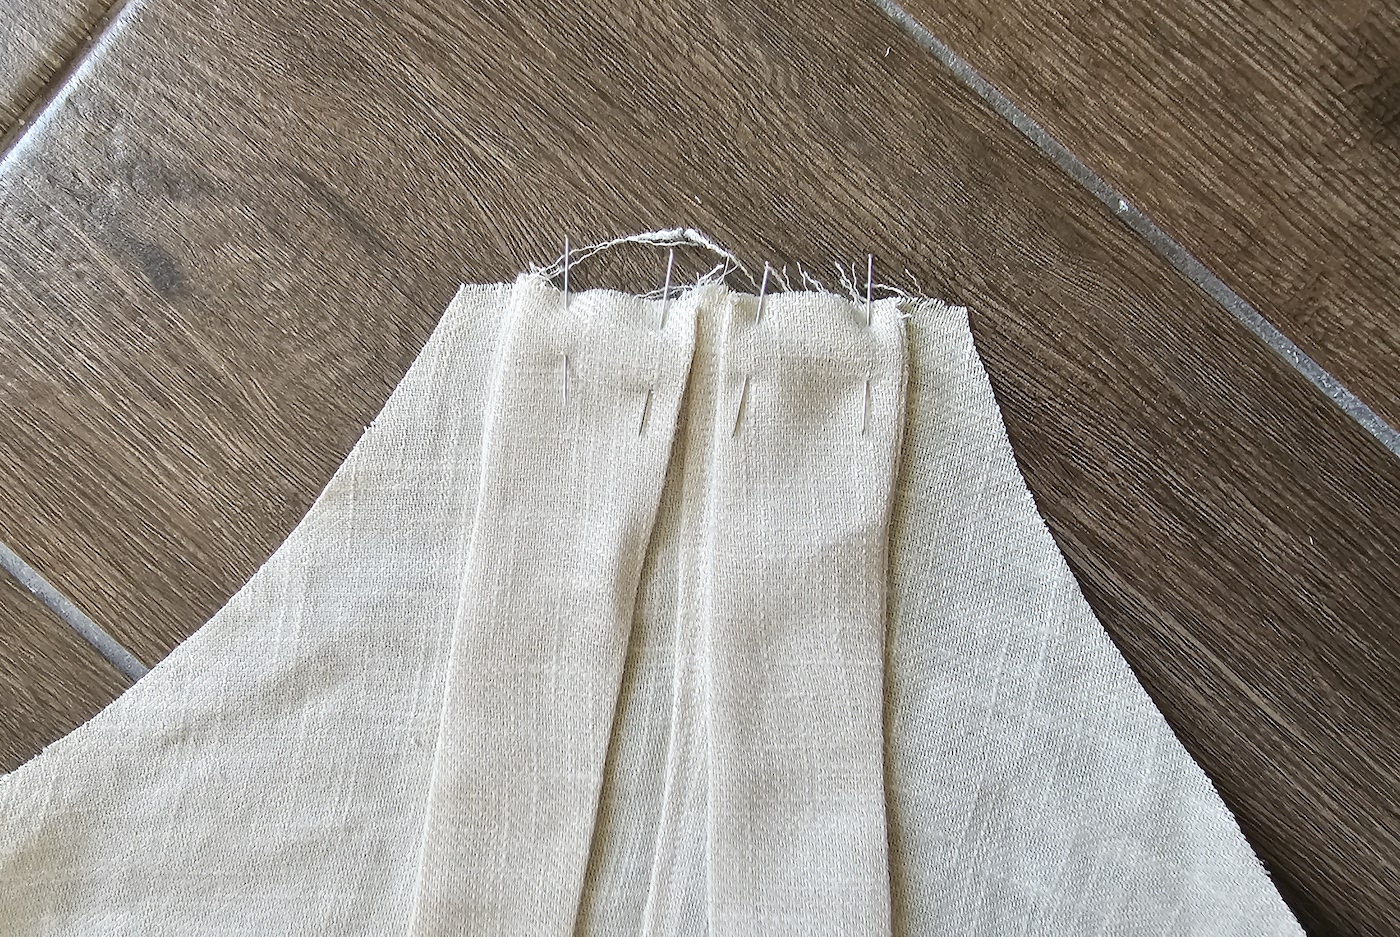
VII. I pinned my straps at the back and secured with a stitch.
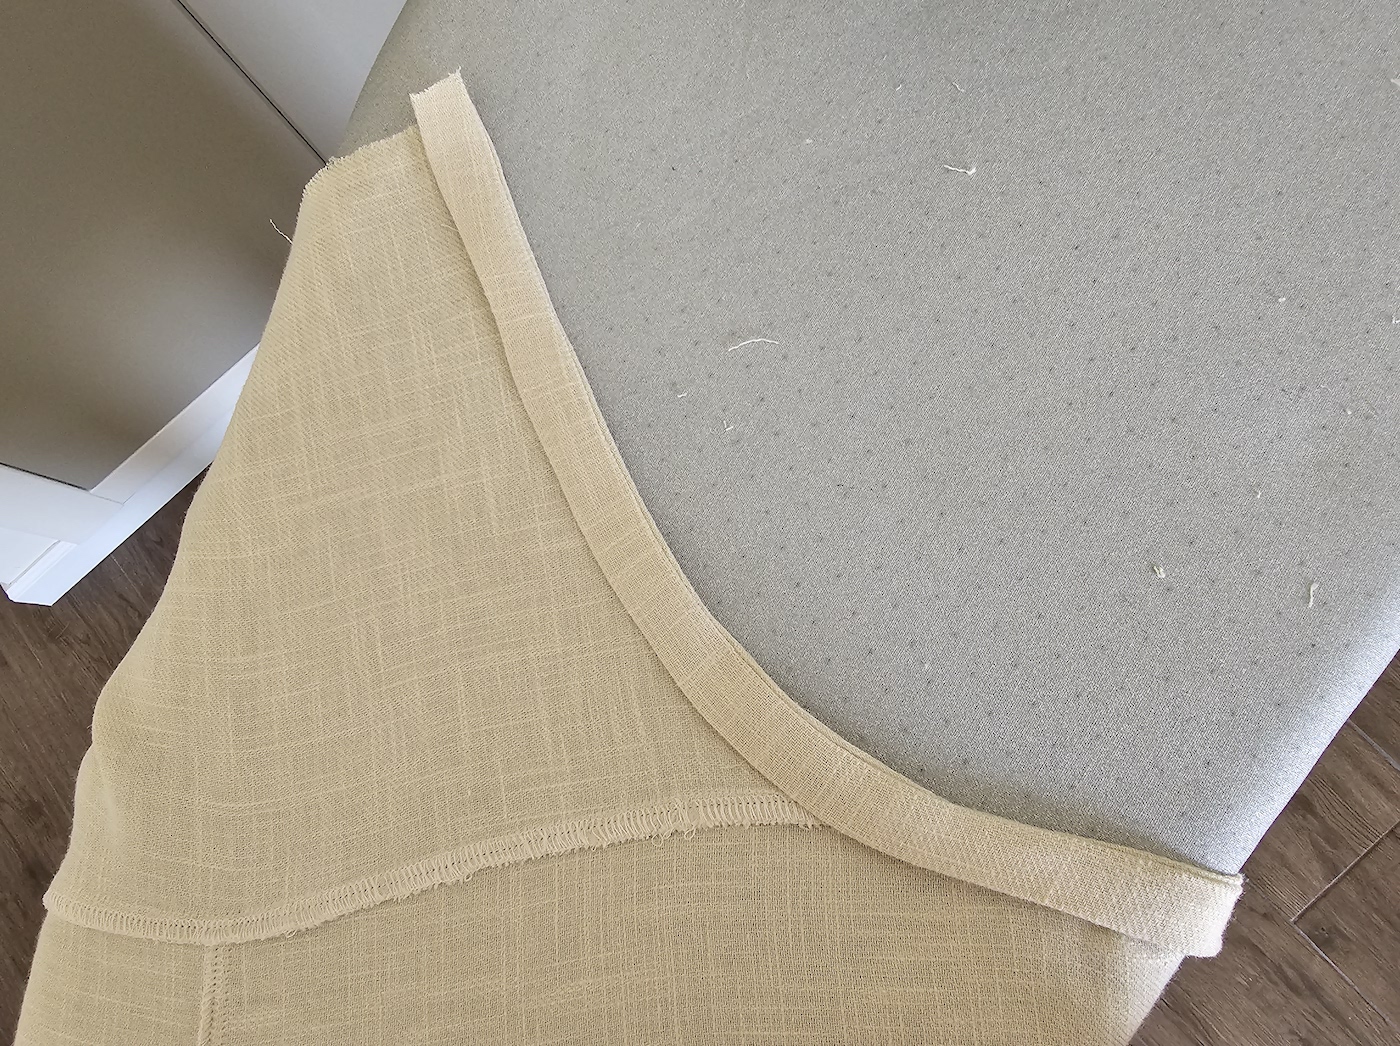
VIII. Then I used my fabric scraps to cut some matching bias binding, which I pinned right side to right side along like so:
All the way to meet the straps in the back.
IX. Then pressed the binding onto the reverse..
.. And stitched it down along the folded edge.
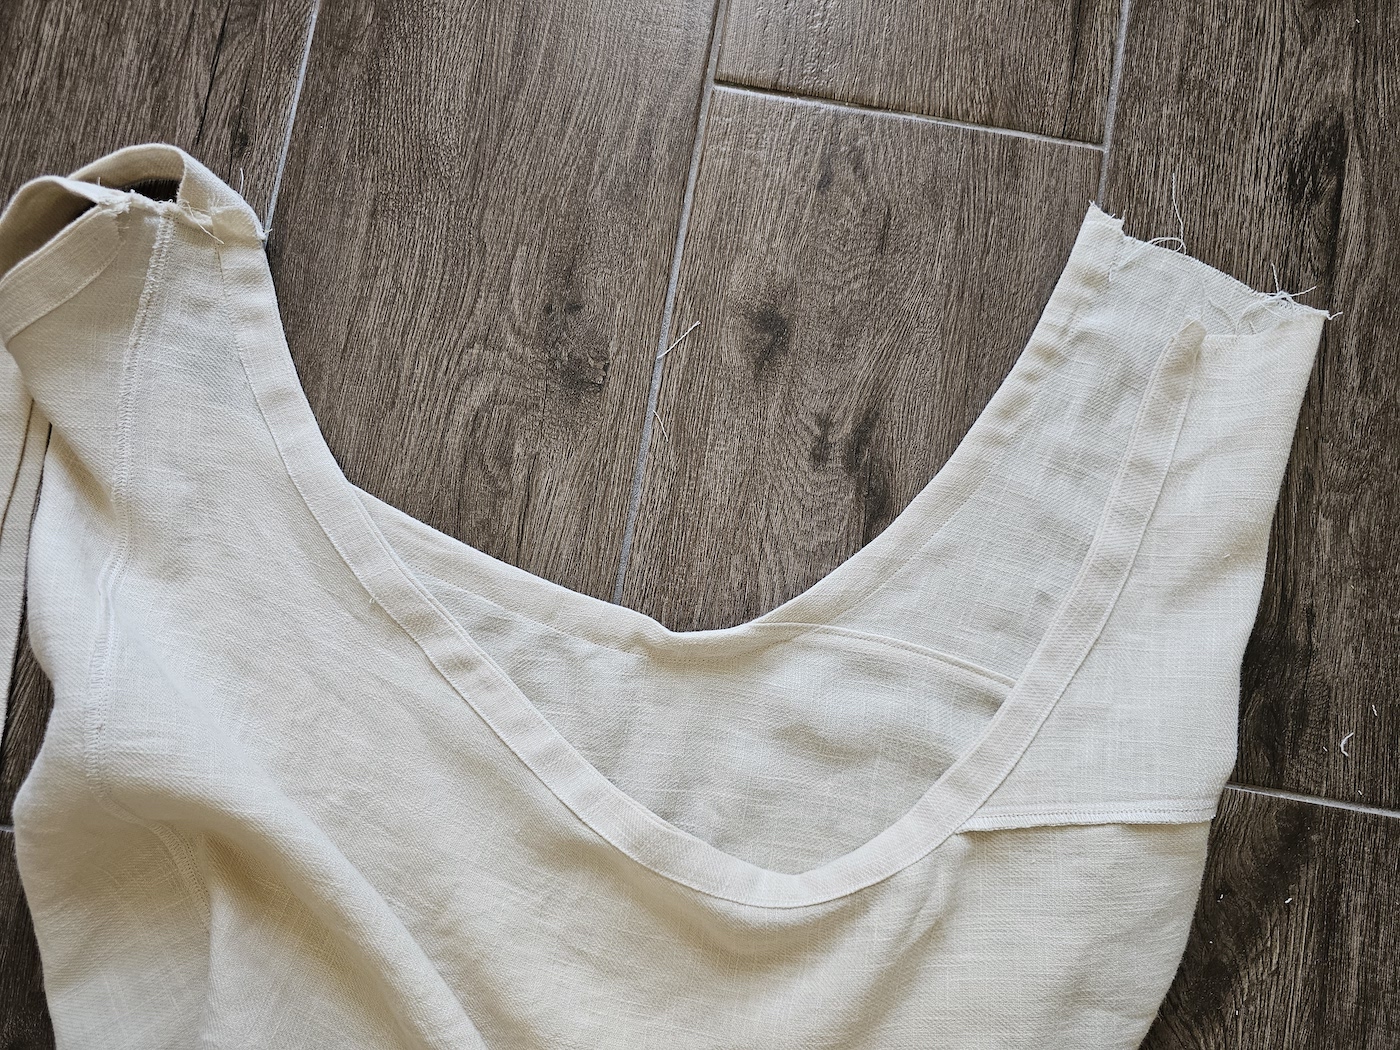
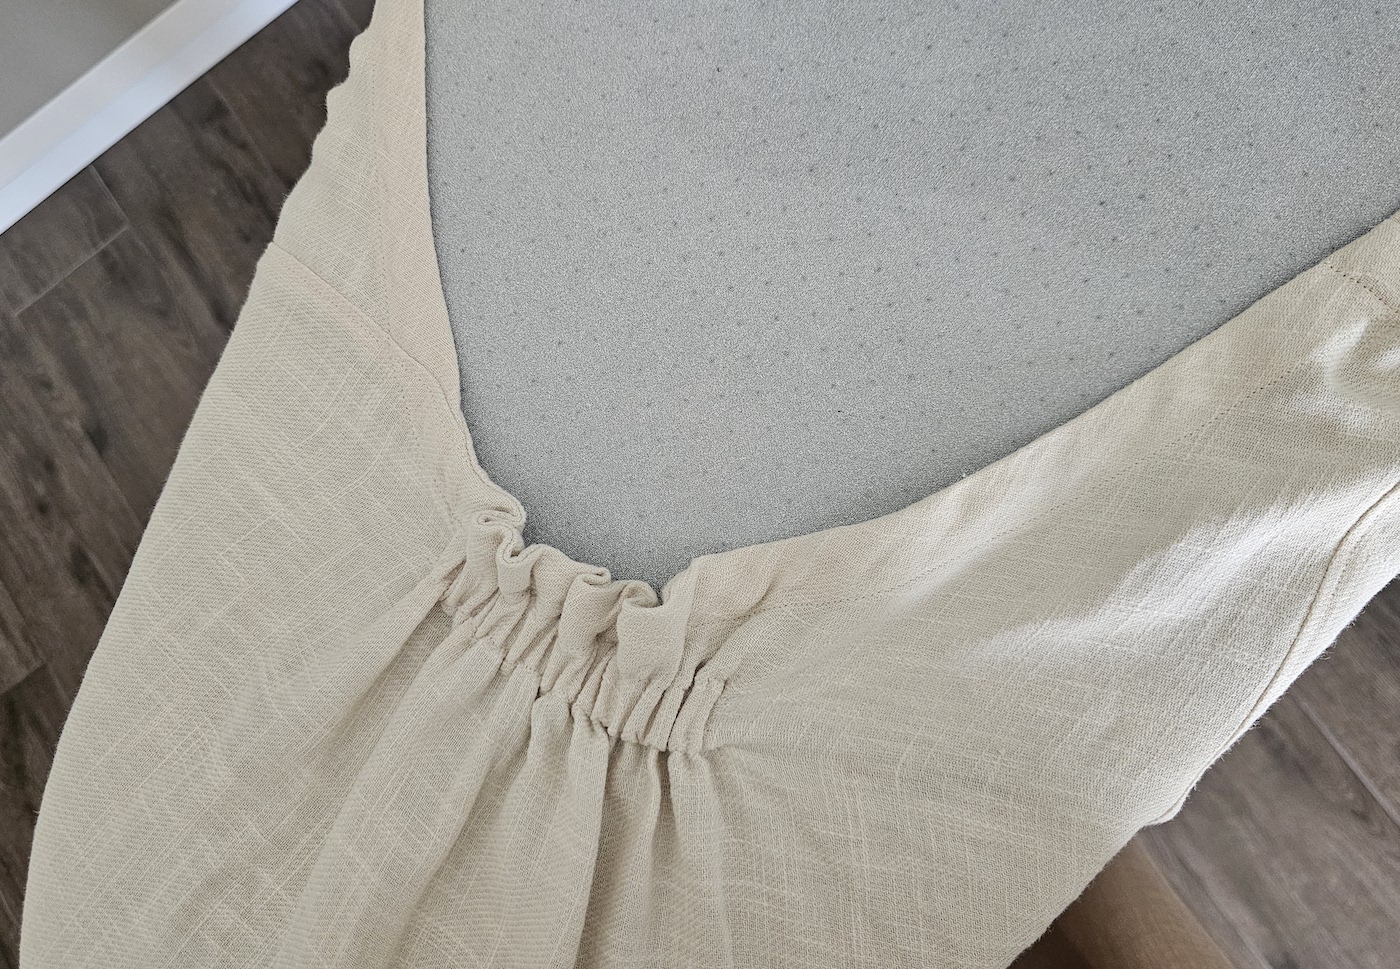
X. I finished the neckline of the front panel with the same method, folding the ends of the binding in to fully enclose the raw edges.
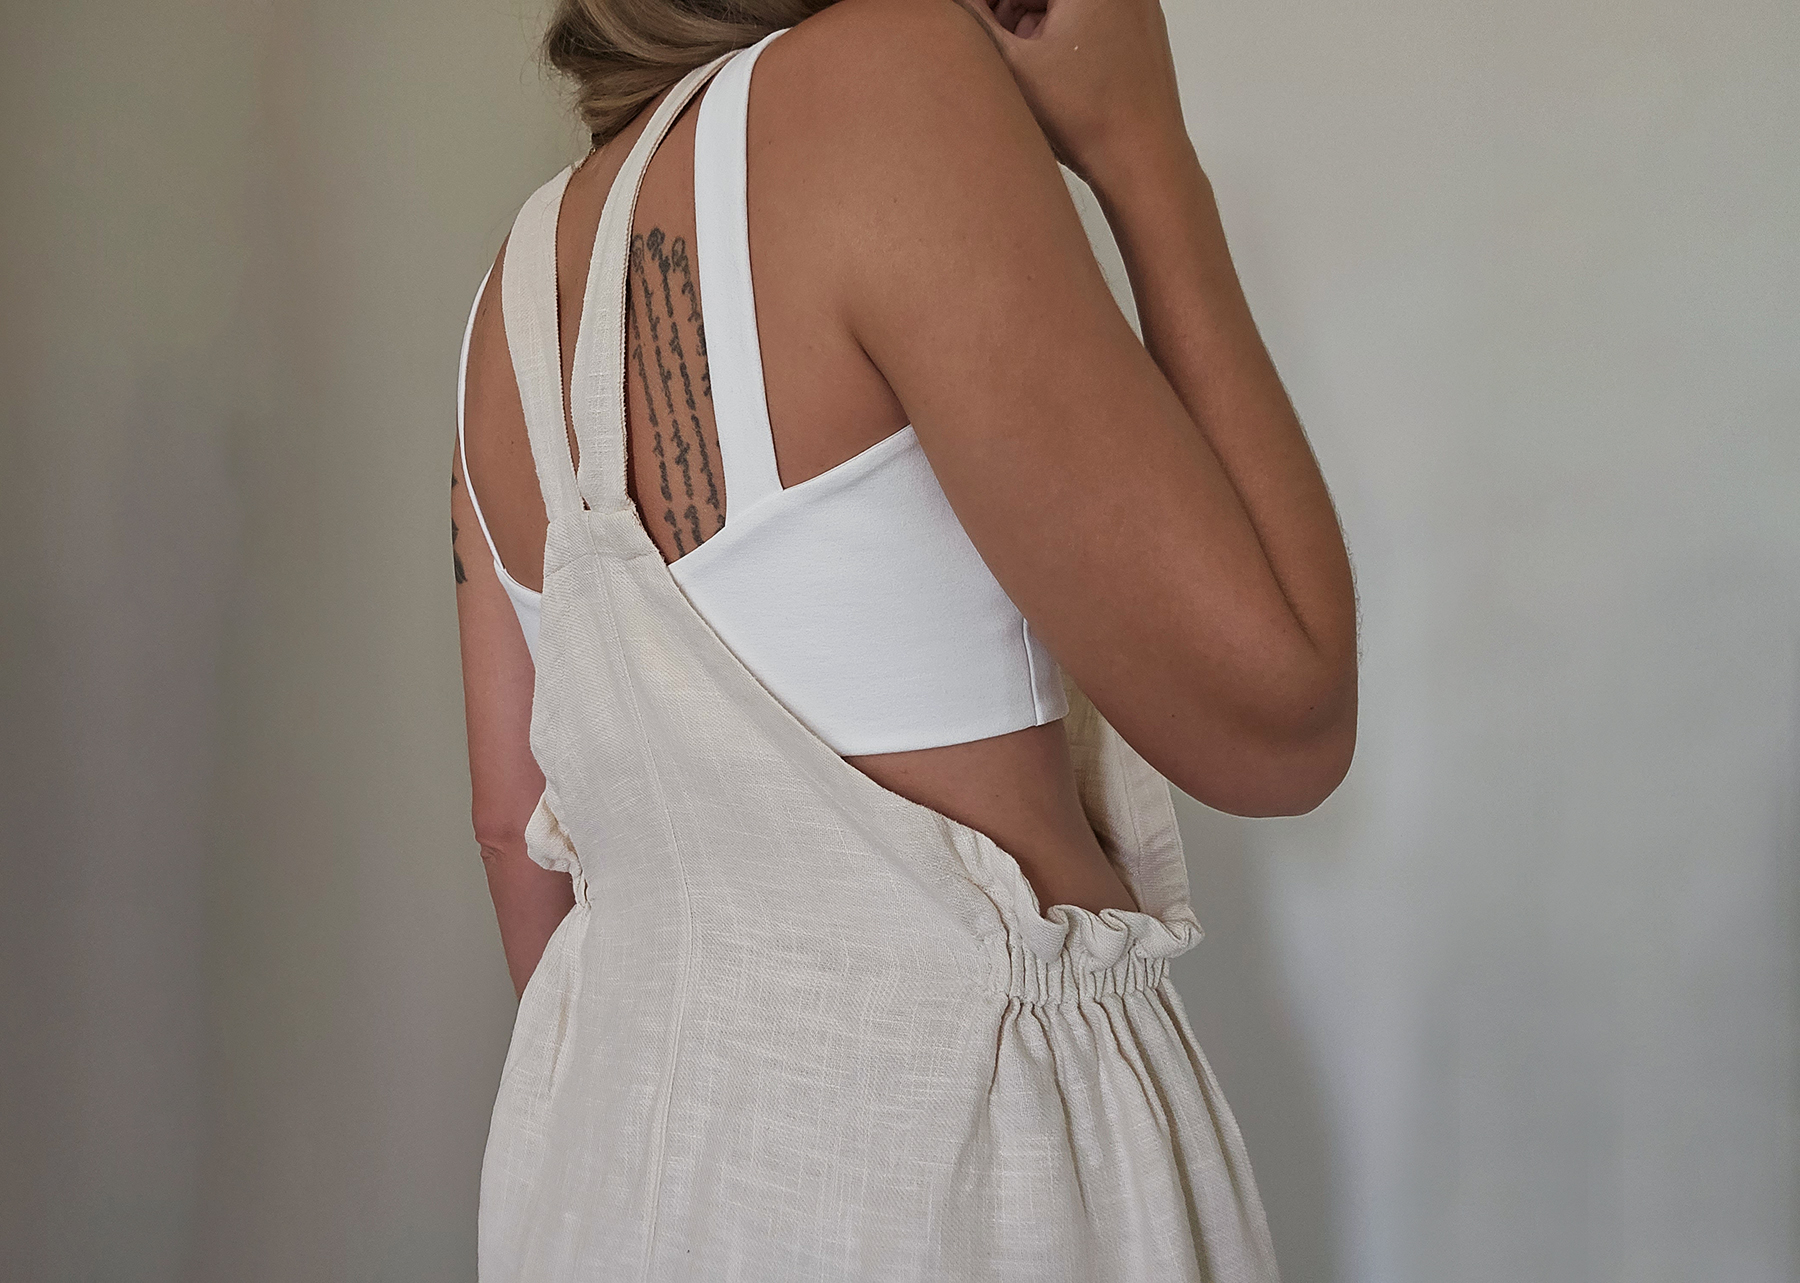
Same thing at the back.
.. After pressing and stitching the binding along the folded edge I had a cleanly finished neckline and back.
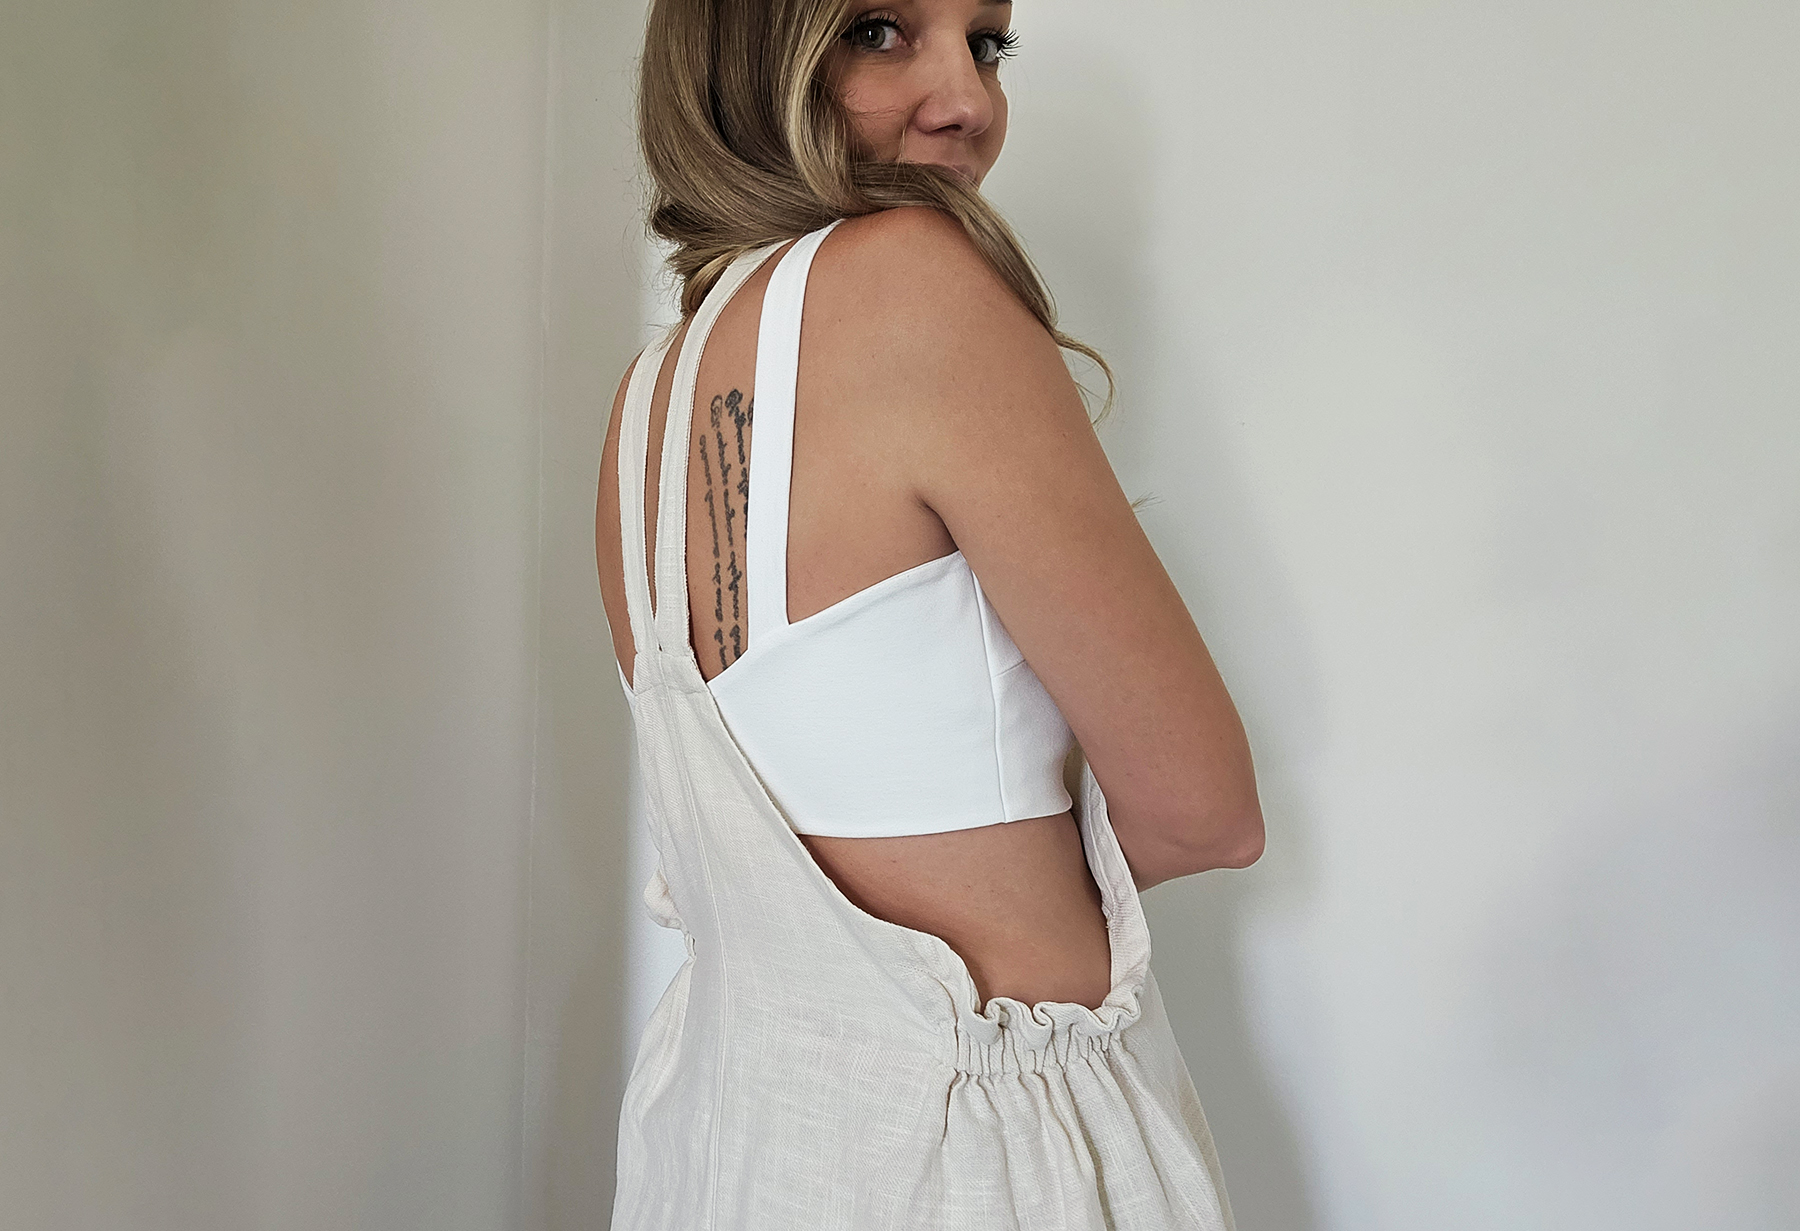
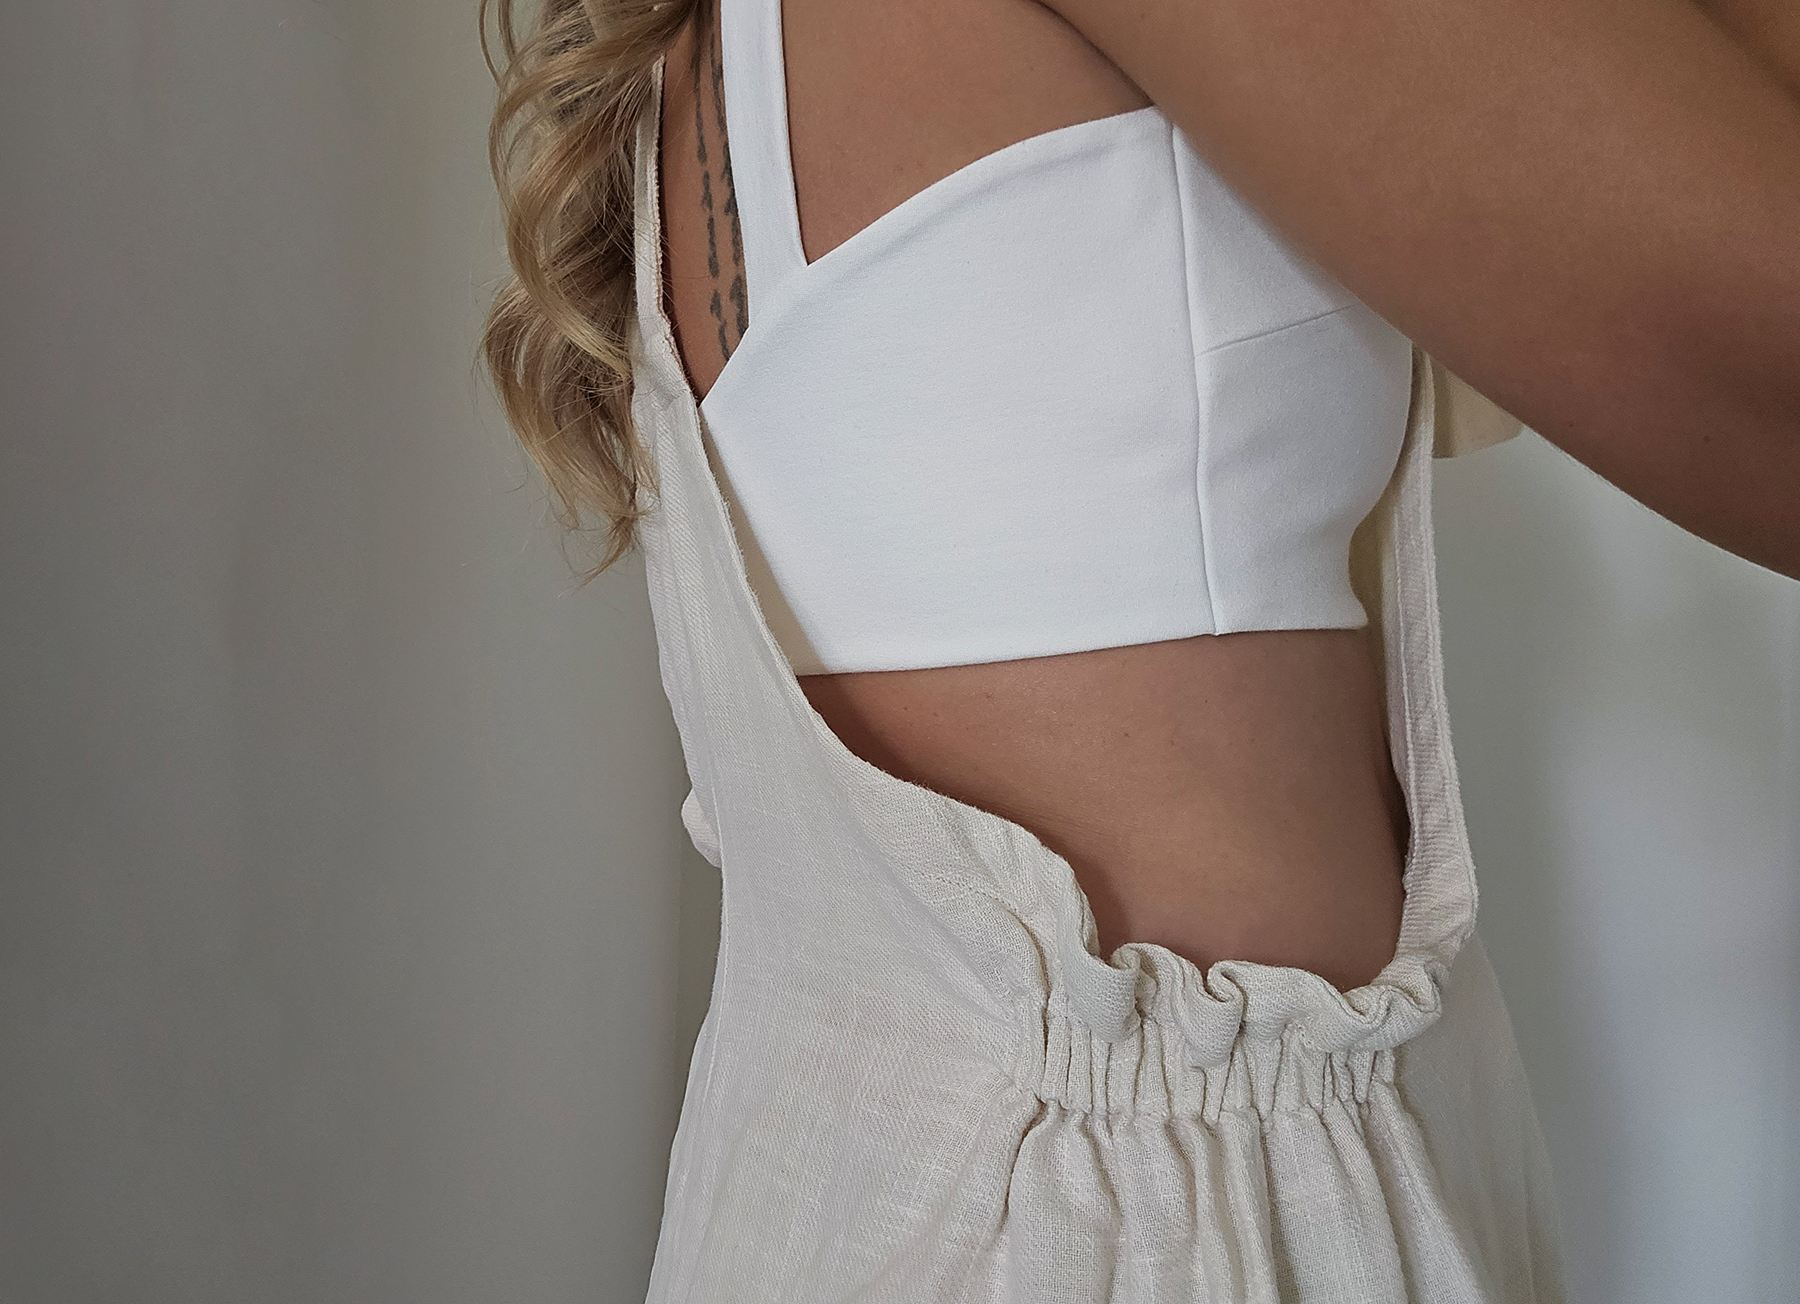
XI. Now the suit was mostly constructed, just needed to add the elasticated sides to bring it in.
 This was my first attempt - I marked the start of my casing for the elastic about 3 cm from the seam joining the suit & the front panel, and I thought gathering a 15-cm distance would do it. I had to eventually adjust this to 20 cm gathered.
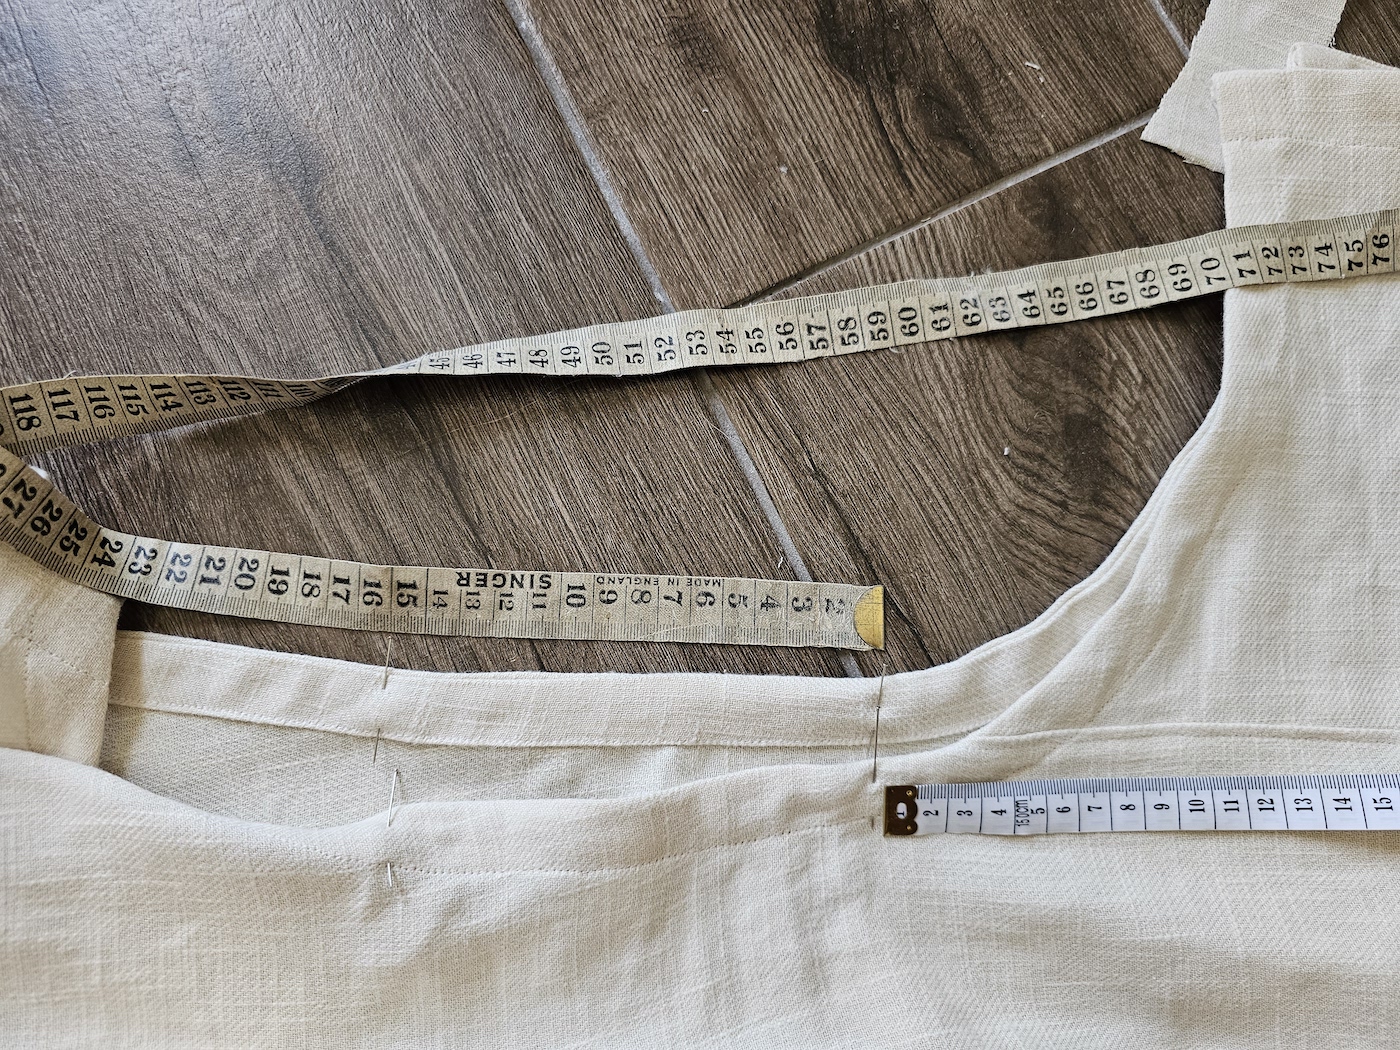
I pinned my casing in place (for which I just used regular bias binding with the ends folded under):
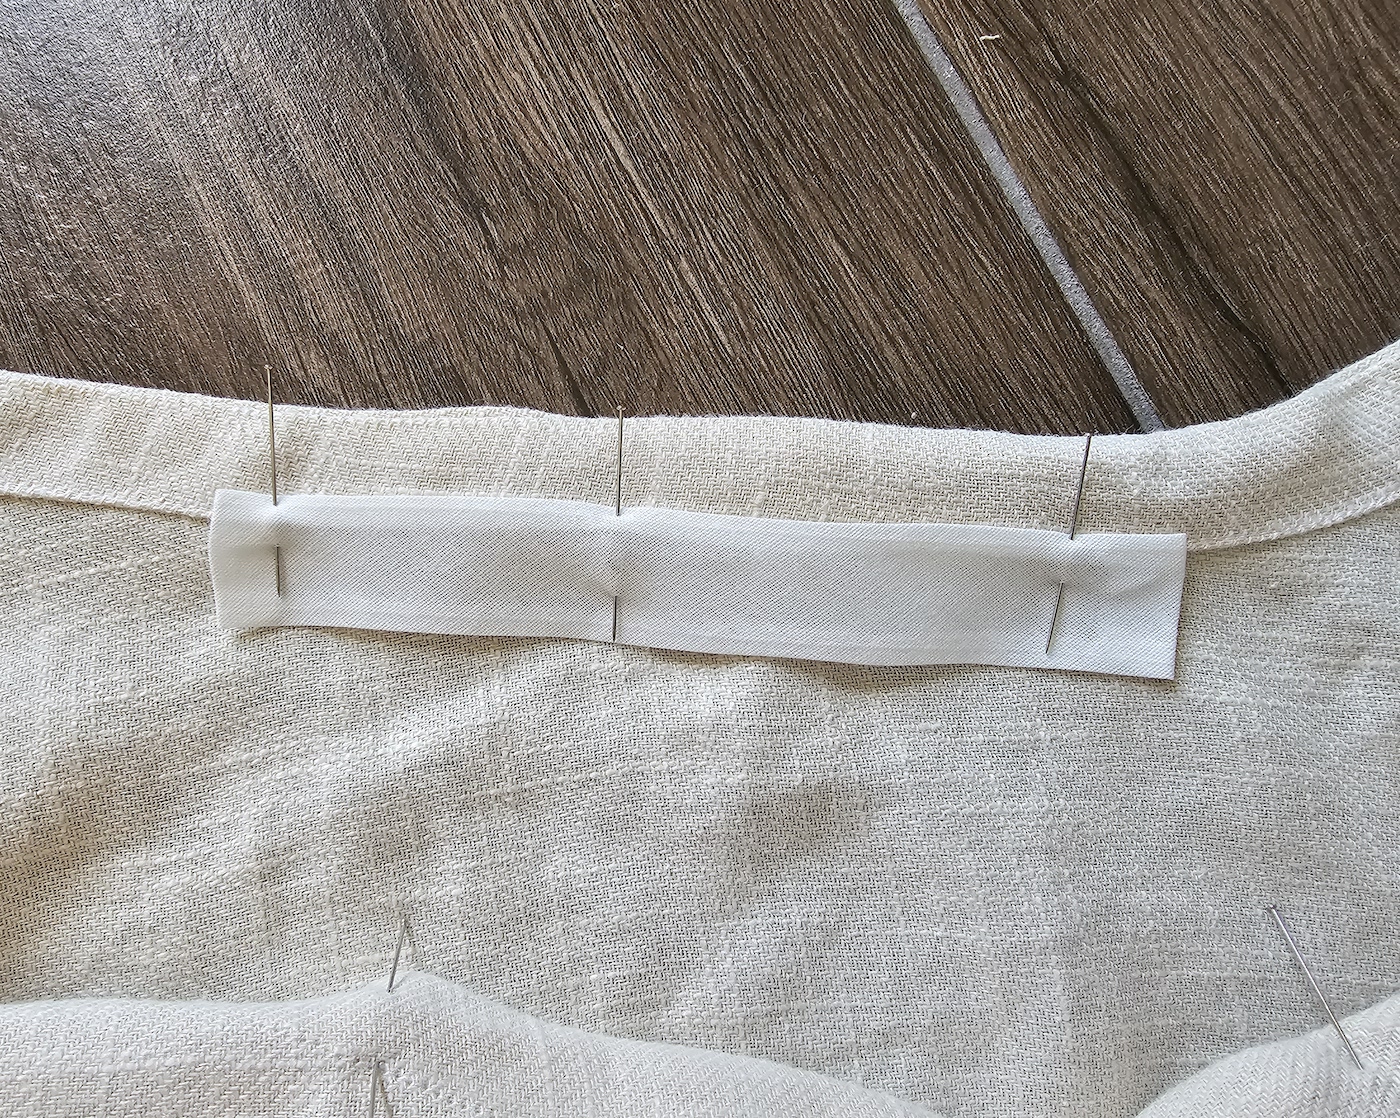
And sewed a straight stitch along the long edges. Then I took a piece of elastic half the length of the casing, and fed in with a safety pin.
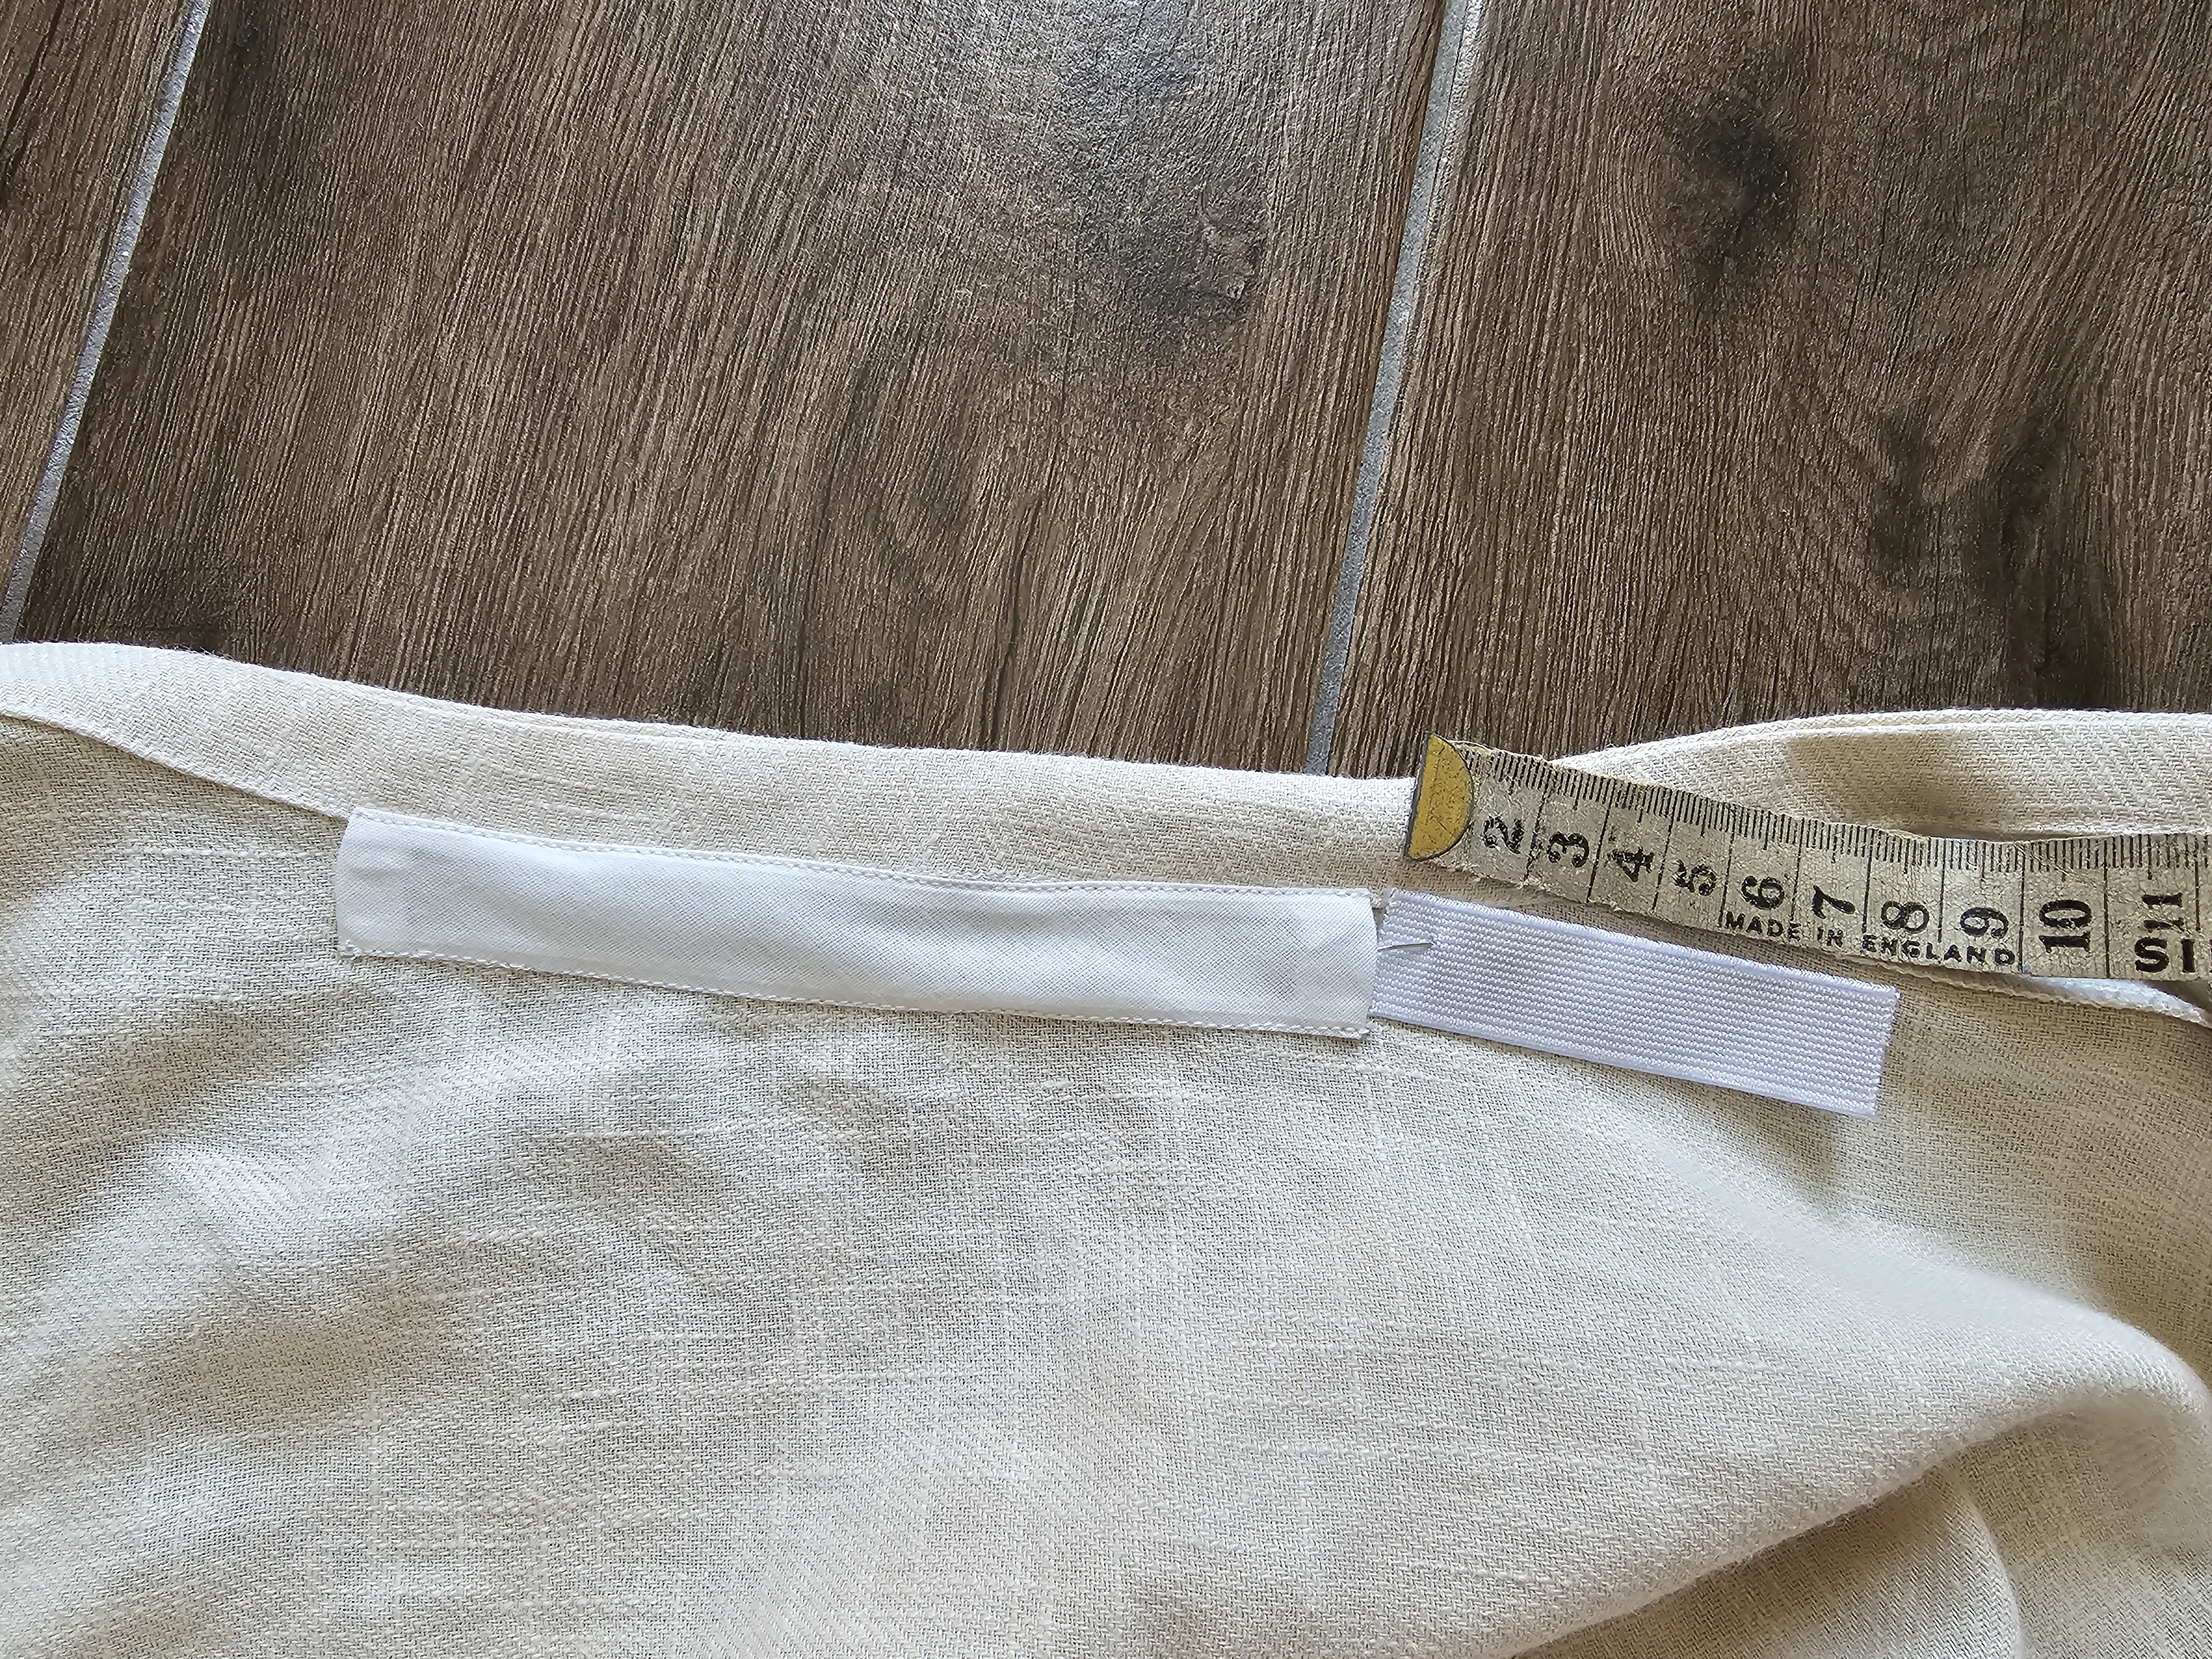
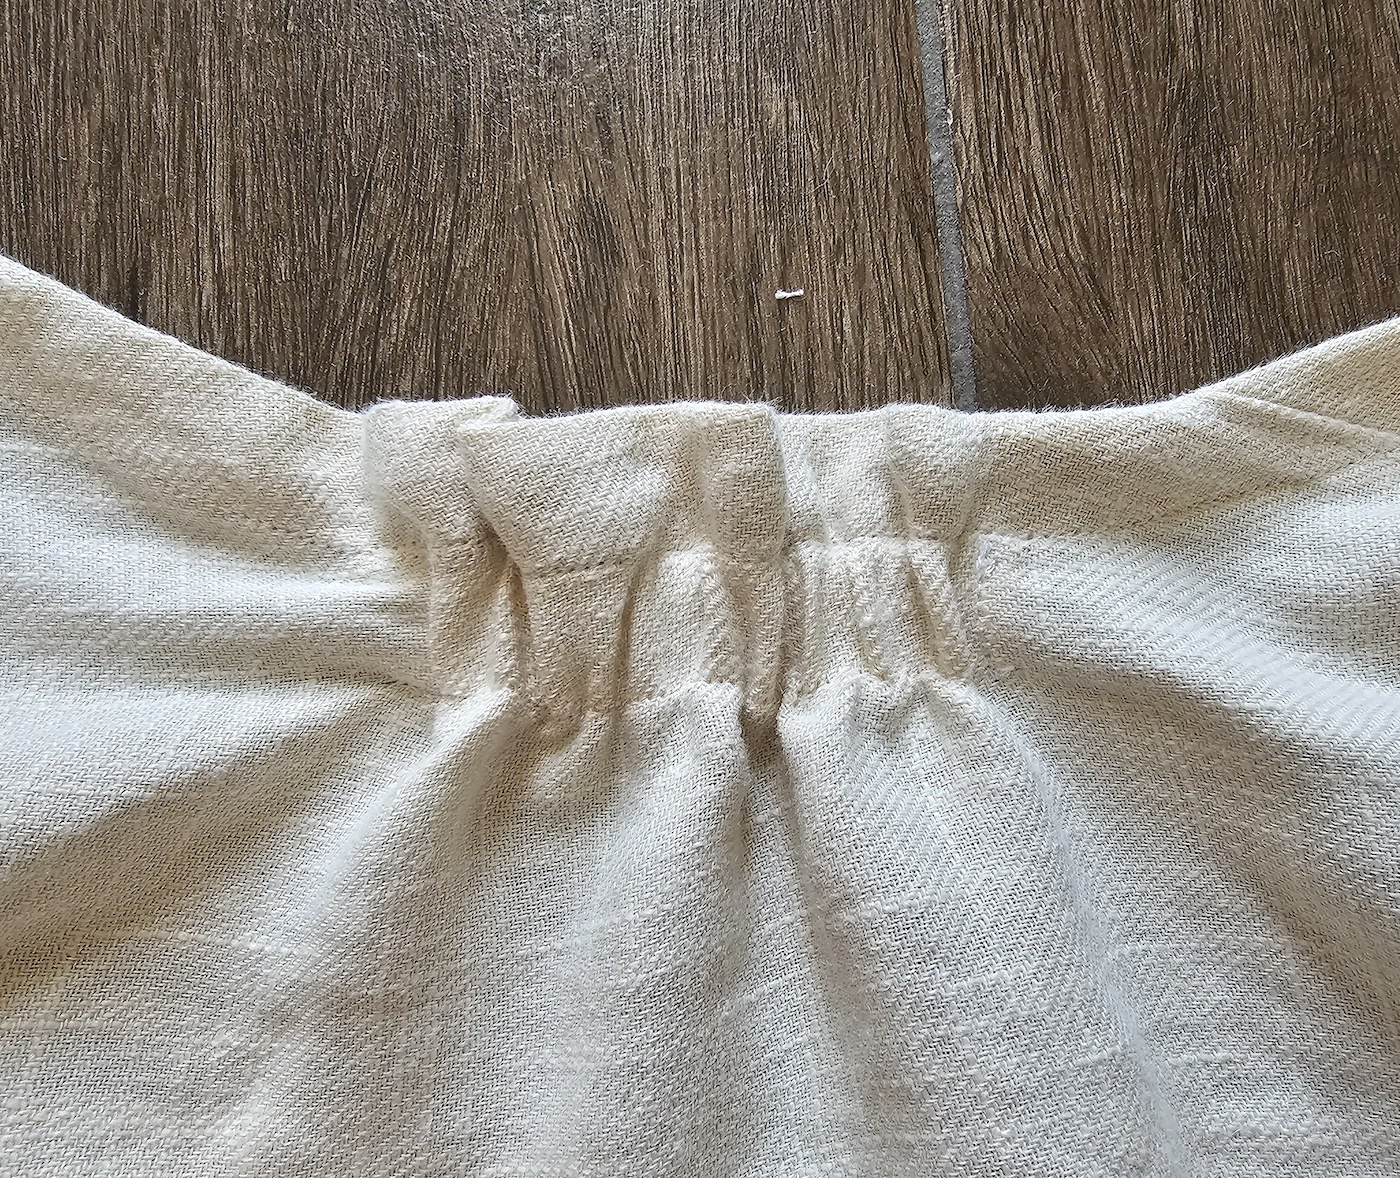
.. But turned out I needed the sides gathered just a bit more than that, there was some gaping and I thought it's classier if people can't see into my pants if they're a bit taller than me. So I added 5 more cm of casing, and switched the elastic out to just a slightly longer one (9 cm). I can't stand the idea of even the smallest scrap not being used, so I did this with small leftover pieces of binding.
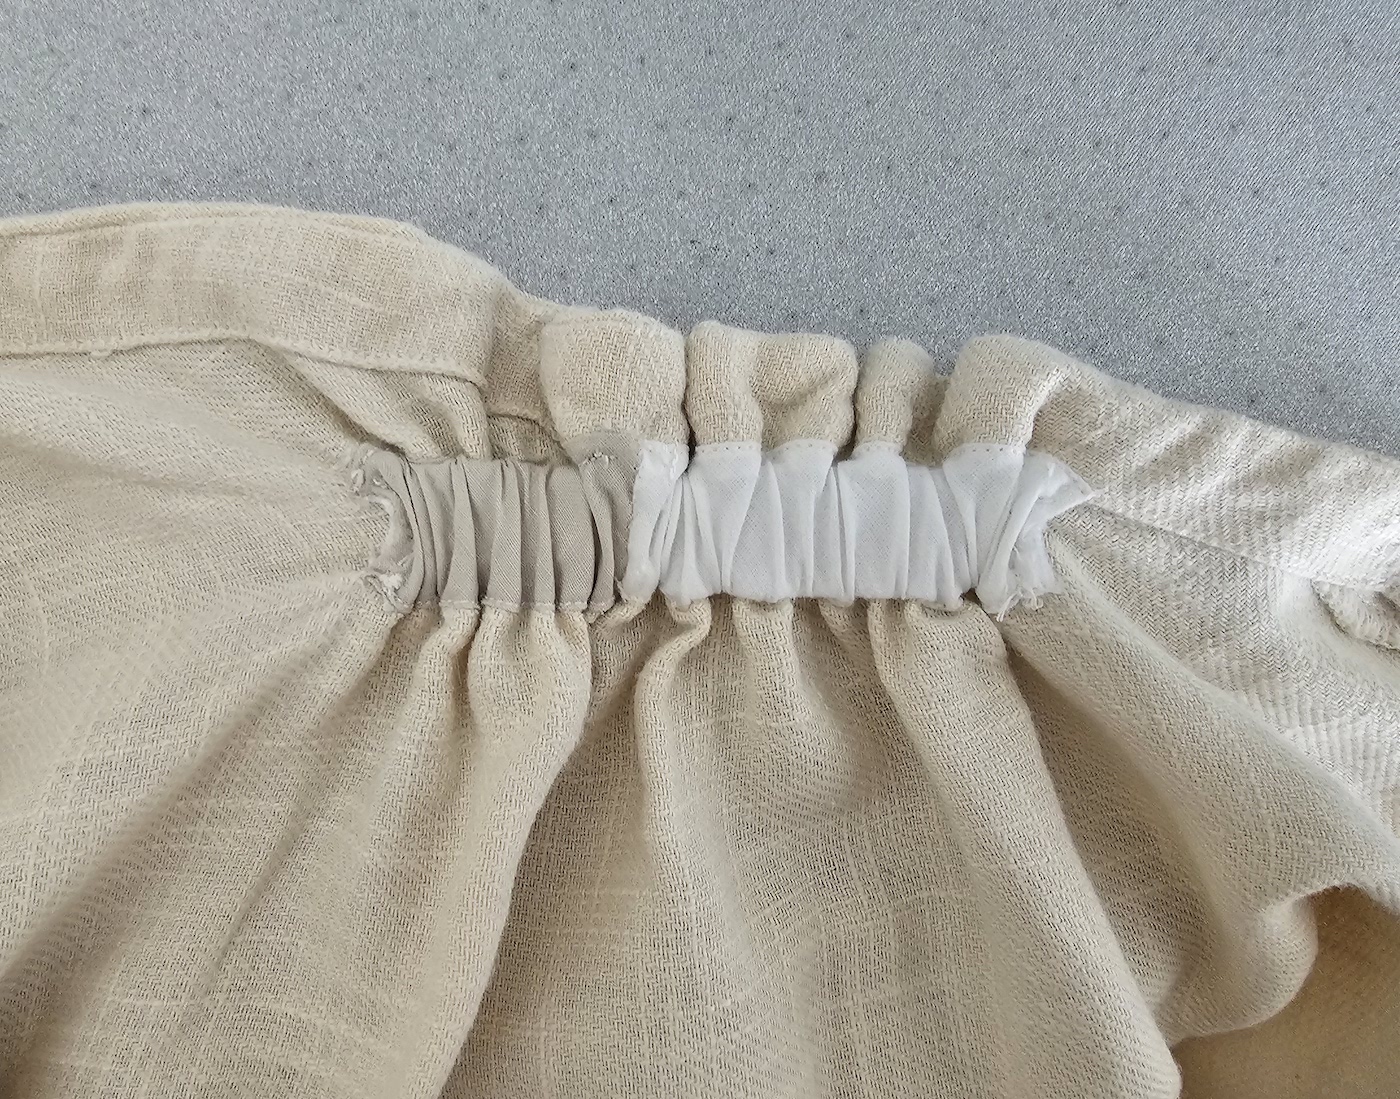
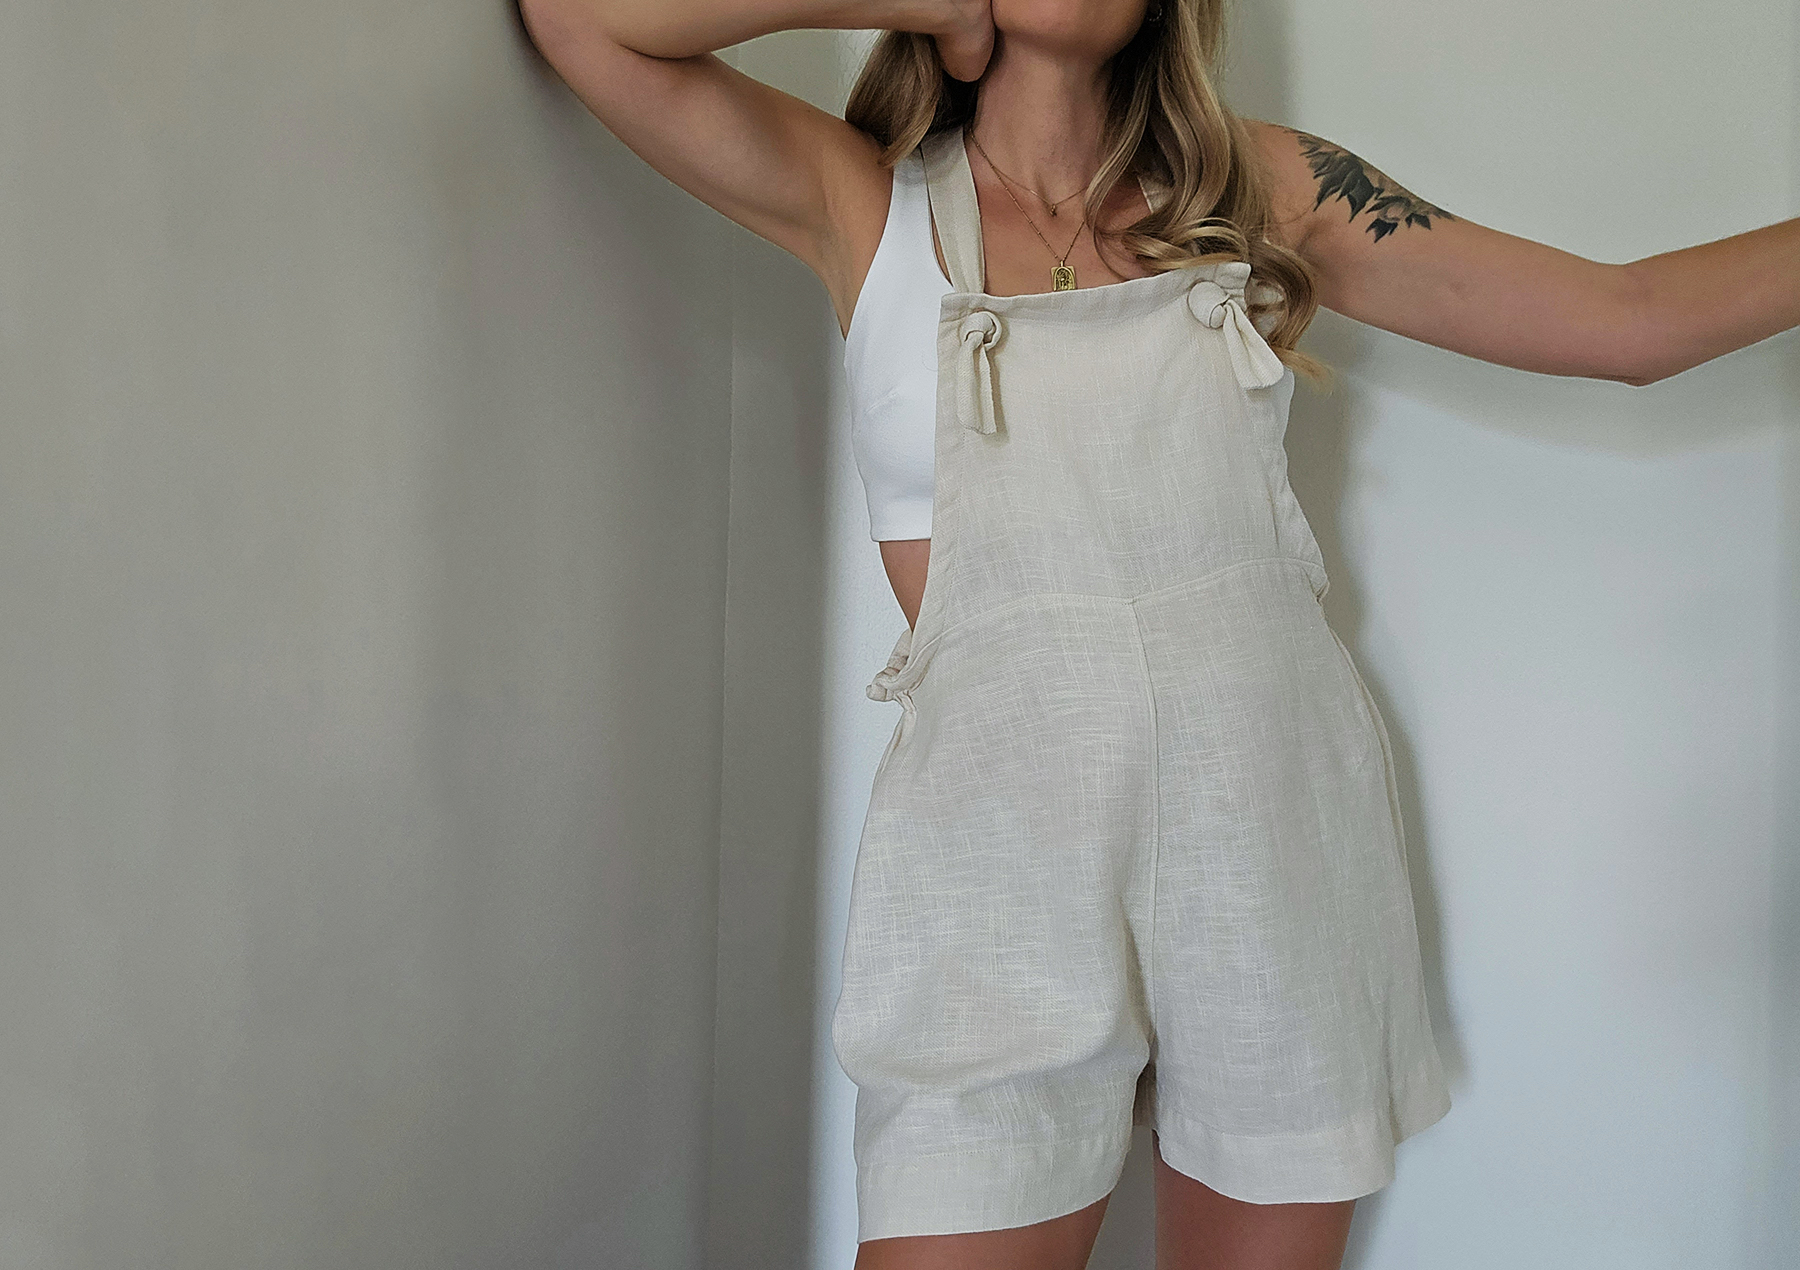
After that adjustment, the fit was just right. Here's the right side view.
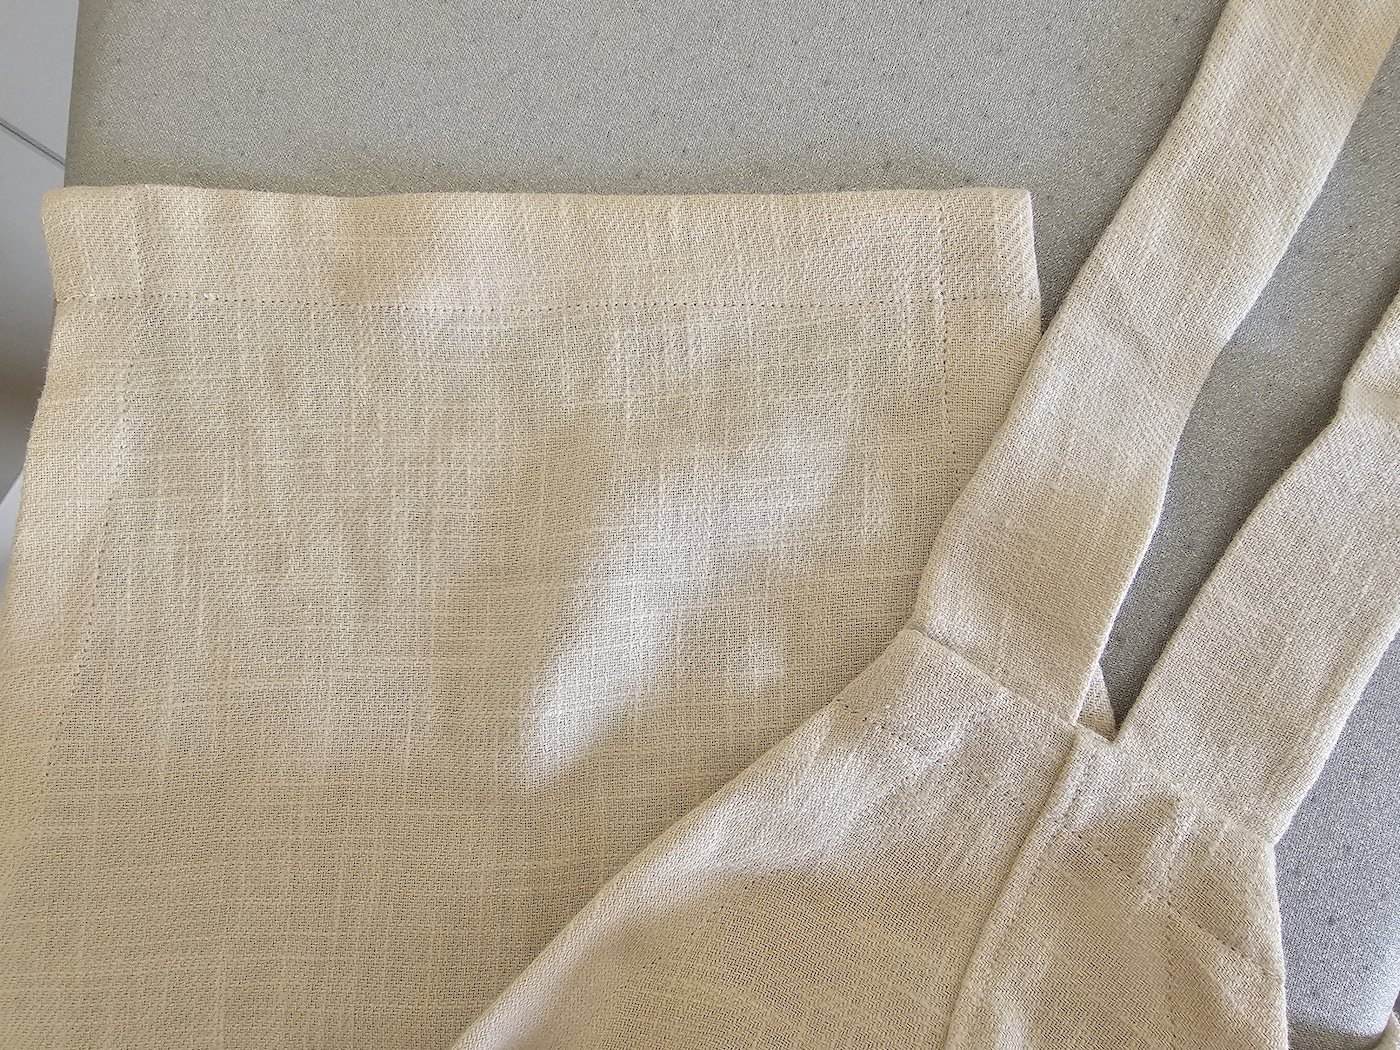
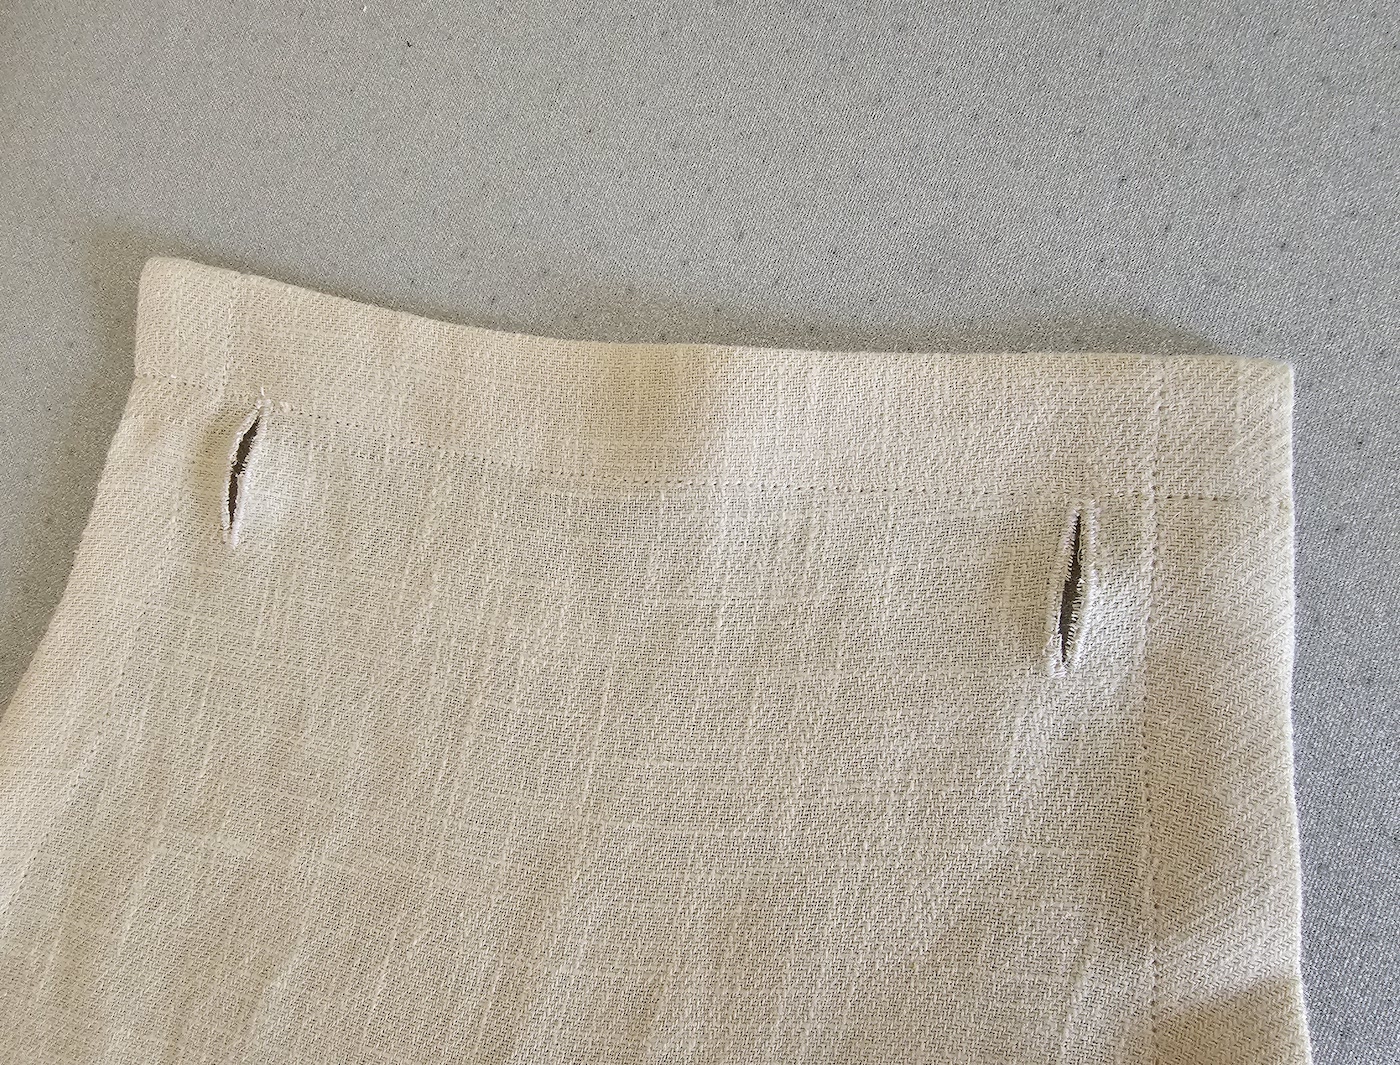
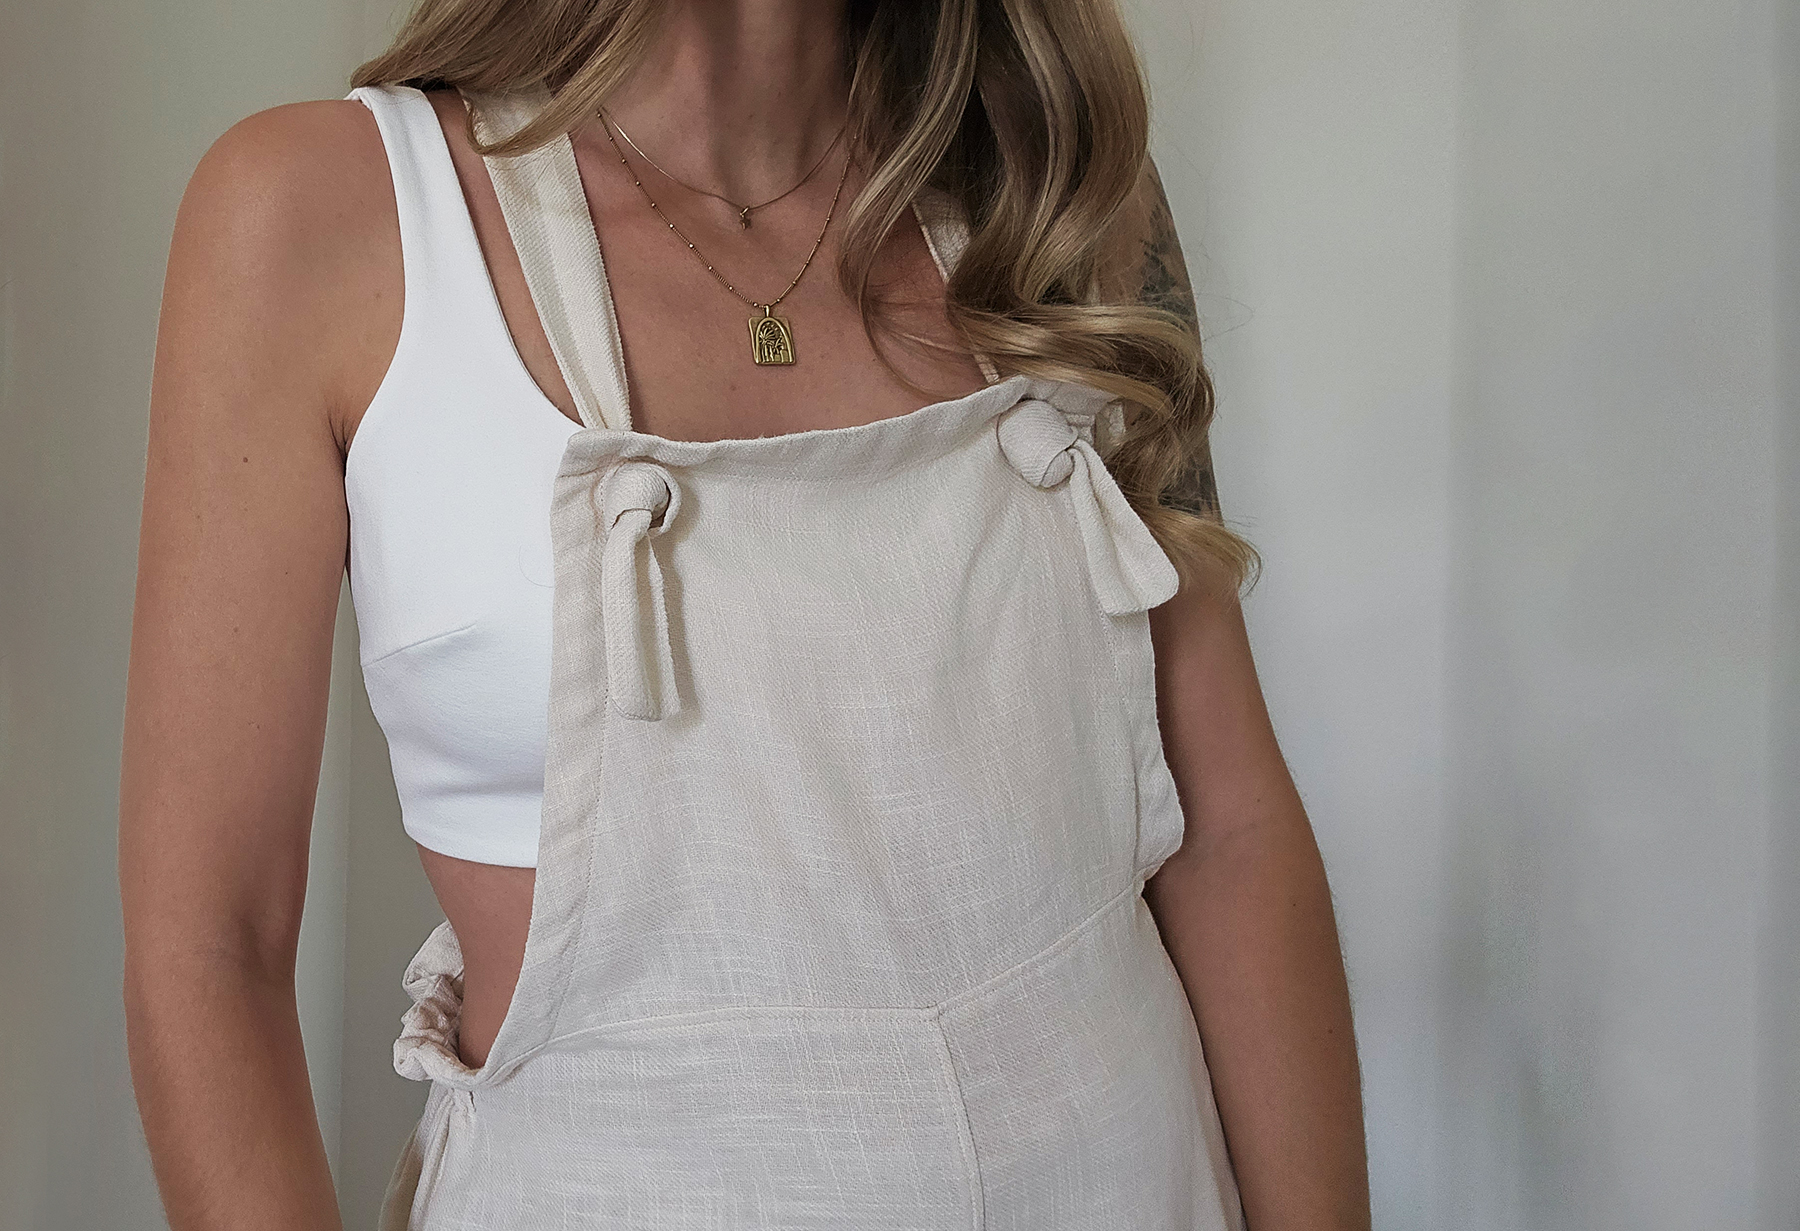
XII. Nearly done - Just added buttonholes to the front panel:
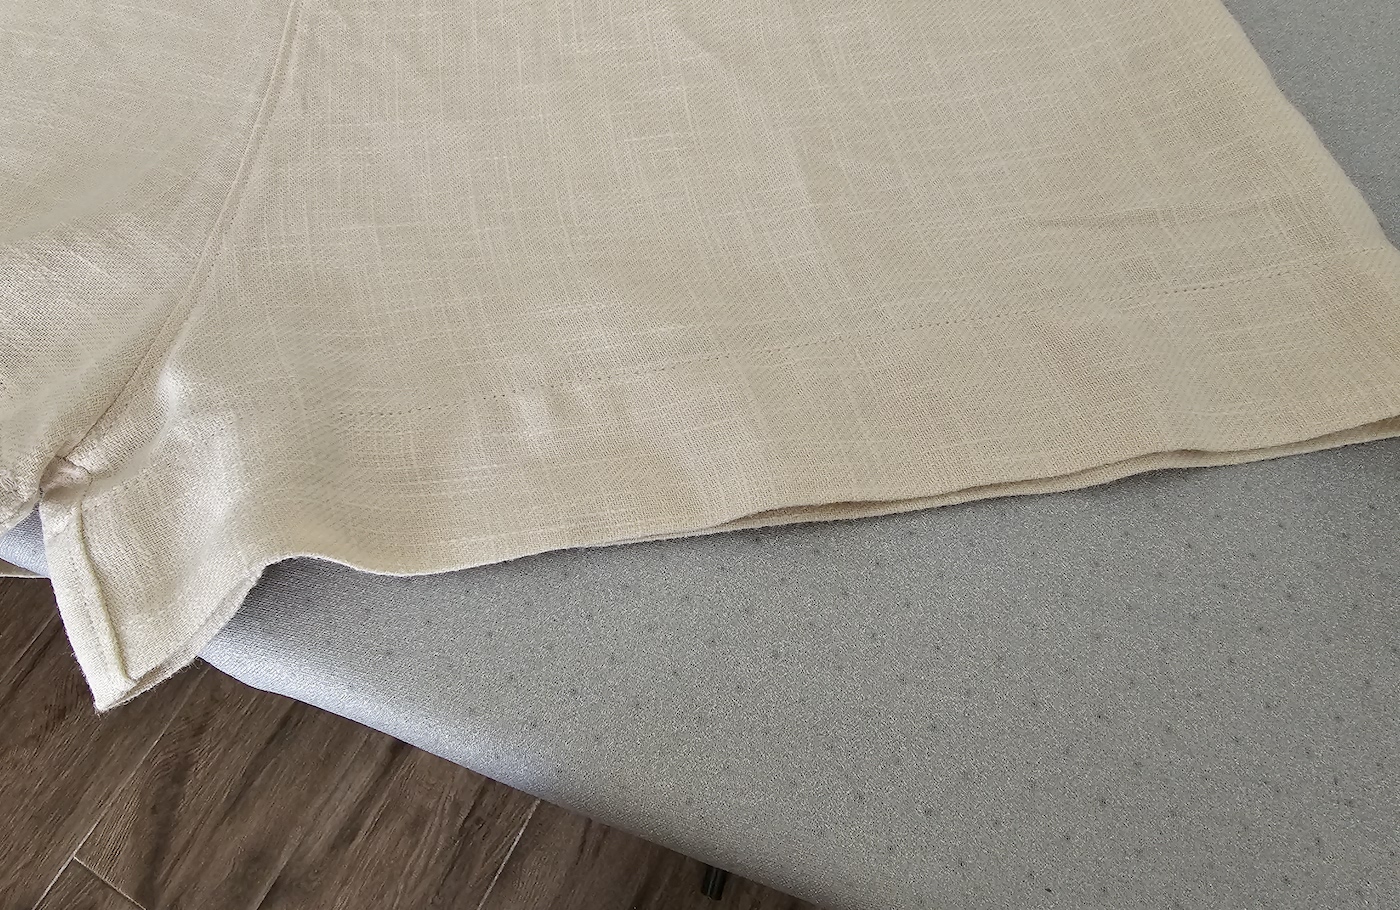
XIII. And hemmed the shorts with a wide 4 cm fold.
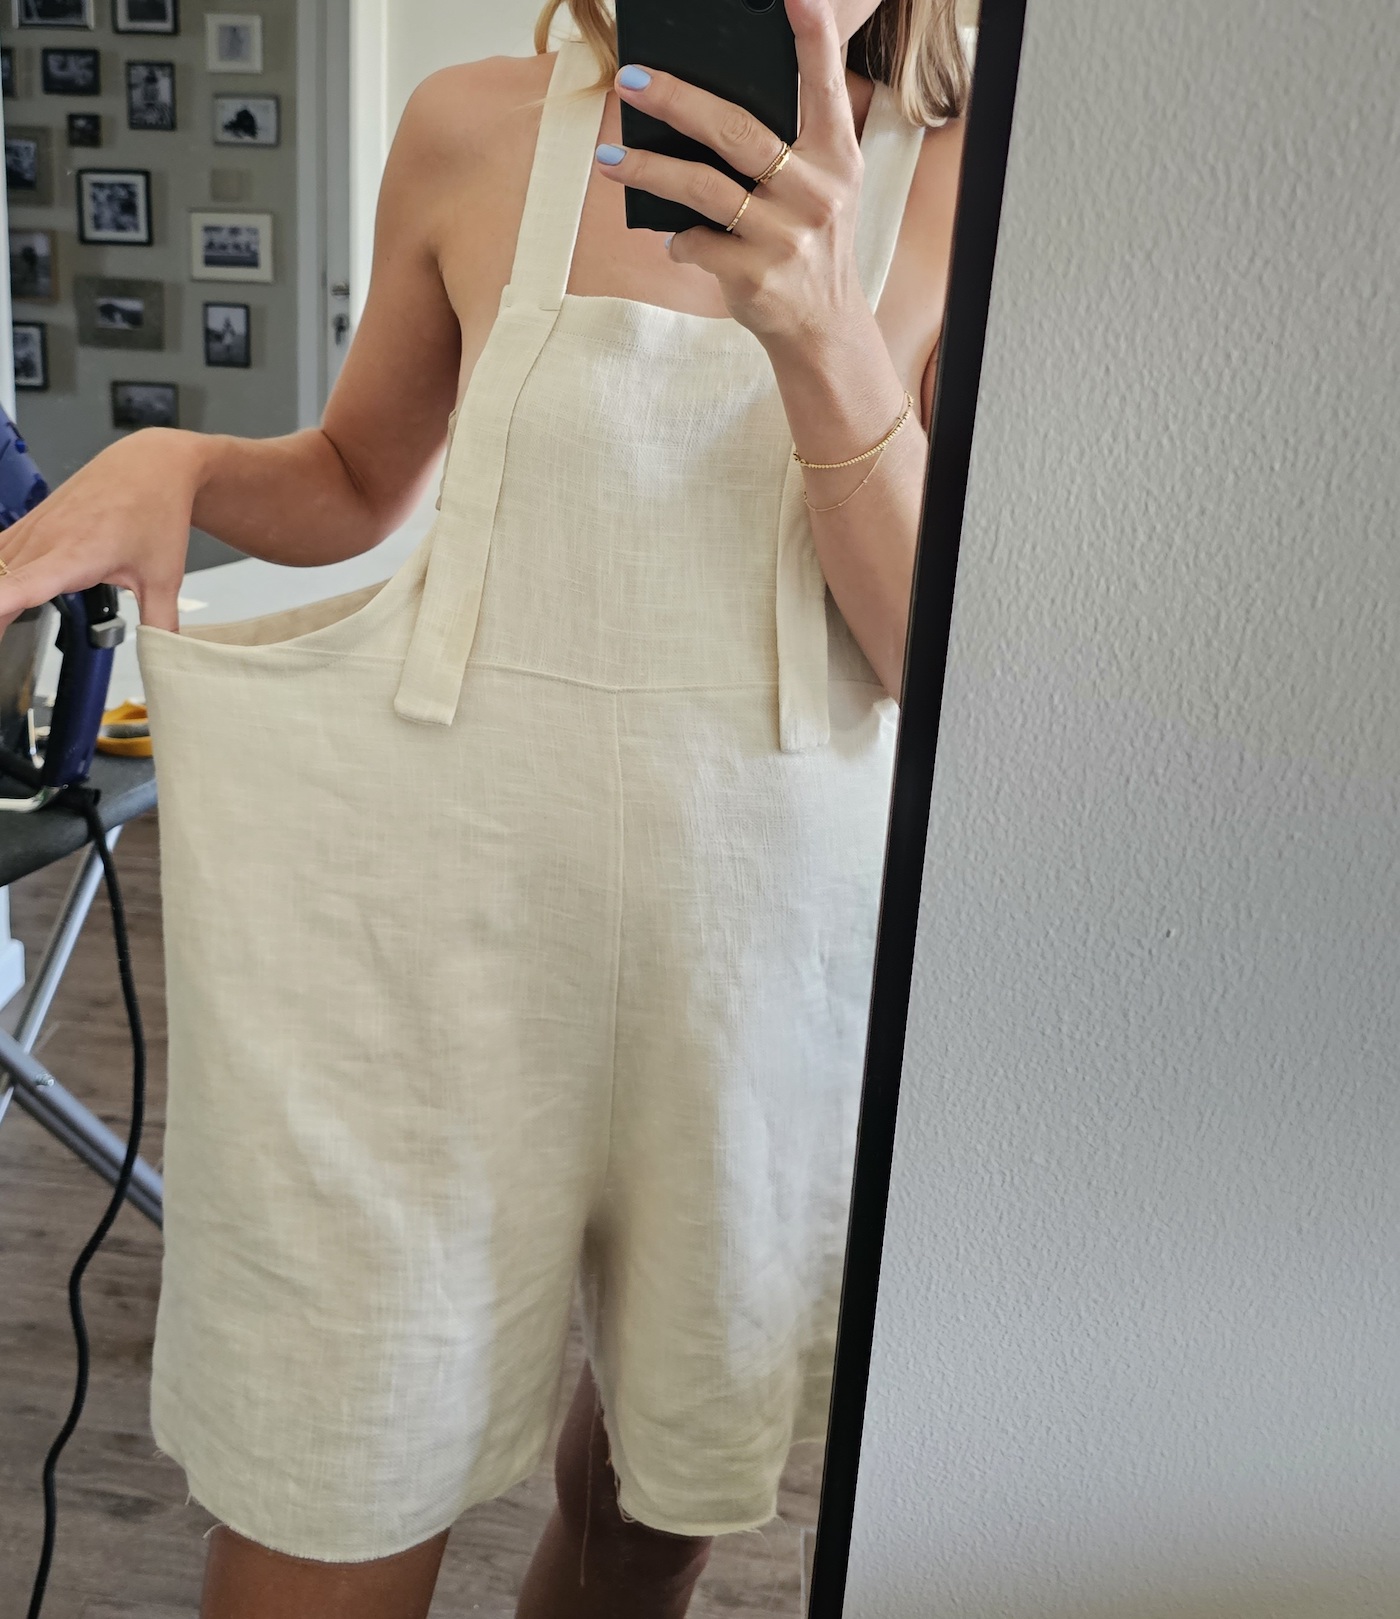
I had planned to use buttons to secure the straps at the front, but none looked right to me, so I ended up just tying the strap ends in double knots after slipping through the buttonholes. I like the relaxed look of them more than buttons on this style.
xo,
Julia


Love it! I def would make it!!
ReplyDeletePKR98 Game surprised me with how calm and comfortable the gameplay feels. The layout is straightforward, and nothing feels rushed. I liked playing at my own pace without pressure. It’s a good option for unwinding. If you enjoy relaxed online games, you should definitely play here and experience it yourself.
ReplyDeleteRompers are a fun and versatile wardrobe choice, combining comfort with style for any casual outing. Choosing the right design and fit takes a bit of attention, just like handling research projects requires care and expertise. When working on complex data tasks, relying on the best primary data collection writers can make all the difference. Their guidance ensures that data is organized, accurate, and ready for analysis, allowing researchers to focus on drawing meaningful conclusions without unnecessary stress.
ReplyDeleteStreamers and educators will love NohBoard for its customizable real-time keyboard visualization, smooth animations, and effortless setup. Its intuitive interface, lightweight design, and reliability make it an essential tool for anyone seeking professional-looking displays and seamless interactive experiences.
ReplyDeleteDelightful experience every time I visit Mangayomi because their collection of manga is extensive, updated, and well-organized, making it simple for readers to explore new series. The website interface is smooth, visually appealing, and genuinely enjoyable for all manga lovers.
ReplyDeleteTotally amazed by MegaBasterd as it combines simplicity, efficiency, and speed in one platform. Downloading large files has never been easier, and its straightforward layout, stability, and responsive support make it an essential tool for anyone managing media content efficiently.
ReplyDelete