It's been the quietest year in my 10-year blogging history. For many reasons, I just haven't felt like documenting the making process, or putting the effort into writing up guides - I've just been focused on enjoying the process of crafting & sewing, for me. The world has gone so crazy this year that talking about things like sewing tutorials has seemed irrelevant and superficial. Now I think I've found peace with the fact that creative projects are still the thing that brings me solace, and it's especially when it feels like the world is falling apart, that you need to re-energise yourself somehow, to be able to keep speaking for the oppressed.
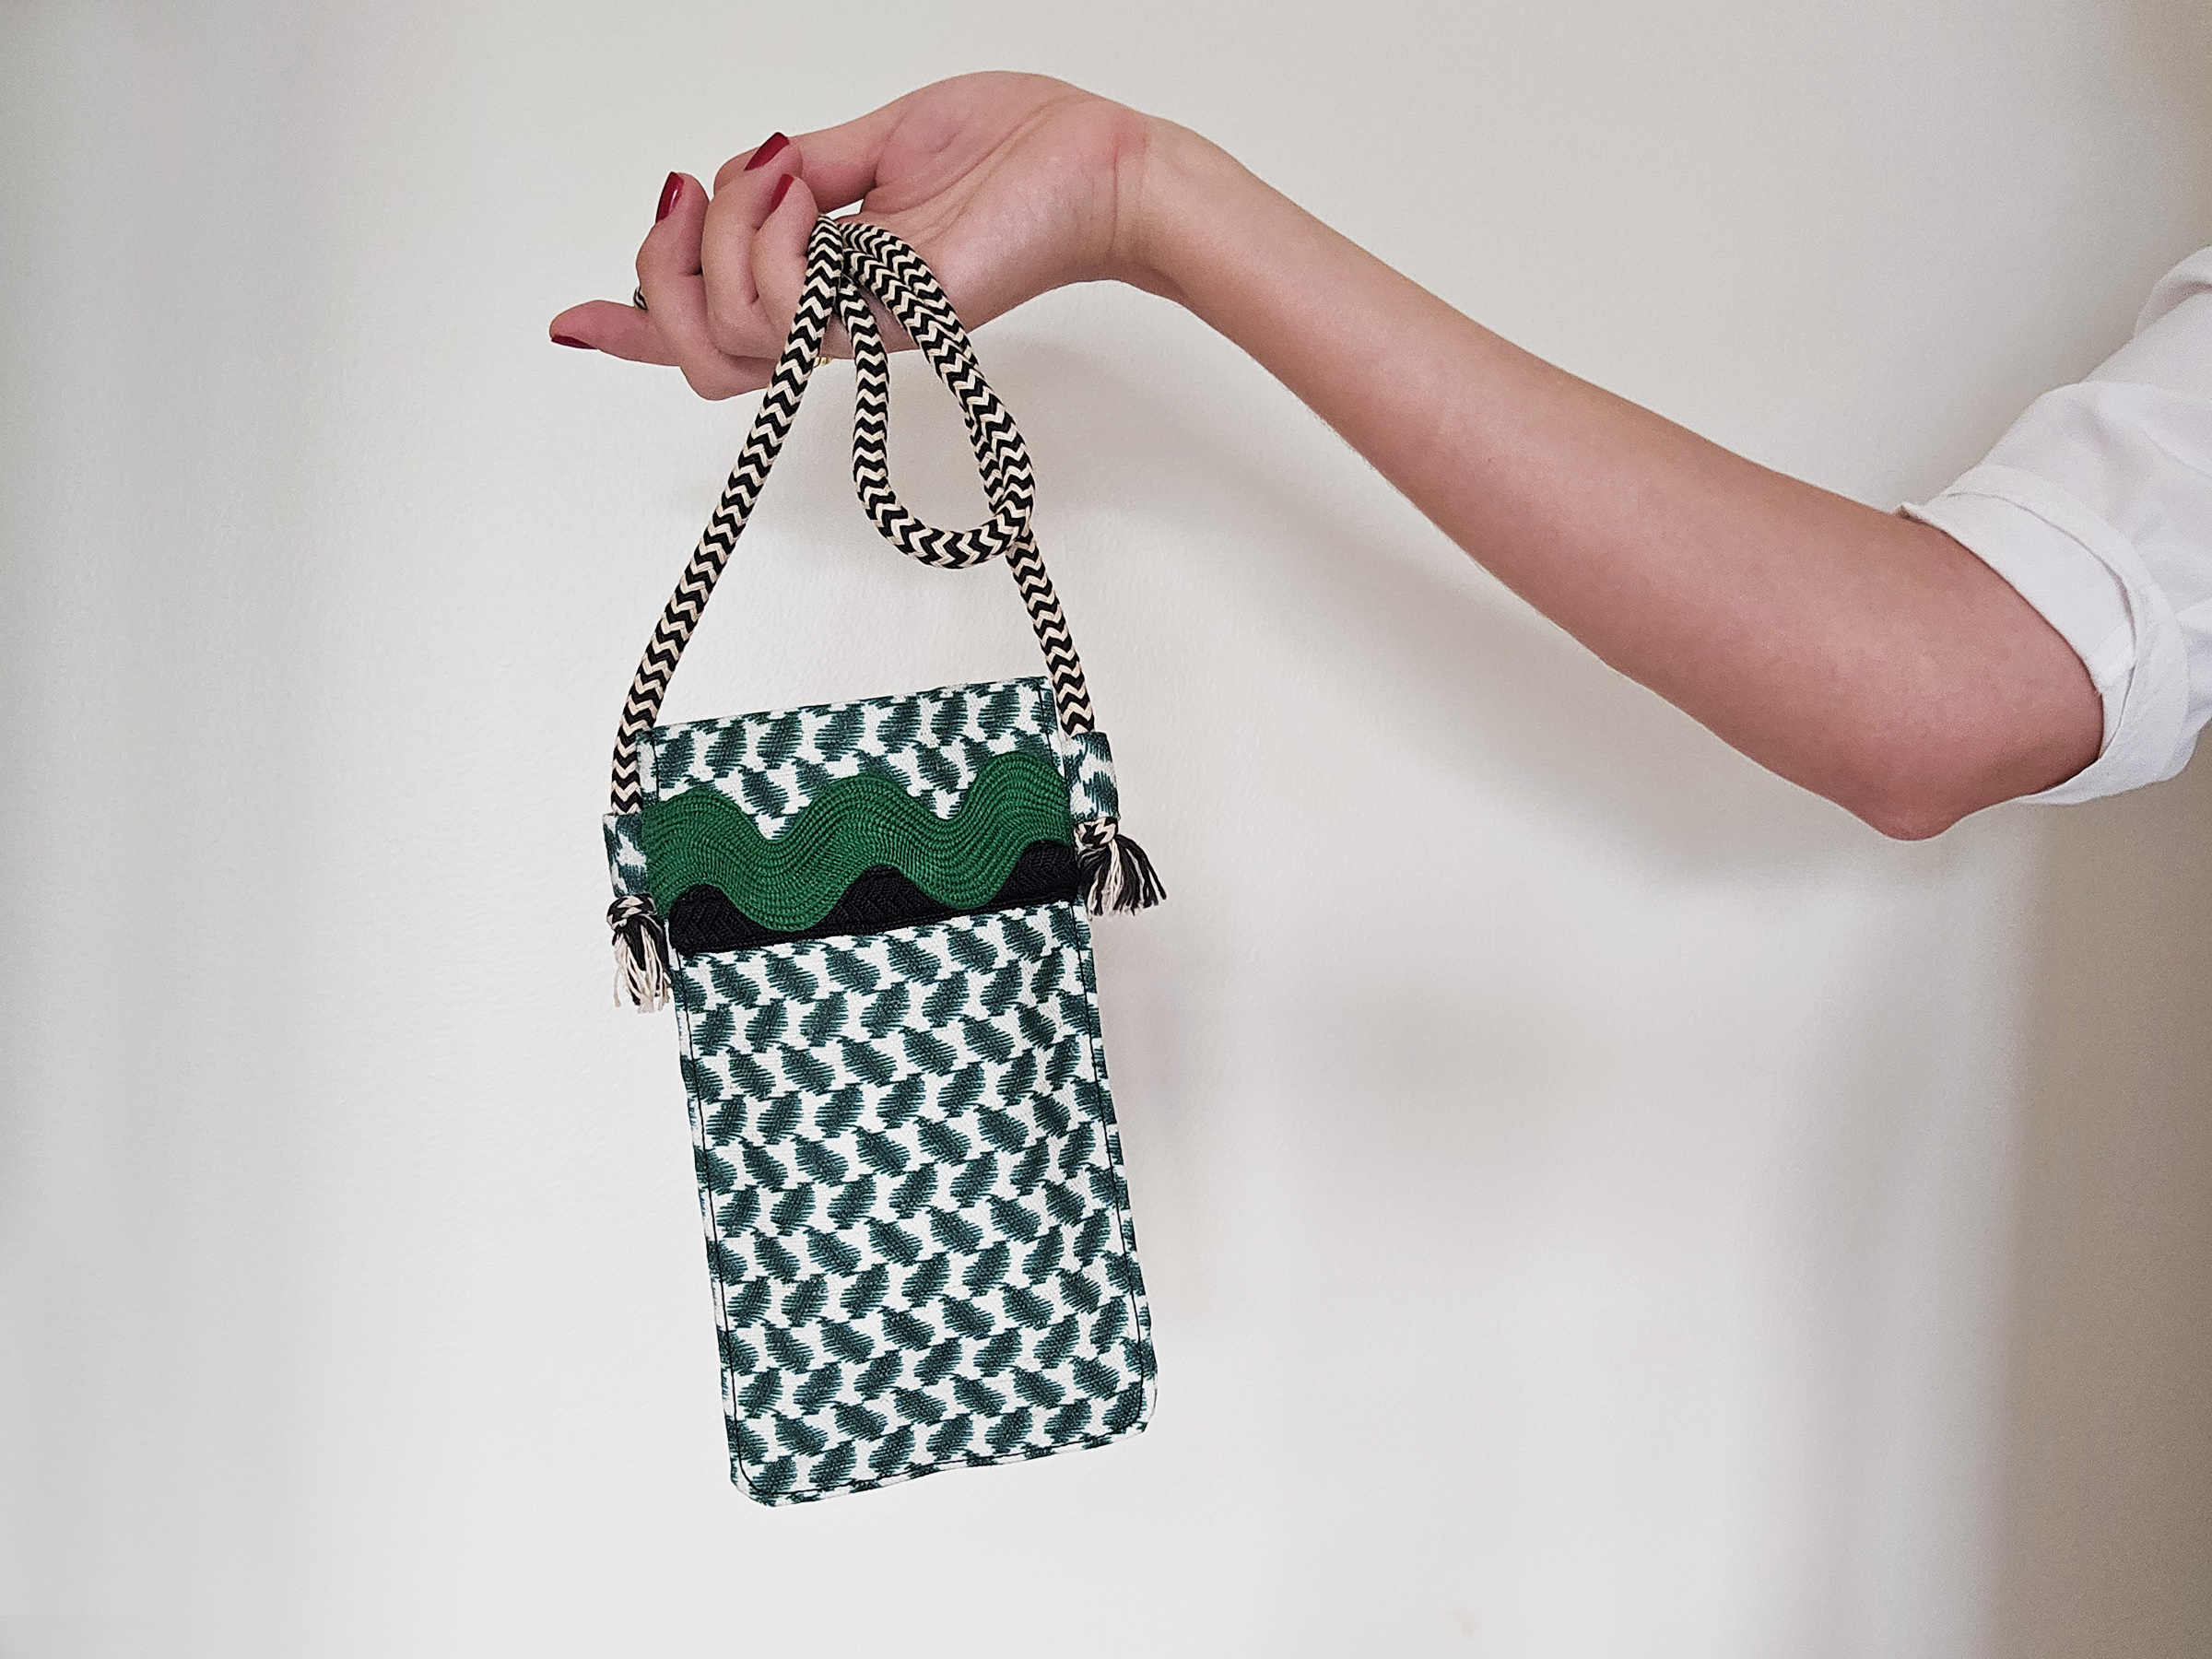
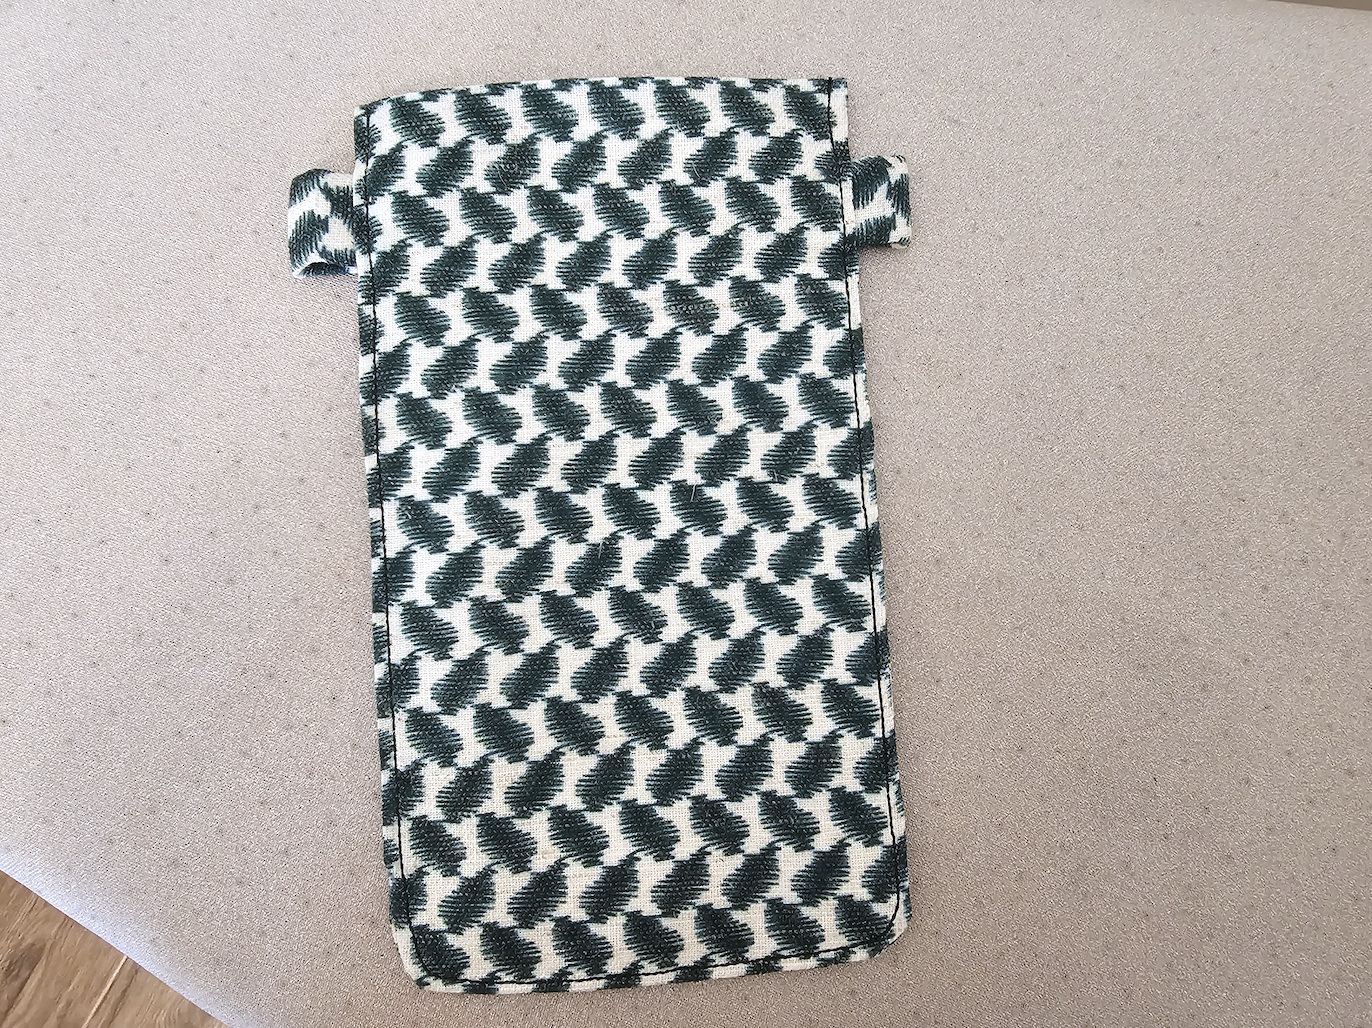
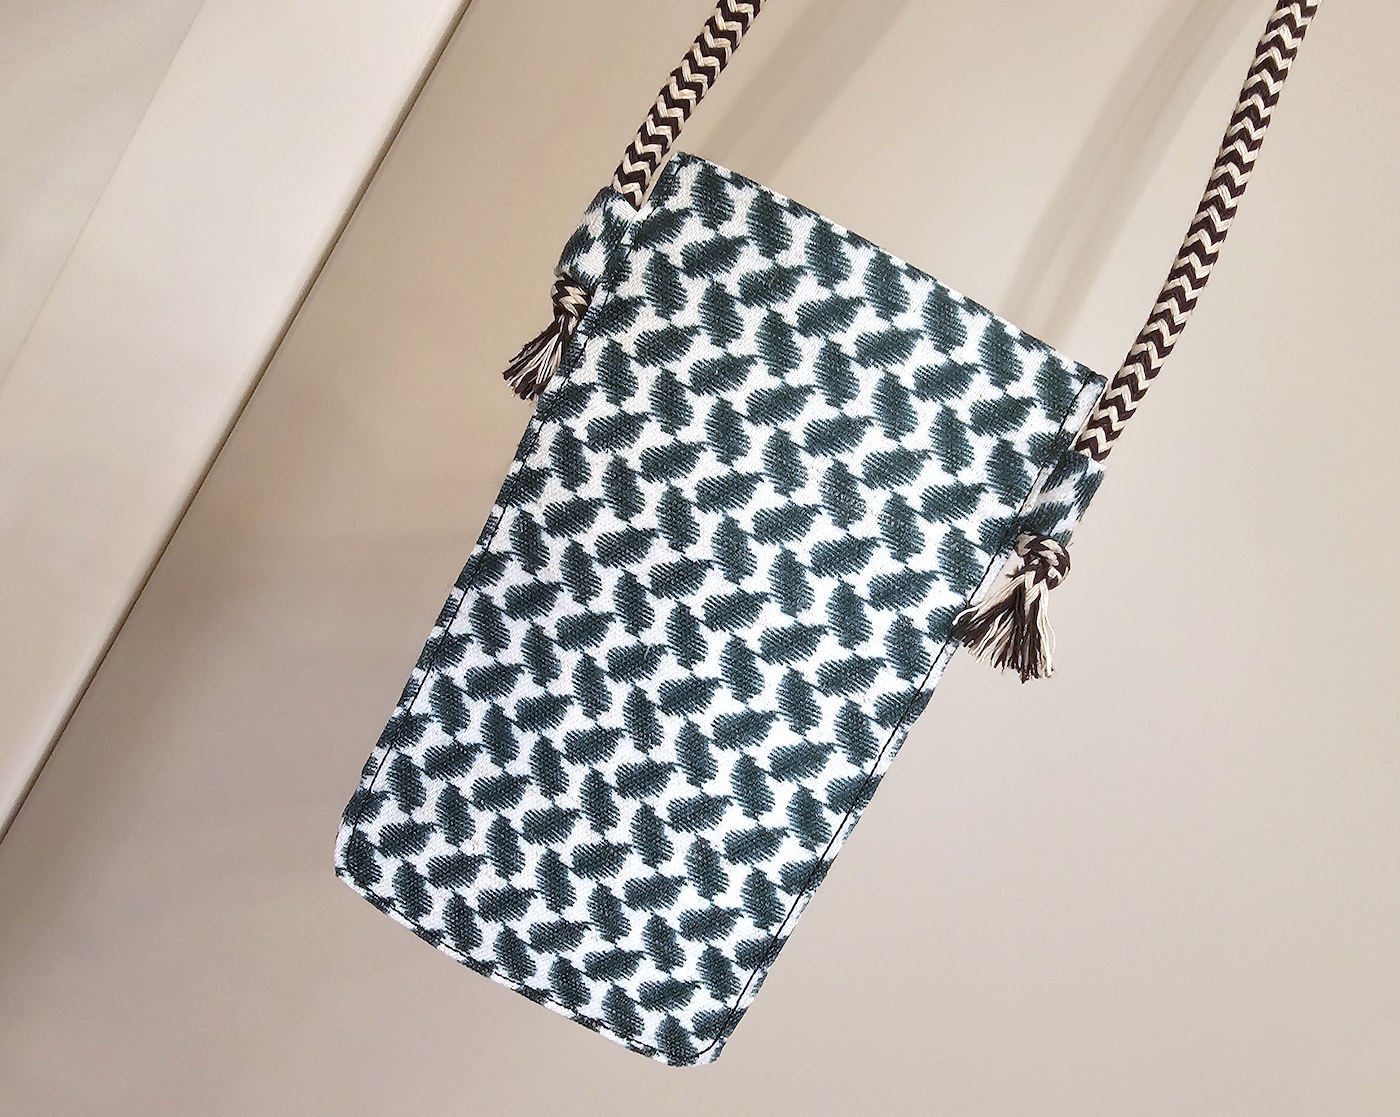
With Christmas around the corner, this little phone pouch would be a nice gift idea, and simple enough to still have time to pull together. You could make this in so many different styles by combining different types of fabric/prints, different trims/rope... Also, the loops that in my version hold the rope, could instead have little metal rings, and then you could do a strap from embroidered trim, where at the ends you have snap hooks.
Tutorials take a lot of time & effort to create, and I choose to make mine available for free. If you enjoy this guide, you can support my work with a donation that feels right for you, here.
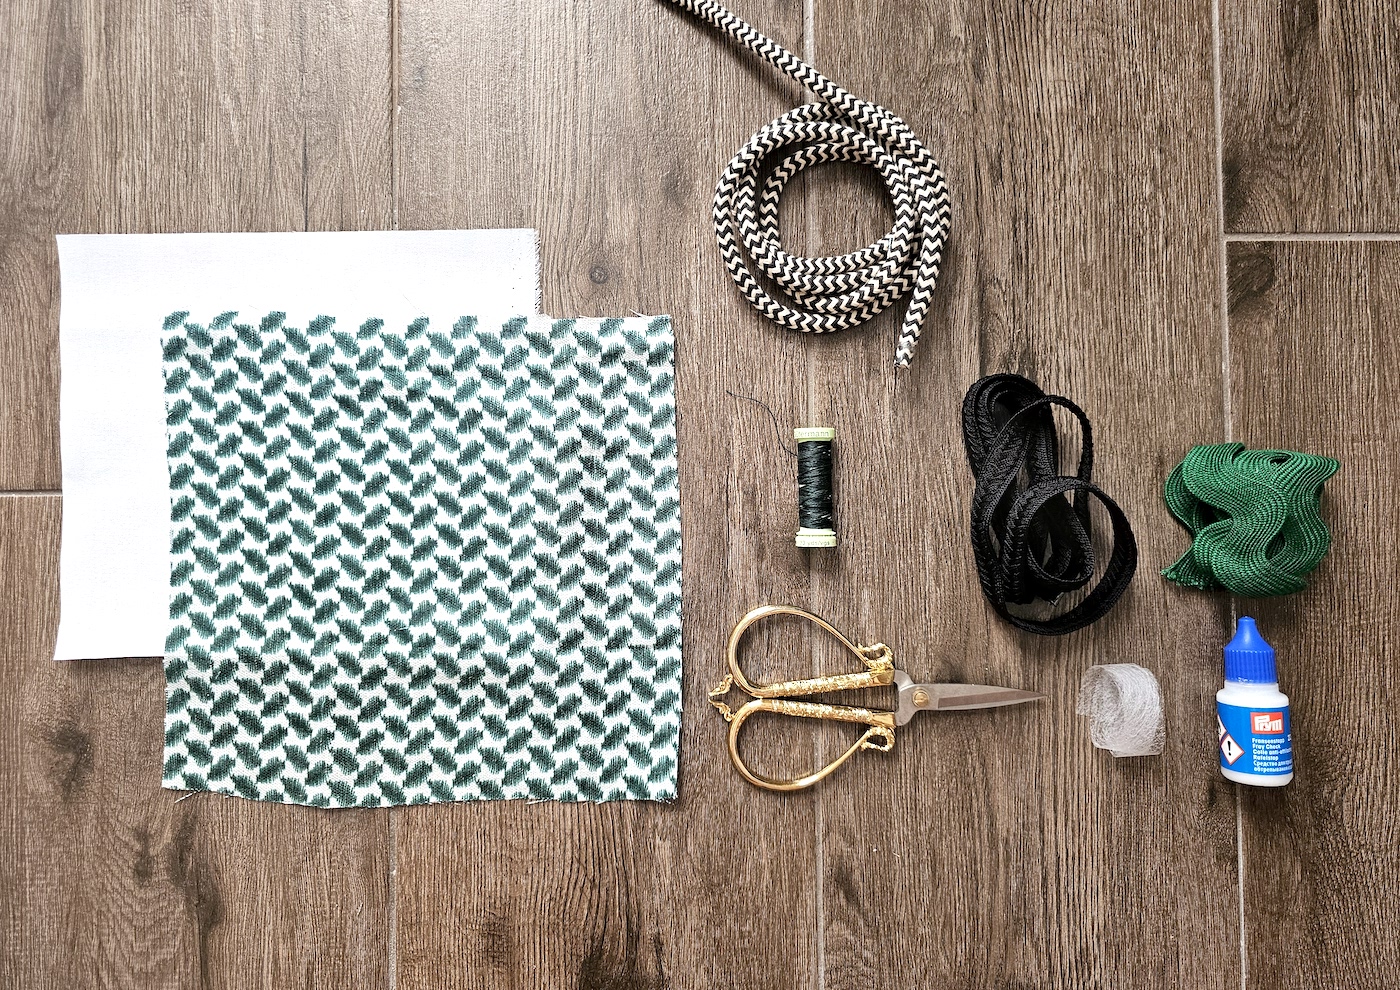
TOOLS:
Main pouch fabric - Something medium-weight, I used linen in a green keffiyeh print in solidarity with Palestine. 30 cm by 25 cm or so | Medium-weight iron-on interfacing, 30 cm by 25 cm | Scissors | A decorative rope or other kind of strap, 120 cm (or more if you want the pouch to hang lower) | Topstitching thread | Fusible hemming tape (not mandatory but makes things easier) | Fray check | Decorative trims, I used two different ones (optional)
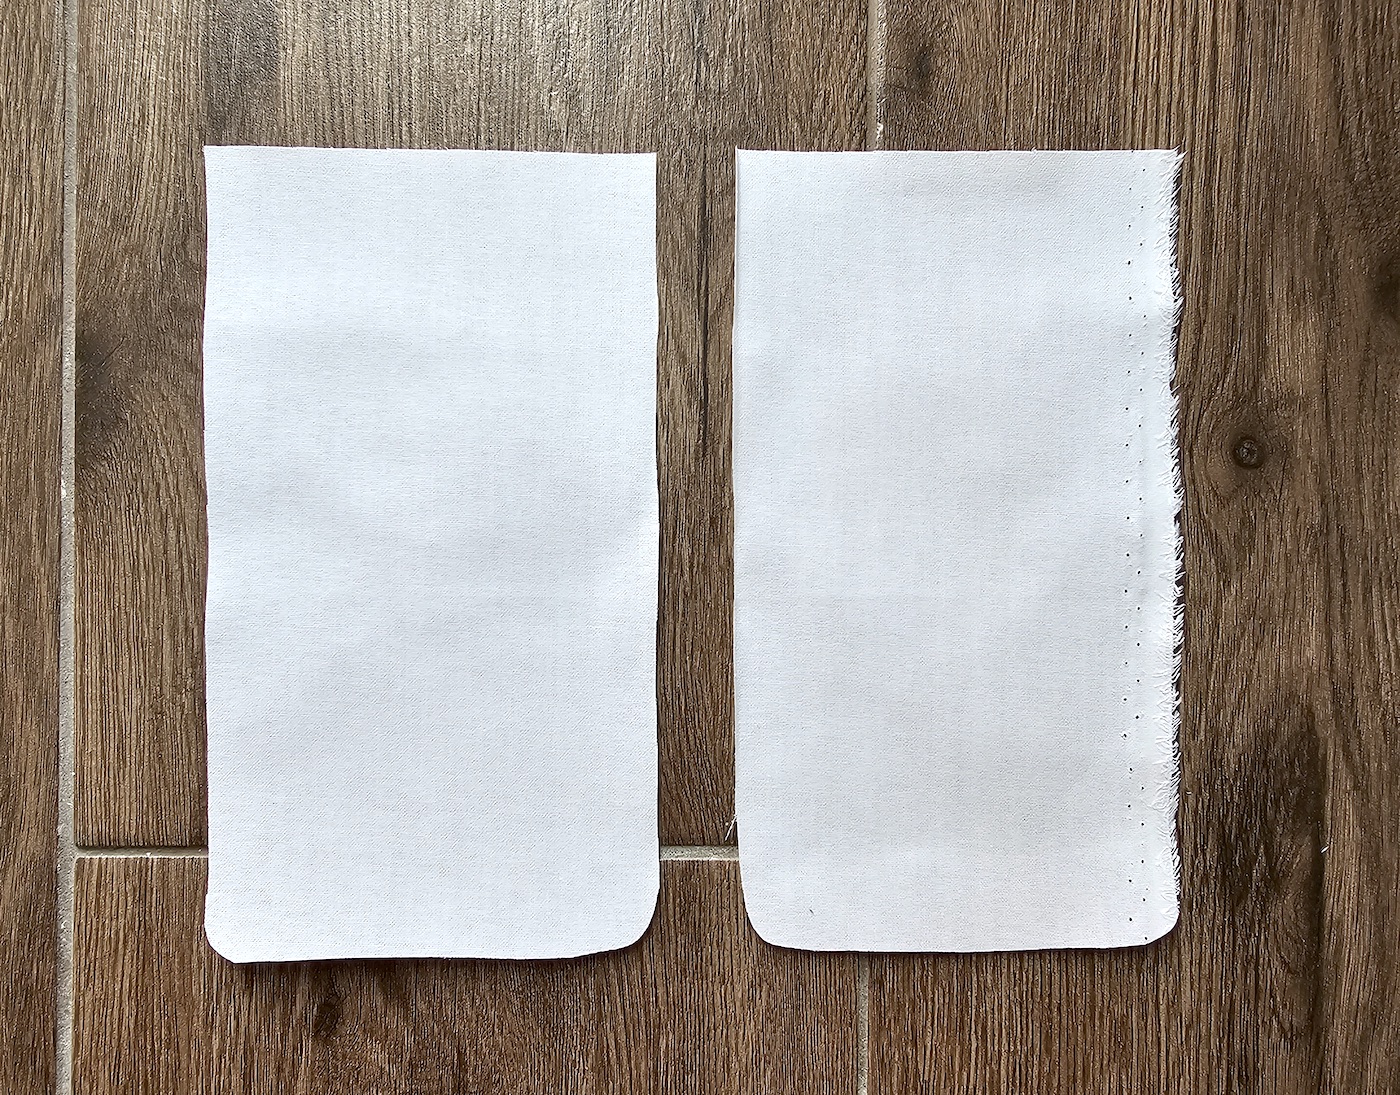
I. Start by measuring your phone and cutting two rectangular pieces from the interfacing, that measure the width of your phone + 3 cm, and the length of your phone + 3 cm. Cut a slight curve at the bottom corners.
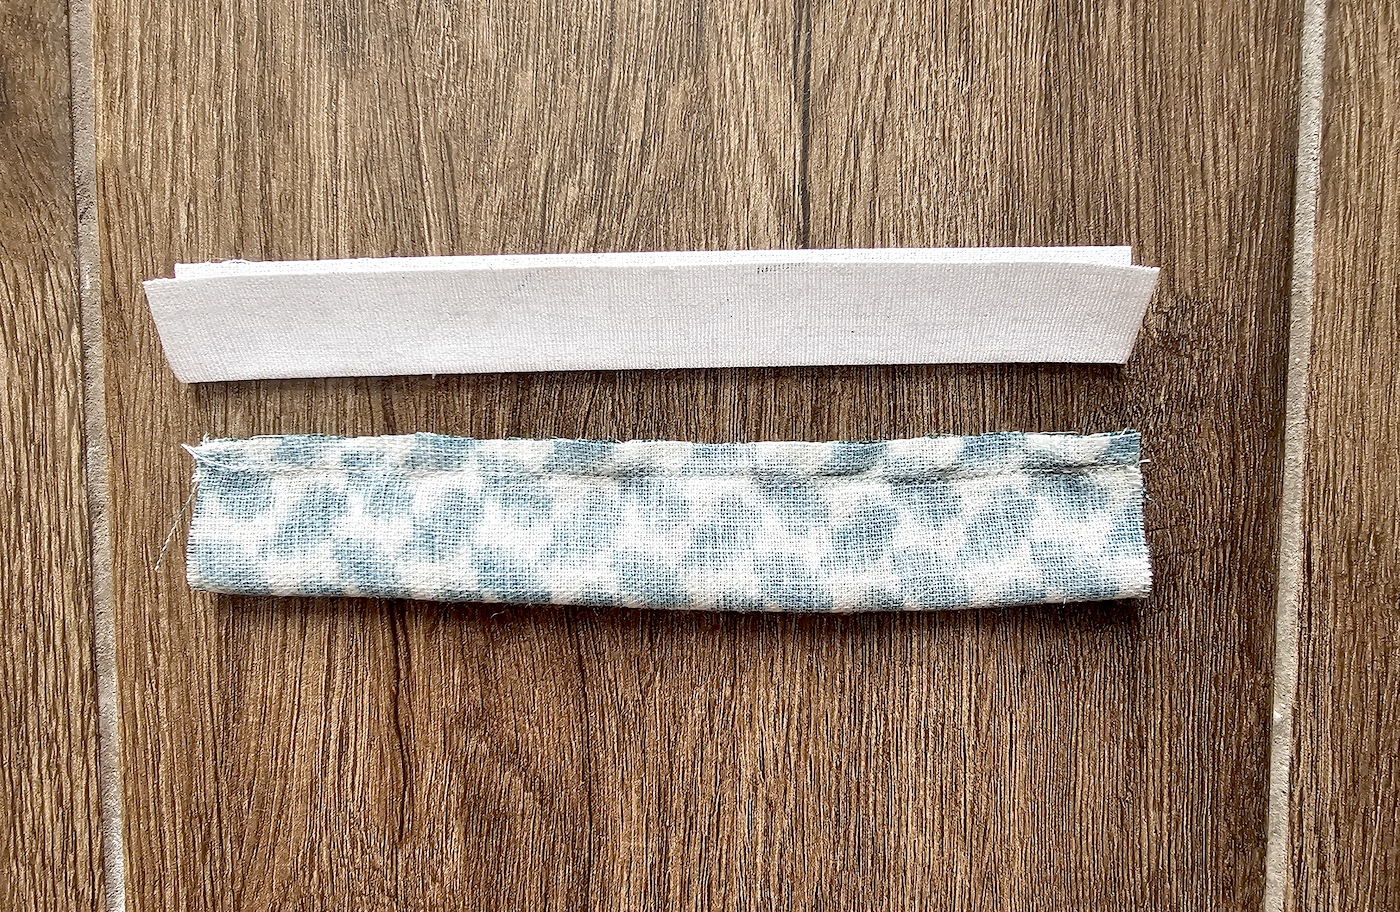
II. Next cut 2 pieces of your main fabric. They should be 1 cm wider than the interfacing pieces, and 3.5 cm longer. Treat all the sides of the main fabric pieces with fray check.
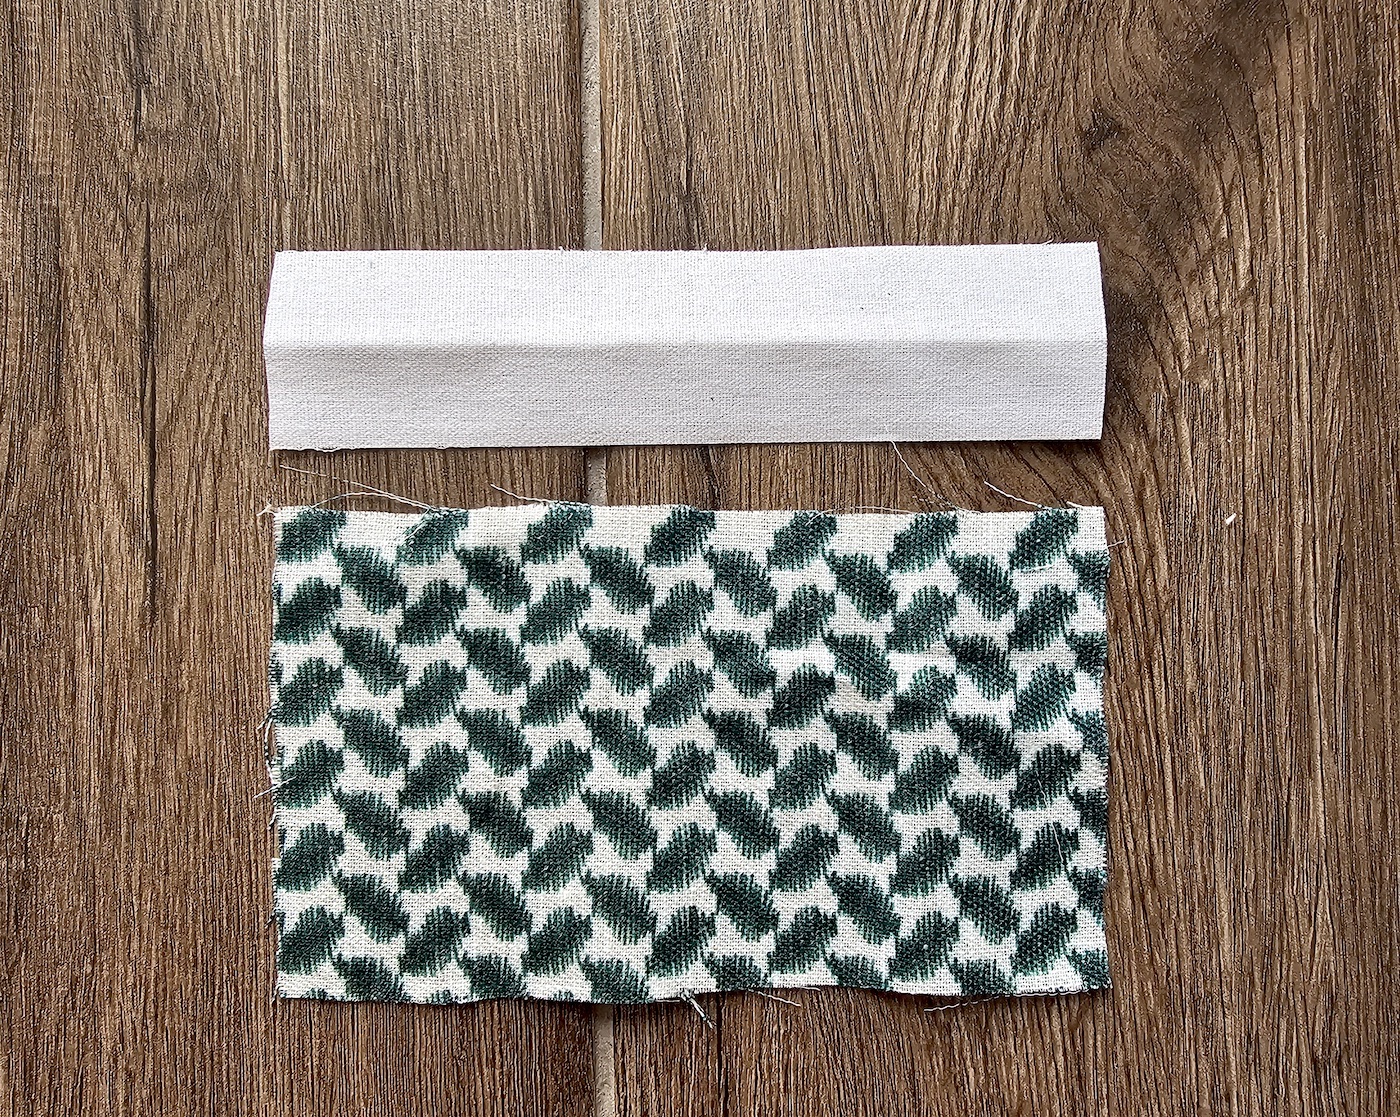
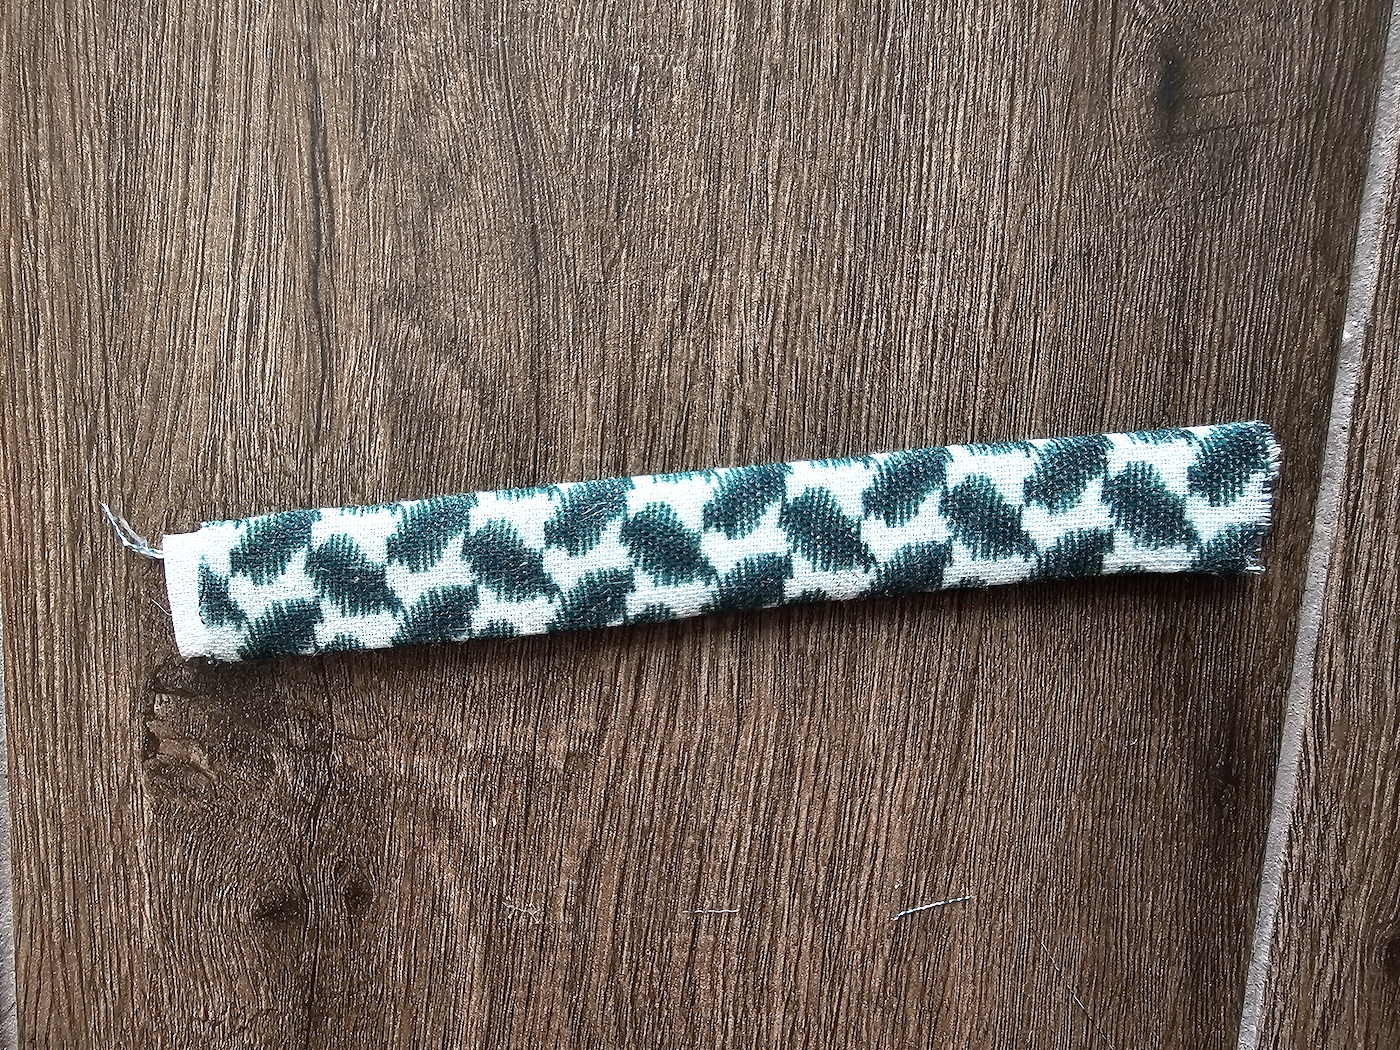
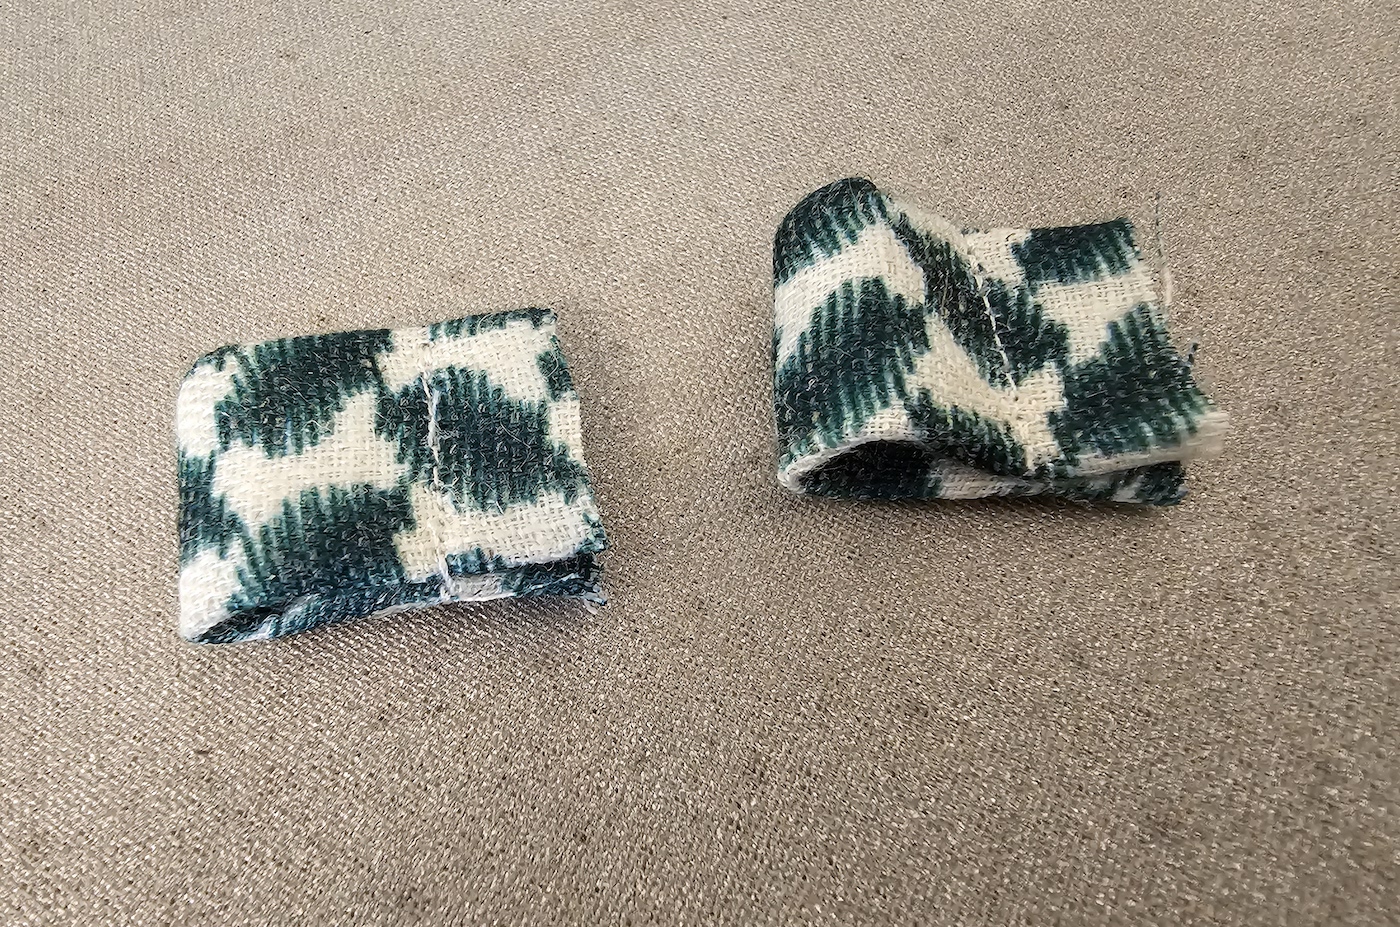
III. I started by making the little loops the rope will go through. First cut a 5 cm by 12 cm piece of fabric, and a 4 cm by 12 cm piece of interfacing (I folded my interfacing in half width-wise to make it even more firm, so the loops wouldn't collapse).
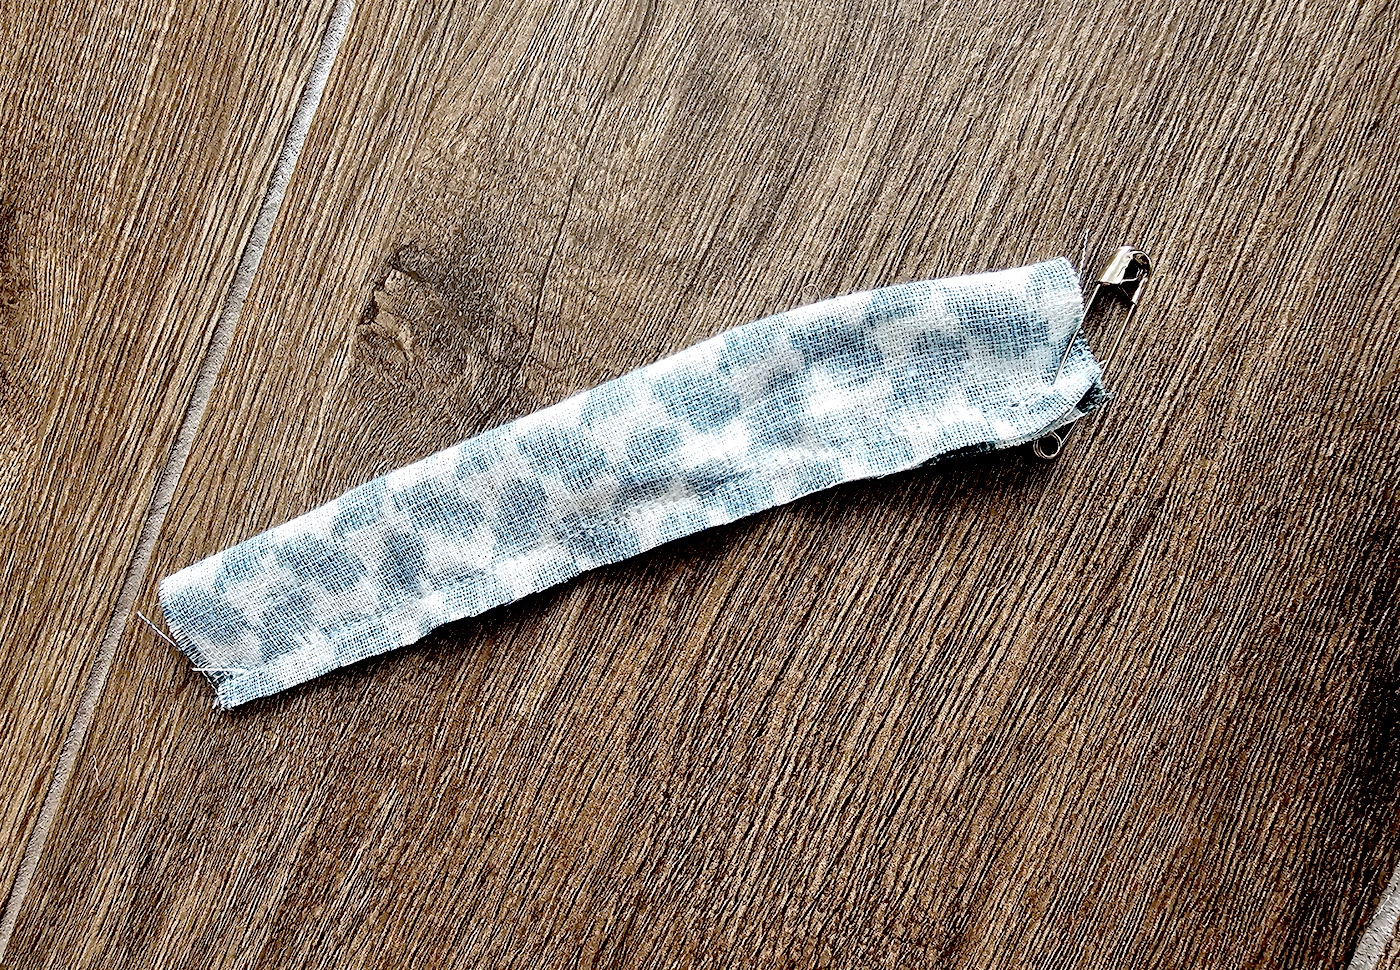
.. Then fold the fabric in half width-wise and sew into a channel - creating a casing just the size of my folded interfacing piece to go through.
Attach a safety pin to the end of the fabric casing to turn right side out..
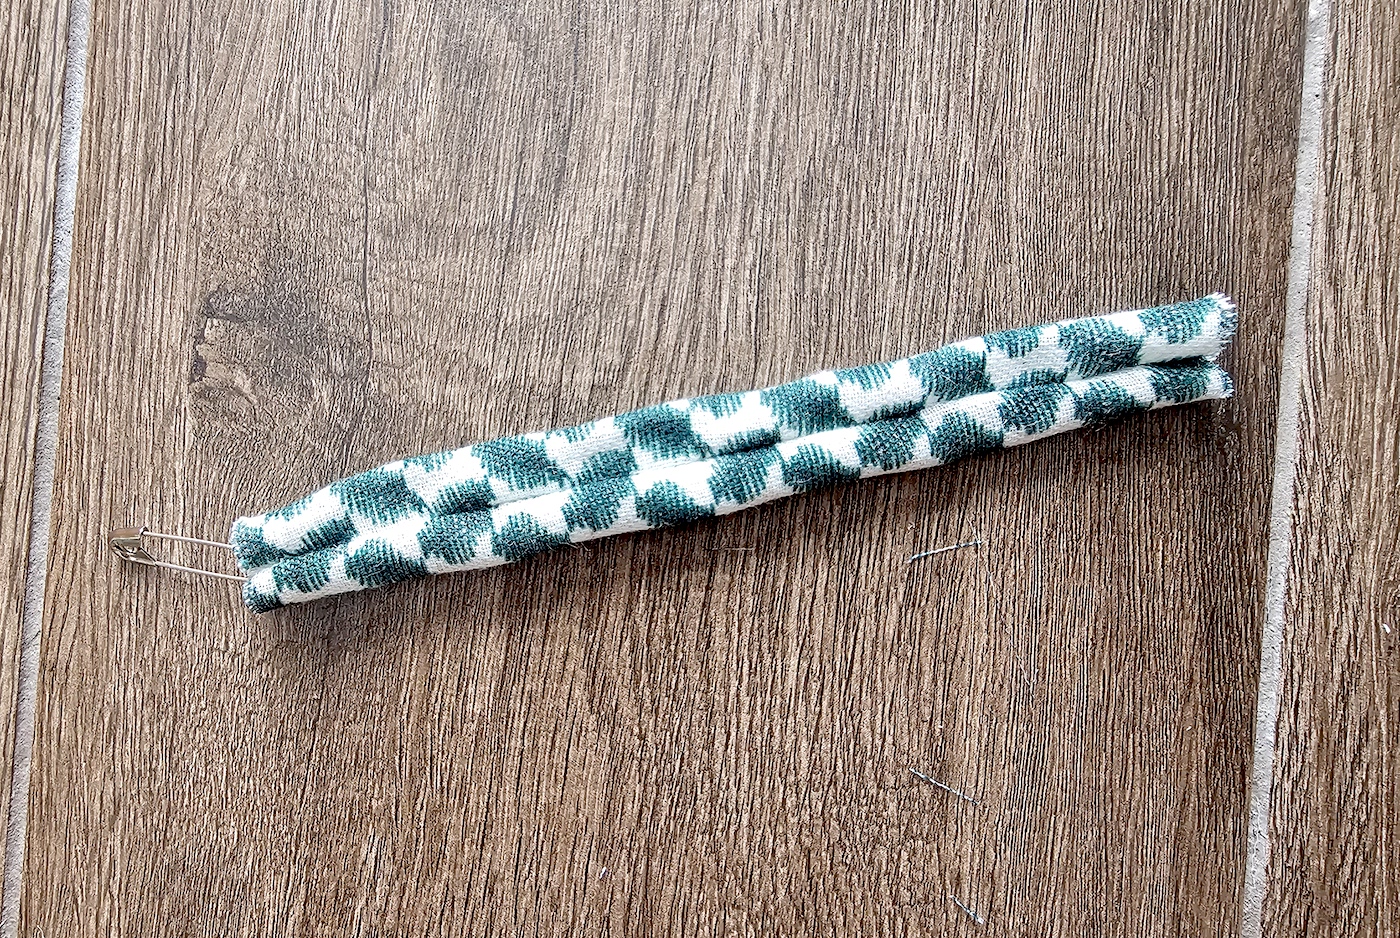
Pressed the casing with your iron, then insert the folded piece of interfacing inside using the safety pin again.
You'll have this - a little strap, reinforced with the interfacing inside.
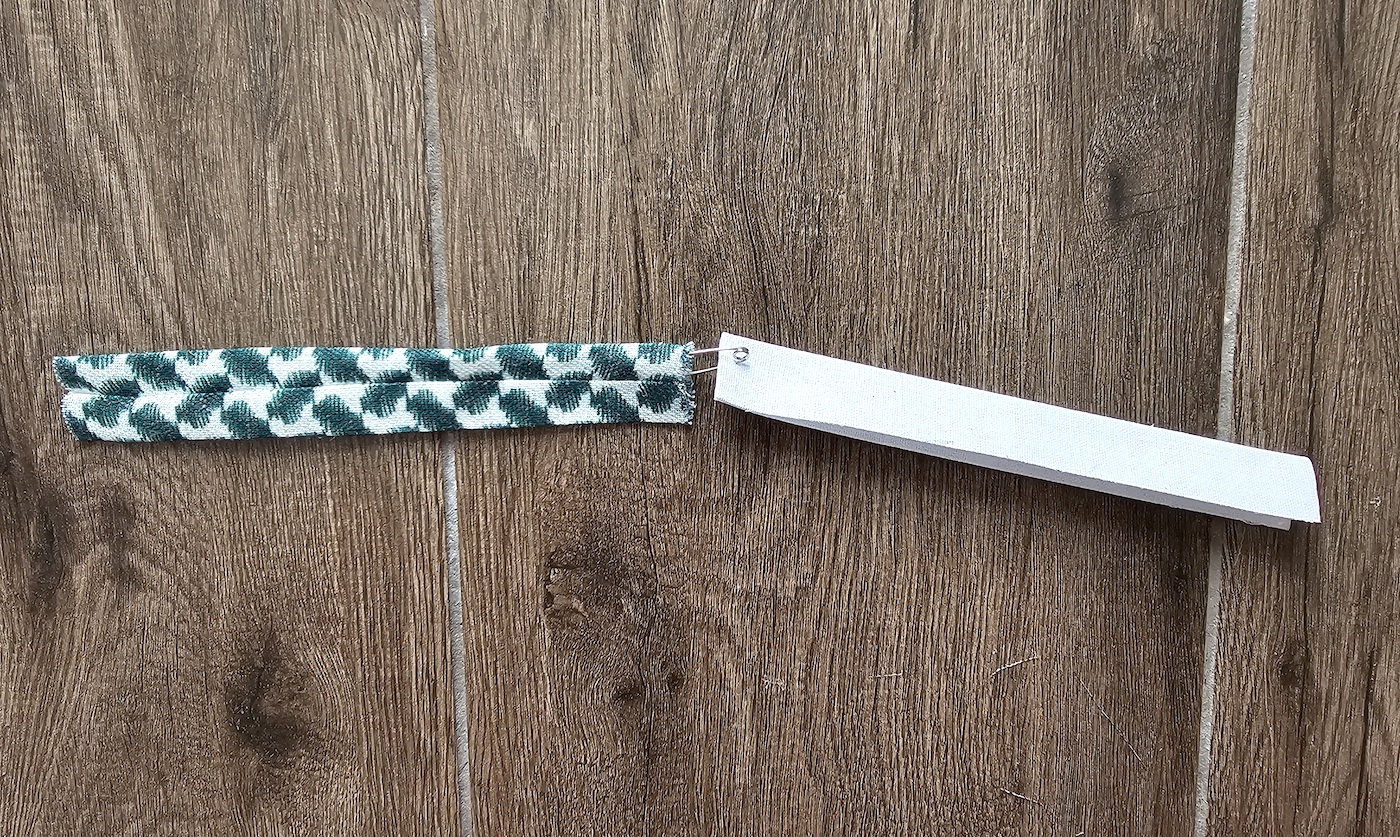
Cut in half to create the two little pieces that will create the rope loops.
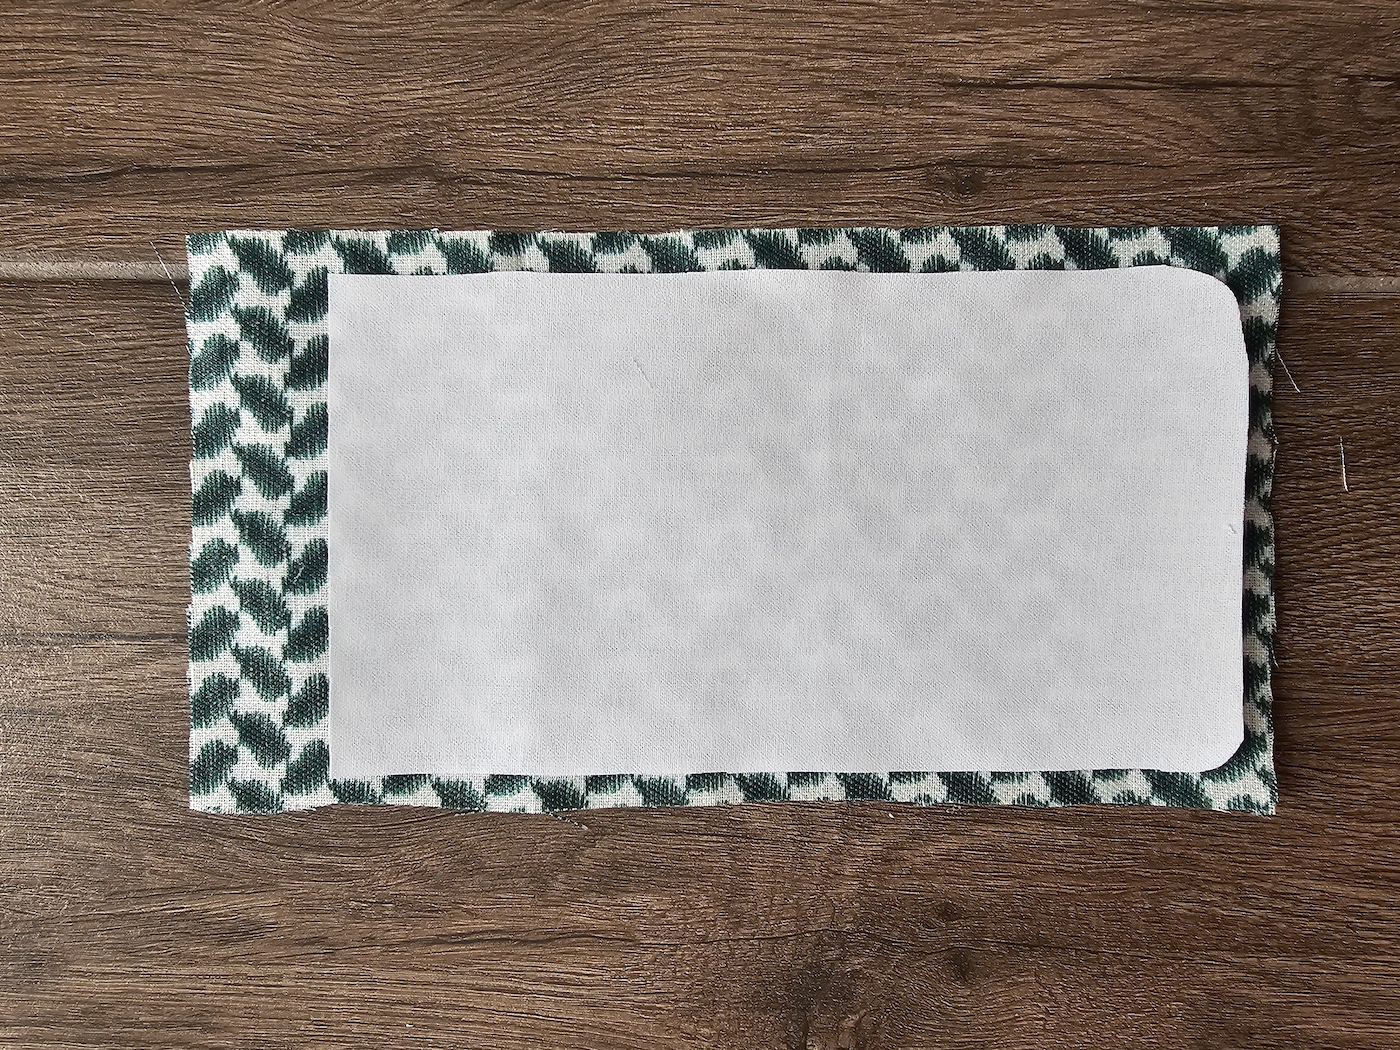
IV. Onto the construction of the pouch itself. If your fray check hasn't dried, you can help it dry by ironing your fabric pieces through a light cloth. Then fuse the interfacing onto the reverse side of each fabric piece using your iron. You want to leave 0.5 cm along the long edges, 0.5 cm at the bottom, and 3 cm at the top.
V. Next fold the long edges and the bottom edge over the interfacing. At the top, fold 0.5 cm down, and then fold 2.5 cm again to wrap the interfacing inside. Here I used the fusible hemming tape to glue the folds down.
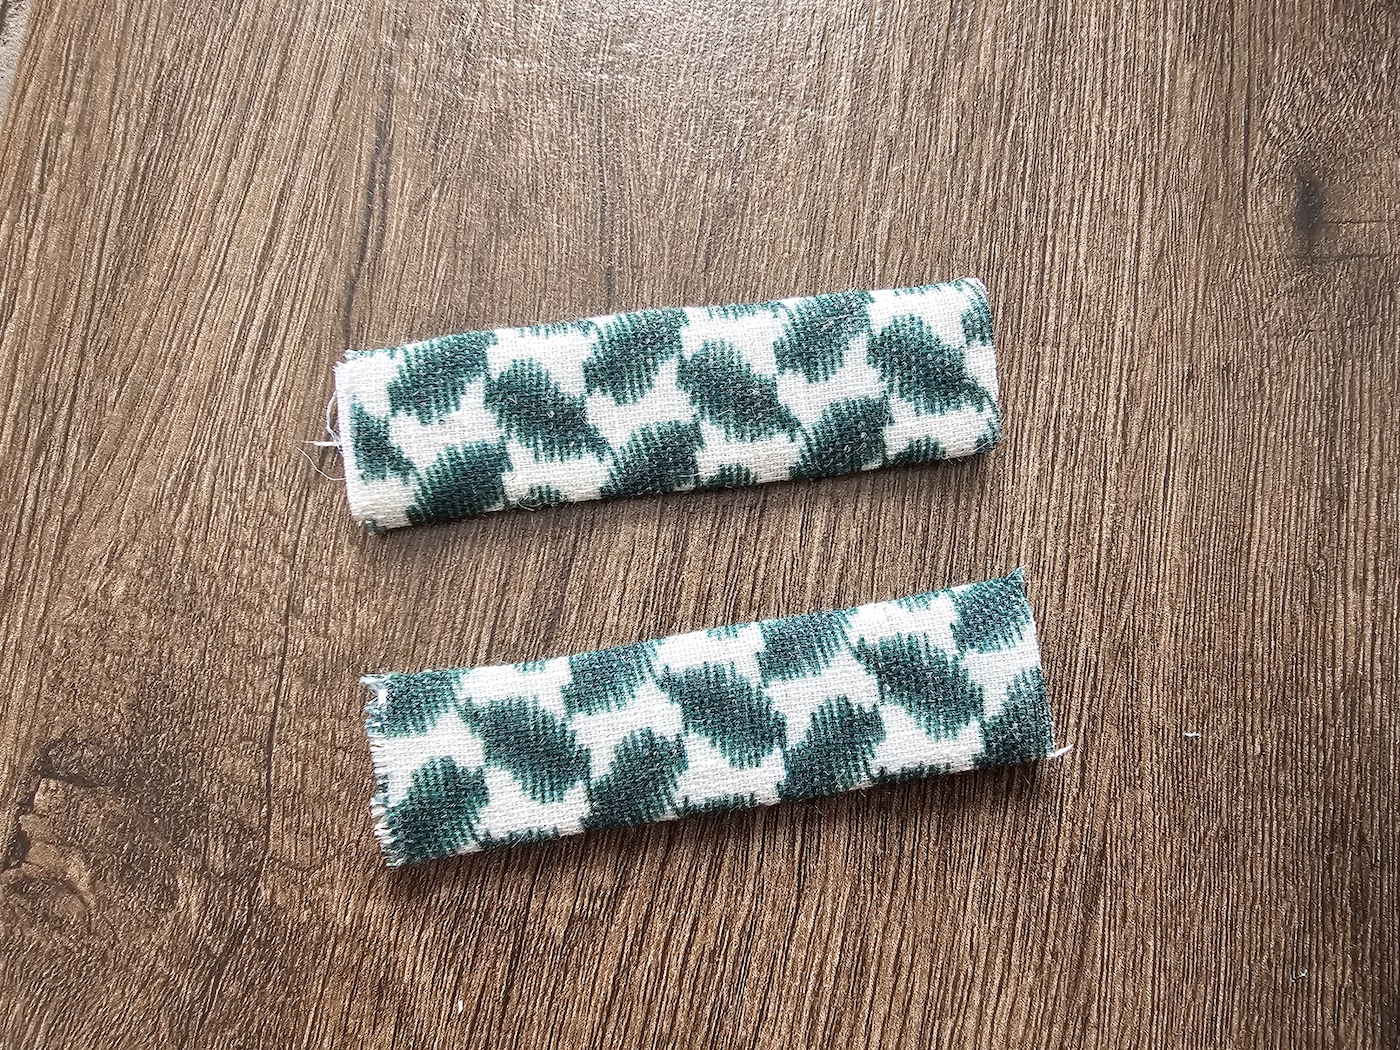
VI. Next create the loops for the rope. Measure the size of the loop, so your rope fits snuggly in.
Then sew a straight stitch just a couple mm looser than what you measured. Repeat with the other piece so you have 2 loops.
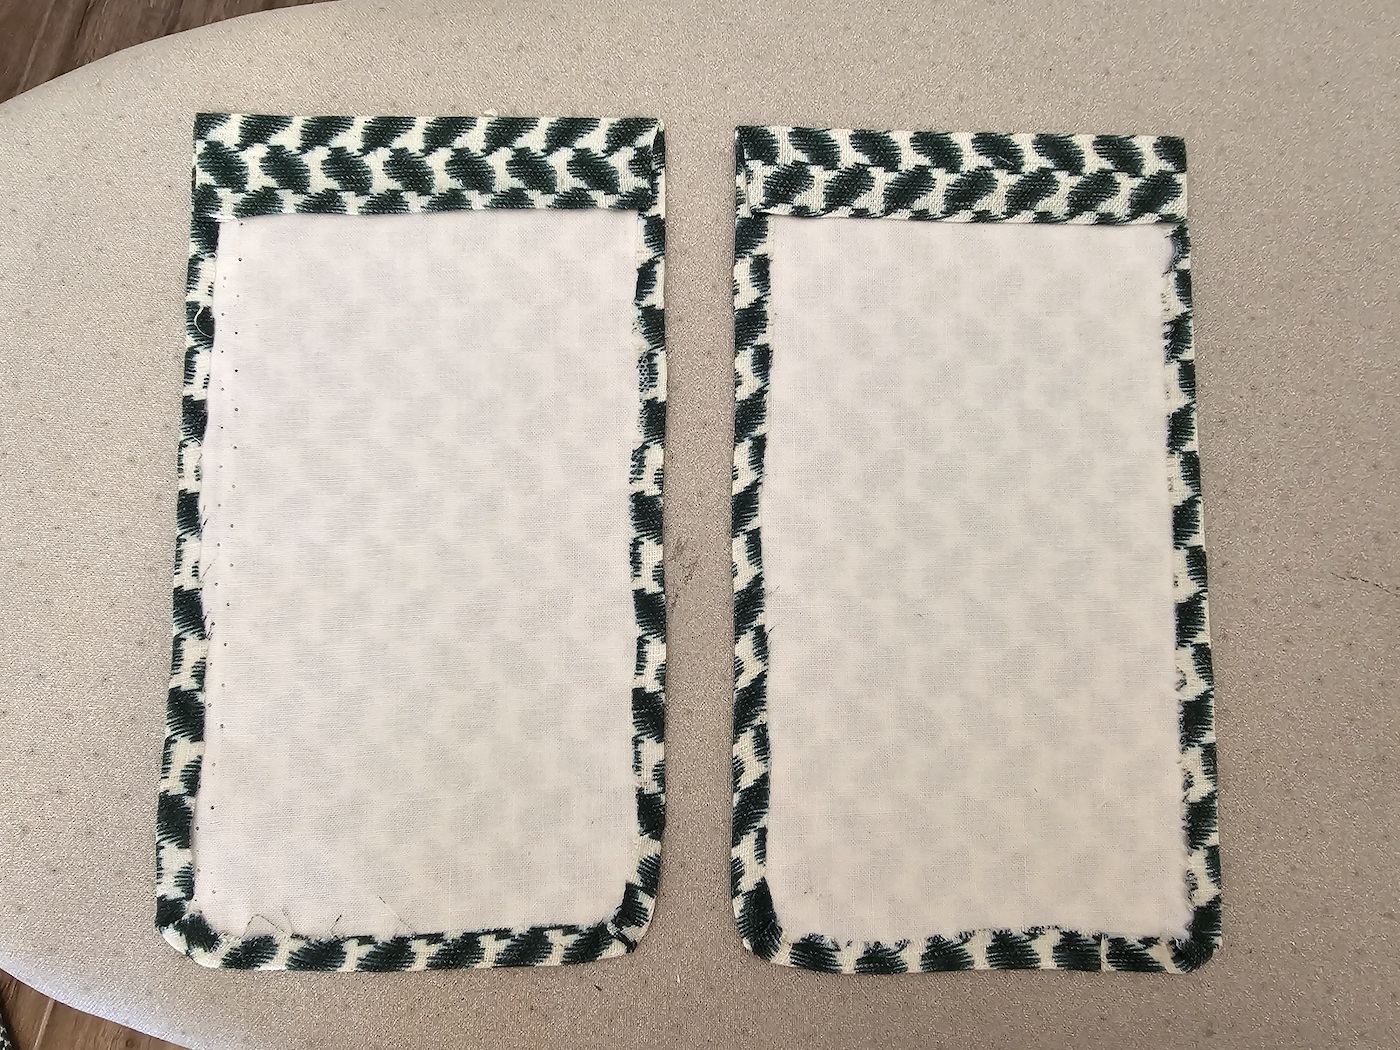
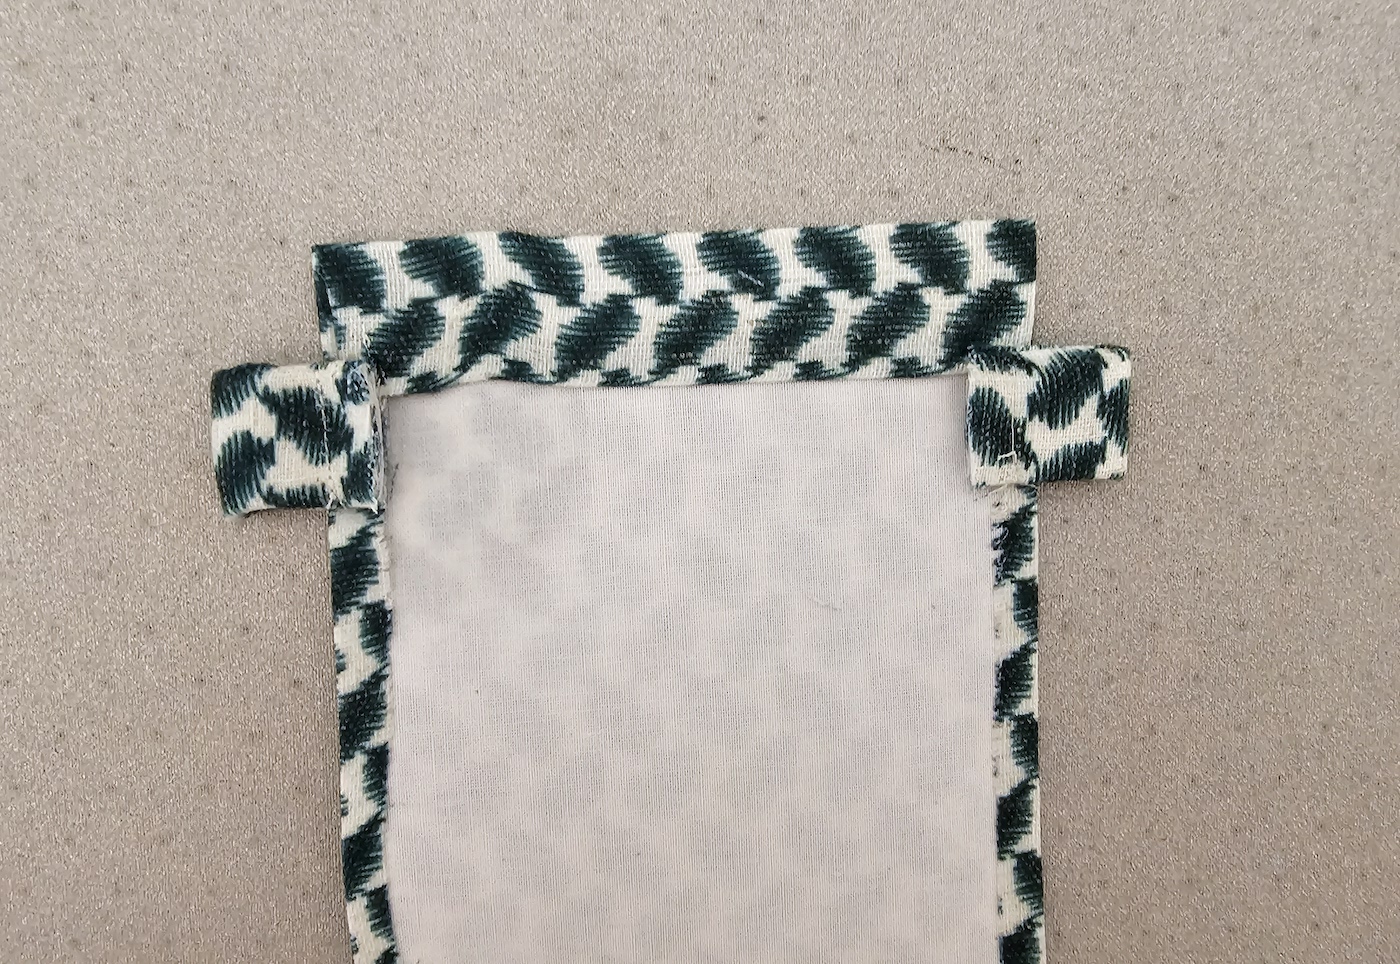
VII. Trim excess and position your loops on either side of one pouch piece, towards the top. I used fusible hemming tape here as well to secure them in their spots. The stitch should be just inside, so it won't show in the ready pouch.
VIII. Add the other pouch piece on top. You can secure the layers with a few pins - I used small pieces of fusible hemming tape again to make sure edges stay perfectly aligned, for me to sew the pieces together.
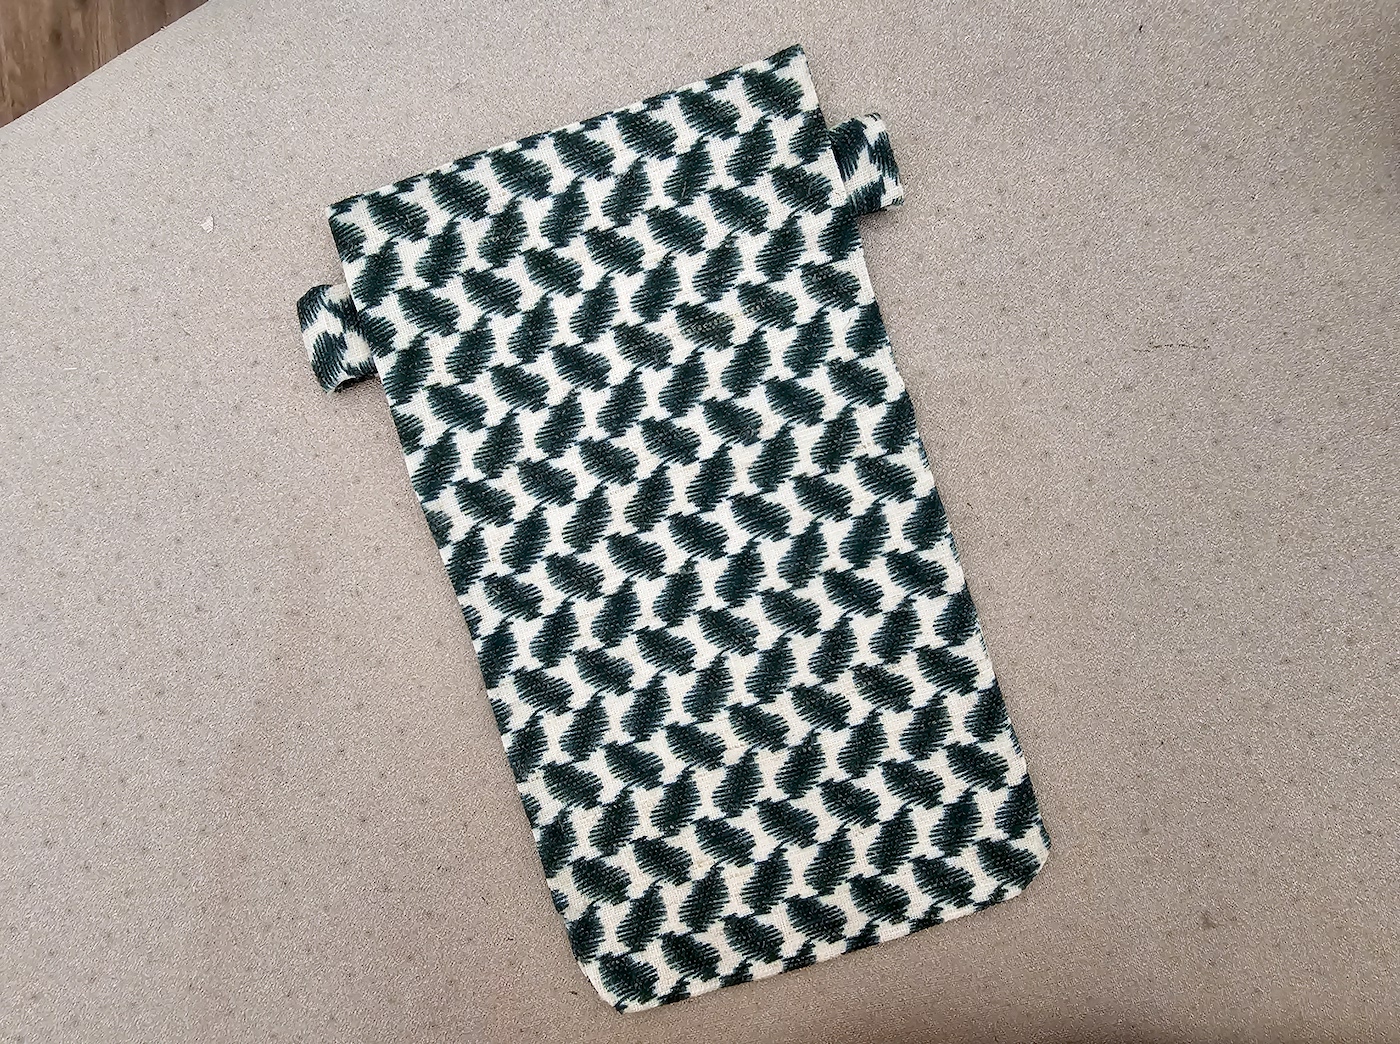
IX. Top-stitch all around, just a couple mm from the edge.
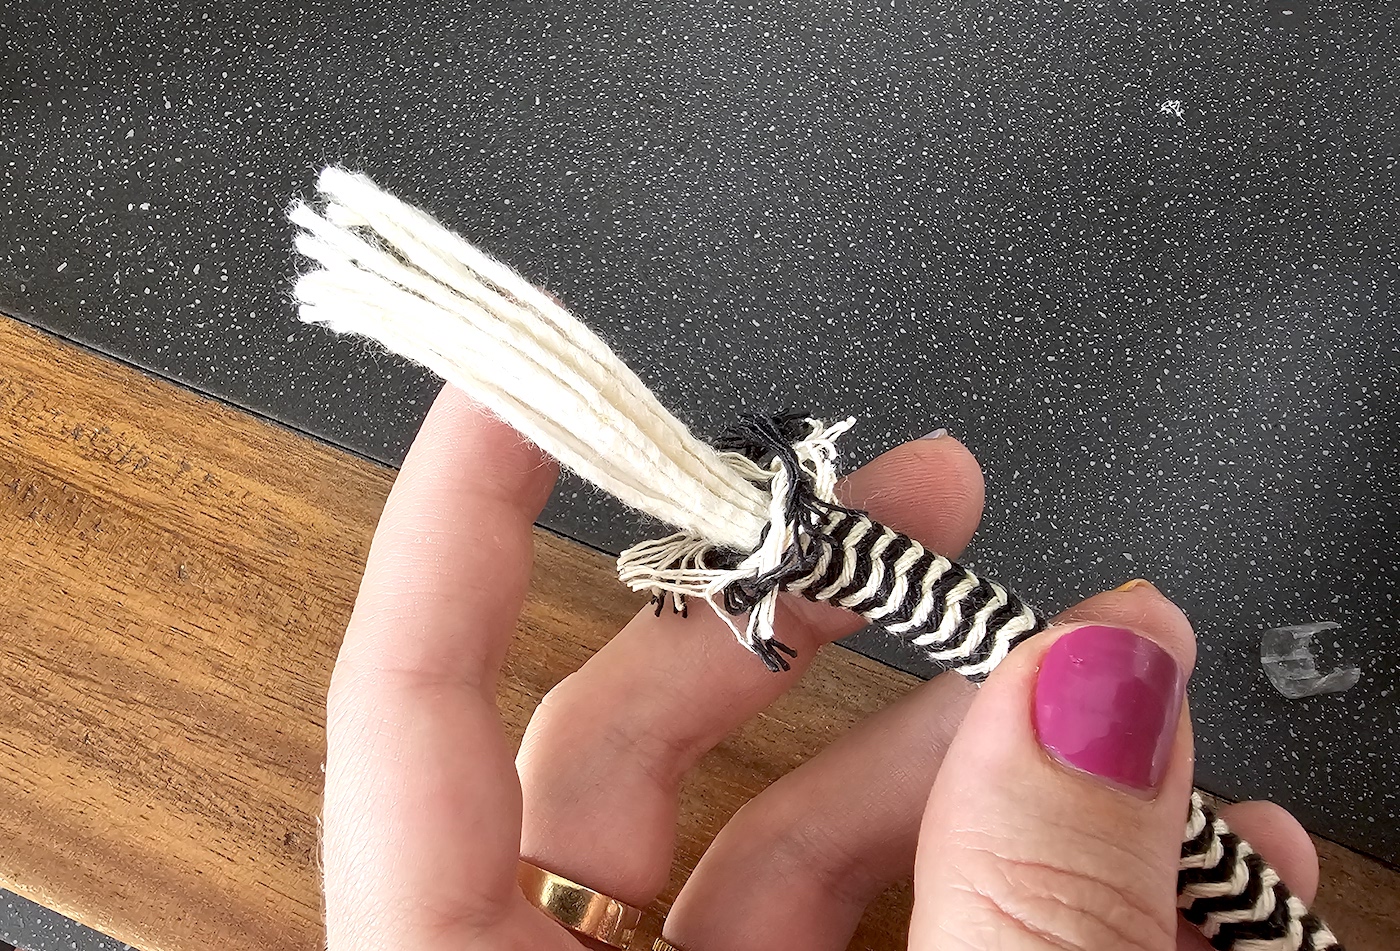
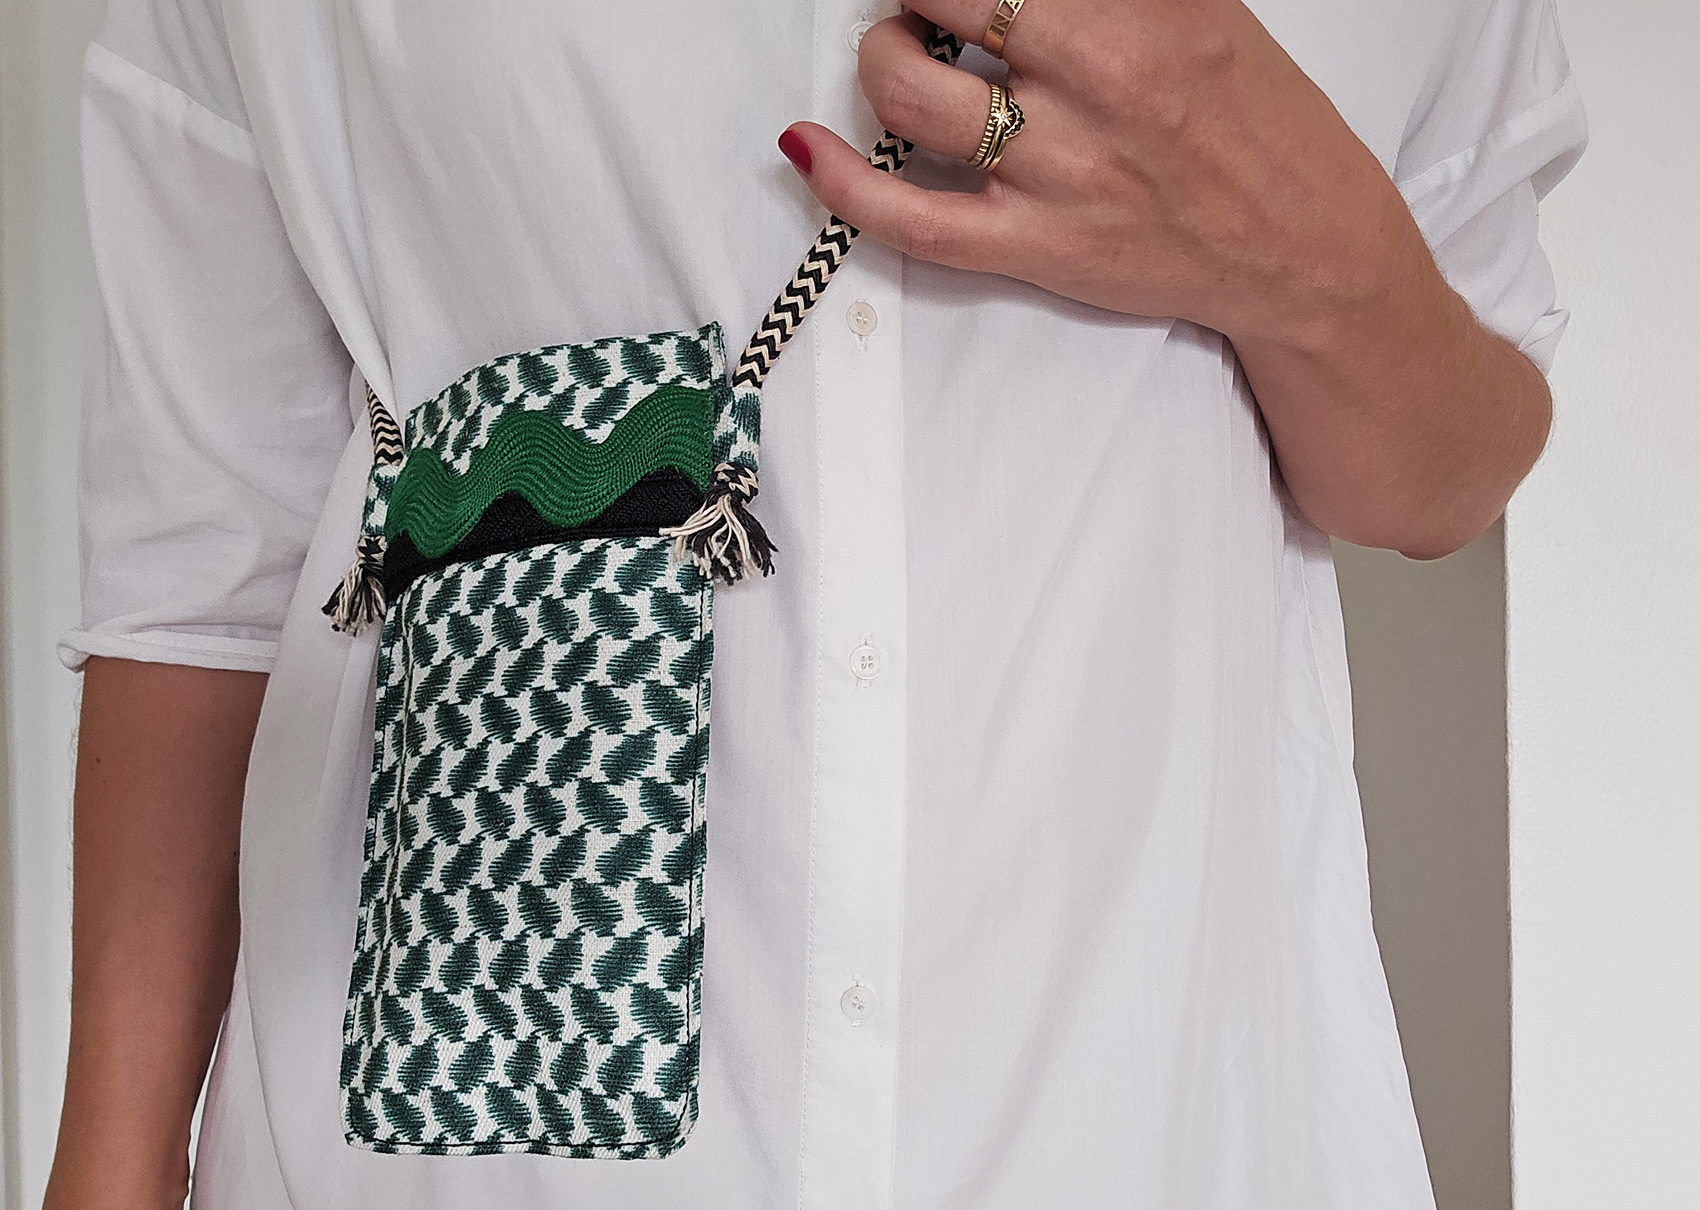
X. Last bit is adding the rope. Scroll all the way down and you'll see where the pouch sits with my chosen rope length, 120 cm (which gives you an actual strap length of about 110cm after the knots are added). I like crossbody bags of all kind to hang quite high - Best to measure on yourself to confirm your preferred strap length.
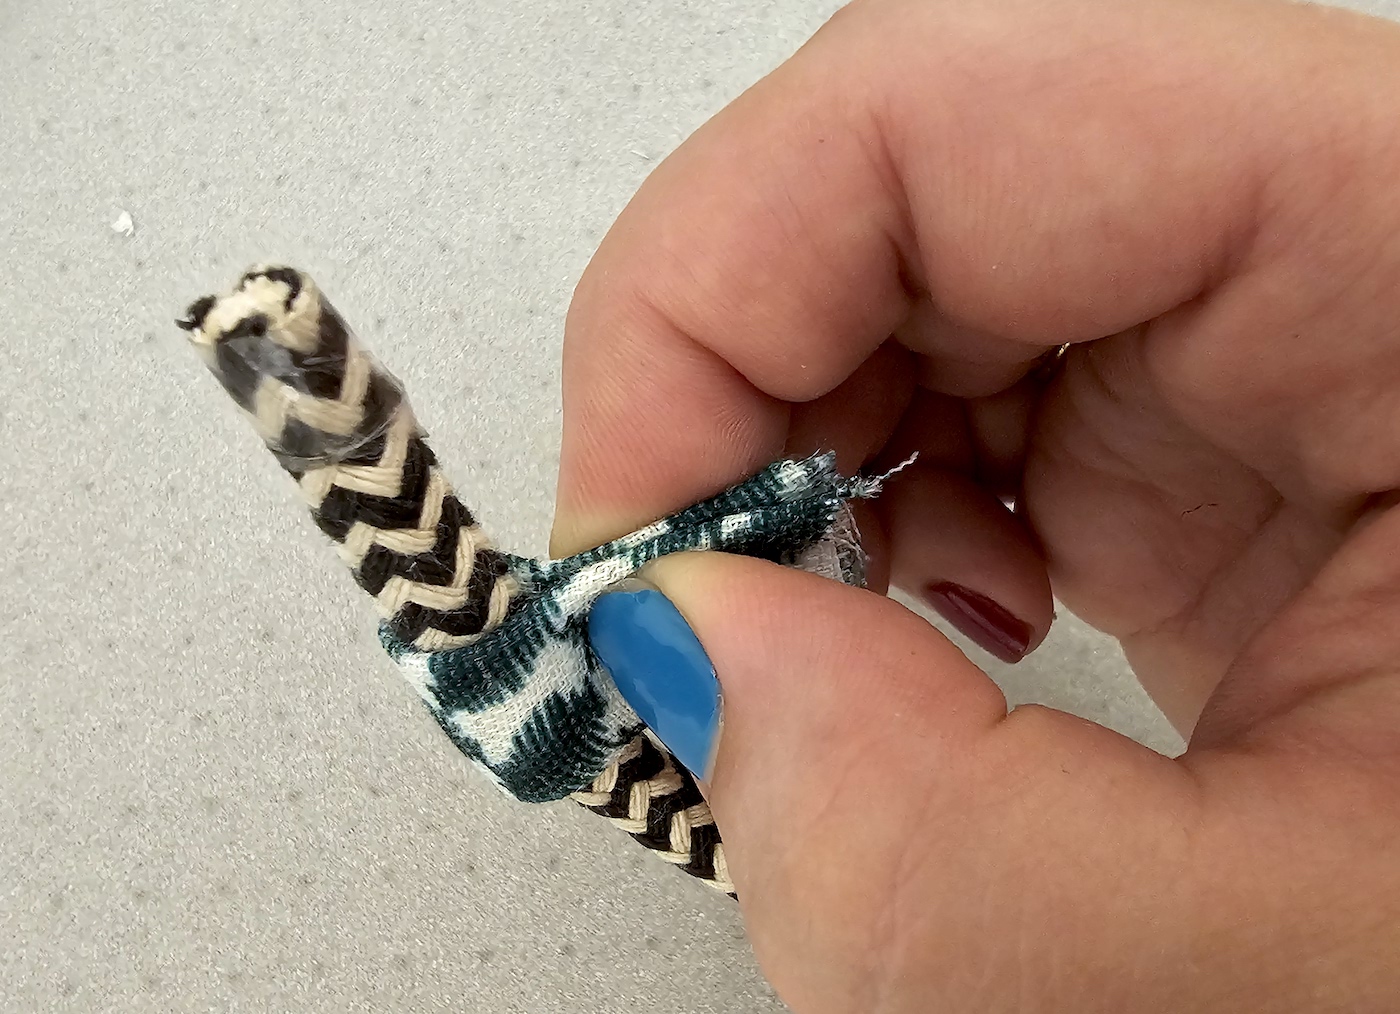
To add the rope, first feed it through both hoops from top down. I did some testing, and tying my rope into a knot as-is resulted in a much too bulky knot. So I first peeled/pulled up the wrapping of the rope by about 5 cm, exposing the interior, and chopped it off:
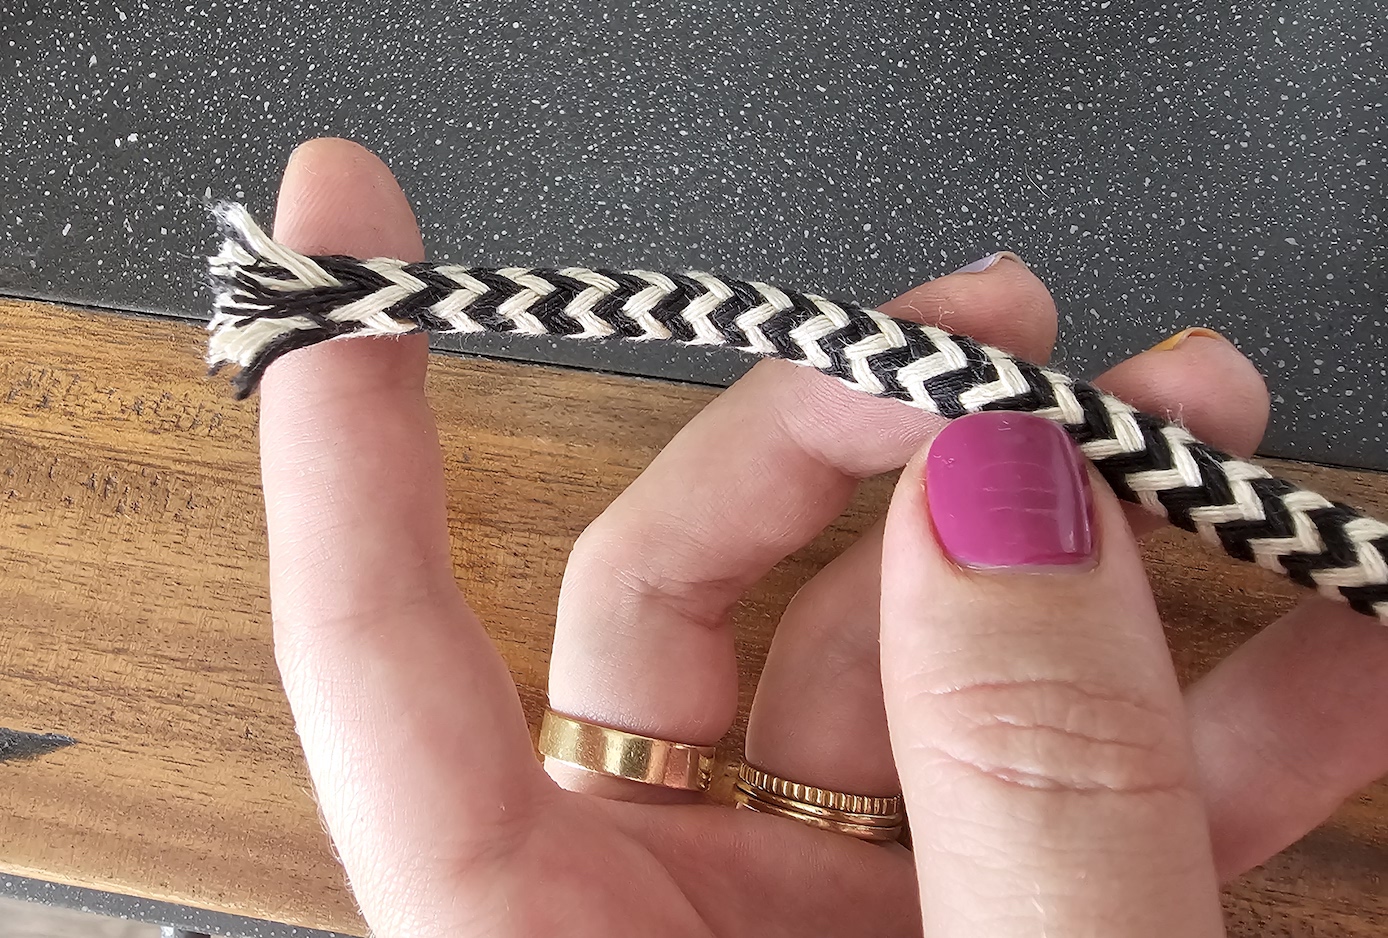
Then pulled the outside back down, so I now had a hollow rope end:
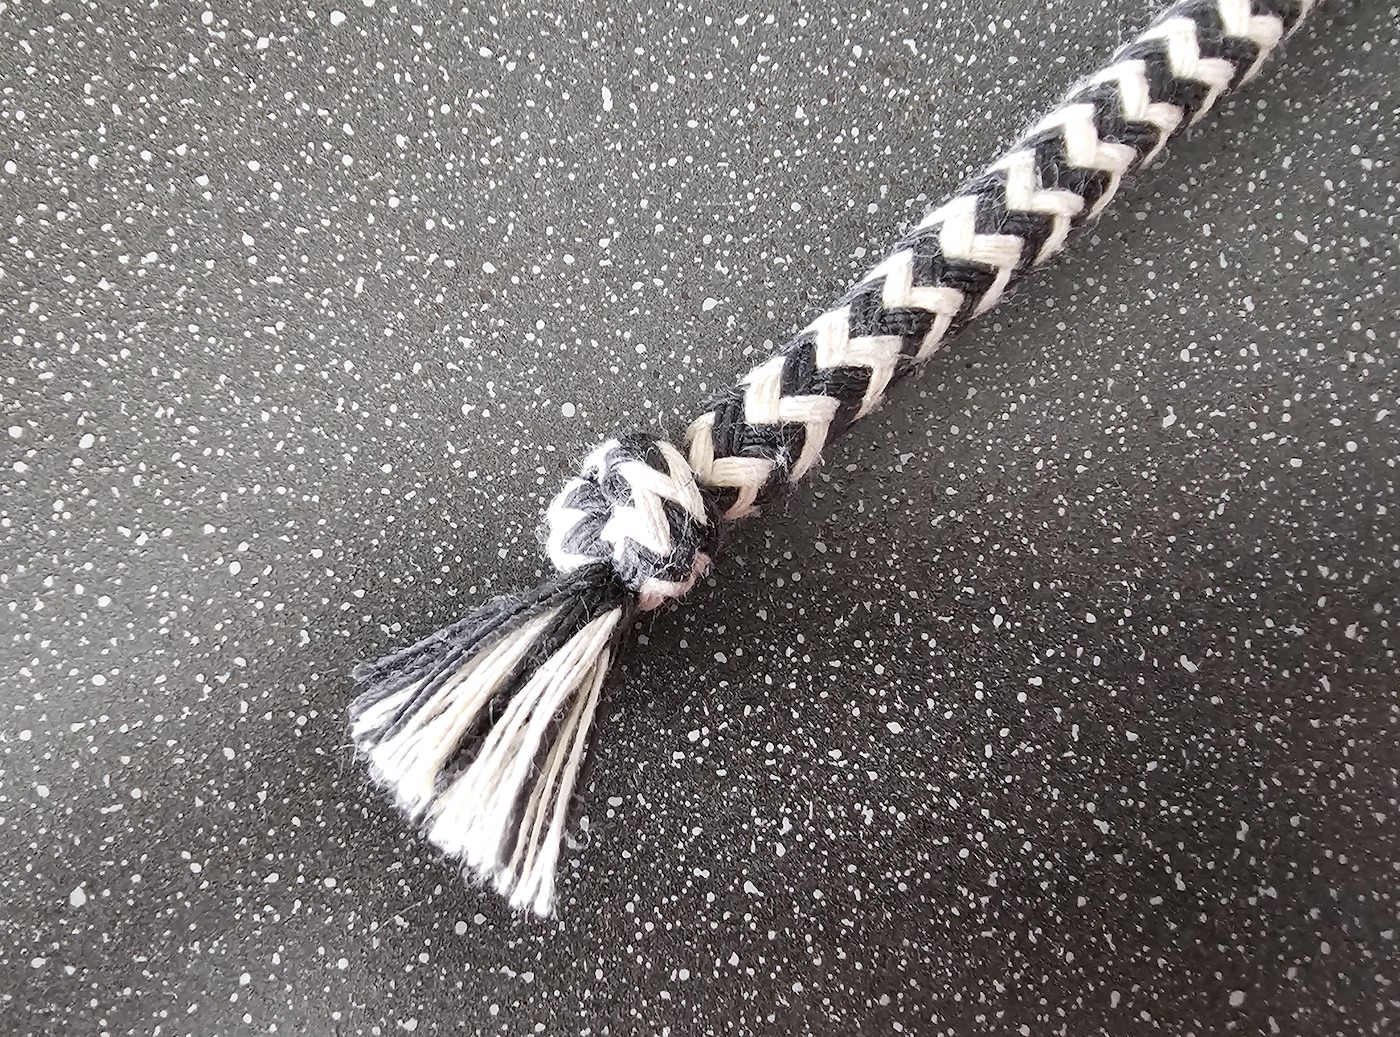
.. And so it made a much smaller knot tied up. Brushed the ends & cut them straight.
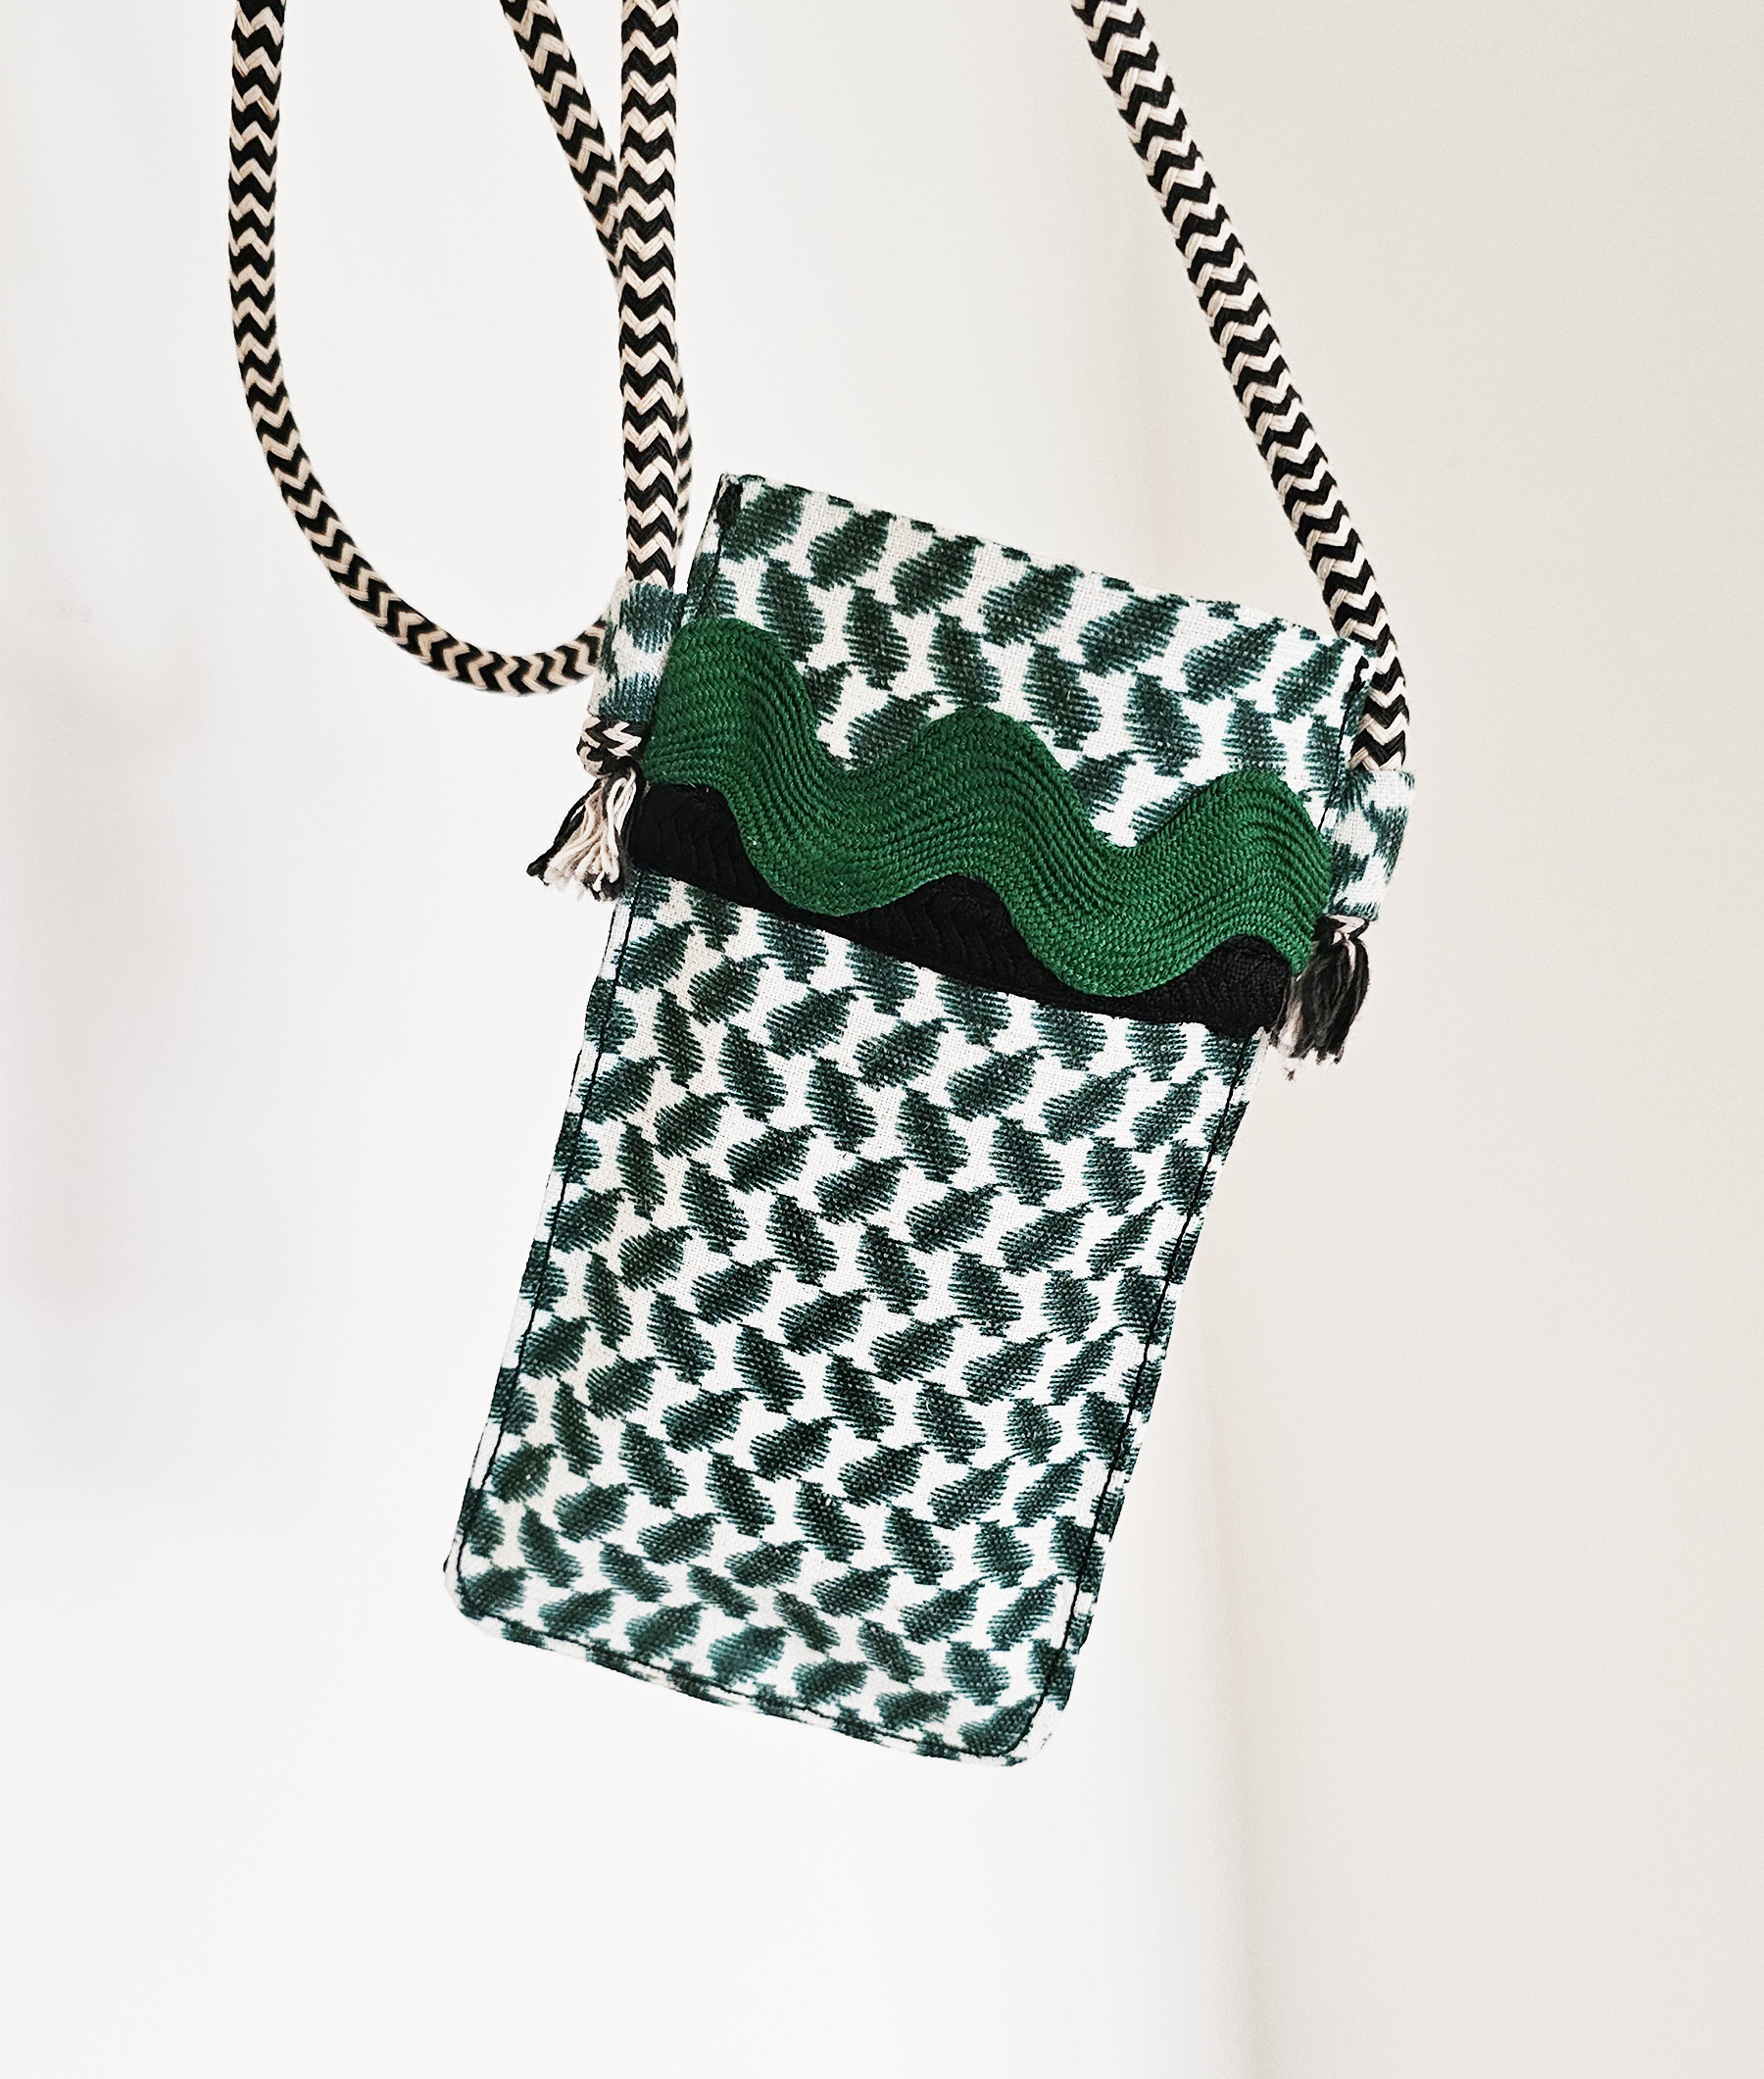
That was the pouch done.
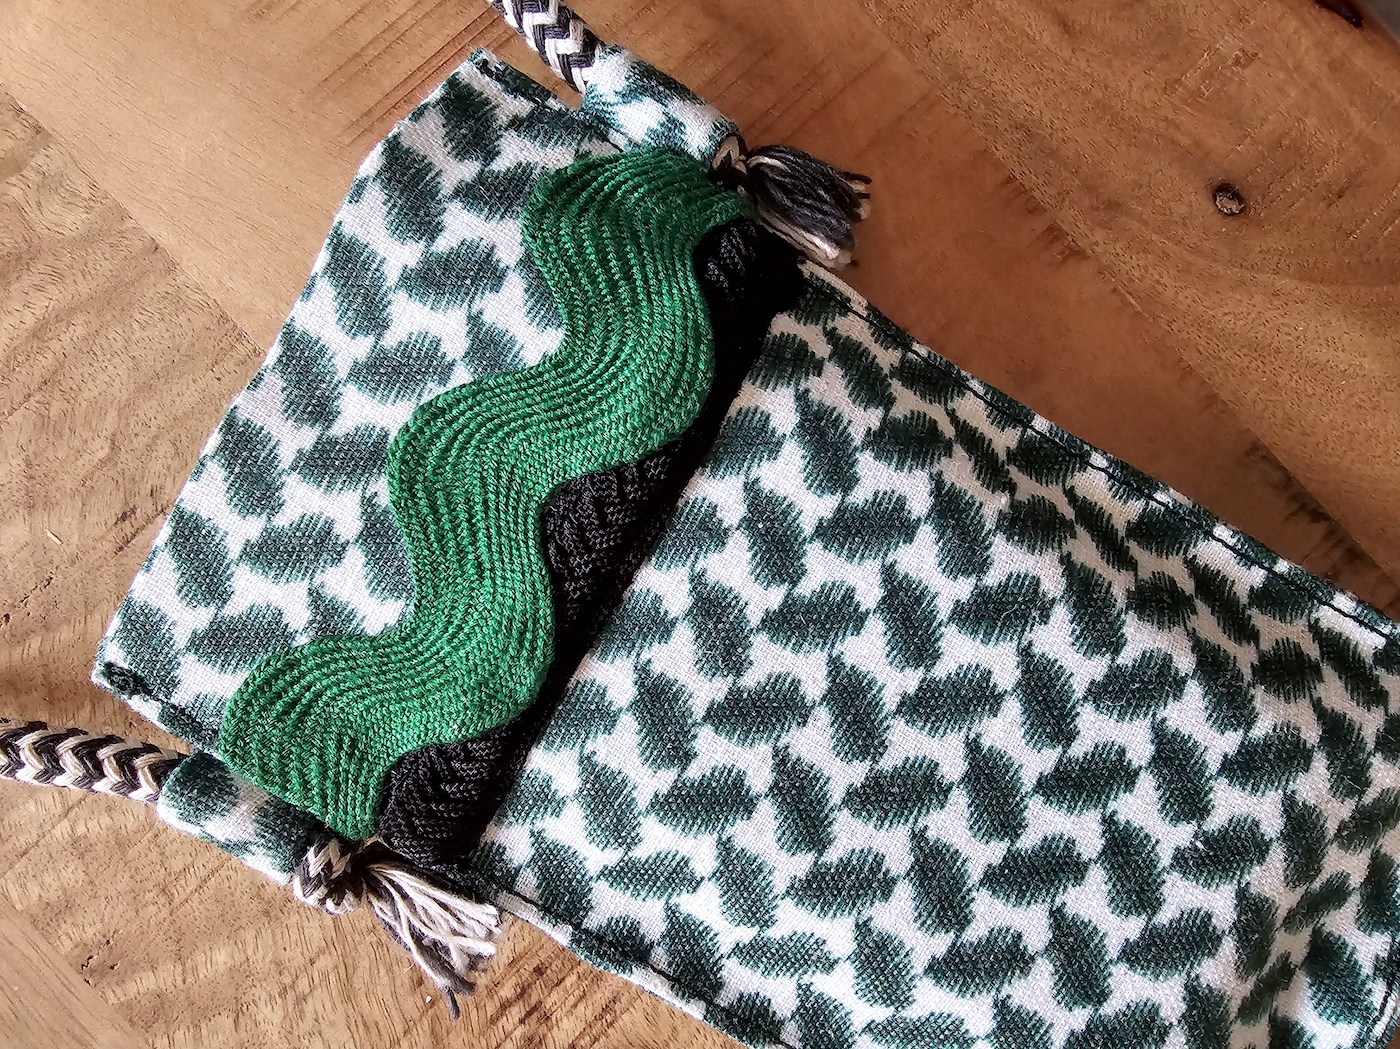
I still wanted to add some texture, so I hand-sewed two rows of different trims across. My original plan was to also add a couple beads above the knots, but I couldn't find any big enough for my rope to pass through. If you used a smaller rope, I think that would create a nice detail.
xo,
Julia


I love this! Would it be too bulky if I serged the edges?
ReplyDeleteI don't think so - the only thing is you'll want to then be sure that you fold right at the edge of the serger stitch (so the fold on the inside is as narrow as possible). Otherwise you'll have the overlocked edges showing on the inside (which isn't really an issue unless you're an perfectionist of unhealthy levels like me :D)
ReplyDeleteThis comment has been removed by the author.
ReplyDeleteYou can play a video clip with better sound quality and improved picture resolution. artmobile al
ReplyDeleteI like phones with a clean display. Bli iPhone 15 Pro Max cash ose me keste
ReplyDeleteThis DIY crossbody phone pouch is ideal for daily convenience because it is both fashionable and useful. I adore the way that basic materials can be turned into something so practical. Just as resume writers make sure information is presented clearly and succinctly, clear directions are important for every endeavor. An incredibly imaginative and friendly manual.
ReplyDelete