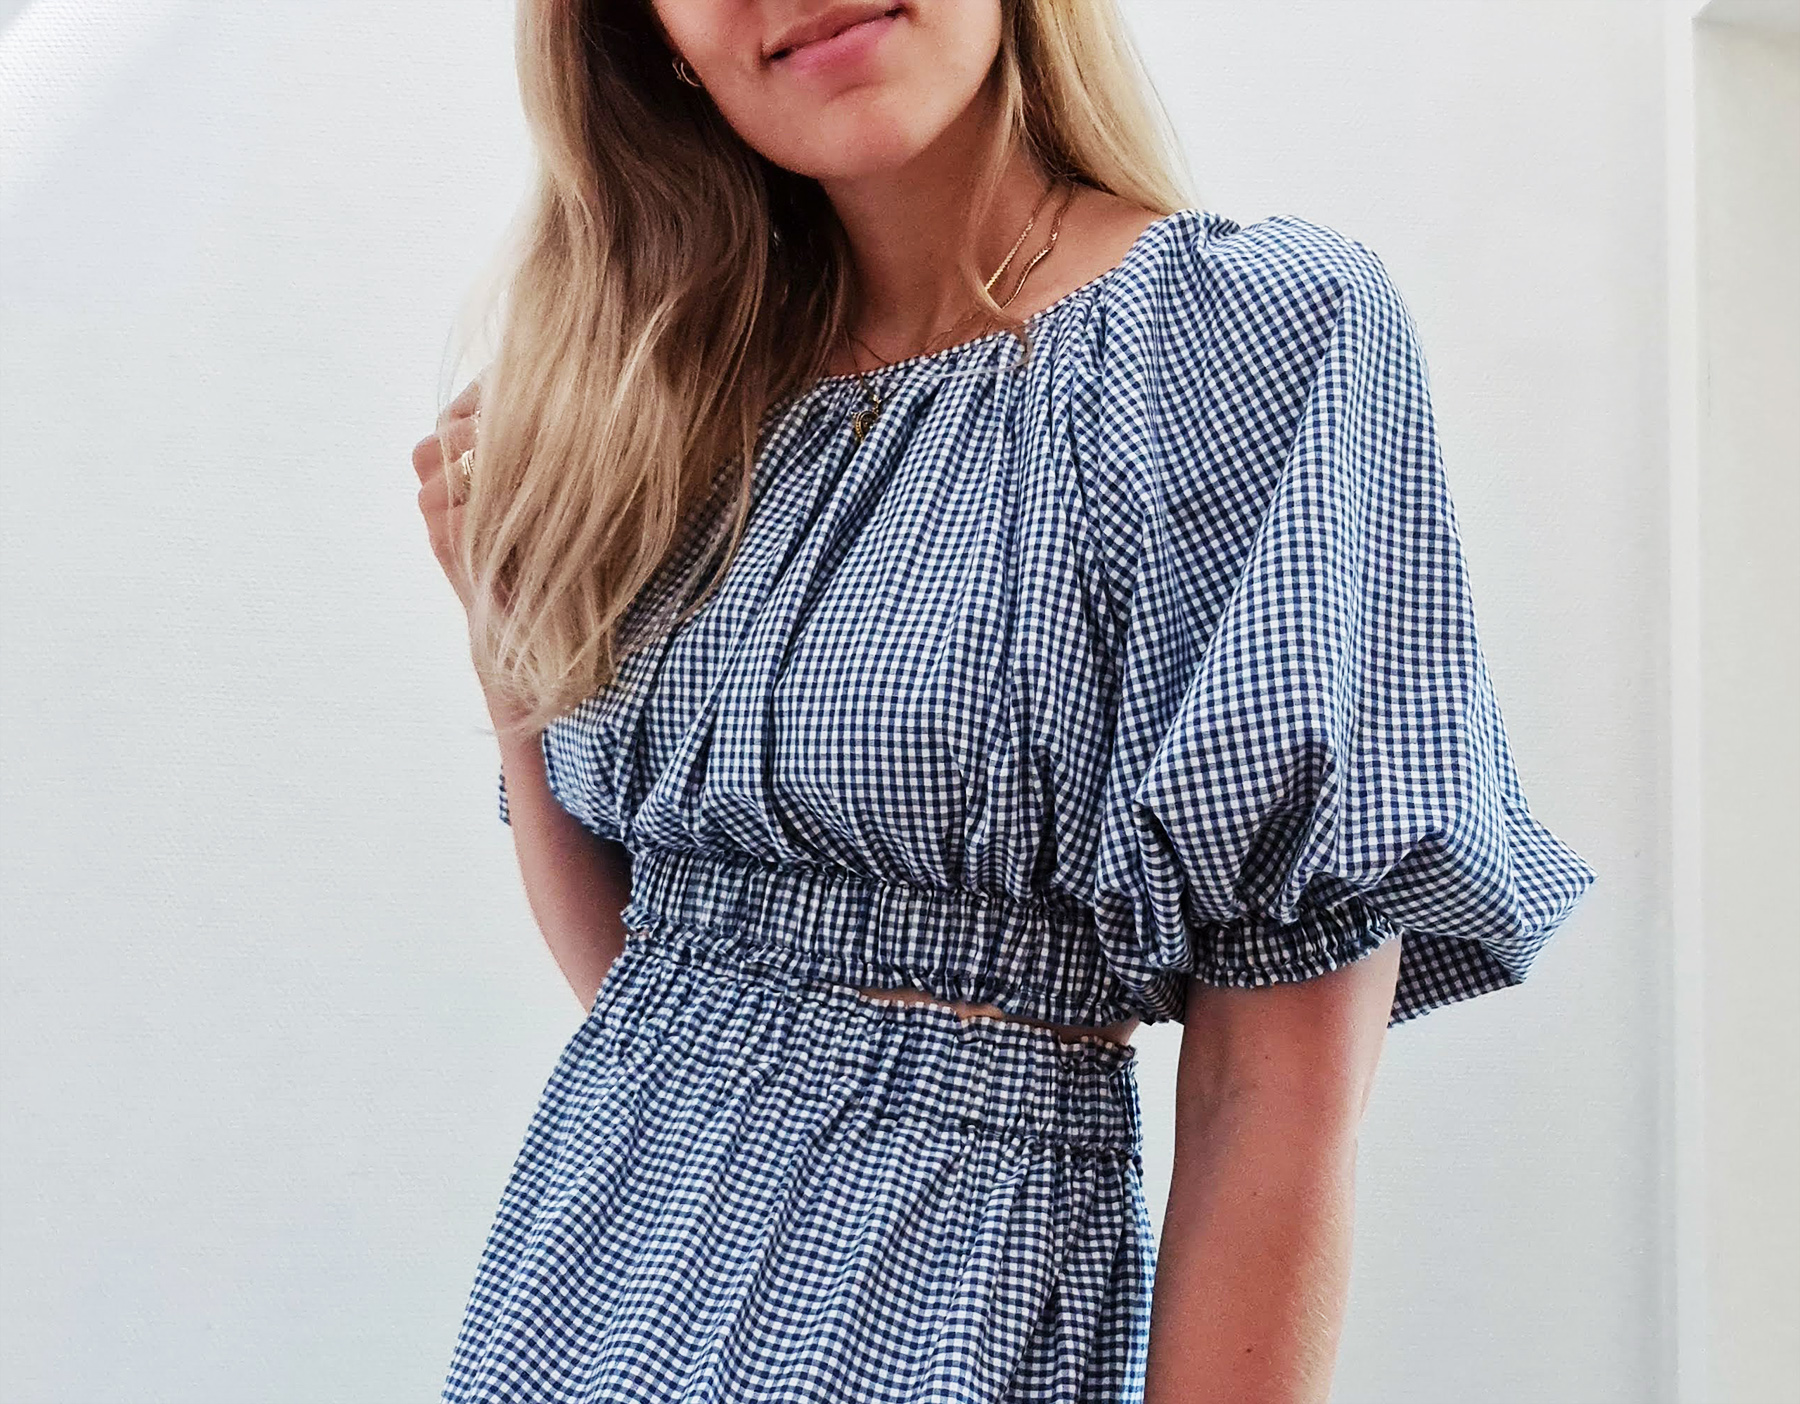
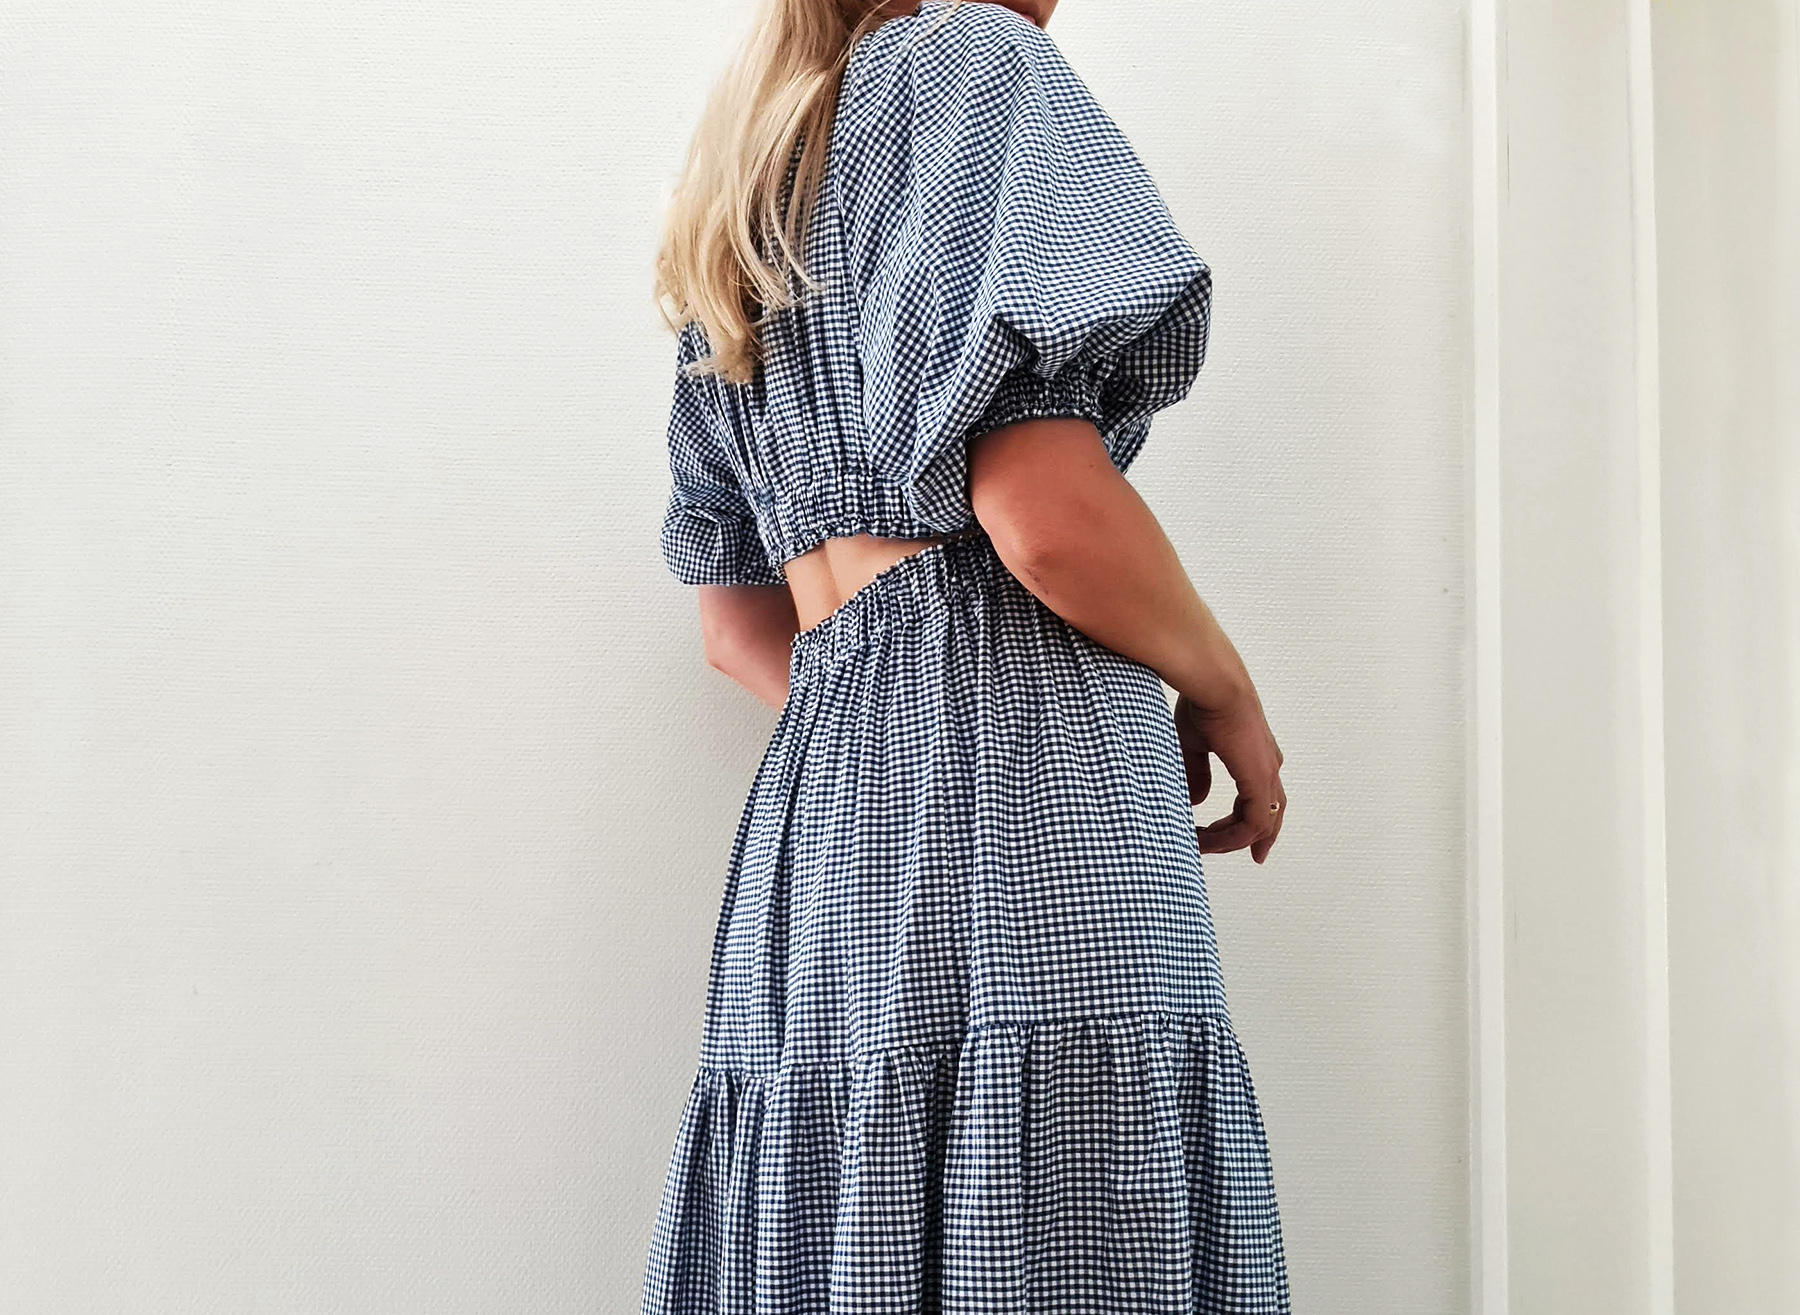
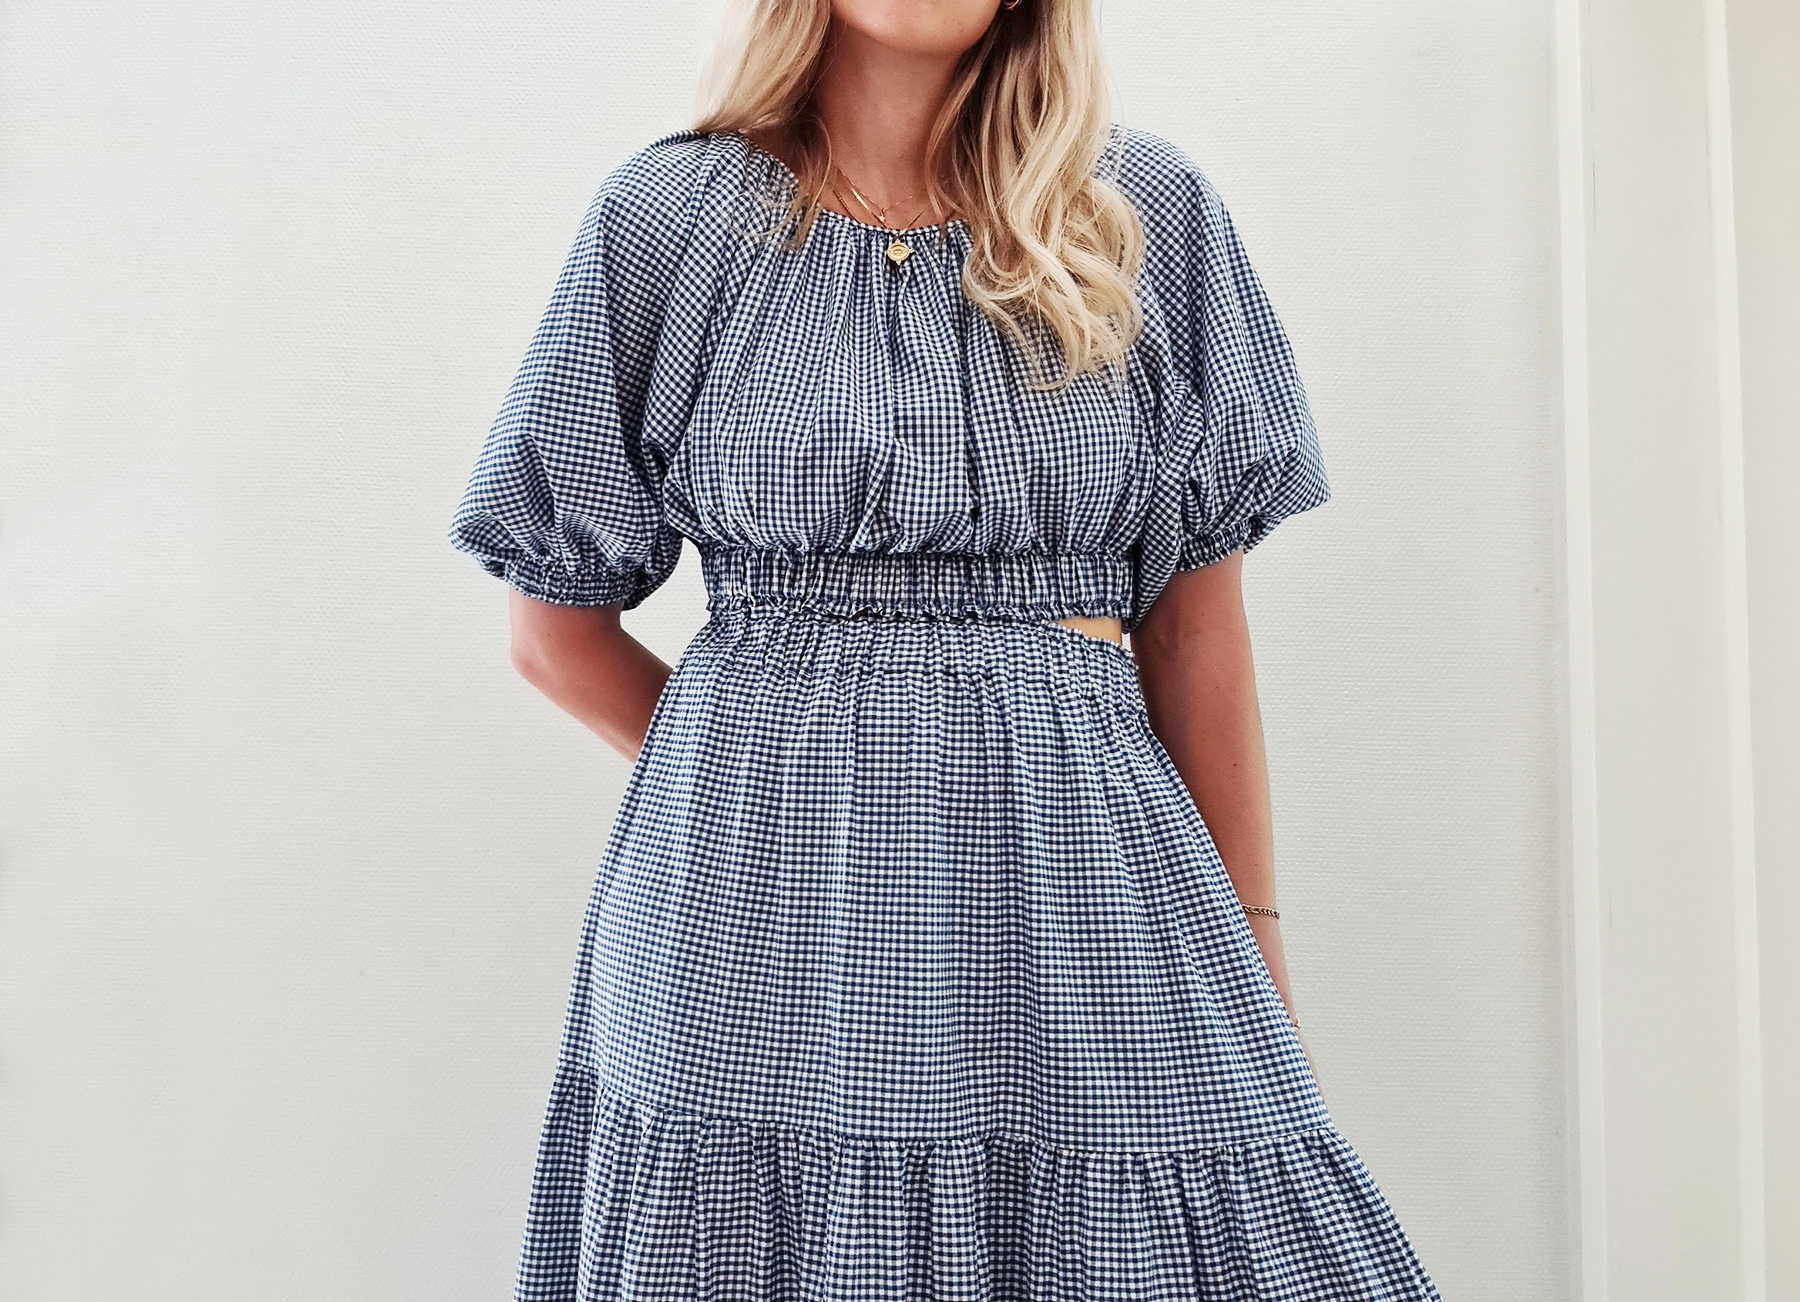
So here's a total experiment that ended up working! Lots of gathers, big sleeves, and easy to selfdraft if you're a beginner. I used a thrifted duvet cover to make this set, and I'd say on the scale of 0 to picnic basket on the farm it's a strong 9. Bonus: breastfeeding friendly if that's a thing for you.
Tutorials take a lot of time & effort to create, and I choose to make mine available for free. If you enjoy this guide, you can support me with a donation that feels right for you, here.
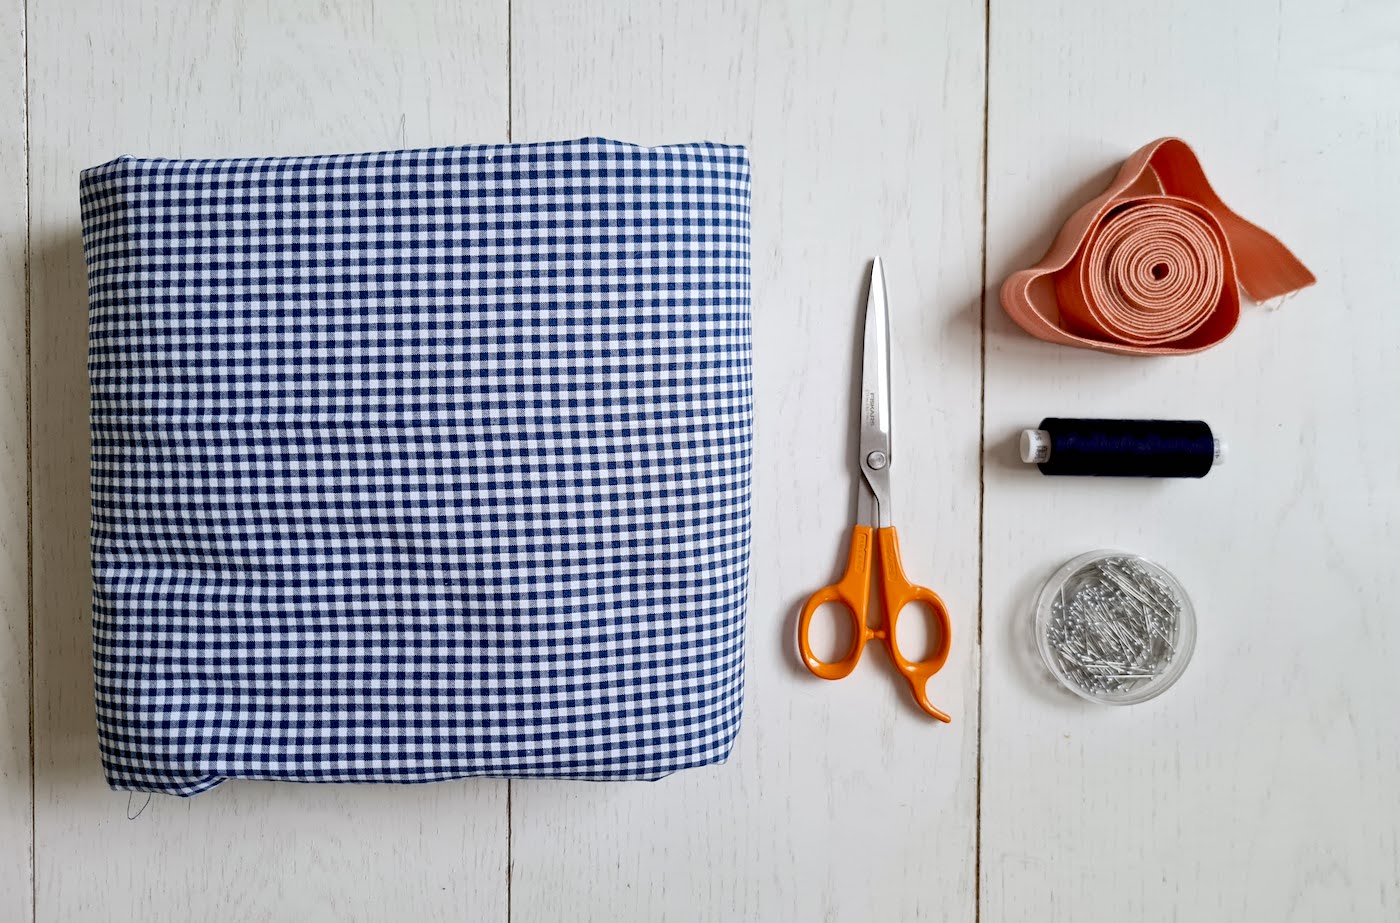
TOOLS:
Fabric (I used 100% cotton) 4 m of full width (150 cm) for top + skirt, 1 m of half-width (110 cm) for top only | Scissors | Pins | Elastic (I used 3 cm wide for top hem & skirt waist, and 1.5 cm wide for top sleeves) | Thread & Sewing machine | Didn't make it into the photo, but bias tape maker
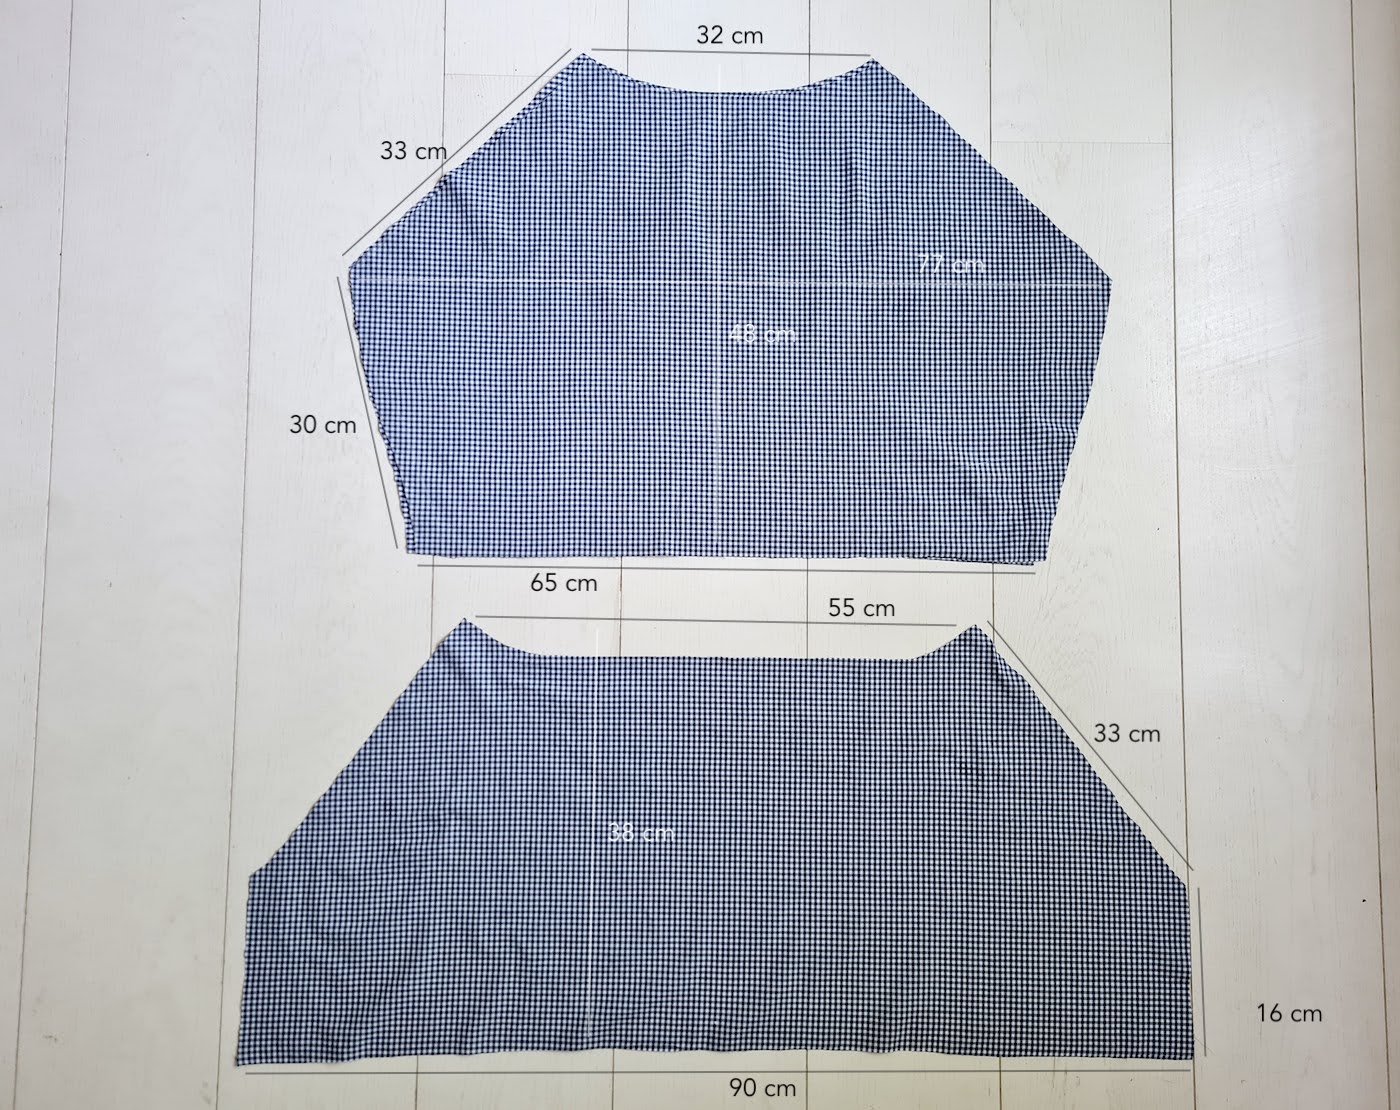
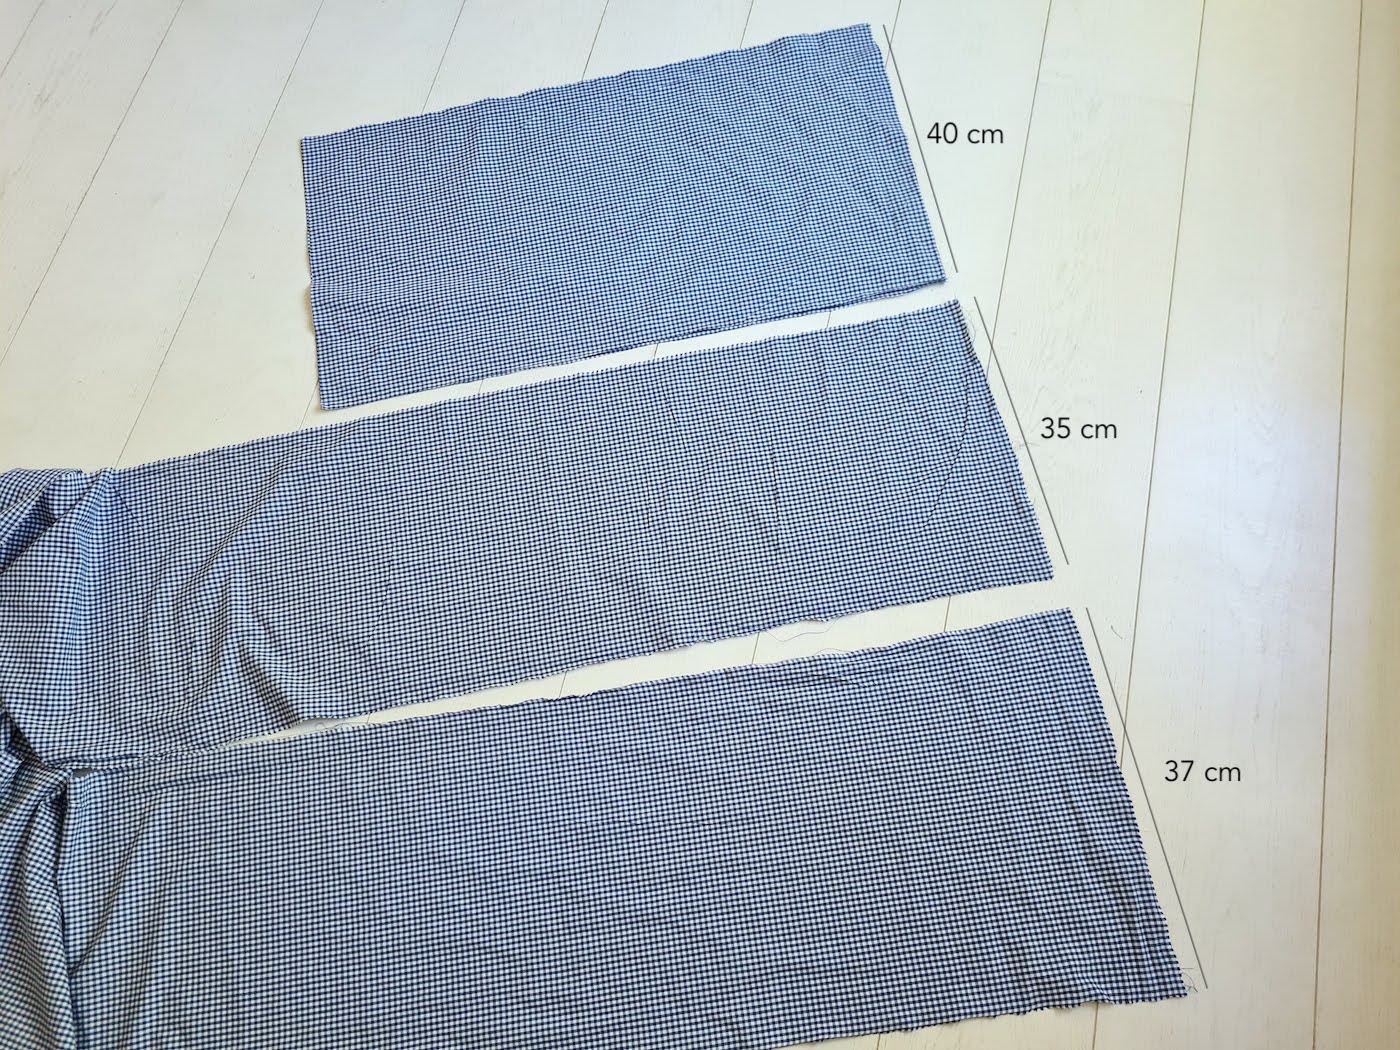
I. Here are the measurements of my cut top pieces, you need two of each - at the top you have the 2 sleeve pieces, and at the bottom the front and back top pieces. As this is a gathered style with elasticated details, the same dimensions would work a size or two up from me - I'm EU36/US4, so up to EU38/US6 or EU40/US8.

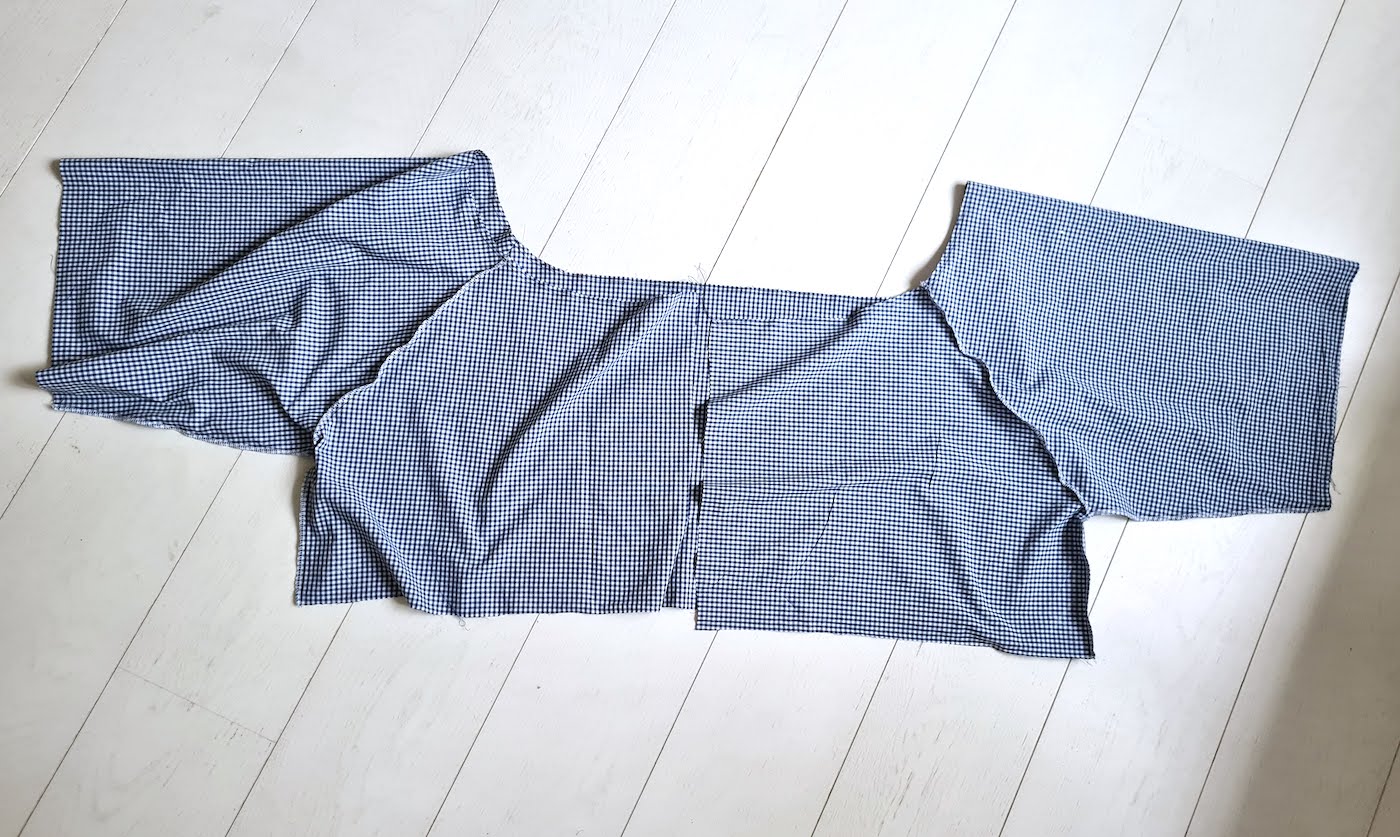
II. Next you'll want to assemble the top by pinning the raglan sleeve seams together, right sides facing (the edges that measure 33 cm above.) Ignore the fact that in this step I had cut the back piece in half - I wasn't sure how big I was going to go with the neckline, so I thought I needed a keyhole detail there. I ended up making the neckline big enough to be pulled on, so no need for the keyhole (due to the gathers of the top, it didn't even end up being a very interesting stylistic detail, since it gets hidden in the gathers). In other words, you can just leave your back piece as is, no cutting in half. Once you've pinned the pieces together, sew the 4 seams and press.
III. Then fold at the center of the sleeves, right sides facing, and pin & sew the side seams.
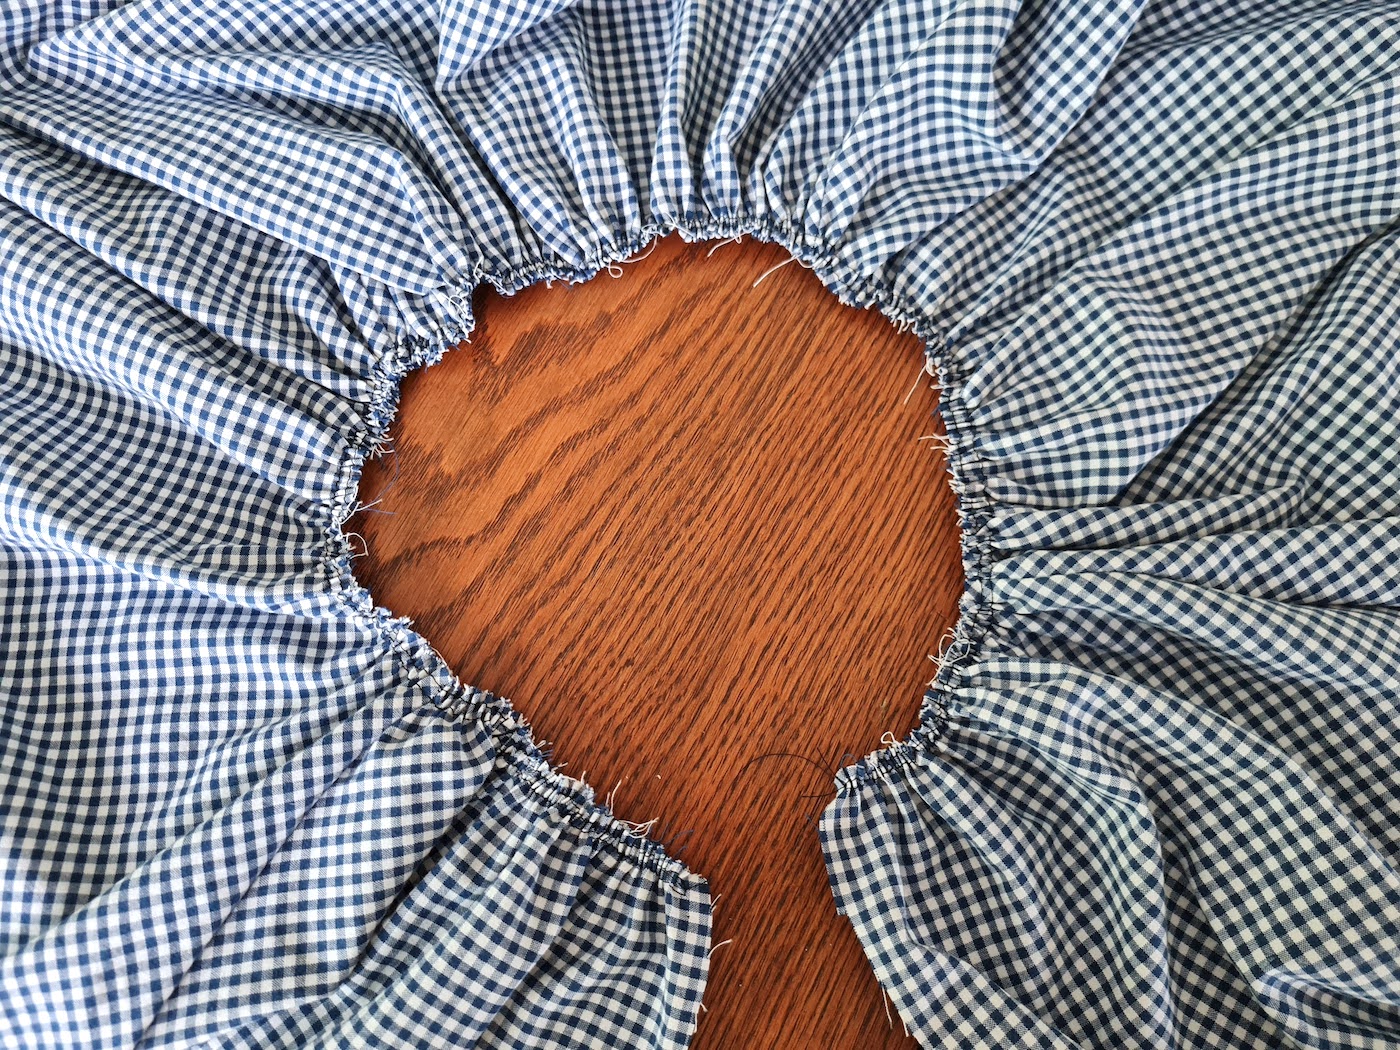
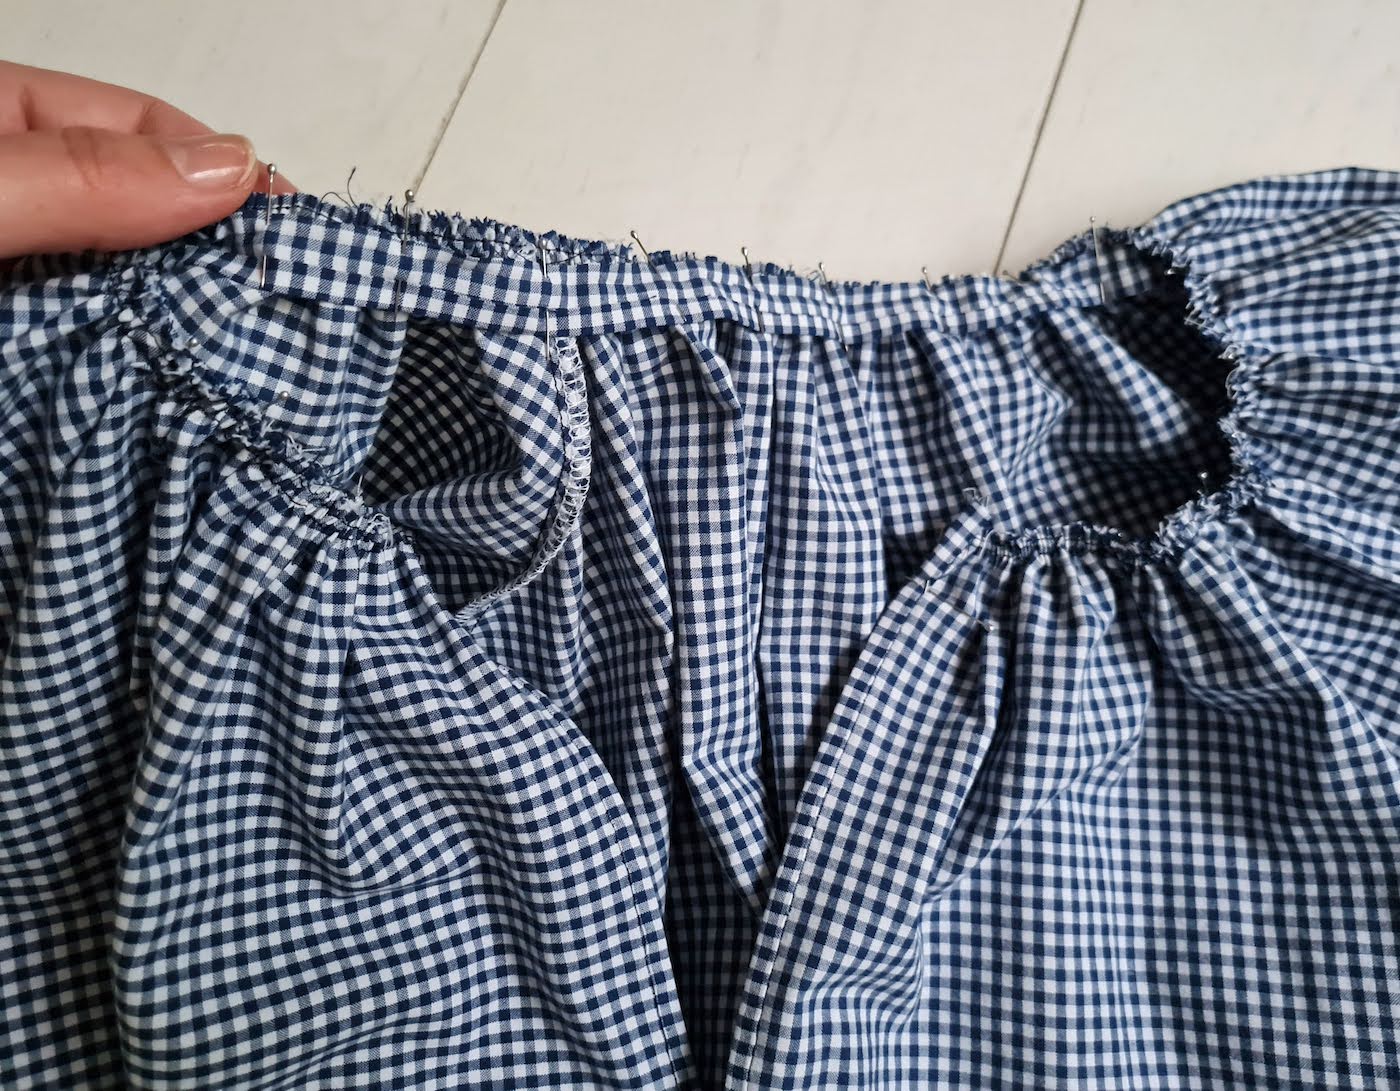
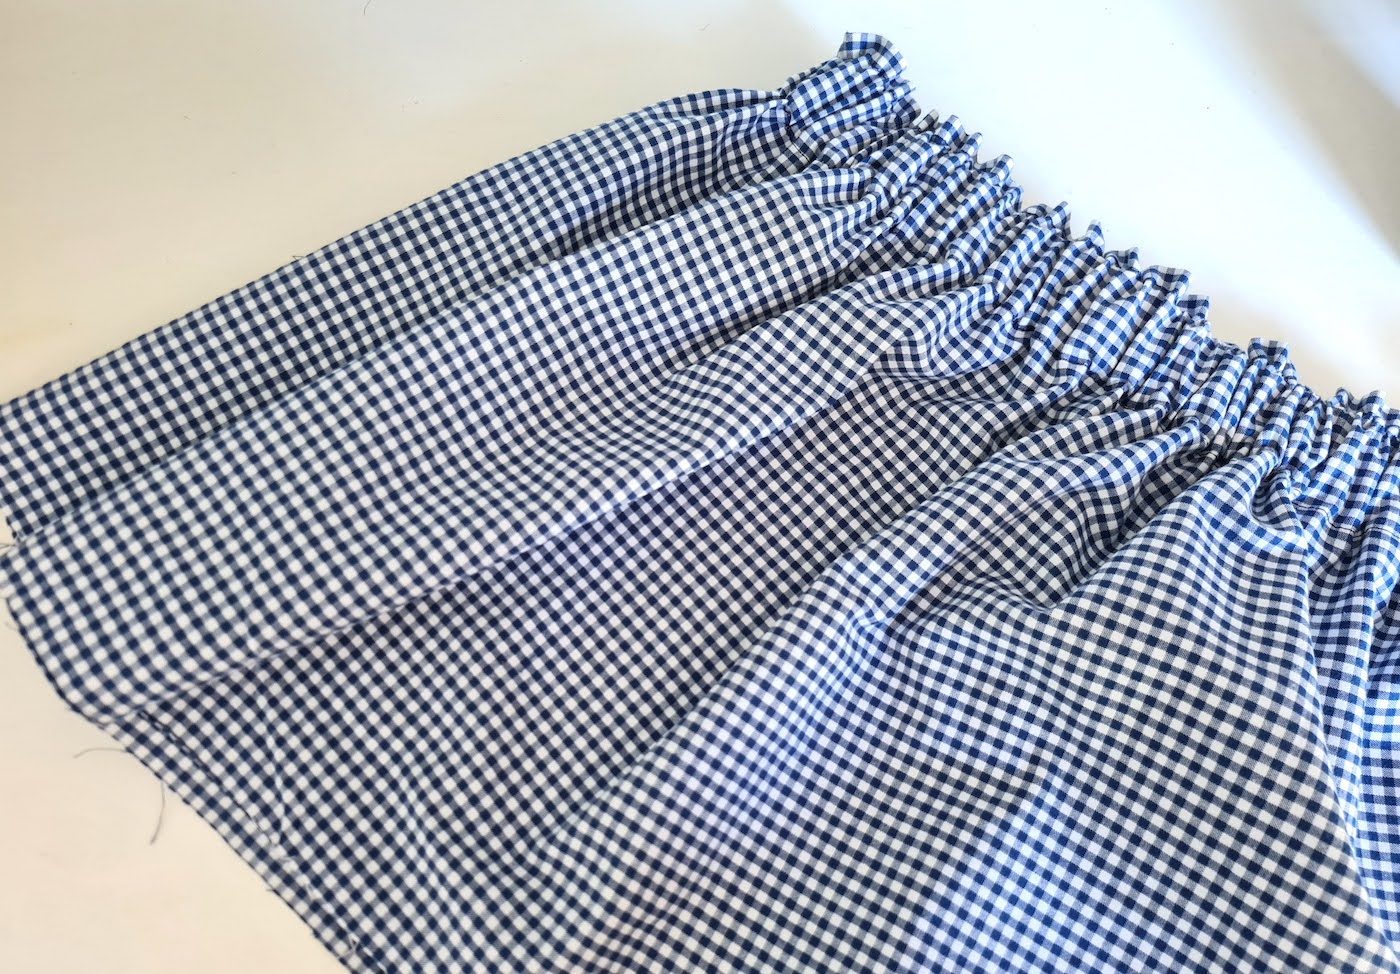
IV. Now you're ready to gather the neckline of the top. I usually do 2 gathering stitches (longest stitch on your machine with maximum tension). Pull on the bobbin threads until you have the gathering you want - I gathered enough for the length of the neckline to be about 60 cm.
Again something you won't need to do when you don't cut your back piece in half.. binding the keyhole.
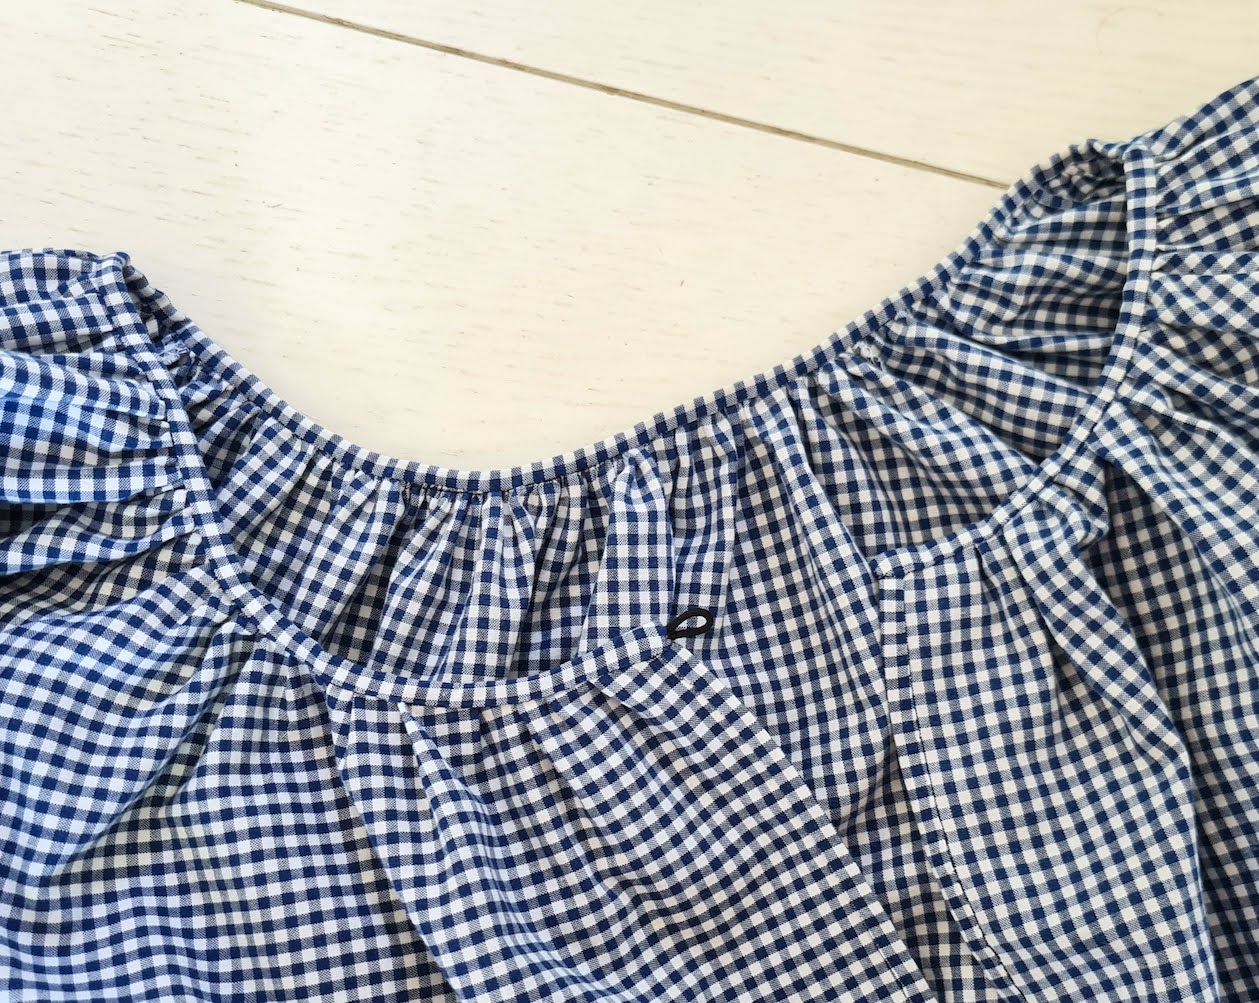
V. The photo of this bit turned out a bit blurry, but I first made enough matching bias tape to cover the neckline length using
one of these babies, and then pinned my bias tape onto the neckline. I've covered that process in more detail
here.
When topstitching bias binding with a machine, I actually prefer to first pin the bias tape on the reverse side of the fabric, so that when I turn it over onto the right side to envelop the neckline, I have more control over getting the topstitch perfect (instead of having to sew on the reverse, not seeing exactly where your bobbin stitches will land). That ended up being irrelevant though, because I decided I didn't want a visible stitch, and hand-sewed the bias tape in its place on the right side. This is what it looked like when done - I also had to add a little loop & button to be able to close up my useless keyhole detail.
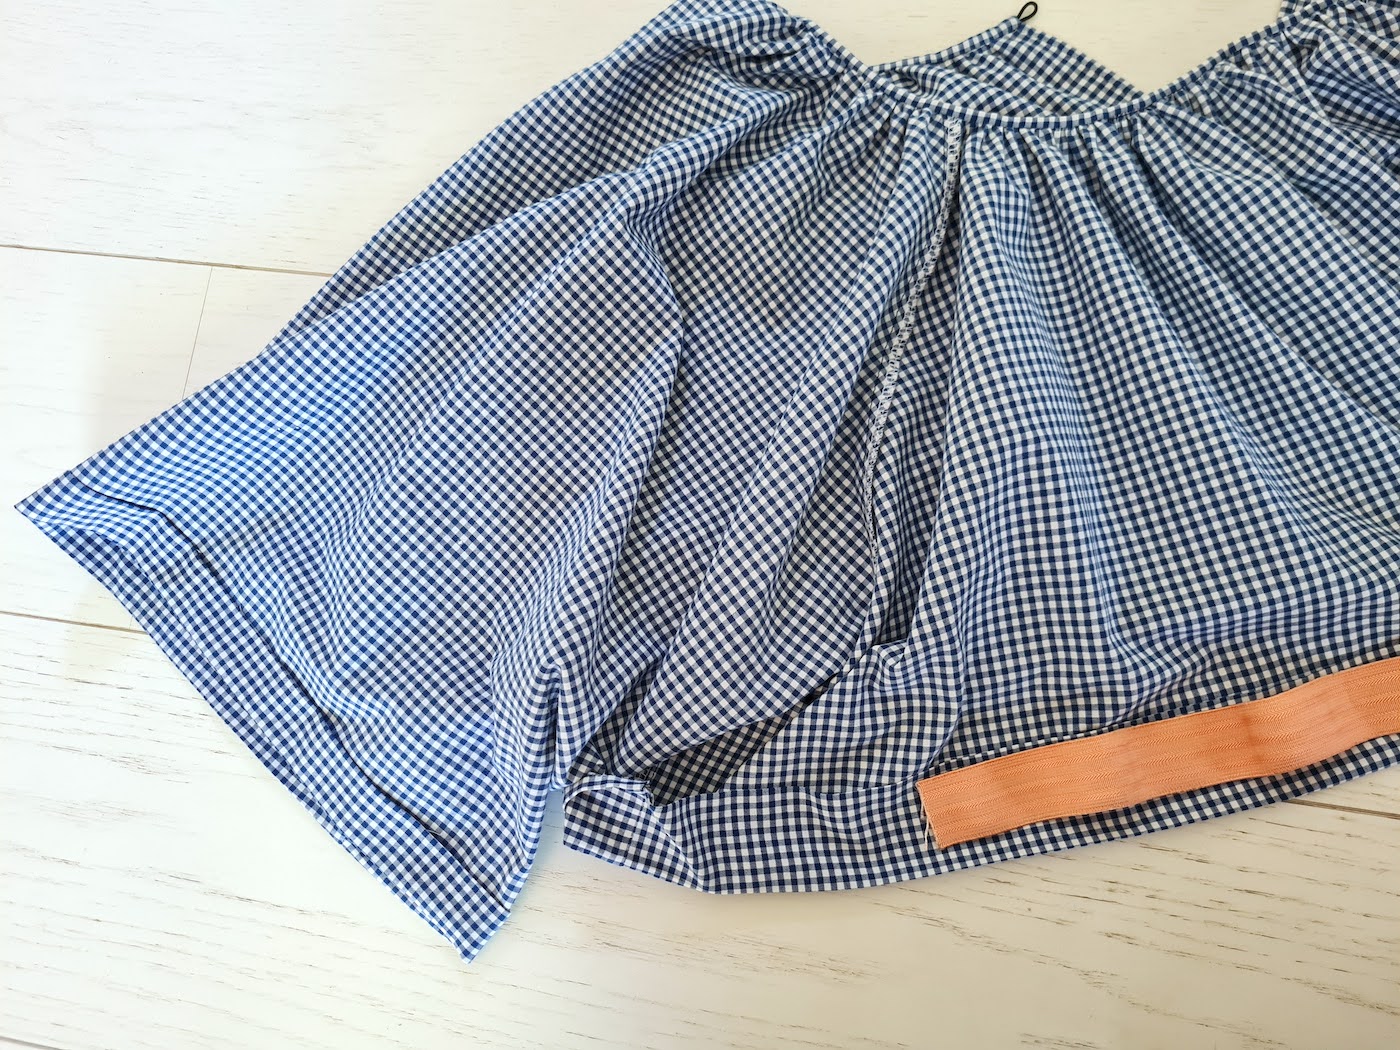
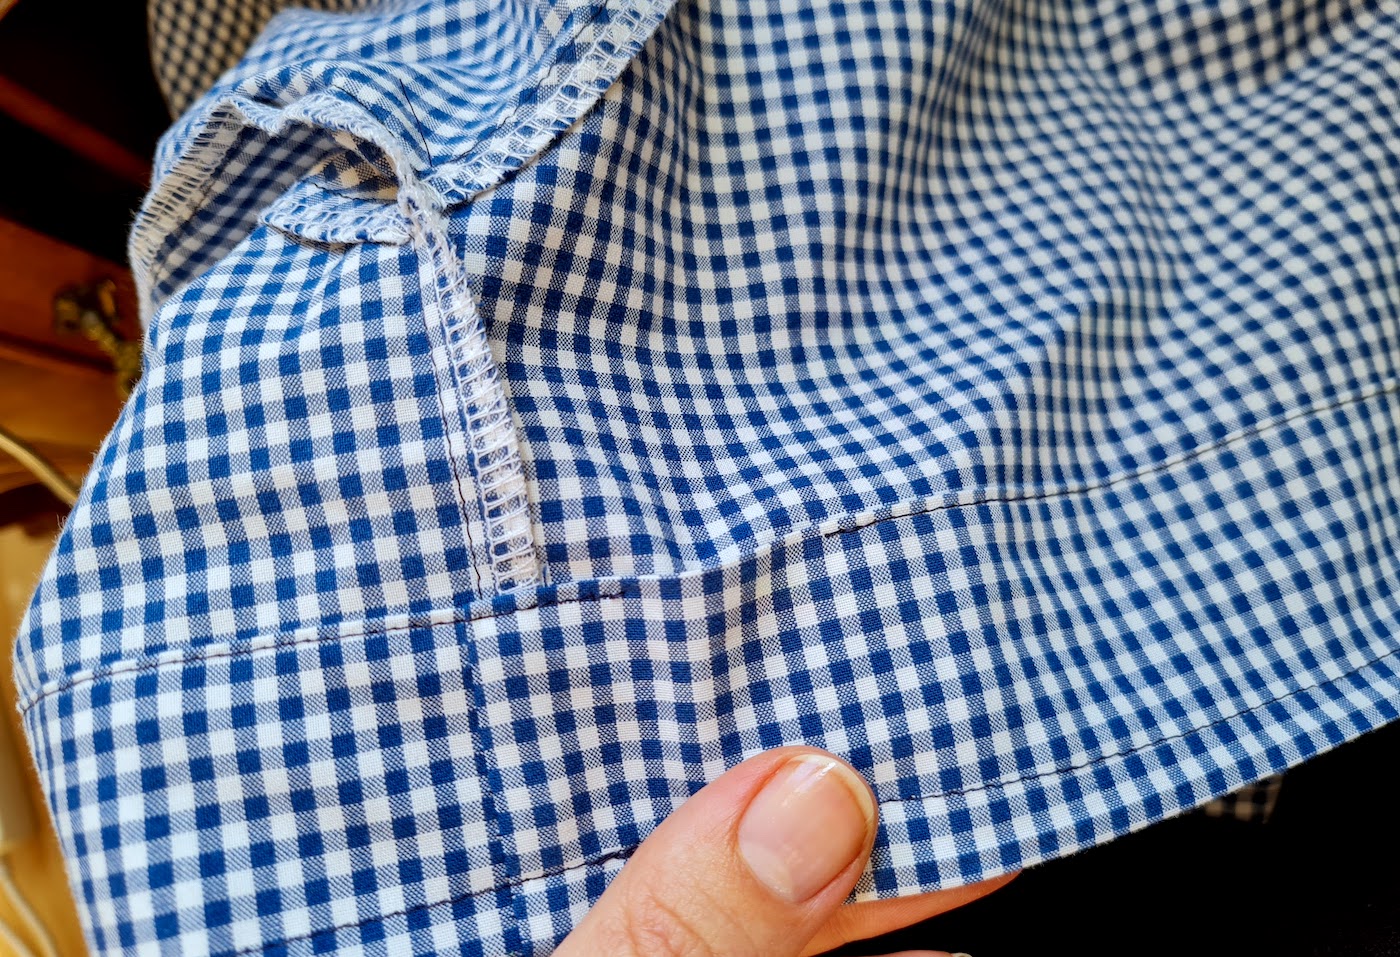
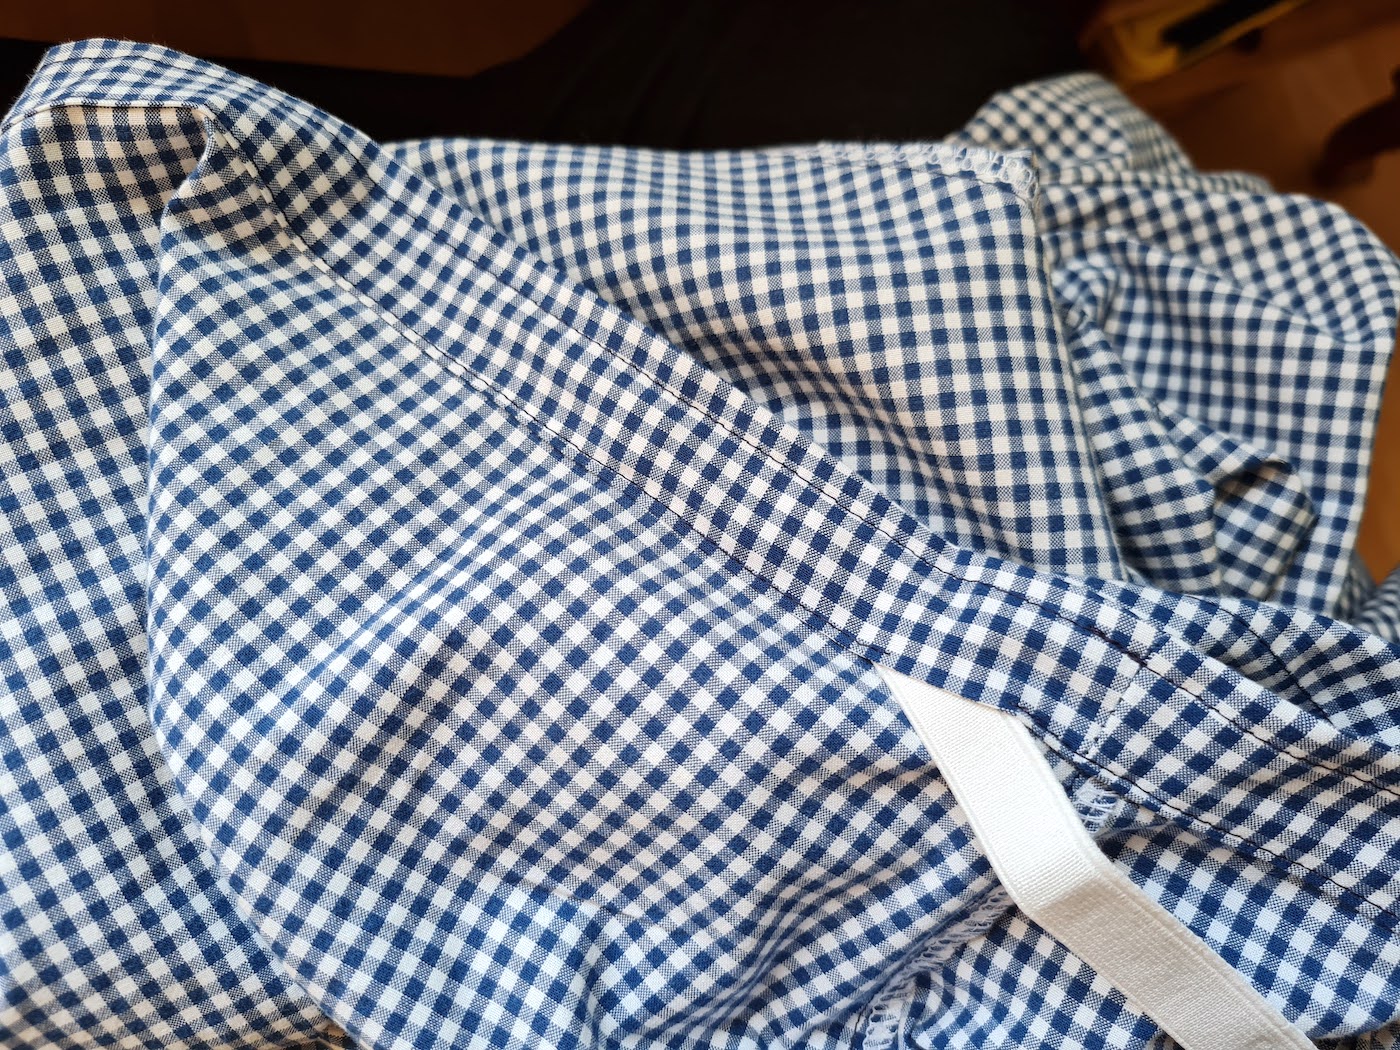
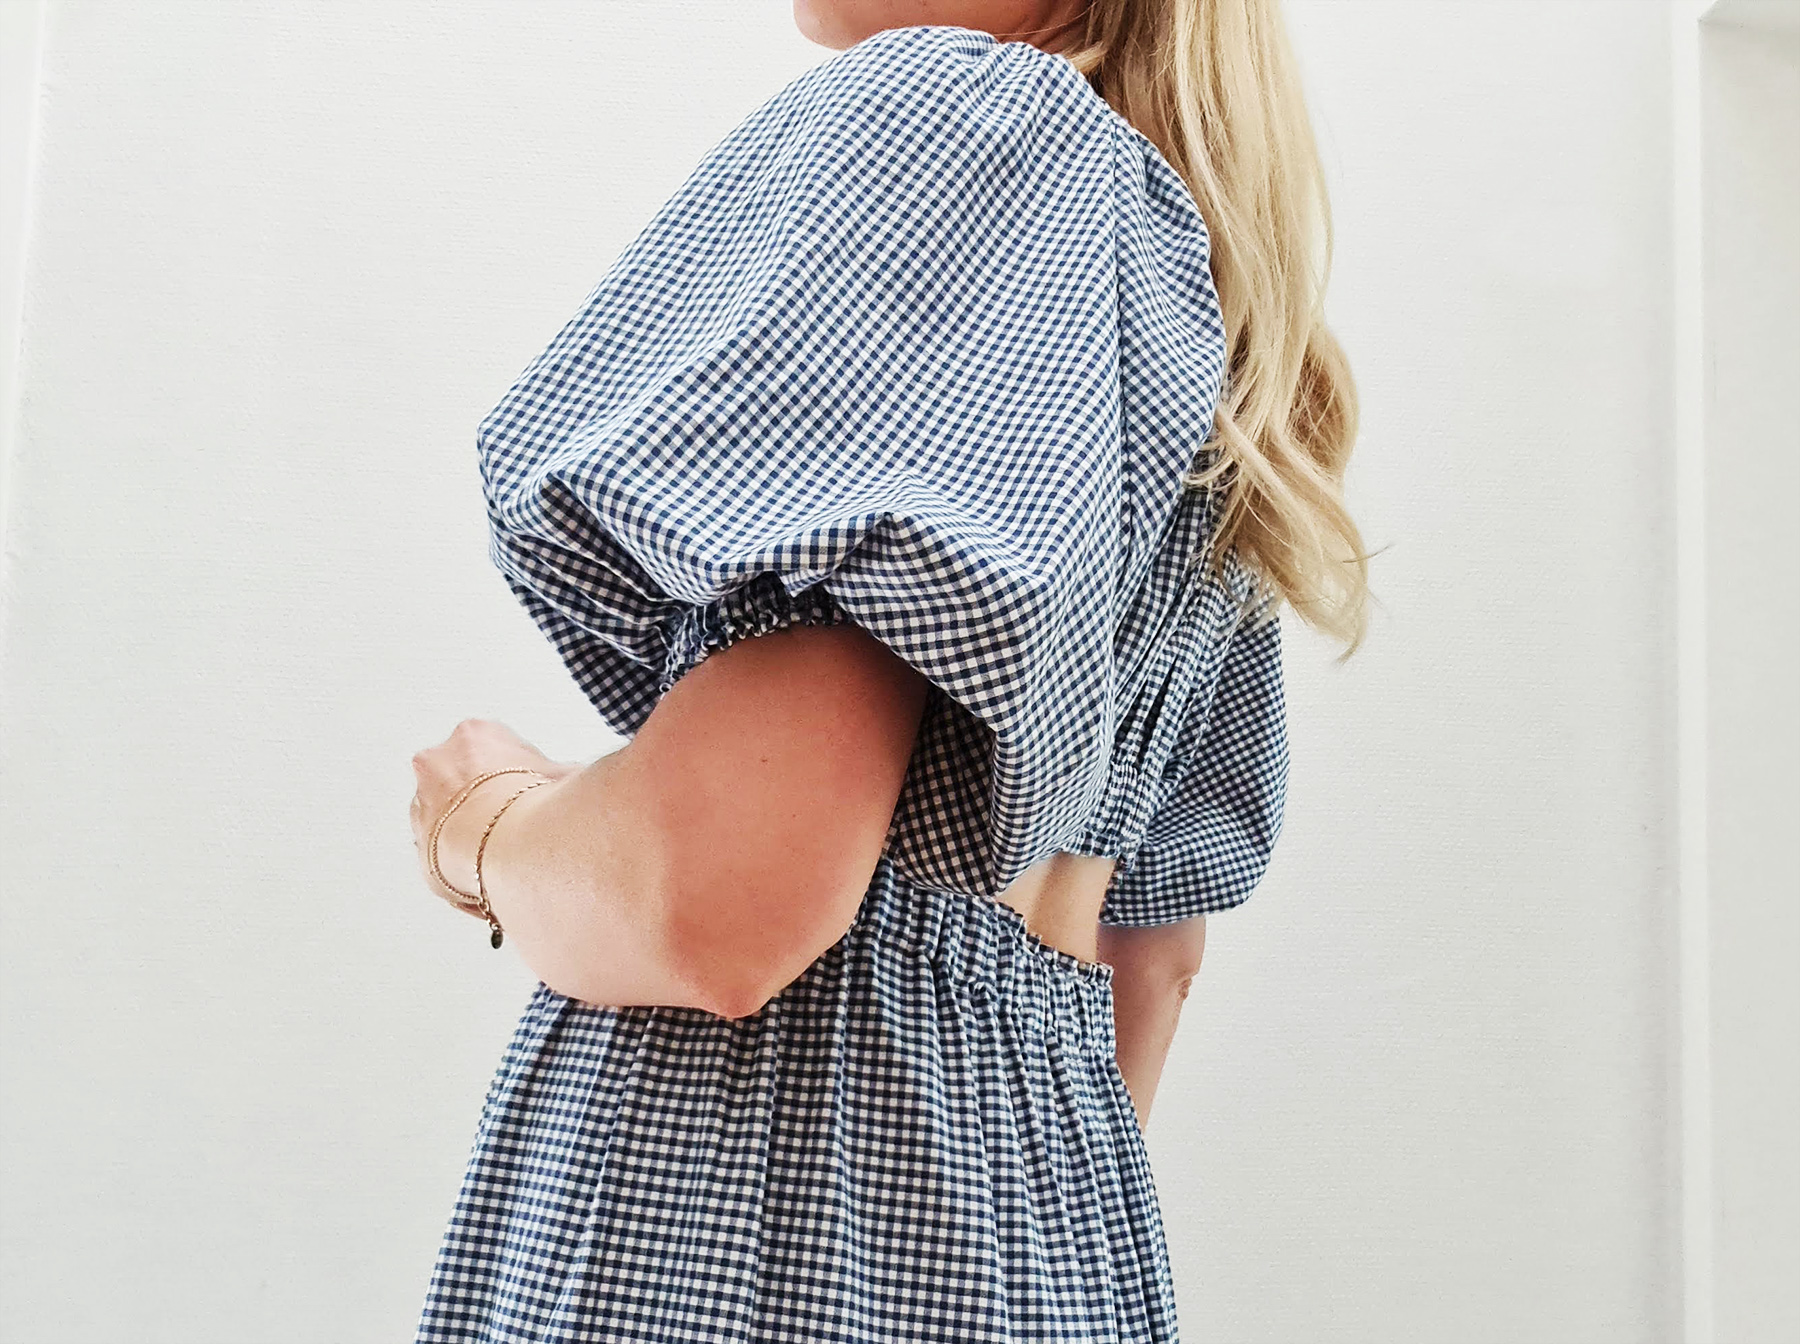
VI. Onto the top hem: I first pressed a narrow 0.5 cm fold onto the reverse, then another wider fold, about 1 cm more than the width of my elastic.
Then sewed two rows of stitches to create the casing for the elastic, leaving a gap to insert it from. Took a piece of elastic that comfortably wrapped around my waist, passed it through with a safety pin, sewed ends together, and closed up the gap in the stitch.
And so I had this.
With the sleeves, I repeated the same process, just with a less wide elastic.
VII. For the skirt, I didn't do much documenting since it was a super simple tiered rectangle number. I did 3 tiers, lengths are below, widths as follows: first tier 140 cm (cut from two 70 cm pieces), second 250 cm, third 450 cm (two latter cut from multiple pieces sewn together).
To begin, I sewed the first tier - two 70 cm wide pieces - together at the sides, and then elasticated the waist the same way I did with the top hem.
From there it was just mindless gathering and attaching the 2 other tiers.
Here are more visuals of that process in case you need.
I prefer to show finished pieces in action in the wild, but the baby life has me stuck inside quite a bit these days.. So a white wall is all I can give🤷♀️
Julia


Lovely...just lovely! Wear it with a smile.
ReplyDeleteCan you please let me know if the sleeve pieces measures are off/incorrect? Ive just tried making the pattern and the measurements dont add up
ReplyDeleteHi there! the measurements are correct and do add up as long as the pieces are attached correctly (other people have used the tutorial successfully as well). Is it possible you are matching the wrong edges of fabric with each other? In the cut pieces photo, you have 2 x sleeve piece at the top and 2 x top piece at the bottom. The raglan seam is 33 cm long and the top side seam is 16 cm.
DeleteThank you for your quick reply. I am drawing the pattern up on Adobe Illustrator so I can print it out as its faster than drawing by hand. By using AI it means the measurements need to be completely correct. When I do the sleeve the vertical middle 48cm is too short and the 32cm neckline is too long and if I reduce it, it puts the 33cm edge out.
DeleteDo you know what degree the 30cm and 33cm lines are at?
Sorry, just wanted to ask, is it a 1cm seam allowance? I am knew to sewing so still learning :)
ReplyDeleteYou can find the general notes that apply to all my tutorials under 'About & Sizing' at the top of the blog, I use a 0.7cm seam allowance but 1 cm is just as fine.
DeleteThis comment has been removed by the author.
ReplyDeleteCreate the stunning cottage dream dress that captures personal charm and is perfect for any season. However, availing the reliable assistance from the IT assignment writers to learn top tips to meet academic writing standards.
ReplyDelete