
I don't know what vortex time slips into these days. In my head I sewed this top a couple months ago, maybe max. four... and I just checked and it was in March. 8 months ago. My struggle with PPD materialises often in feeling unequipped to get things done, even if I want to. Writing up a blog post about a sewing project may seem like a dumb example, but it perfectly illustrates the reality of what PPD feels like to me - I have what feels like an endless list of things I'd like to be able to invest in, do well, improve.. But as much as I want to feel motivated to do them, I feel overwhelmed and unable. This creates a weird cycle where I avoid things and then feel worse for not making progress.
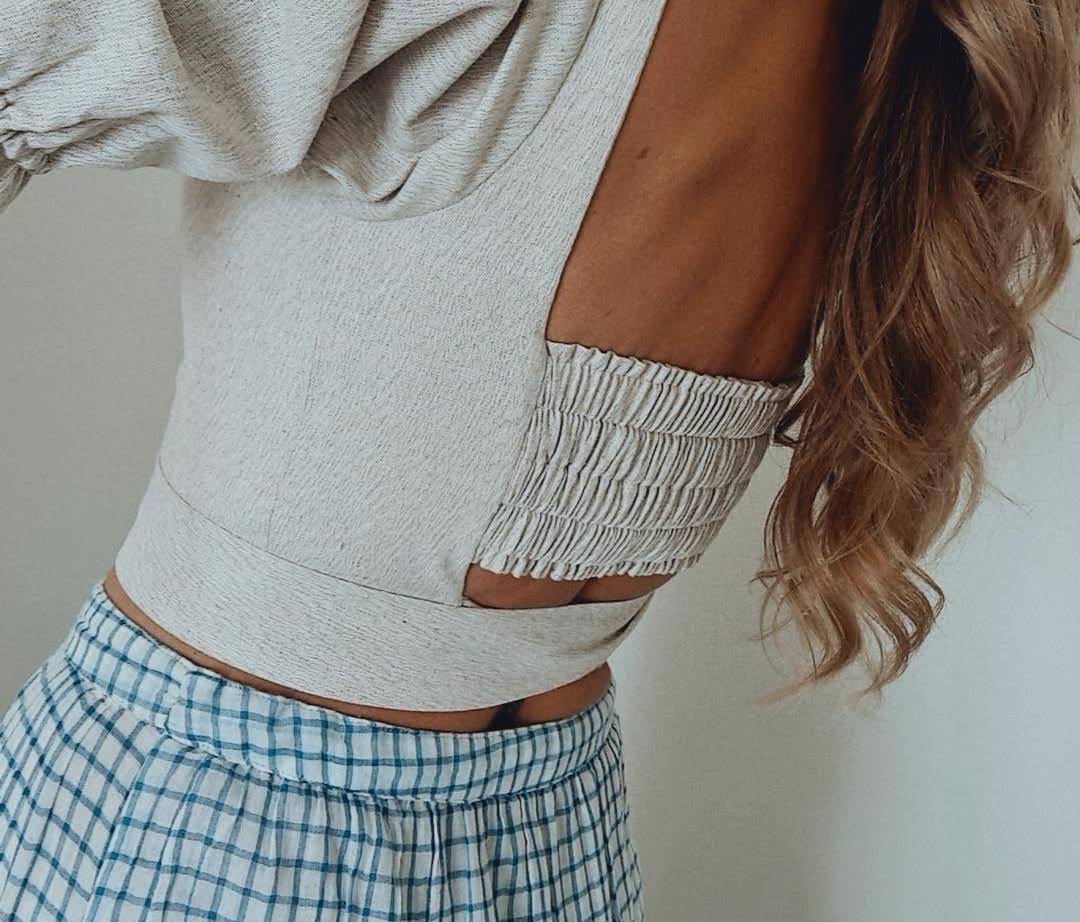
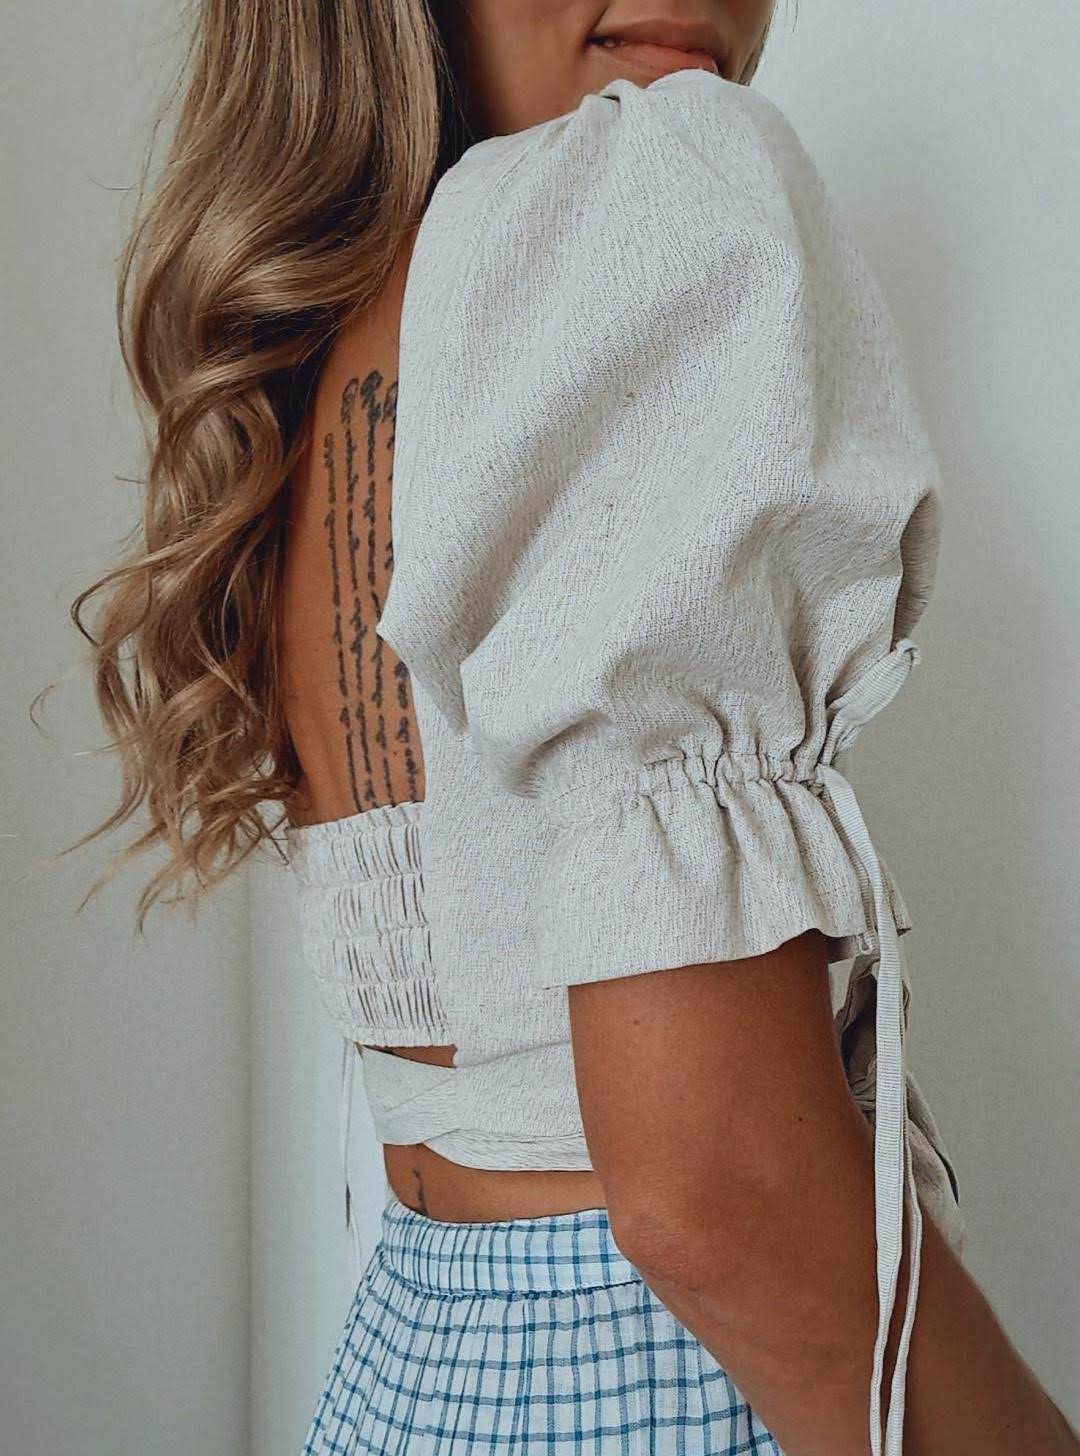
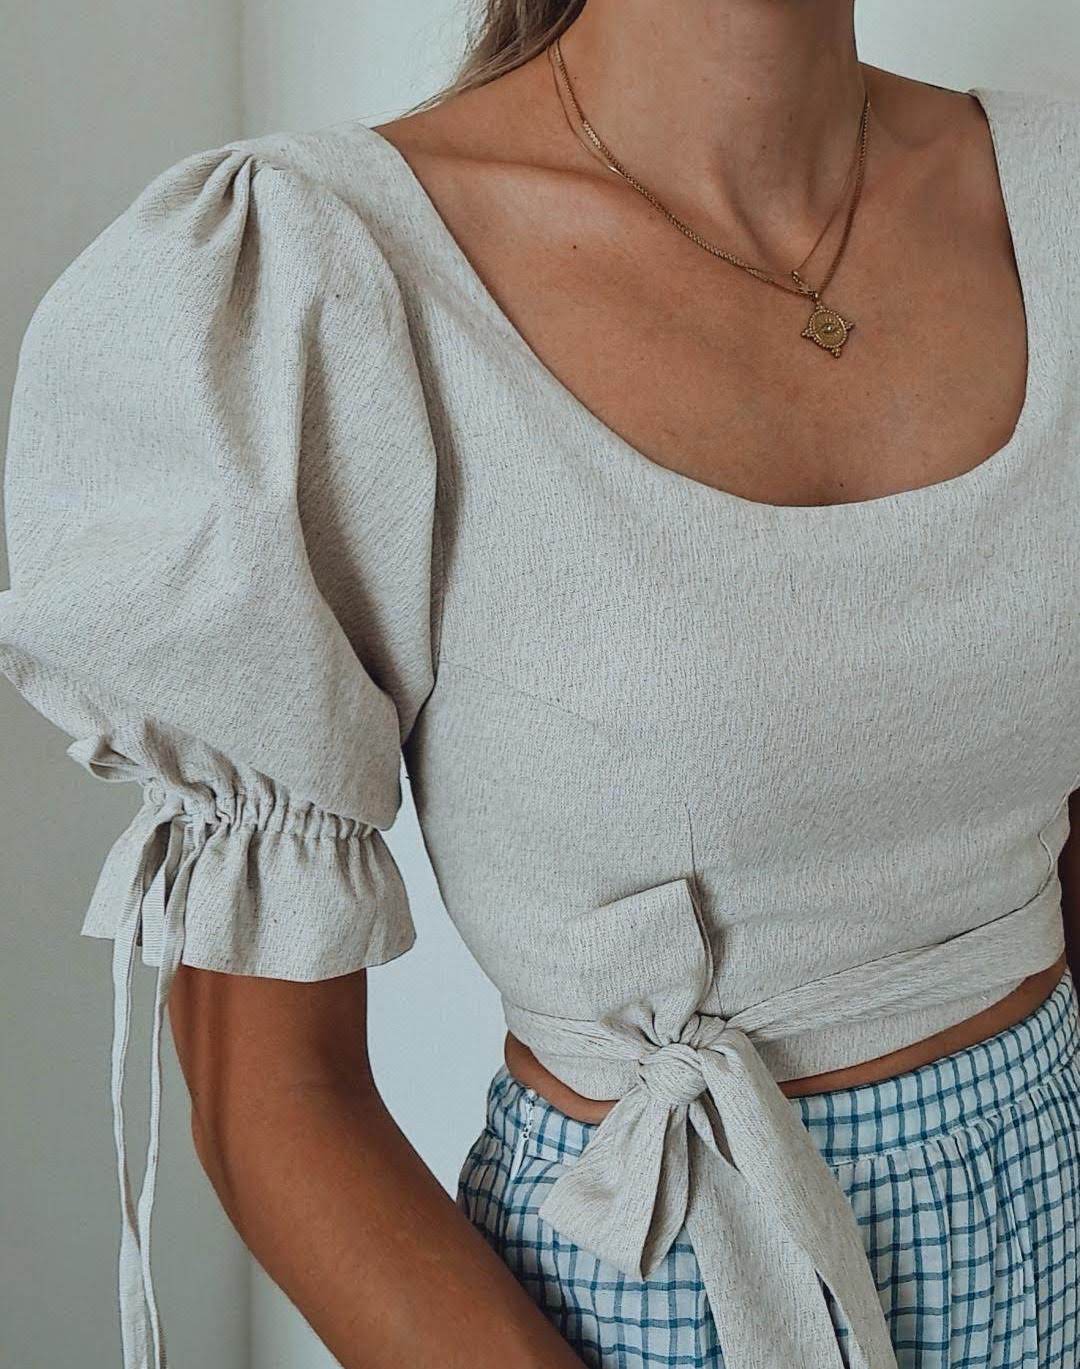
Today I scraped some energy together to finally get this out 🙌🏼 The story of this top: The beautiful Vanessa of @vemon_paris tagged me in a photo of this Aje dress at the start of this year, saying I should make a version of it. I absolutely agreed and this top was the result. I ended up keeping the elasticated back and puff sleeves with ties, but changing the neckline to a scoop, which I thought was more interesting, and adding a waist tie since I was making a top, not a dress.
Below is my process. Not a quick or very simple sew, but I'm so satisfied with the fit.
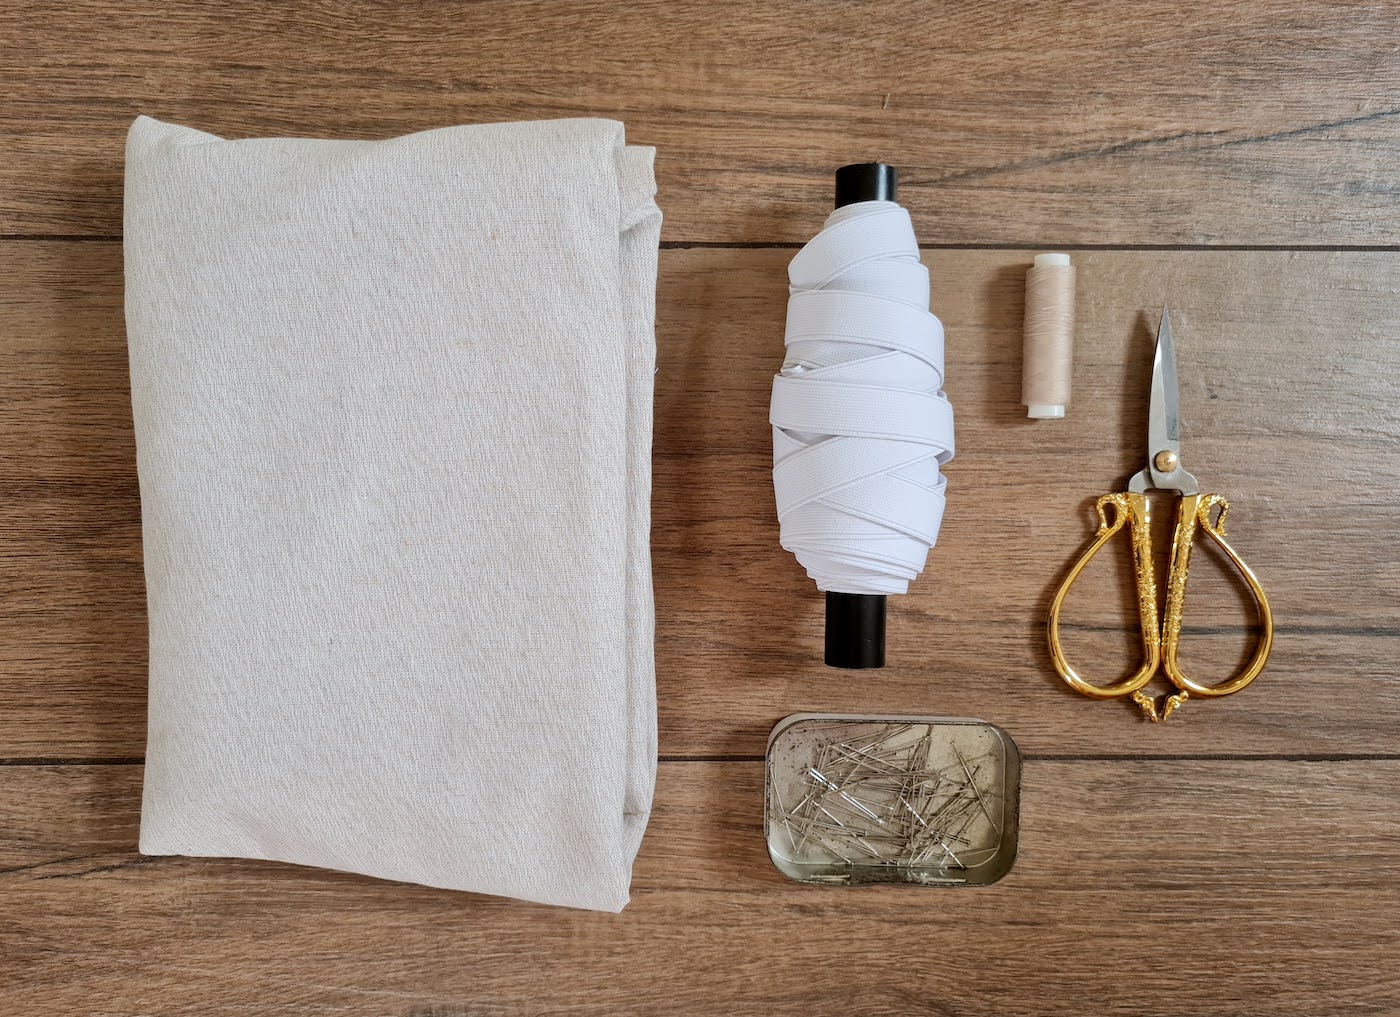
TOOLS:
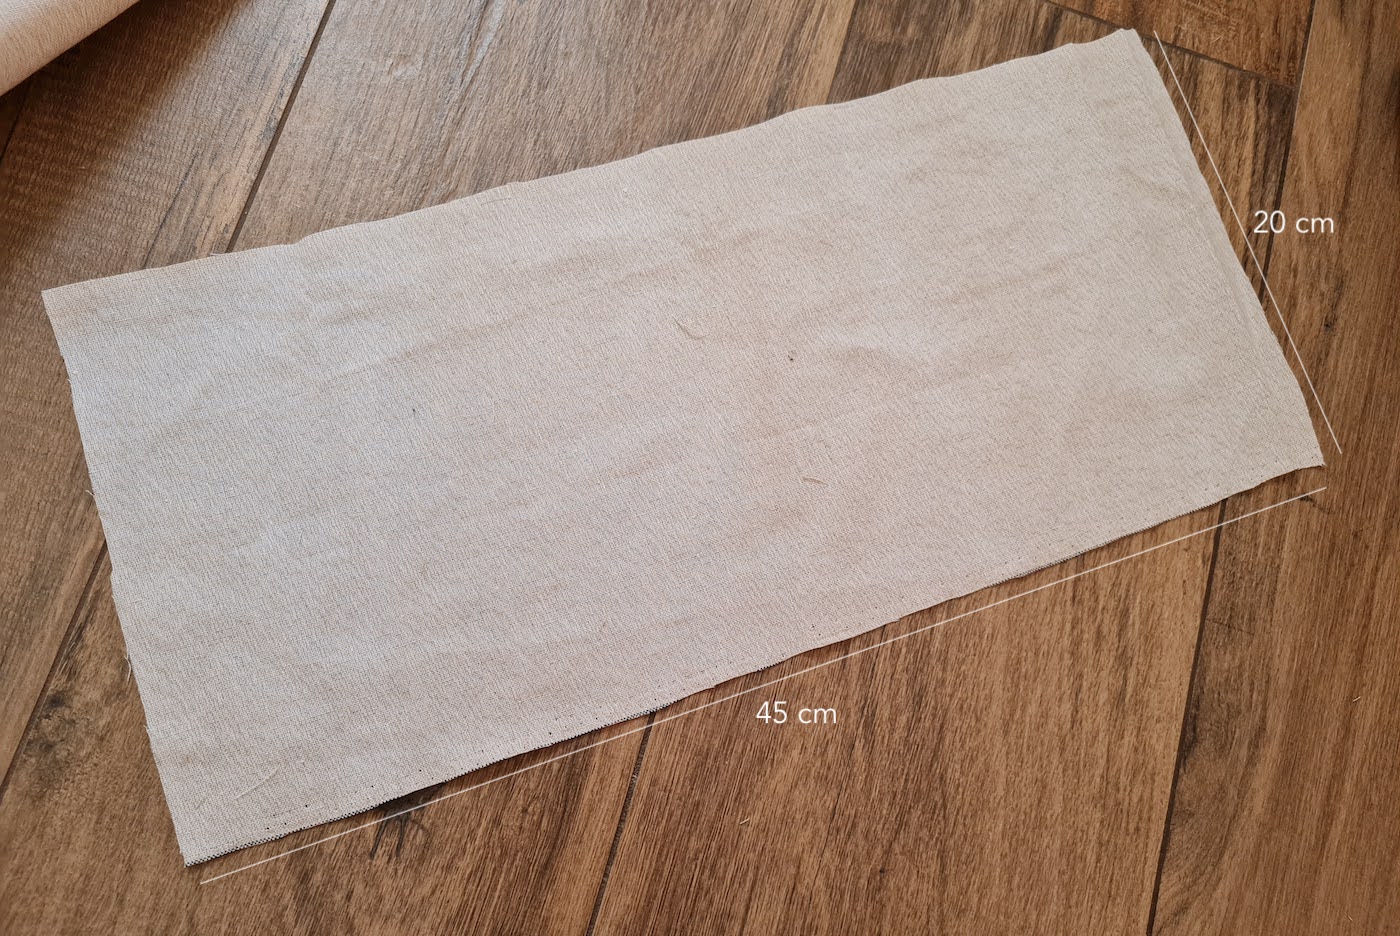
Fabric (I used a medium-weight linen) 0.7 m of full width (150 cm wide) or 1 m of 100 cm wide | Elastic (I used 17 mm wide) | Pins | Scissors | Thread & Sewing machine
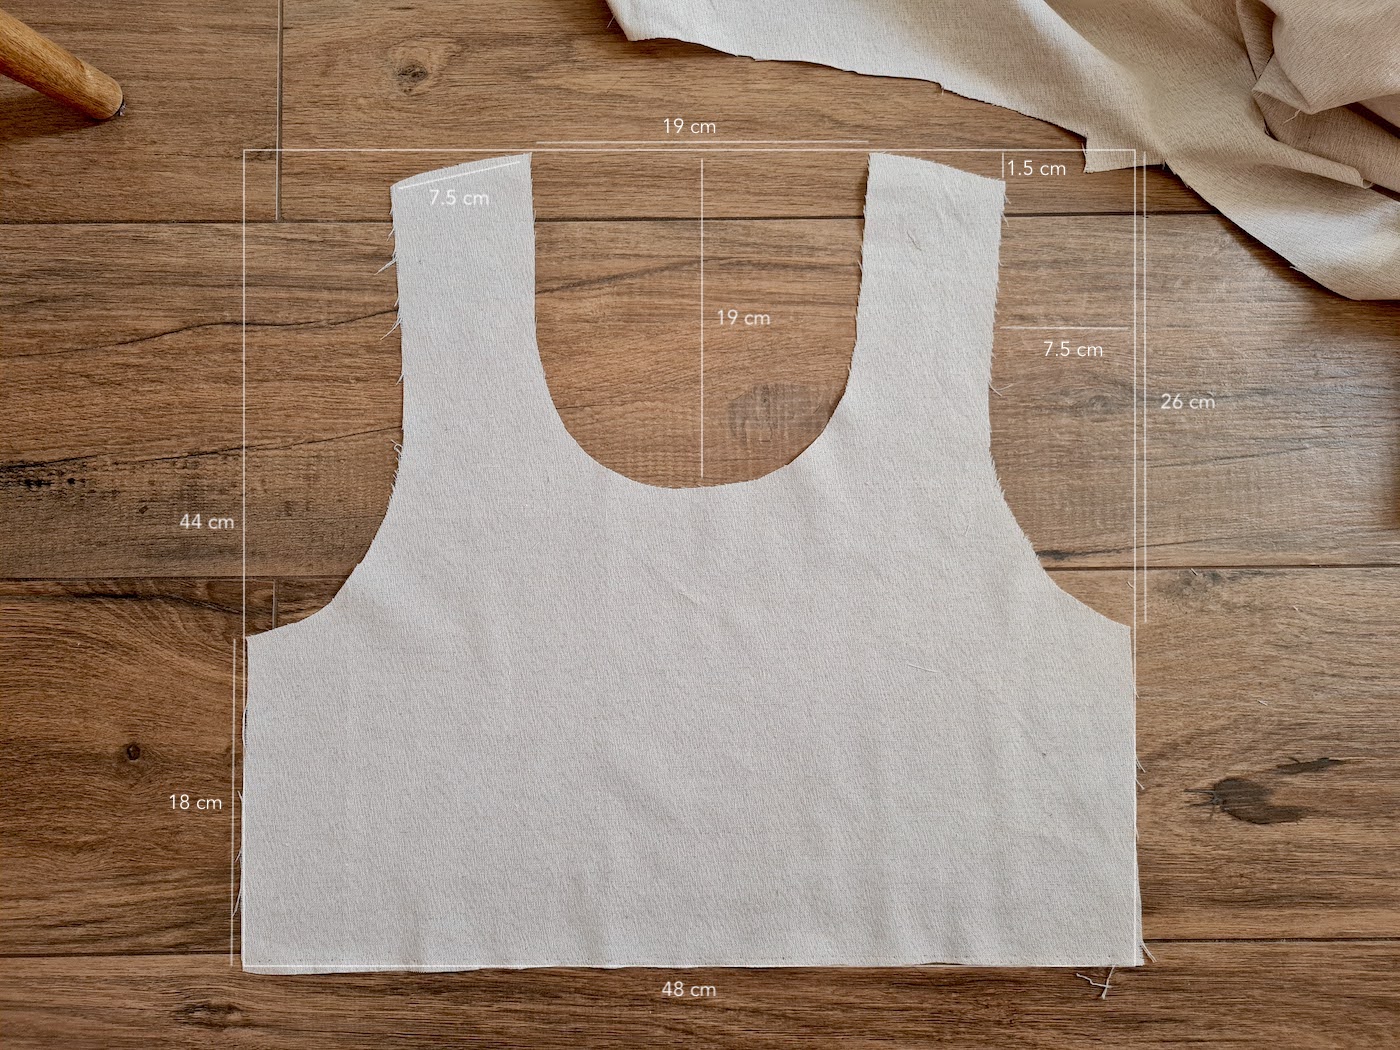
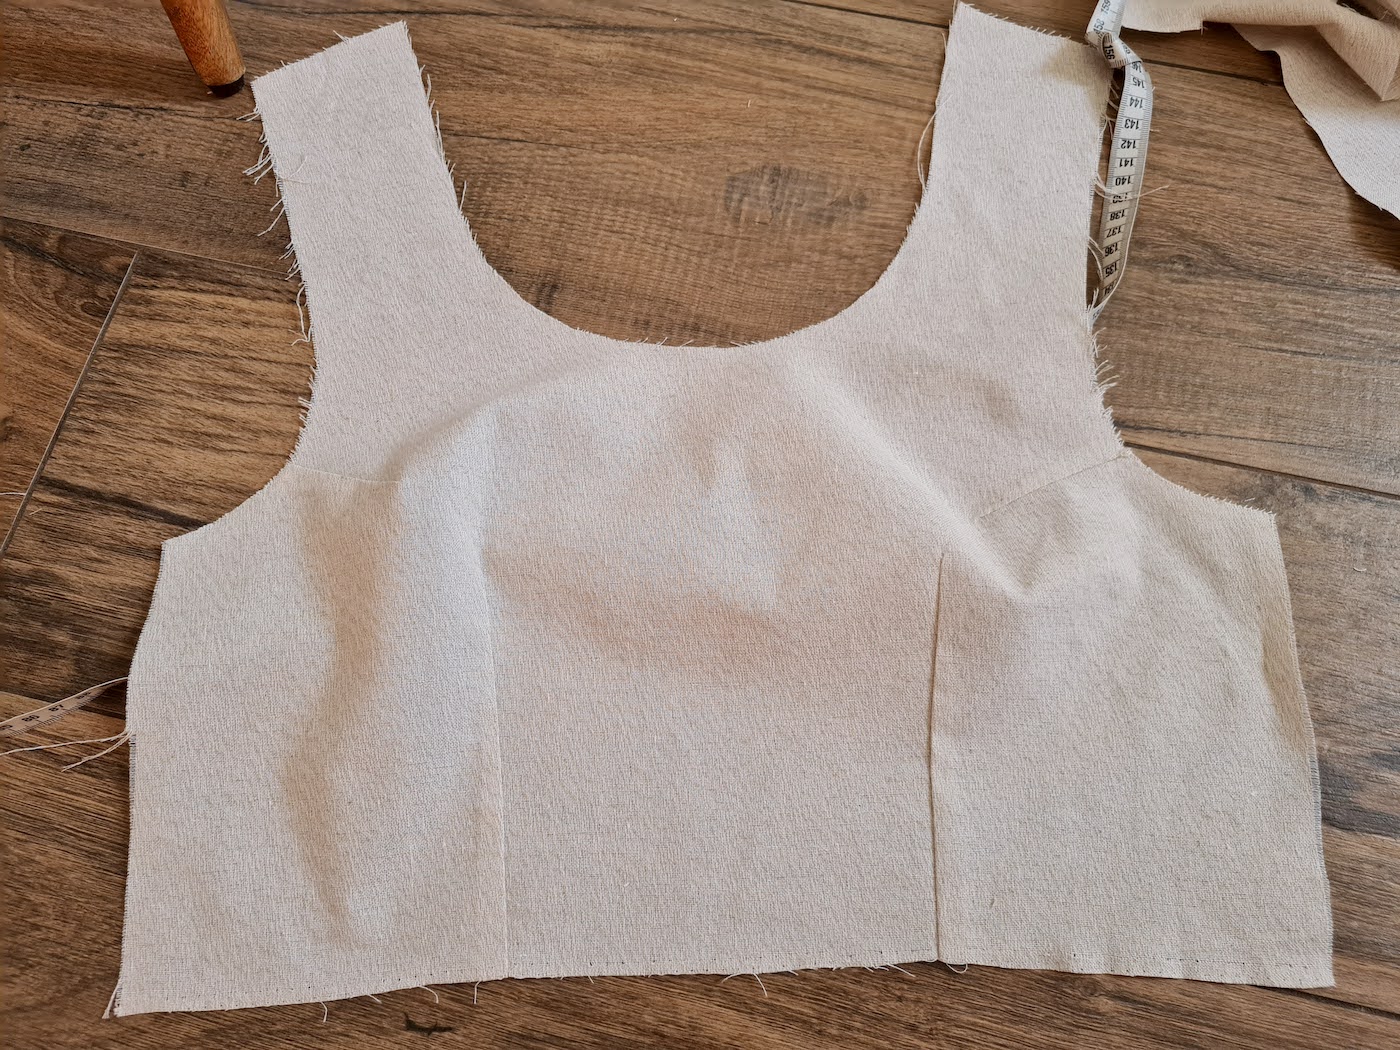
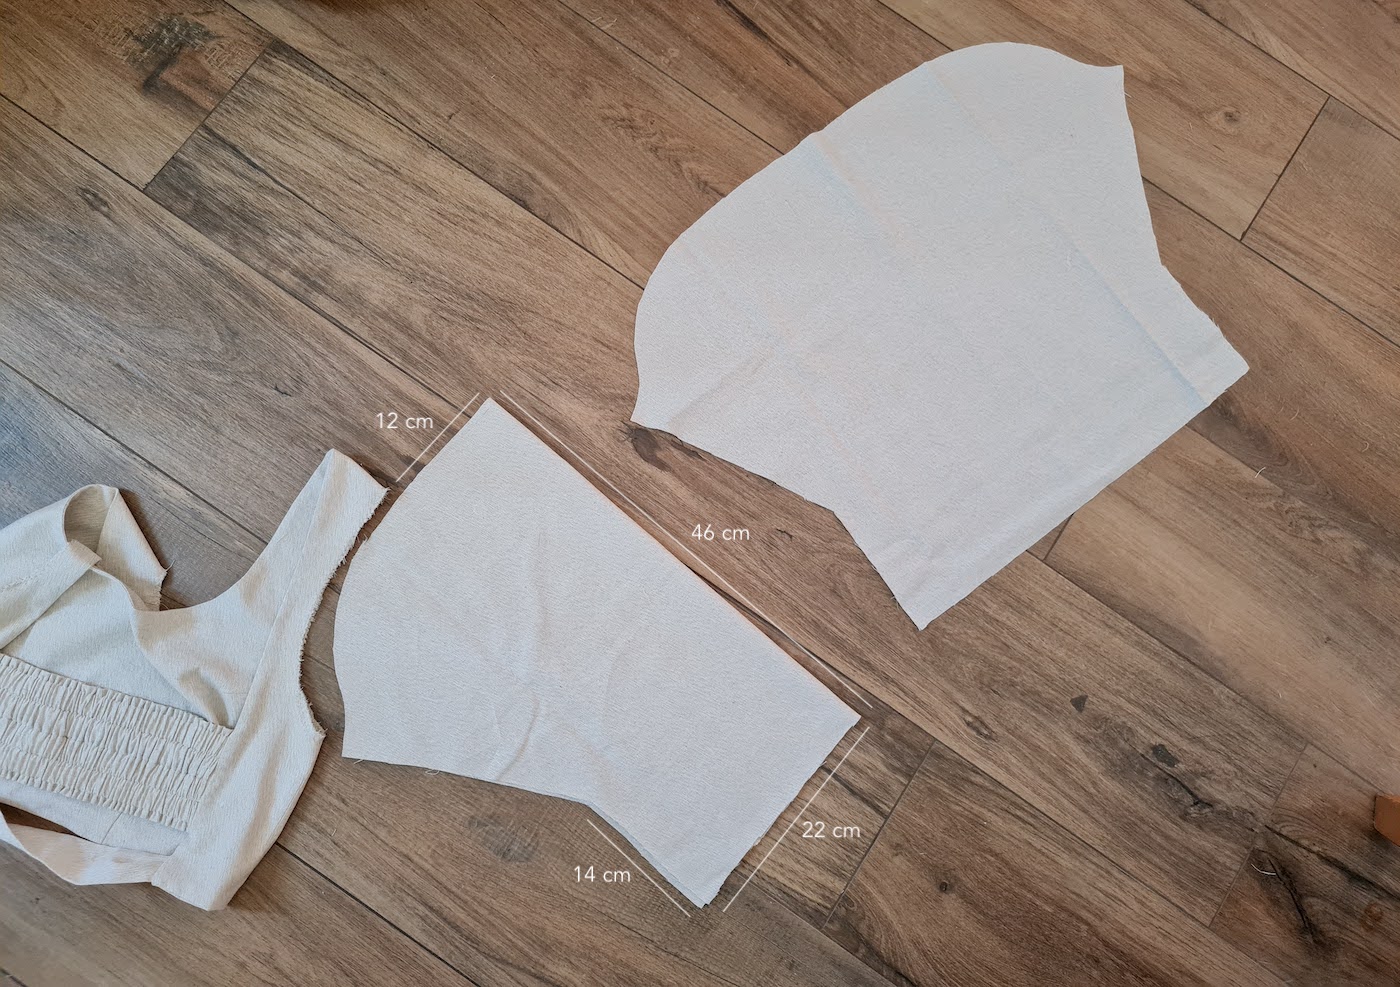
I. First I cut 2 front pieces (lining and main front), these measurements got me a great fit for my size EU36/US4.
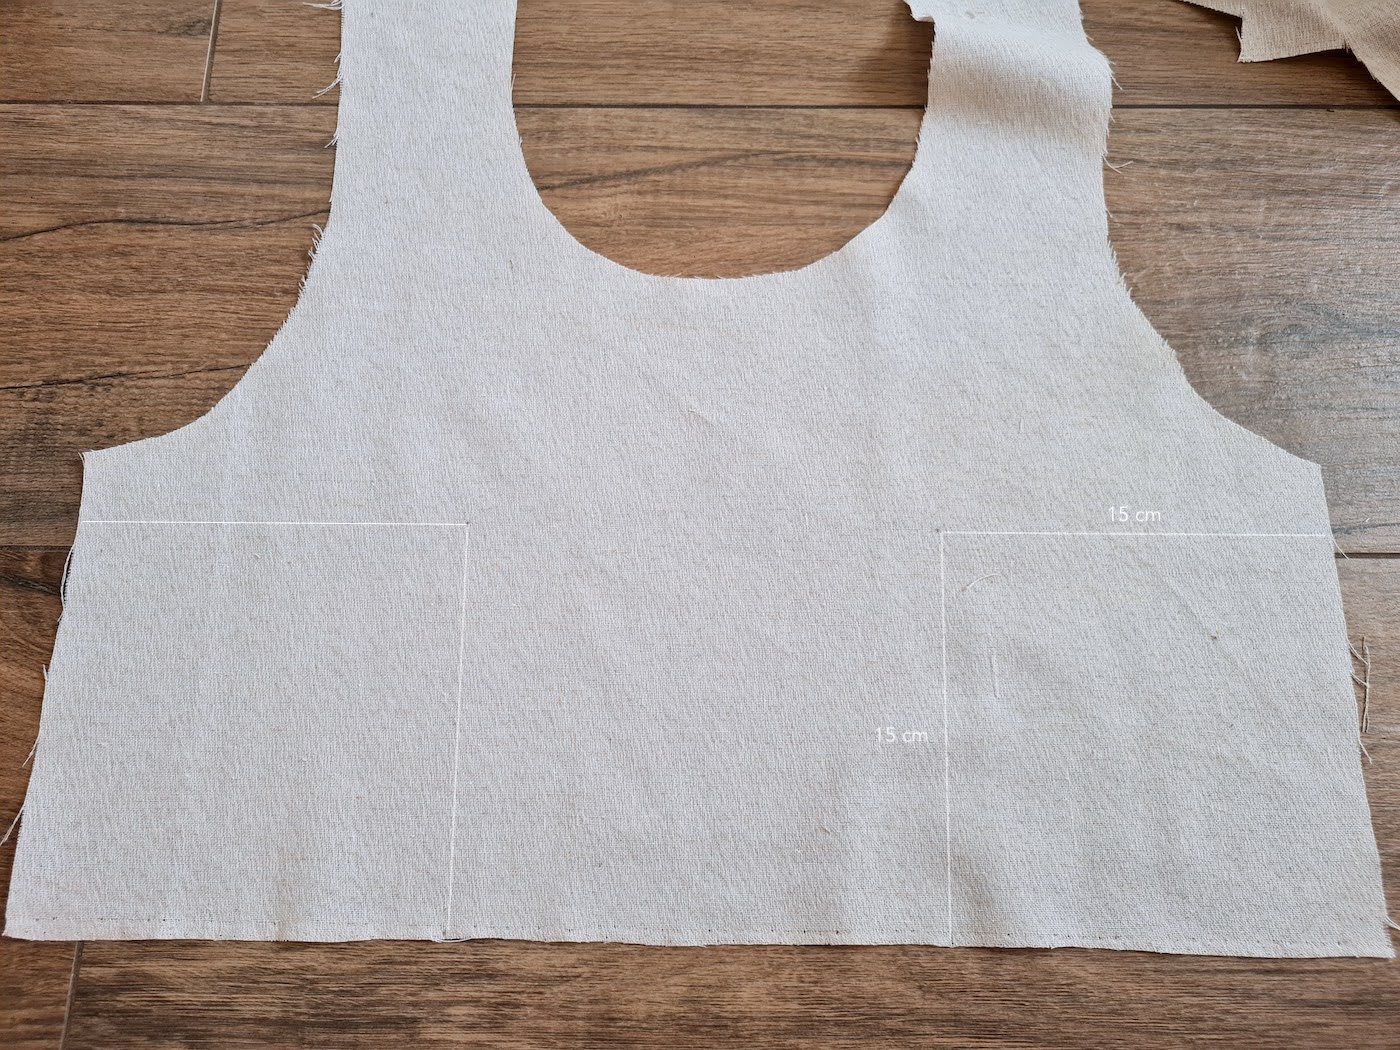
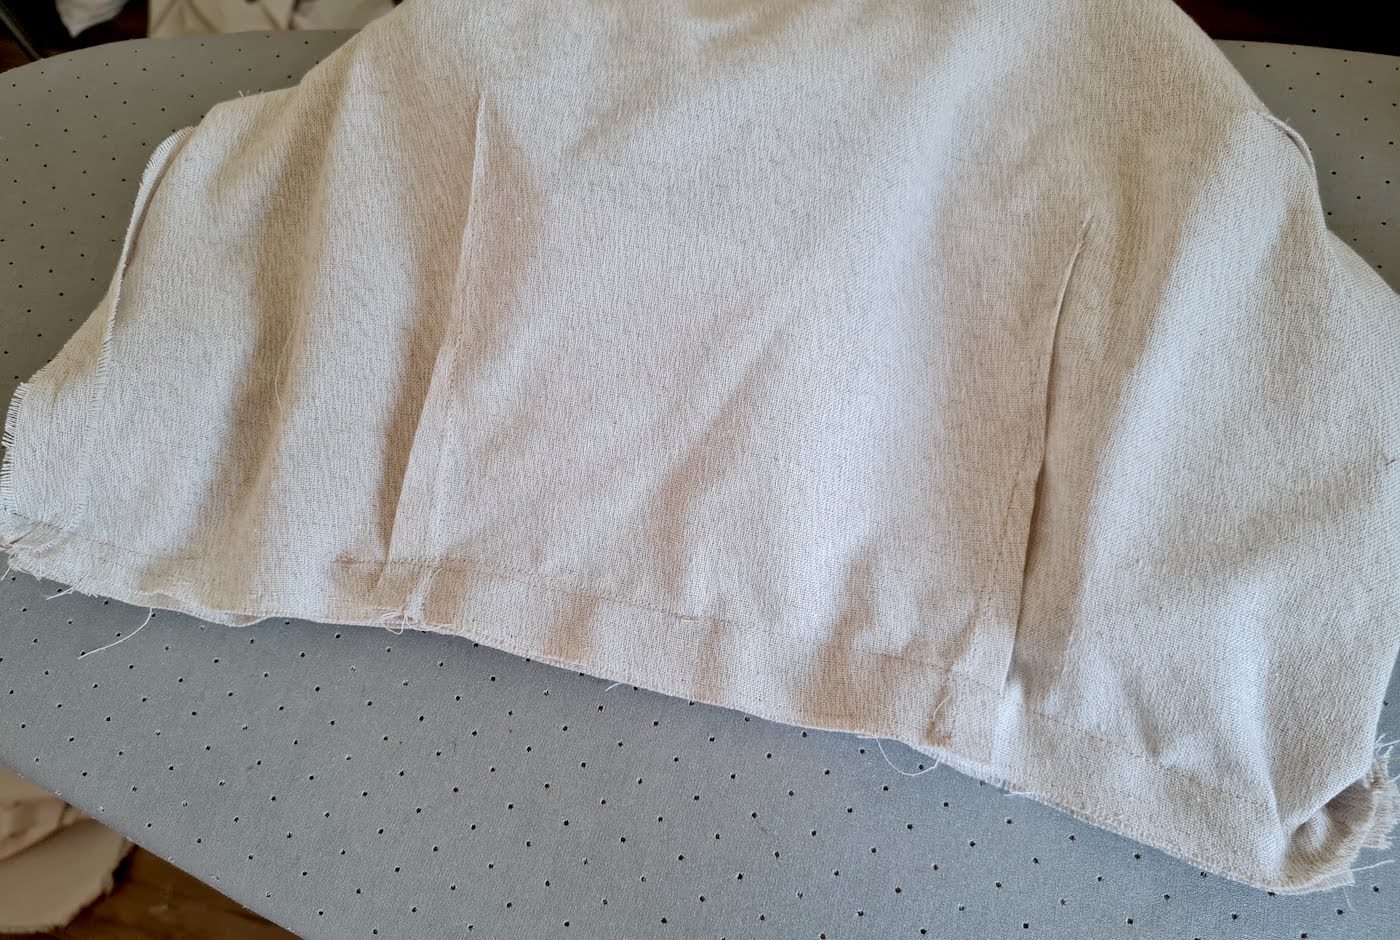
II. I then sewed darts onto both front pieces. First marked 15 cm from side and up from hem as my dart end point..
.. Then sewed my darts on both sides (dart width at start about 1.5 cm).
Pinning the front piece onto myself, I checked how much I needed to pinch at the armscye to create the right bust fit, and added those darts in (doing this for both the main front piece and the lining piece).
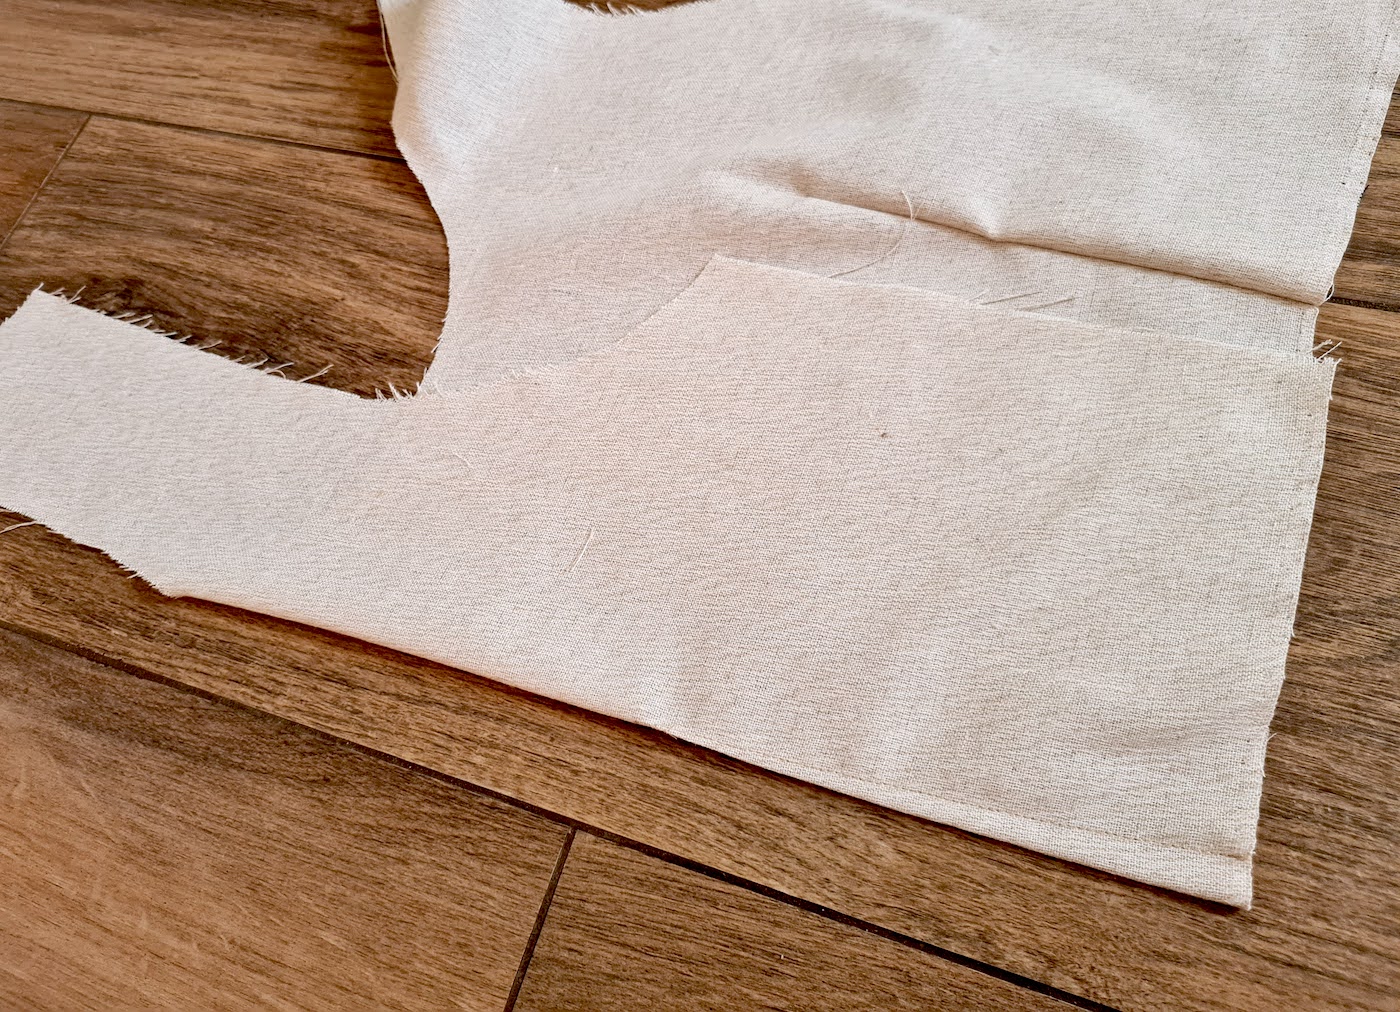
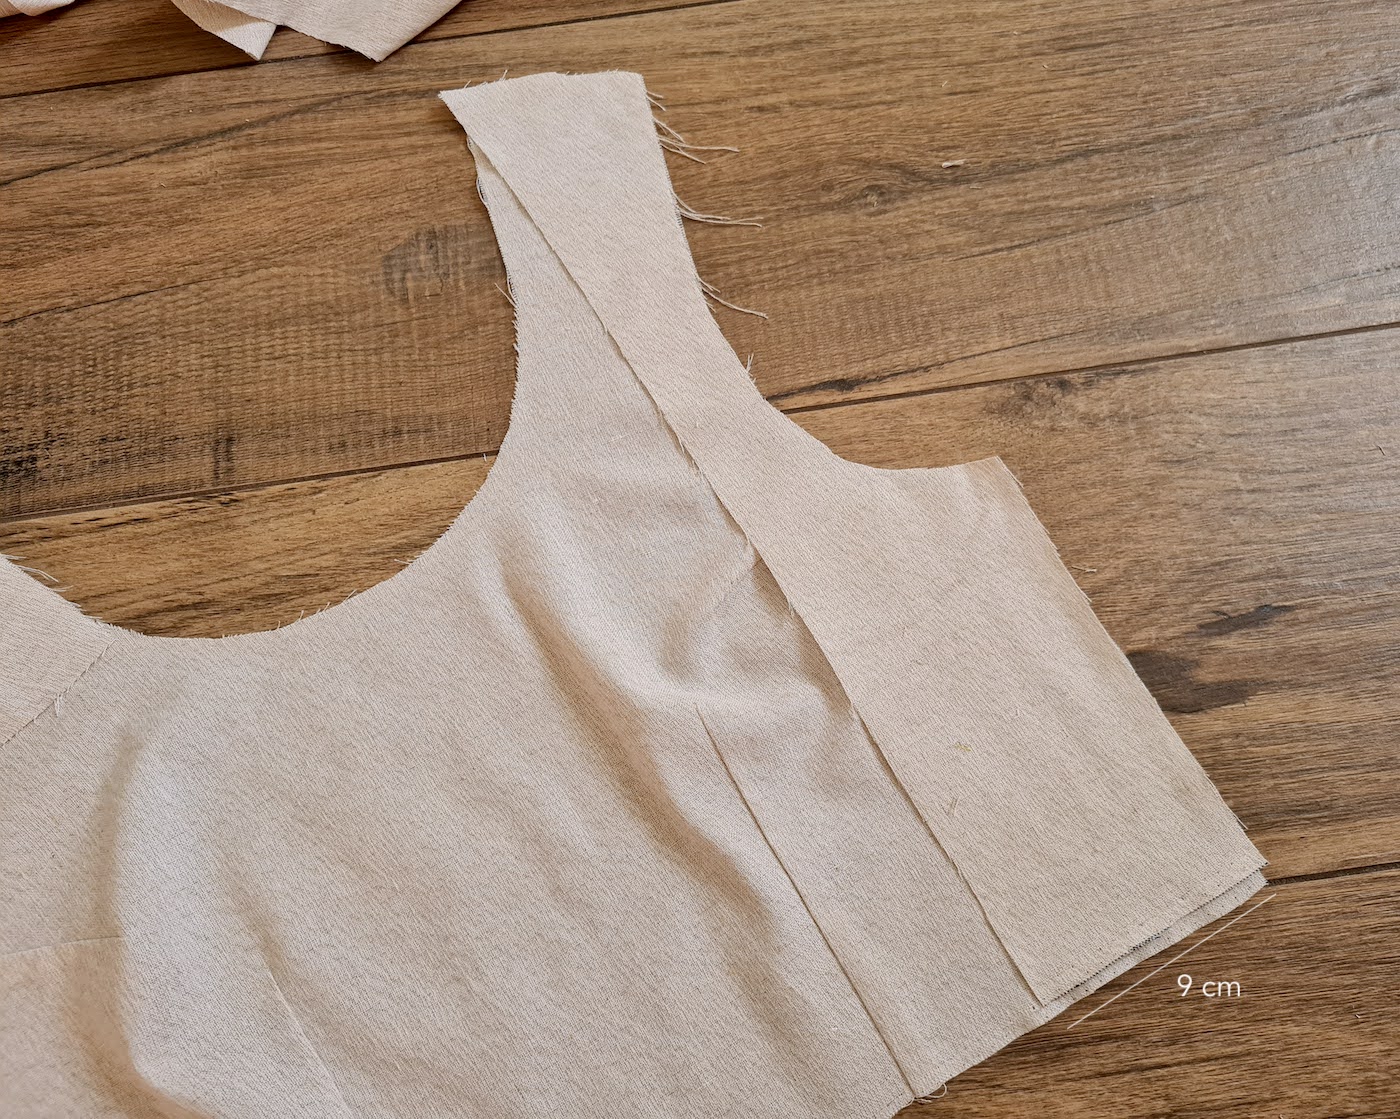
III. Next I used the front piece as a stencil to cut my back pieces as below. 2 of each.
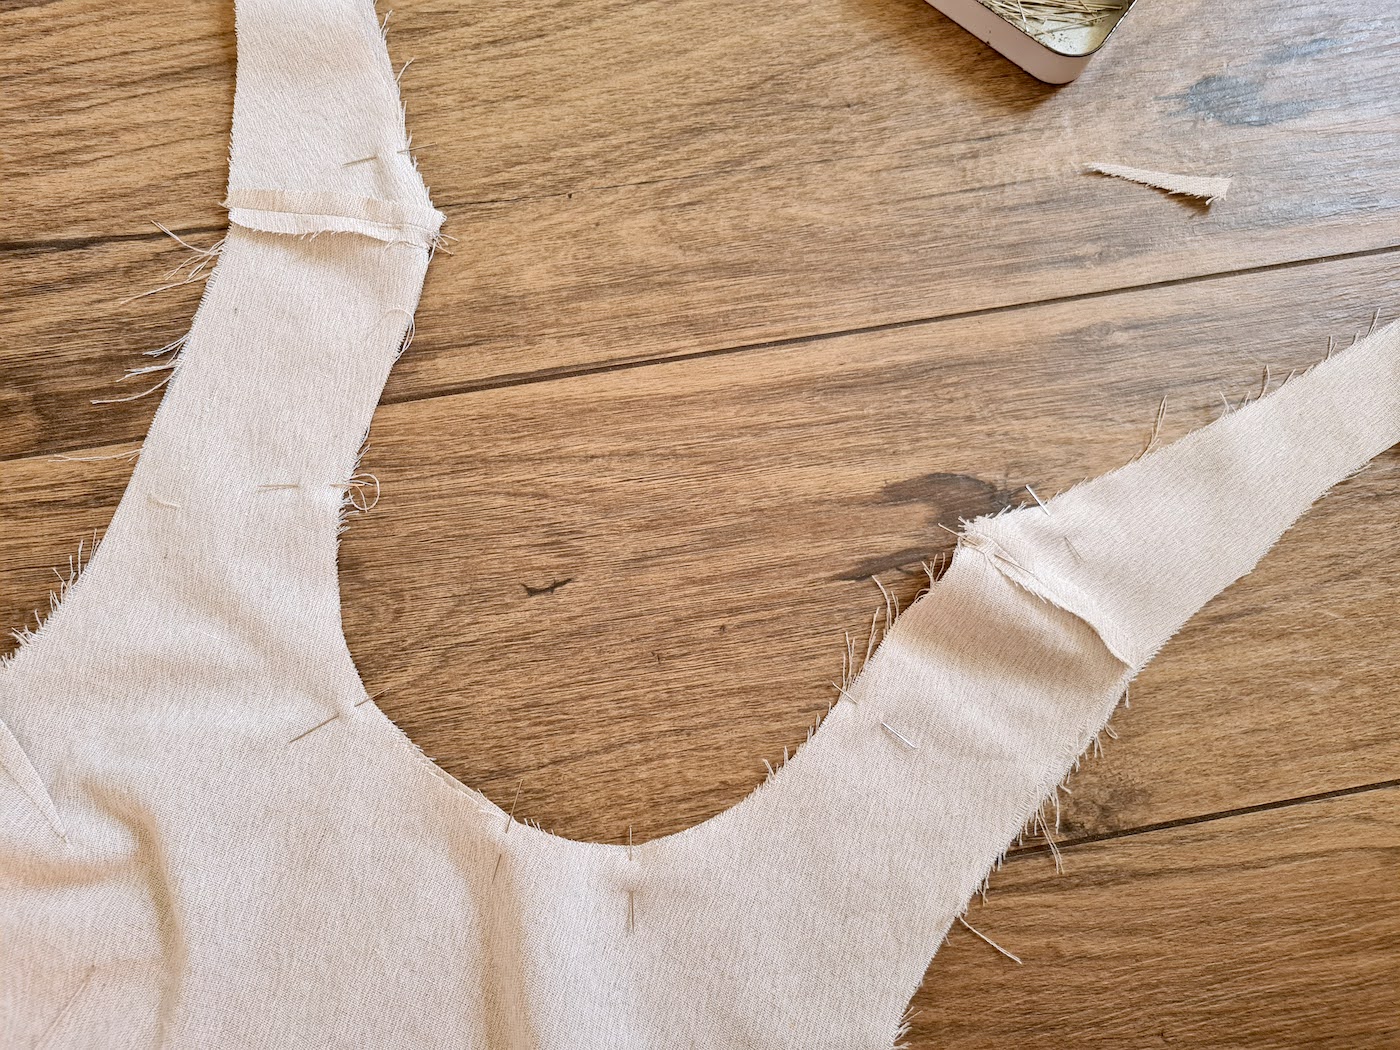
IV. Pinned my front piece and back piece shoulder lines together right sides facing, sewed and pressed. Repeated for the lining pieces.
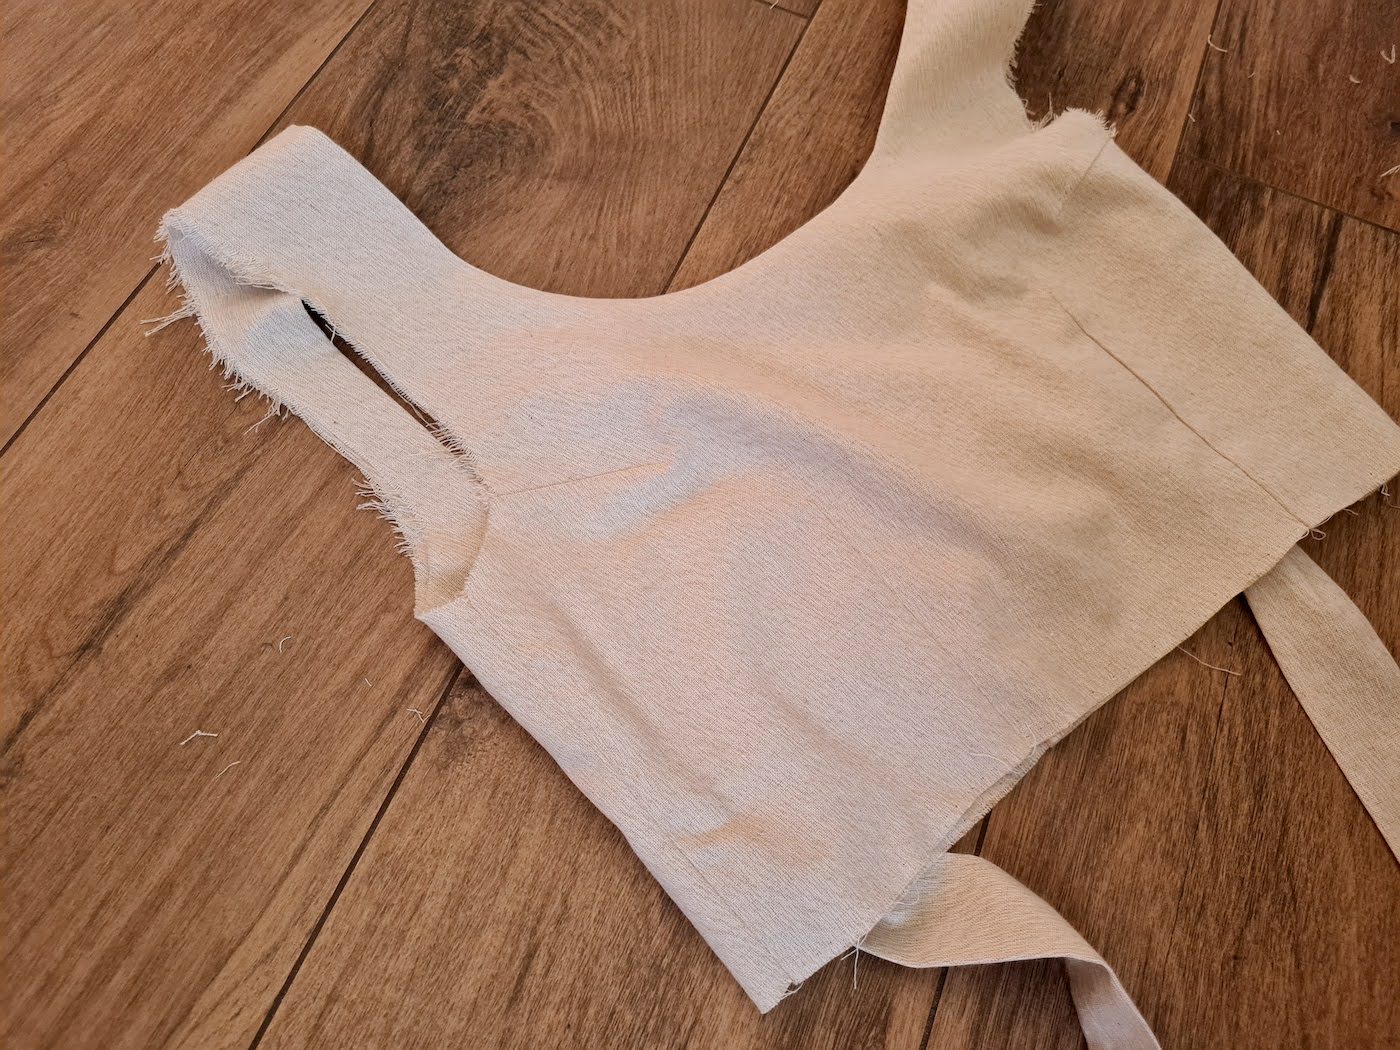
V. Then pinned the lining and the main top piece together along the neckline, and sewed through just a bit past the shoulder seams.
.. And clipped into the curved neckline to remove tension when turned right side out.
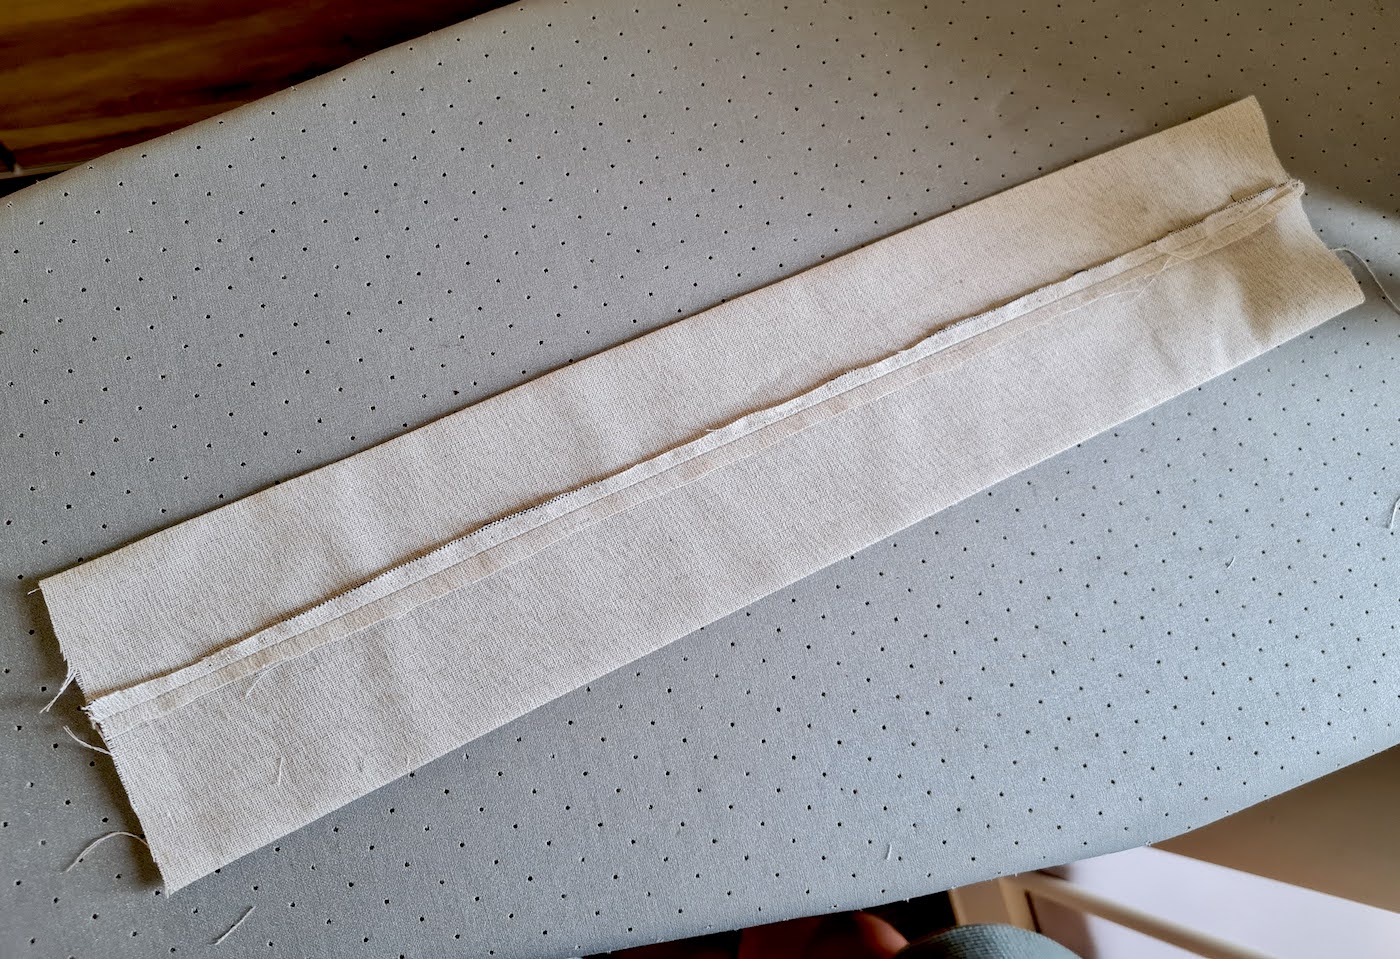
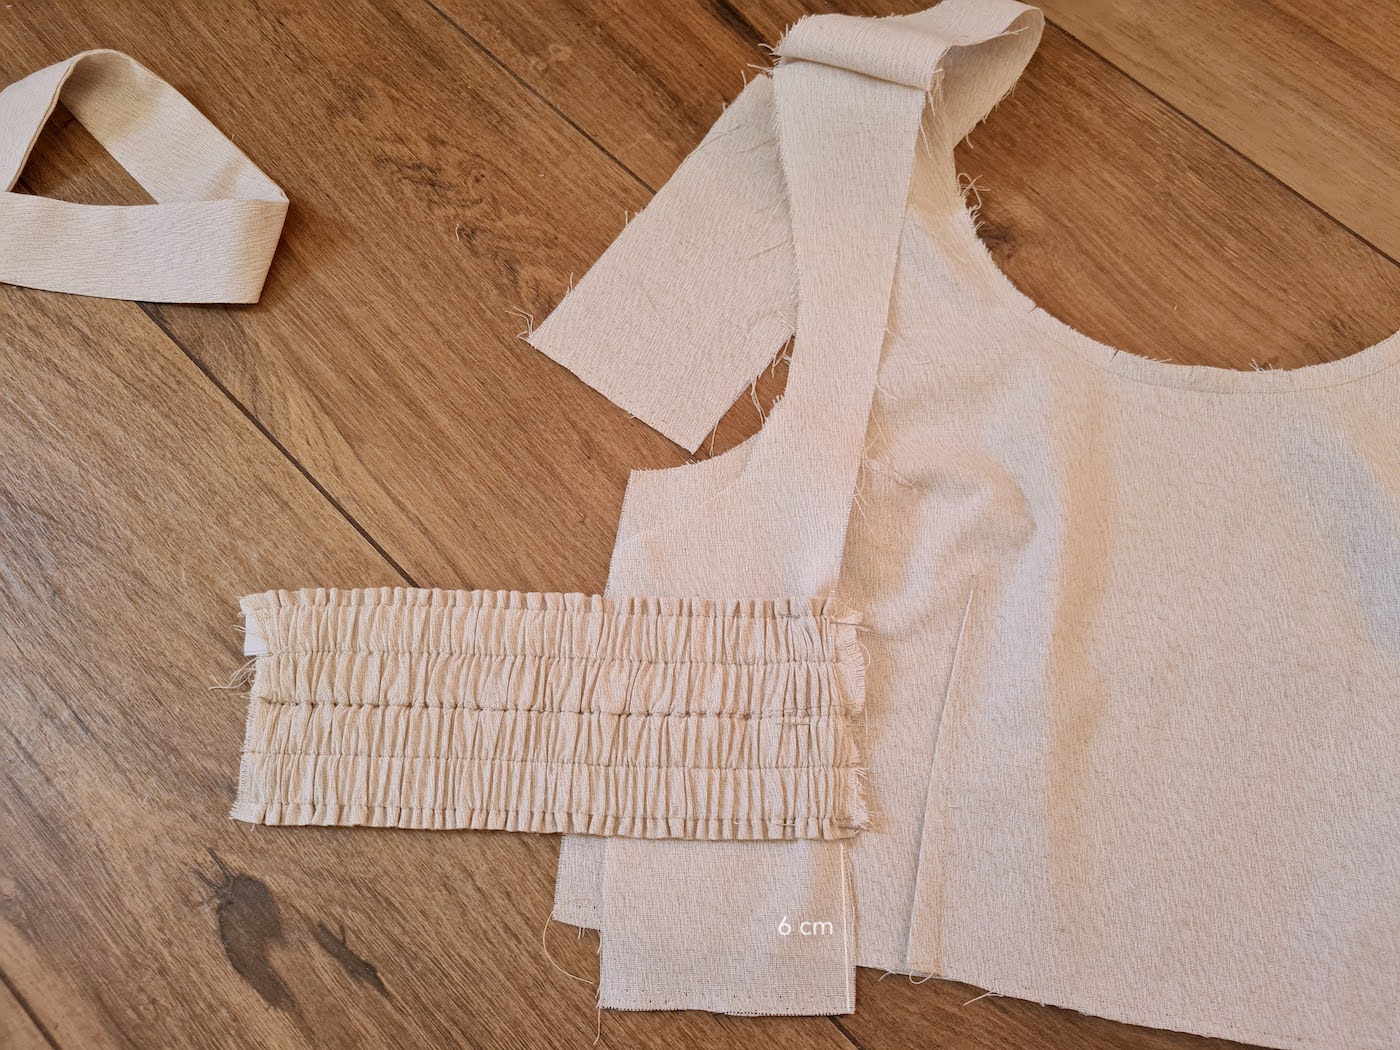
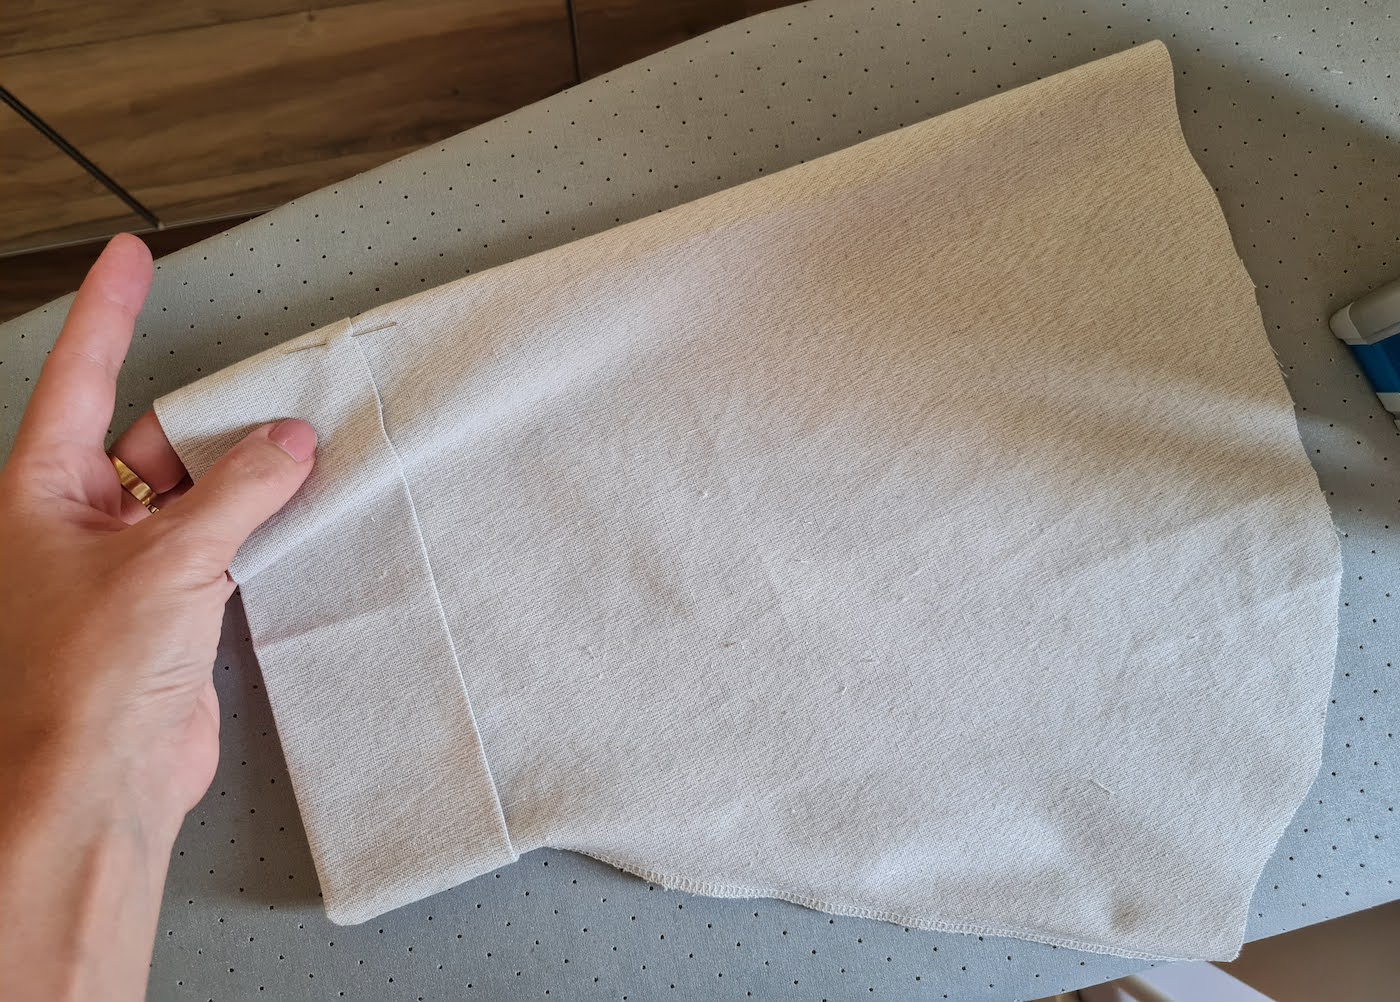
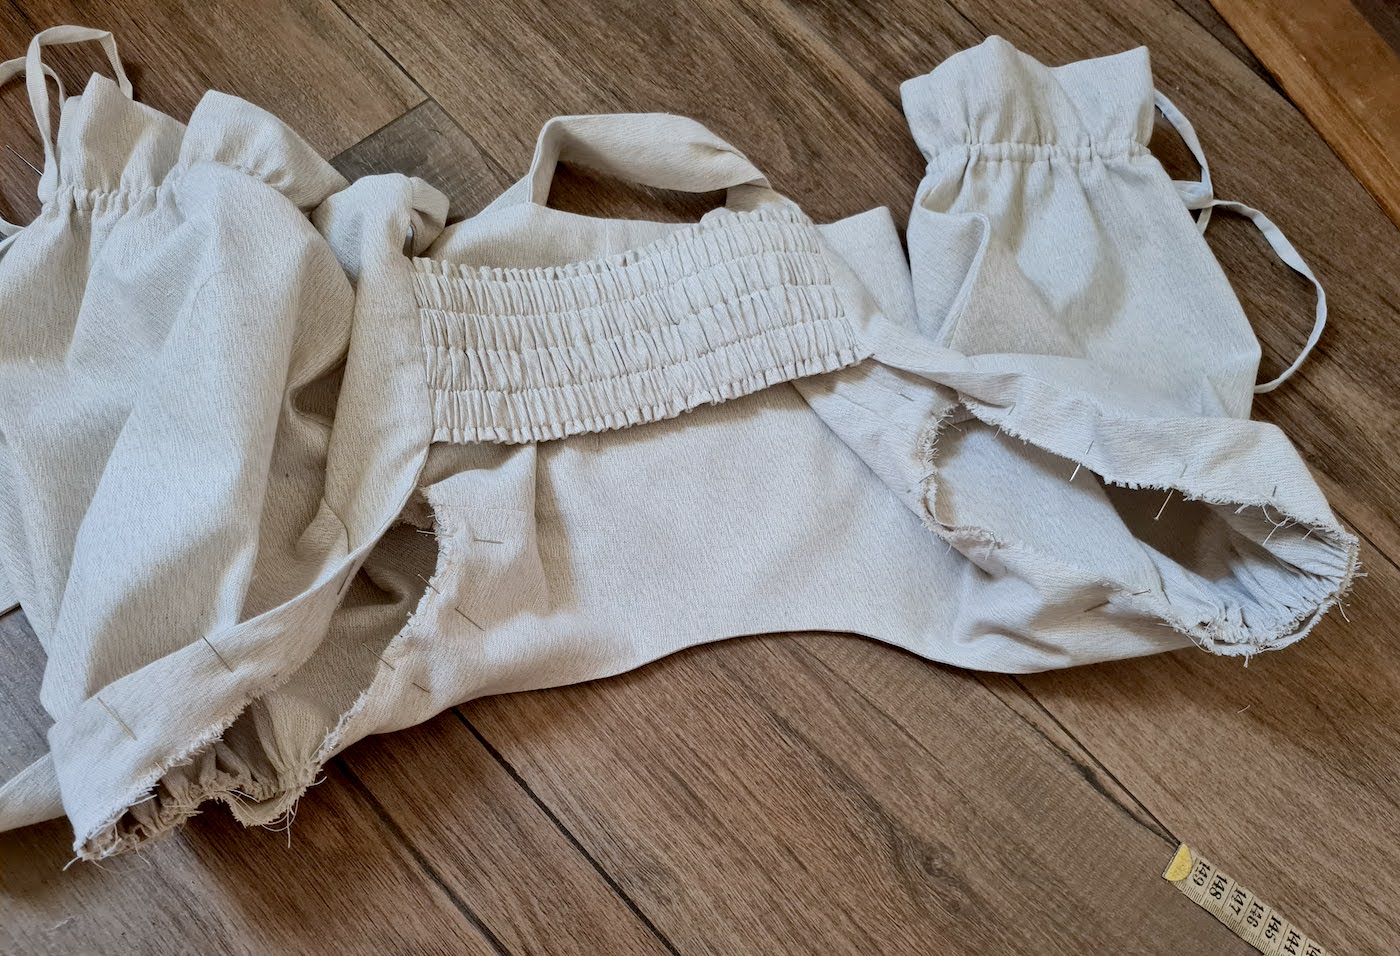
VI. Moving on to the elasticated back piece. I started with a rectangle:
Which I sewed into a large casing along the long side, right sides facing, and pressed the seam open at the middle.
Turned right side out so I had this.
Then I cut four straps of elastic, in my case 23 cm long was right. I used my mannequin to pin the top on it and then measure the gap in the back. I took out a couple cm from this measurement since the elastic should stretch out a bit when worn for a snug fit.
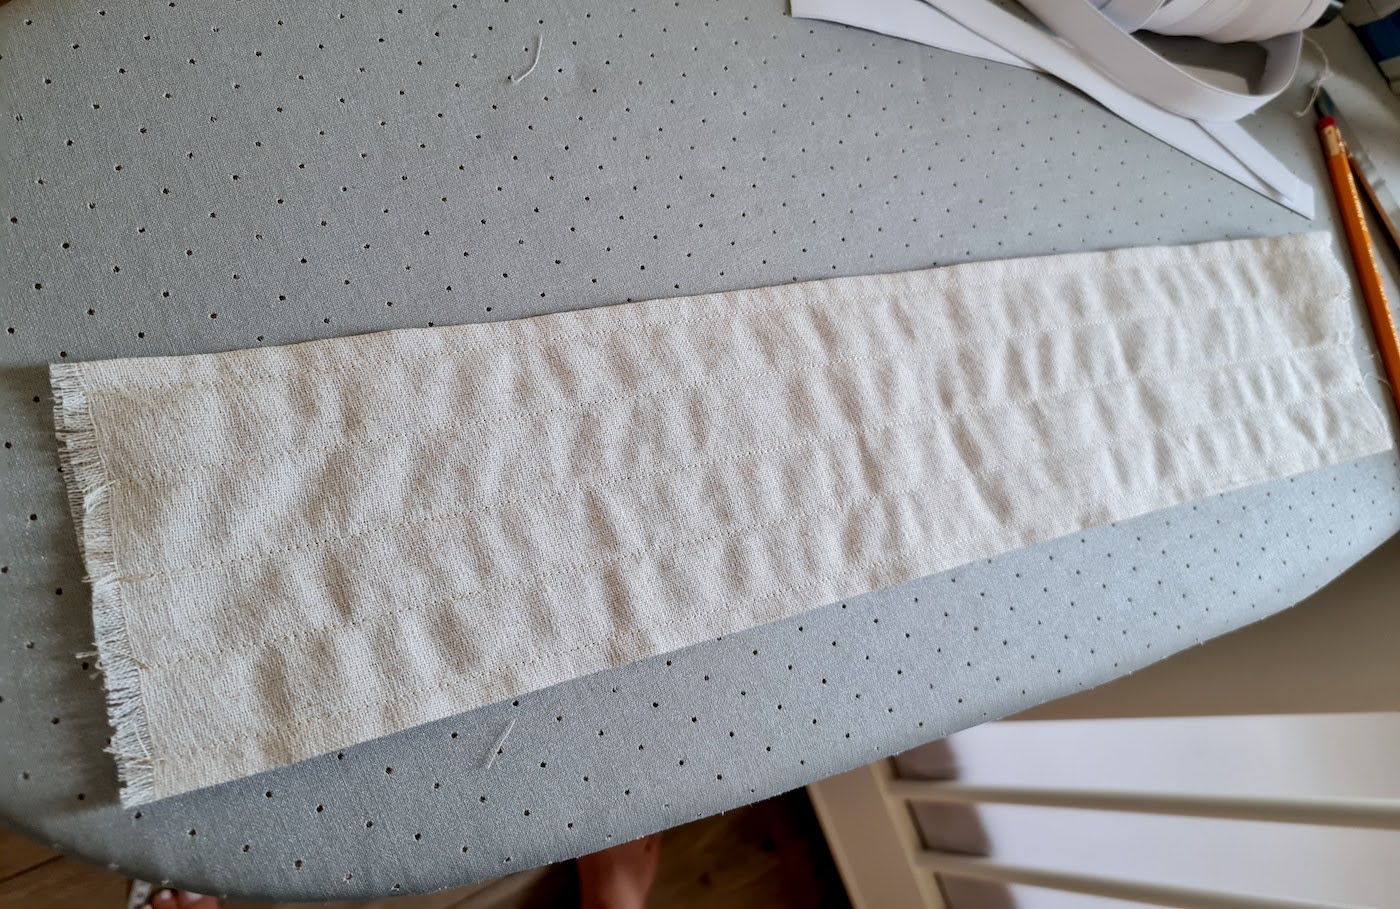
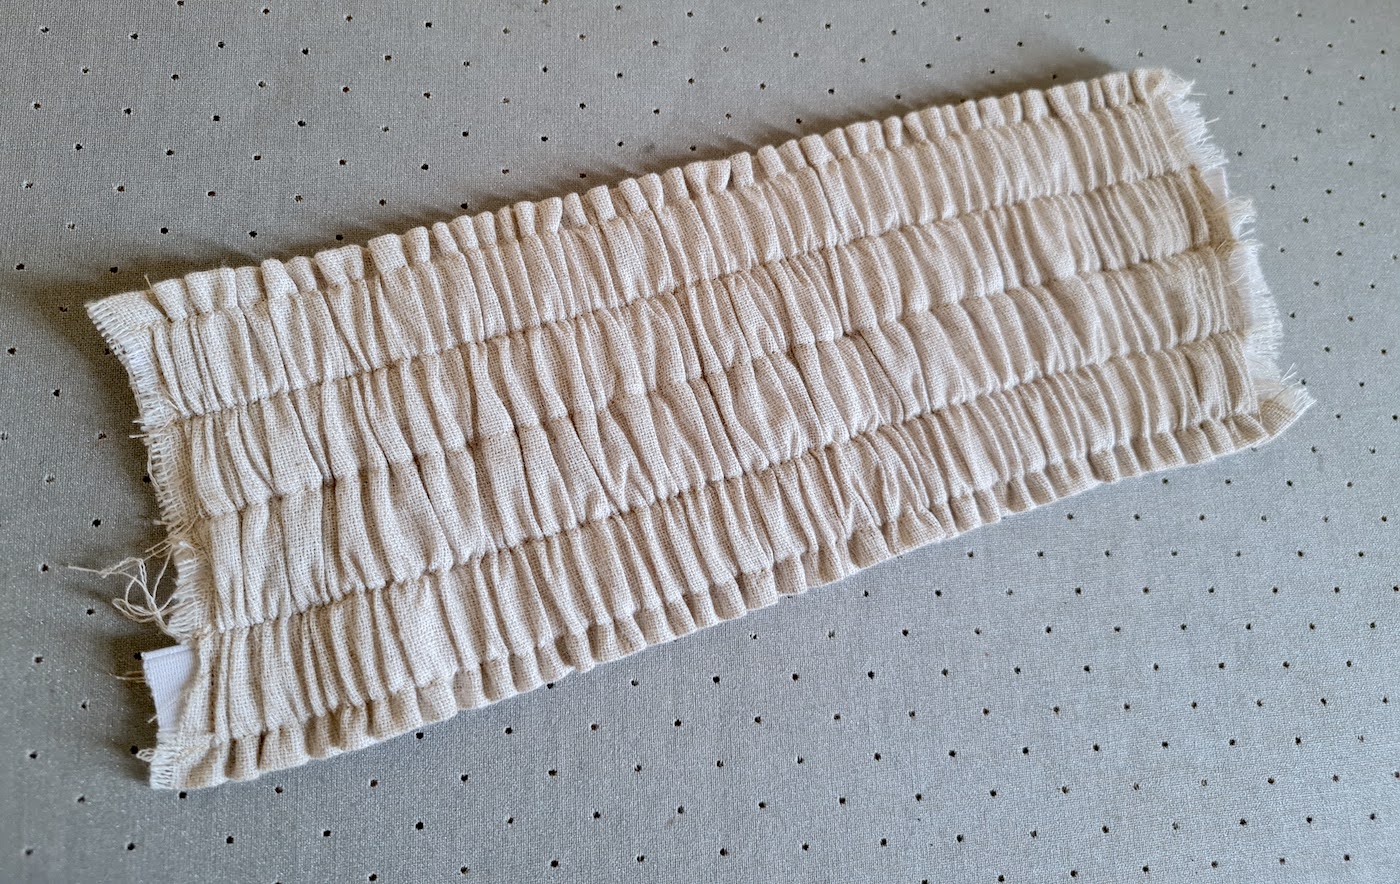
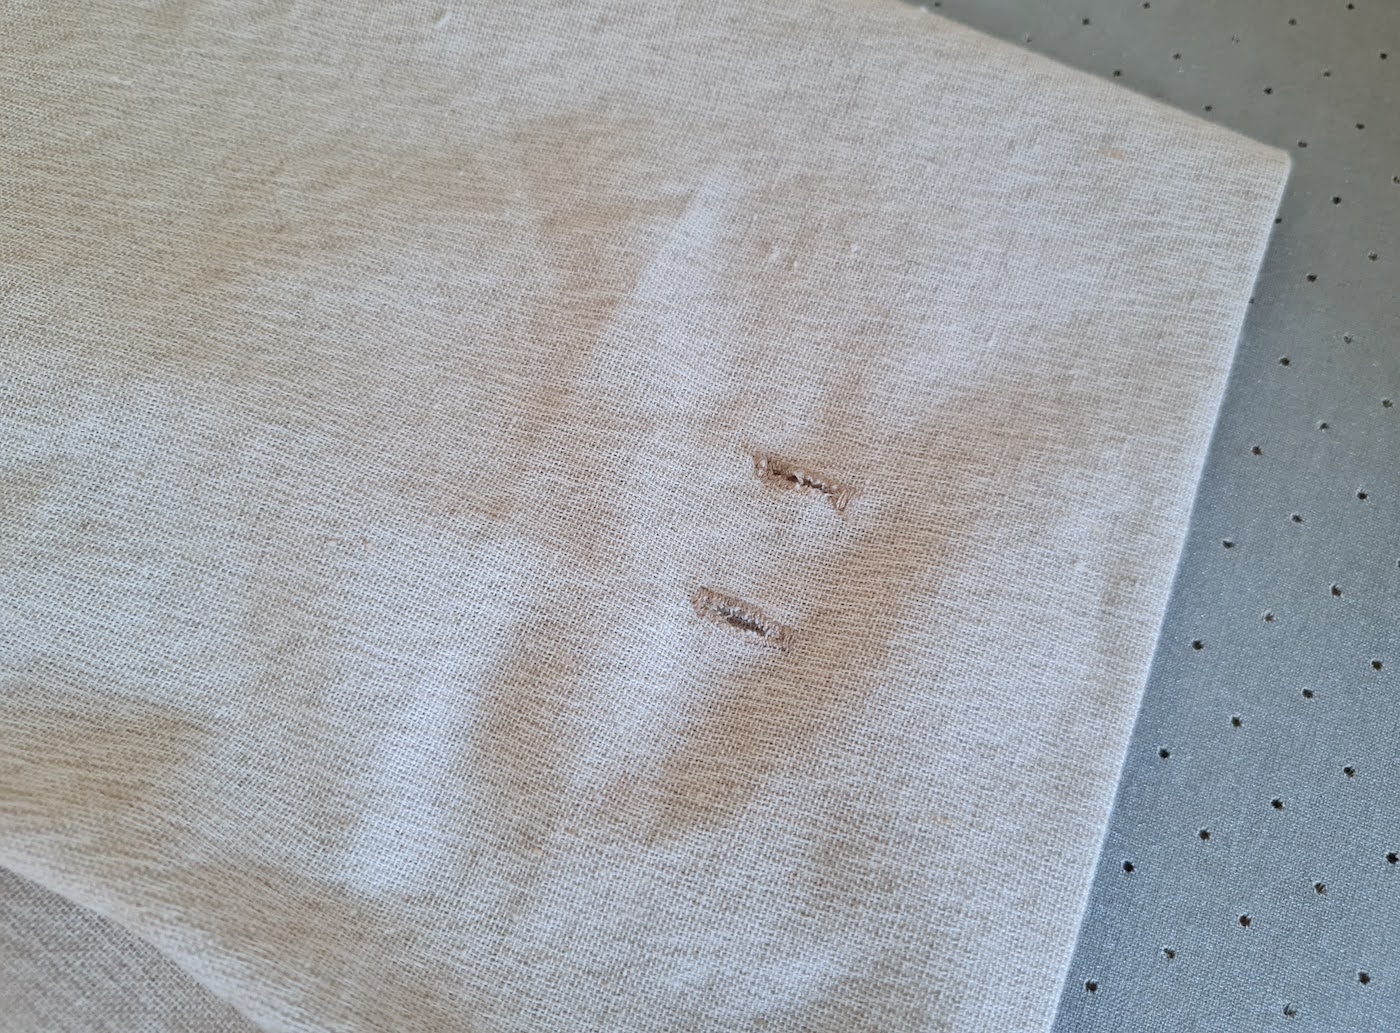
I then sewed five stitches along the length of the casing, to create 4 casings for the elastic.
When inserting the elastics in, pro tip: Insert them all at the same time. First attach a safety pin to the end of each elastic, and start feeding them together at the same pace through the casings, kind of like horses in a race. This is easier than feeding in one, which gathers the piece, and then trying to add the rest. When the elastic ends meet the start of the casing, sew over them to secure, and repeat at the other ends as the elastics come out. Press for a clean finish.
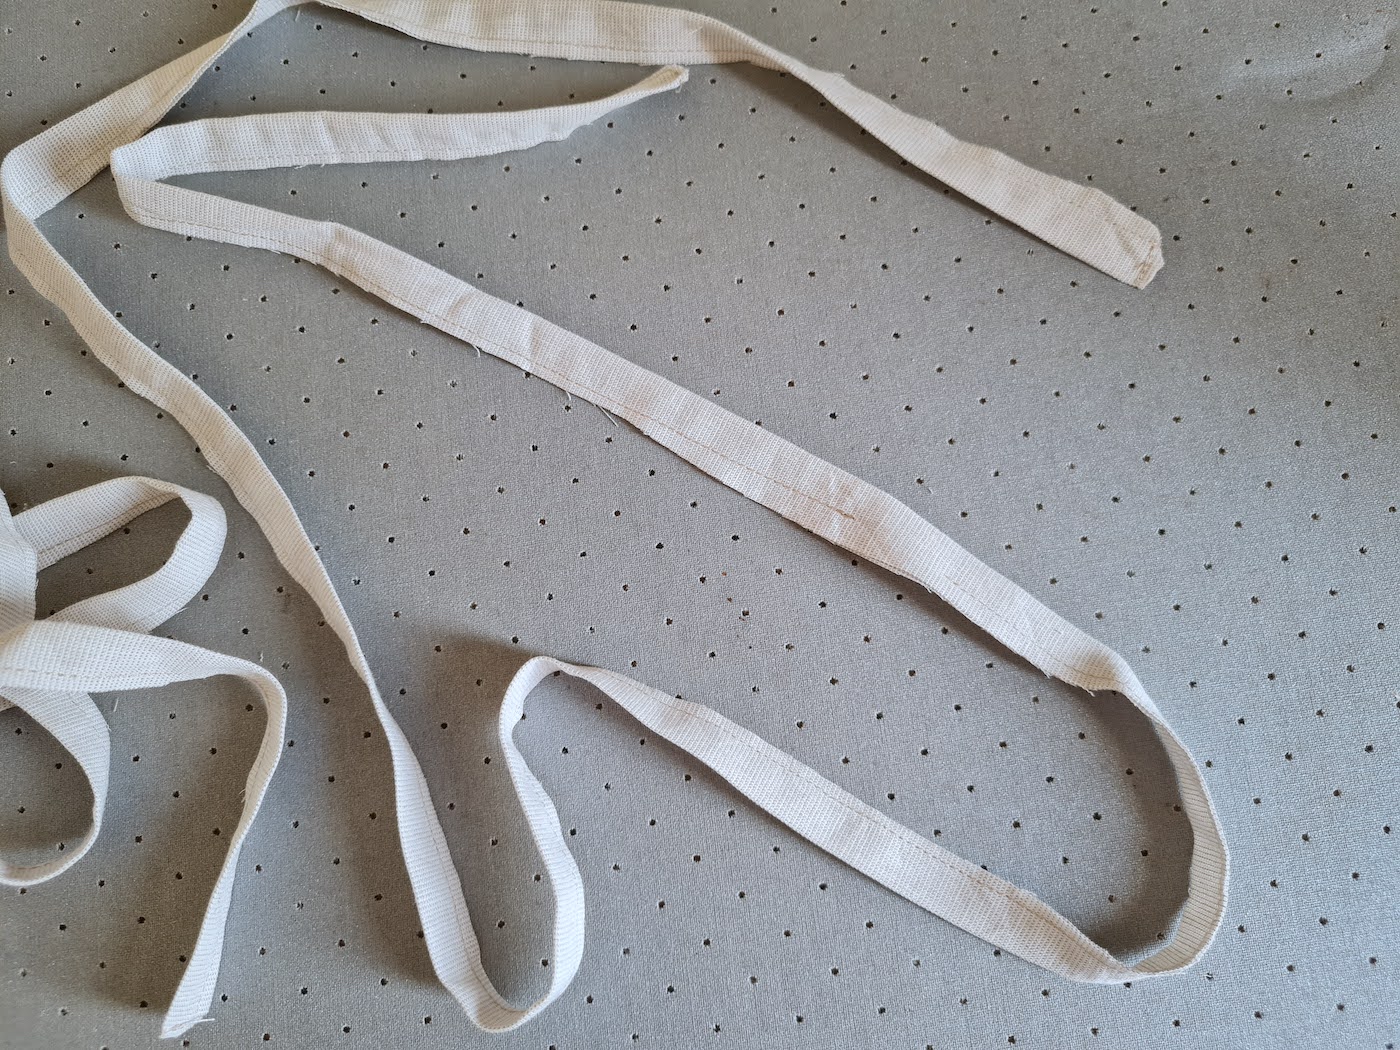
VII. I also made the tie-up straps for the waistline. I started with straps 10 cm wide and 100 cm long, resulting in straps 4 cm wide and 100 cm long.
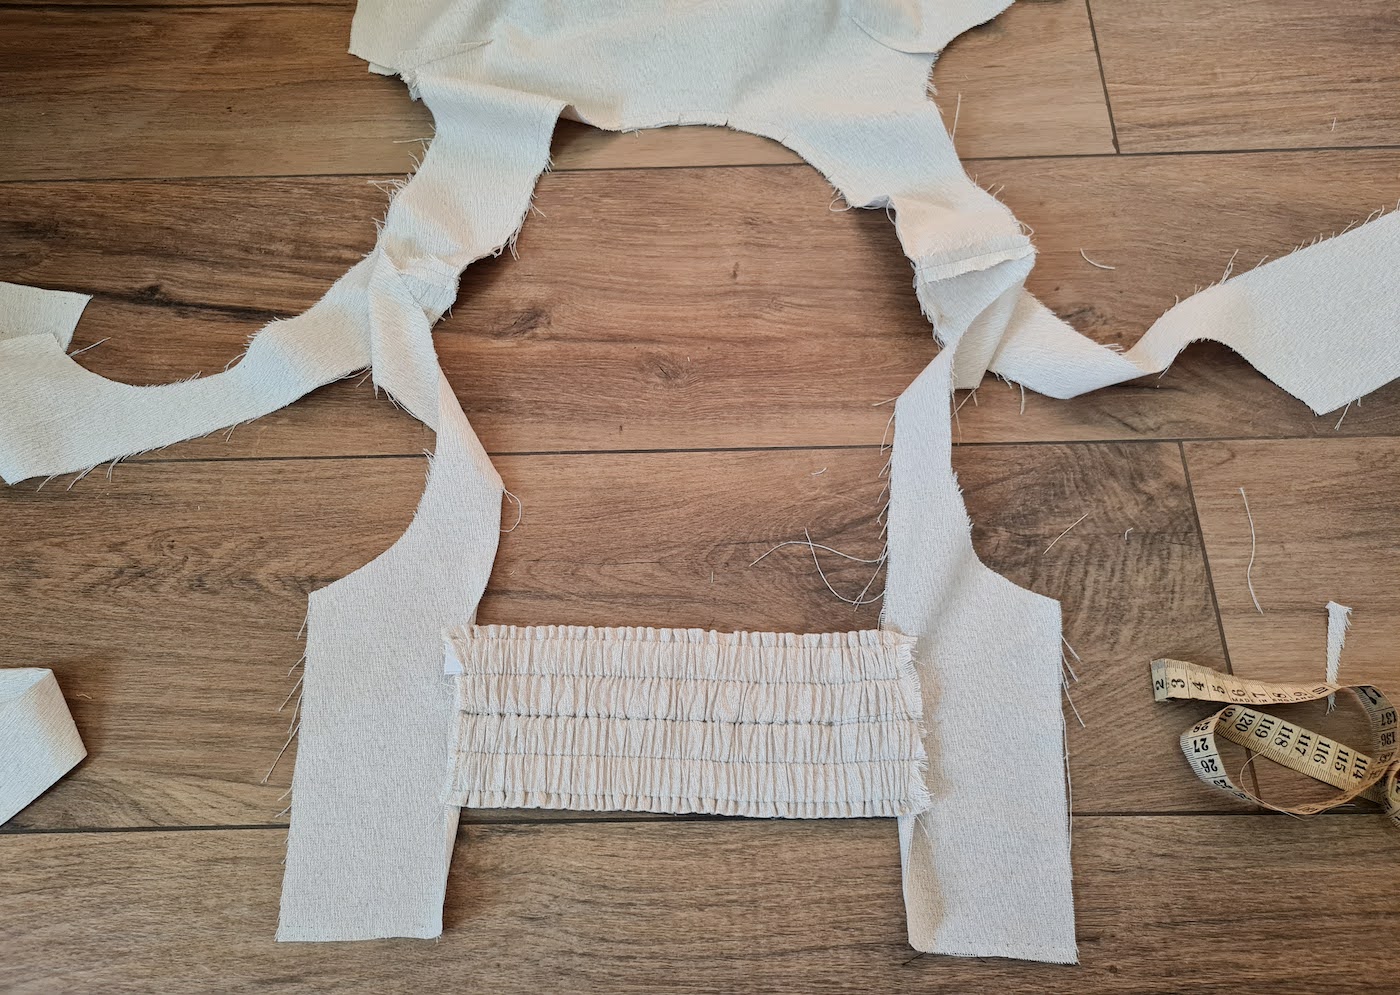
VIII. To attach the elasticated back to the top, I pinned one end of it to one side of the top back piece, right sides facing, 6 cm up from the hem. Then sewed there to secure.
.. And repeated with the other end.
Also pinned my waist tie-up straps below the elasticated piece, about 1.5 cm up from the hem. As I pinned them, I created a little pleat in each but this was just a visual detail. Sewed the straps in their spots.
IX. Next I brought the lining piece over, pinning and sandwiching the elasticated back piece and the straps in between. Sewed along the edge, starting where I had earlier ended the stitch right after the shoulder line.
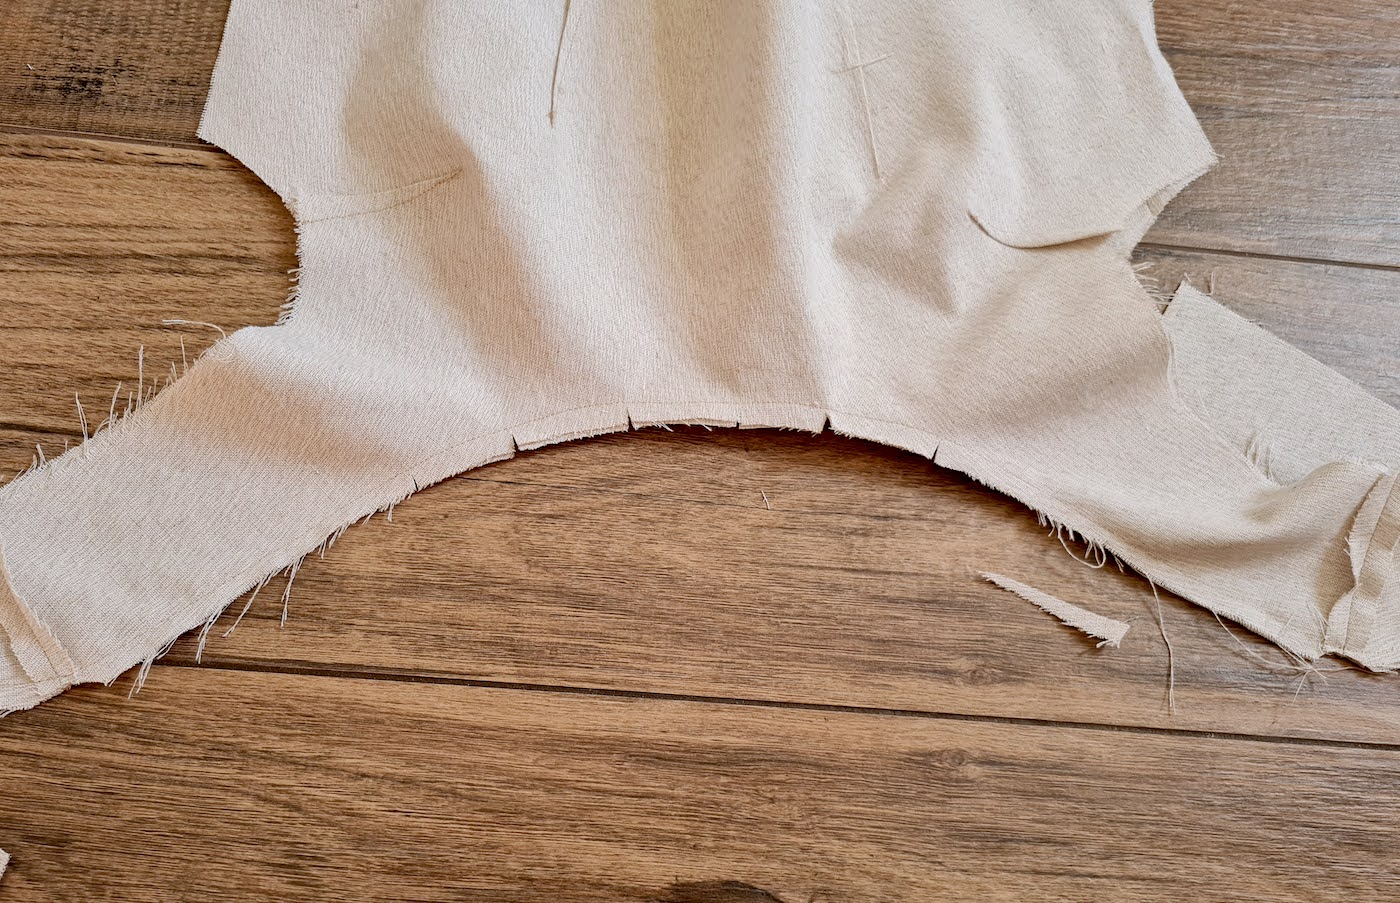
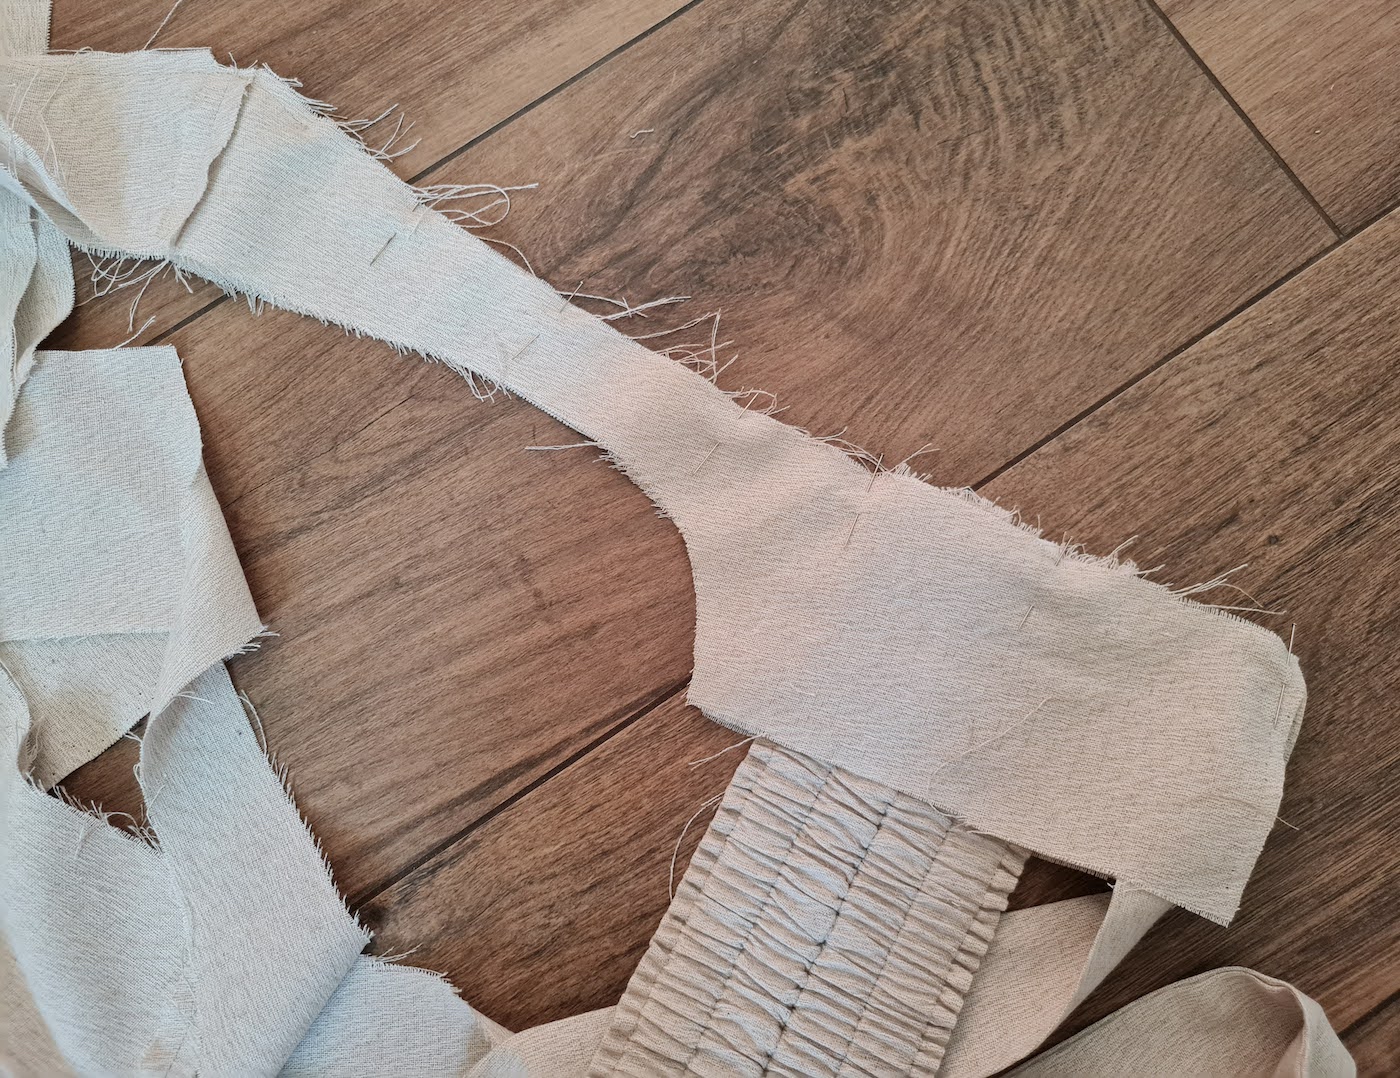
X. Then I pinned the sides of the main top pieces and the lining pieces together and sewed those.
.. So I had this.
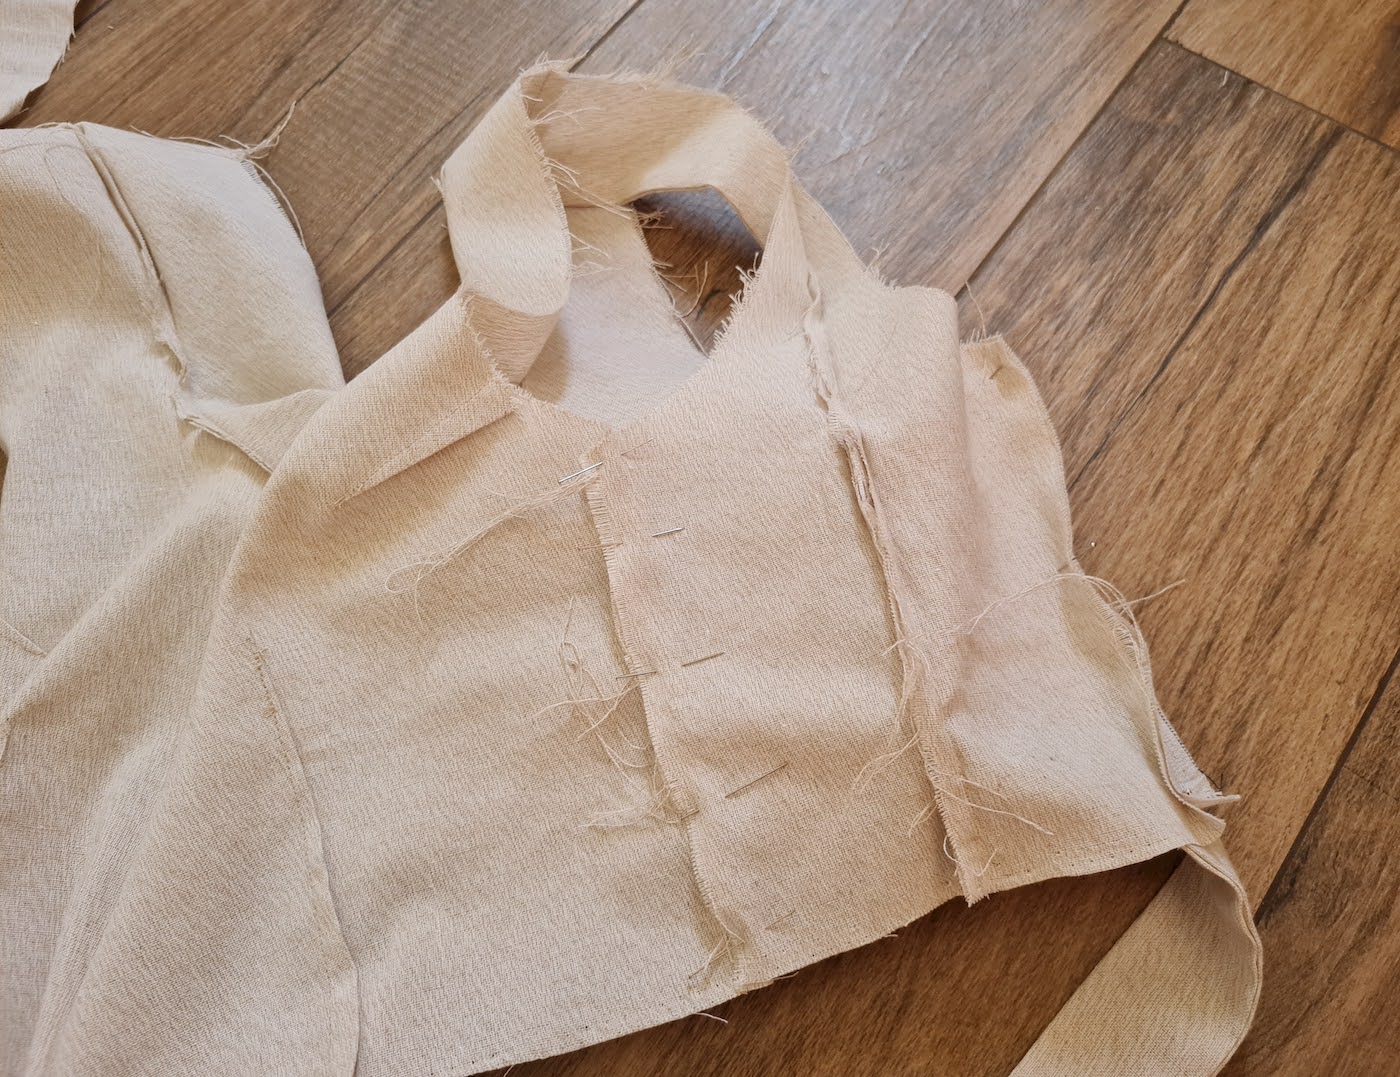
XI. Home stretch!! I pinned the hemline, right sides facing, and sewed across, leaving a gap in the stitch to turn the top right side out. I was careful to start the stitch right where the tie-up strap ended at the back opening, so the strap edge would be aligned with the hem. I sewed the hem with a generous 1.5 cm allowance, then turned right side out, pressed, and hand-stiched the gap closed.
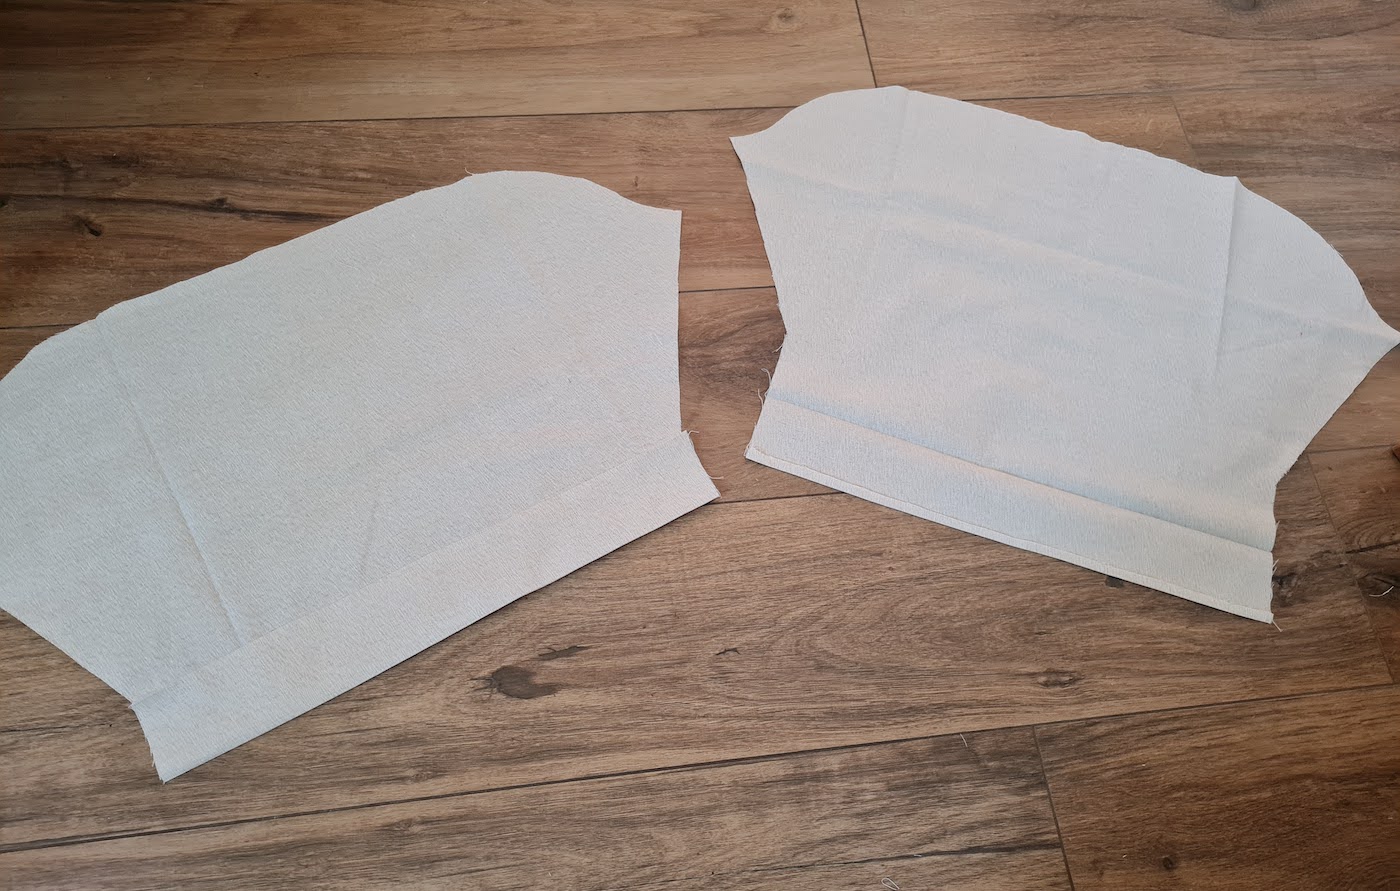
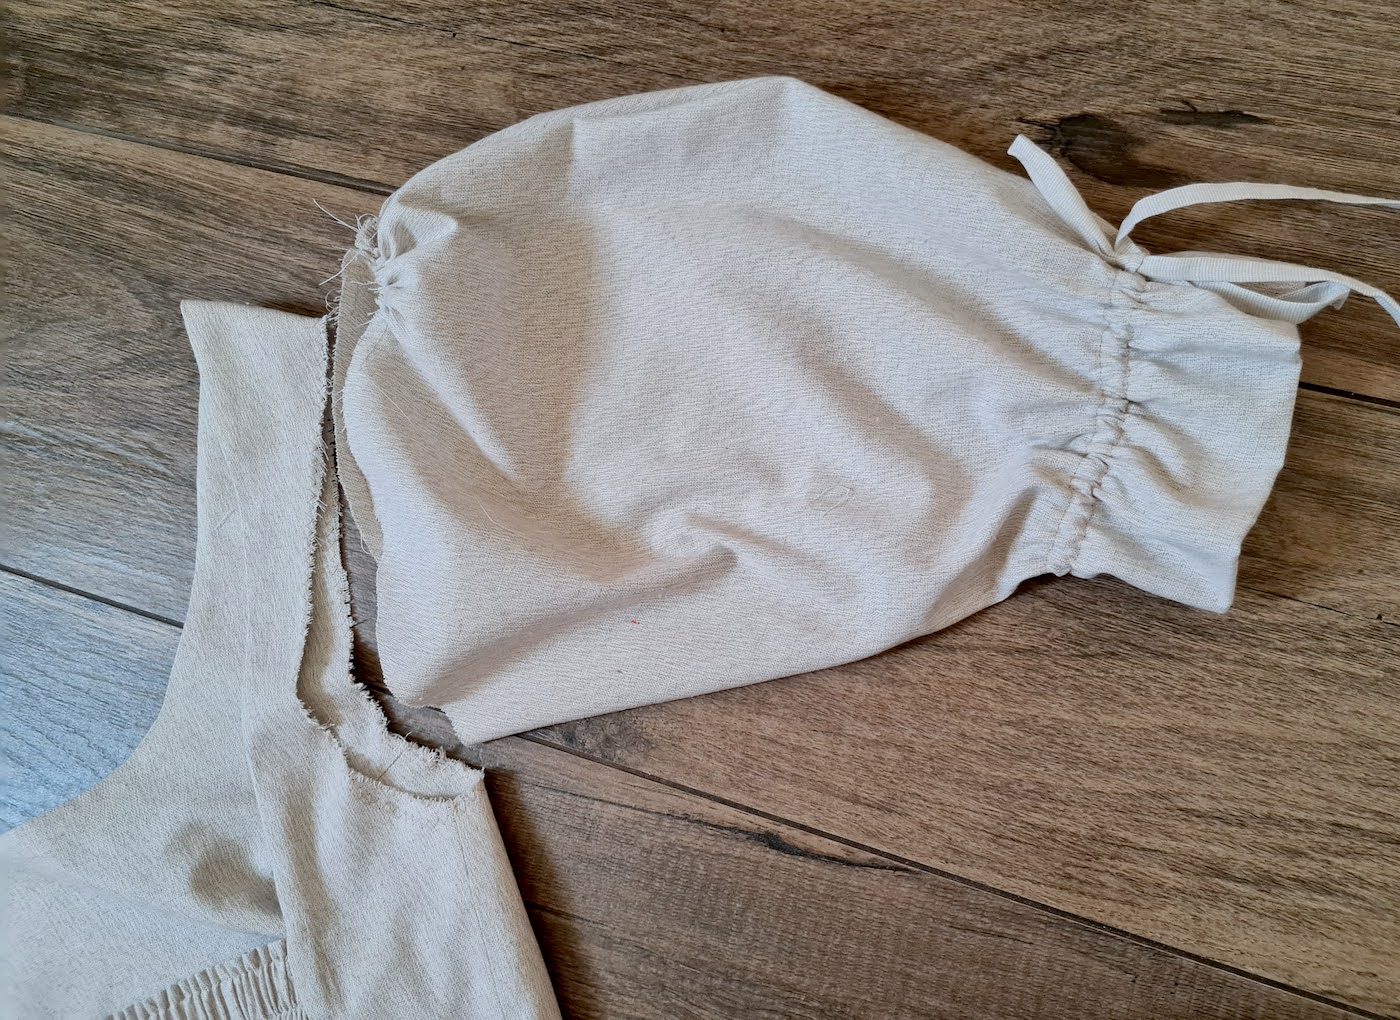
XII. Lol I was kidding that was not the home stretch, we still don't have sleeves 🫠 Here's how I cut them.
I double folded the rectangular part at the sleeve hems to create the casing like so:
Then sewed the sleeve underseam and pinned the casing fold..
.. So I could go onto the right side and mark where the center of the top of the sleeve hem was.
There I created 2 holes for the tie-up straps using my machine's button hole function.
Then made two 120 cm long, narrow straps for the sleeves. I used a lighter fabric in a matching colour, since the linen I was working with would have been too stiff. When making any straps where both ends need to be finished, I leave the gap to turn right side out in the middle of the strap and push the ends out from there.
After pressing, neat little straps..
To finish the casing, I sewed two parallel stitches all around (the upper one went along the edge of the fold on the reverse. I was so close unpicking and redoing that crooked stitch, but then realised the sleeve would be gathered it wouldn't show. Finally, inserted my strap into the casing with a safety pin. Repeated for sleeve number two.
XIII. THIS is the real home stretch. I zigzagged around the armscye of the top to keep the lining and main side nicely together. Then I added a gathering stitch (longest stitch on your machine on highest tension) at the top of the sleeve, over about 28-30 cm, and adjusted the gathers so to match the armscye circumference.
Finally... Pinned the sleeves in place, right sides facing, sewed around and finished the seam allowances with my serger (zig-zag is also fine).
Phew. That was it. Photos below are a bit grainy, it gets dark early now and the window with light after work is slim..
xo,
Julia


This turned out beautiful! I love the explanation about the horses in the race, makes so much sense!
ReplyDeleteThank you! I'm happy it made sense:D:D
DeleteThis is so pretty! Thank you for sharing such detailed instructions too
ReplyDeletelove this! how much fabric did you use?
ReplyDeleteThanks for making me realise I had forgotten to put the quantity in there! I've updated the caption under the tools now:)
DeleteI am so excited to try this!!
ReplyDeleteI just saw your IG for the first time today as I was scrolling sewing ideas. Wow! Beautiful work. So simple and elegant. Your clothes flow and drape off you so beautifully! Look forward to making something as weather gets warmer!
ReplyDeleteDelighted to hear<3
Delete