

TOOLS:

Fabric (recommended with a comfortable stretch) 1 m | Scissors | Thread & Sewing machine | Pins
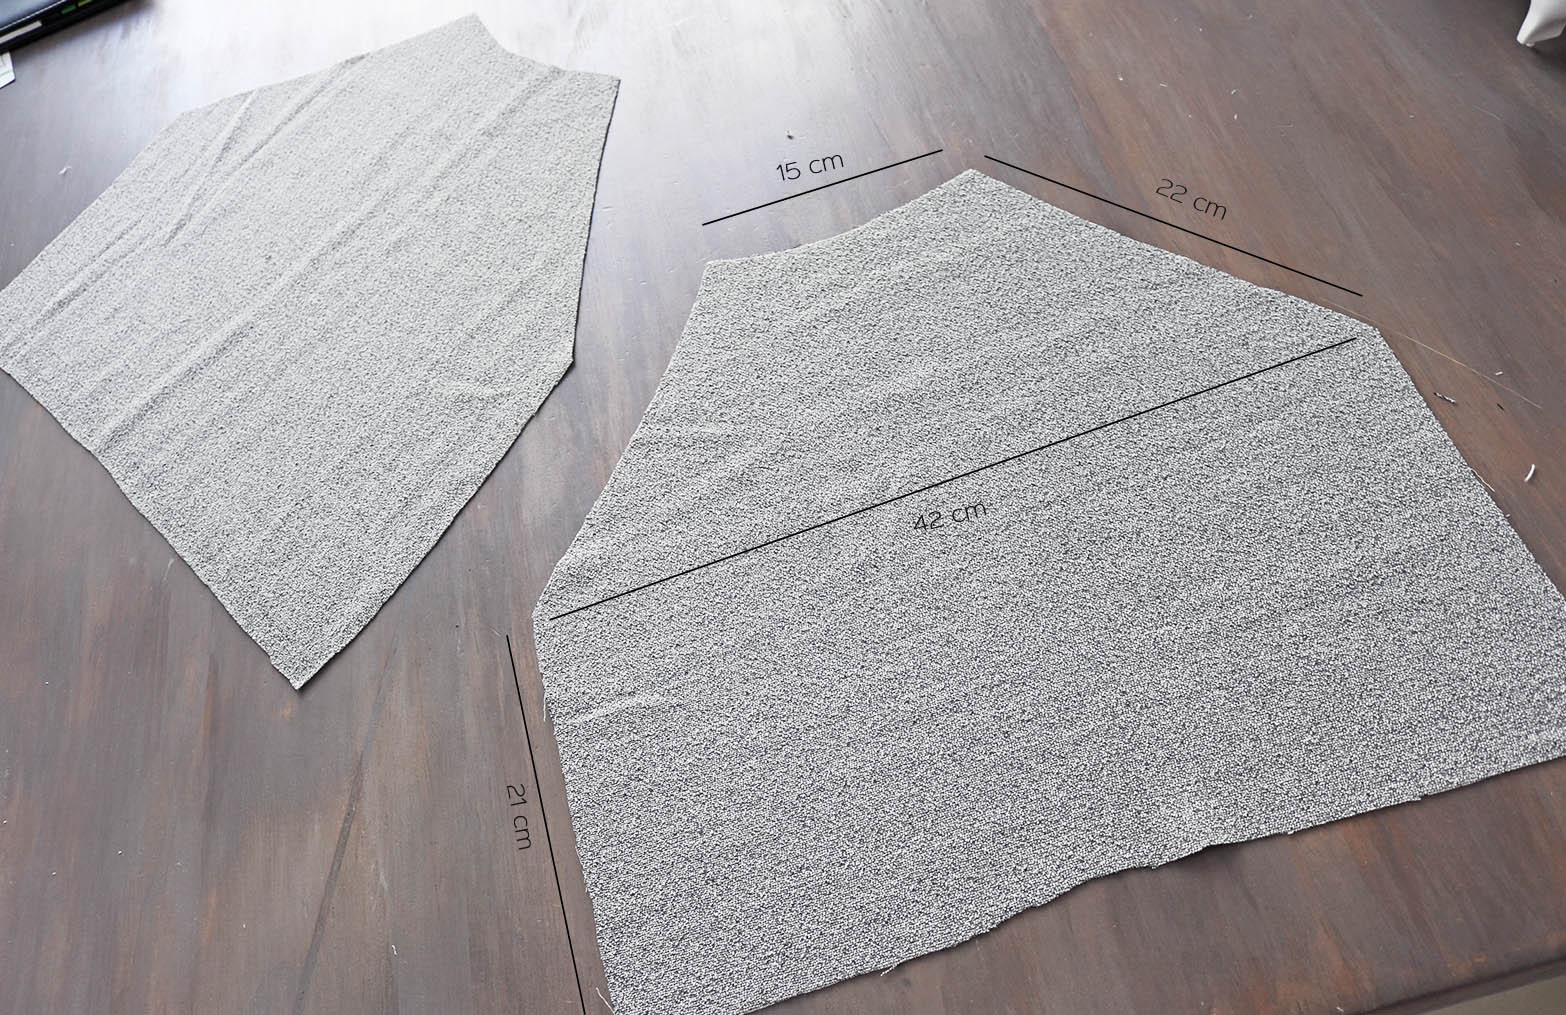
I. My cut pieces - I'm EU36/US4 (length depends on whether you want a crop cut like mine, or a longer hem):
II. First I created the back keyhole by cutting the back piece in half, finishing the raw edges, and sewing it back together, leaving about 15 cm from the top open:

III. Then I added darts to the front piece by folding each side at about 15 cm down from the neckline, and sewing my darts there..

.. So I had this. I then sewed the front and back pieces together at the sides..

.. And measured the distance from the neckline down to the armpit, and back up the the neckline (the area the ruffle would cover).

IV. That ended up being about 38 cm, I added a few cm just in case and plugged that into the circle skirt calculator, using the half circle option. That's where I made a mistake - if I could go back, I'd do a full circle ruffle. I'll explain later why. Anyway, I cut my ruffles:

.. And finished them with my serger (could do zig-zag as well) + a single fold:

V. Then I proceeded to making my second mistake. I really don't know where my mind was when working on this project... Had I pinned the ruffle to the top with its right side to the reverse side of the top, I could have attached it with one simple stitch, flipping the ruffle to the right side after. Instead I pinned it like this.

As a result, I had to add a random strap of fabric to cover the raw edges, kind of like a makeshift bias tape.
VI. The last step was to cut a long strap of fabric, about 3 times as wide as you want the neckline strap to be, which I attached to the top like I did with this playsuit (I wasn't taking photos at this point since I was annoyed with my own lack of attention:D)
Also, because I only did a half-circle ruffle, it would not flow nicely when worn (it was too tight under the armpits). So I cut little slits there, to release the tension (as you can see from the ready pics). But I could have avoided this by just doing a full circle ruffle. You live you learn!

The skirt is a remake of this fluted midi, with the addition of belt hoops like these.


xo,
Julia


0 comments:
Post a Comment
I would love to hear what you think and learn about your DIY adventures! If you use one of my tutorials, tag me on social @contour_affair, I'd love to see!